

Concrete might not be the most interesting of topics, but to me it’s an amazing invention that’s been around forever. Without it, we wouldn’t have all of the cool things in the world like skyscrapers, bridges and tunnels. Mega-complex concrete structures like those might be a little out of my league, but the smaller concrete slab is easy enough to install for even the novice home improvement hero on a weekend warrior mission to complete the honey-do list. Use these concrete forming tips and become a slab crab with ease.
Prints and Permits
This part is a lot like having your teeth pulled by a medieval dentist. A print, land survey and engineer’s approval are all needed before you can even begin the permitting process. If you’re good at jumping through government hoops and slashing through the red tape, you should be able to secure a homeowner’s permit provided the homeowner’s association doesn’t have to approve the plans as well. This is where a good contractor can come in handy. Make sure you check with your local inspector on what’s needed given the particulars of your project, jurisdiction and mood of the inspector.
Placement

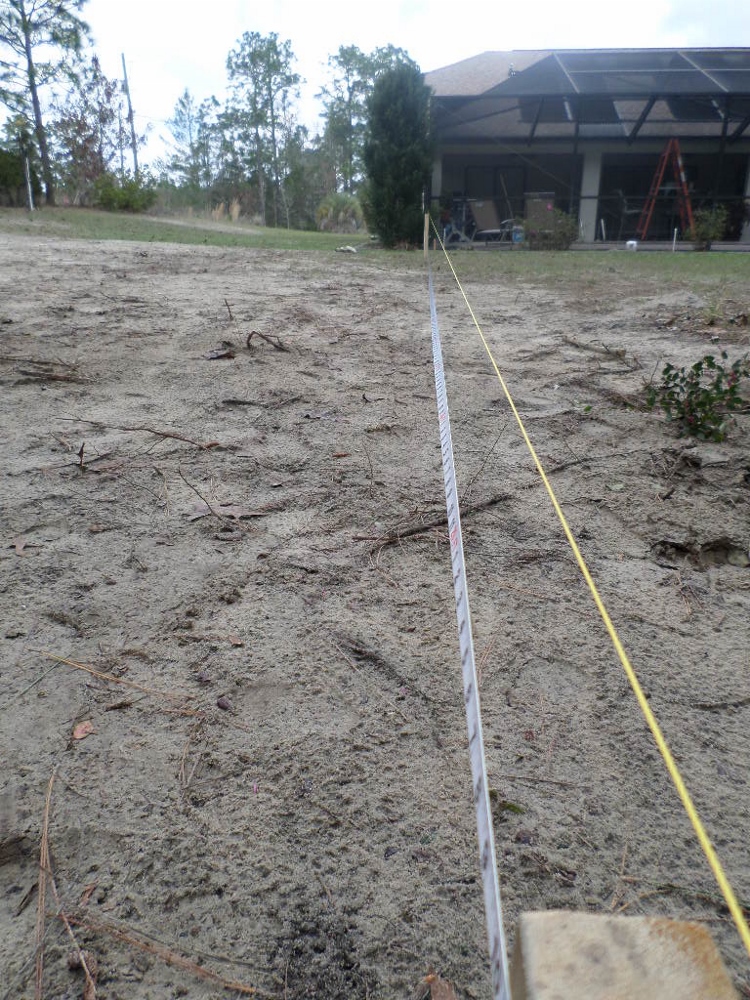
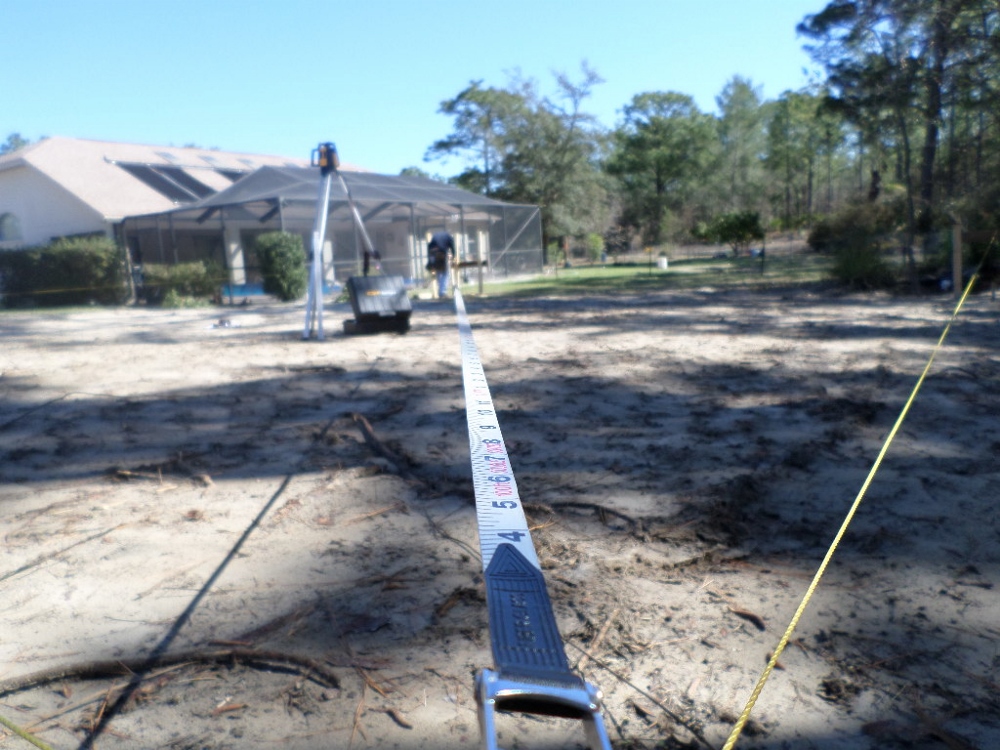
Nothing’s more important (well almost) than placement of the slab. It needs to be situated on the lot in the correct location and that can easily be done with a little referencing. In our case, we had an existing house and property line boundaries set up to make the placement of the structure go simple and smooth. Our client wanted the back of his garage set up so that it was flush with his pool cage. After setting up a string line that ran down the length of the property and the pool cage, we were able to position the garage layout in the correct place in just a few minutes time.
Batter Boards
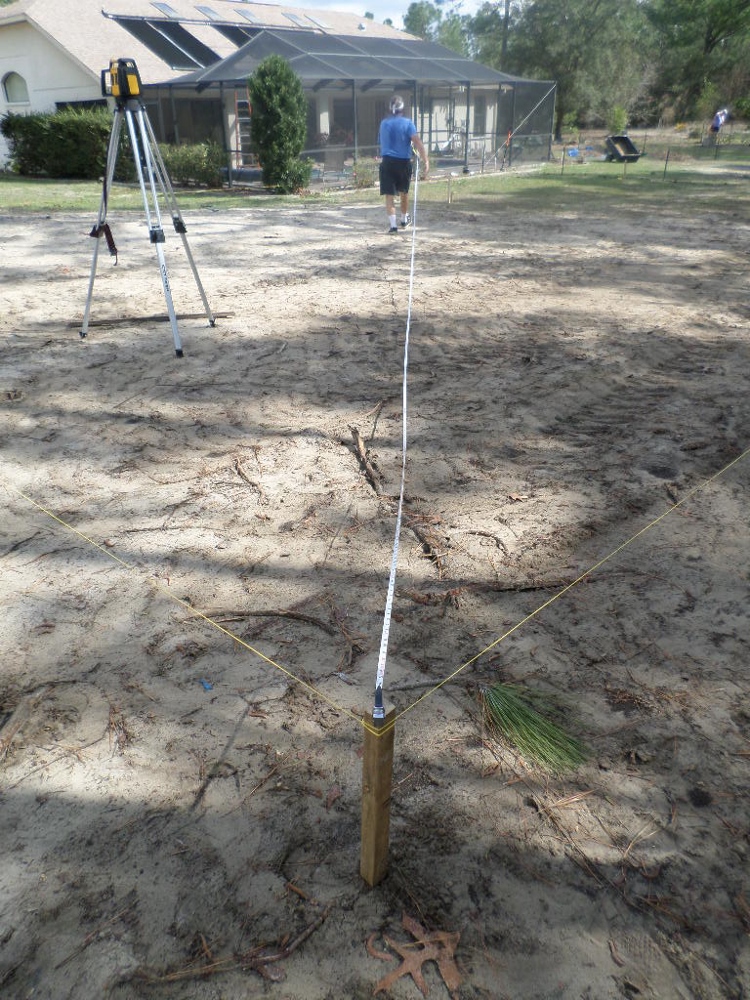
Because we had a large rectangular slab, only four small stakes were needed to mark each of the four corners of the slab. After the stakes were in place, we did a quick cross corner check with our large 300 foot tape measure. Cross corner measurements ensure the square is actually square and not a parallelogram.
Simply measure diagonally from one stake to the other on the opposite end of the slab. Record the measurement and measure in the opposite direction on the other diagonal axis and compare the two measurements together. If they are the same, then you’ve got a perfectly squared slab and you should probably play the lottery that night because you’re so lucky. If they are different, which they most likely are, then you’ll need to move the stakes accordingly.
For instance, if you’re at 110 feet on one side and 112 feet on the other, you’ll need to move the two stakes down on the larger side one foot. This will evenly divide those extra two feet in half. By moving the two stakes down by half of the difference between the two cross corner measurements, you’ll square up the slab and ensure each corner of the slab is a true 90 degree angle.
Now comes the actual batter boards. These are just three stakes set on 90 degree angle around the four smaller stakes. A wide board is nailed between the stakes at the appropriate level of the slab. Nails are set into the top of the board at the correct distances so that string line can be pulled to create a true perimeter for the soon to be concrete slab.
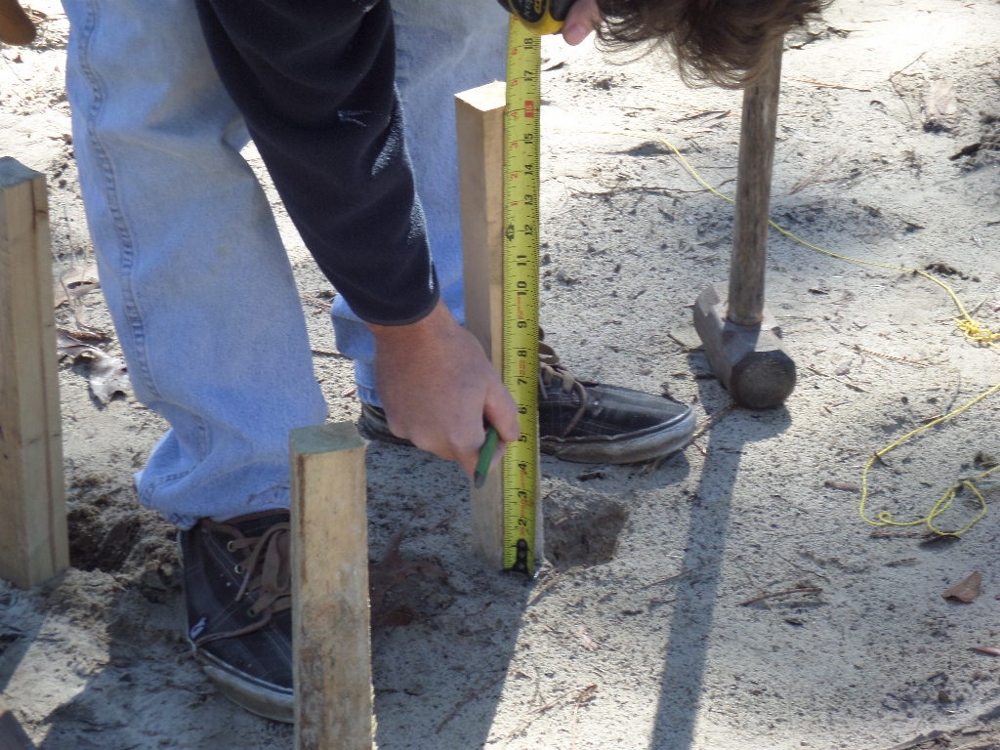
We put the stakes in place and aligned the batter boards. Using the CST/Berger laser level that I was lucky enough to review in an earlier article, we found the highest side of the lot. From here, we simply marked the main stake six inches above the ground. Six inches is the optimal height for a slab off of the existing soil height.
After setting up the laser level, we aligned the laser finder onto the measuring rod so that our benchmark height was the six inch mark we created on the highest stake. After that it was a simple matter of aligning up the laser finder and marking the bottom of the measuring rod on each stake. I was very pleased with how well the CST/Berger laser level performed doing this task. In just a few minutes time, all of the batter boards had a perfect benchmark.

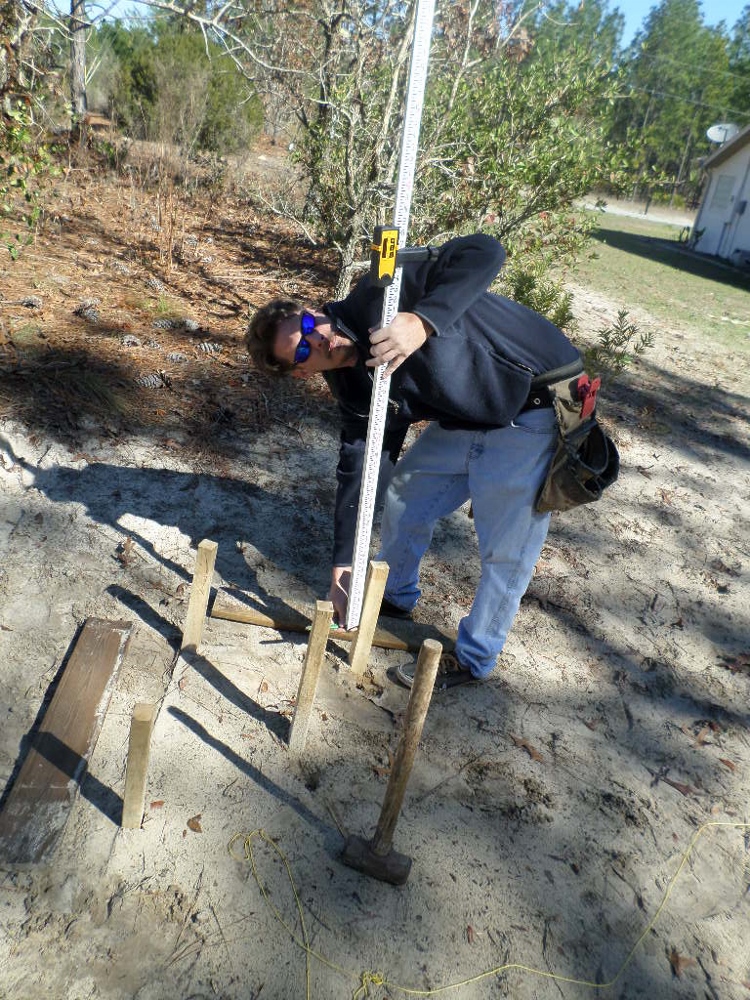
Last but not least, we nailed the batter boards to the stakes at the appropriate height and double checked for accuracy with the laser level. With the batter boards in place, the string lines could now be set and forms, footers and steel were ready to be installed.
Batter Board Layout for your Concrete Slab
Last but not least, the string lines need to be set on the batter boards. We used a combination of two methods. Leveling over to the batter board from the center stakes and using our pool cage and property string line as a reference point. Once we had a fairly accurate layout on top of the batter boards, we placed a few nails on the marks and tightened the string line to create our slab edges.
At this point, it’s time for a cross corner check again and the large tape measure had to come out once more. Stretching from corner to corner of where each string meets, a cross corner measurement is taken on each side and the string line is adjusted on one side of the slab as needed. In our case, we were about three inches off, so we slide one side down 1-1/2 –inches and rechecked the measurements. Success!
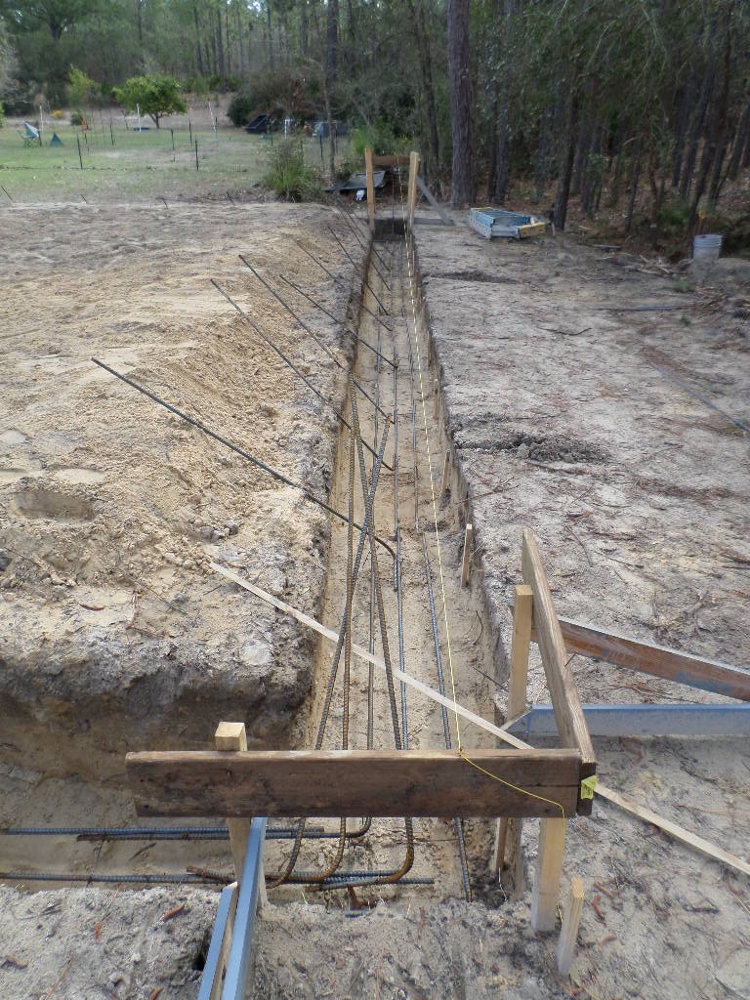
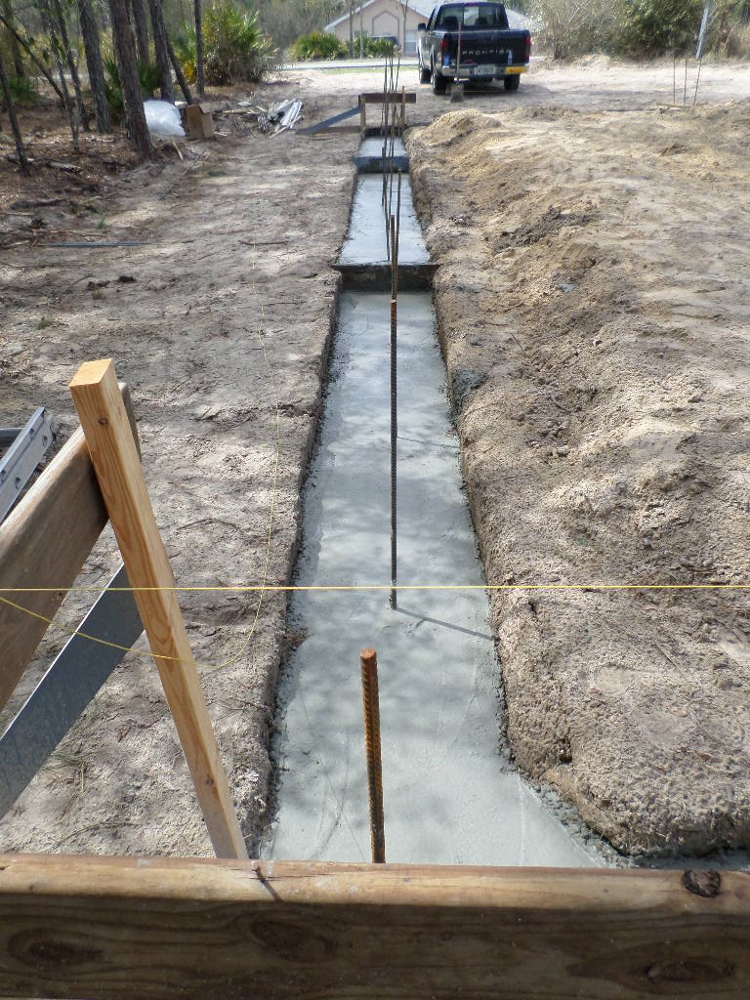
Now it’s just a matter of digging footers, tying steel and setting forms according to the blueprint. Your footer depth, form height and concrete thickness can now be dictated by the string line and batter board layout. In our case we had to build a stem wall due to the extreme slope of the land. The only form work we needed was where the footer stepped down with the lay of the land. These “bulkheads” are simple 2×6’s dug into the sides of the footer. Grade stakes were set into the footer to determine the correct depth of concrete was maintained during the pour.
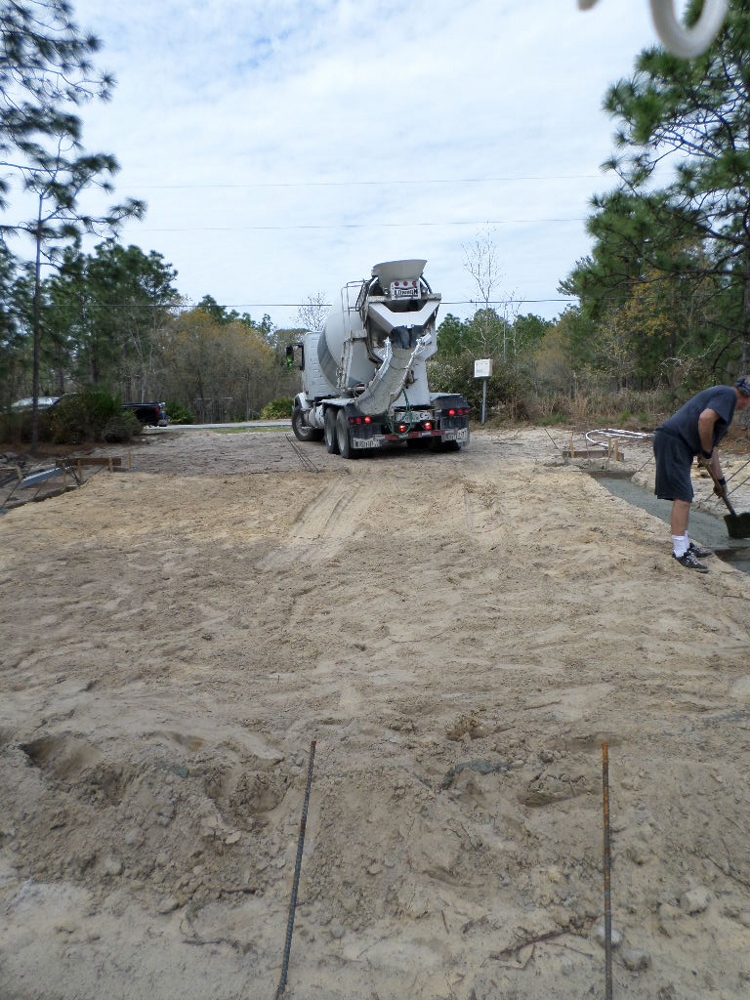
Our concrete truck couldn’t drive around the property to deliver the mud into the hole so we had him drive across the footer and enter the property. It worked out excellent for us because we had a call back for a second load. After we poured out the first truck, we simply dug out the remaining footer and let the next truck pour the rest. After it hardened up and we had everything nice and level, the string lines were replaced and the steel uprights were set into the correct place so that when the block was installed, it fit neatly into the center of each block cell for a solid grout pour later on.


one picture,s worth a thousand words thank you for this article just what i was looking for .
For those reading the article in the future if you’re going to use heavy equipment to excavate the footing, set your boards back a few more feet from the hole so the operator doesn’t take them out with the hoe. You’ll need those strings later to locate stem wall