

We are already a couple months into the new year, and, while I’m not the resolution-making type, I do relish (mmm hot dogs) the new year as an opportunity to clean house and get back on track. Unfortunately, a major case of the flu sidelined me big time in January, and many of my projects and good intentions are sitting in a pile in the garage. Woe is my poor family. The good news is there’s no time like the present to get back on track! And I’m hitting the ground running (ughhh running) with two goals that never expire: better home organization and more exercise. Full disclaimer: I don’t like to exercise, BUT I have an elderly dog who loves her morning walks and has eaten one too many pieces of “But I’m sick!” candy. *She* really needs to walk. We’re getting to a great how-to project here, stick with me.
The problem is I’m a bit of a dog-walking Goofus. Nothing is where I left it last, and everything is so scattered I’m annoyed before I even put on my walking shoes. I feel like my whole life is the disheveled, black-and-white part of the infomercial.
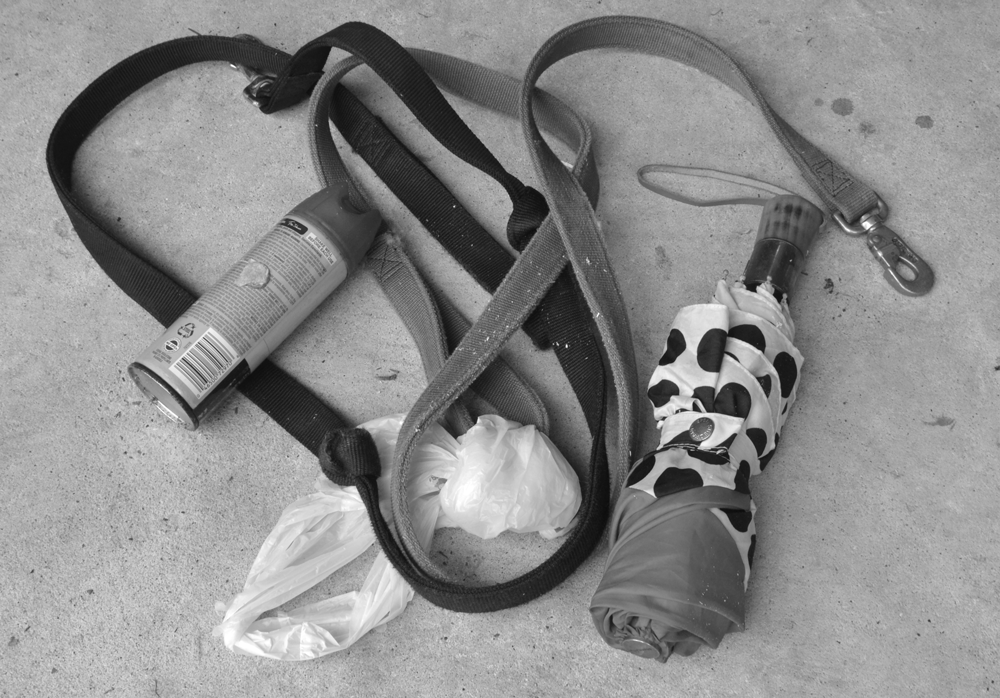
So to kill two birds with one stone (that’s such a morbid idiom, btw), I decided to build this DIY Doggie Command Center. This will hold everything you need for your dog (or cat?) walks – plastic bags, leashes, an umbrella, sunscreen – and it even has space for the extras, like the pet brush and shampoo. And who doesn’t love a good DIY double entendre?!

You will have in one place all the necessities for your fur babies, thereby shushing the part of your brain that says in a floaty, hypnotizing voice, “You don’t know where the leash and umbrella are –- just sit on the couch instead, Monique.” Or whoever. #dontjudgeme
The best part is it’s a quick DIY build that costs less than $10 in wood. Third goal: save money! Total gallant move!
So let’s get to it!
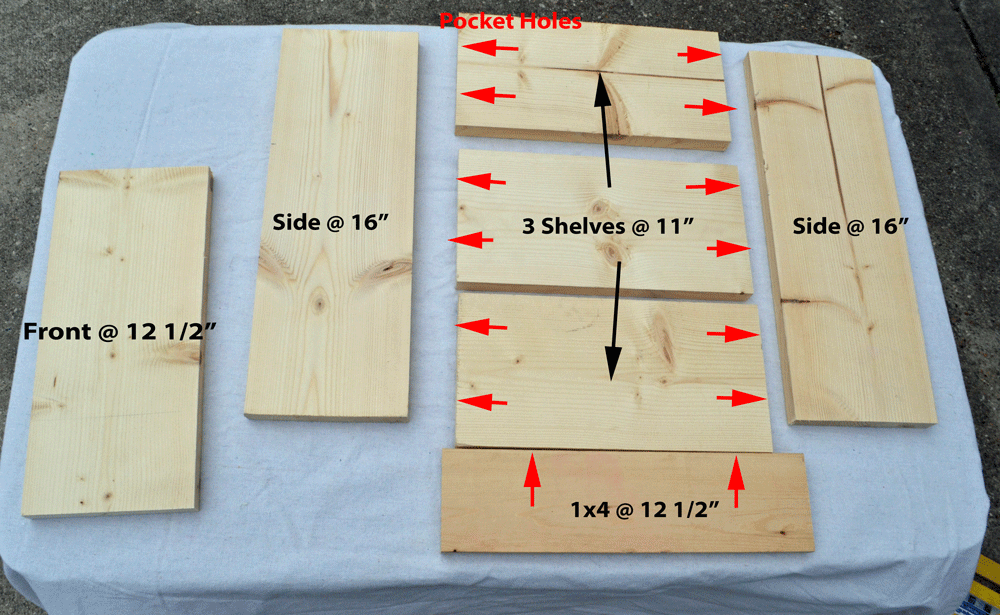
Doggie Command Center Lumber
1 – 1×6 common board @ 8’
1 – 1×4 furring strip (try to find a nice one)
Yes, that’s it!
Cuts
1×6:
– Front: 1 – @ 12 ½”
– Sides: 2 – @ 16”
– Shelves: 3 – @ 11”
1×4:
1 – @ 12 ½”
Awesome Instructions:
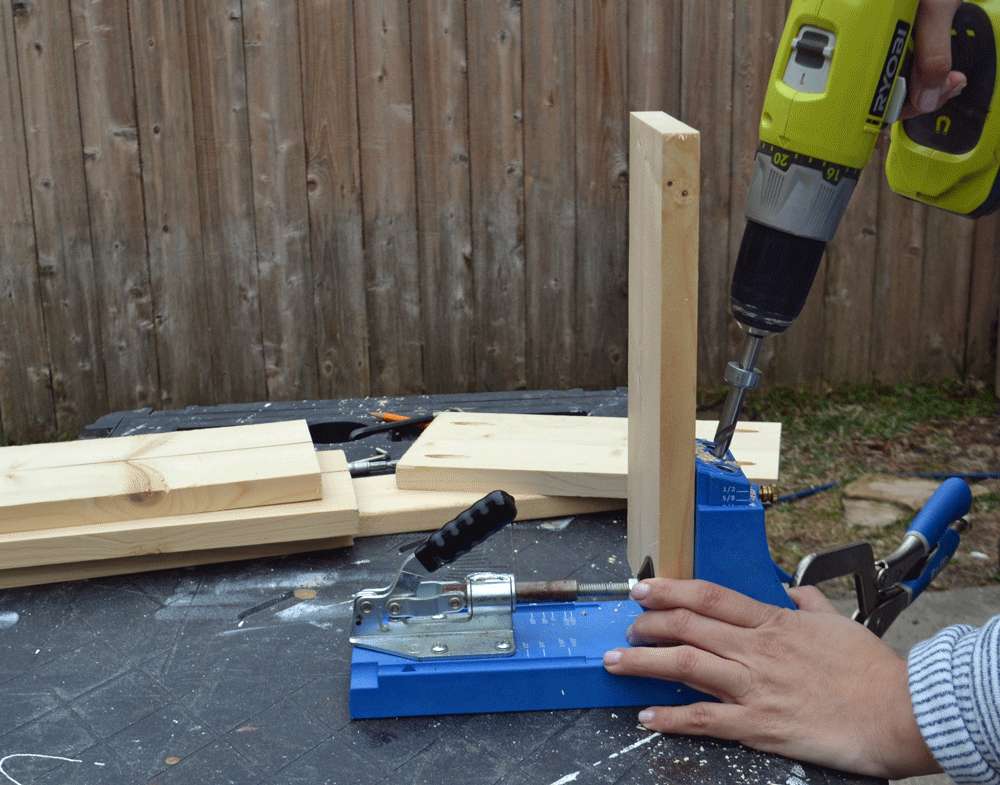
First, make your cuts. If you are going to stain, you can put on a first coat now before assembling to save time. Use glue and nails or glue and pocket holes to assemble.
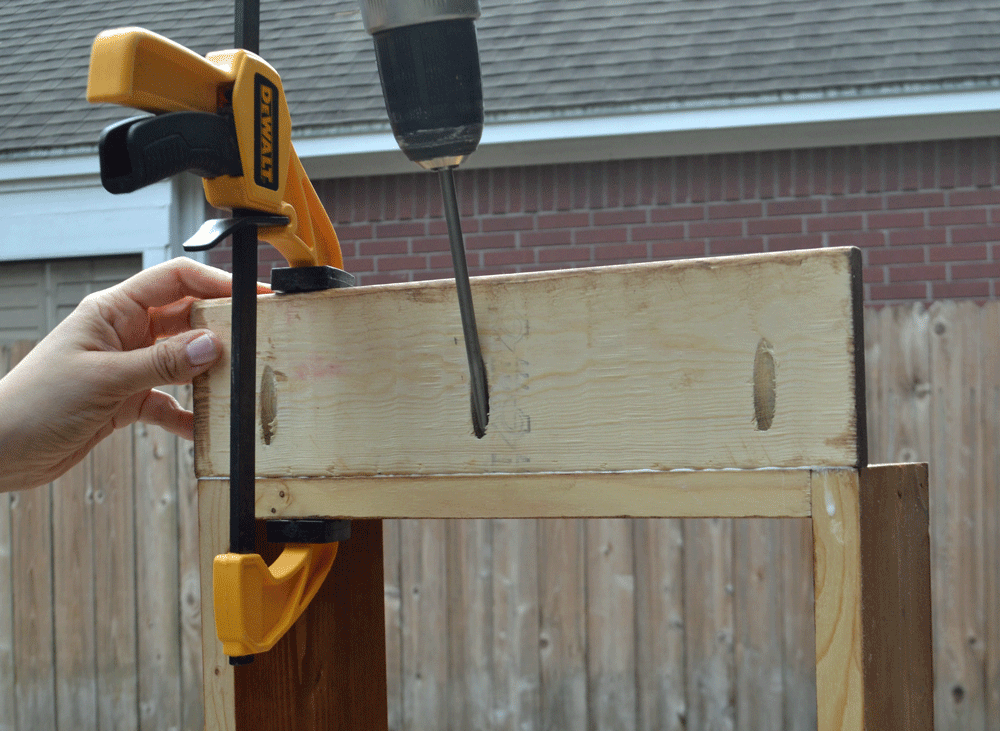
Drill pocket holes in all 3 of the 11″ shelves, and in the long side of the 1×4.
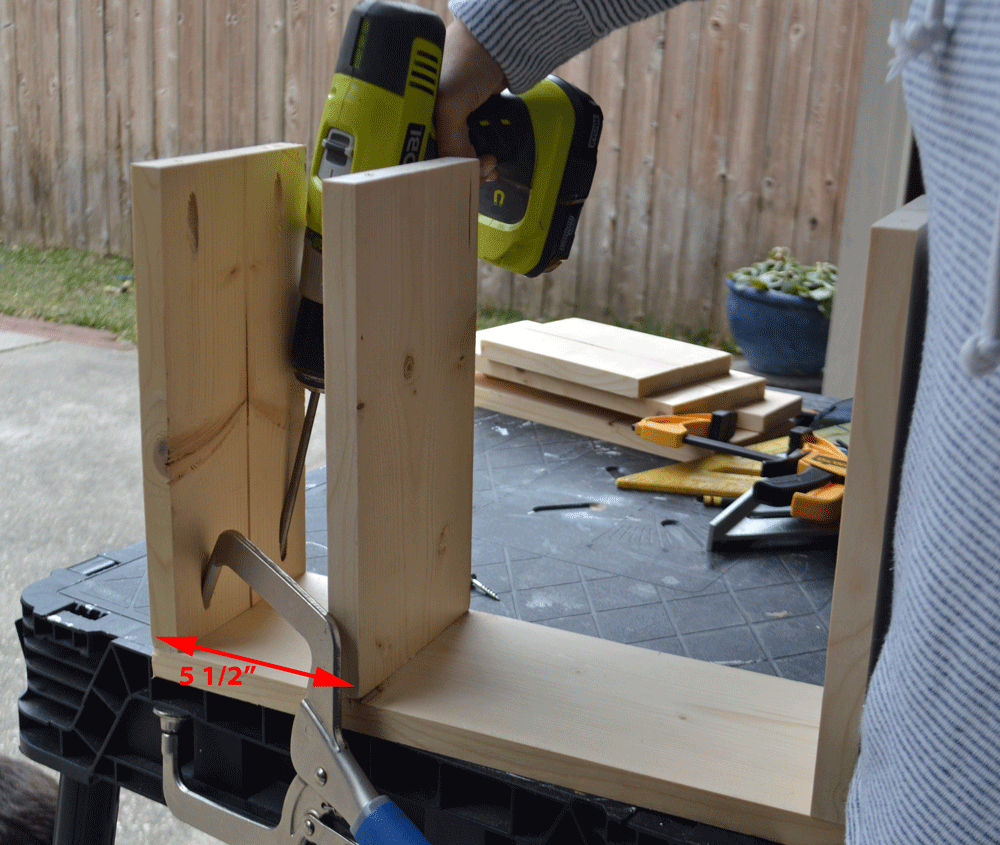
Measure and mark down 5 ½” from the top of the 16” sides. The bottom of the middle shelf should sit at the 5 ½” mark. Attach the top, middle and bottom 11” shelves to one of the 16” sides. I used pocket holes to assemble, but nails and glue would work too.
Attach the other side, and your main frame is complete!

Now that the frame is assembled, let’s get to work on the front piece, which will hold the doggie walk bags.
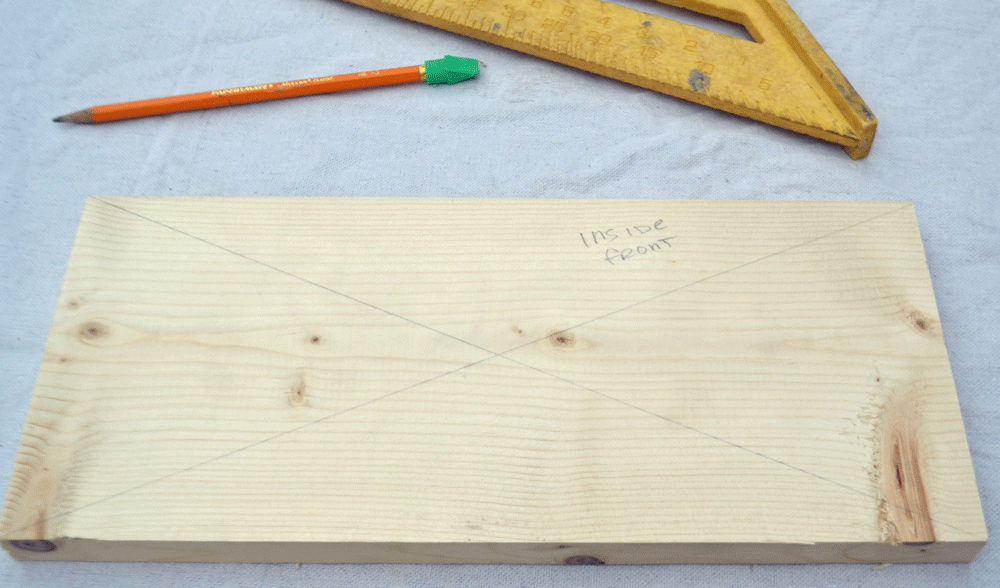
I am a bit of an over-measurer, so I marked the center of what will be the “face frame.”
Then I drilled two 1 1/2” holes with a Forstner bit on either side.
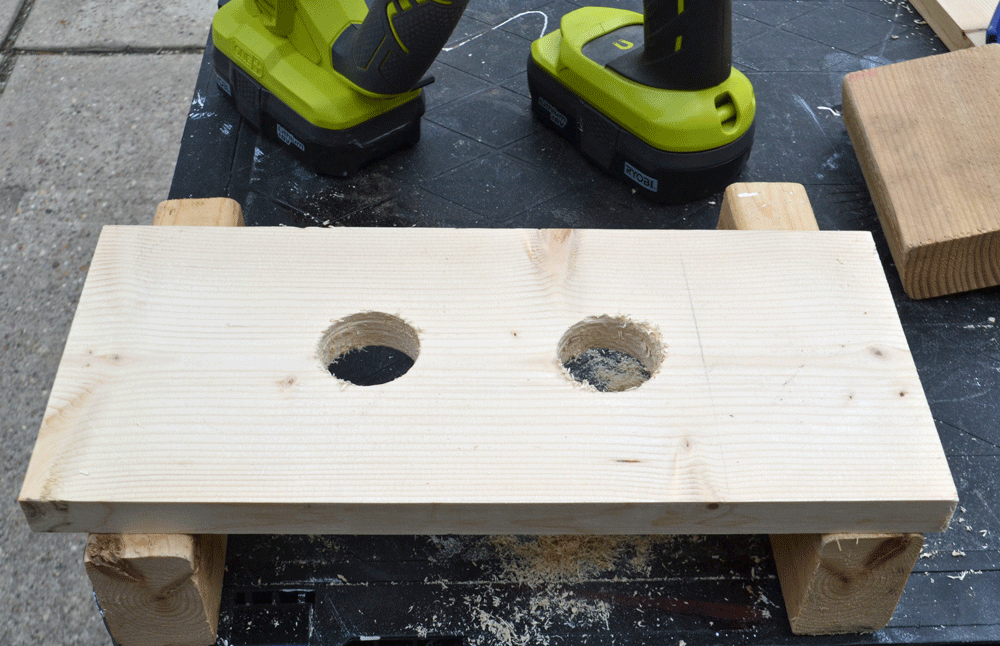
I then used a jigsaw to connect them. Sorry, I forgot to get a pic of the jigsawing/face frame part, but you can see the final version in the background of this photobombing pic from my 5 year old.
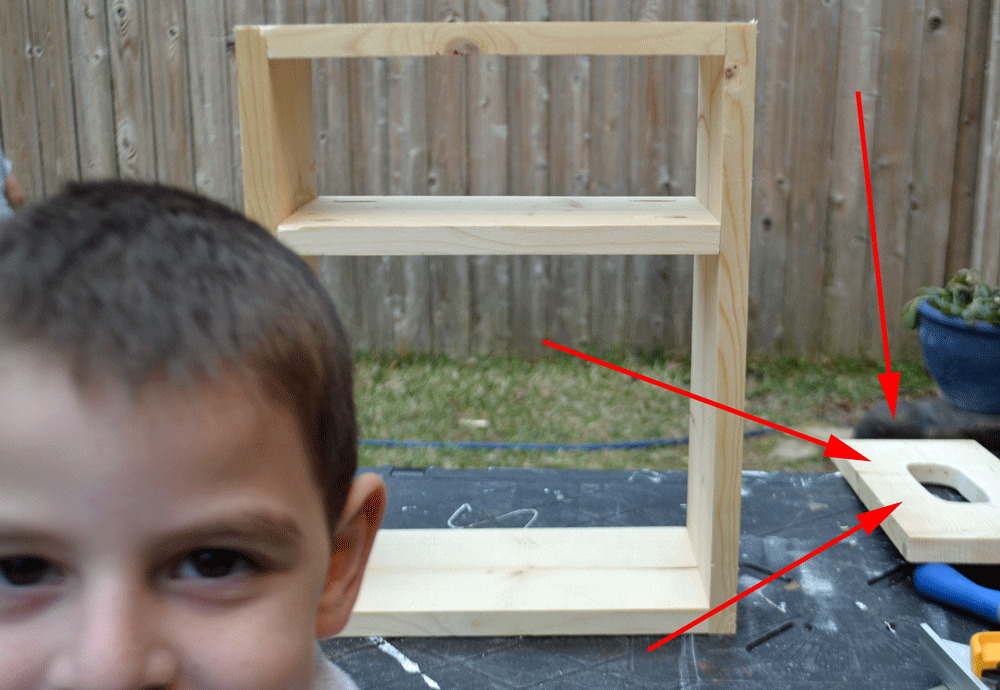
Now, attach the face frame with nails and glue and voila! It’s coming together nicely!
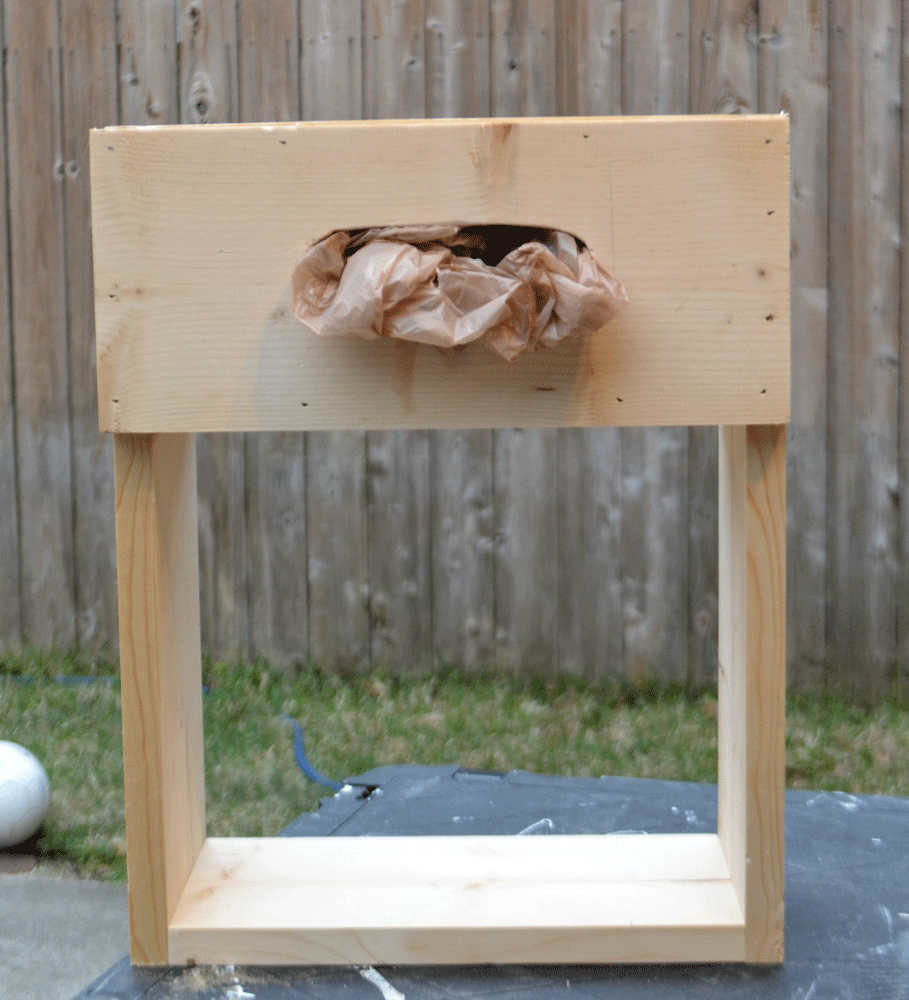
Turn this baby upside down, and attach the 1×4 to the bottom of the frame with 2-3 pocket holes. (I’m not sure why I used 3, when 2 would have been just fine.) Pocket holes can be addicting! Attach your hooks to the front of the 1×4.
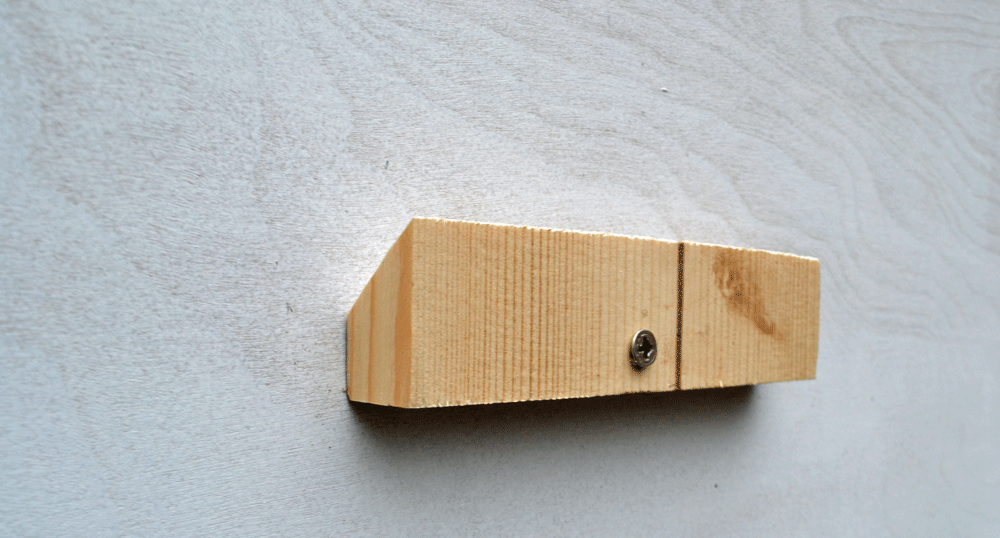
For easy wall hanging, use some of the remainder of your 1×6 to make a French cleat. Attach the “top” of the French cleat to the back inside of the plastic bag area using glue and nails (or pocket holes).

Mount the bottom half of the French cleat to the wall into a stud or using anchors.
Hang and done!
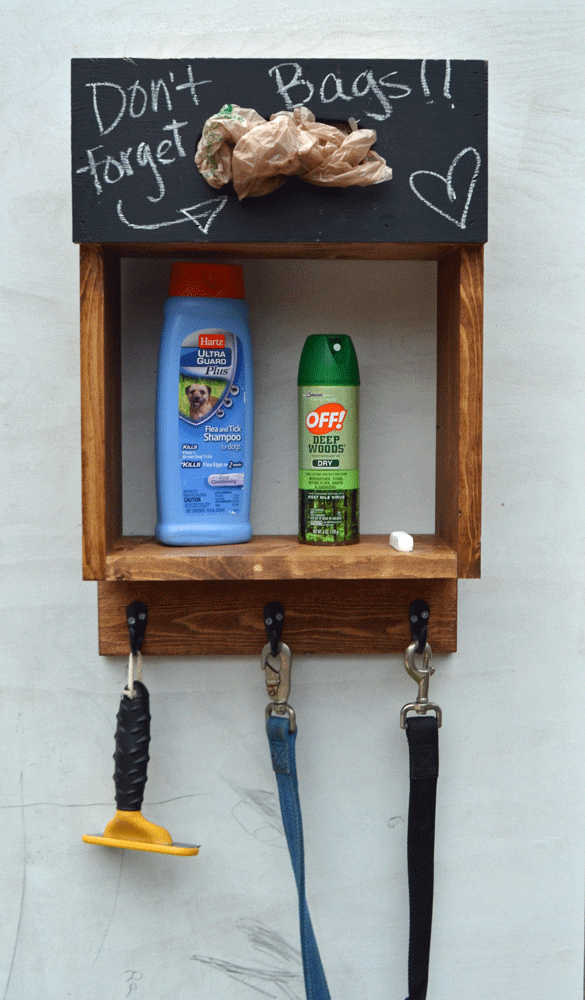
You can leave it unfinished, or paint, or add some chalkboard paint like I did to leave messages to the dog walker in your family. Or to your dog if they can read. Now take that pup for a power-walk!


