

If you’re a framing carpenter, a hard-core DIYer who loves taking on big projects, or possibly a magician (more on that later), most likely you make use of a stick nailer for much of your framing work. Stick, or framing, nailers are a HUGE time (and arm) saver when you have a lot of 2x4s to bring together. I’ve had my Bostitch N79WW for about 12 years, and it’s launched many a nail, while not receiving much in the way of TLC beyond a few drops of oil in the air fitting before each day’s use.

Most nailers are made of aluminum or magnesium to cut down on weight, and they’re able to withstand quite a bit of abuse—being dropped, getting wet while working outdoors, and just generally getting banged around. Inside the tough body, though, there are valves and O-rings and other little plastic parts that see almost as much action as an advance Secret Service detail. After a while the constant vibration, friction and pounding causes these little plastic parts to protest, in the form of self-destruction (a fairly radical, but effective, form of protest). When this happens, you’ll know pretty quickly, because all the air in your compressor will be hissing out around your trigger assembly. This effectively turns your nail gun into a large, noisy yellow paperweight, and may cause you to hiss out a few of your favorite DIY words, as you revert to your trusty hammer.
An Easy Fix
To get your nailer back in the game, you’ll need to replace the trigger valve assembly. You can take your gun to a service center and pay roughly $75-100 to have it done, or you can buy the kit for around $27 and change it out yourself. The repair is easy to do; the only tools you need are a hammer and a pair of pliers, and you’ll be up and nailing again in about 15 minutes.
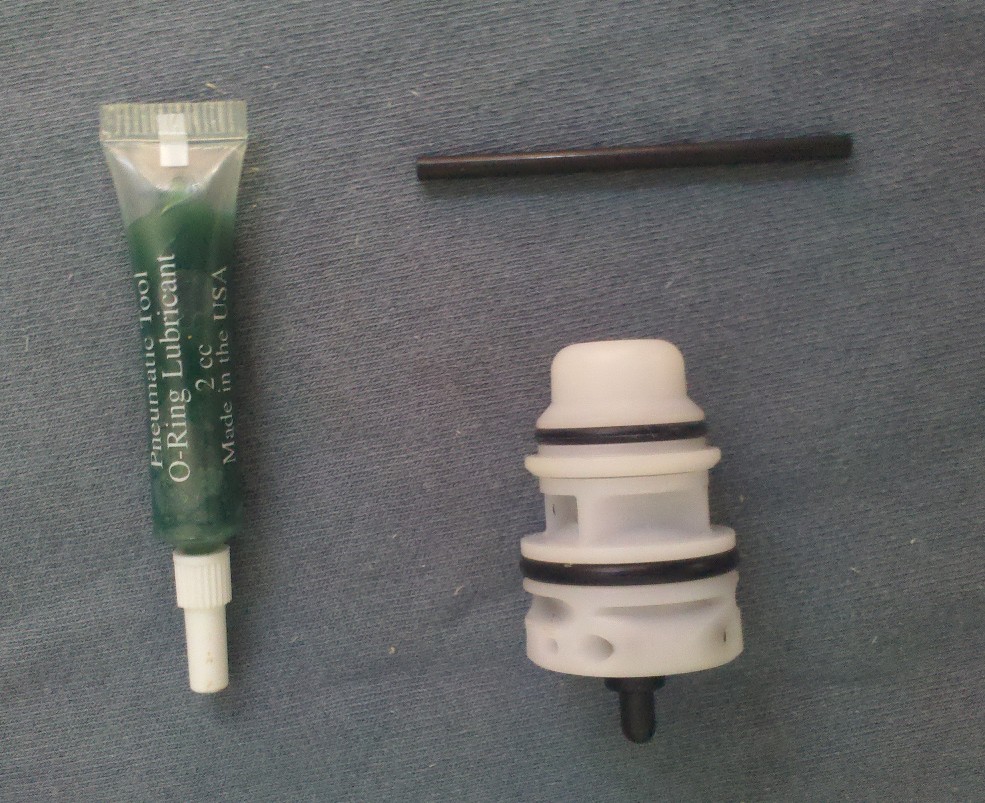
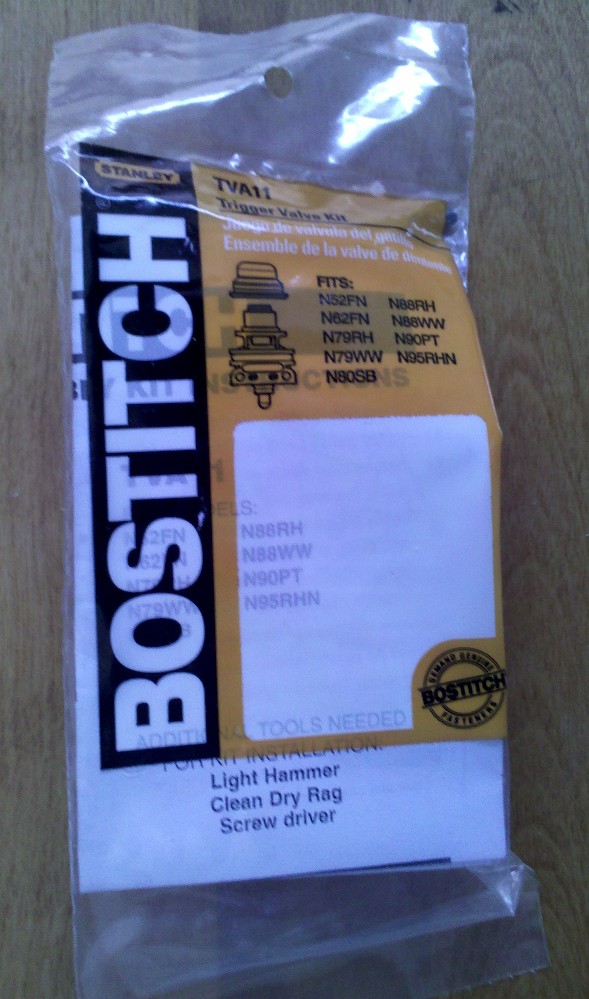
The kit contains everything you need to change out the valve—the valve itself, a little roll pin to knock out the retaining pins in the gun, and a small tube of grease to lubricate the assembly when you install it. The kit was the TVA11, in my case; this same kit works for several Bostitch models. If you have a Senco, Dewalt, or other brand, many will have a similar fix; type your gun’s model number and ‘trigger valve repair kit’ into a search engine to get the right kit, or check the manufacturer’s website.
First, take it apart…
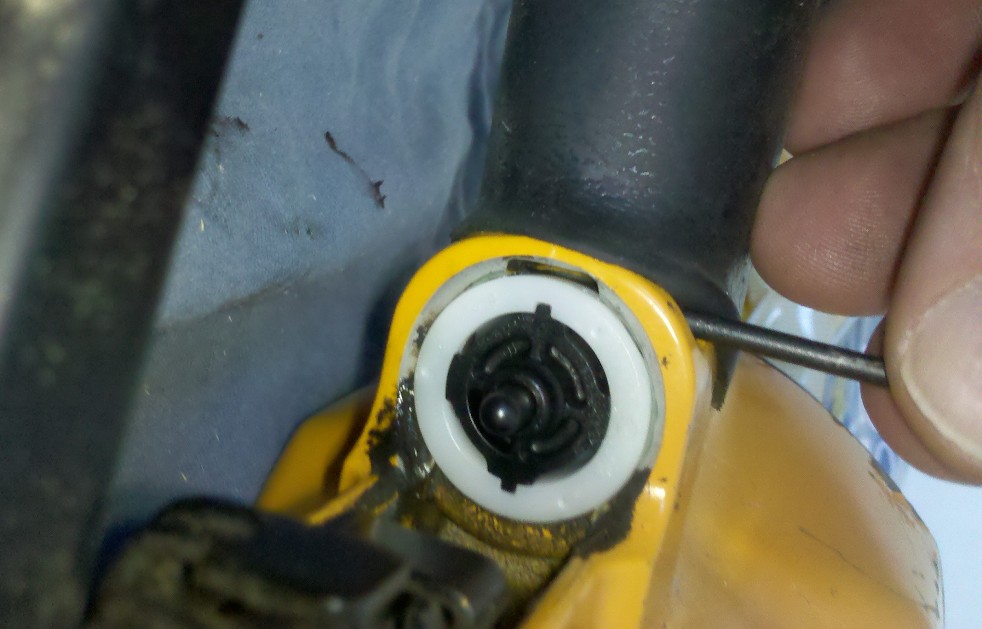
To begin, make sure your nailer is disconnected from the air hose. If you don’t, you’ll also need a change of underwear shortly after you begin the disassembly process. Lay the nailer down on a large rag or an old towel, to help corral the pieces as they tumble out. Hold the little roll pin from the kit on the end of the retaining pin for the trigger and gently tap it with your hammer until it pops out. The trigger will drop free; set it aside with the retaining pin.
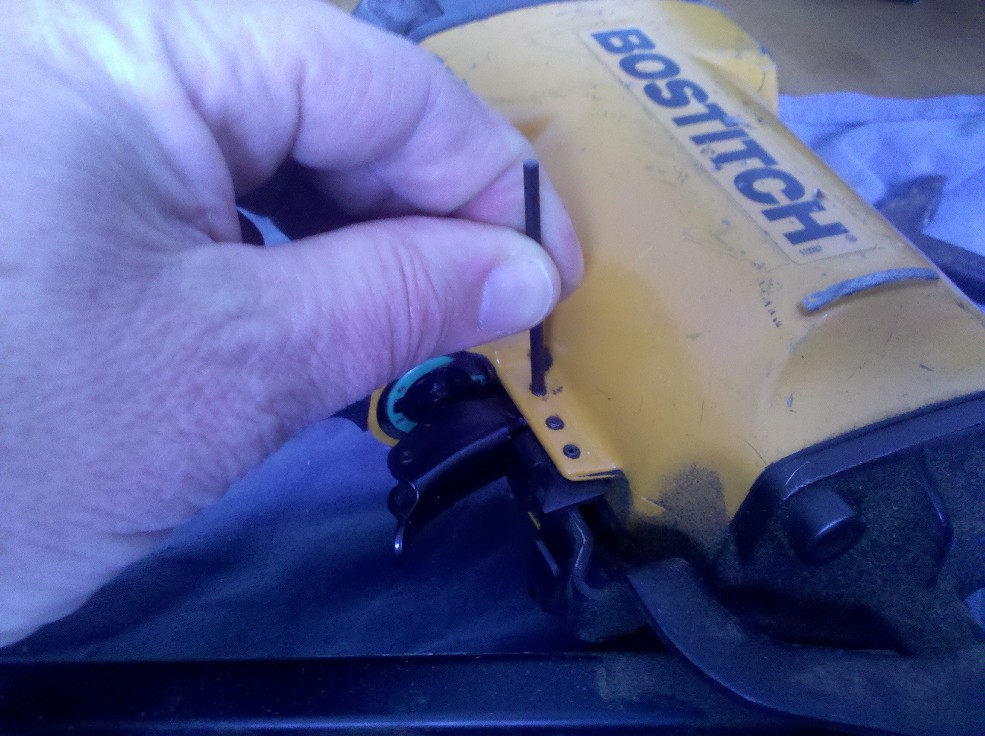
Next you’ll pop out the retaining pin for the valve the same way. My gun has one pin, some models have two, and you may have to peel back the black rubber cover slightly to access the pin(s). Set the pin aside so it doesn’t get lost.
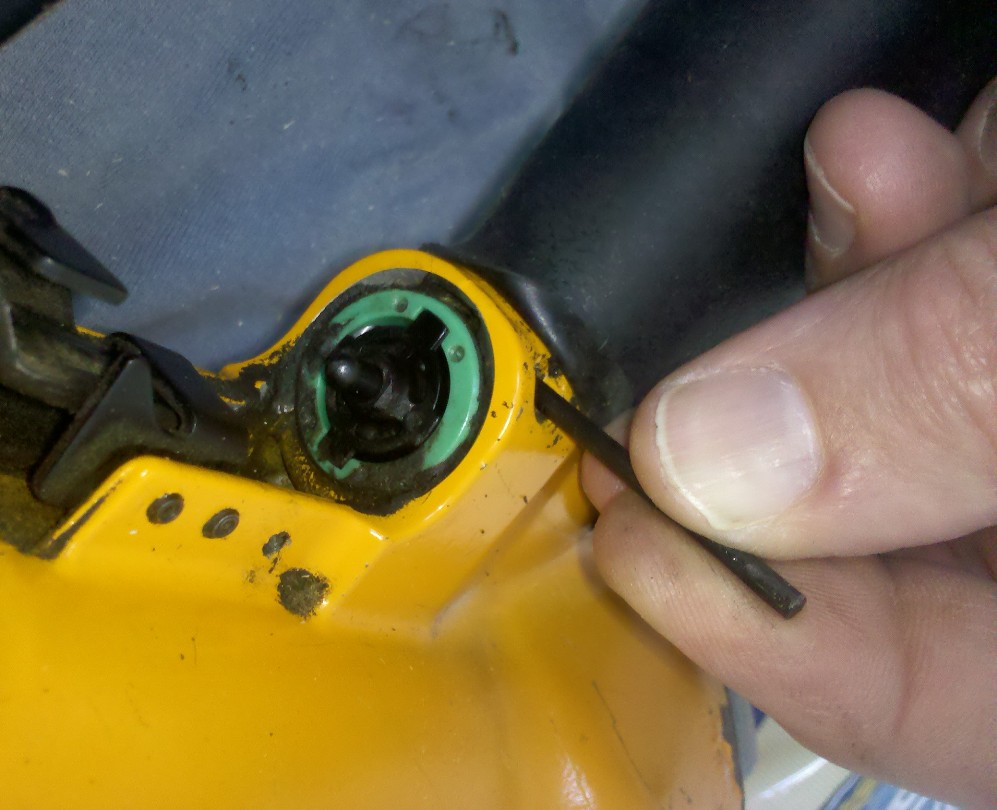
Once the valve pin is out, there are two ways to remove the trigger valve assembly—manual or turbo. Usually, if you grab the valve’s plunger with a pair of pliers, you can slide it right out. If it doesn’t (because perhaps you’ve been a bit lax with the daily lubrication), or you just want to add a dash of excitement, grab a rag and wrap it well around the area the valve will be exiting, and connect a lightly charged air hose to the gun’s coupling for a second or so—the valve will make a speedy exit from its little hidey hole. You’re halfway done!

Now put it back together!
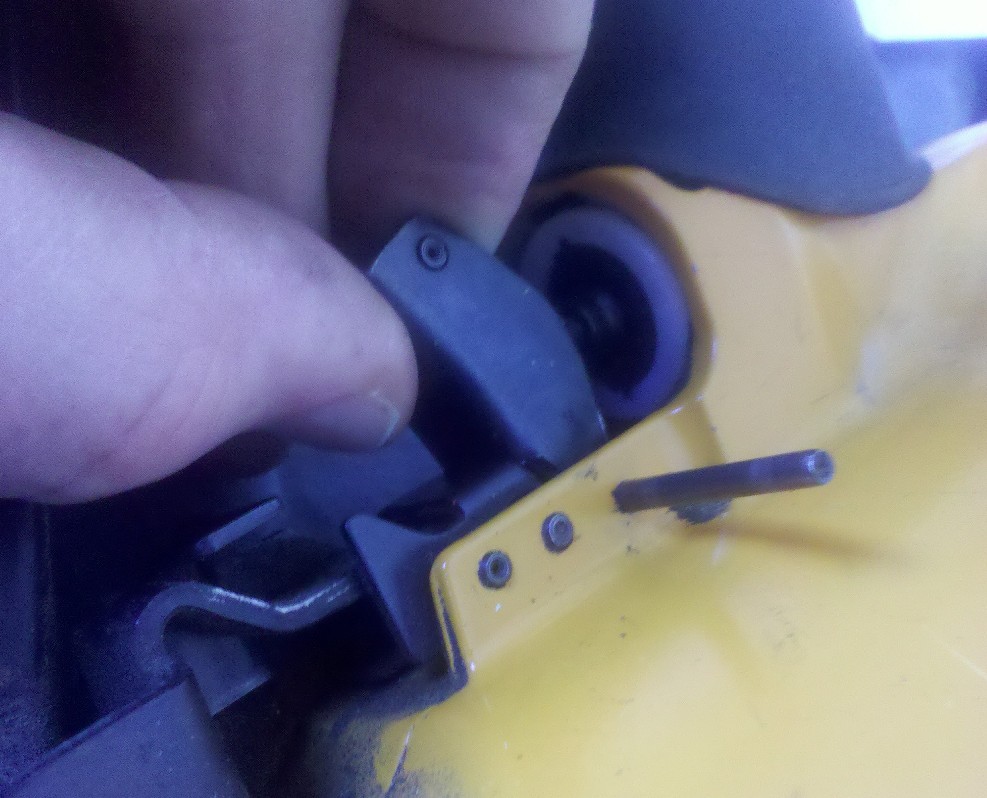
Take a good look inside the cylinder the valve came out of, and make sure there are no little pieces of debris left behind. (If you used the jet propulsion method, there shouldn’t be much of anything left in there!) Pop the cap off the new valve body (roughly the top third), and lubricate all the o-rings on the assembly with a light coat of the provided grease. Snap the top back on, find the grooved side of the valve, and make sure when you insert the valve the groove will line up with the retaining pin when you re-insert it.
Push the valve GENTLY into the bore, being sure to keep it square to the valve body so as not to tear the o-rings. When it’s all the way in, start the retaining pin back into its hole, again making sure the groove in the valve body lines up with it, and tap it gently back into place using the roll pin.
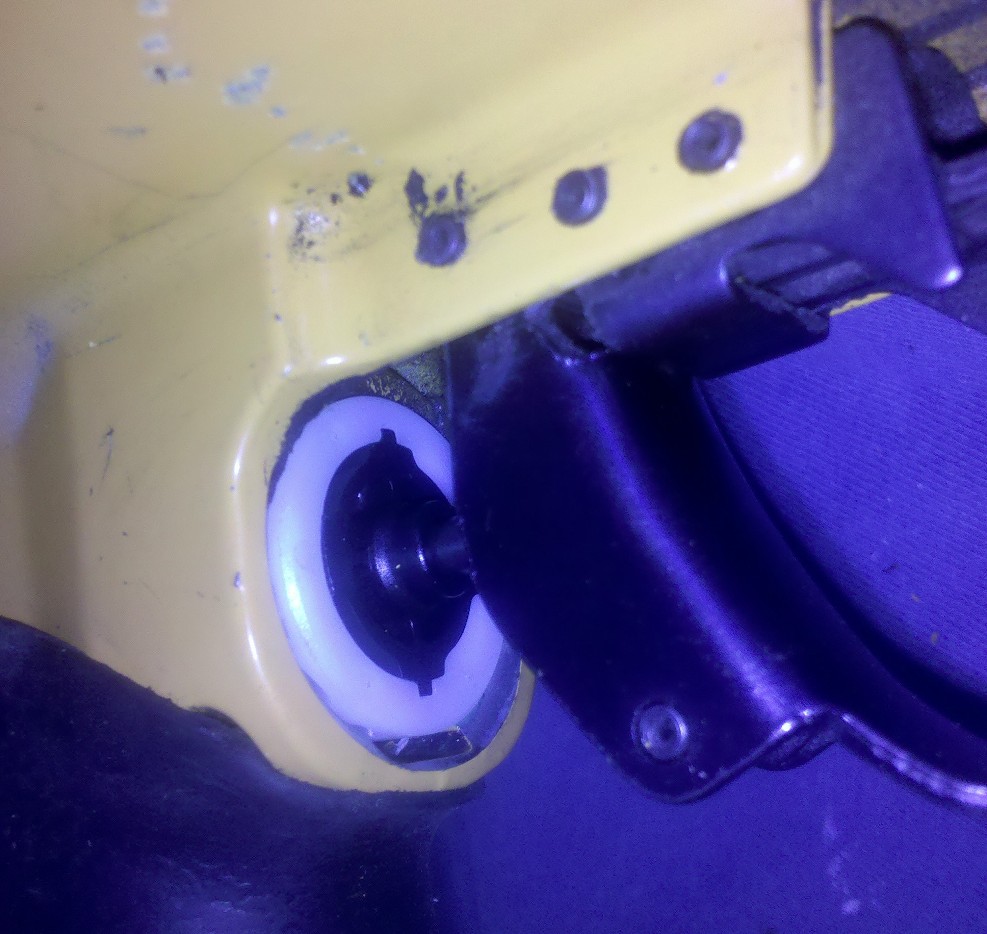
Finally, hold the trigger in position, line up the holes, and gently tap it home with the roll pin. Eureka—you’ve done it! Fire up your compressor, attach the nailer, and it should operate like a brand new unit!
Pricing and Where to Buy
You can find the Bostitch TVA11 Trigger Valve Kit for around $25 on Amazon, and you may also be able to get one from your local home center or tool rental store. It’s not a bad idea to order an extra kit to keep in your nailer’s case – depending on the amount of usage it gets, the valve will go kablooey every couple of years or so, usually when you’re under the tightest deadline. It’ll give you a warm, fuzzy feeling knowing you’re ready for the next hissy fit.
Finally, to reward yourself for a job well done, treat yourself to this Penn and Teller video demonstrating a fairly unorthodox, and definitely NOT recommended, use for a nail gun. Do NOT try this at home. Or ANYWHERE!
http://youtu.be/z8OIwmKnnuY


Sounds like I nailed it! Thanks for the kind words, Joseph, hope it got you up and gunning again.
Very very nicely written. Clear, elegant in its economy. good sense of humor. What more could you ask for?