

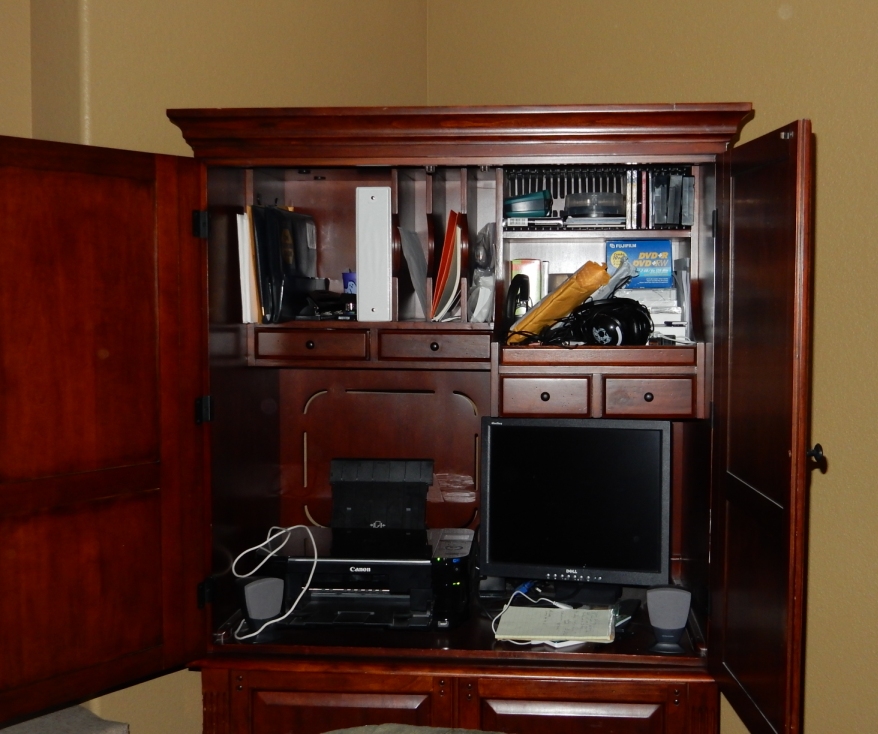
Once upon a time, dinosaurs roamed the earth. Millions of years later, computers the size of dinosaurs appeared on the scene. To contain these beasts, huge cupboards lurked in homes everywhere. With the supersized computers long extinct, most folks moved on to smaller desks or tables to support their smaller systems. Unlike those who move on quickly, we’ve had a long standing debate in our home over what to do with our fossil of a cabinet. For years, I’ve been a proponent of a downsize. My husband, on the other hand, was still in love with the big, old monstrosity – I think partly because he didn’t want to move it. Can’t blame him for that I guess. Over time, I became pretty adamant about the whole thing. I just couldn’t live in the same home with the enormous space waster anymore. It was either the cabinet, or my sanity. Fortunately, we were able to compromise. We decided that I would revamp a computer cabinet so that I too, could remain in our home.
Taking the Beast Down

We moved the old hutch to a new location in the same room. Much to my relief, the move alone created a better use of space. Next, I gutted the beast. I’ve never emptied a piece of furniture and not been able to part with at least some of the contents. The project of de-junking was an important organizational move. And, as part of the gutting, I removed an interior rack that held DVD’s and other unnecessary space invaders.
I decided to lighten up the fossil with some new paint. I chose to use Annie Sloan Chalk Paint in Old Ochre for this project. Chalk paint adheres to previously finished surfaces with no priming or sanding required. This was a huge time saver. Chalk paint is also a low vapor paint. With no sanding required and no fumes, I was allowed to work right in the room with the beast. This was important due to its size.
A couple of coats of paint to the interior and exterior of the cupboard really brightened it up. The overall feel of the cupboard is much less dark and ominous as a result. Then, to give it a warm touch, I sealed the paint with a coat of clear wax and a coat of dark wax. The dark wax gives a distressed, relaxed quality. Finally, to match the distressed look of the wood, I put a light coat of paint on the hardware and quickly wiped most of the paint off. This simple step saved me the time and money of replacing all of the hardware.
The final touch for the outside of this creation was to mount this IKEA magazine rack to store papers and books. Nothing roars clutter louder than papers everywhere. So this is a handy and inconspicuous little containment system.

Adding New Life

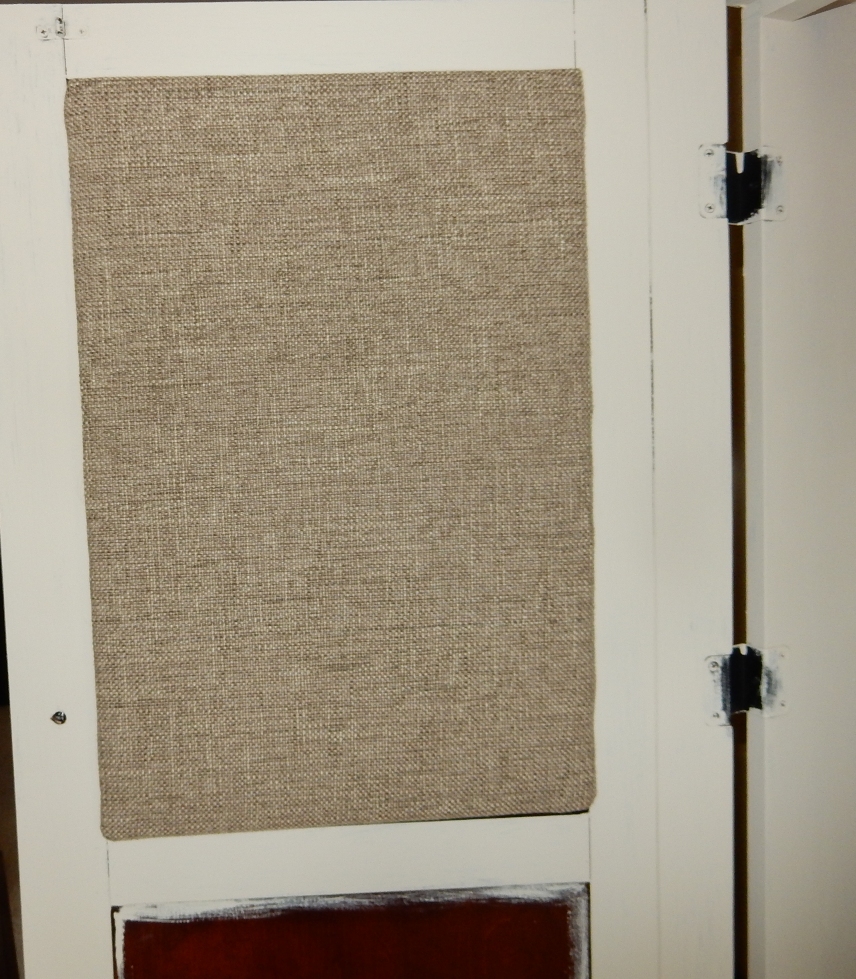
With the shell completed, I was ready to tweak the interior. I wanted to create a cozy, welcoming, and functional office space. To begin, I purchased an inexpensive corkboard from the poster board section at Wal-Mart along with some double sided adhesive tape. I cut out two pieces of the corkboard to fit two of the interior panels of the upper portion of cabinet doors. Then, I covered the cork board with fabric. I attached the fabric to the back of the board using a glue gun. These two fabric covered boards were mounted onto the cupboard doors with the double sided adhesive tape.
To complete the upper doors, I purchased a roll of adhesive dry erase board. Dry erase board on a roll is a lot like contact paper. It can be cut to size, and after it’s mounted, it becomes an instant dry erase board. This is a super handy feature whether I am using it to jot down a quick number during a call or to help my kiddos solve a math problem. And, the doors look really nice now, too.
The bottom cupboard doors needed to be just as useful and attractive as the top doors. I simply painted these panels with several coats of chalkboard paint. With the doors complete, we’ve created interest, and we’ve improved on the usable space.
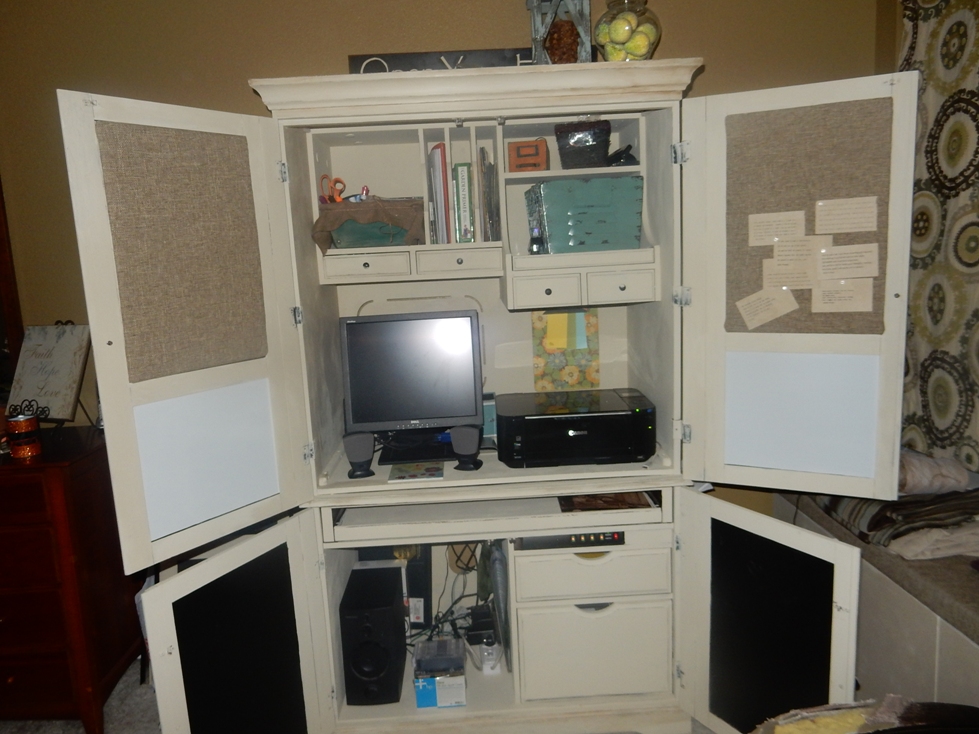
We placed our monitor and printer back in place. Then I collected a few containers to complete the interior of the project. Since we still have lots to store, I put the accessories and office supplies into visually appealing bins, boxes, and baskets. This really completed the overall look. Everything has its place, and the resurrected piece of furniture looks like the coziest little cubicle this side of the Jurassic period. Have you tamed any beastly pieces of furniture lately? Let us know how you’ve been able to upcycle an old relic!


