As an Amazon Associate we earn from qualifying purchases (more).
What do you get for the phone that has everything? Trendy case? Check. Cool apps? Check. What about a wooden speaker? Che- wait, what!?
I suppose to be more precise it is actually called a resonator, but that sounds too much like an Arnold Schwarzenegger movie to me… If you’re looking for a fun DIY Woodworking project that is both visually and aurally enticing, read on for step-by-step details on how to make your own wooden iPhone speaker / resonator.
Selecting A Blank
This is claro walnut, but any hardwood would make a good speaker To start, all you need is one piece of wood. I started with a block of walnut 5″ x 4″ x 2 1/2″ I get these as a cut off from a local factory that sells bags of wood for firewood. Since I have strong moral fiber, and cannot bring myself to stoke my fire with claro walnut, I rescue as many of the bags as I can. You can use any wood or combination of wood you like.
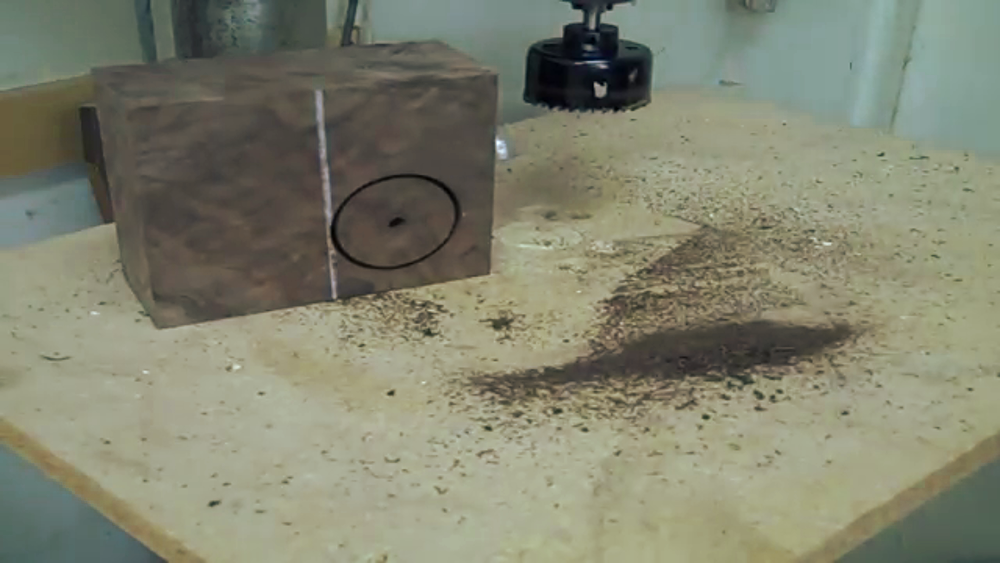
Drilling Speaker Holes
Pick a side where your speaker hole will go. I used a 2 1/8″ hole saw in my drill press and drilled about an 1 1/2″ down. This will give use the holes for the front and a guide for our speaker ‘bowl’ I used a 2 1/8 hole saw to define the speaker hole
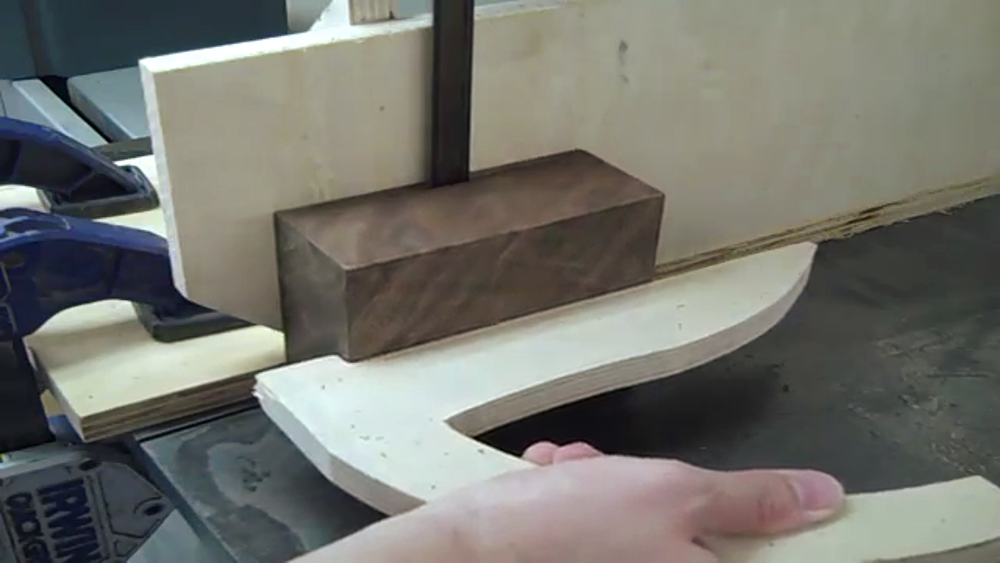
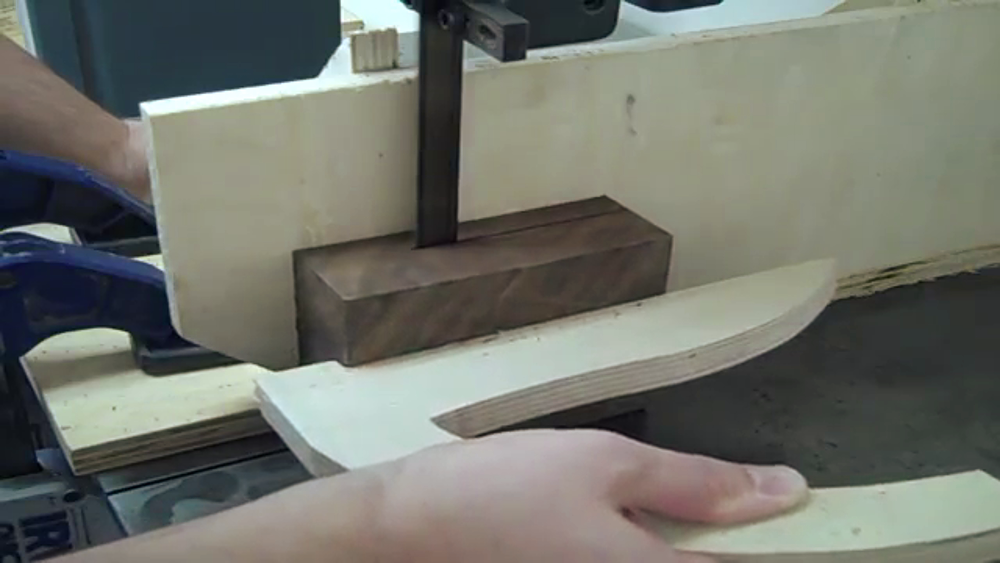
Resawing At The Band Saw
My resaw fence is stupid simple at only 4 pieces of plywood.
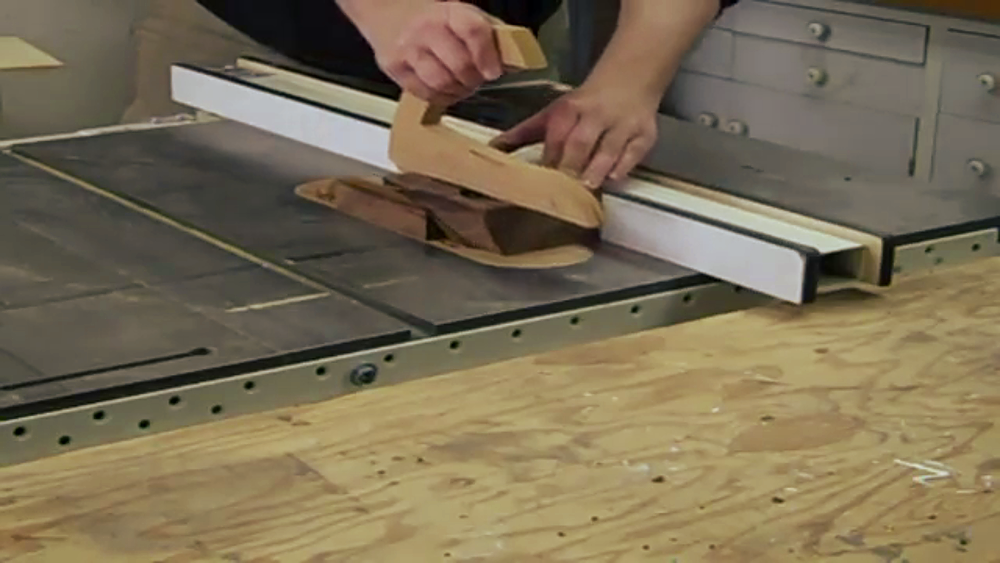
Next I set up the resaw fence on my band saw. This is something like building a band saw box. You want to cut off the face, or front. I took about a 1/4 slice.My band saw fence is stupid simple and easily replicated. It’s 4 pieces. Two boards butted at 90 degrees and two small triangles to reinforce it. The real trick to re-sawing is to take your time and let the saw do the work.
Keep your hands clear with the aid of a push stick. I then took another slice about 3/4″ thick. This measurement should be slightly thicker than the device you will be sliding into it.You should now have two slices of different thickness with a 2″ hole through both of them.
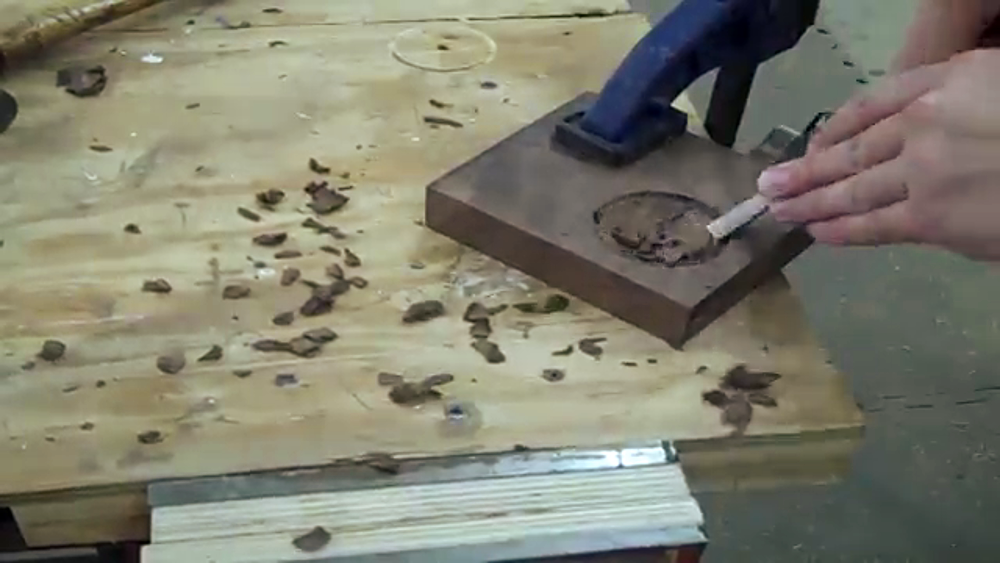
Shaping The Bowl
Due to my poor carving skill this simple dished out section took me almost 45 minutes. Next time I’ll use a forstner bit.Next I carved out the bowl on the remaining blank. I used a set of carving tools that were dull and my skill with them was quite low. I will use a fornster bit next time and just clean up the center point with my carving gouge. Live and learn.
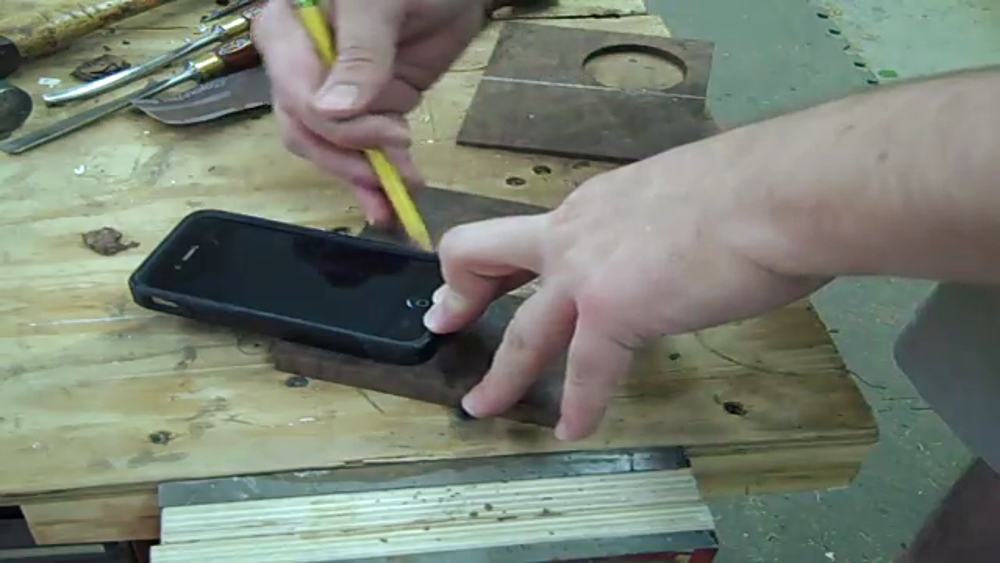
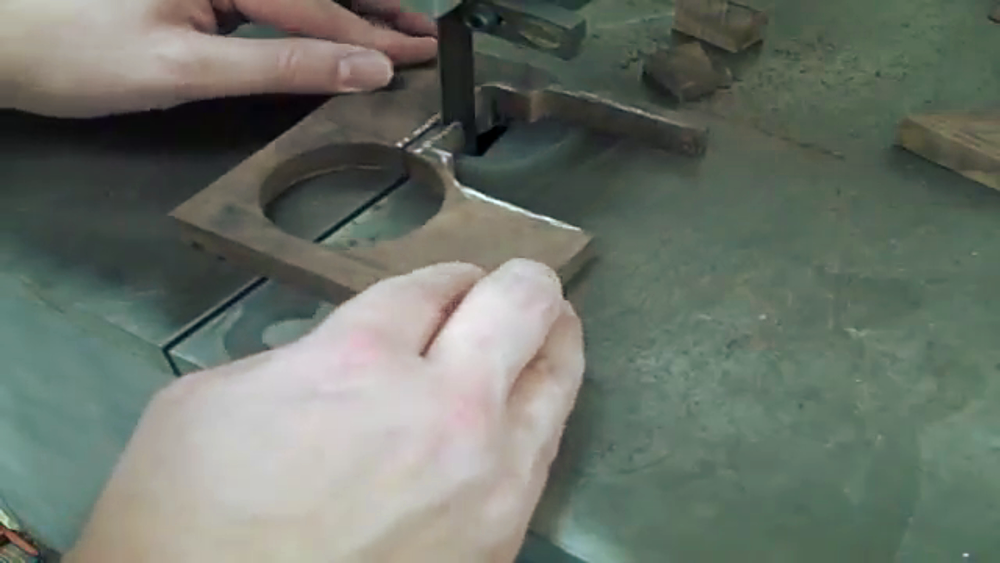
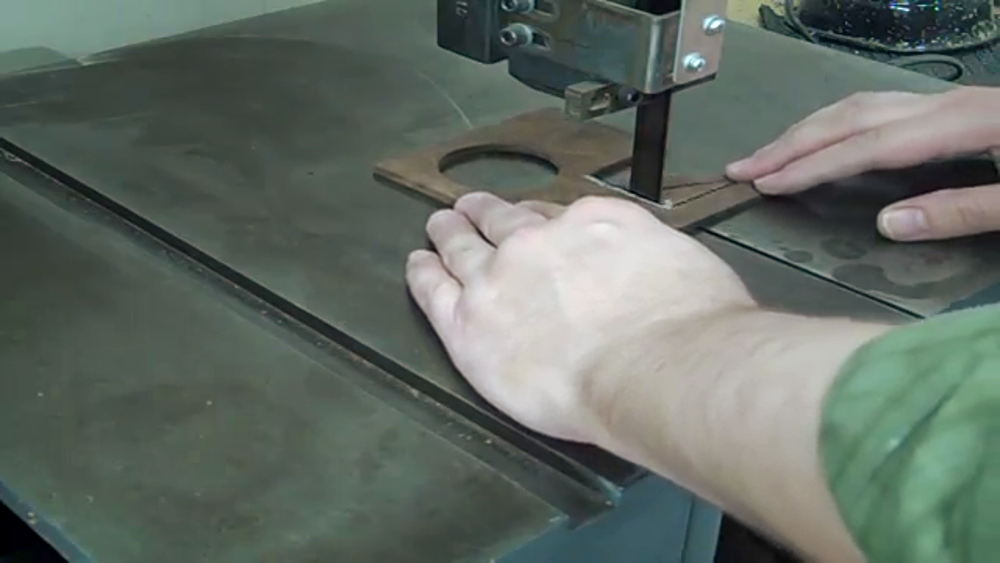
Cut Out Time
I traced my phone with a pencil and then redrew it with chalk. On dark woods pencil lines are almost invisibleNext I traced the shape of my phone in the middle slice and cut it out at the band saw. I also cut a channel for the sound to travel to the speaker. This is just a small slot, and only enough to direct the sound to your speaker.
Stay inside the lines and simply cut out your openings. The channel should be fairly small.
Finally cut an opening on the front slice so you can see the phone buttons but with enough of a lip that it wouldn’t fall forward. About 1/2″ of lip should be plenty. Last cut at the band saw. Just a cutout for the screen
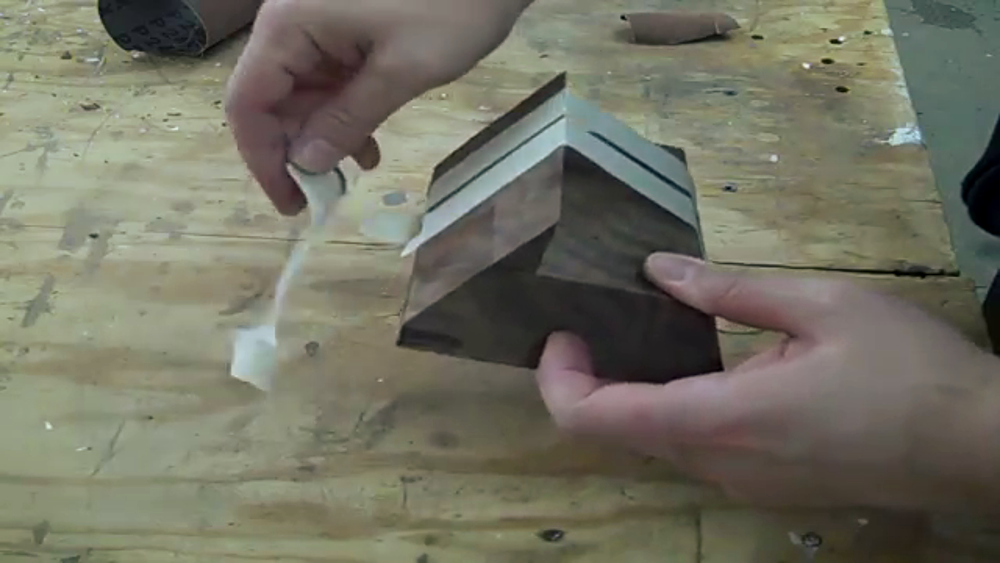
Glue Up
Good coverage and adequate clamping pressure will make the piece look like a single block of wood after glue up. A very cool effect!Glue up time. I use acid brushes to get into all the small areas. Since this project has lots of voids you might need to pull out a wide array of clamps to get good clamping pressure.
Leaning Back
I then took a 25 degree cut at the top and bottom to have it sit back and still look symmetrical. I ended up using one of those cutoffs on the back to give it a bit more stability. It was just a simple matter of gluing it up and holding it in place for an hour with masking tape. 25 degree rip cut on the top and bottom give this piece a finished look and it’s easier to use.Attach cutoff with glue and masking tape.
Sanding & Finish
Sand your project. Sadly this is one of those projects that cannot be sanded before assembly. This is due to the fact you might alter the thickness of the pieces you resawed. They then wouldn’t fit tightly together when glued or your phone might no longer fit. So take some time and sand, sand, sand. 150, 180, 220.
For a finish I used boiled linseed oil just rubbed on and left to dry. Shellac, or any oil would give a similar effect.
Completed
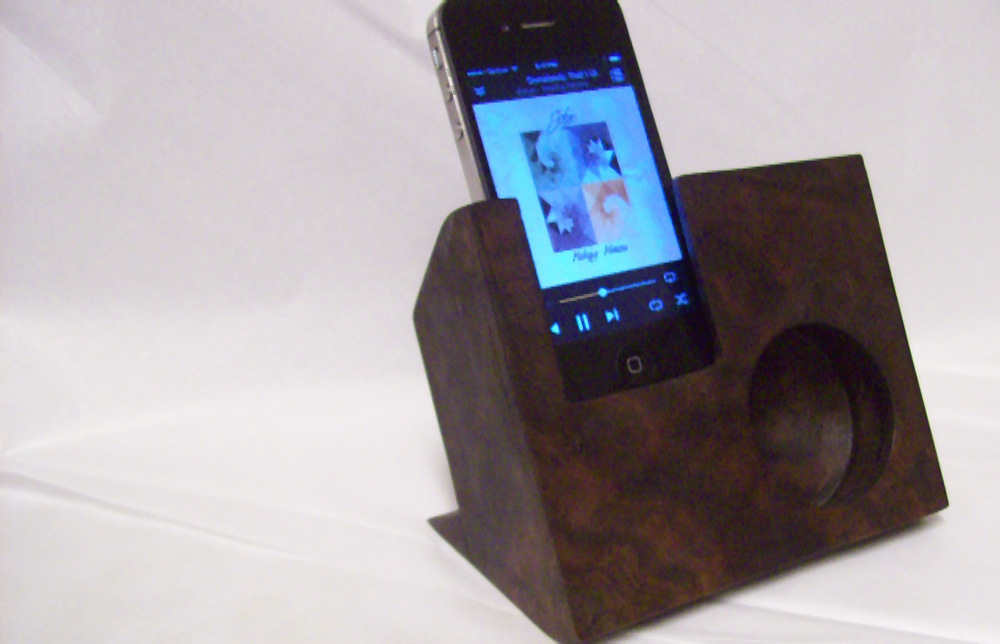
The warm tone and rich grain of the walnut make this my favorite phone accessory.Now add your phone and crank up the volume. For the record there isn’t much of a difference at lower volume but at full volume it is not only louder but the sound is quite focused. It also adds quite a bit of warmth and tone. Add to that the pride from having made it yourself and you’ve got a great weekend project and a welcome addition to any desk.
Peter Brown is a professional computer geek and a hobbyist woodworker in Northern California. He spends his weekends renovating his 1960′s house and escaping to the shop whenever his family declares that he’s “helped enough for one day.”
Subscribe to our newsletter
Get access to free prizes, product sneak-peeks, reviews, how-to's and much more!


NICE AND SIMPLE PROJECT GREAT IDEA