

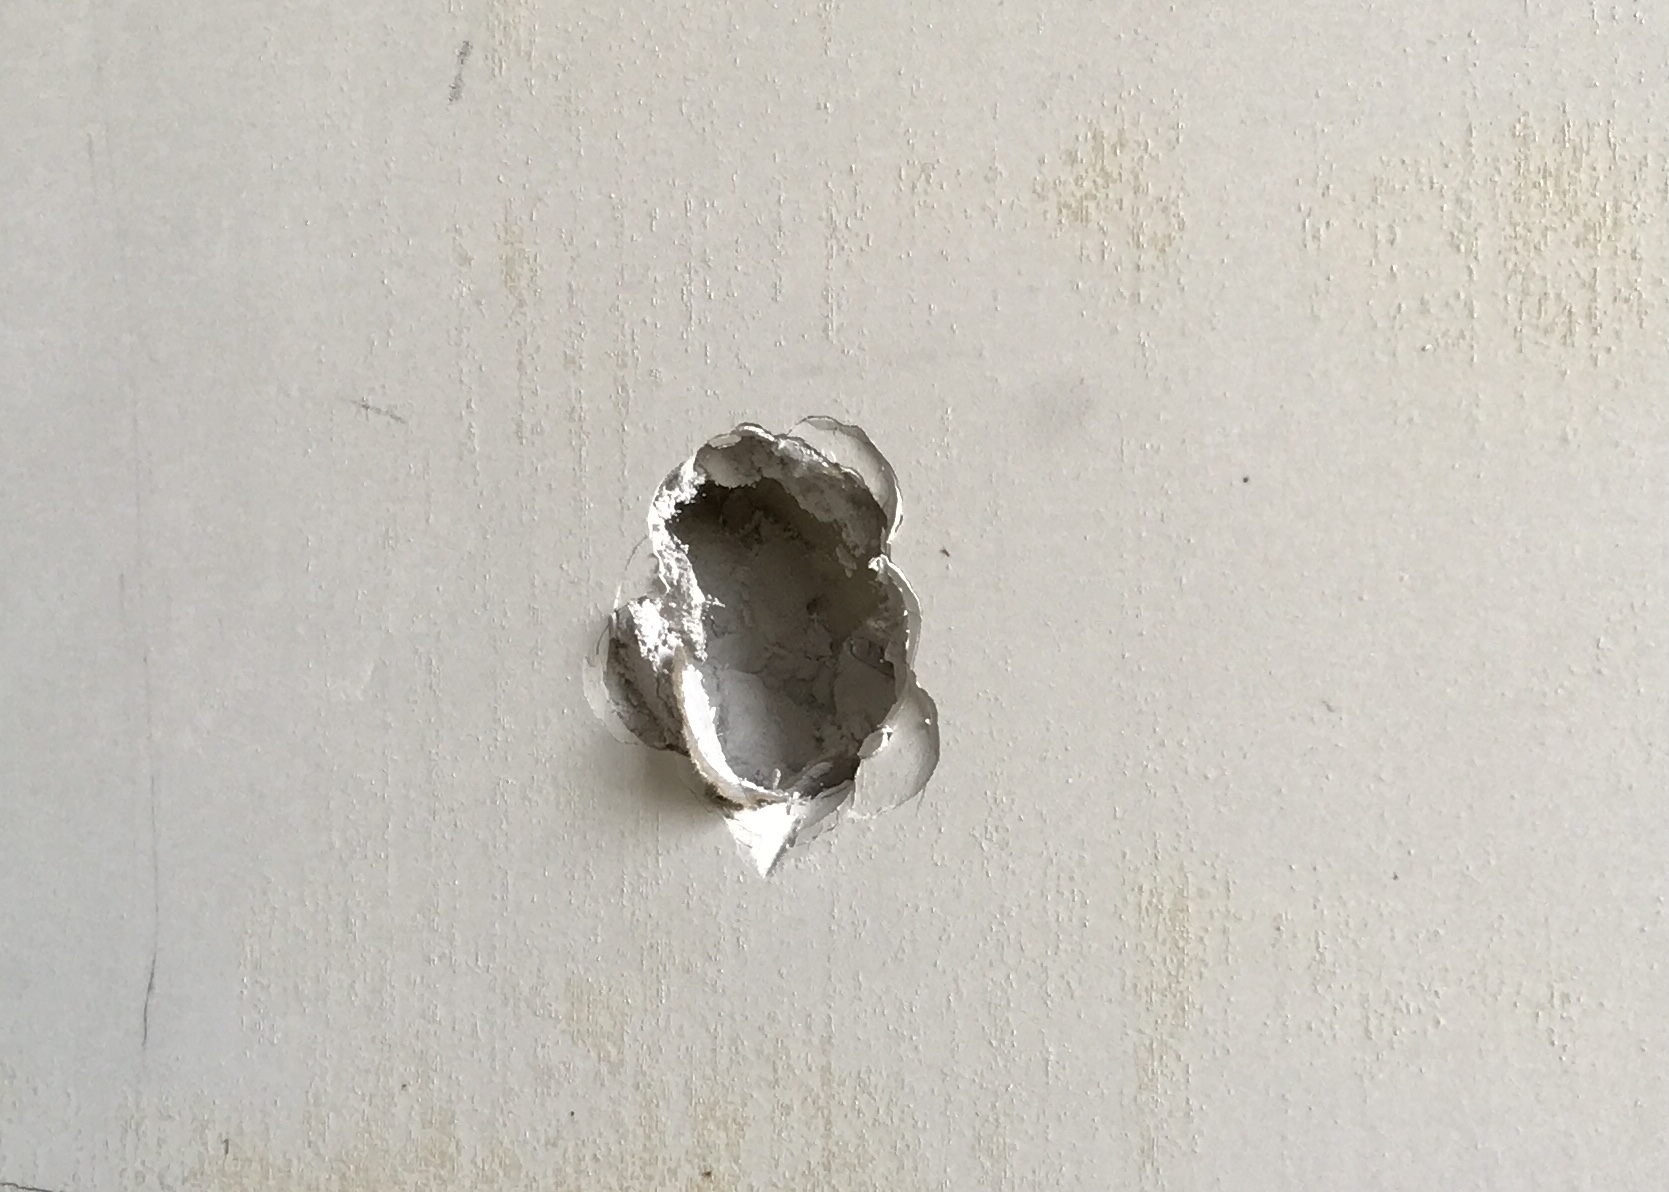
If you’re a homeowner and the phrase “hole-in-the-wall” causes moderate anxiety, you’re not alone. Traditional drywall repairs are wrought with frustration, despair, and defeat. But there is an easier way. In this tutorial, we’ll show you the benefits of making small wall repairs with a California drywall patch.
I don’t think we could enumerate all of the possible ways to puncture drywall. If you have kids, a pool table, or HGTV, you have probably found yourself at one point with an unwanted hole in the wall.
Maybe it was an errant blow with your framing hammer trying to gently tap a small nail into the wall. Or you were a little ambitious kicking off your boots.
Other times, you may have purposely cut holes in the wall. Electricians and plumbers are notorious for making access holes with little thought for how they will be repaired. That’s not true. They think about it all the time and smile.
Regardless of how we arrived at this subject, we have all been there. Staring blankly at an unwanted orifice in an otherwise perfectly flat wall. At this point, you have a few choices.
Let’s just assume that moving isn’t one of them. And you’re likely reading this because you have an aversion to hiring someone, so that’s out. You consider yourself handy and perfectly capable of any small task.
How to Repair a Hole in the Wall – What are Your Options?
So first of all, you could hang a picture or something over it. You wanted to redecorate, right? In fact, Liz wrote an excellent guide on hanging a mirror without a stud.
Admittedly though, that only works at certain elevations. It doesn’t take a keen eye to know that a picture looks out of place 18” off the floor.
And unless you’re building a funhouse or an art museum, you can only have so many mirrors or pictures hanging around.
So you’re left with one rather unpleasant choice: fix it yourself. It’s not as bad as you think, though.
A drywall California patch is the simplest way to repair small holes in the wall. It takes very little skill (which is why I am allowed to write this), is incredibly fast, and requires very few tools.
If you have never heard of them, here is a brief explanation of what they are and how to make one.
What is a California Drywall Patch?
In case you’re uninitiated, a California patch is a way to repair a hole in drywall without any backer to screw into.
With typical drywall repairs, you will cut a piece of scrap wood a little wider or longer than the hole and struggle to get it into the opening. Eventually, you will get it to fit, but then drop it into the cavity of your wall.
Then you’ll cut another piece and repeat the process until you finally figure out how to put a screw in the middle to hold it in place until you can attach the board to the existing wall.
Next, you will screw a patch to the center of the board. Which has a 50/50 chance of pushing the board into the wall, ripping the screws through, and falling into the cavity.
If you can navigate this gauntlet, you can tape and mud like a normal drywall joint.
Alternatively, they sell things like Insta-back clips and self-adhesive mesh repair kits that work pretty well.
But the repair kits are more costly, especially when you have multiple holes to patch. And the clips still need to be taped.
Making a drywall California patch, on the other hand, requires no backing, no screws, and no tape. It’s simply a plug made out of a piece of drywall. They are held in place by leaving the facing paper bigger than the hole to serve as built-in joint tape.
The benefits of using a California patch for drywall repairs are that they are cheaper, are fully customizable to whatever dimensions you need, and are quicker than taping.
You can also use a different thickness of drywall. That’s handy when patching 5/8” sheetrock or plaster walls when you only have 1/2” drywall material. Another plus is that the drywall paper is thinner than most joint tape, making it easier to float out.
Why do they call it a California drywall patch?
It’s a long story involving prospectors misunderstanding the term “sheetrock” and where the term hole-in-the-wall originated…
Not really. The truth is, it probably started in California. Boring, I know.
How Big Can You Make a California Drywall Patch?
This is primarily for smaller holes to repair, in the range of 6”x6”. You can push that a little bit, but you want to be careful to get it close to flush. The bigger the patch, the easier it is to fall into or out of the hole. I would generally not recommend going much beyond 16” in any direction, but only if the other dimension is narrow.
For example, a 4” x 16” hole is a great size to fit a right-angle drill inside. Which is super helpful when drilling through the top or bottom plate. A California patch is the ideal solution for this kind of repair.
But generally, if your repair is much bigger than that, you can still use a piece of scrap wood as a backer. It’s still faster and easier than taping and mudding a normal patch.
Is it a good solution on a Ceiling?
A California drywall patch is also a little more difficult on ceilings, though it can be done. As you can imagine, they tend to sag a bit. Just be sure to make the fitting tight enough to hold until the mud dries.
Alternatively, you can use a traditional board or a couple of Insta-Back clips to hold it in place until the mud dries.
How to California Patch Drywall the Right Way
So now let’s assume we’ve moved through every stage of wallboard repair: Denial, anger, bargaining, depression, and now acceptance.
That process takes longer for some than for others, so don’t rush it. But let’s assume we have worked through all of the feelings and now we’re ready to begin the process.
What You Will Need
- Utility knife
- Pencil (optional)
- Straight edge (optional)
- 6” drywall knife
- 10” drywall knife
- Mud pan
- 20 – 45 minute hot mud (preferable)
- Topping compound (preferable)
- Heat gun (optional)
- Patience (preferable)
Cutting the Patch to Size
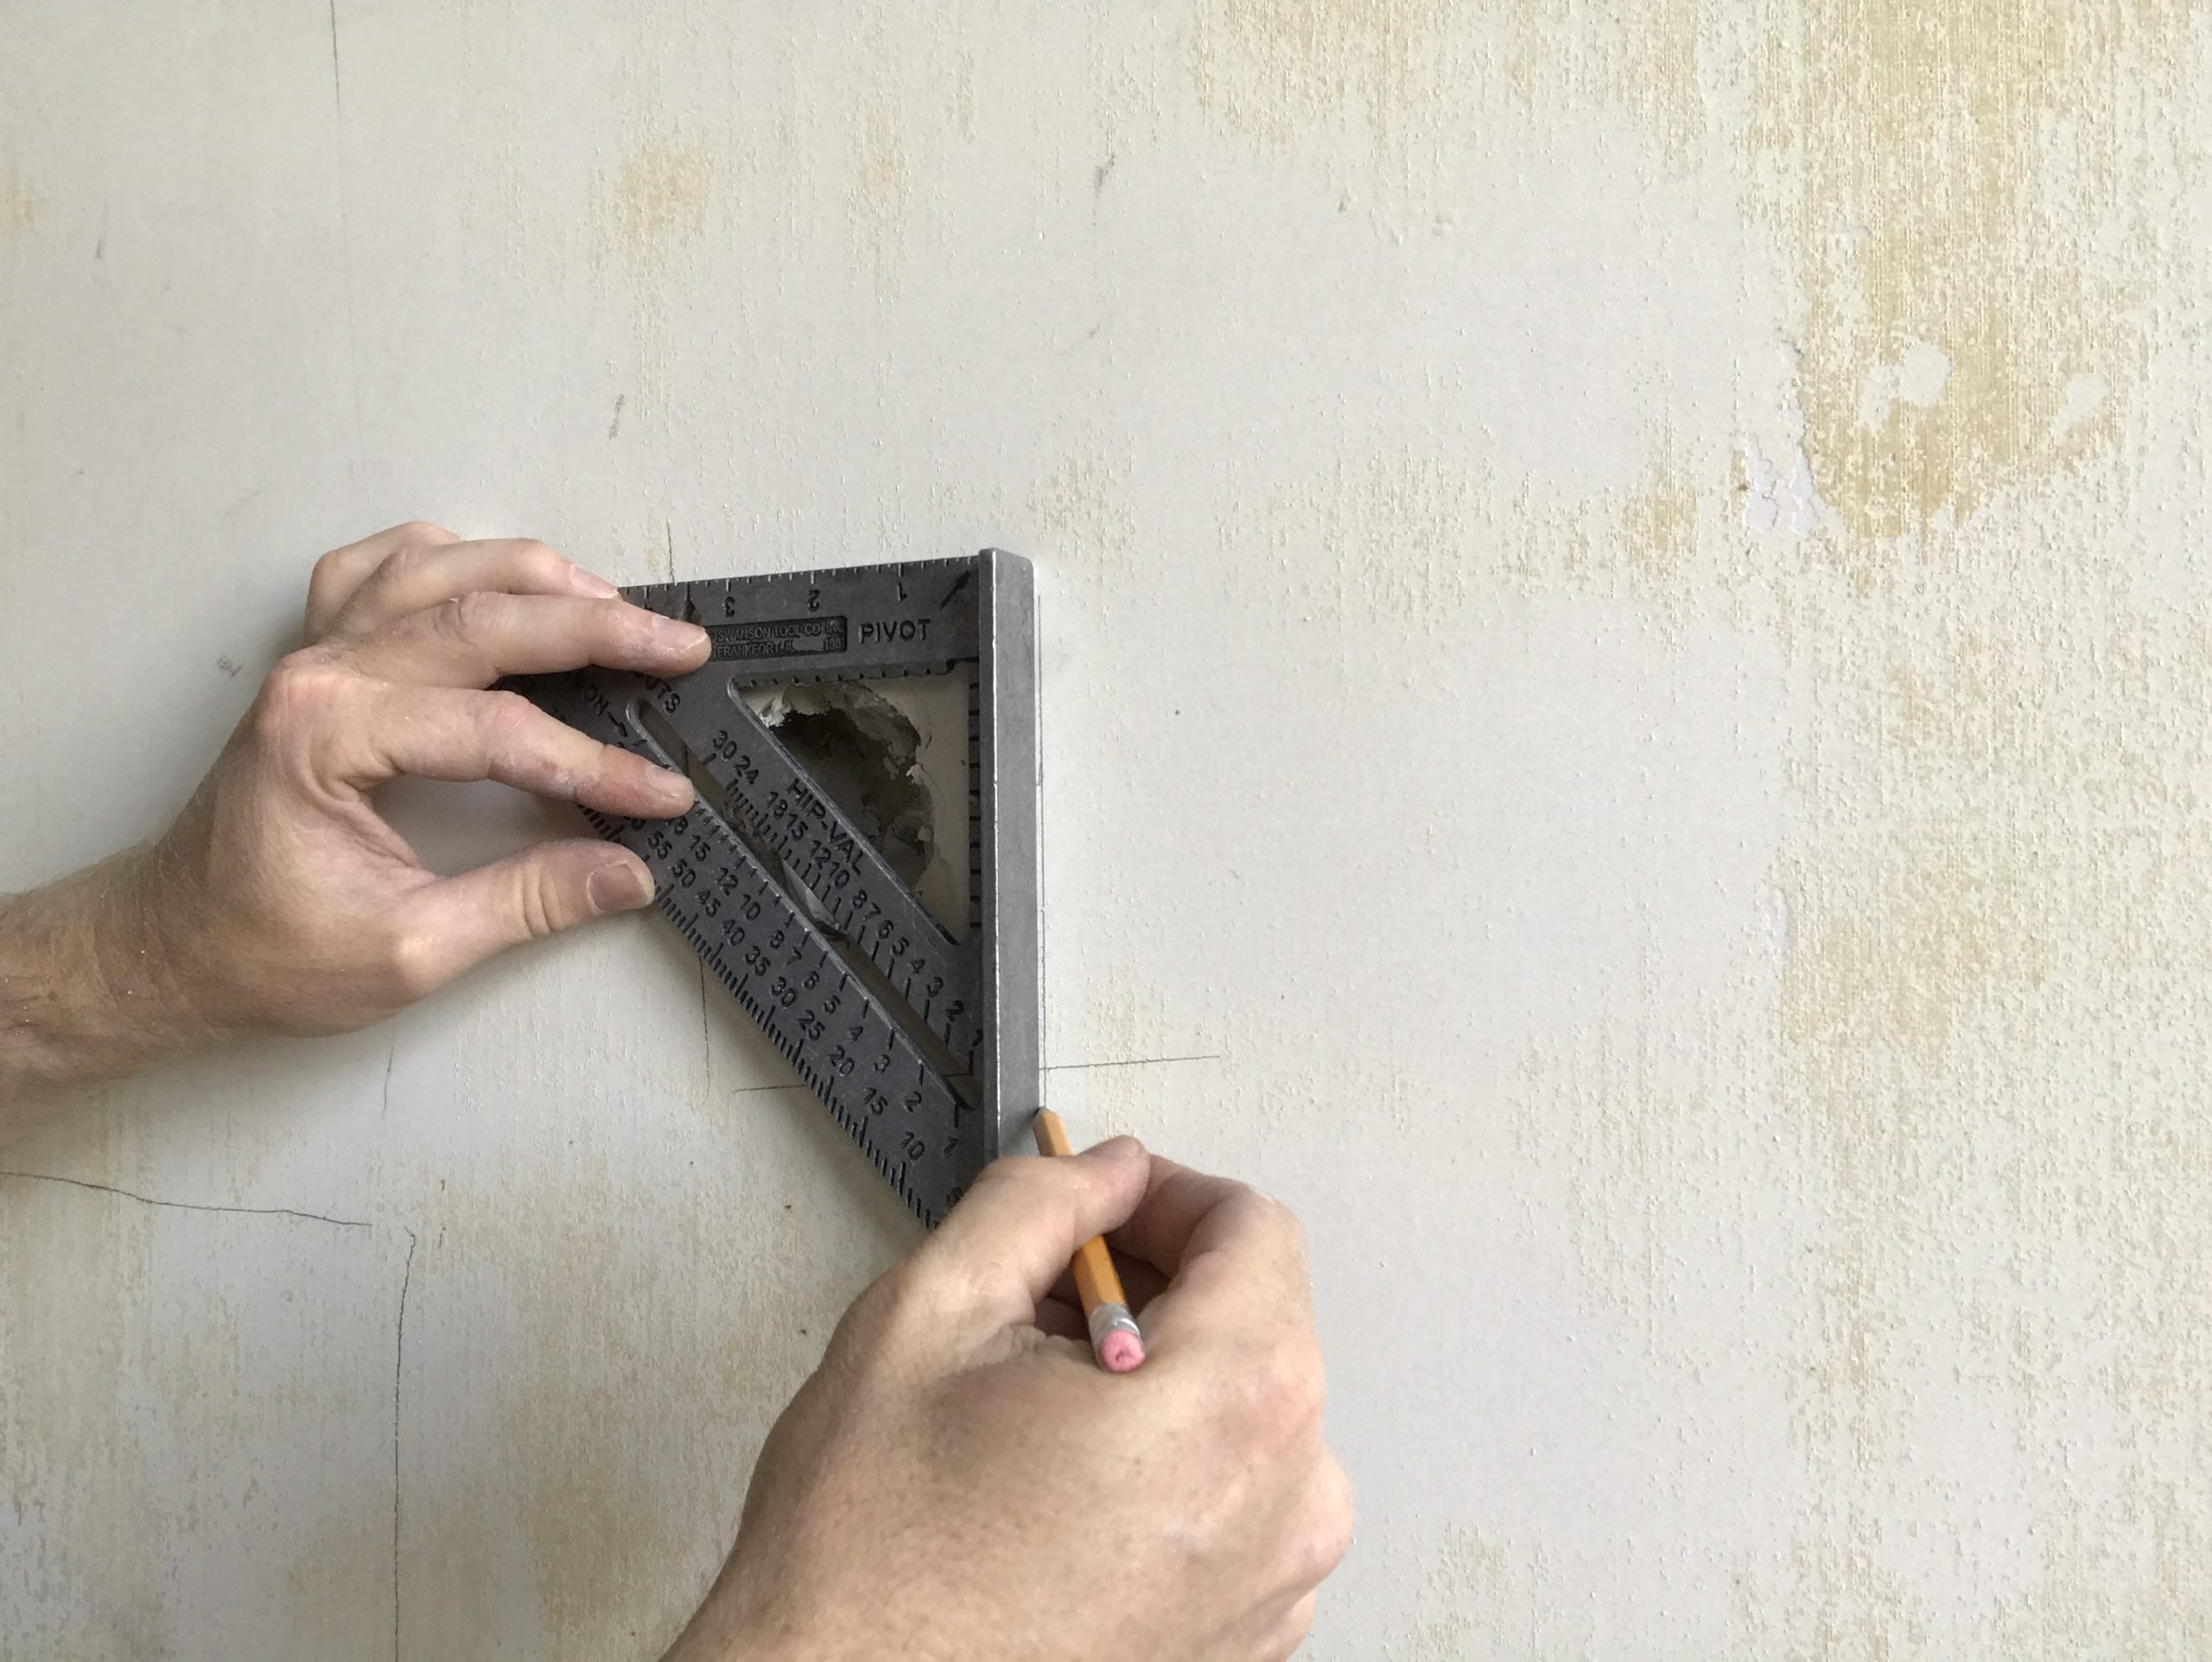
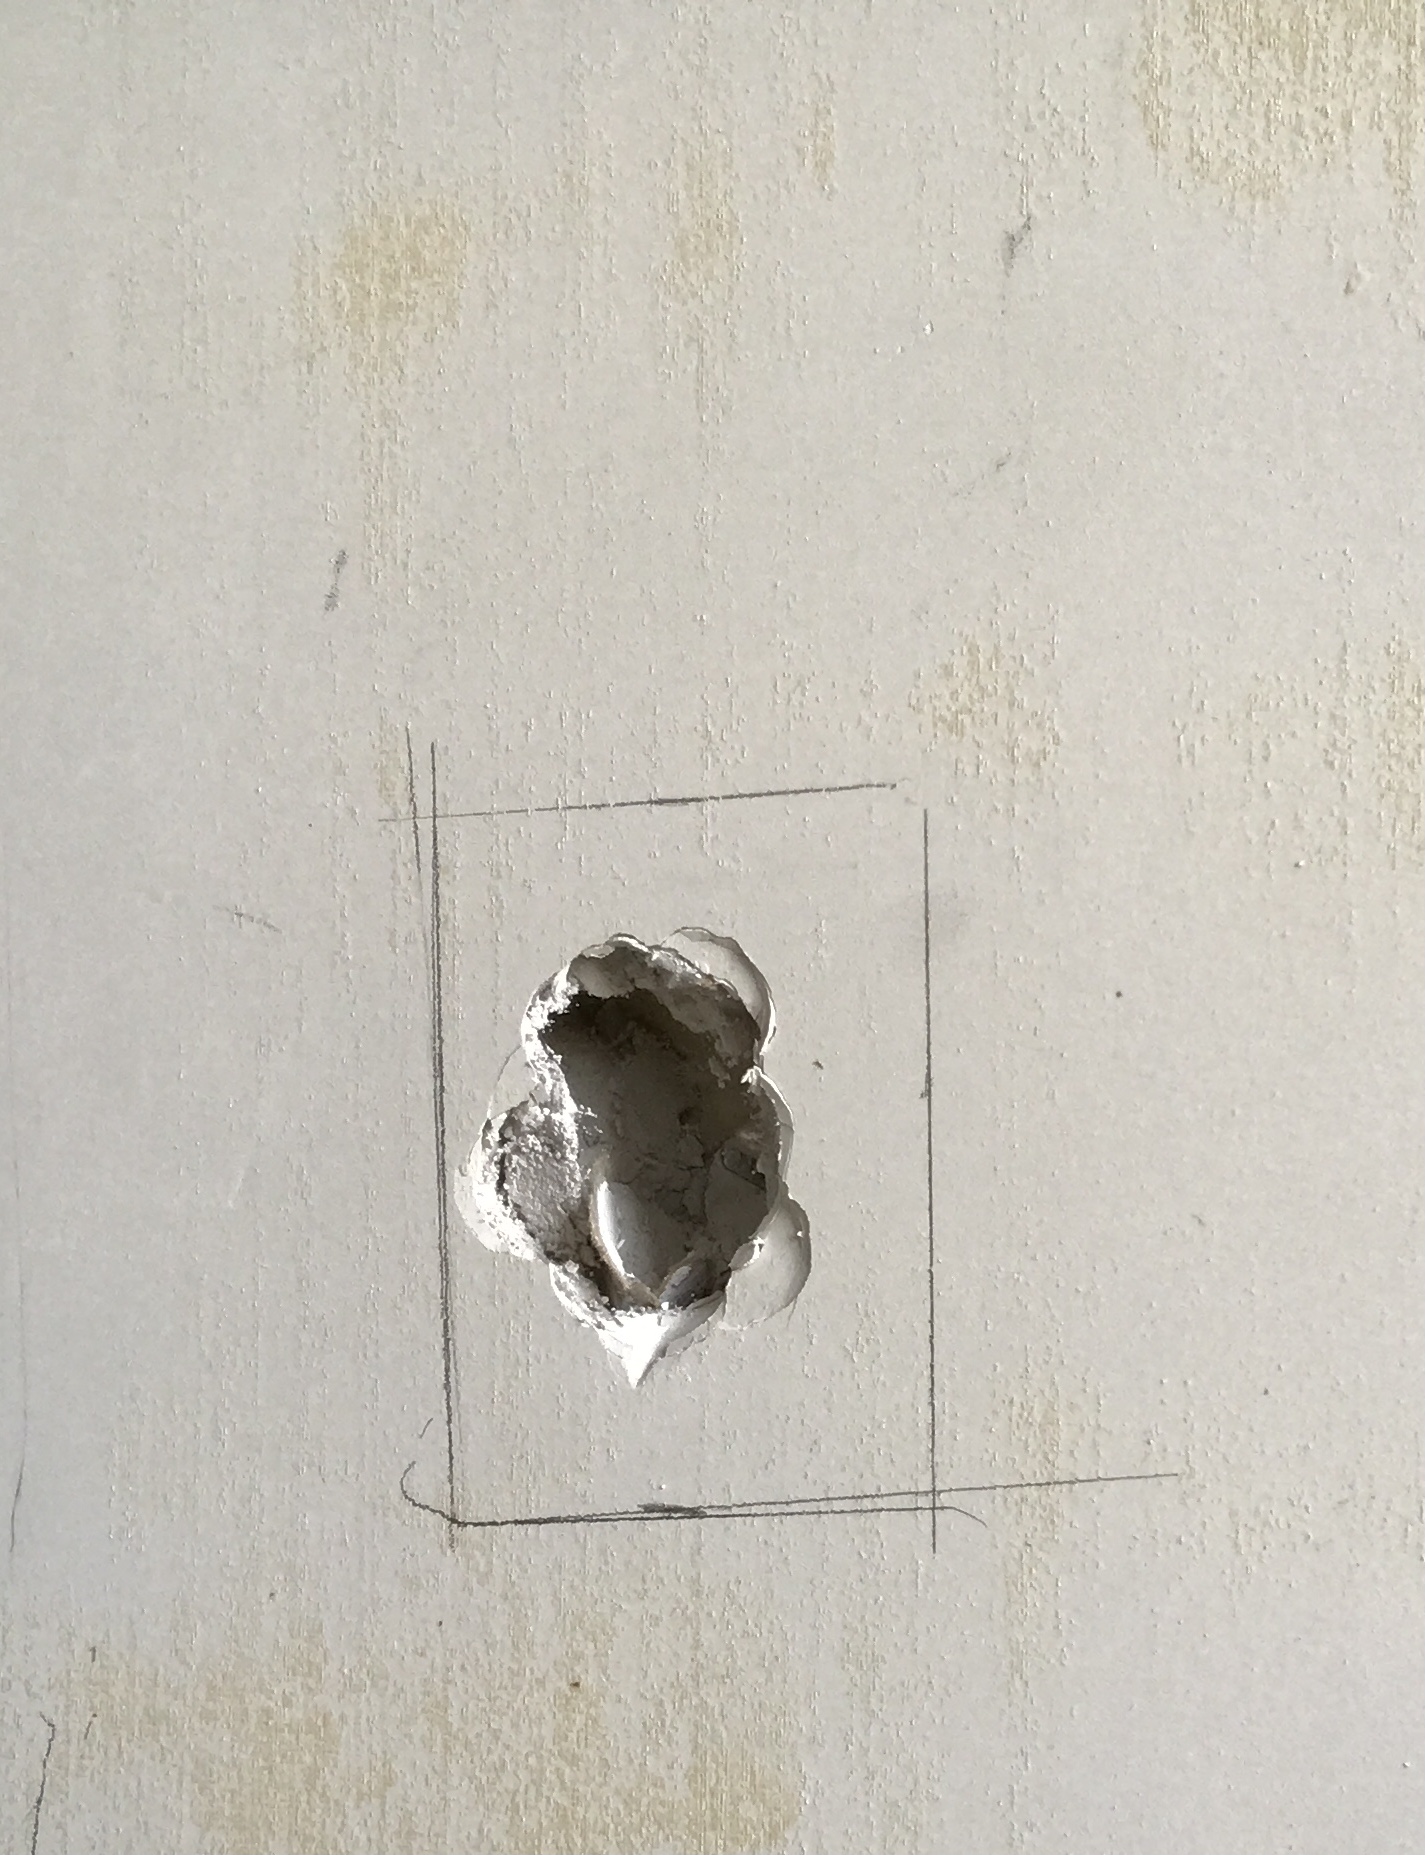
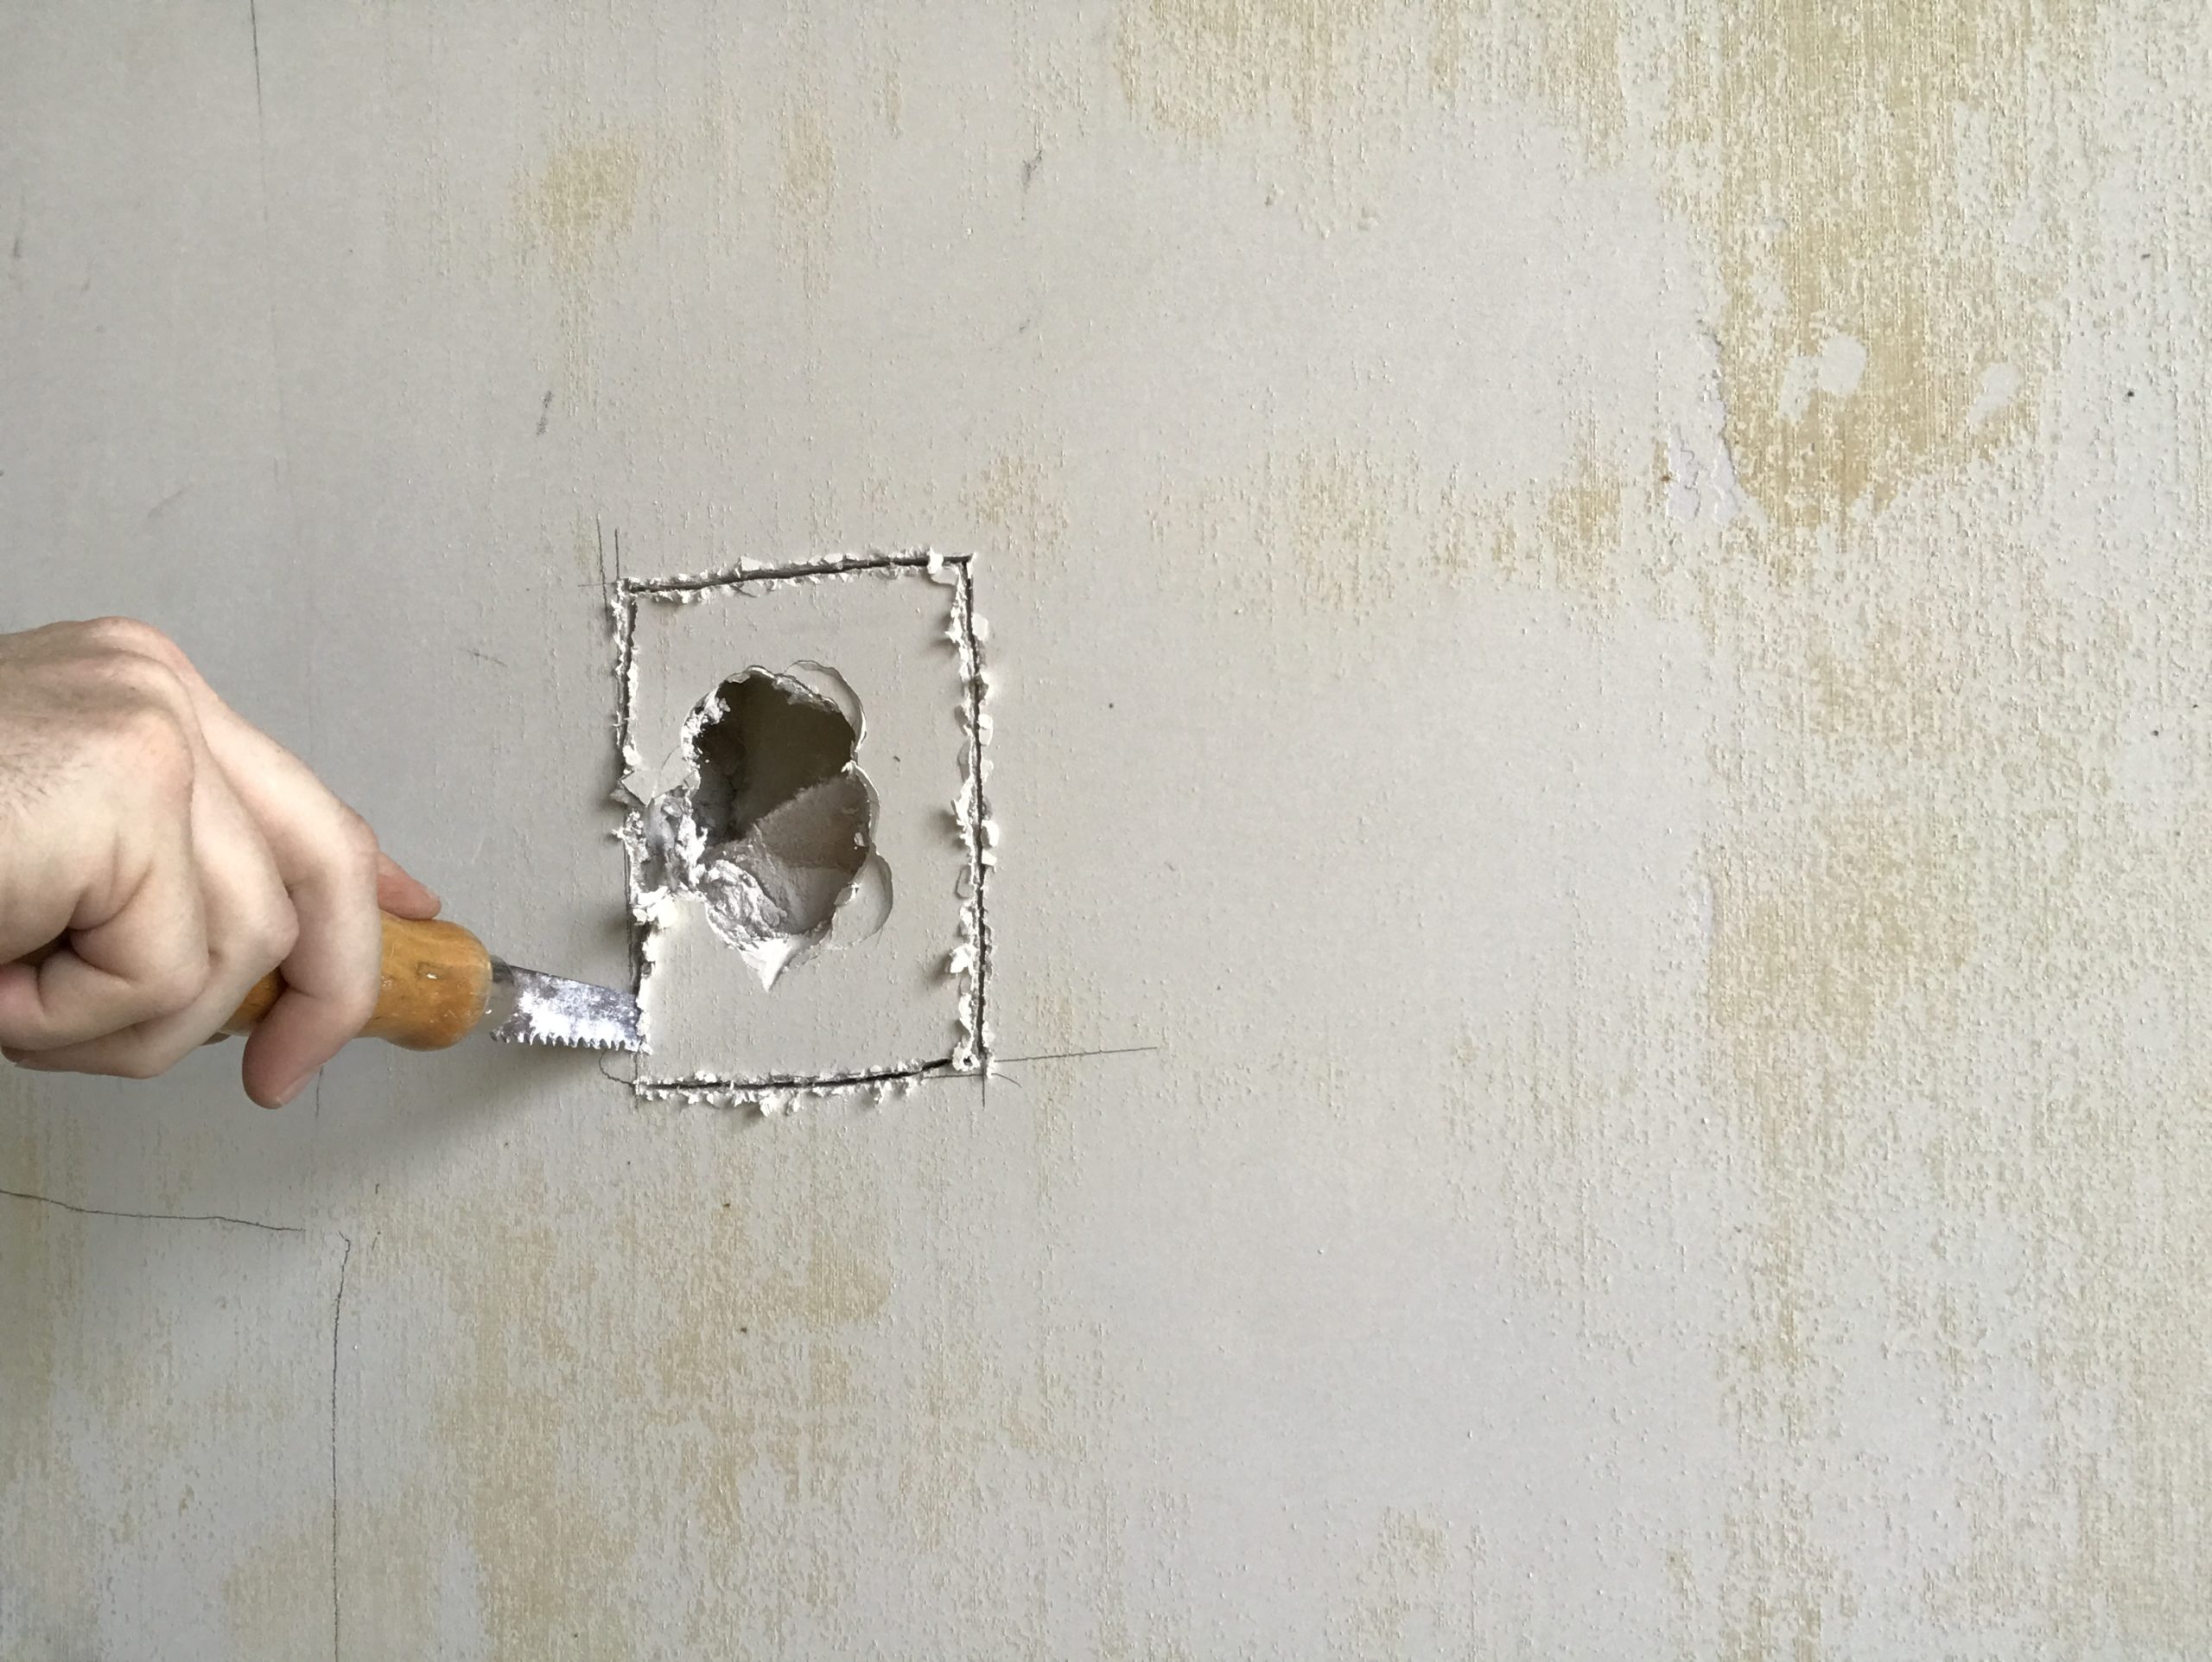
Step 1: Square up the hole. This doesn’t need to be perfect, but you want your patch to be snug. It’s much easier to start with something square than to try to sculpt the repair piece to fit. This isn’t an art class, so no need to get cute here.
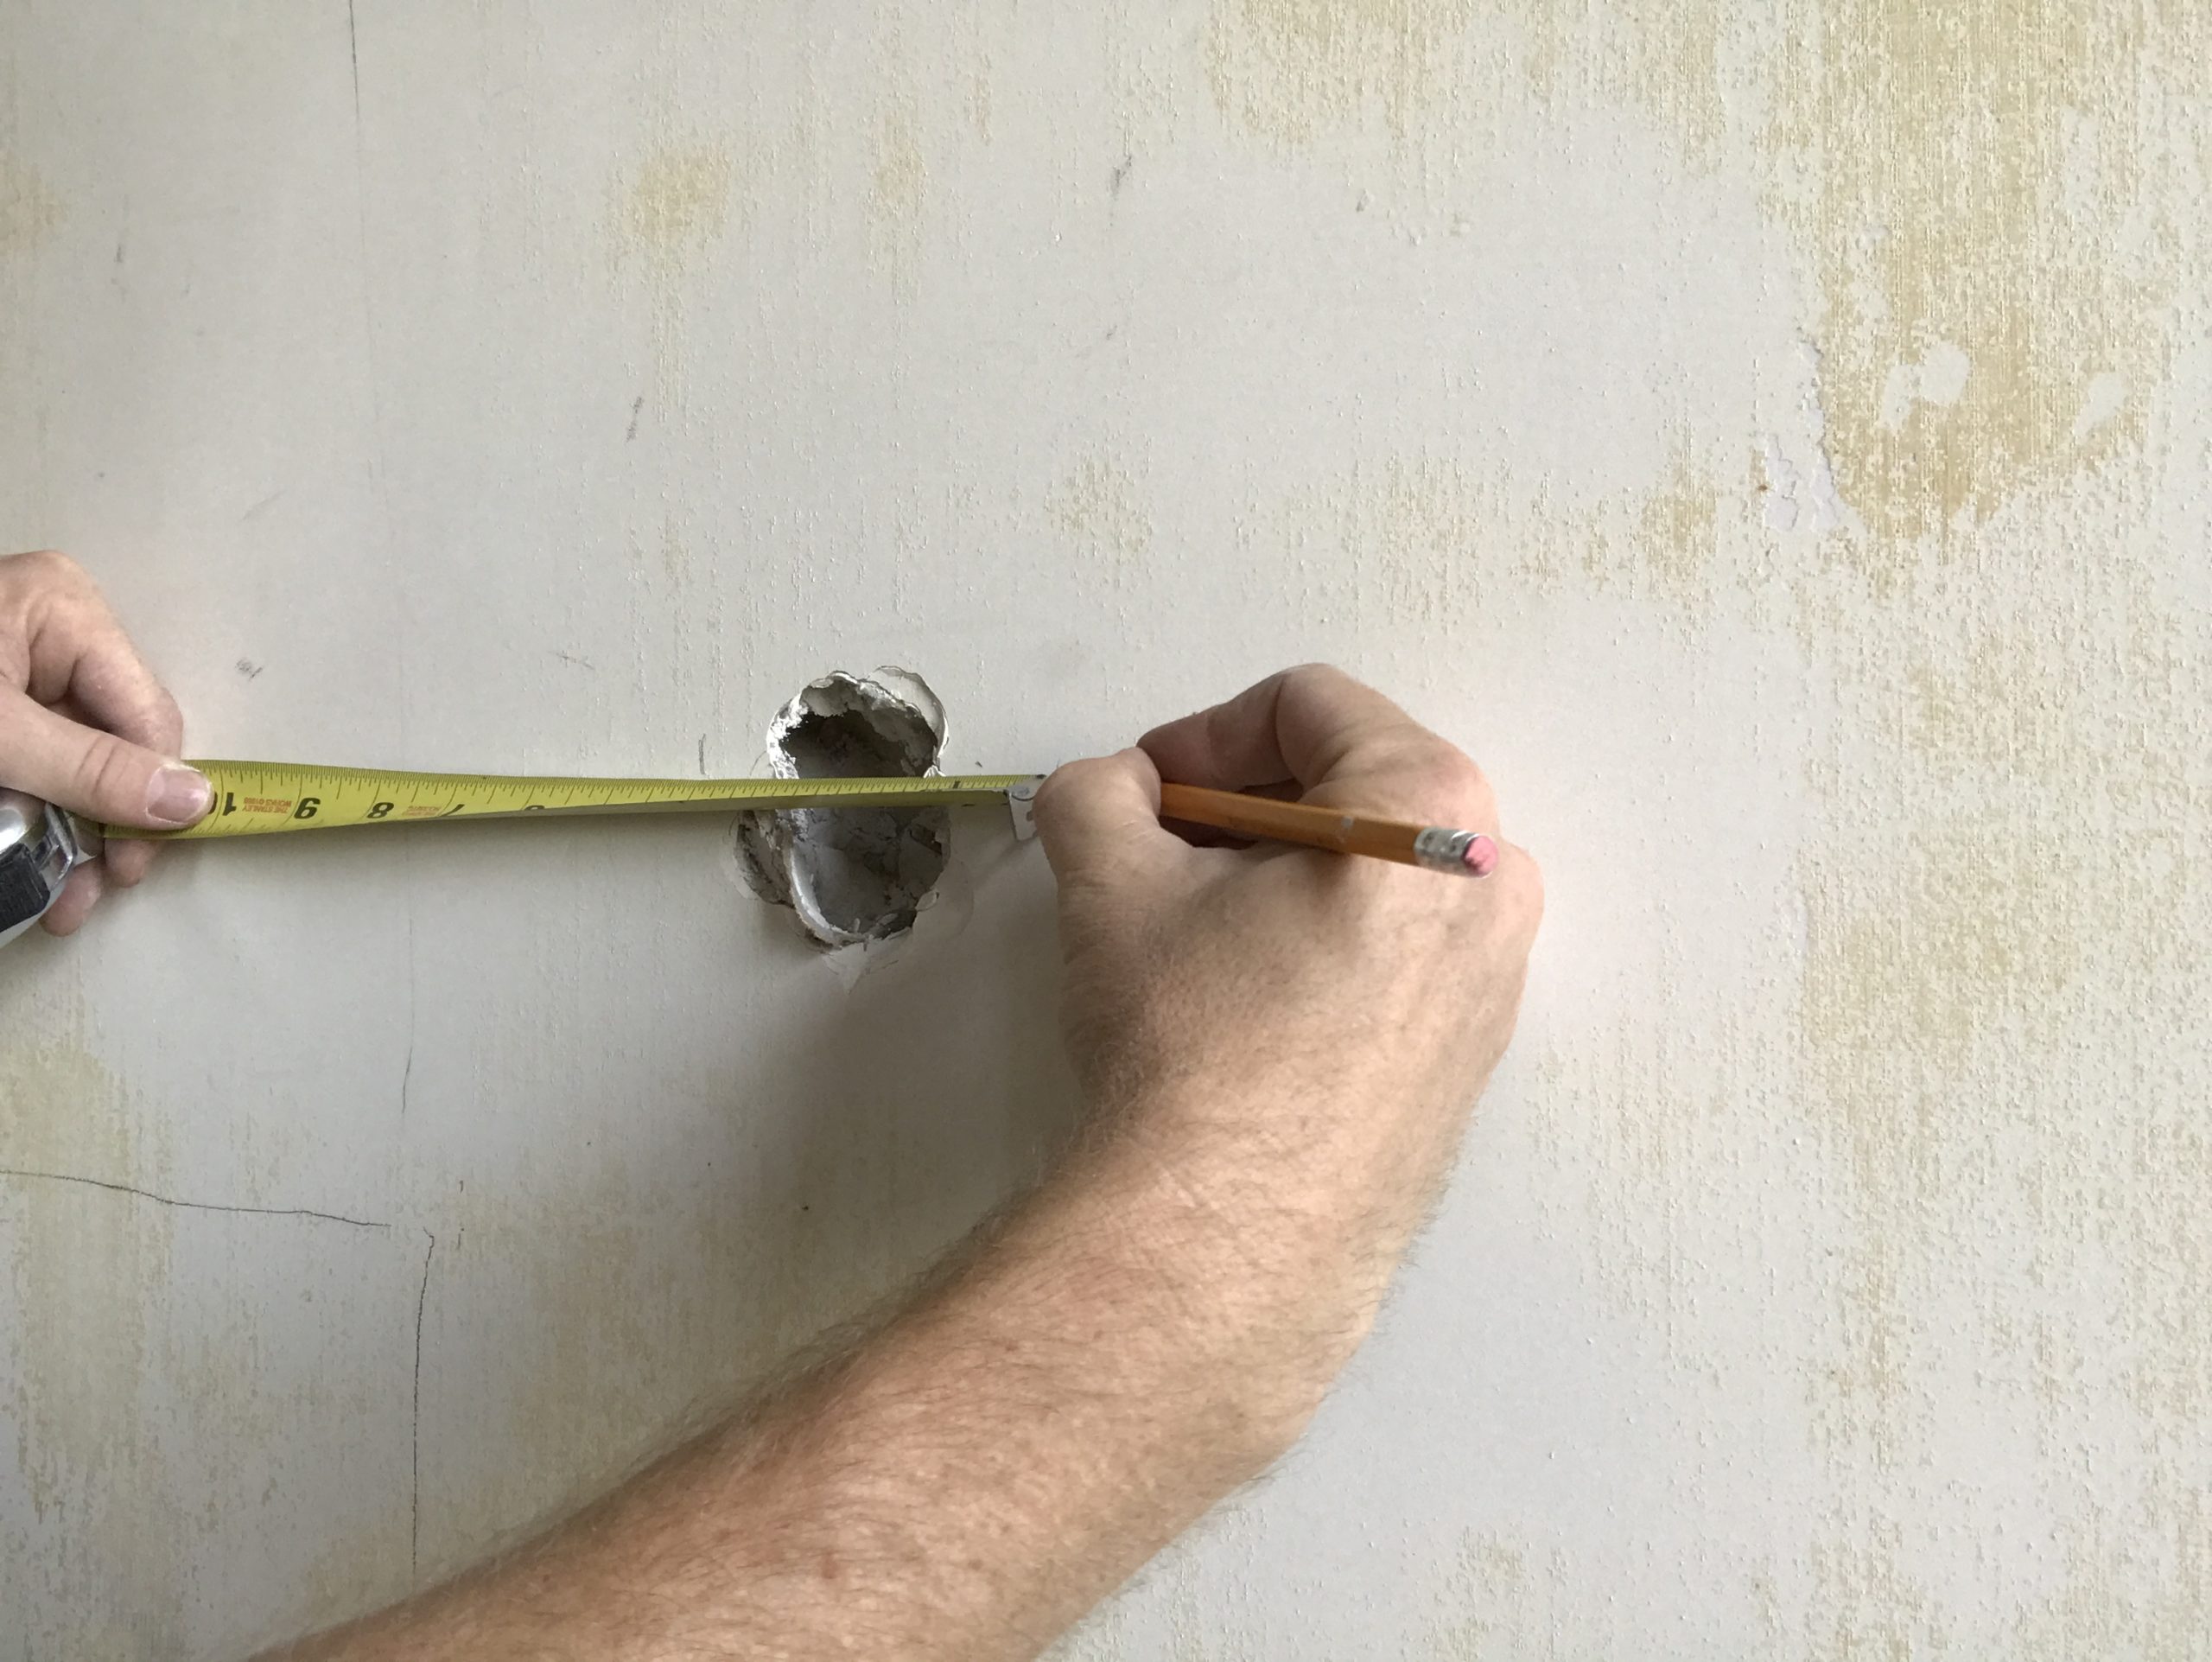
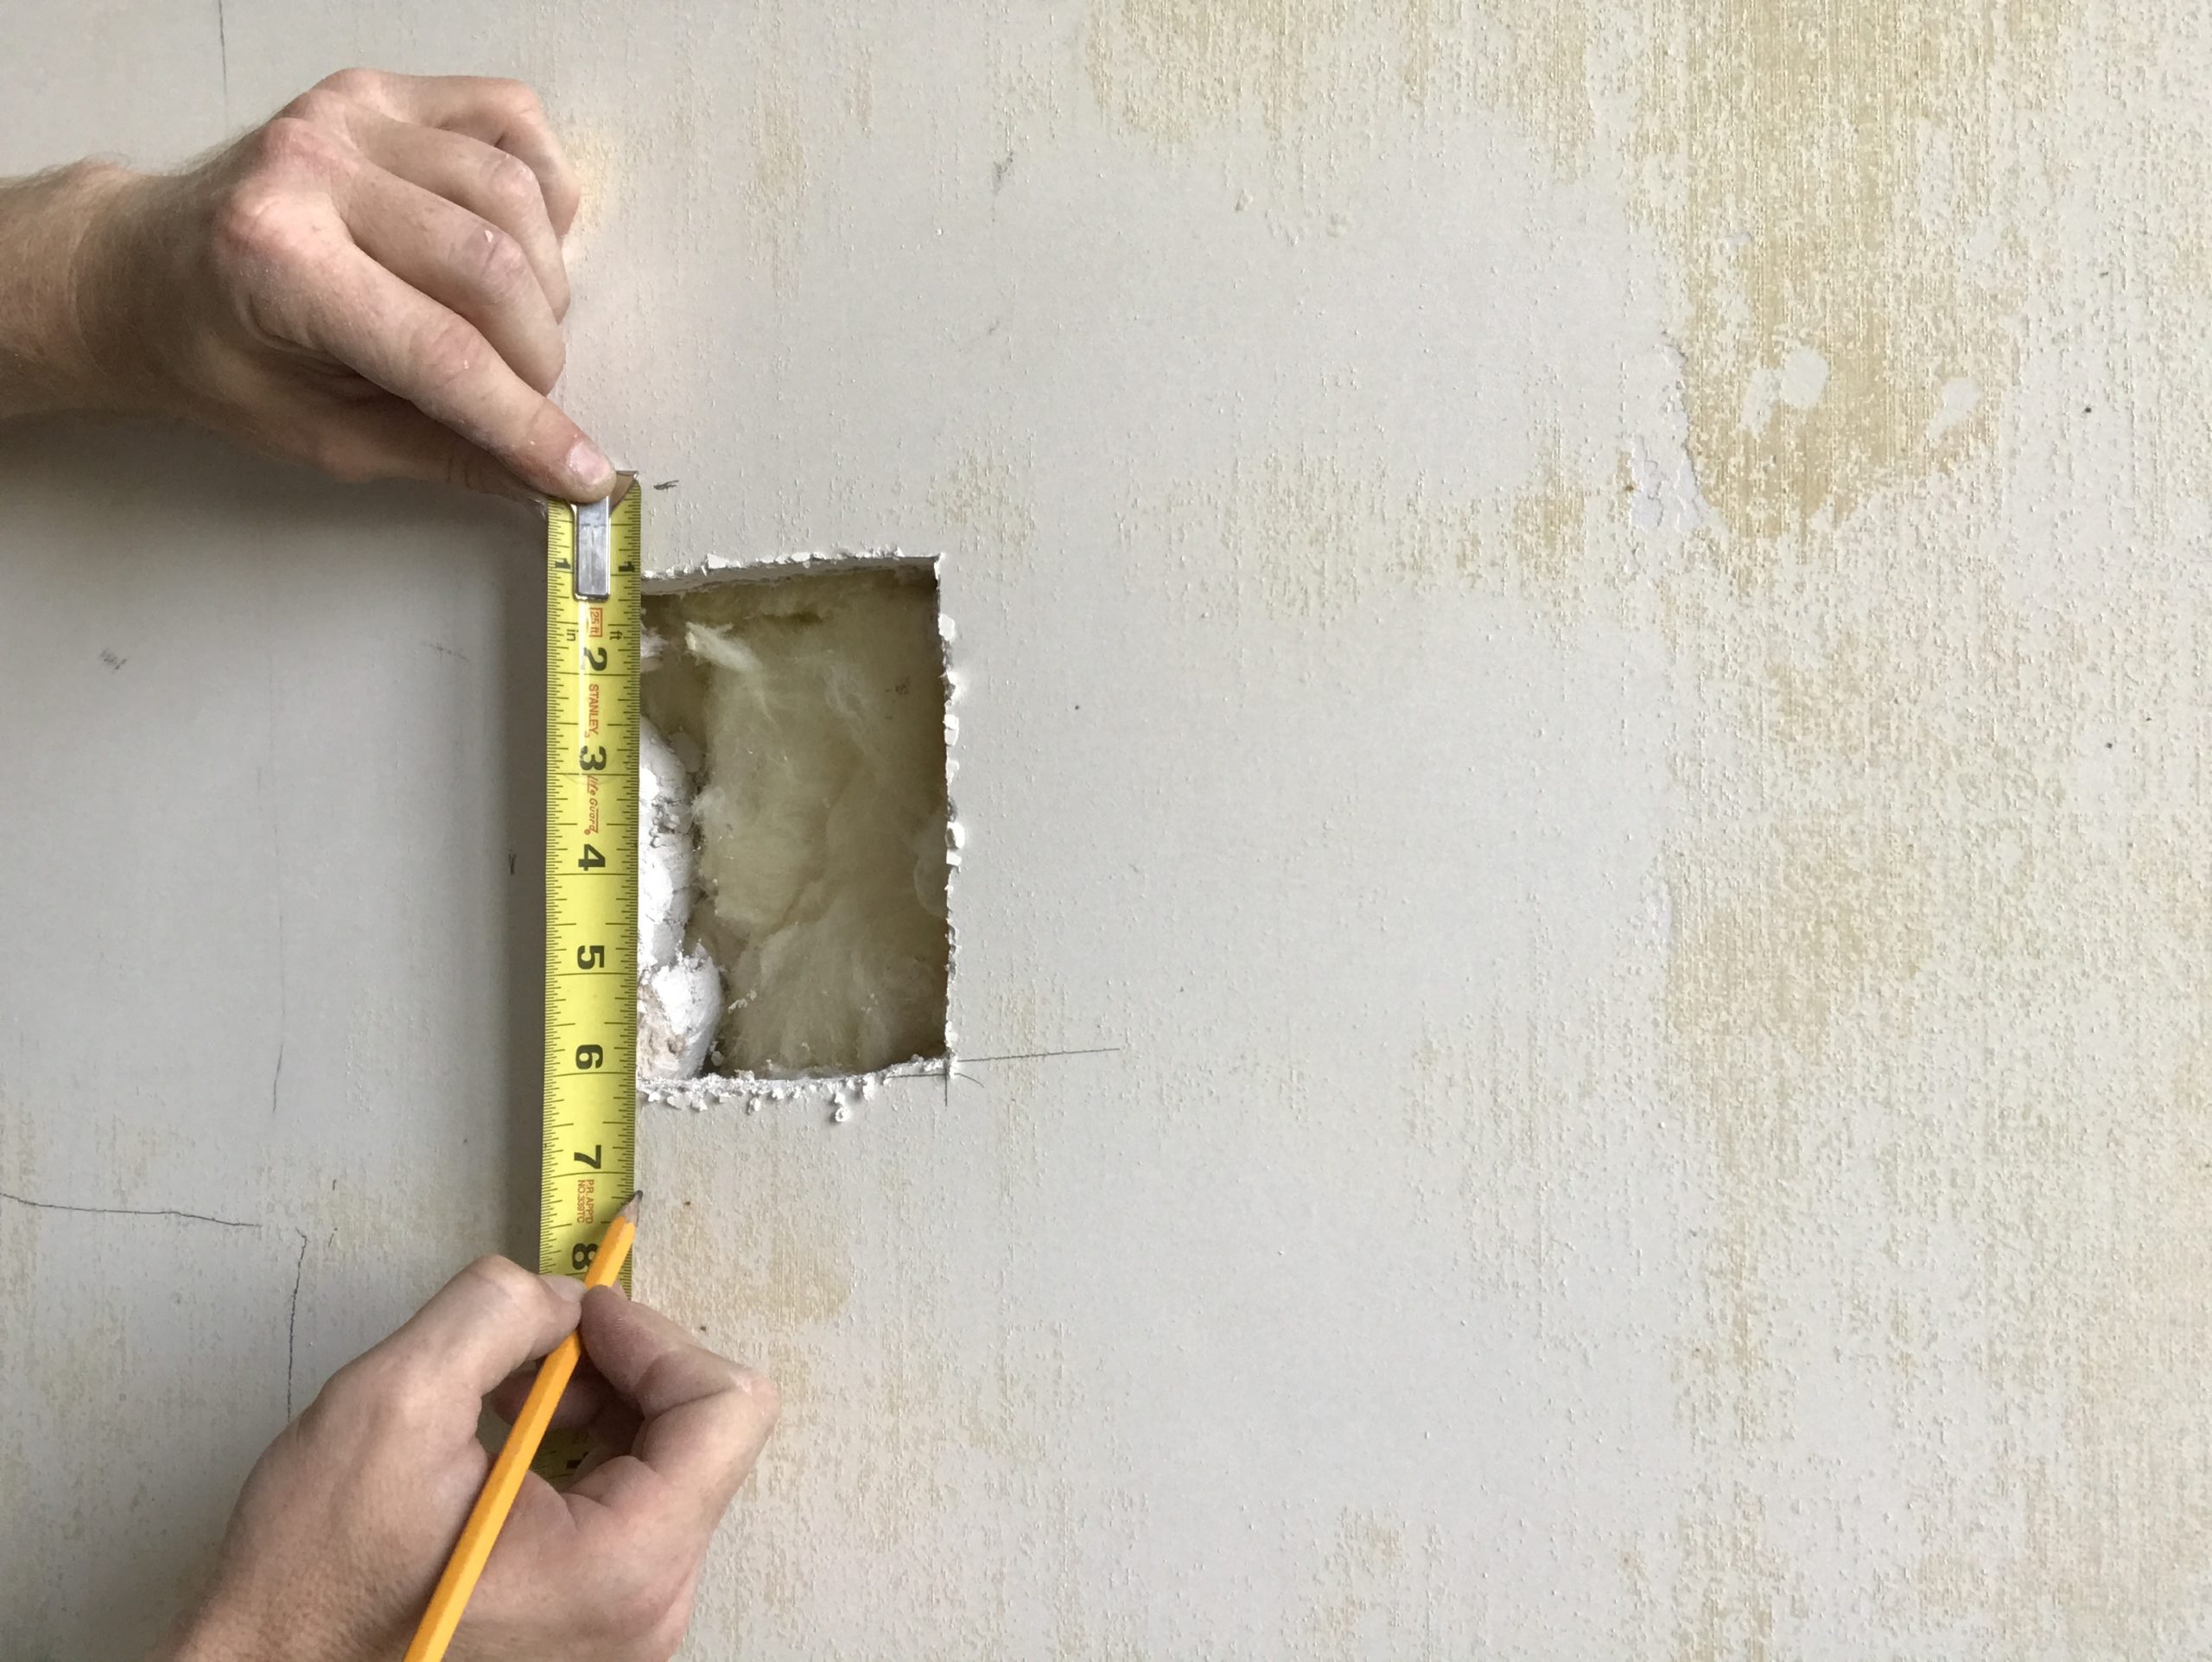
Step 2: Cut a scrap piece of drywall about 2” bigger in each direction. You want a 1”- 2” overlap all the way around. It’ll make sense in a minute, I promise. This doesn’t need to be accurate either, but for display reasons, I measured mine out.

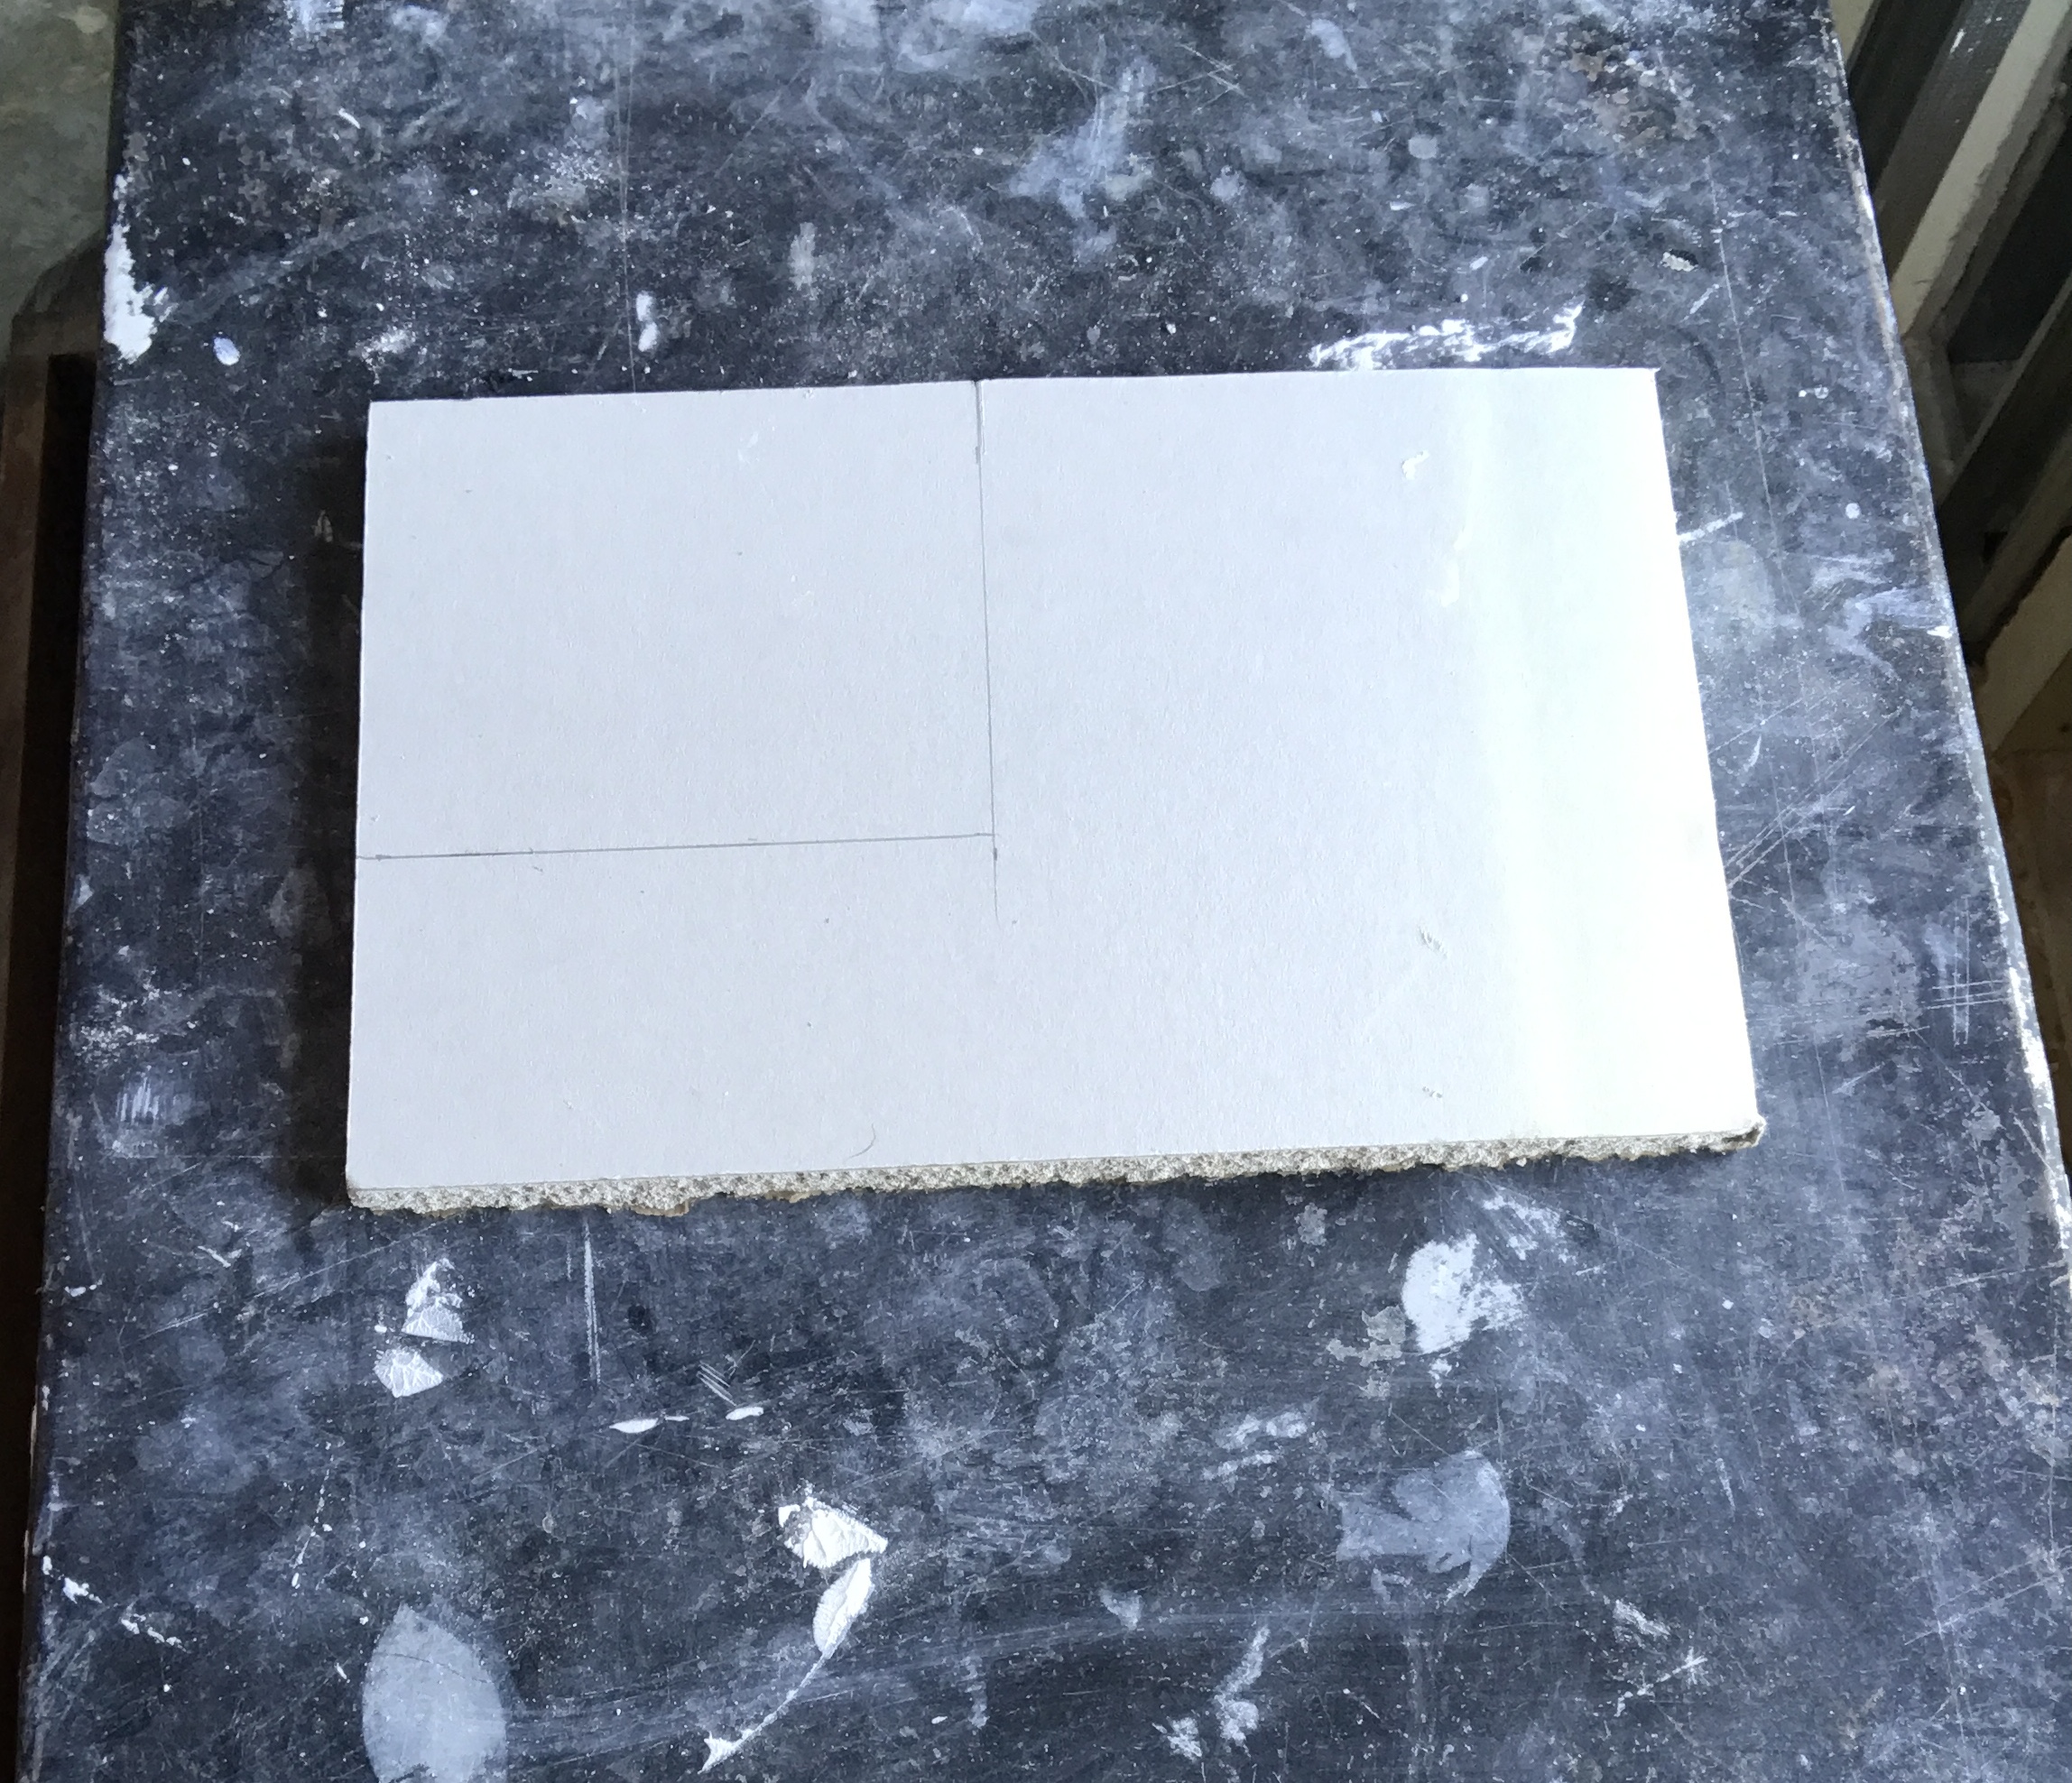

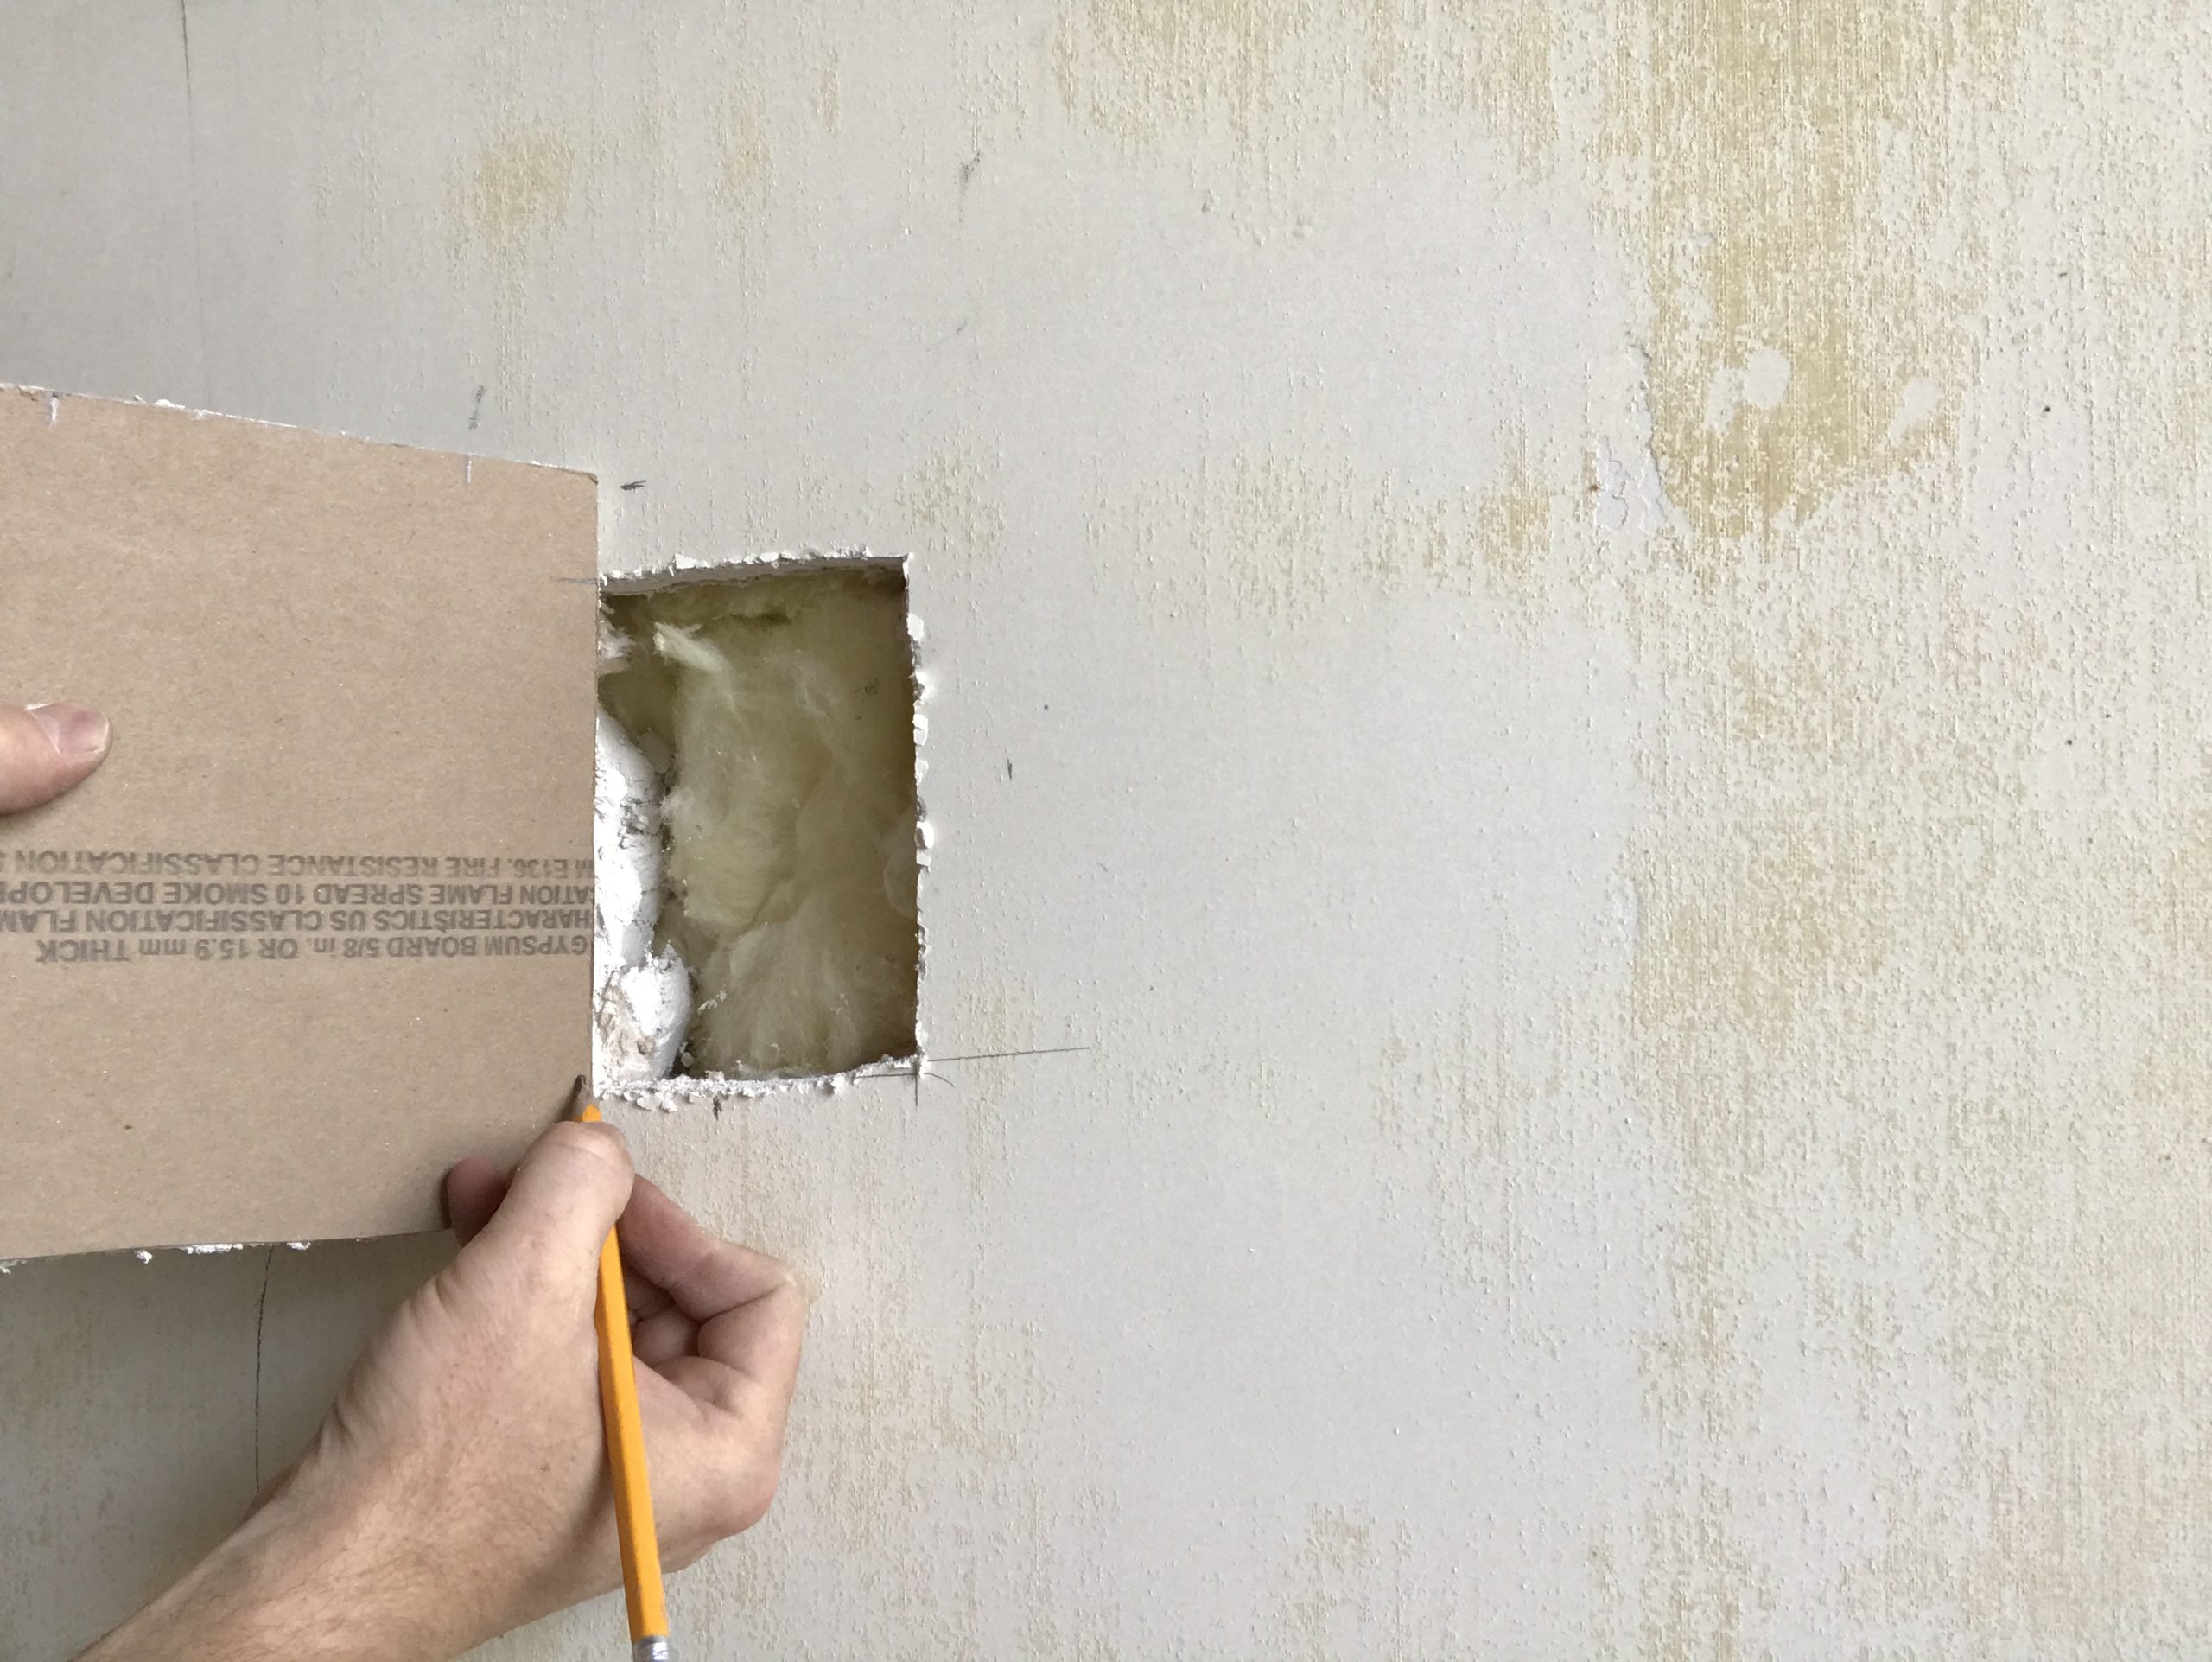
Step 3: Flip the scrap piece upside down and center it under the hole. Mark the inside dimensions for your vertical cuts.
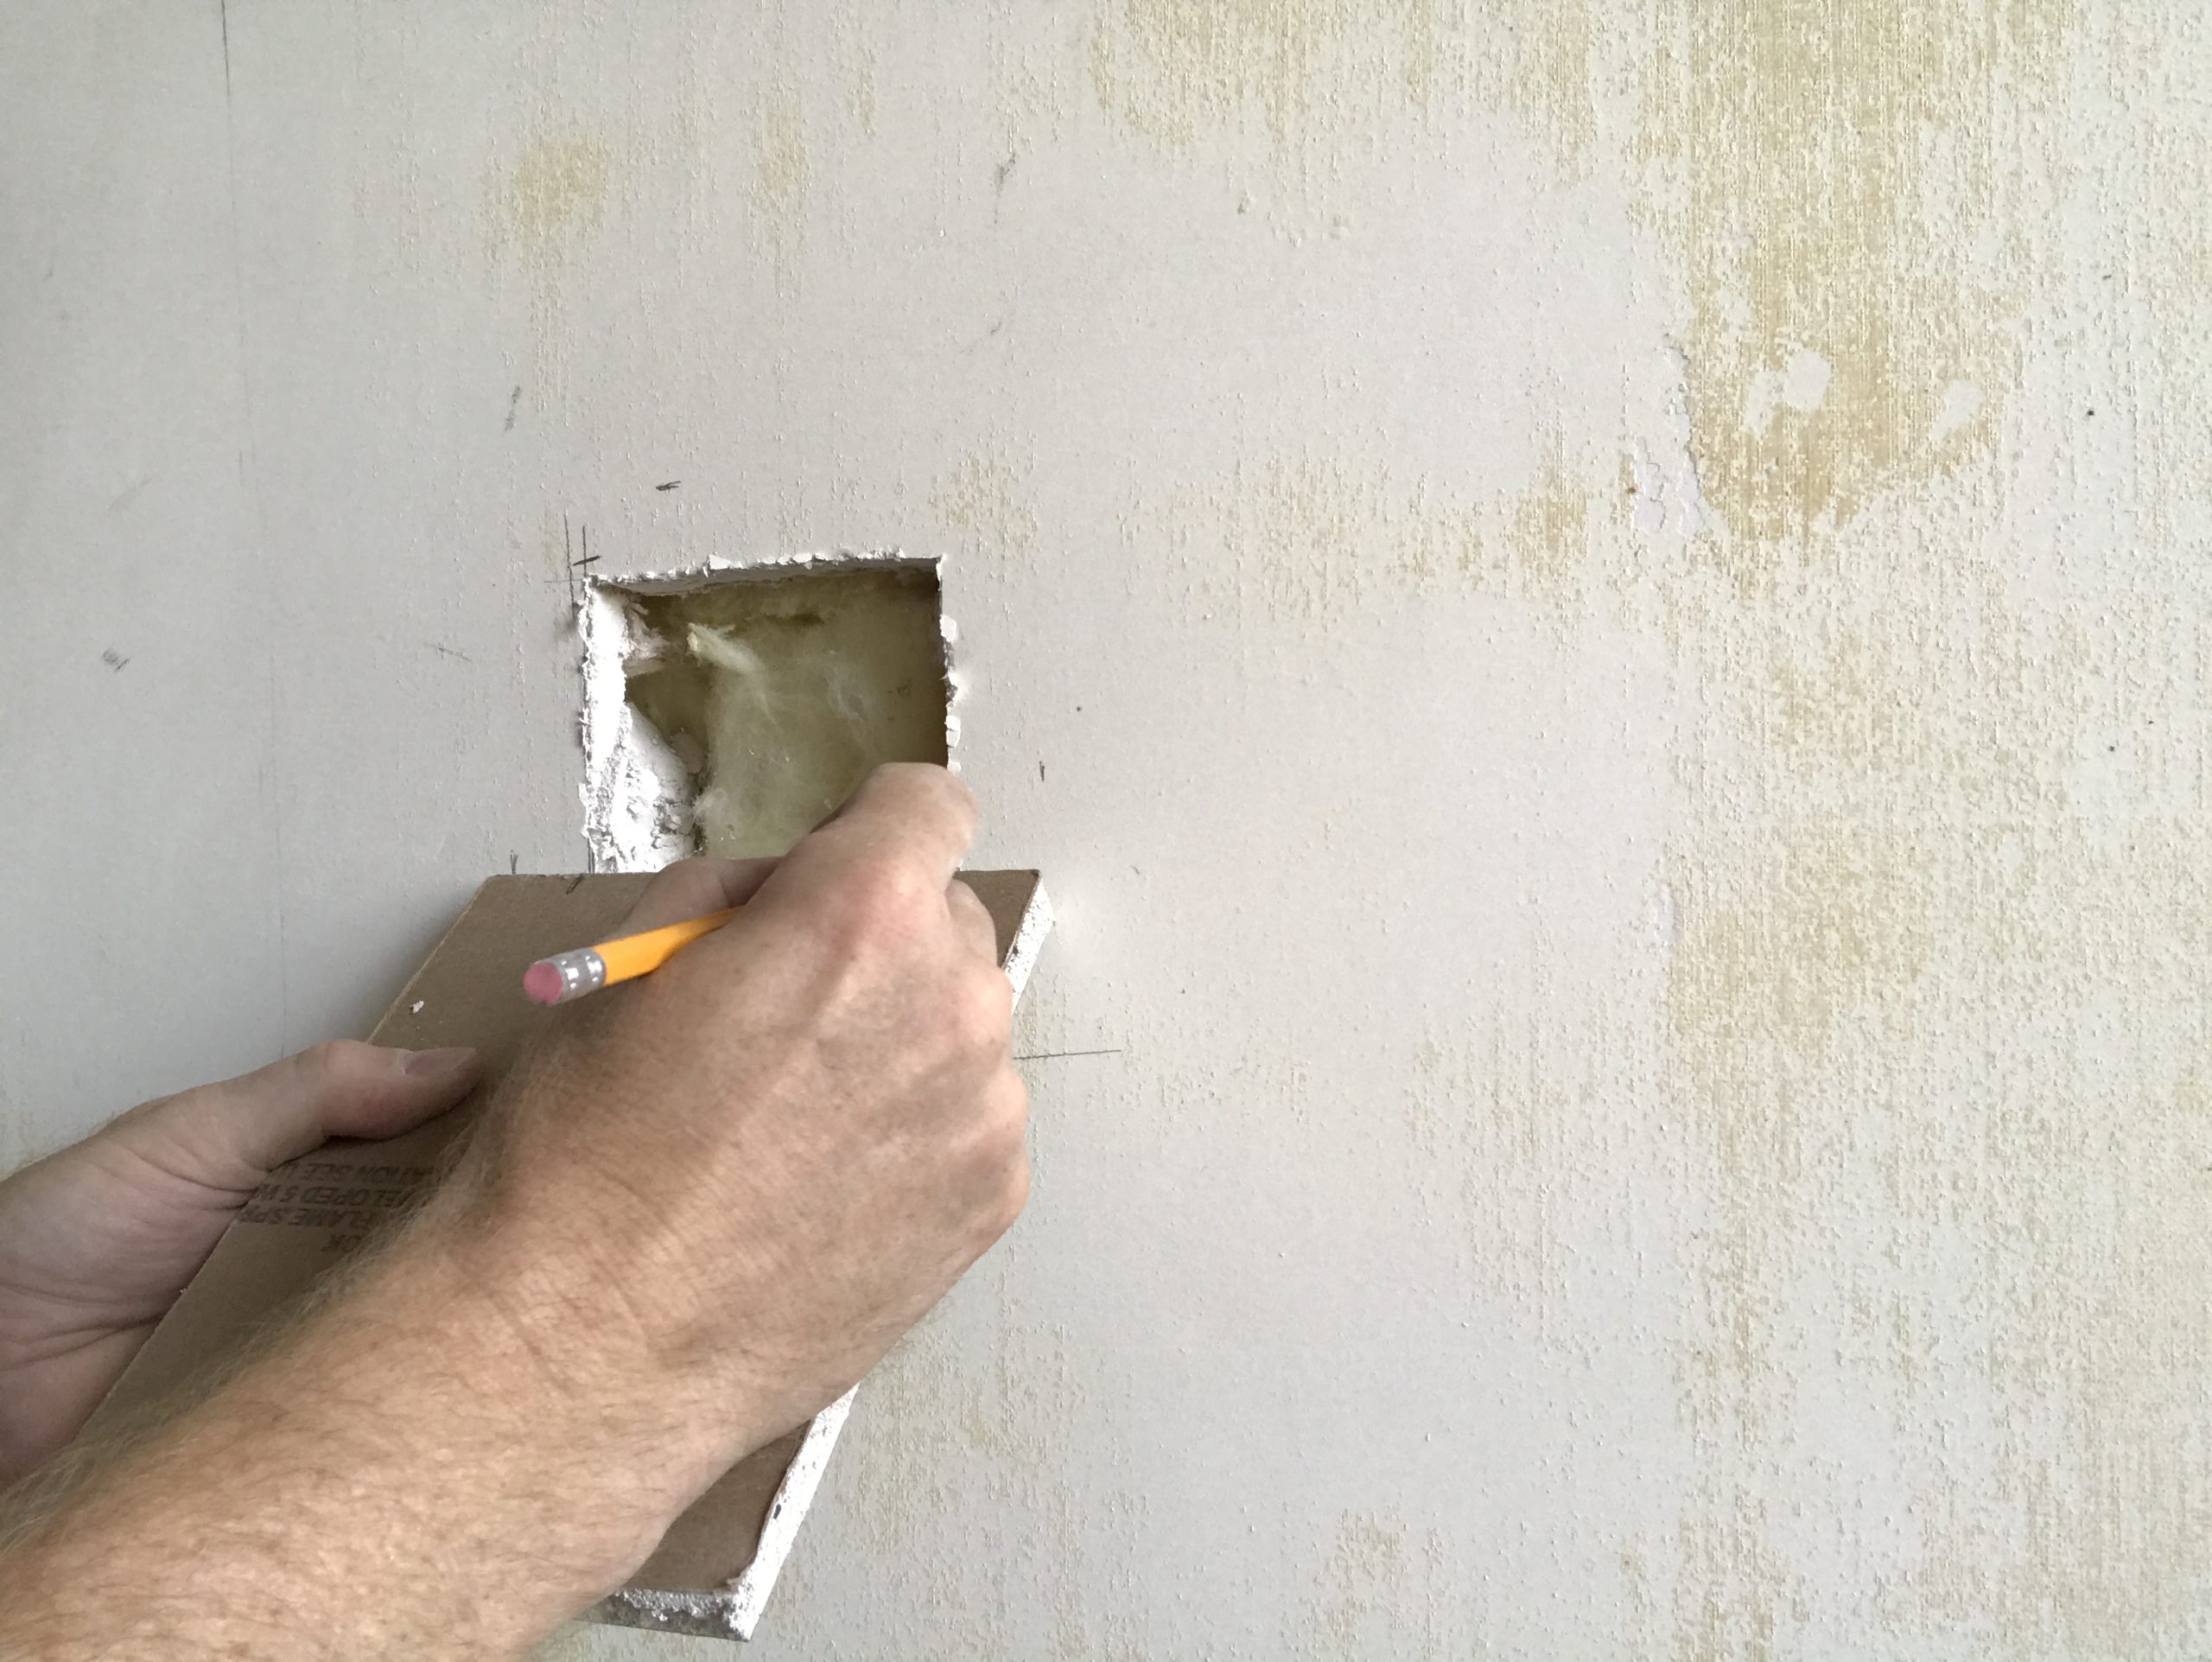
Step 4: Orienting the piece in the same direction, center the scrap next to the hole and mark the edges. This will be your horizontal cuts.
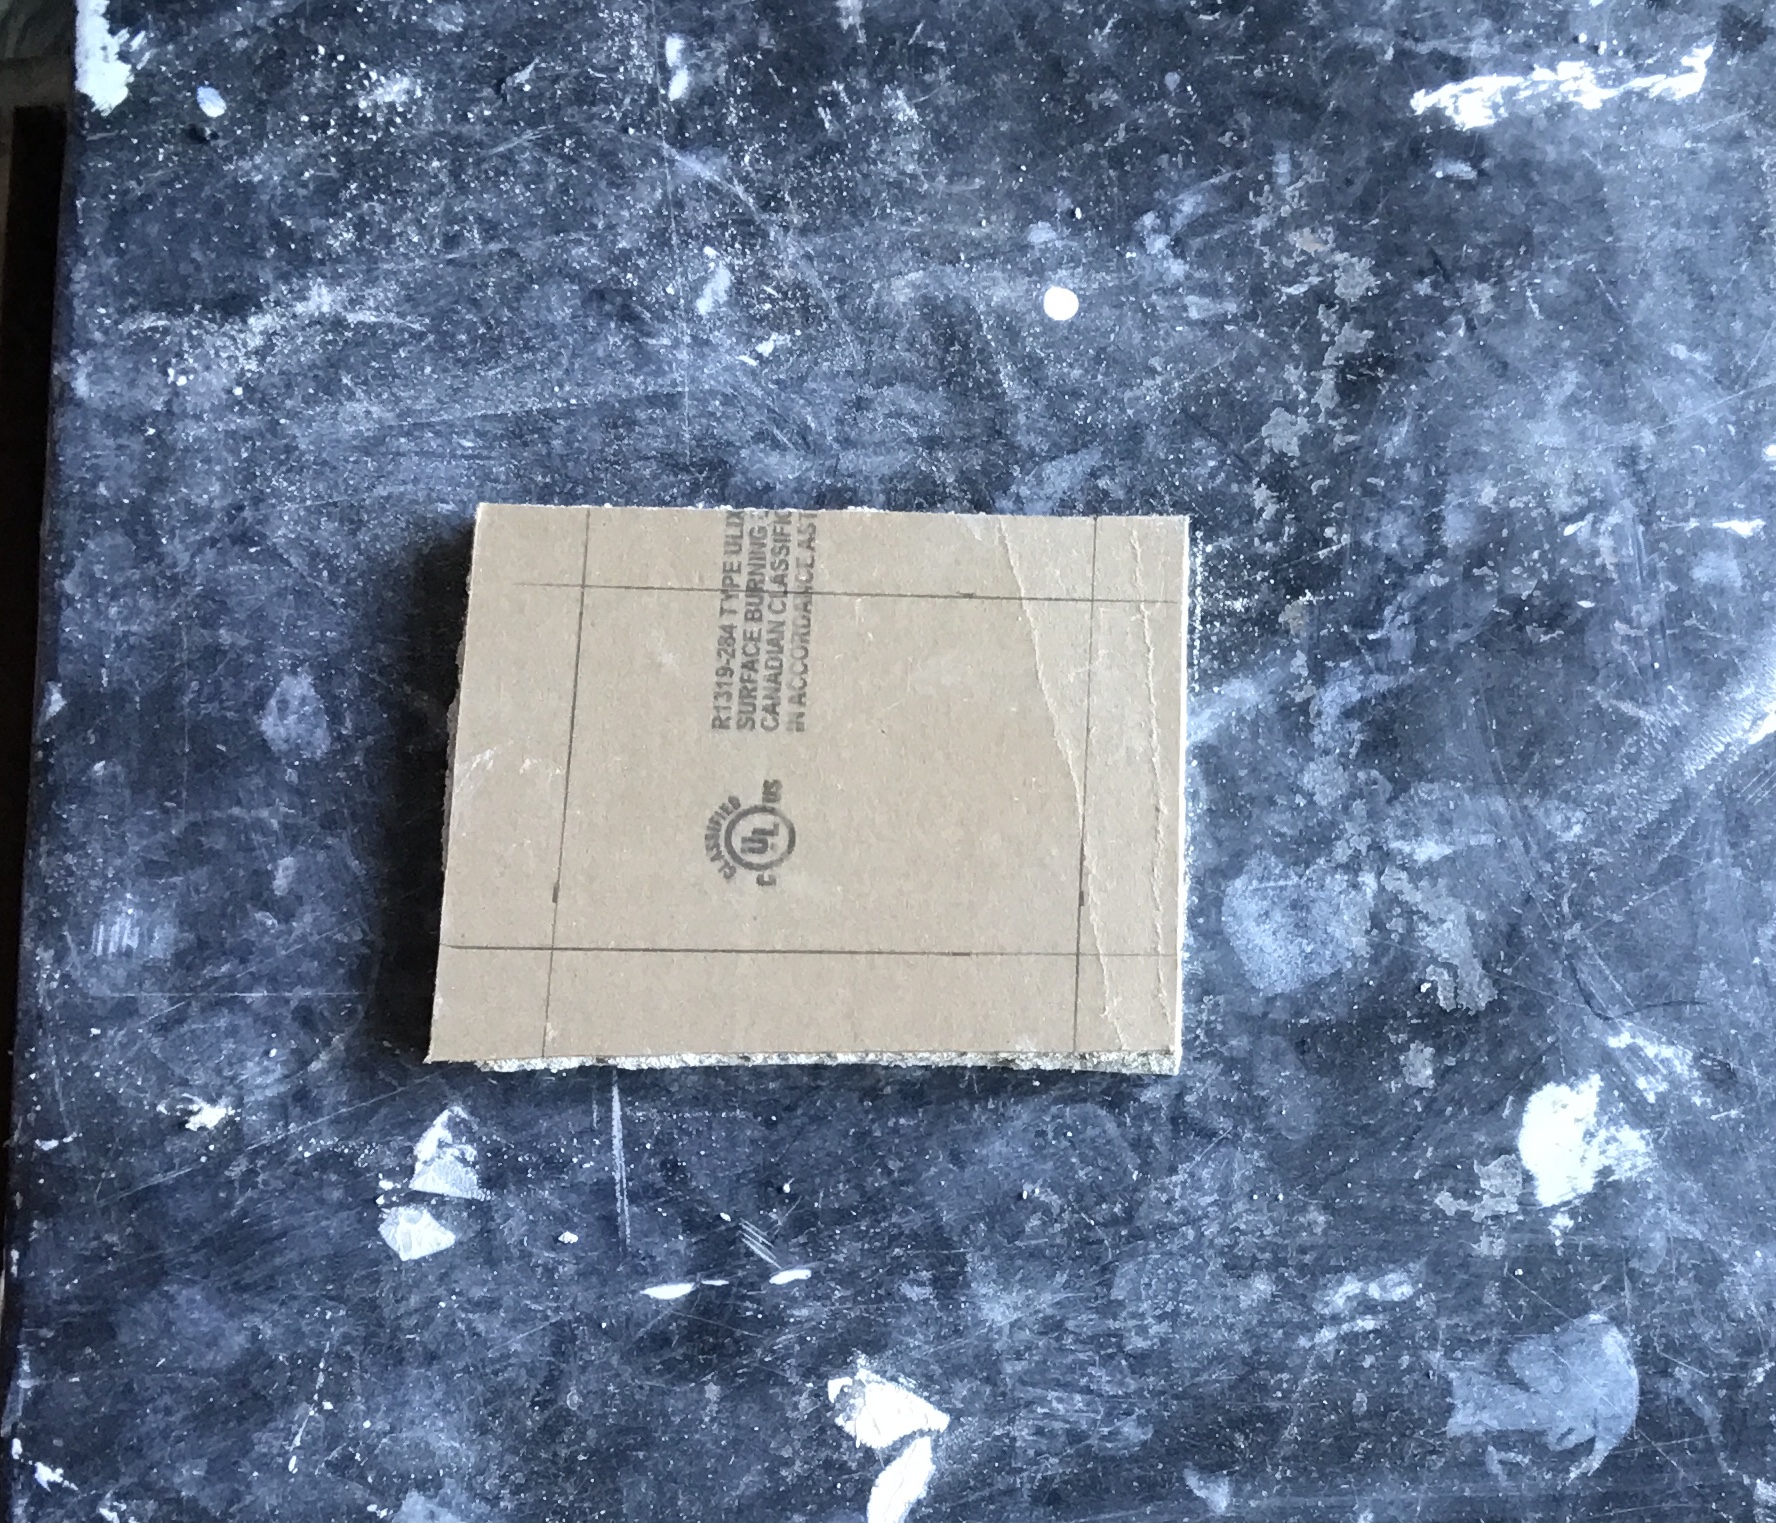
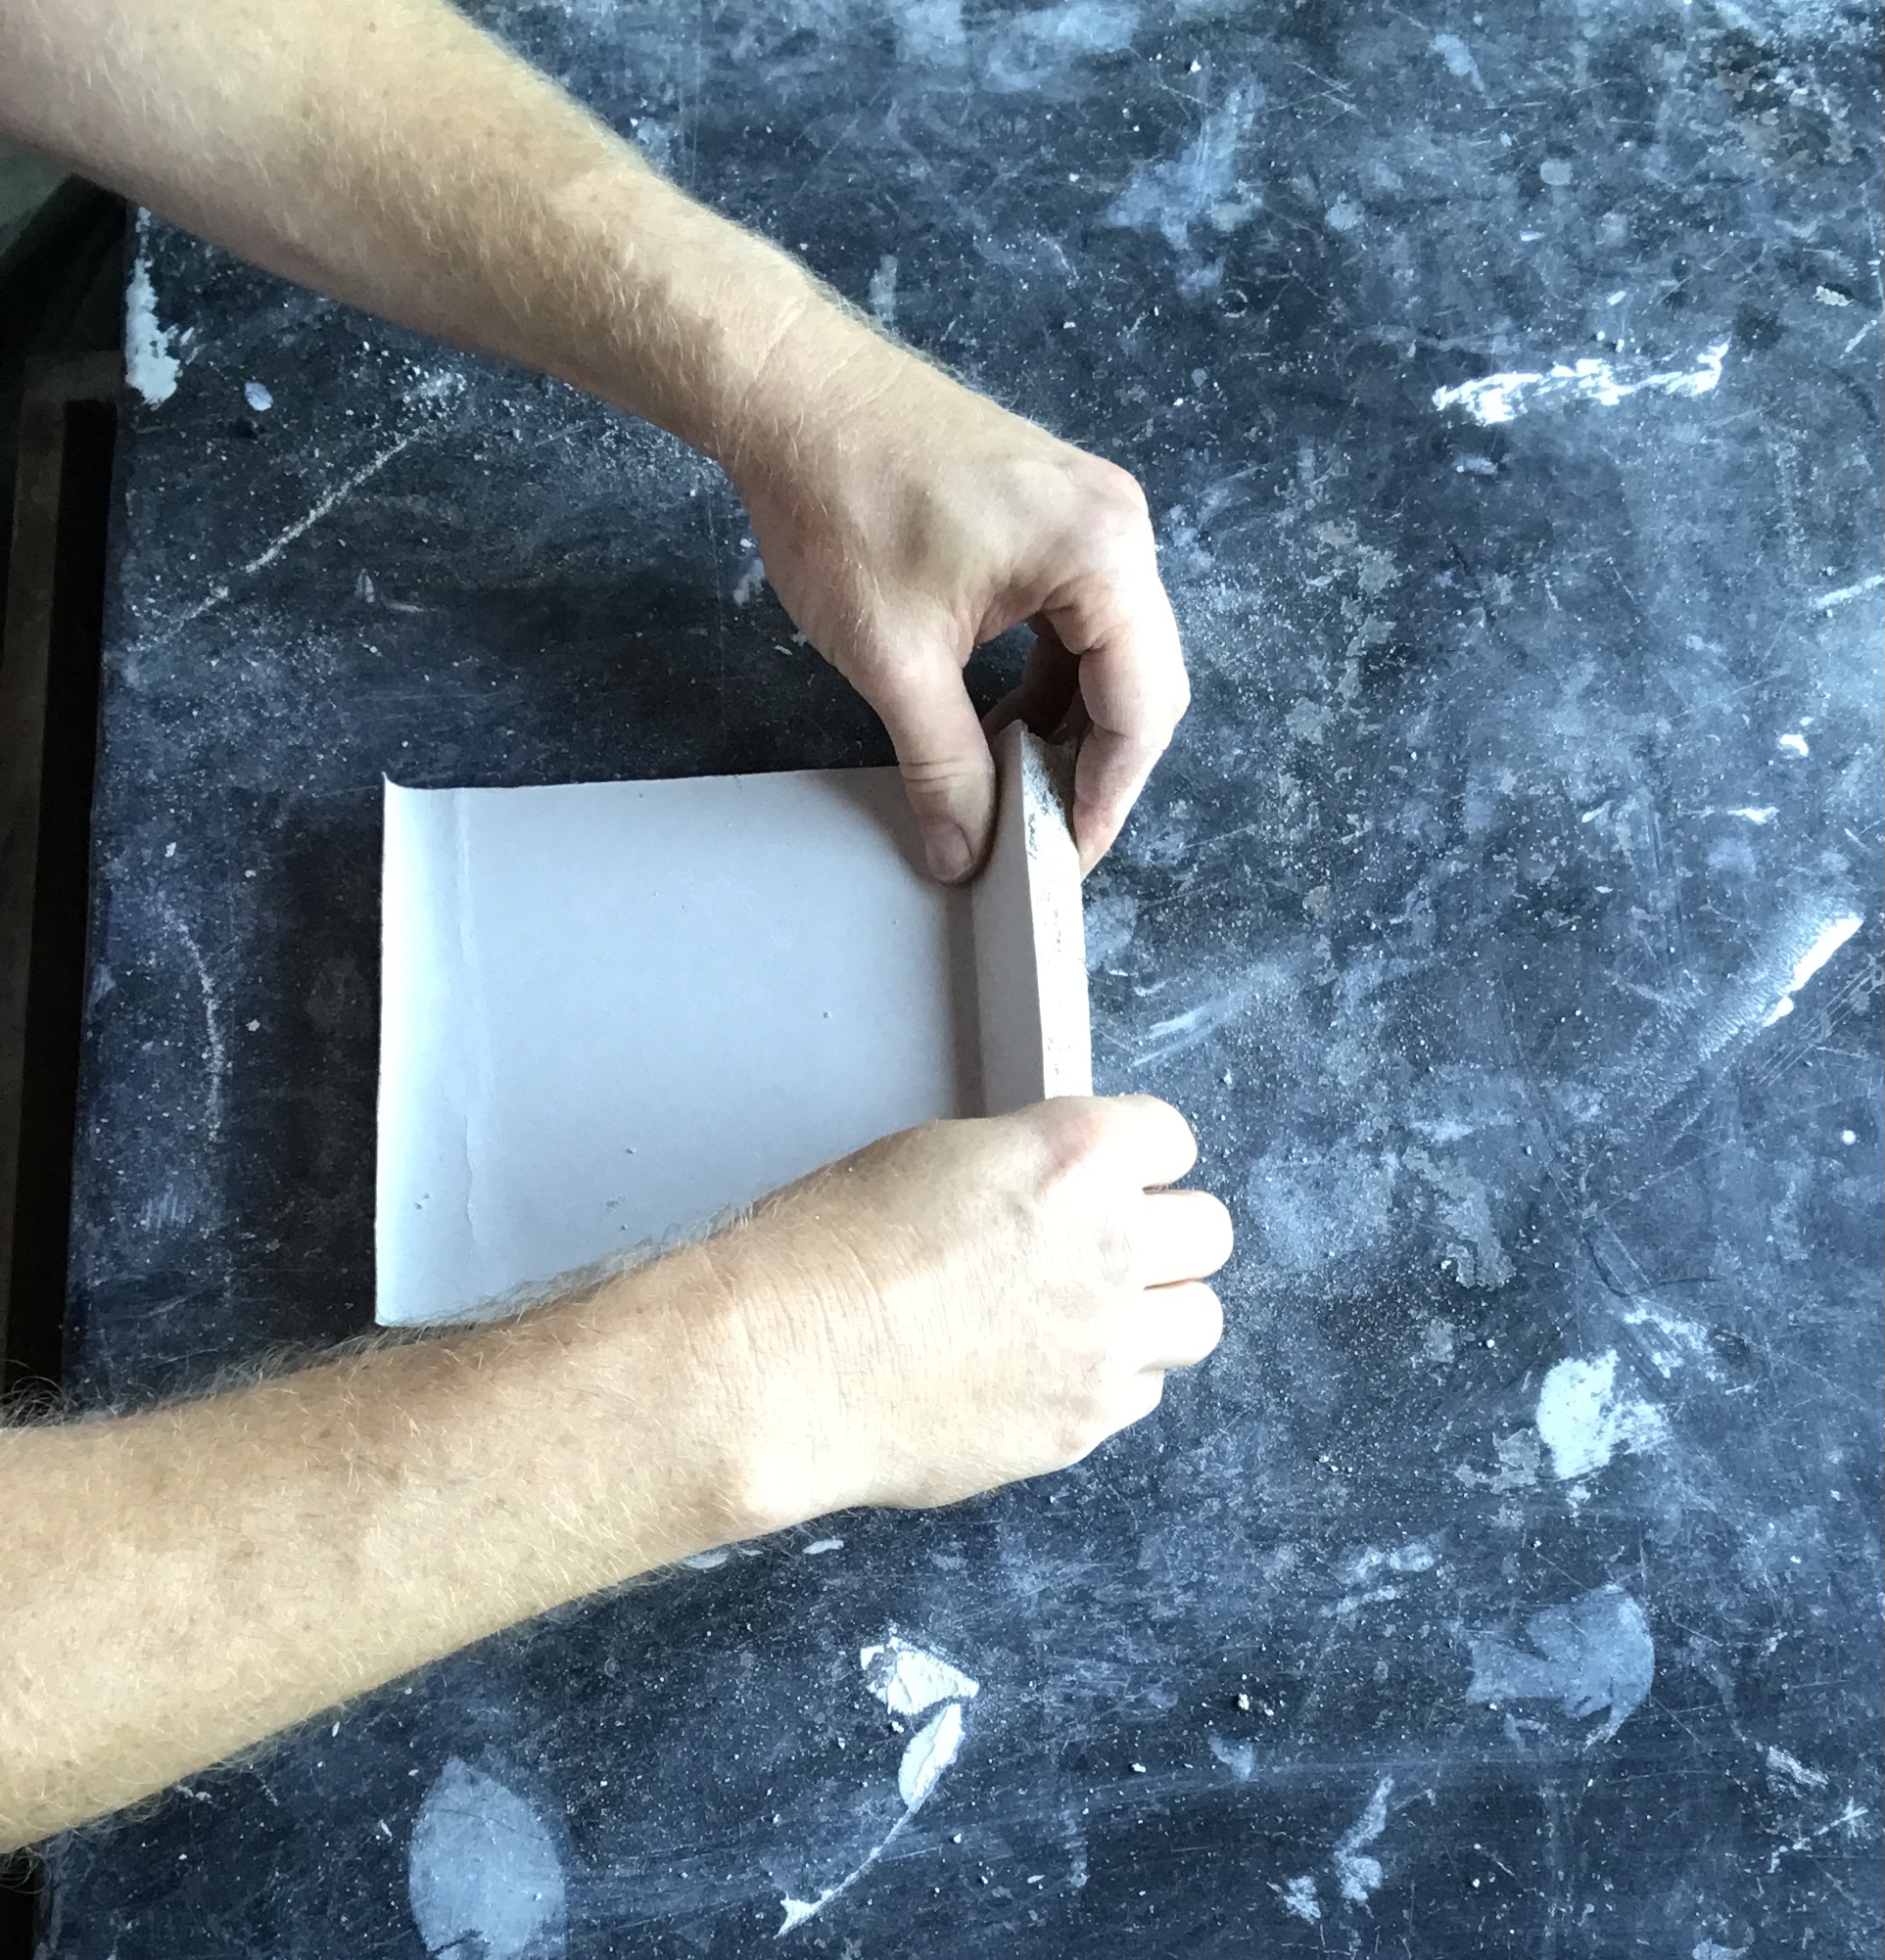
Step 5: Square up and score the back side of the drywall. I know, this goes against everything you were taught about cutting drywall. But trust me, this is the exception.
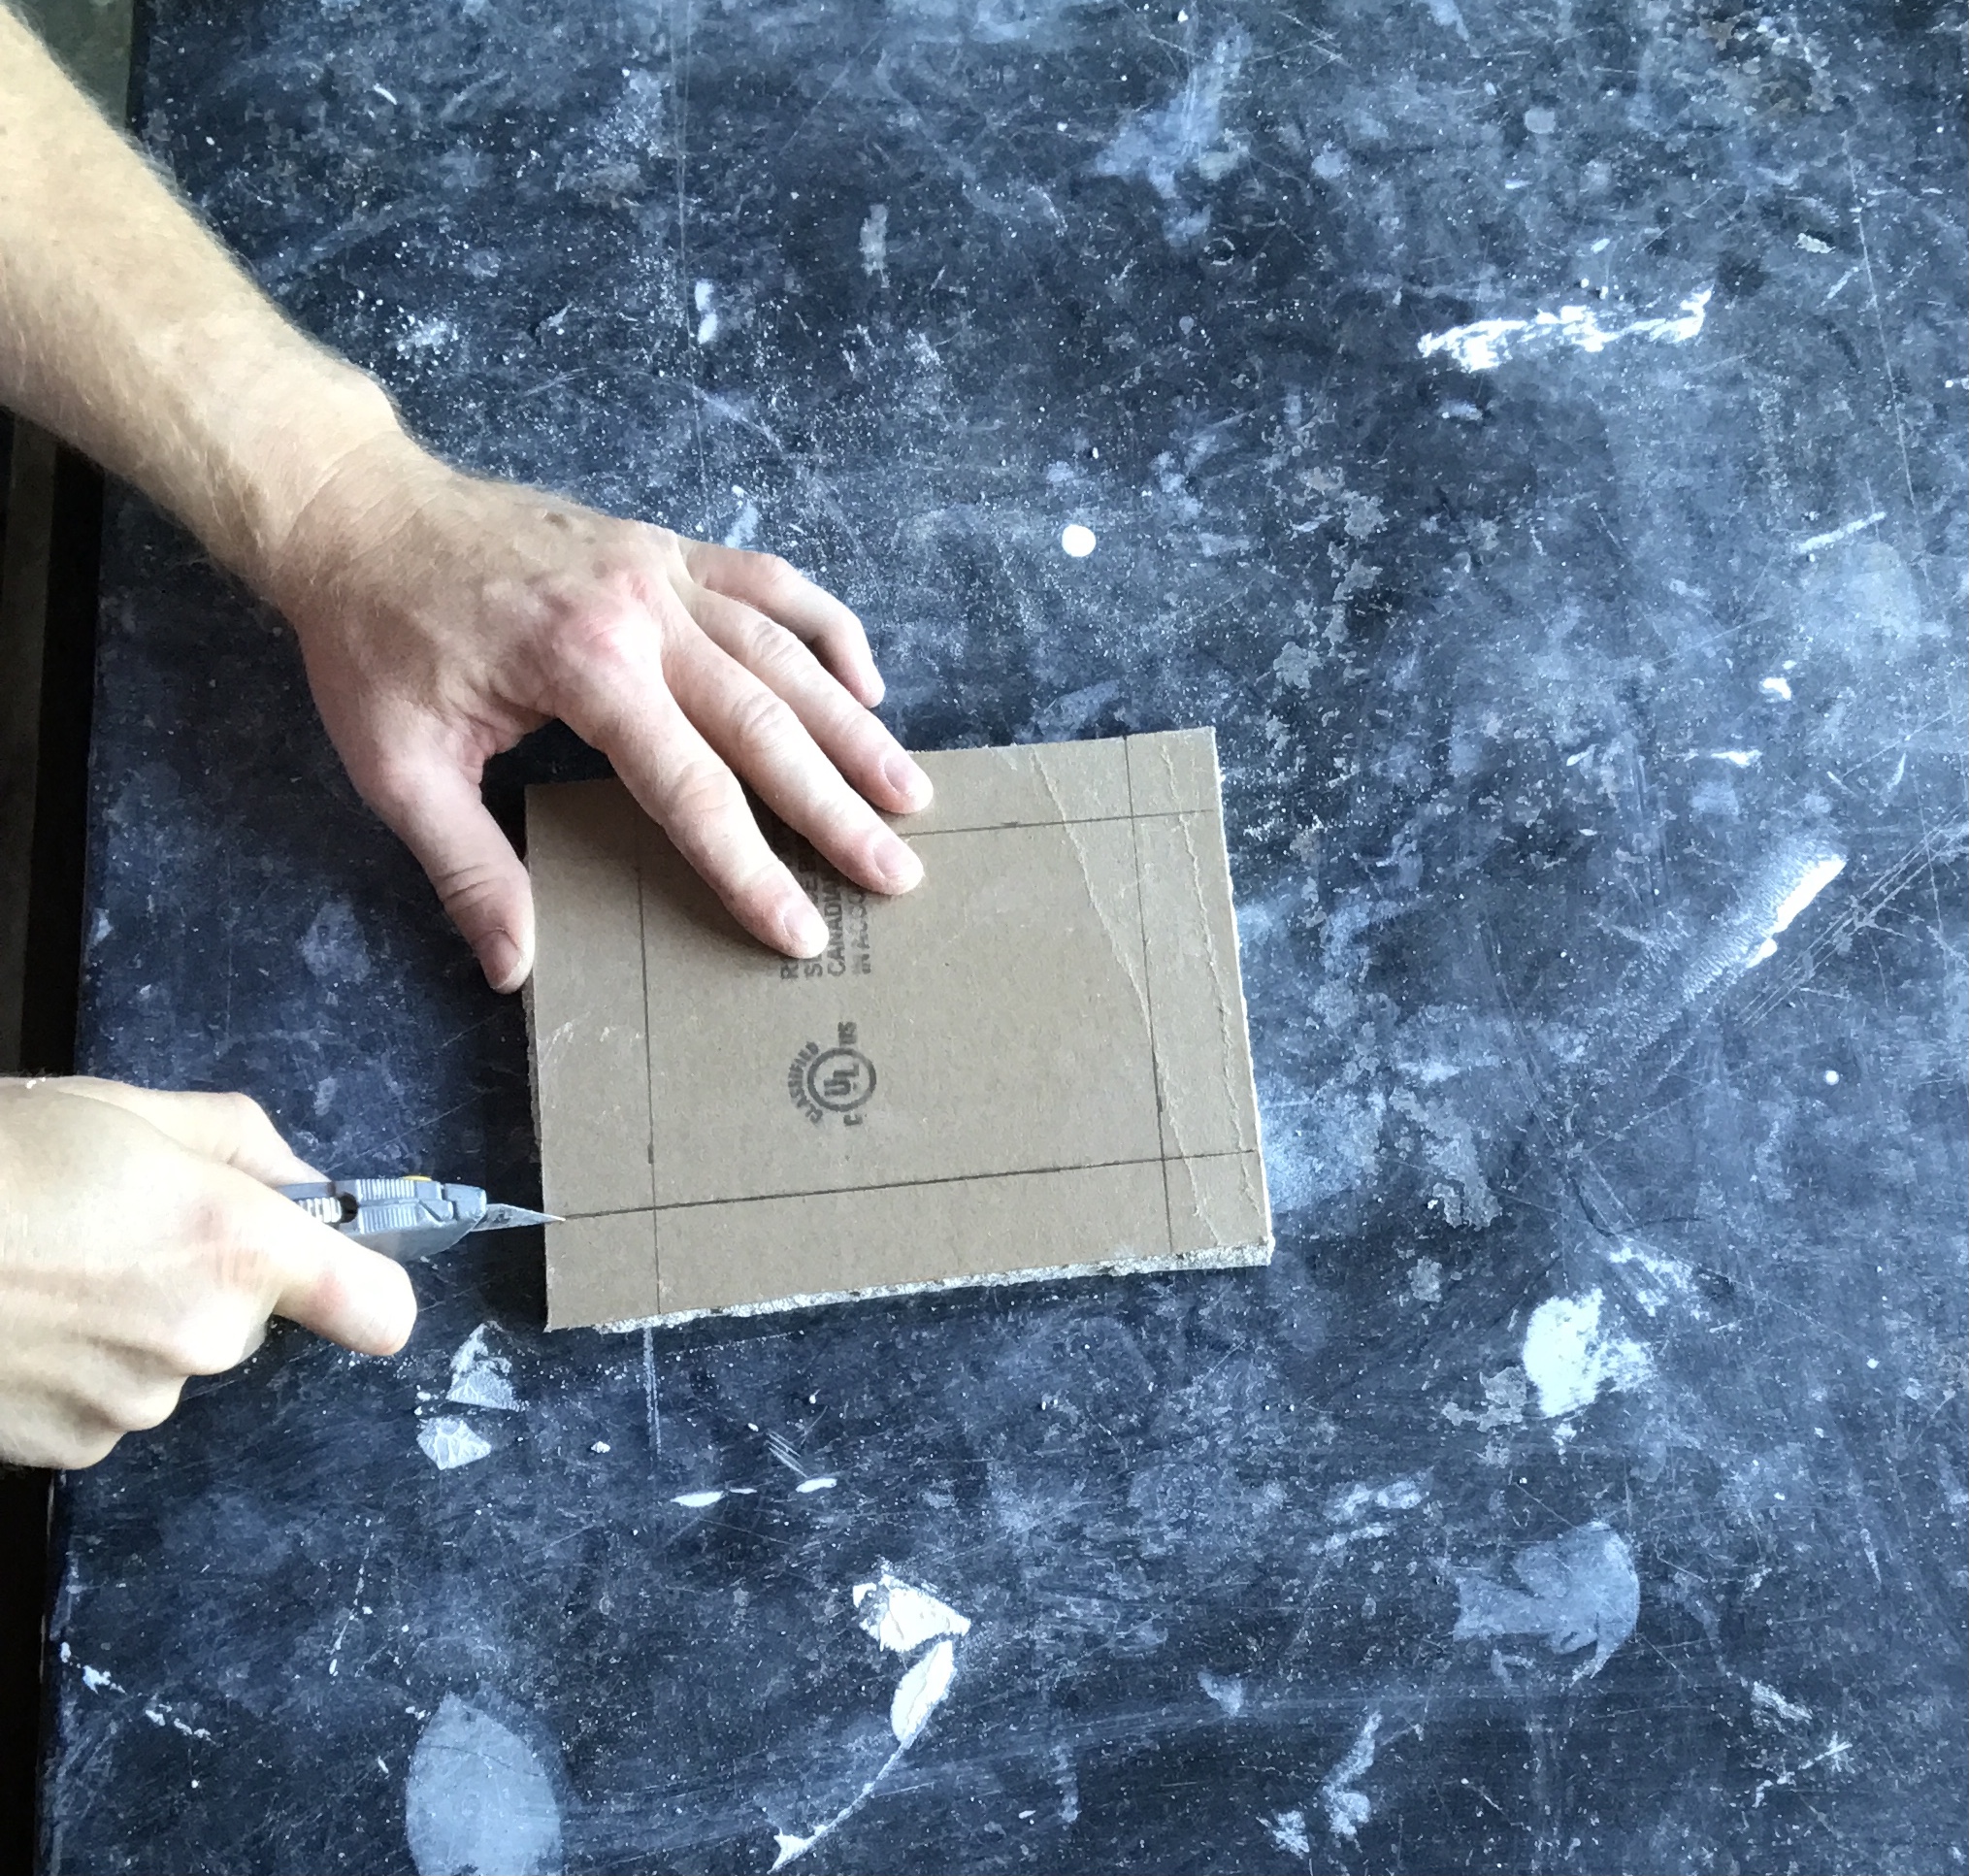
Step 6: This is where we diverge from typical drywall cutting. Snap along any one of the scoring lines, but don’t break it off.
Step 7: Grab the snapped piece with your thumbs on the front side and your fingers grabbing the snapped piece on the back side.

Step 8: Gently roll the snapped piece by pulling your fingers in and pushing your thumbs out and away. It’s easiest if you rest the opposite edge on a solid surface.
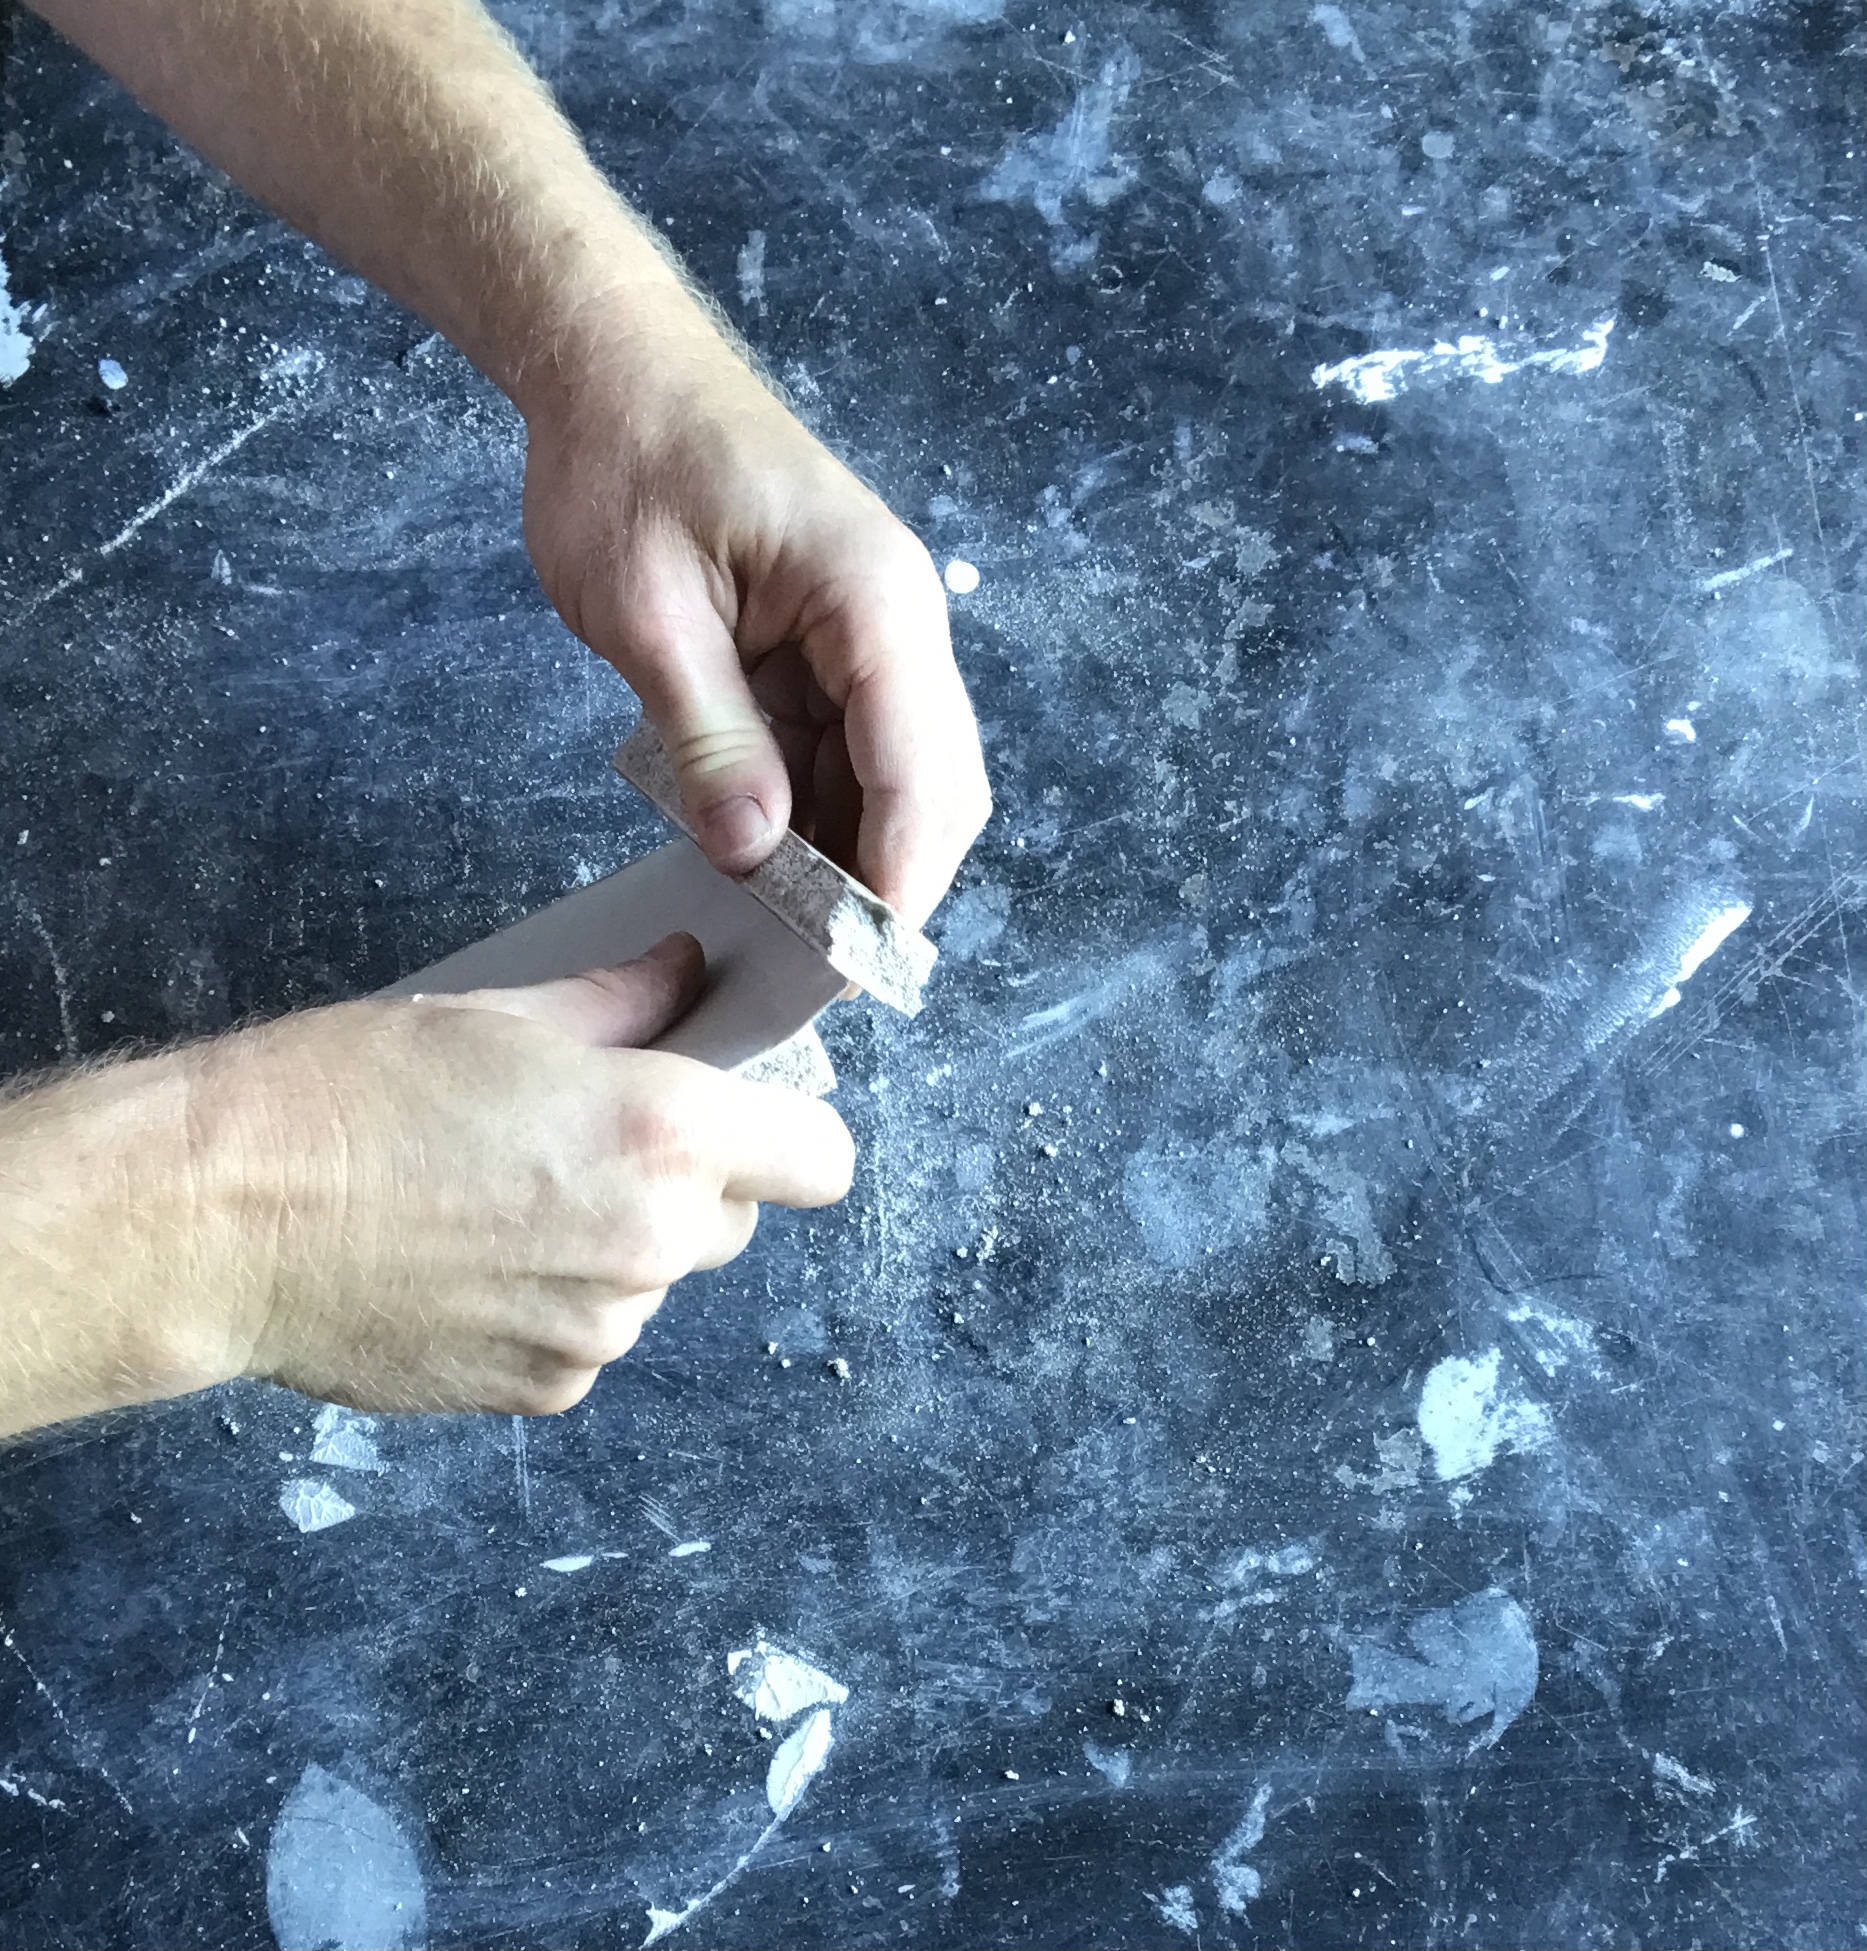
Step 9: As you roll the piece, it detaches from the front paper starting at the scored edge and pulling out. Simply peel the cut piece from the face paper. You should have a repair piece with one floppy piece of paper hanging off.

Step 10: Repeat steps 6-9 for each side. Tip: start with your shortest piece. The smaller the piece the more difficult it is to snap off. And the more you snap off the smaller the remaining pieces are.
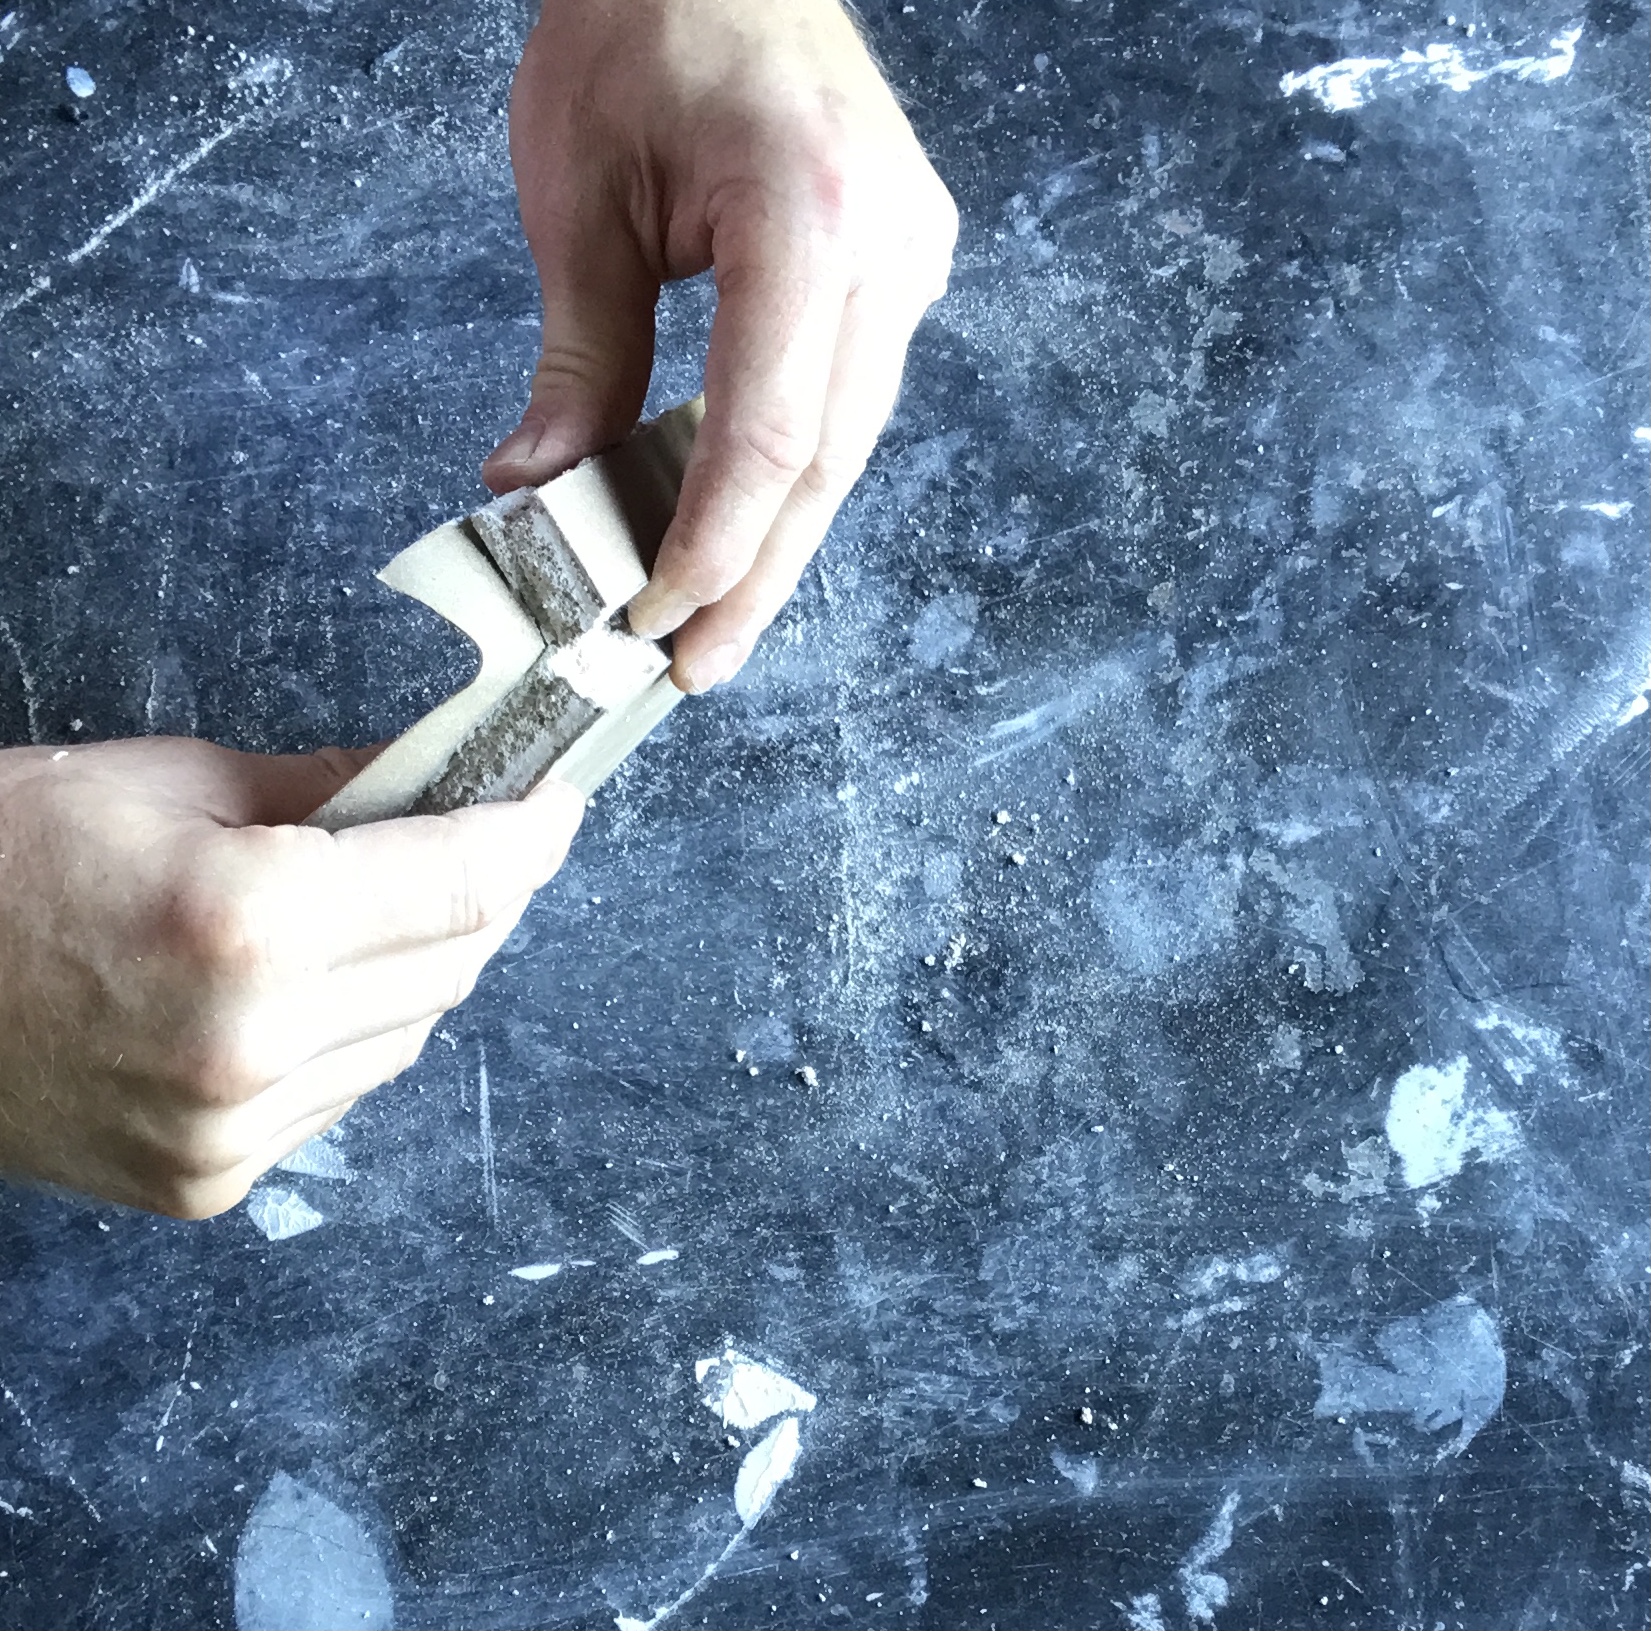
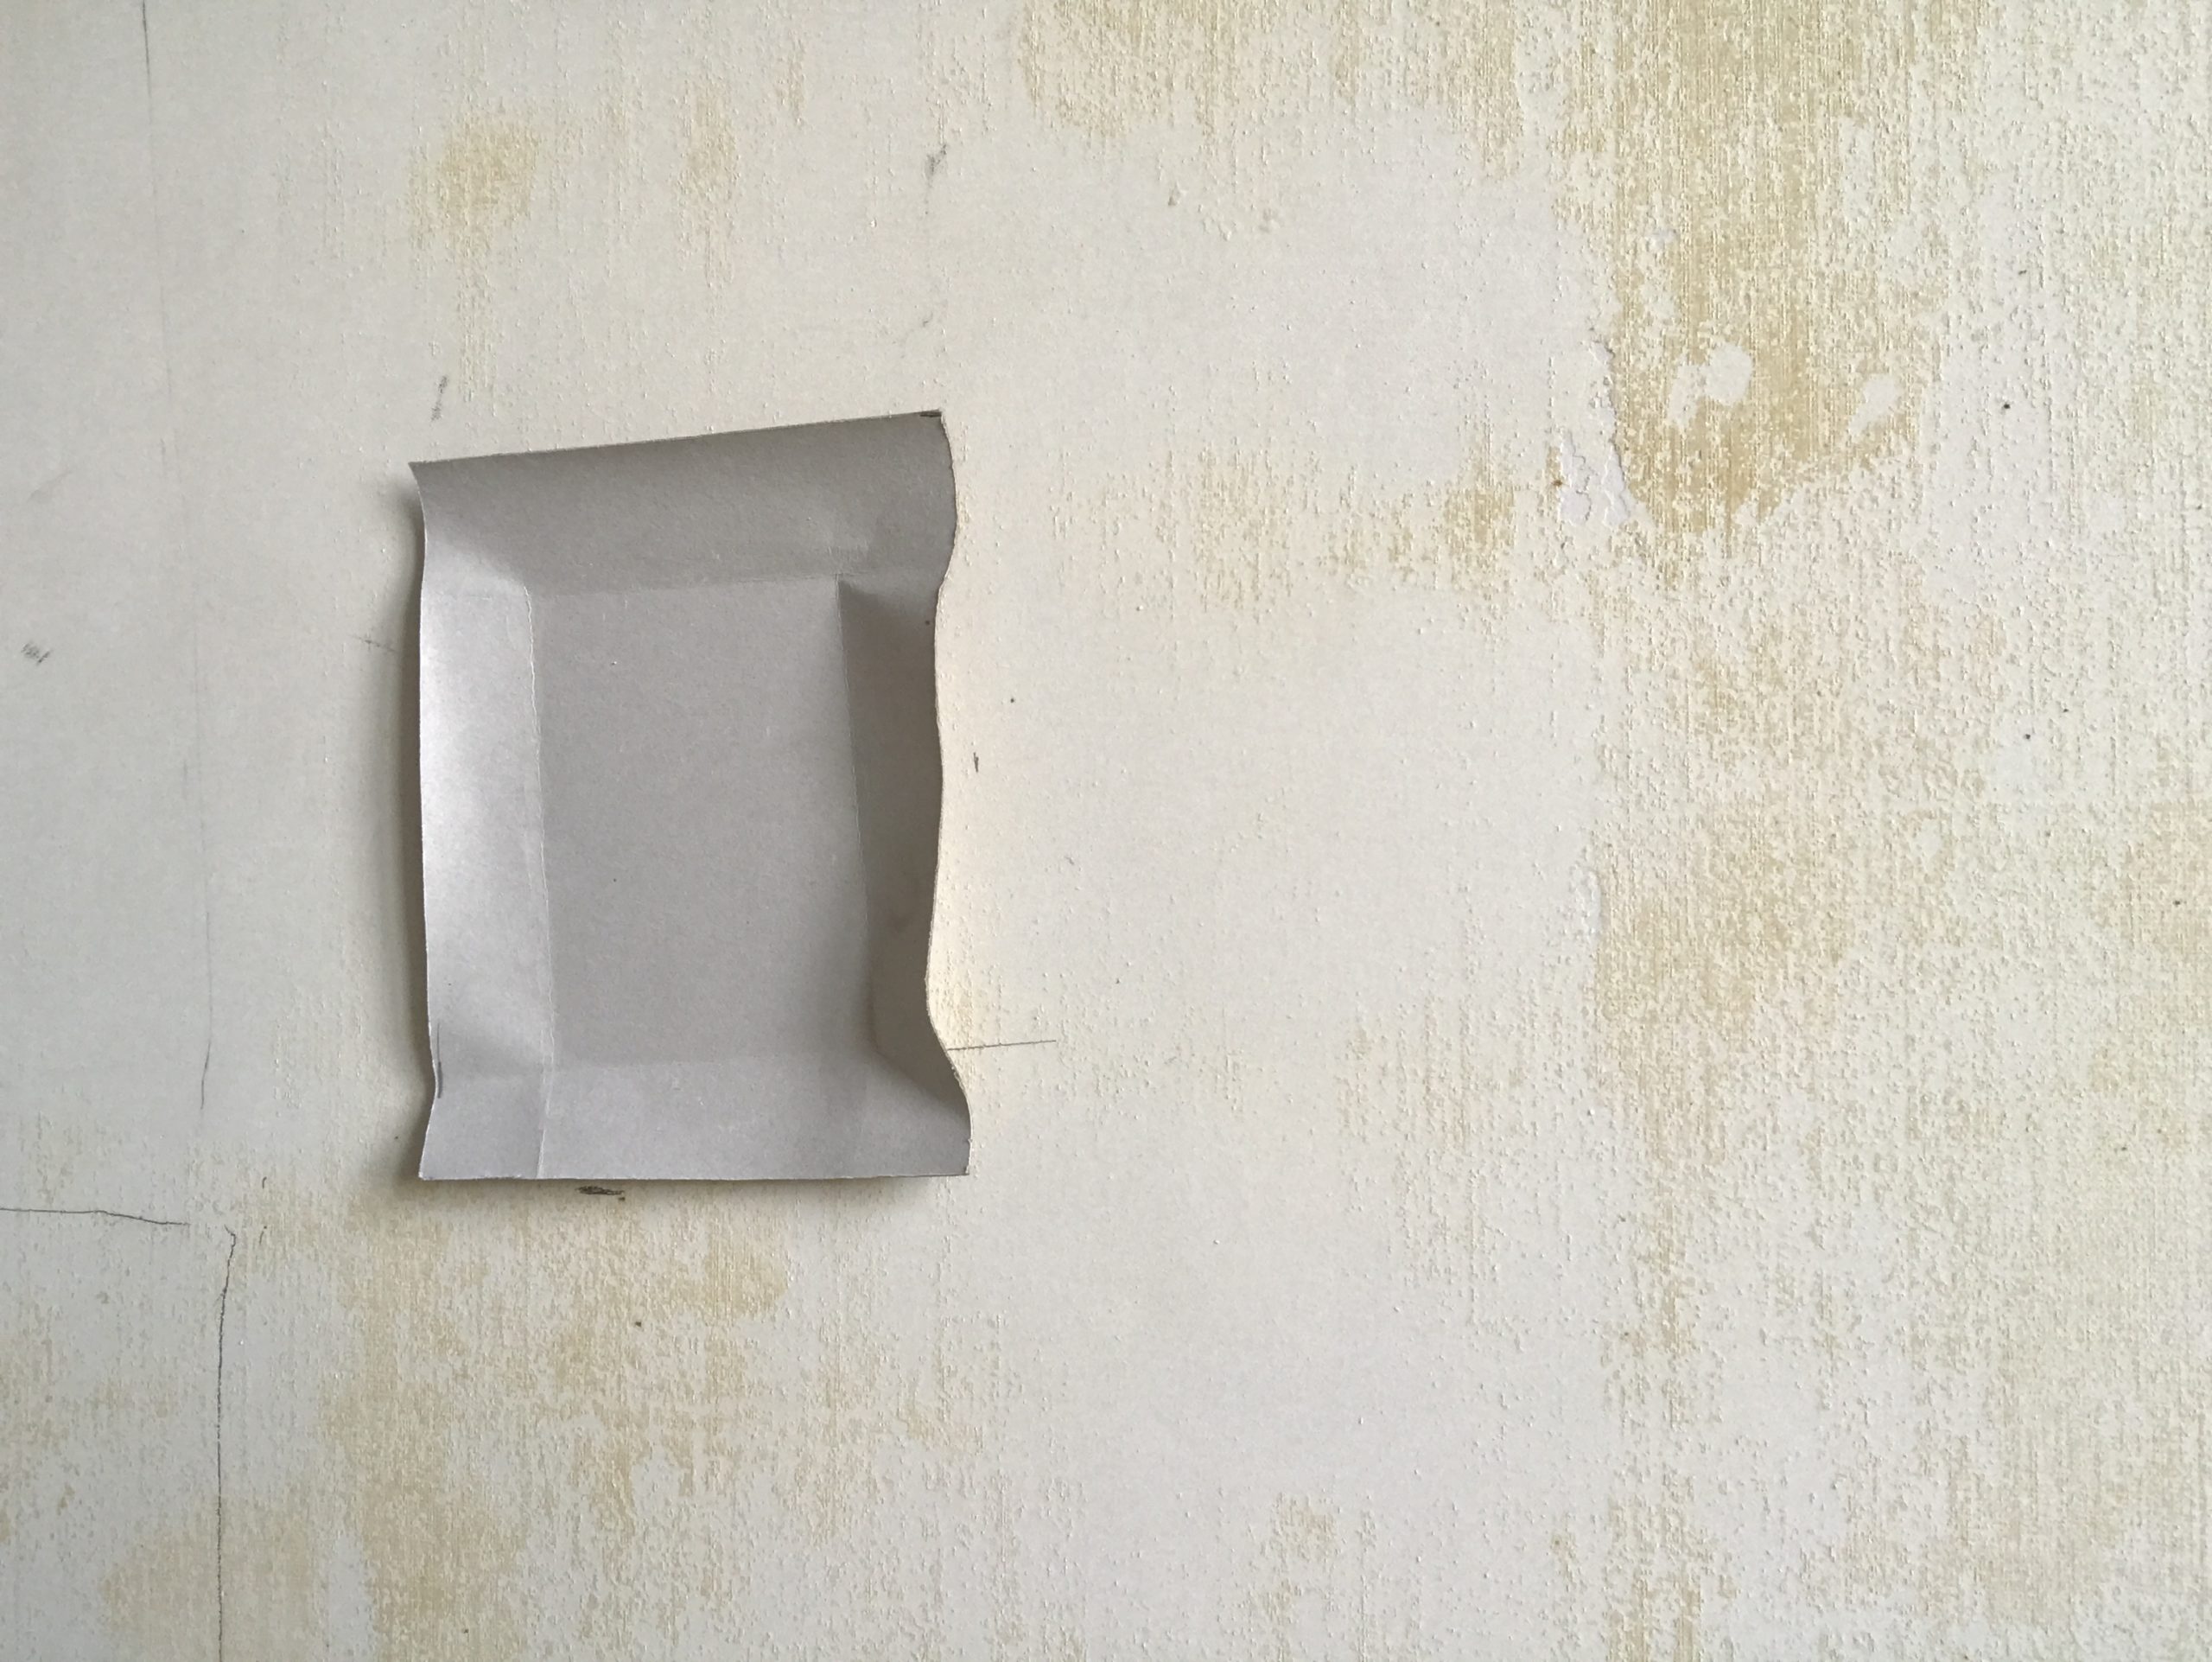
Step 11: You should be left with a drywall plug surrounded by loose paper. Clean off any residual gypsum on the paper. You’ll need this to lay flat on the wall and any crumbs will make that impossible.
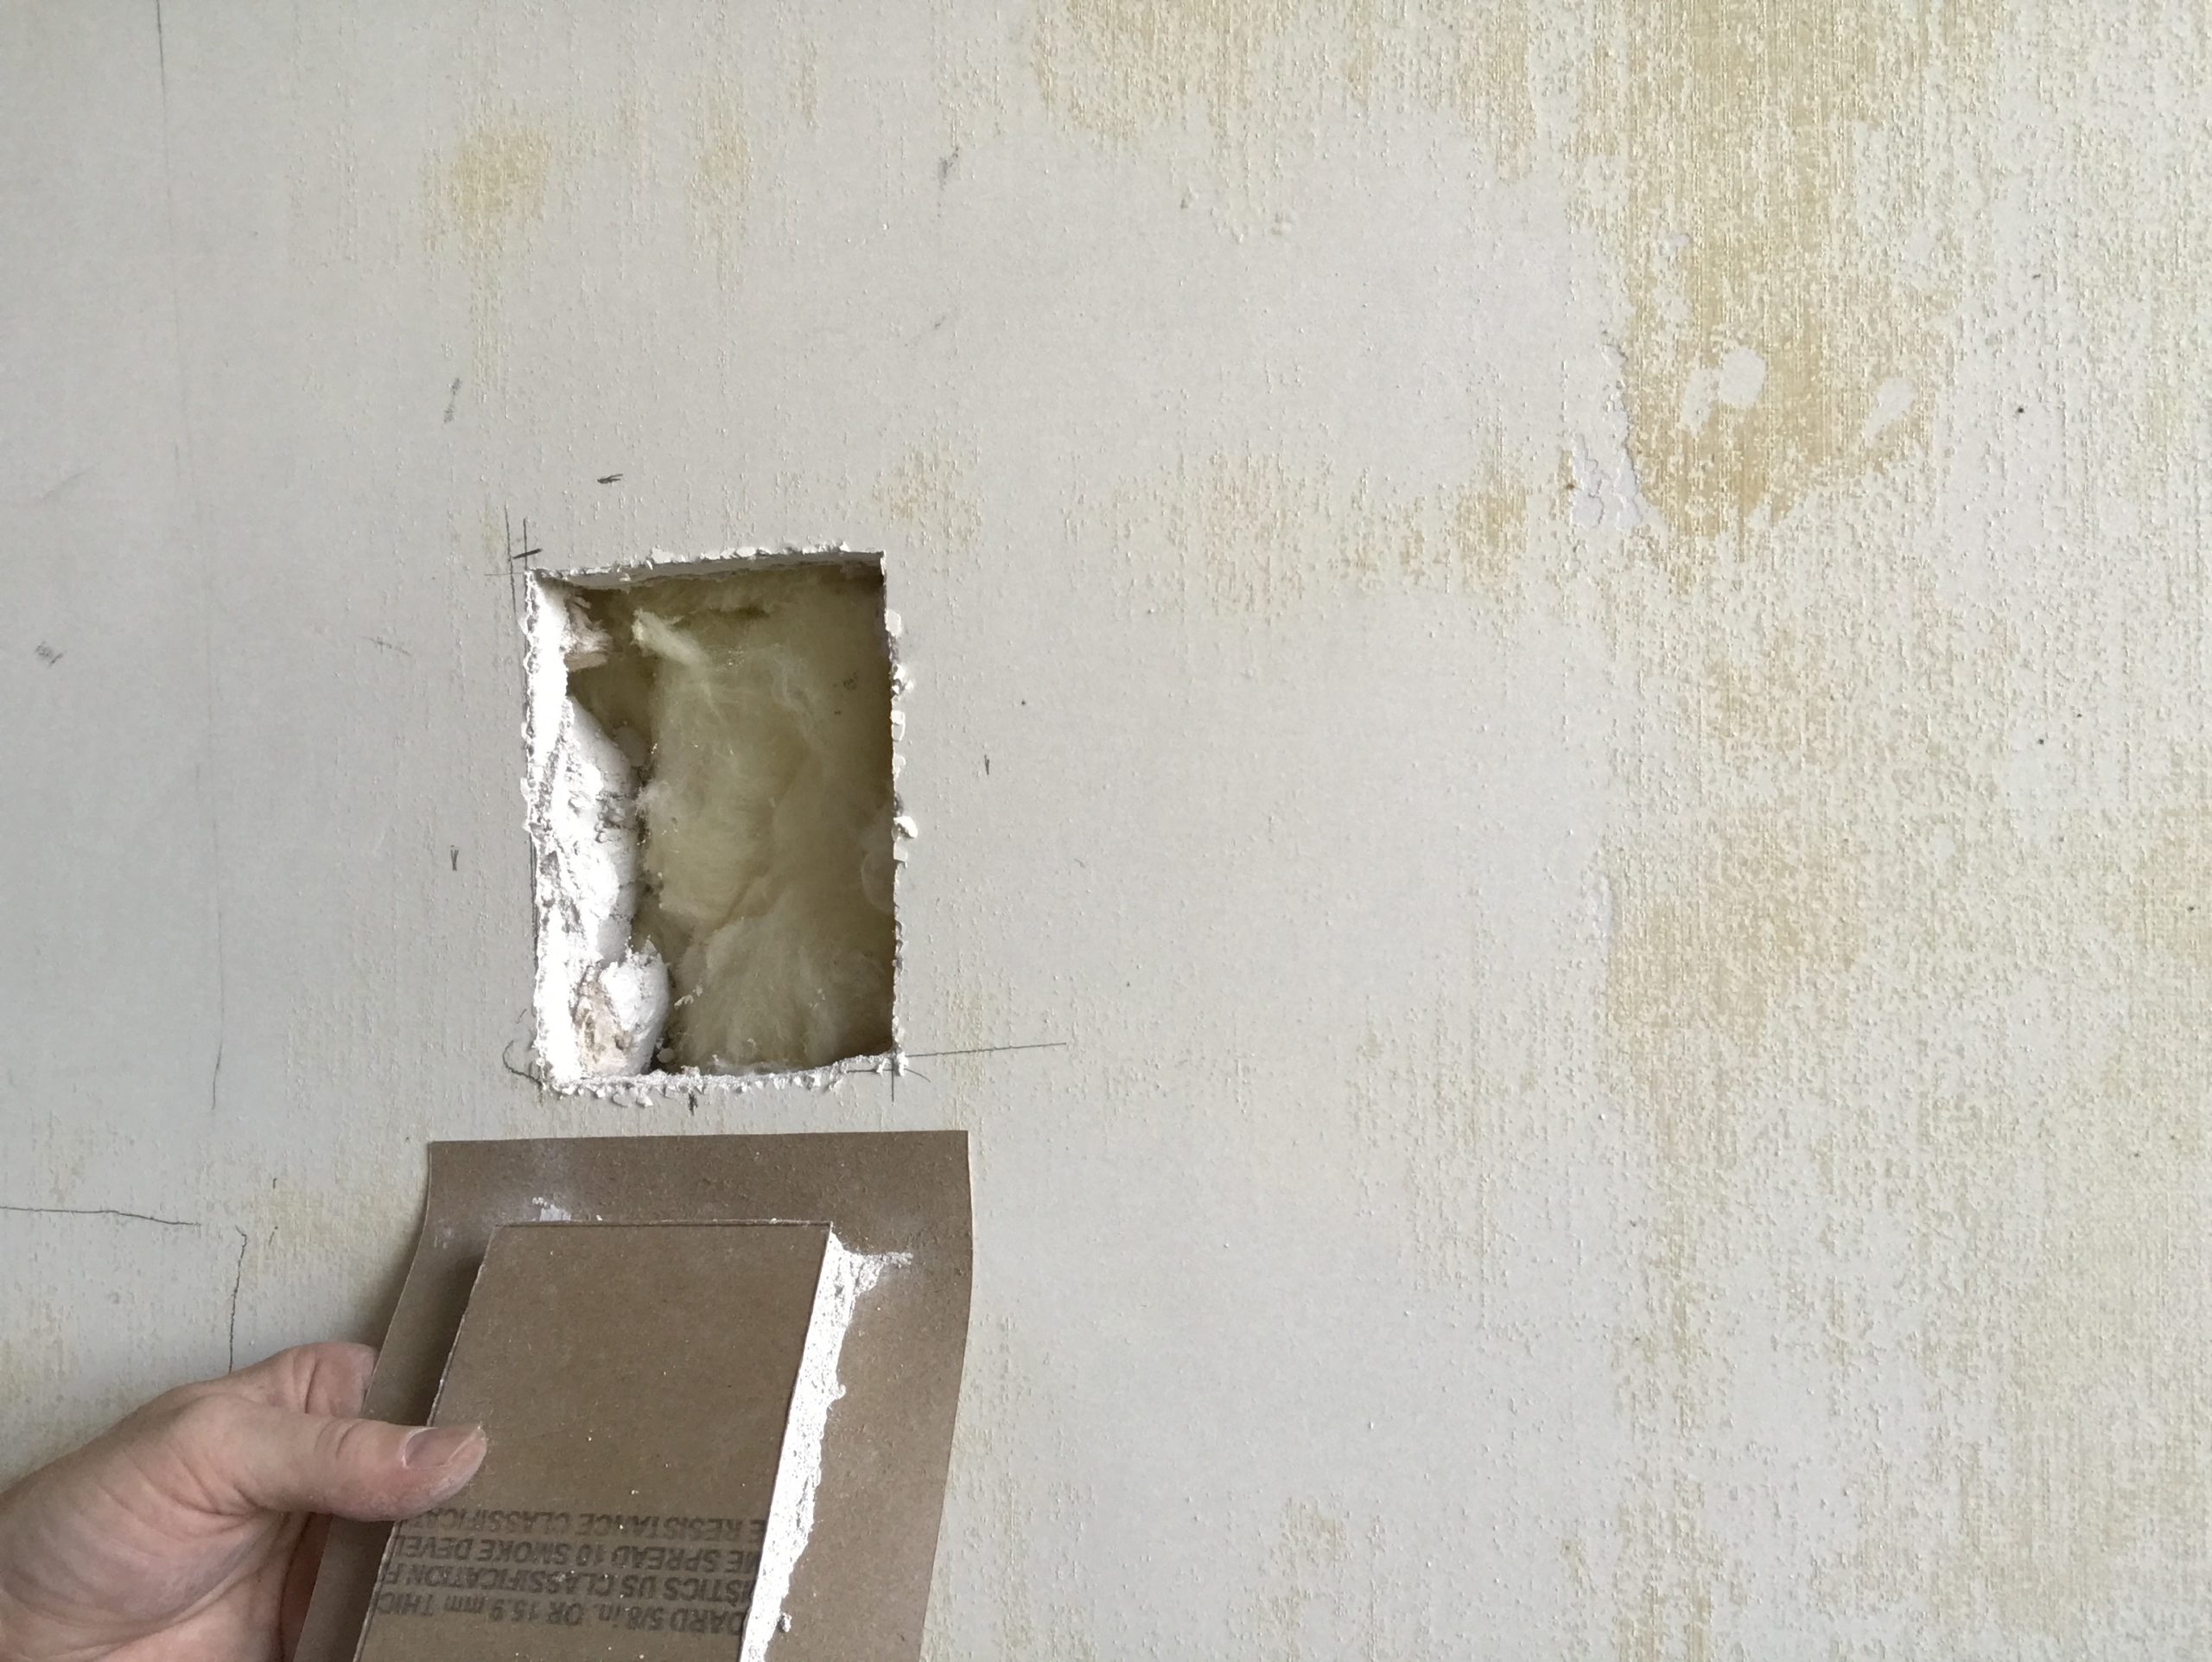
Step 12: The plug should fit inside the hole. Dry fit it and make any adjustments, being careful not to cut through the face paper.

Now you’re ready for the second phase: installing the California patch into the hole.
Setting the California Drywall Patch
The basic premise here is to glue and fill the patch into place. Here are a couple of things to take note of:
You want your patch to be as near to flush with the wall as you can. But if you have to err on one side, remember that in is better than out. Unlike burps. You want to fill the gaps around the patch, but not so much that the mud falls into the cavity. Which, by this point, already has a few dozen wall anchors, backing boards, and a fishing rod stuck inside.
Pro Tip: You don’t want to overwork the paper. It will want to rip sooner rather than later.
Ok, so we have those details worked out. Keep those in mind as we go through these steps of installation.
Step 1: Mix up some hot mud. We prefer hot mud here because it dries faster, doesn’t shrink as much, and has great adhesive qualities. You could use bucket mud, but it will take longer to dry.
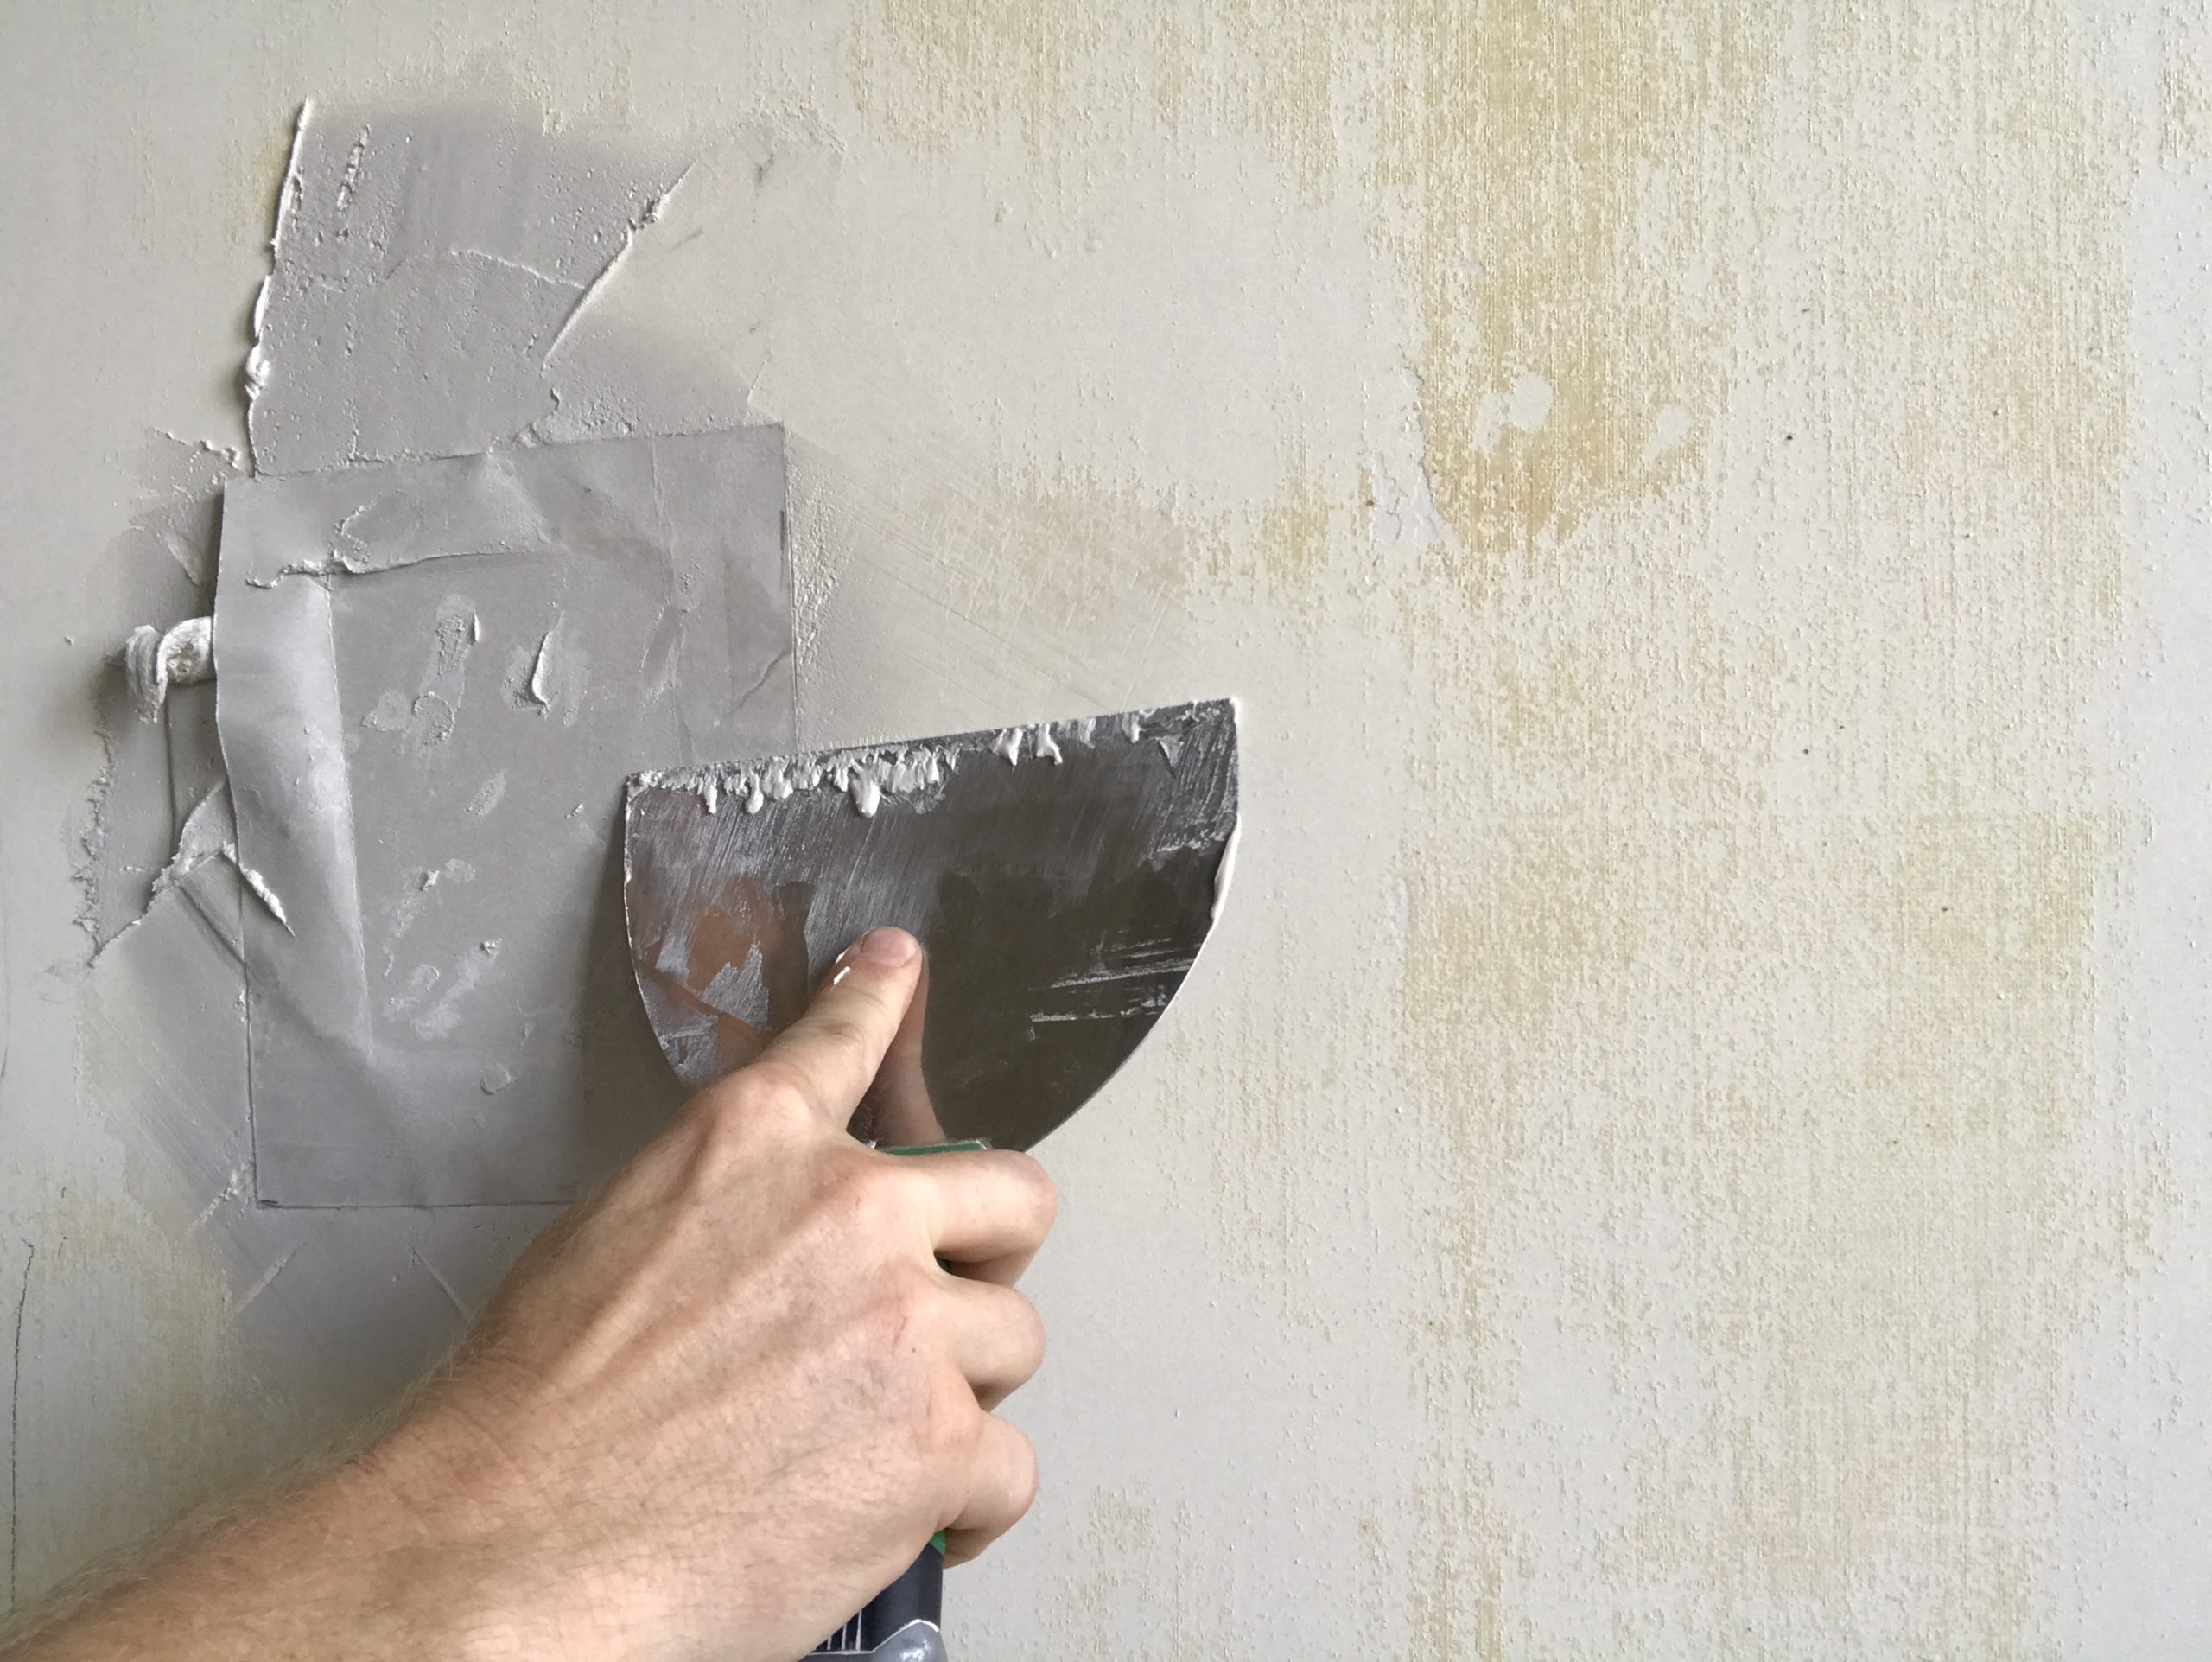
Step 2: Make a mud bed around the hole. Be sure to scrape some around the edge to fill the gaps.
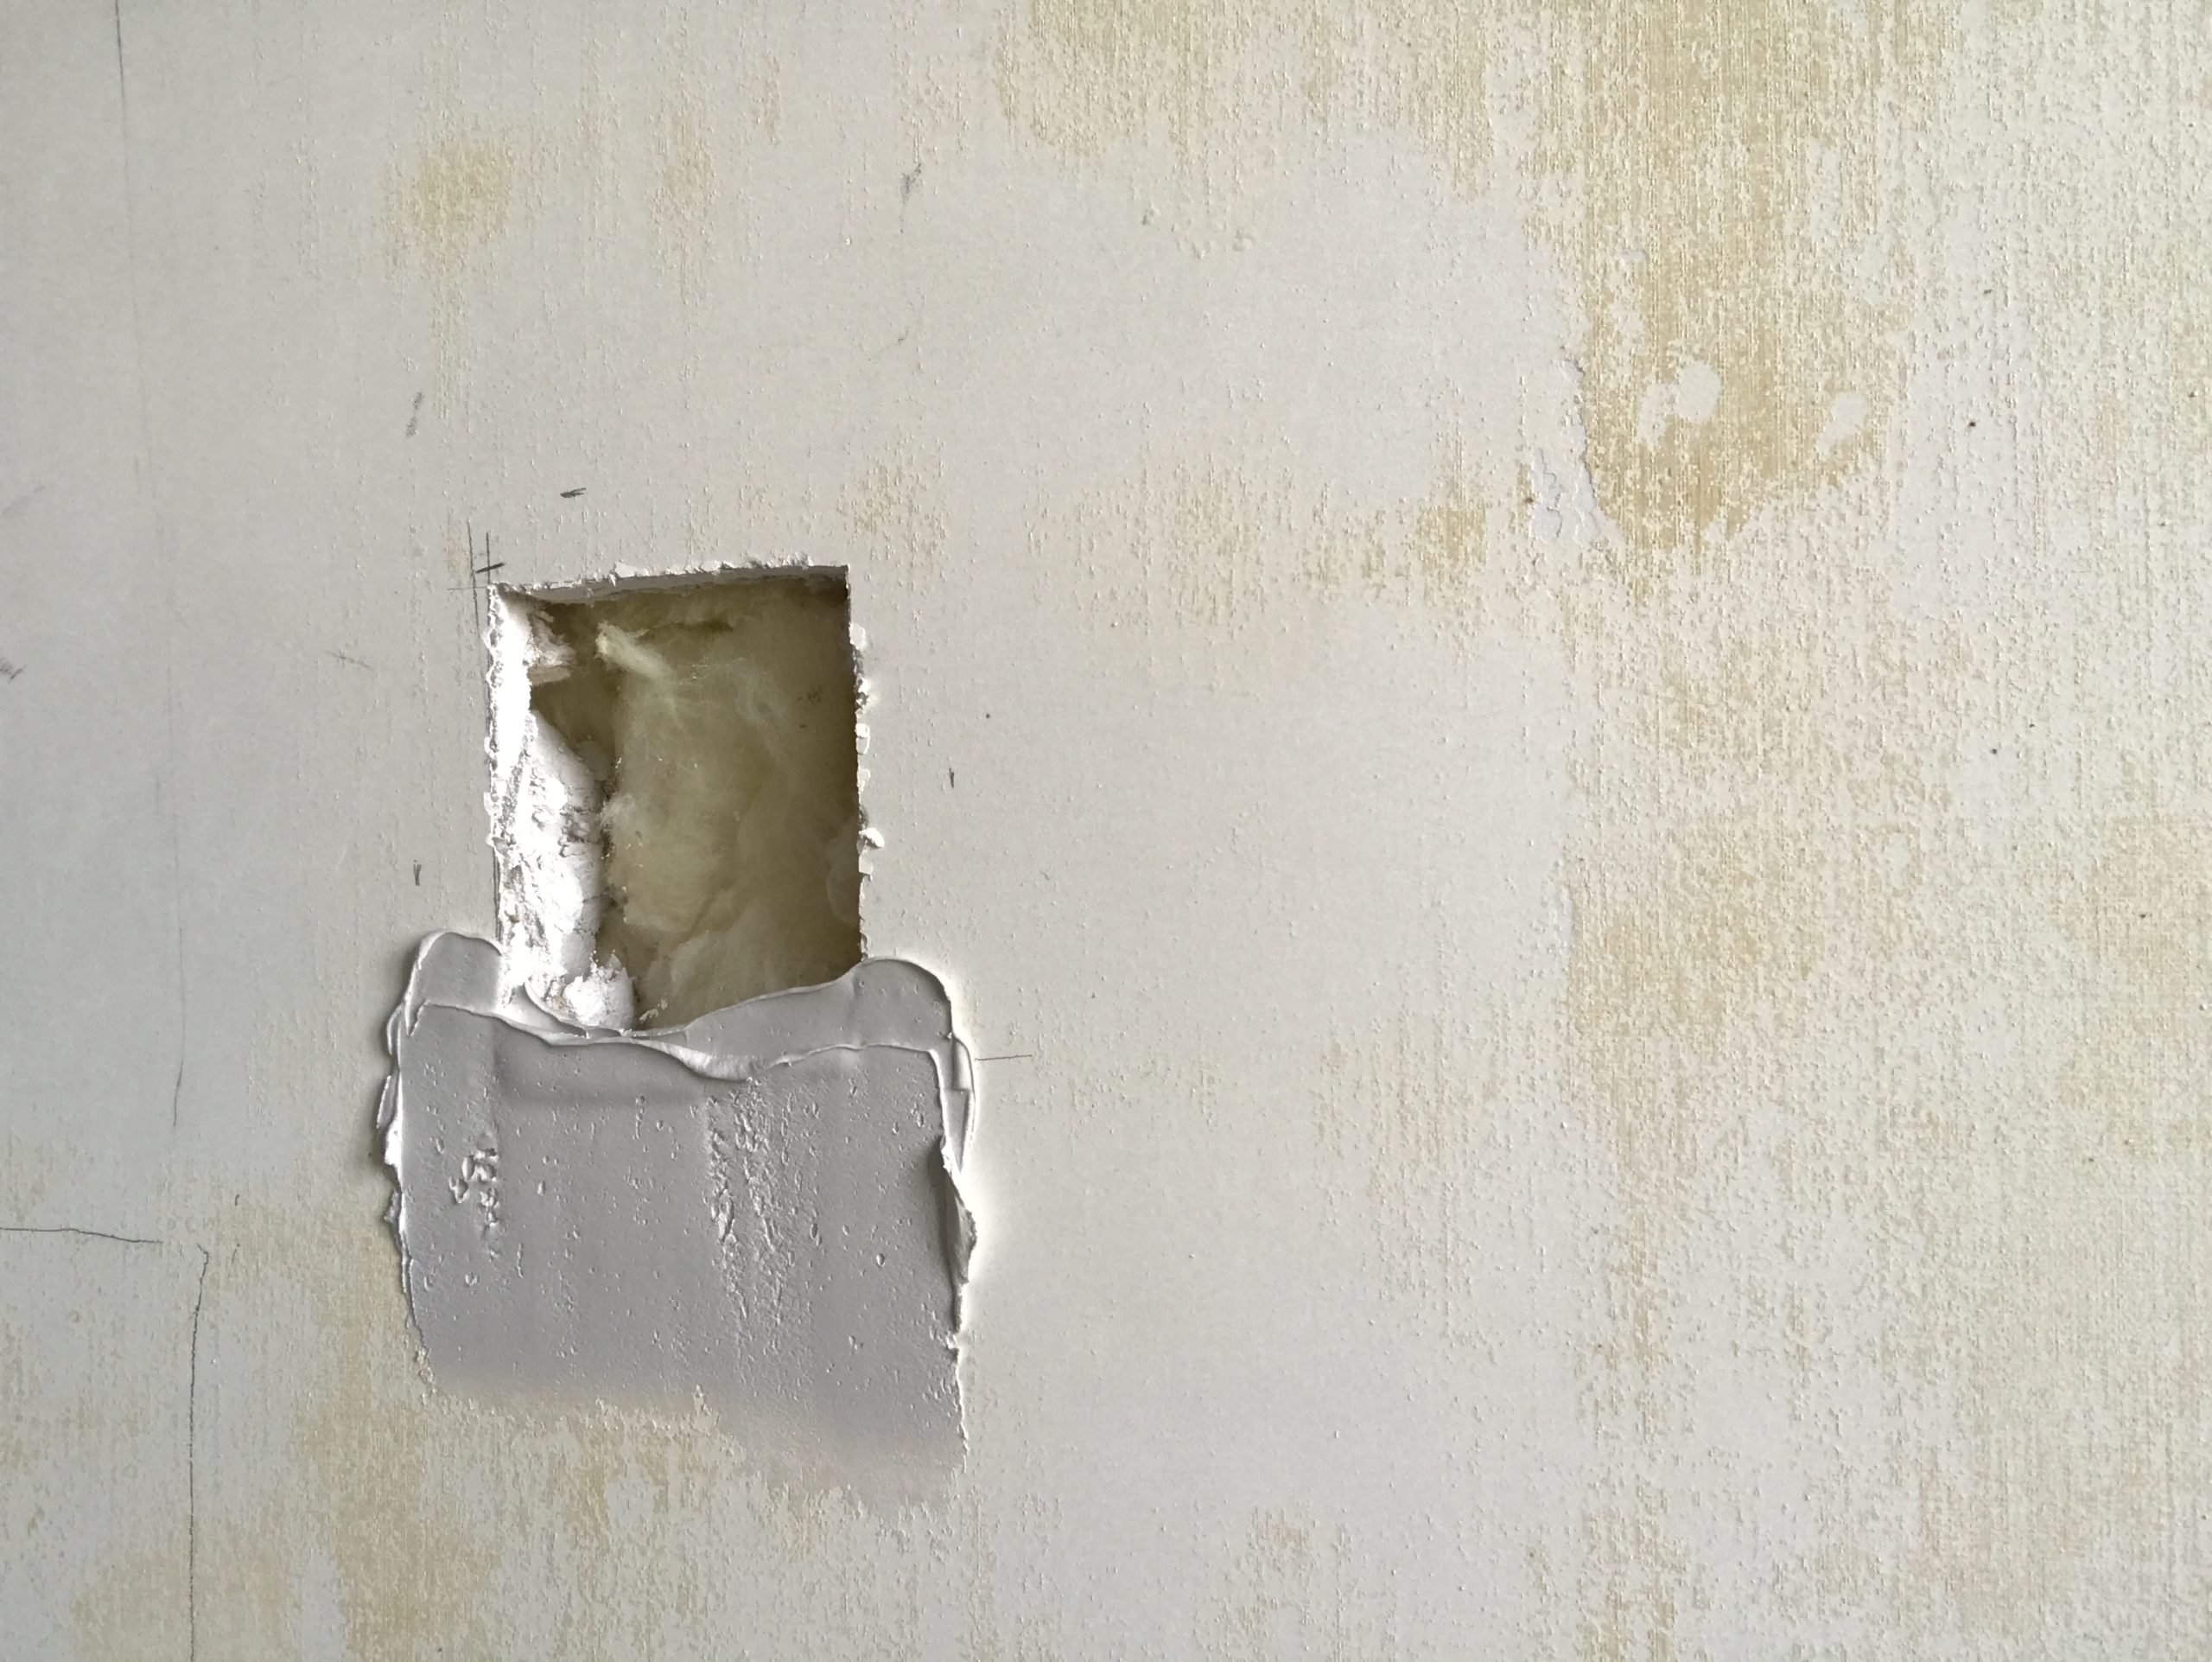
Step 3: Now take some mud and smear it on the backside of the California patch. Generously scraping it around the edges, again to fill the gap. We call it back buttering, but it’s more like cream cheese. You can never have too much cream cheese.
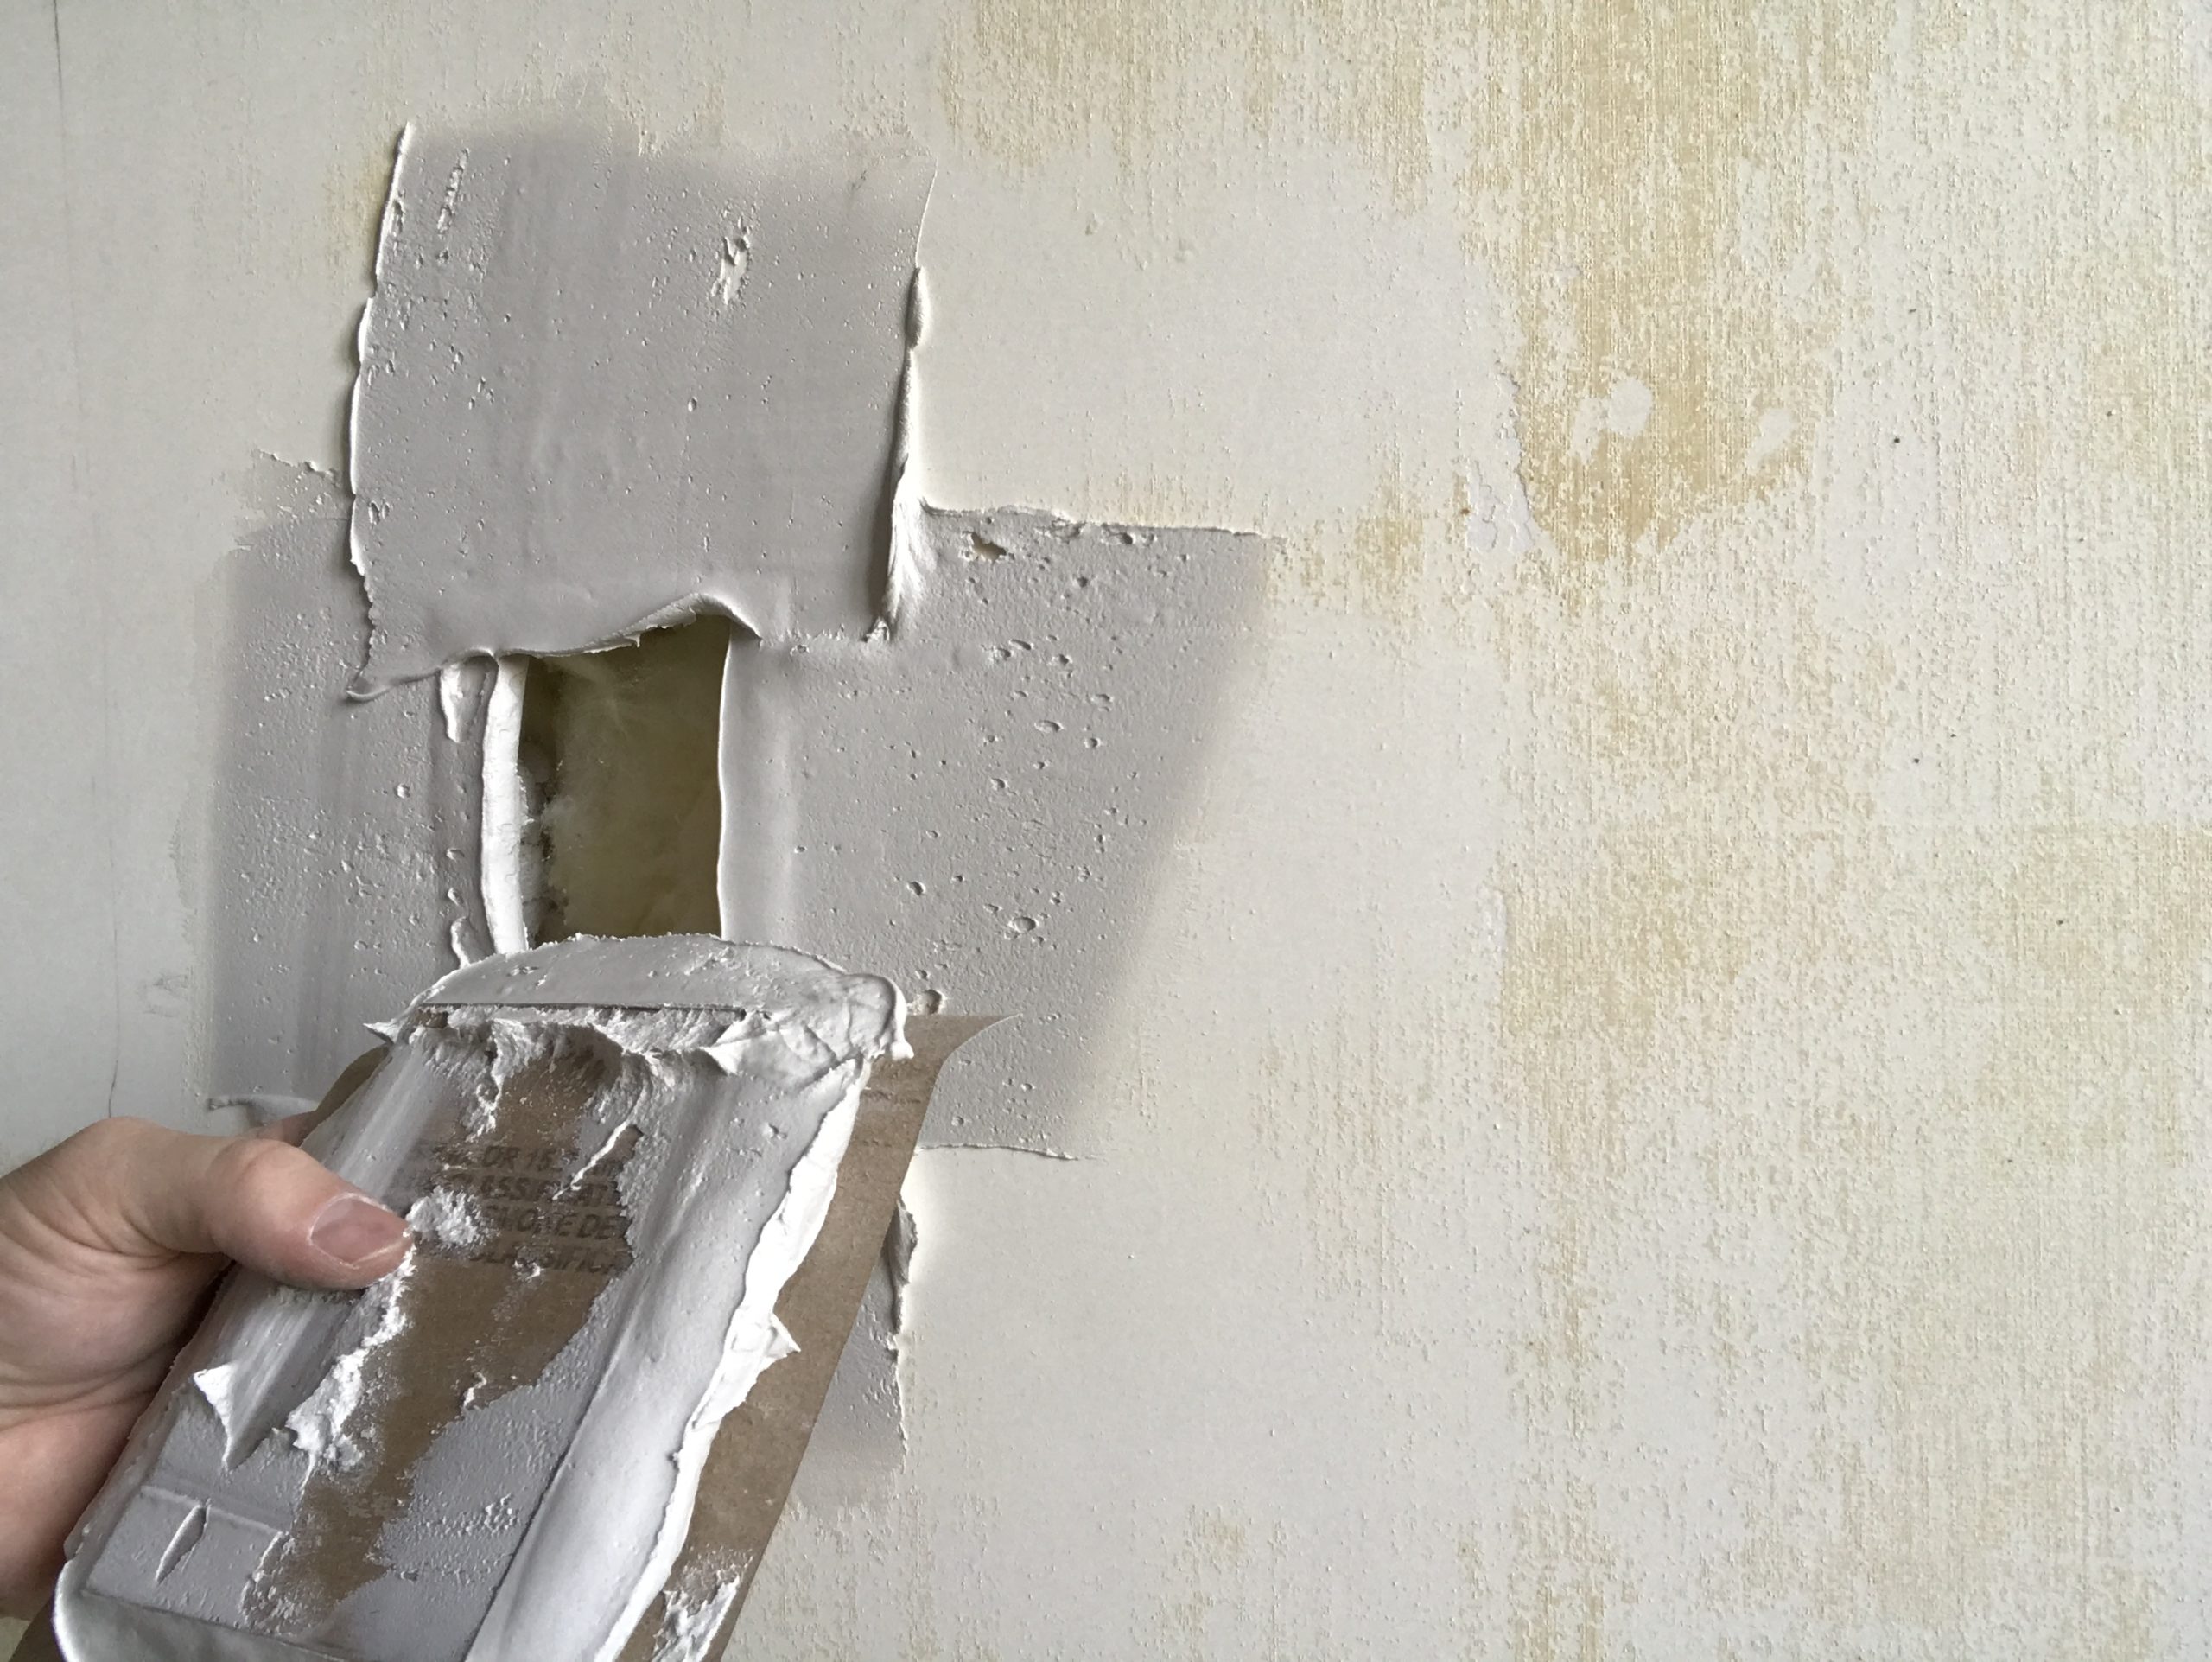
Step 4: Place the drywall patch into the hole. The paper should now be resting on the bed of mud. Ensure that the plug isn’t pushed in too far, but definitely not too far out. Remember, better in than out, just don’t overdo it.
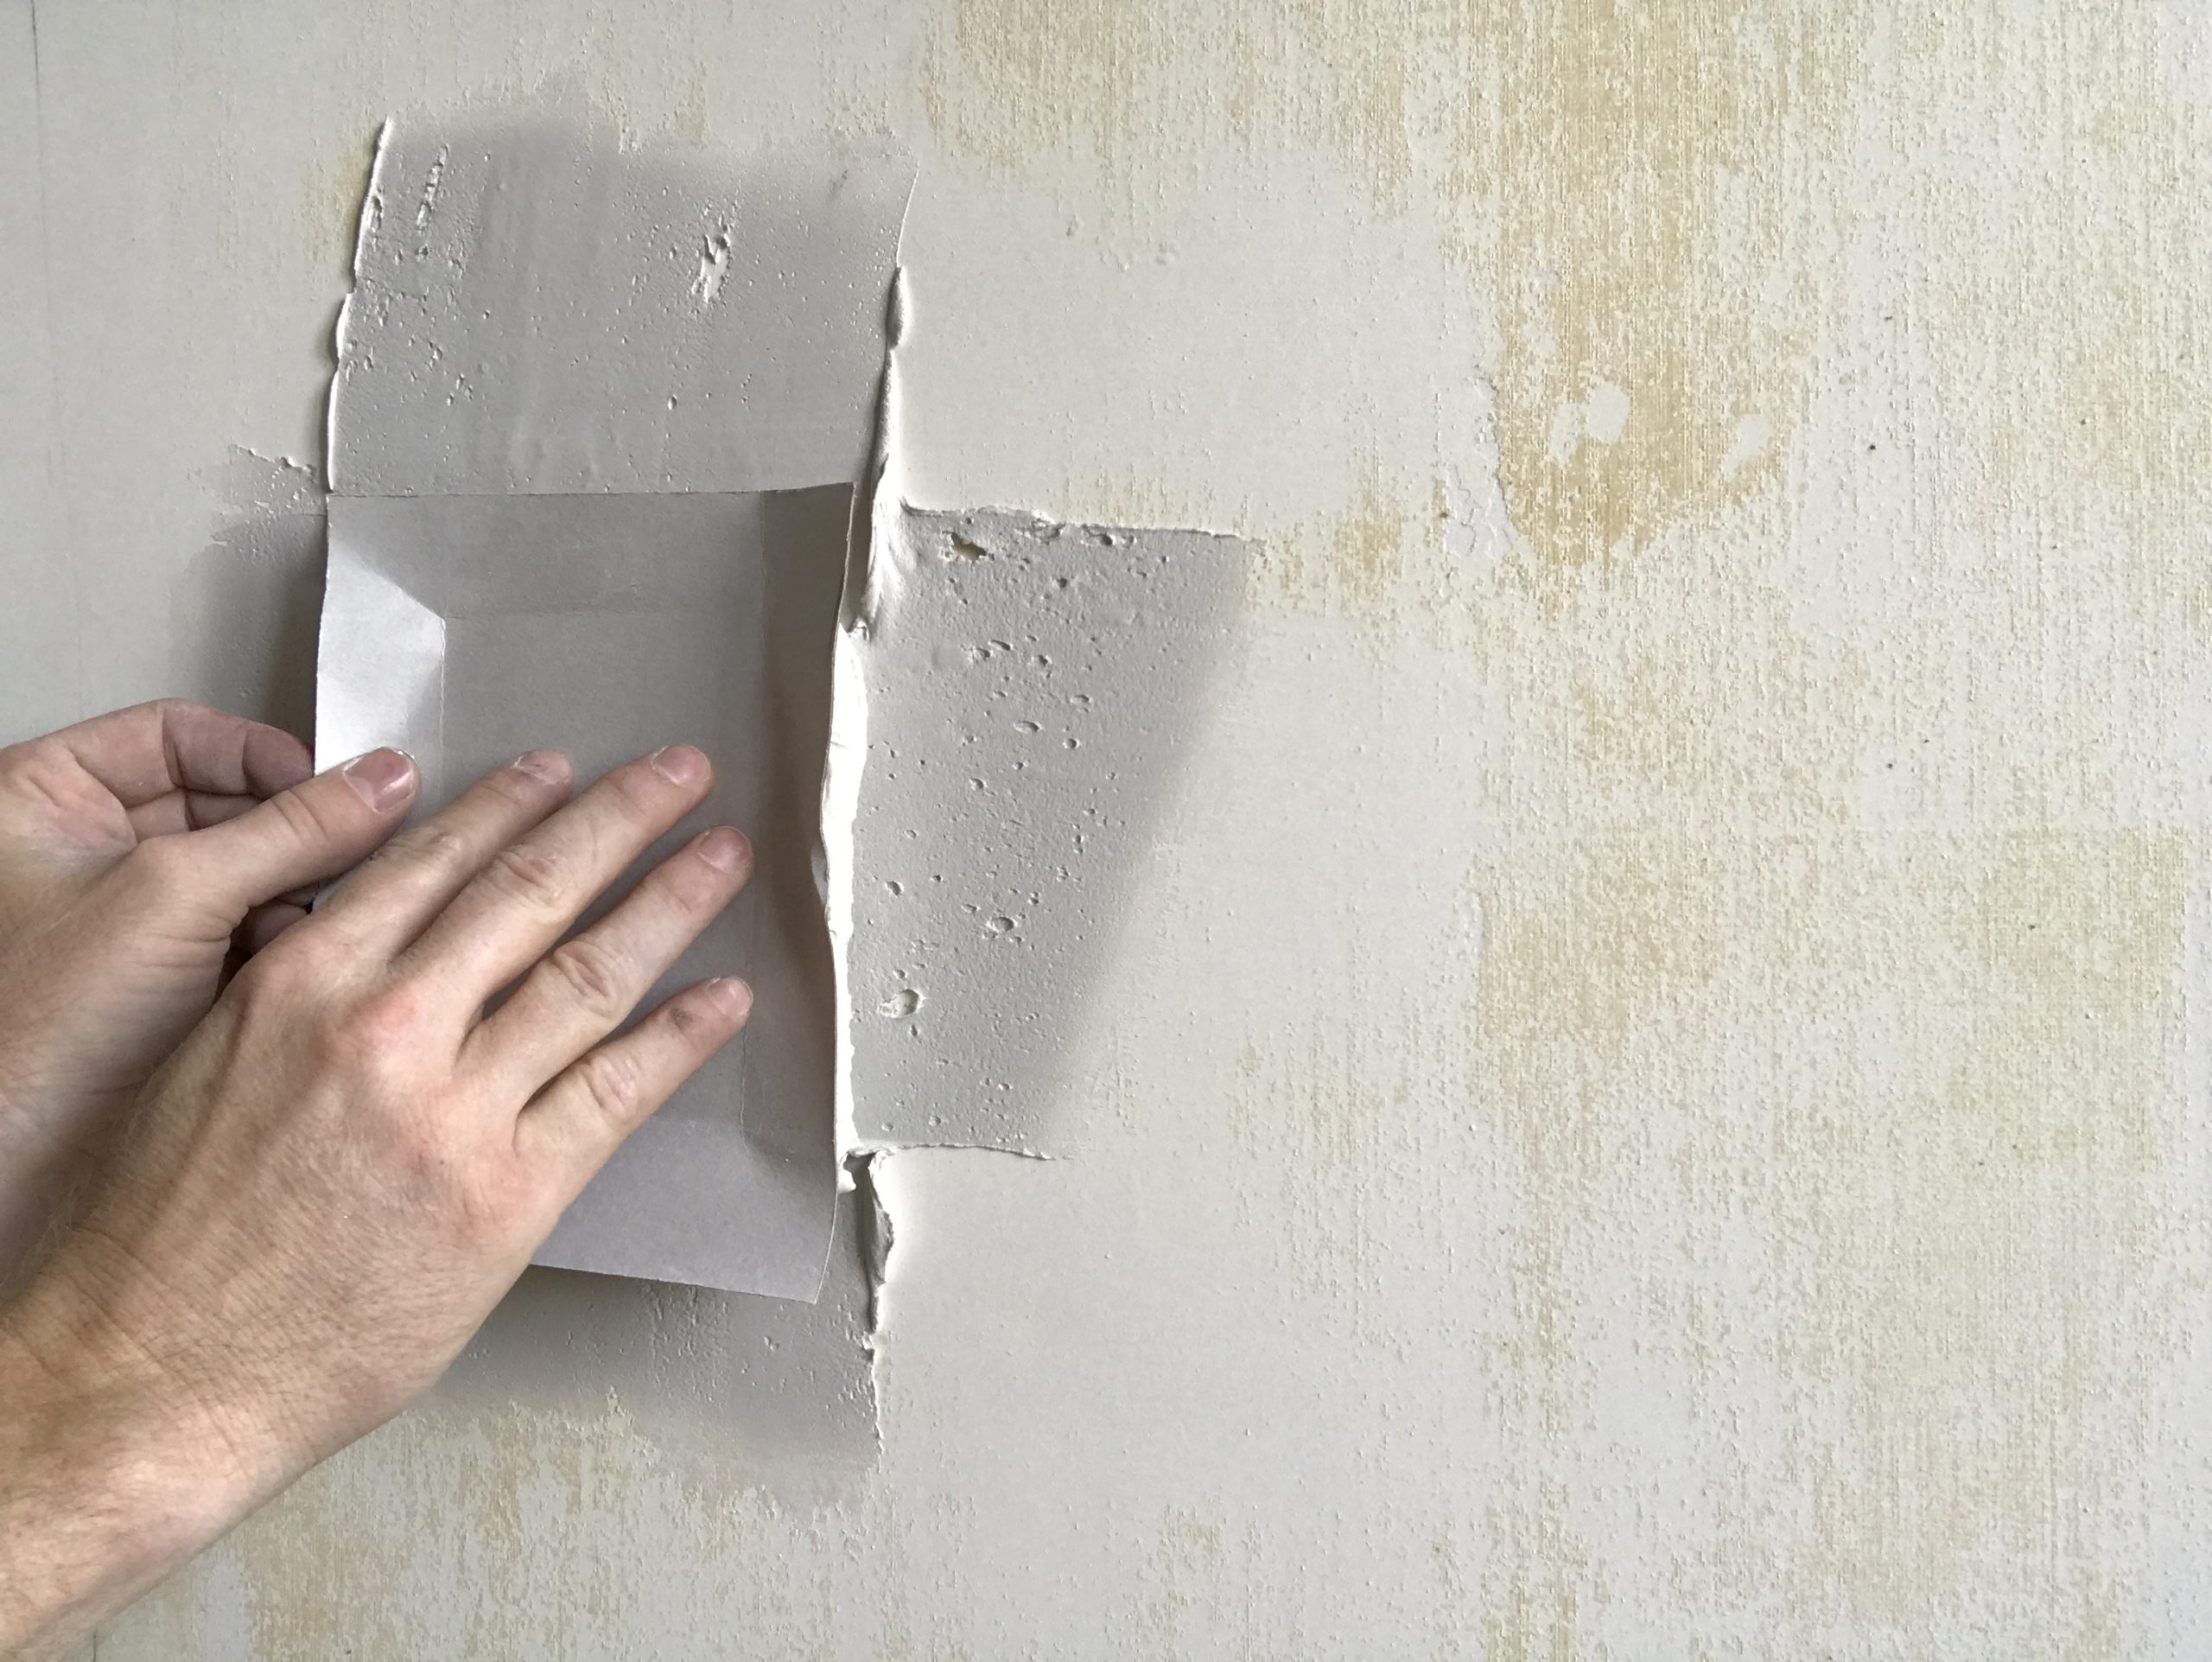
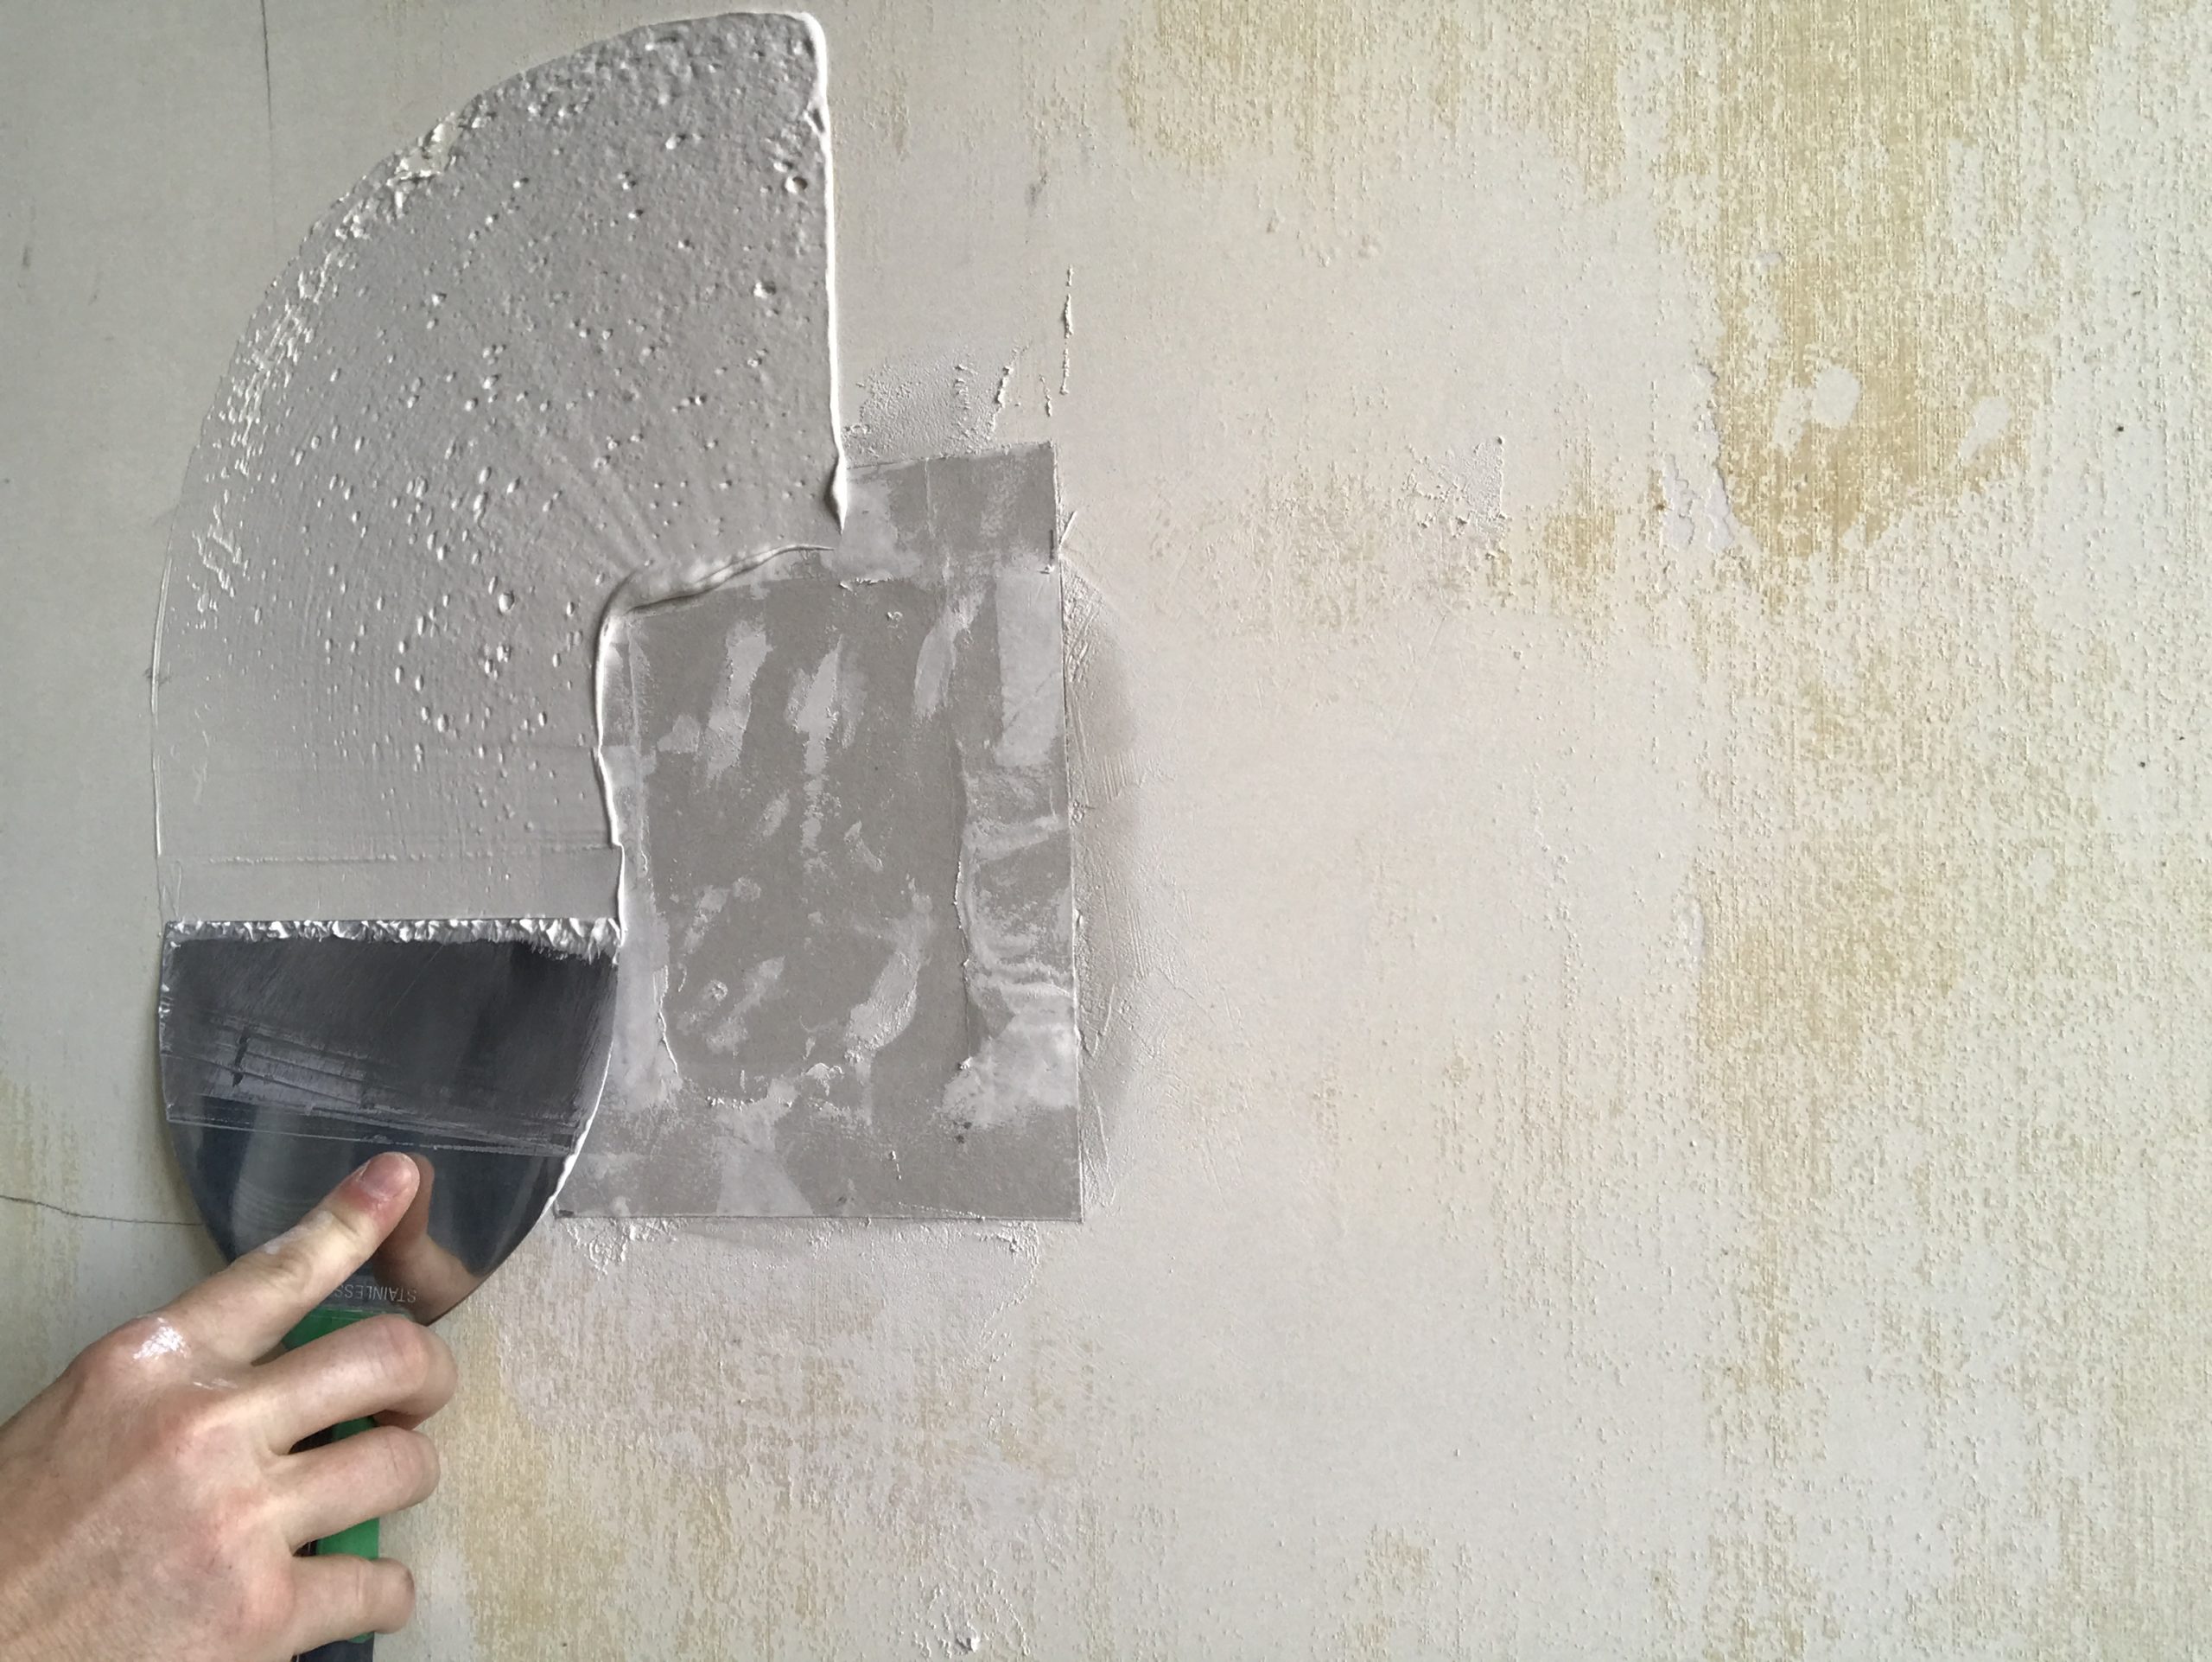
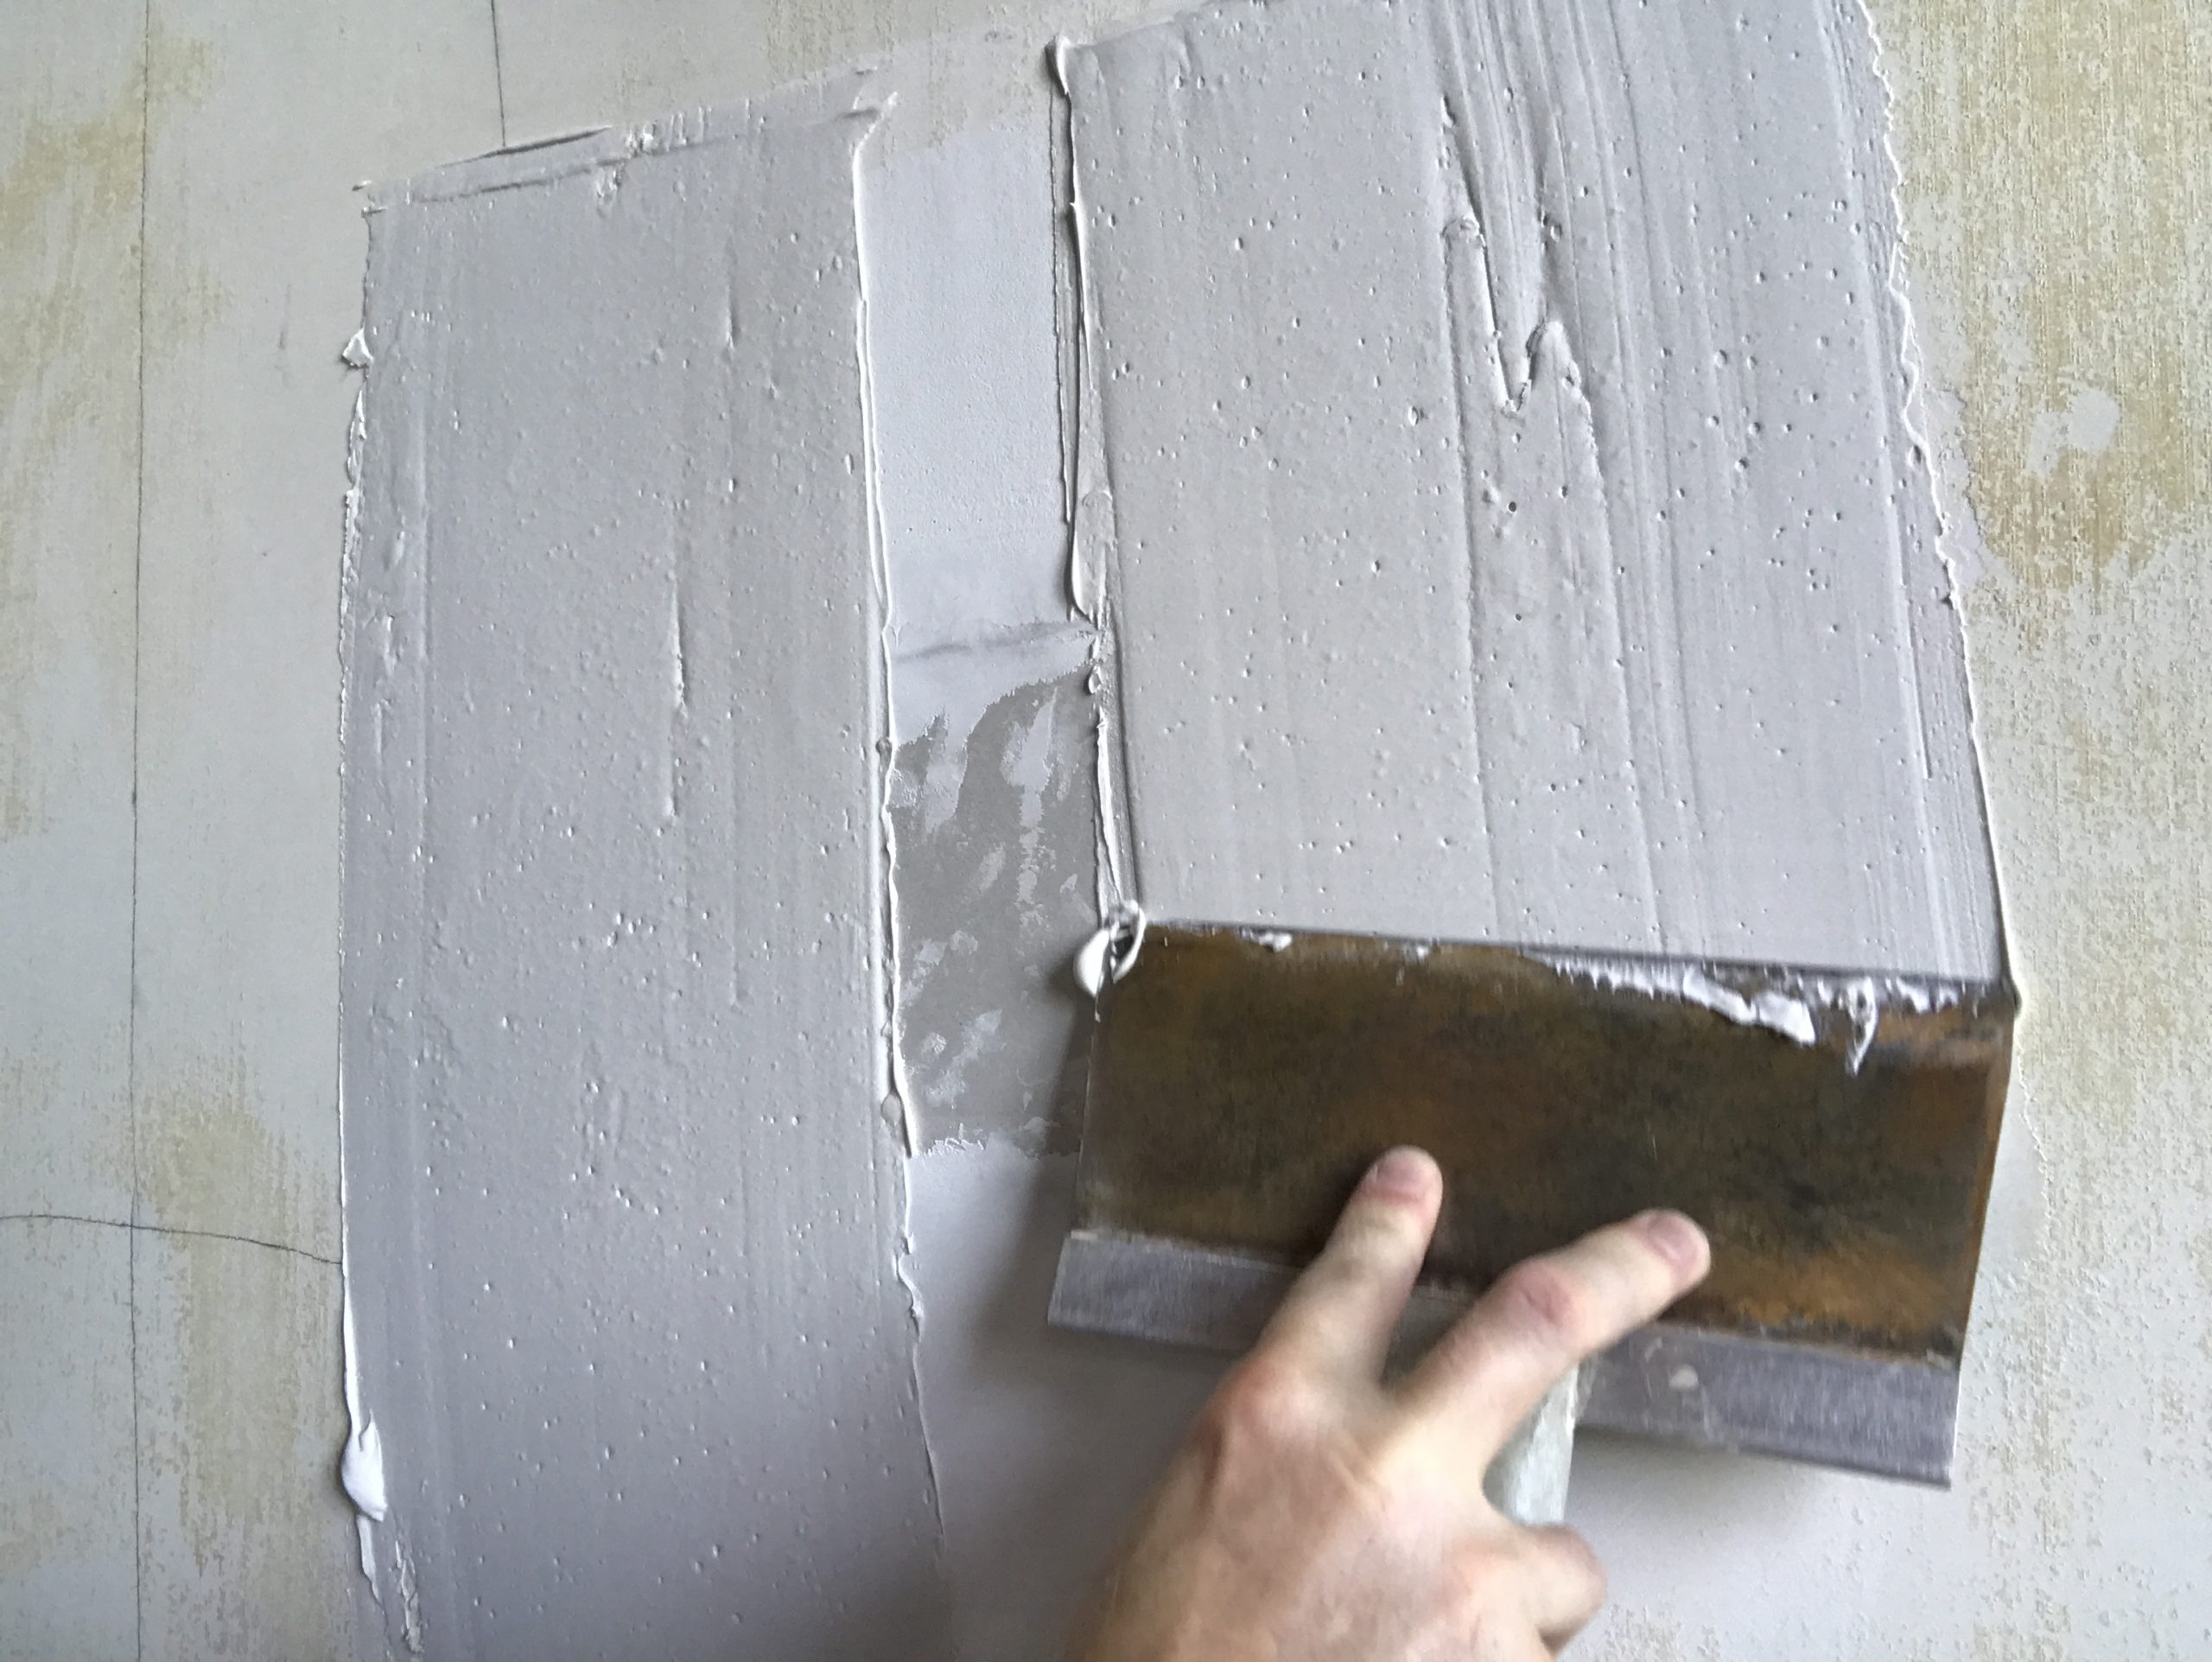
Step 5: Now smooth out the excess mud, carefully squeezing it out from under the paper. I like to pull diagonally from each corner out to get the majority of the mud out. Then, just as when taping a drywall joint, start in the middle and pull parallel with the patch in each direction.
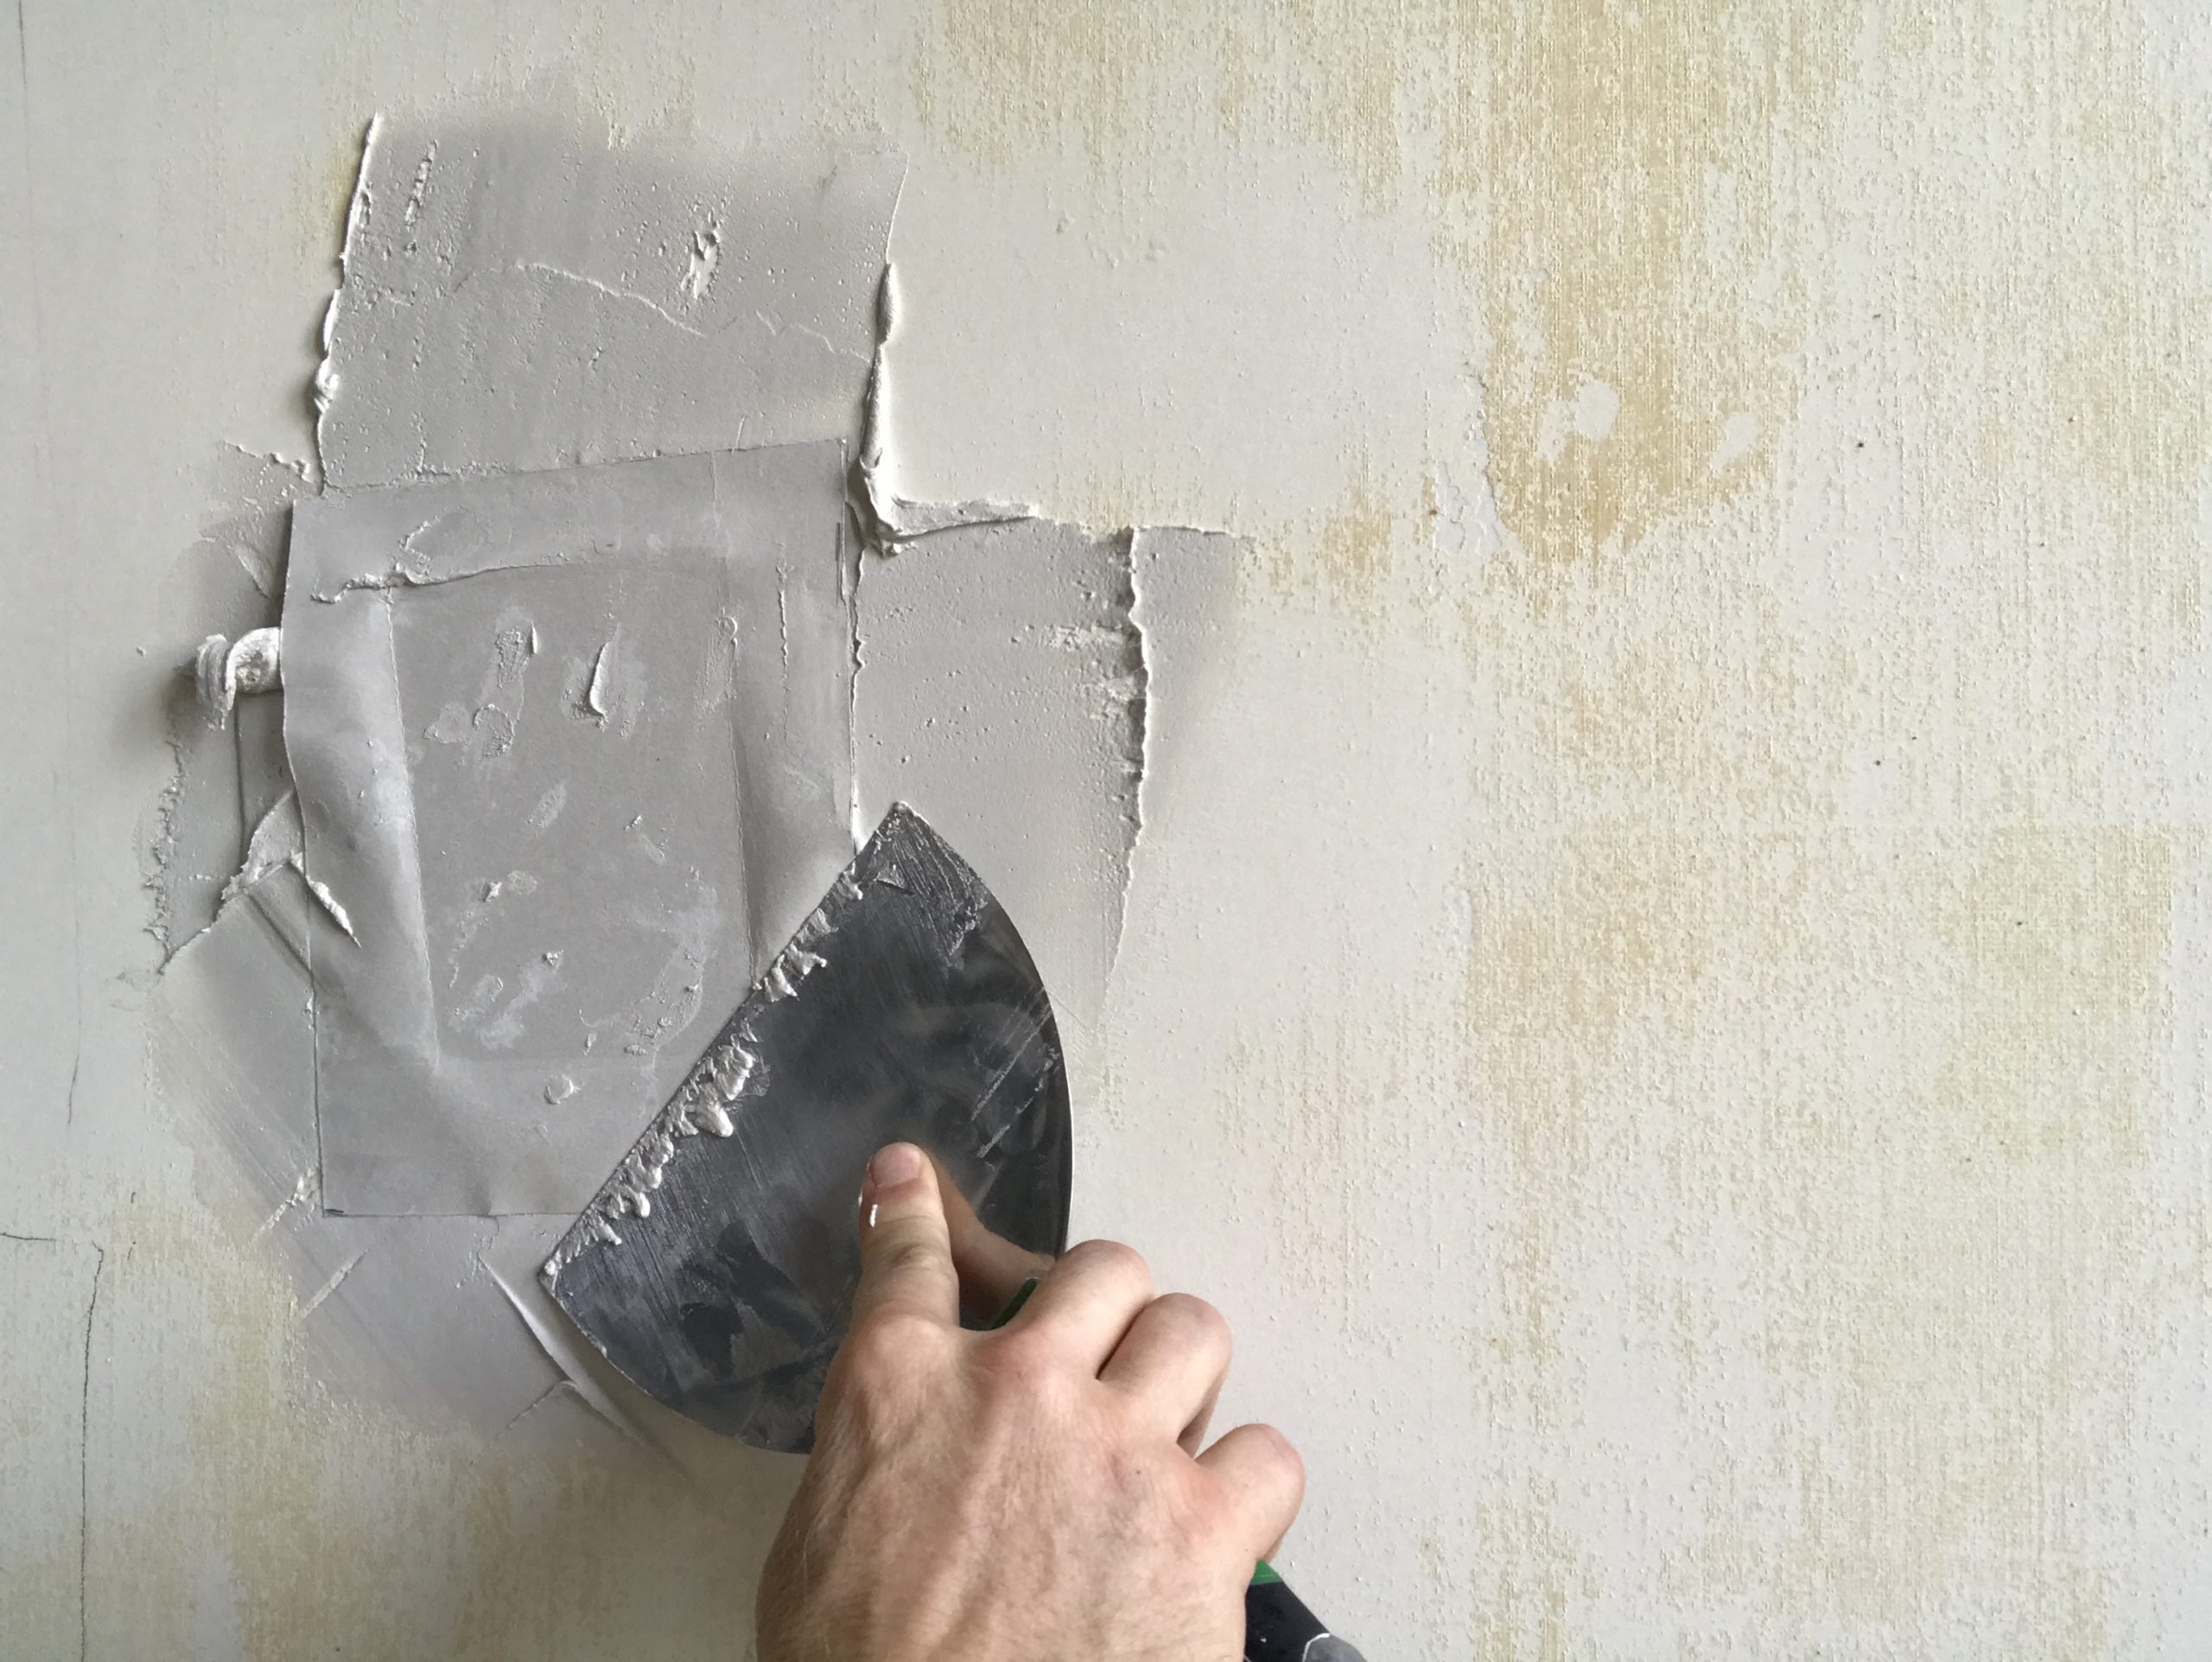

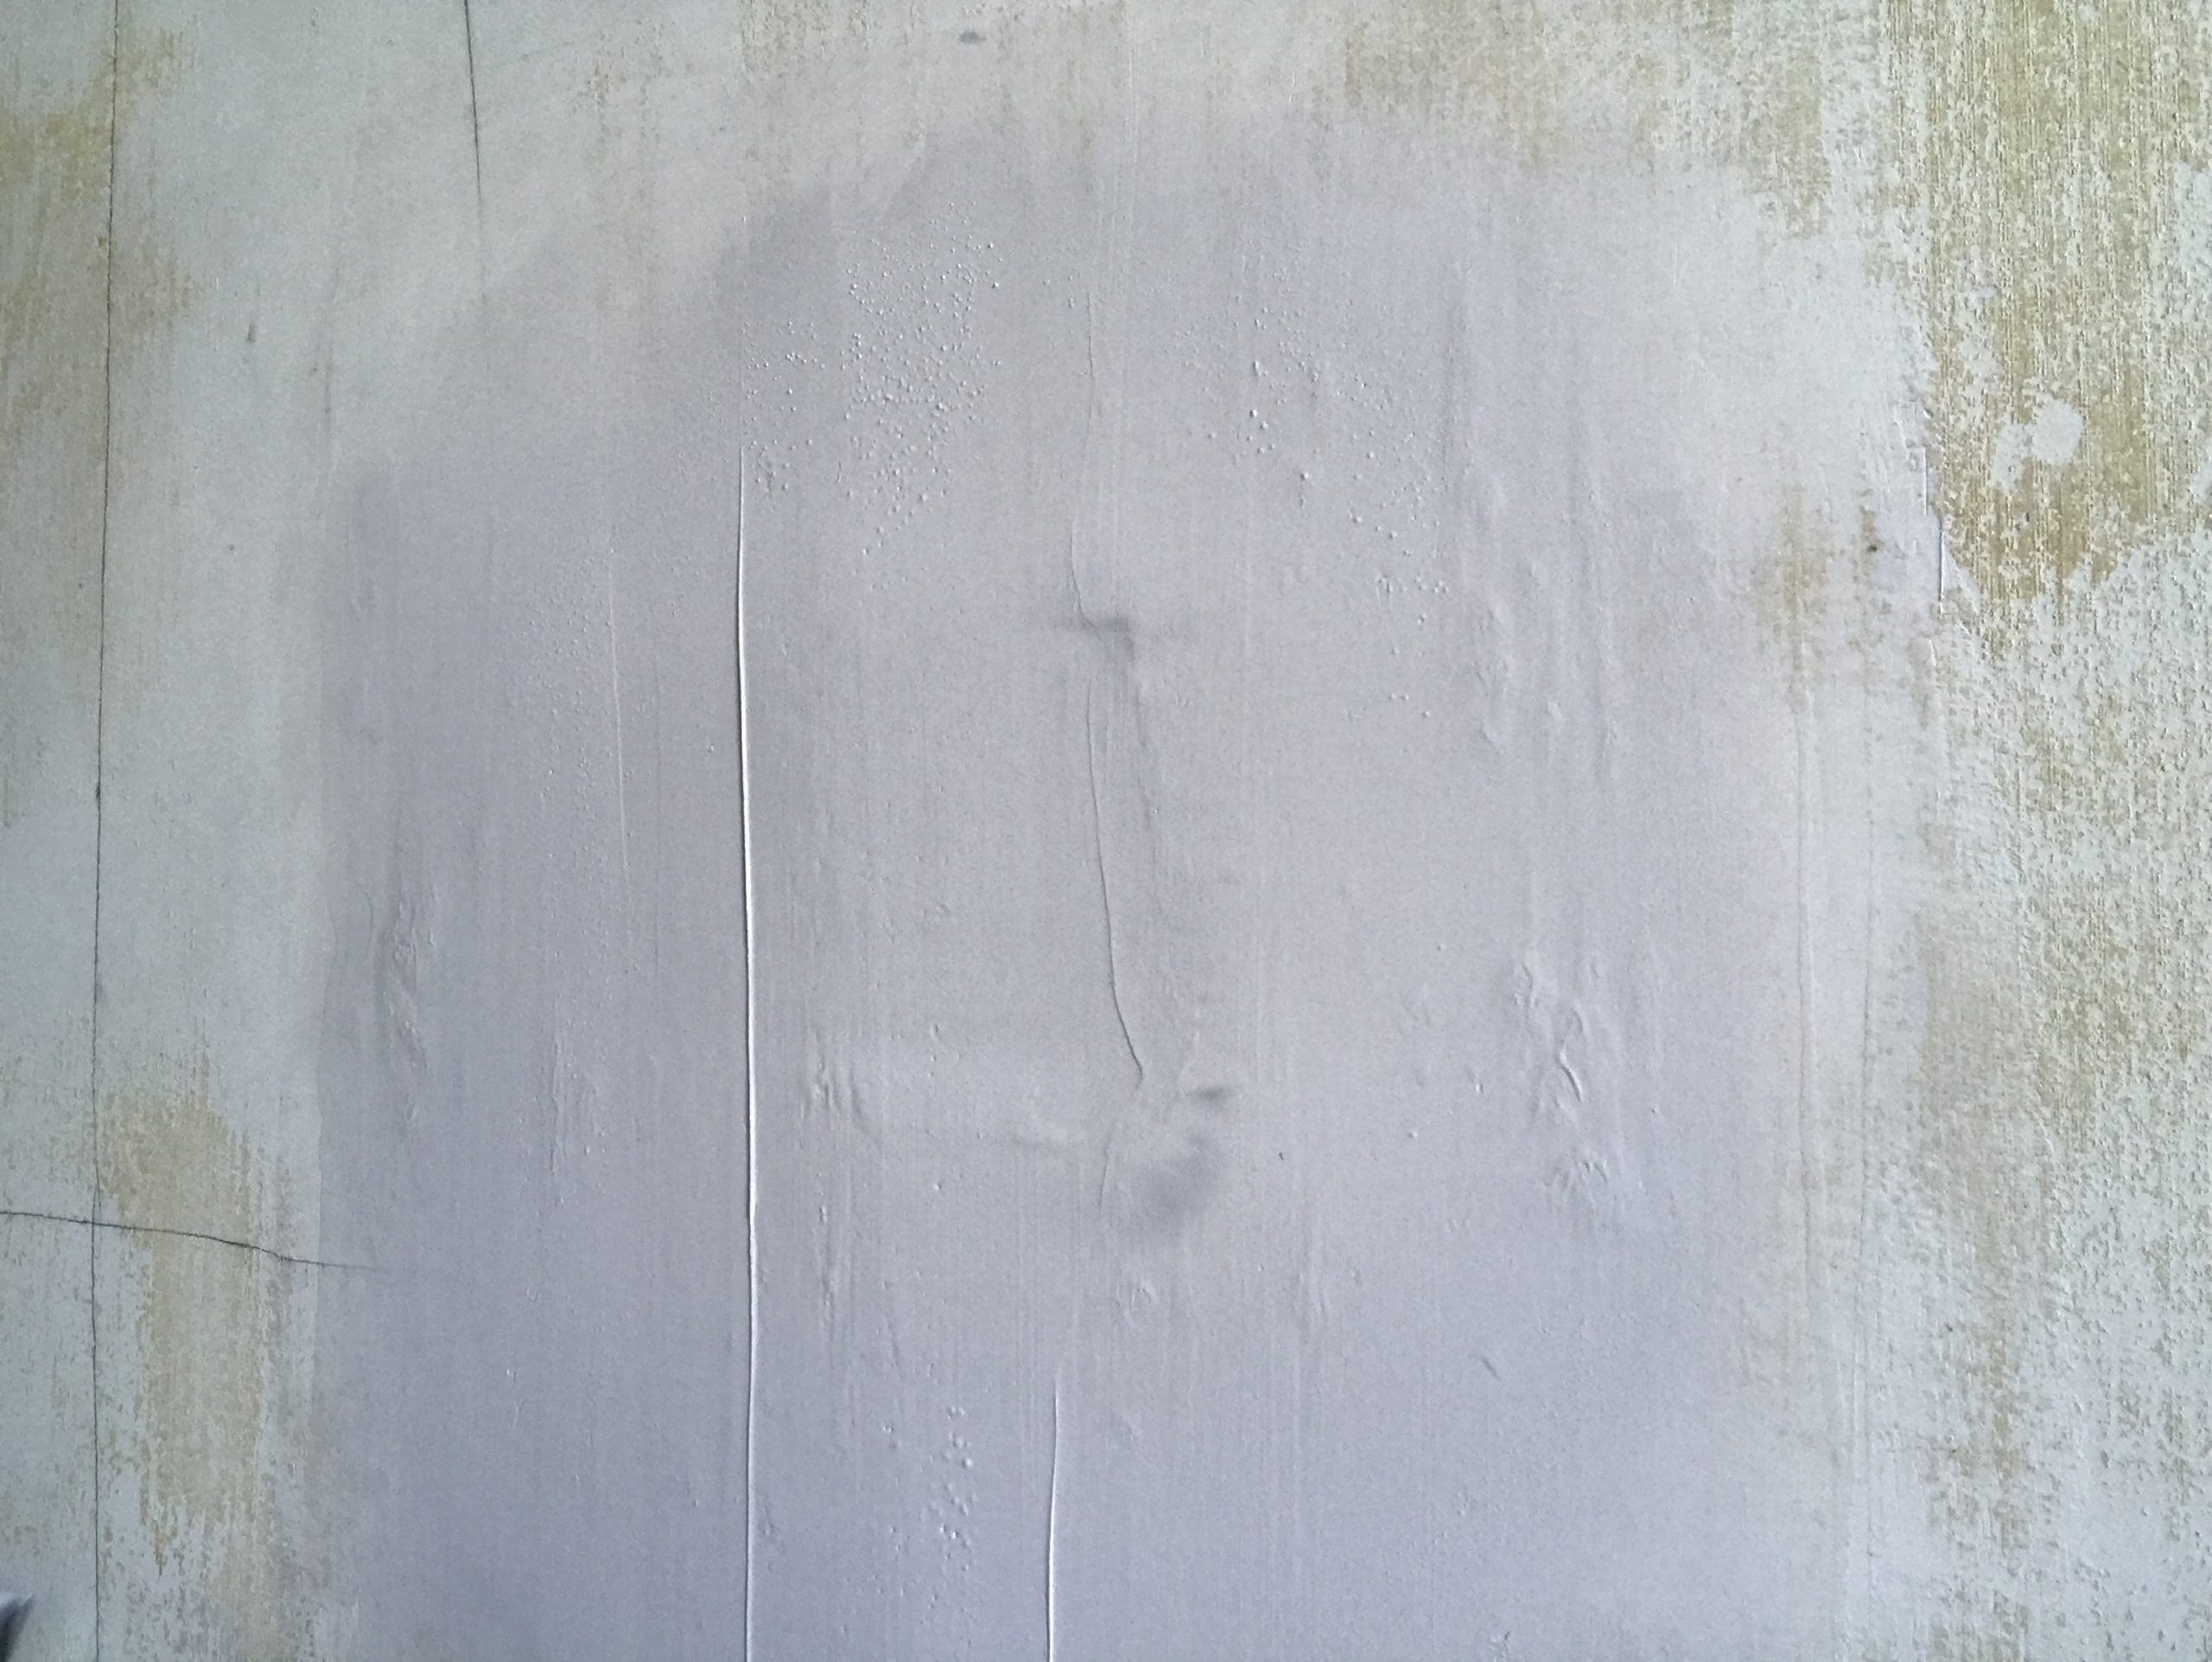
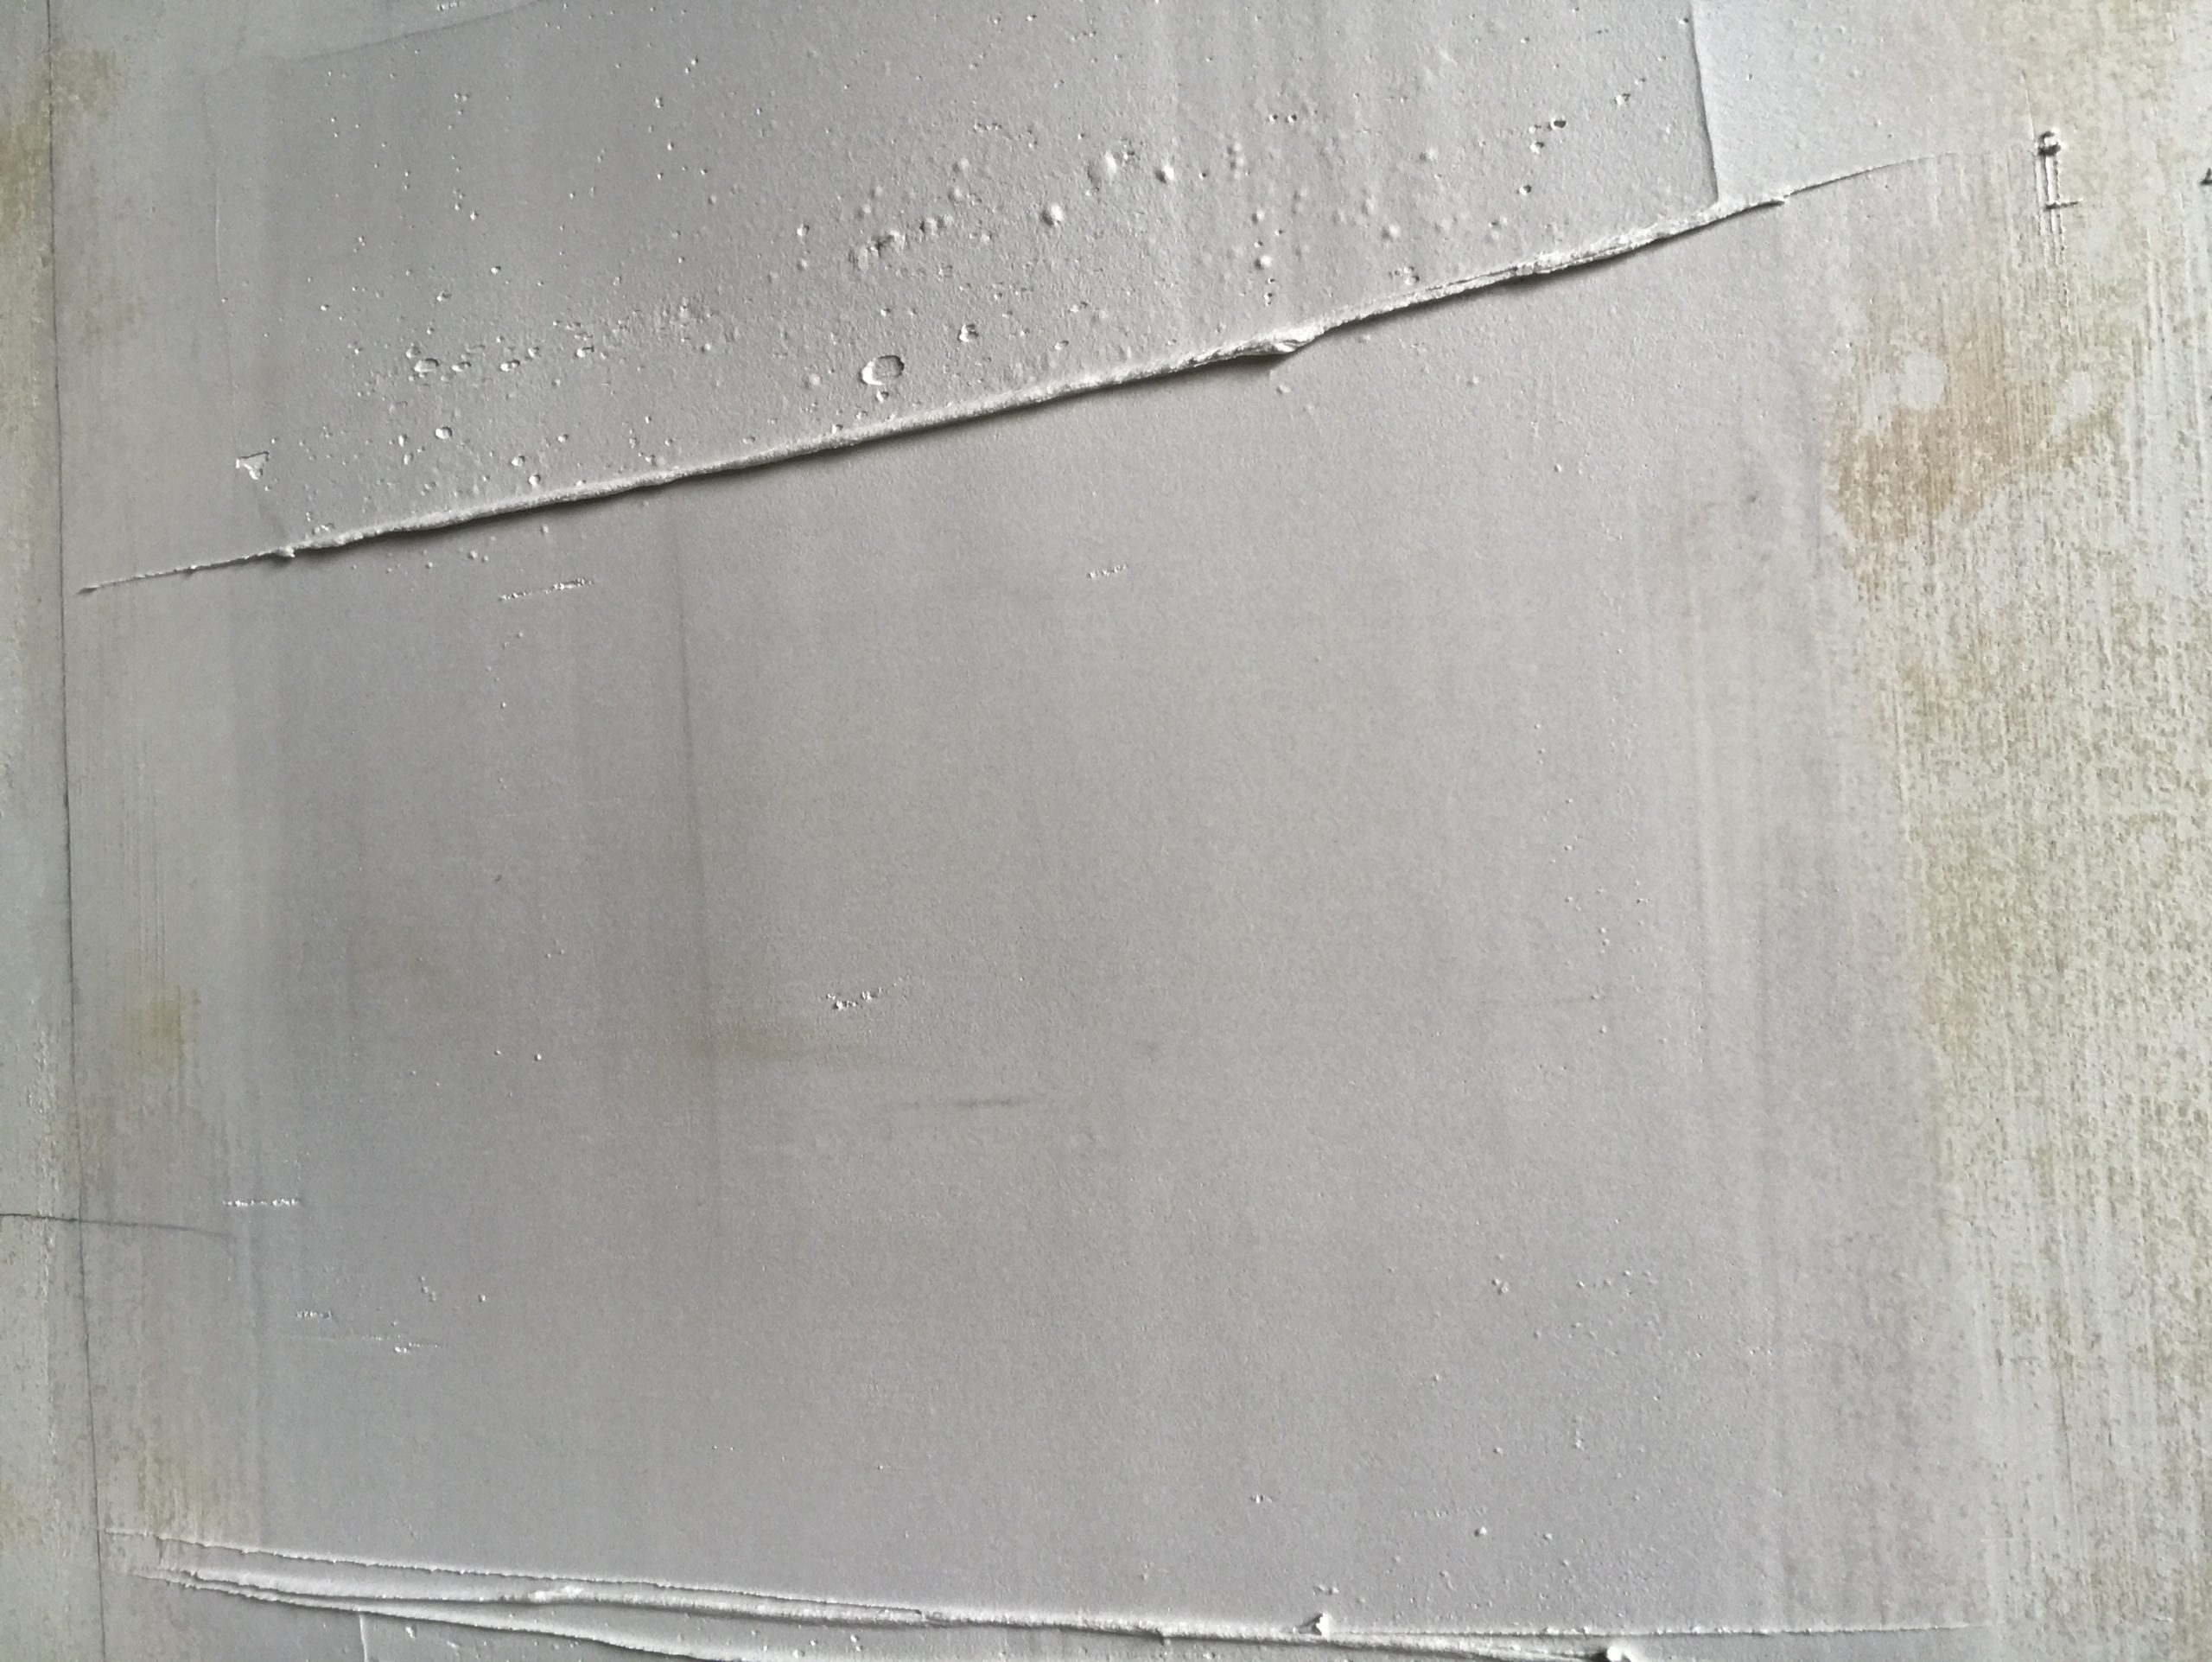
Step 6: Make a tight skim coat around the patch with your 6” knife and let it dry. You can use a heat gun to speed this up if you would like. The idea is to start feathering out the paper of the California patch. Let this dry completely.

[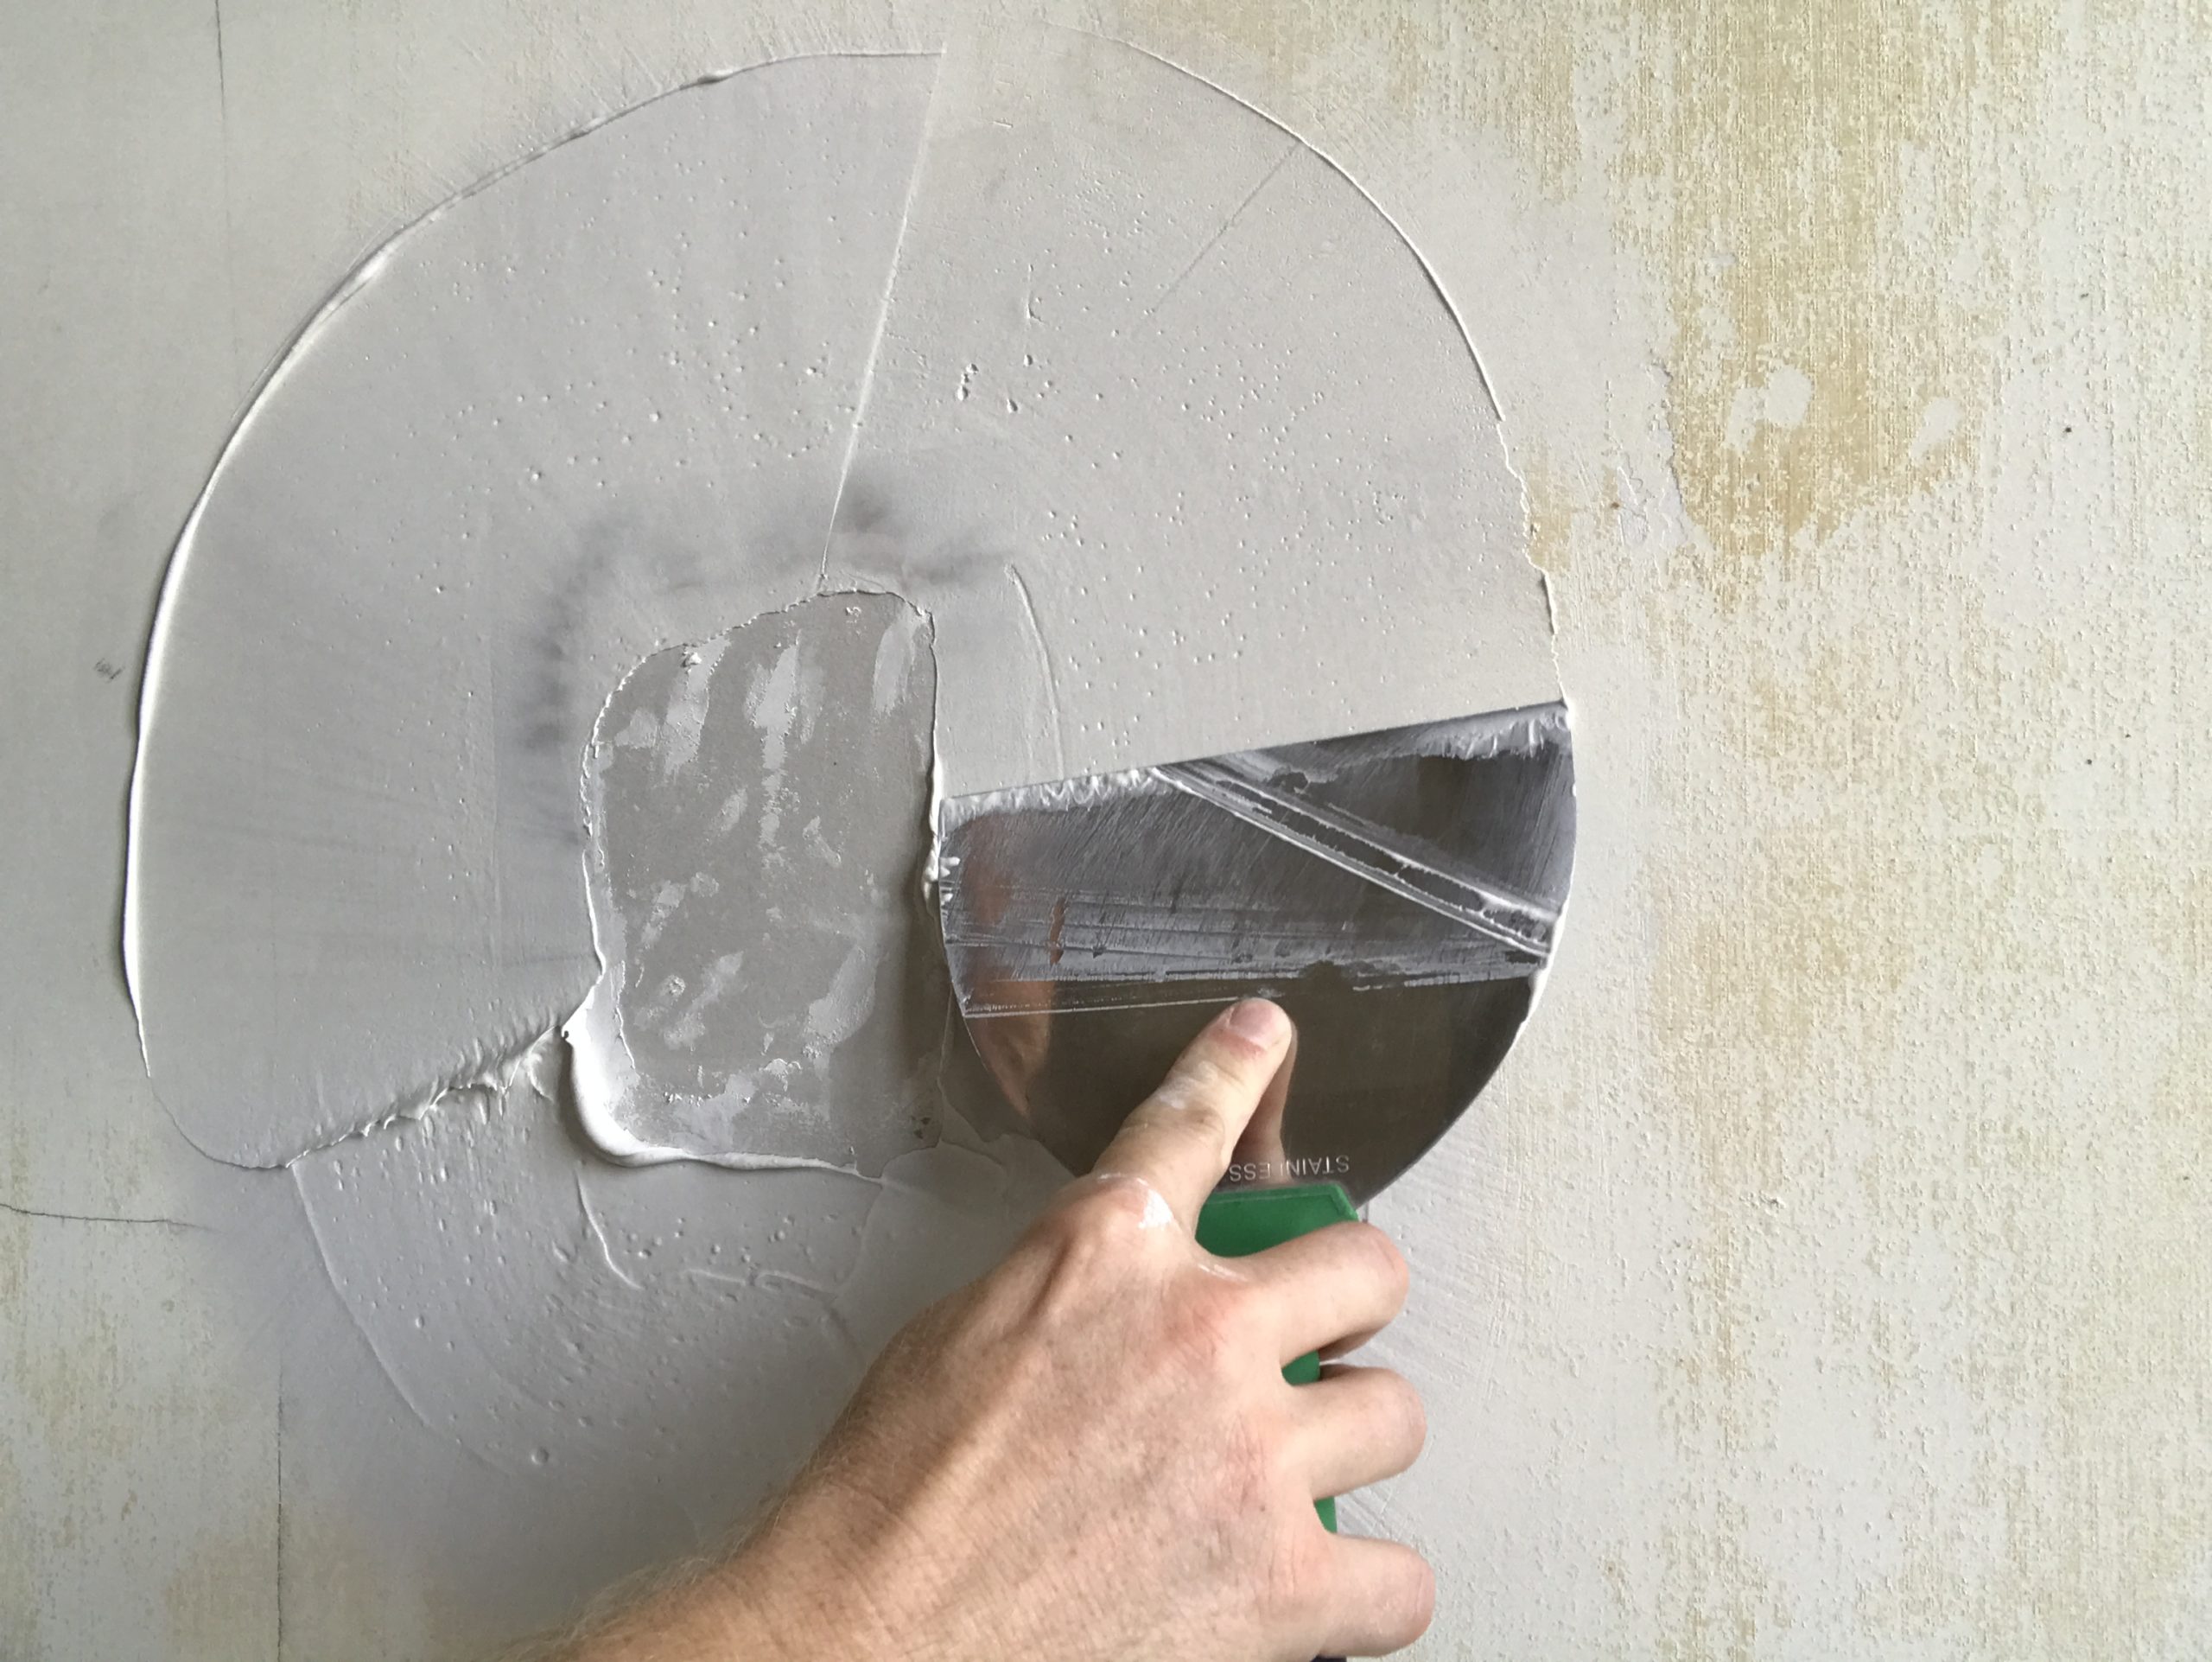
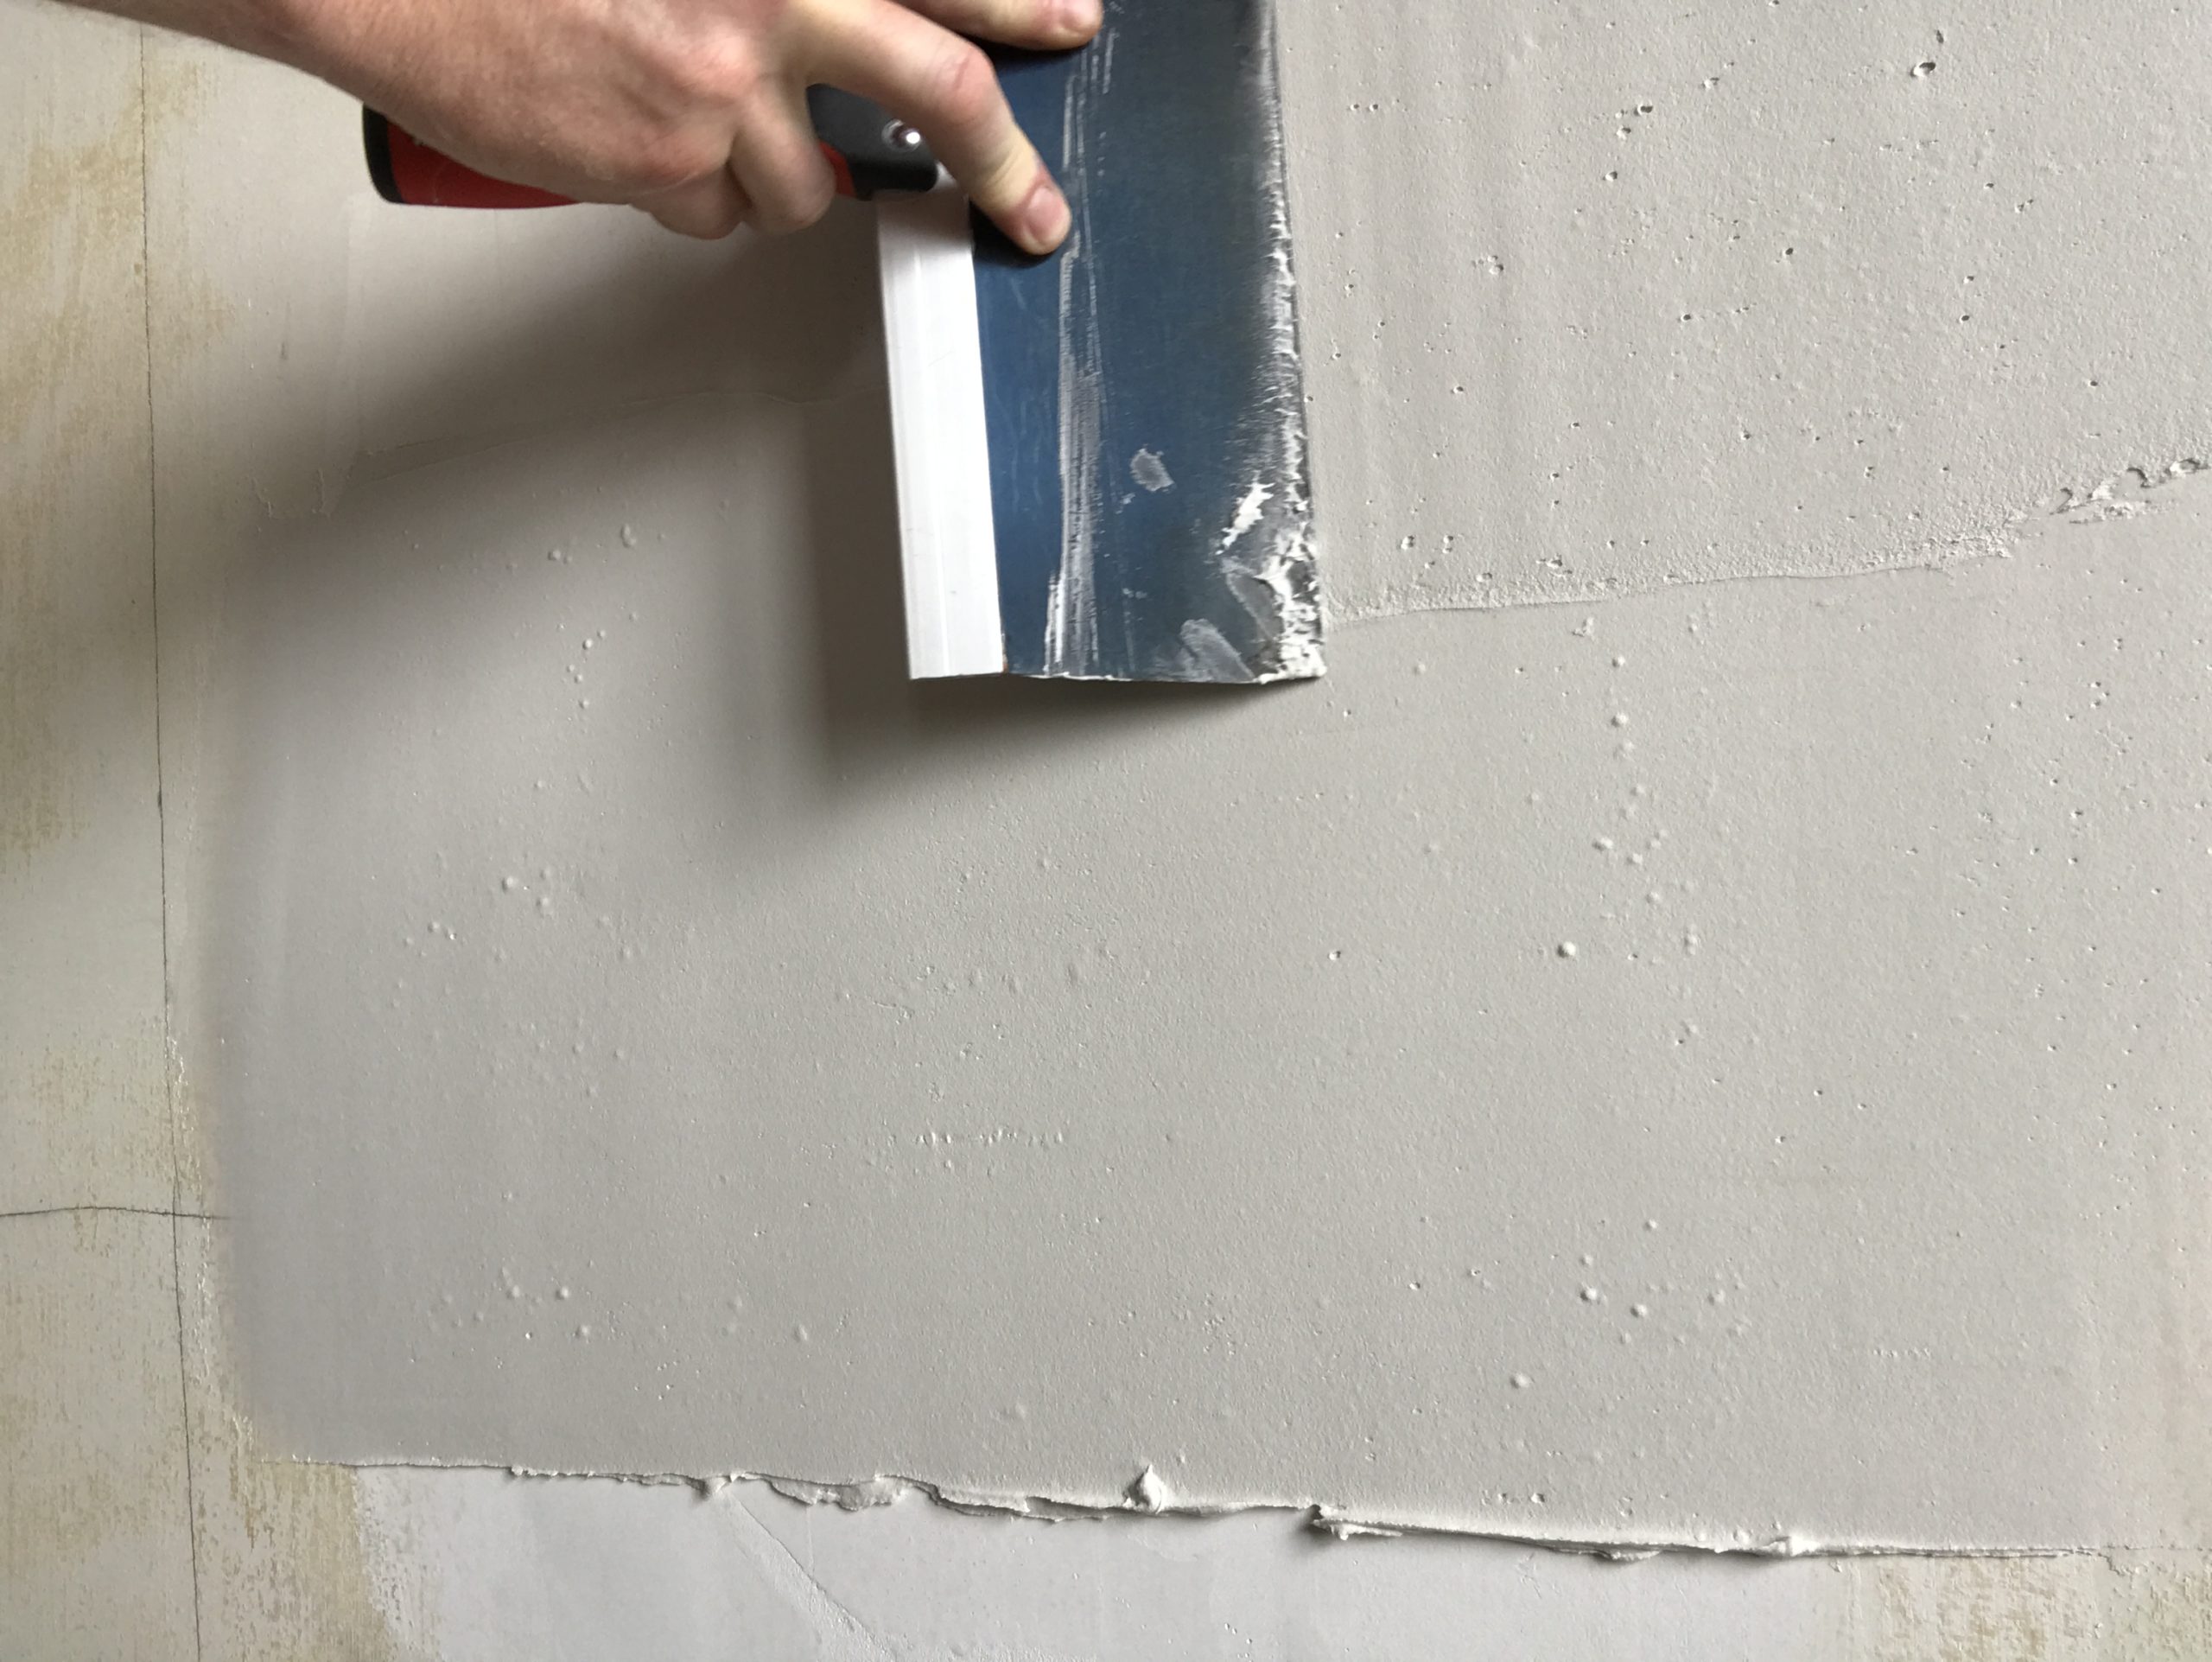
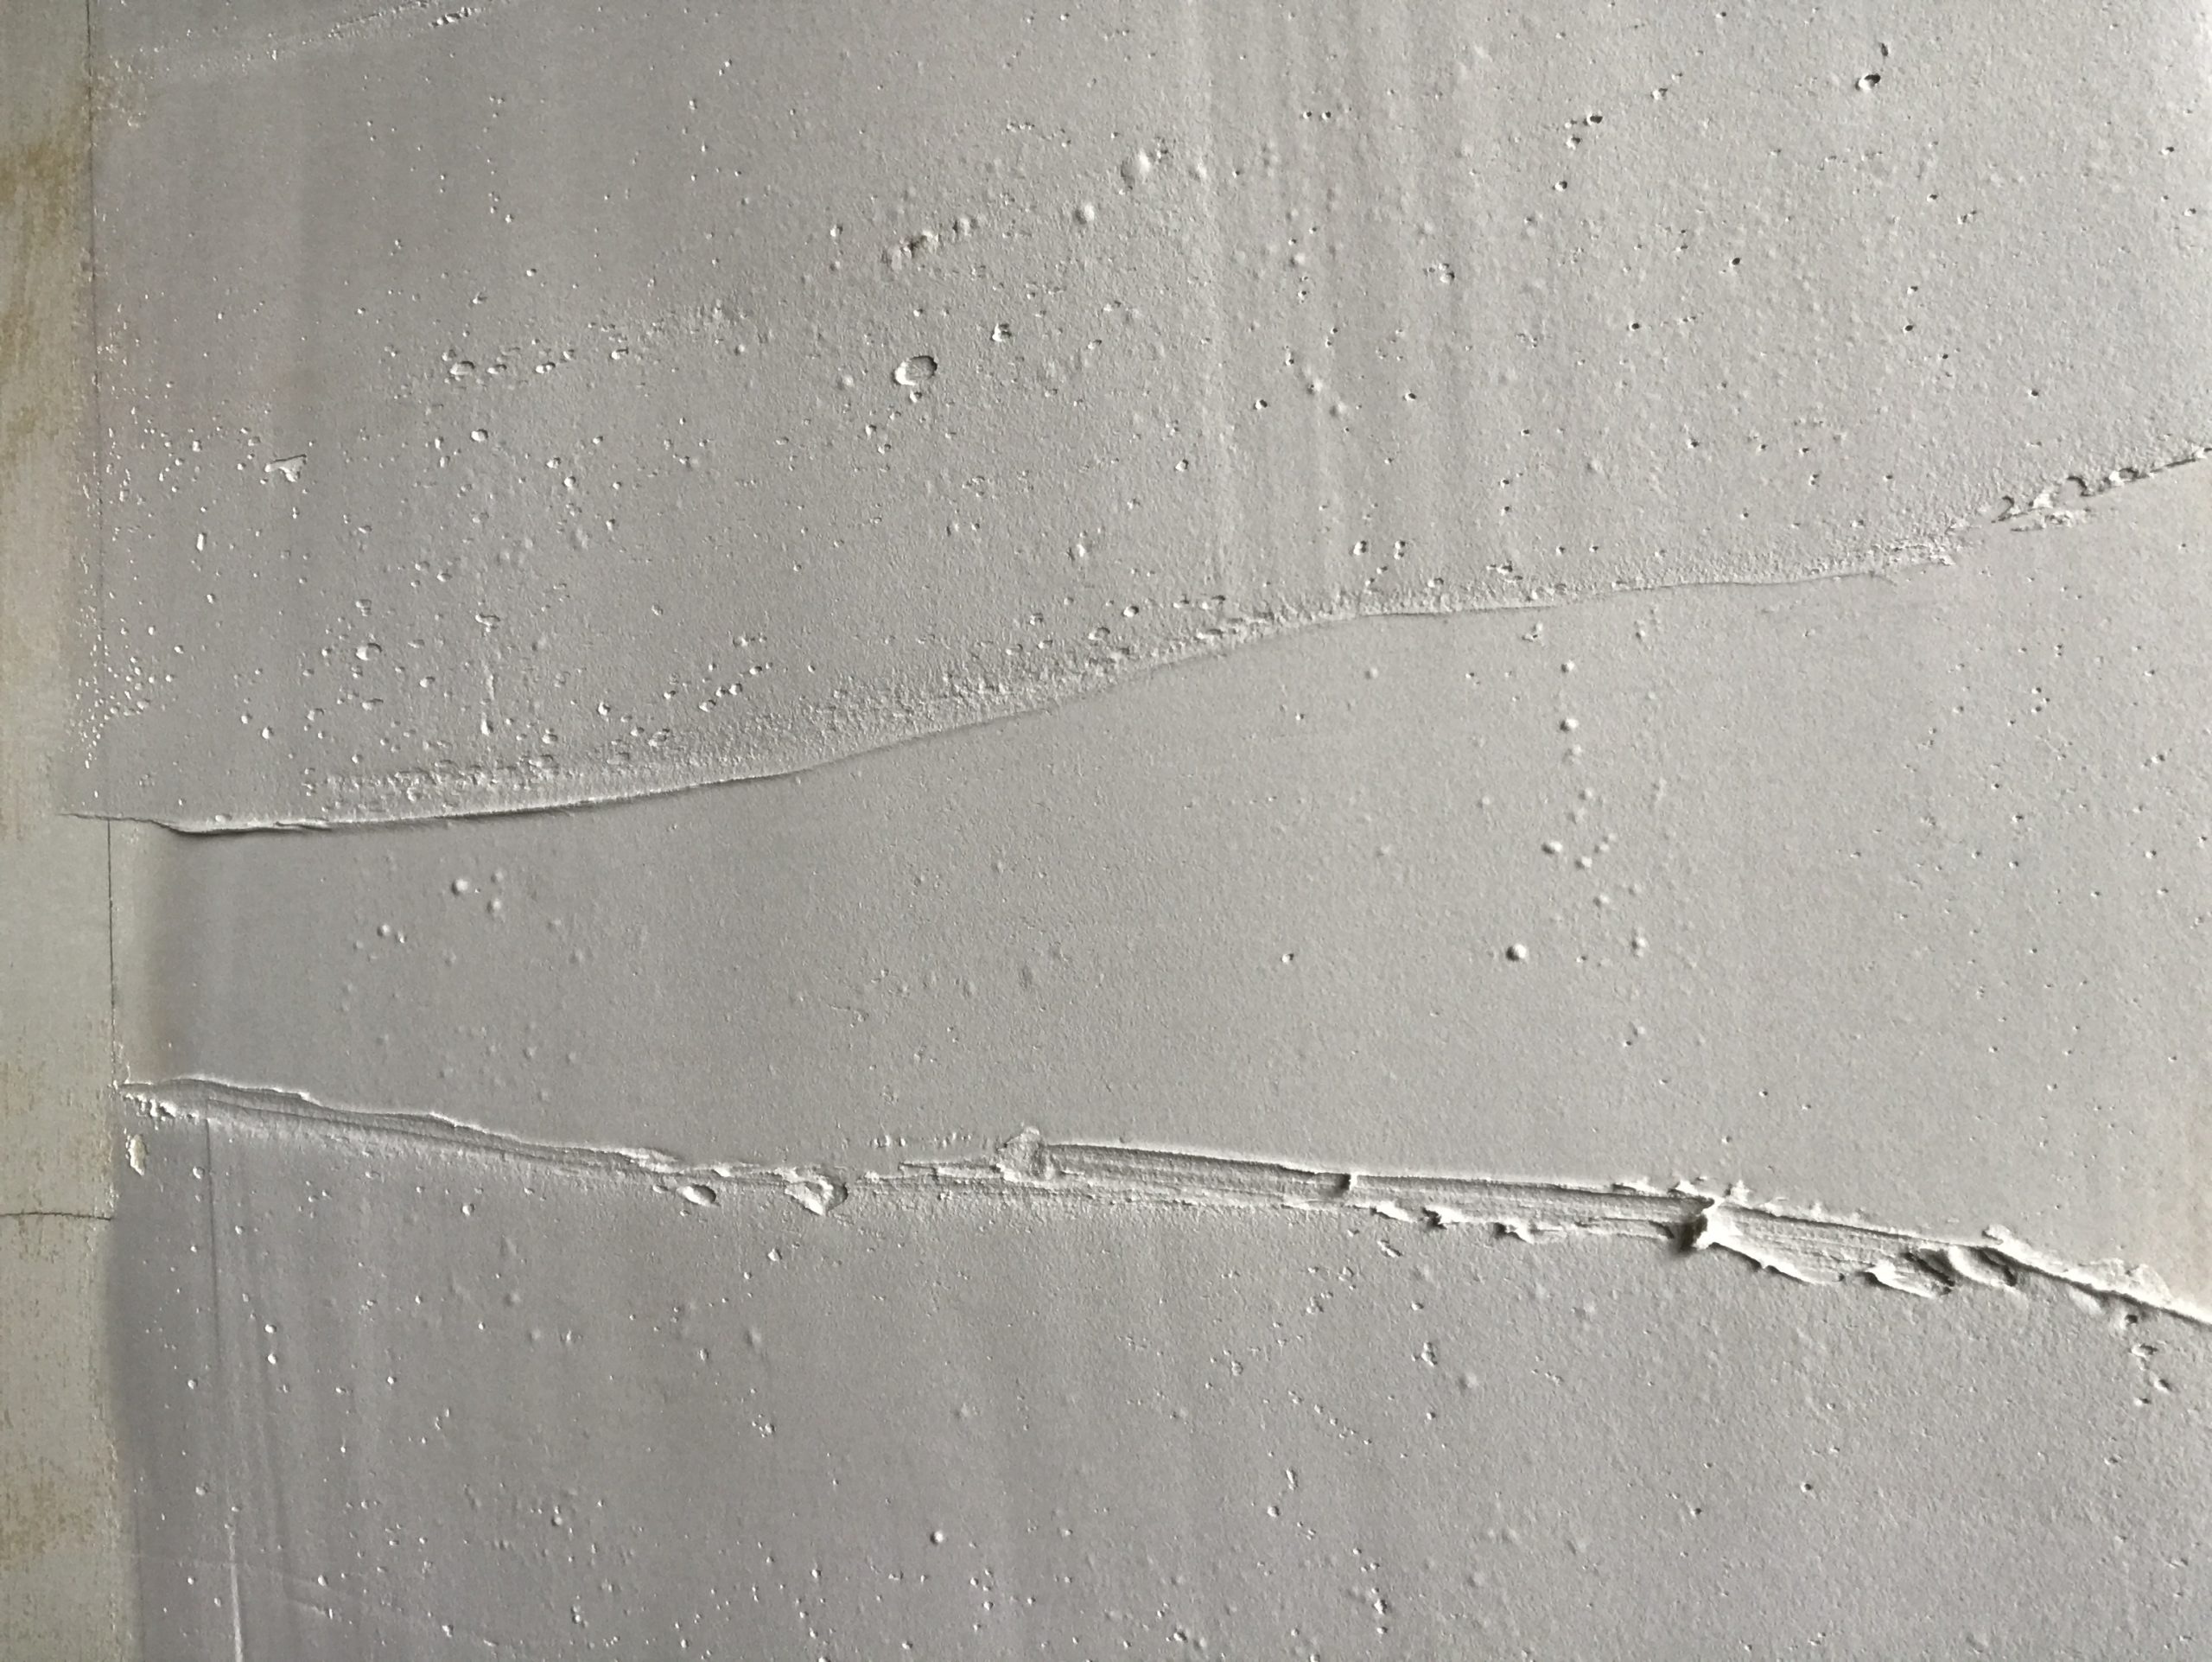
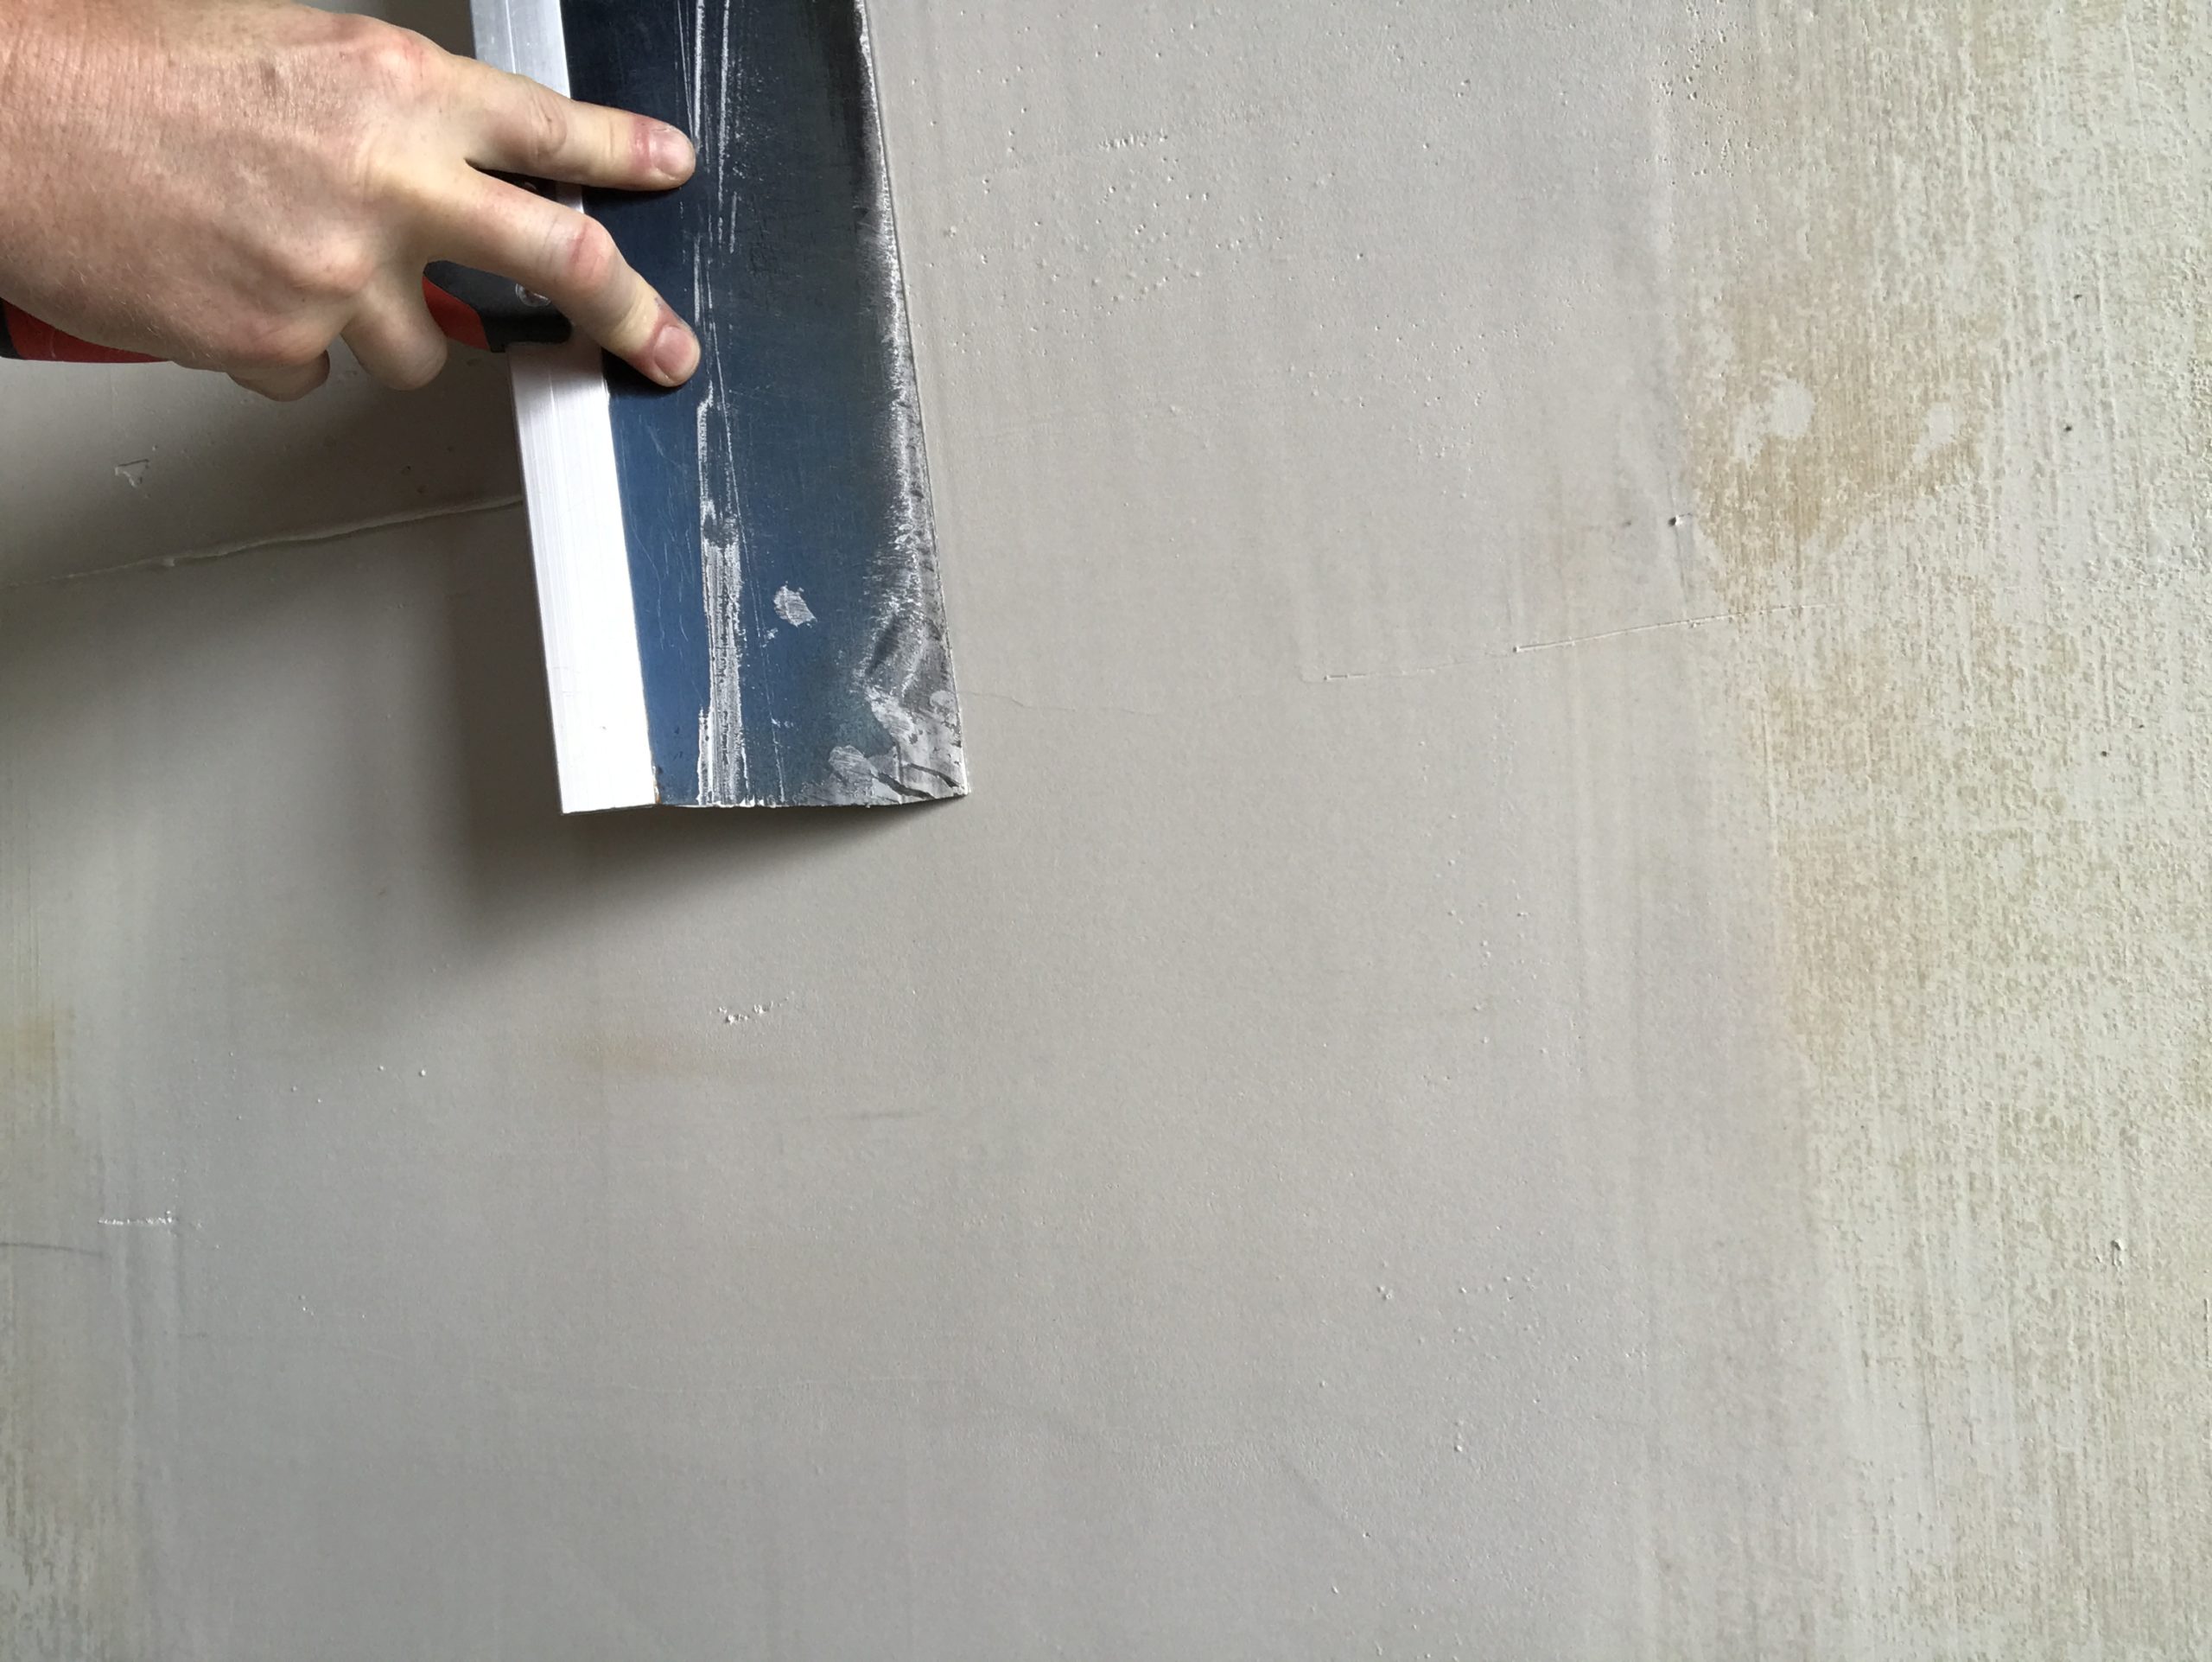
Step 7: With a 10” knife, fill and skim the patch. You can use hot mud on the second coat or start using bucket mud. This should take 3 passes, depending on the width of your patch. In our demonstration, the patch was about 6” wide. The first two passes start at the outside edge and the last pass goes down the middle. You’re essentially ramping up to the California patch and ramping back down. This will make the width of your patch around 24” or so.

Step 8: Let it dry completely. If you used hot mud, you can start speeding it up with a heat gun after 20-30 minutes. You’ll see the mud turn white as it dries. Wait a few minutes as the water will draw to the surface again before hitting it with a heat gun.
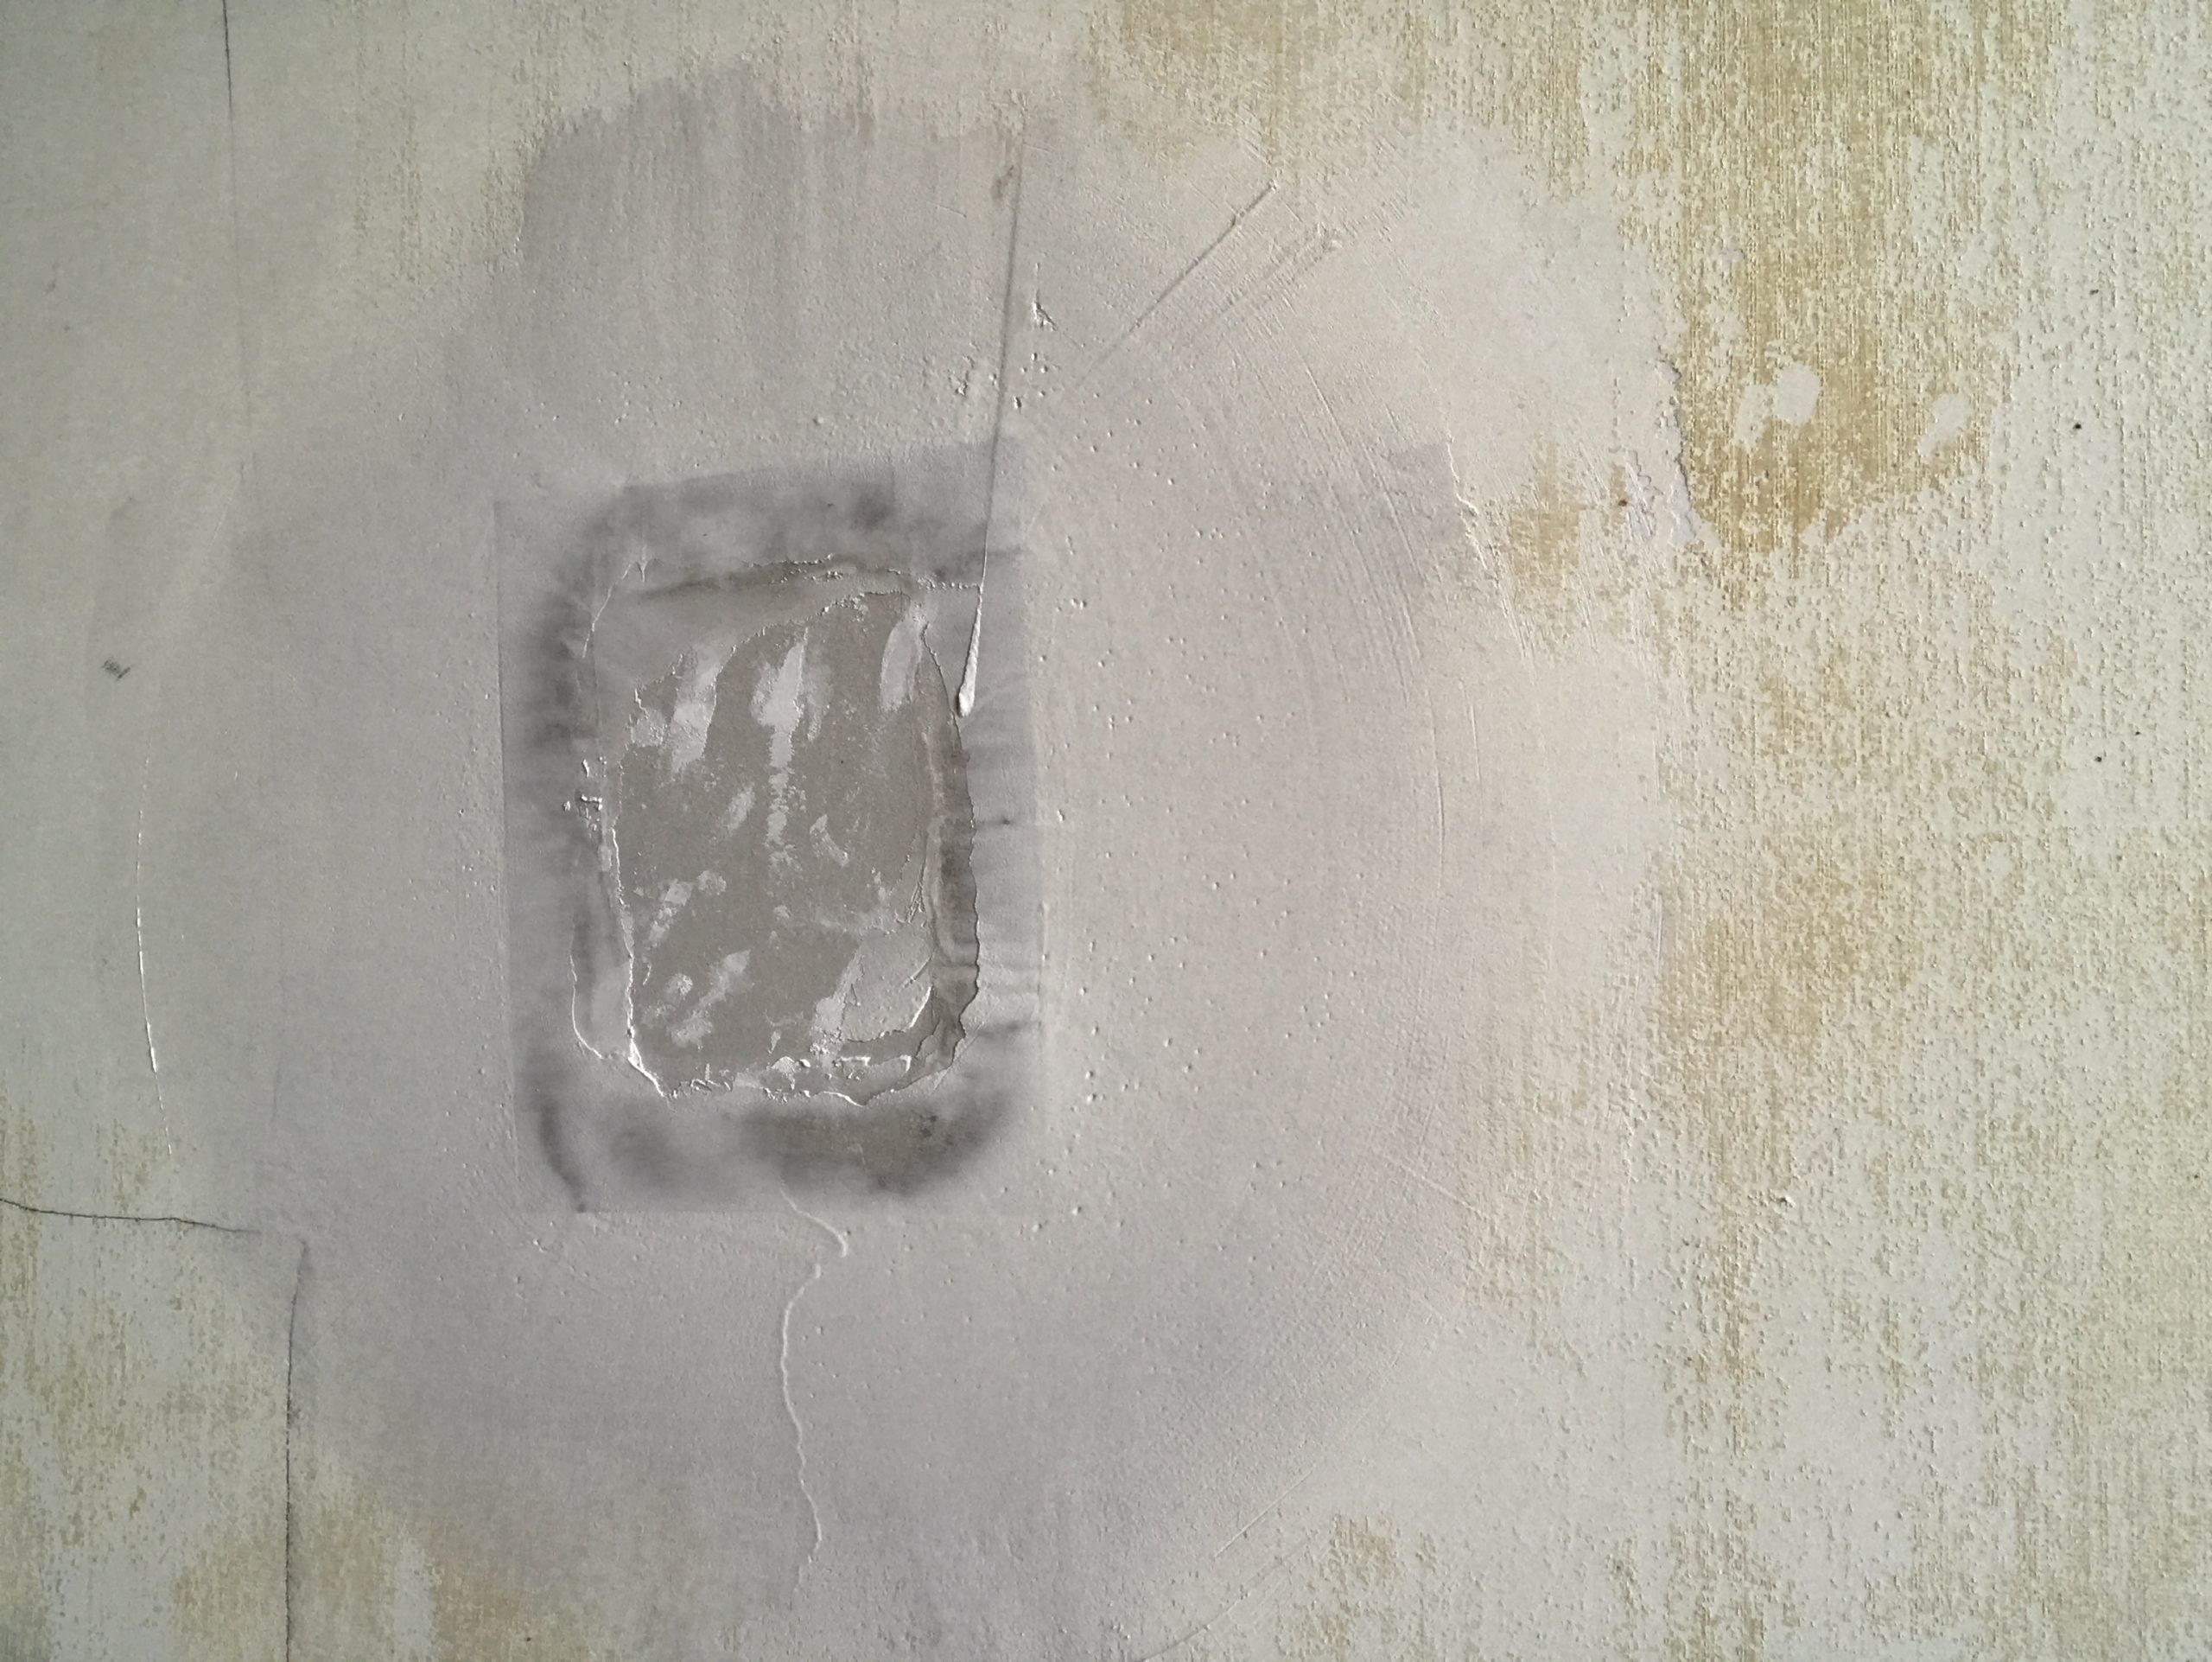
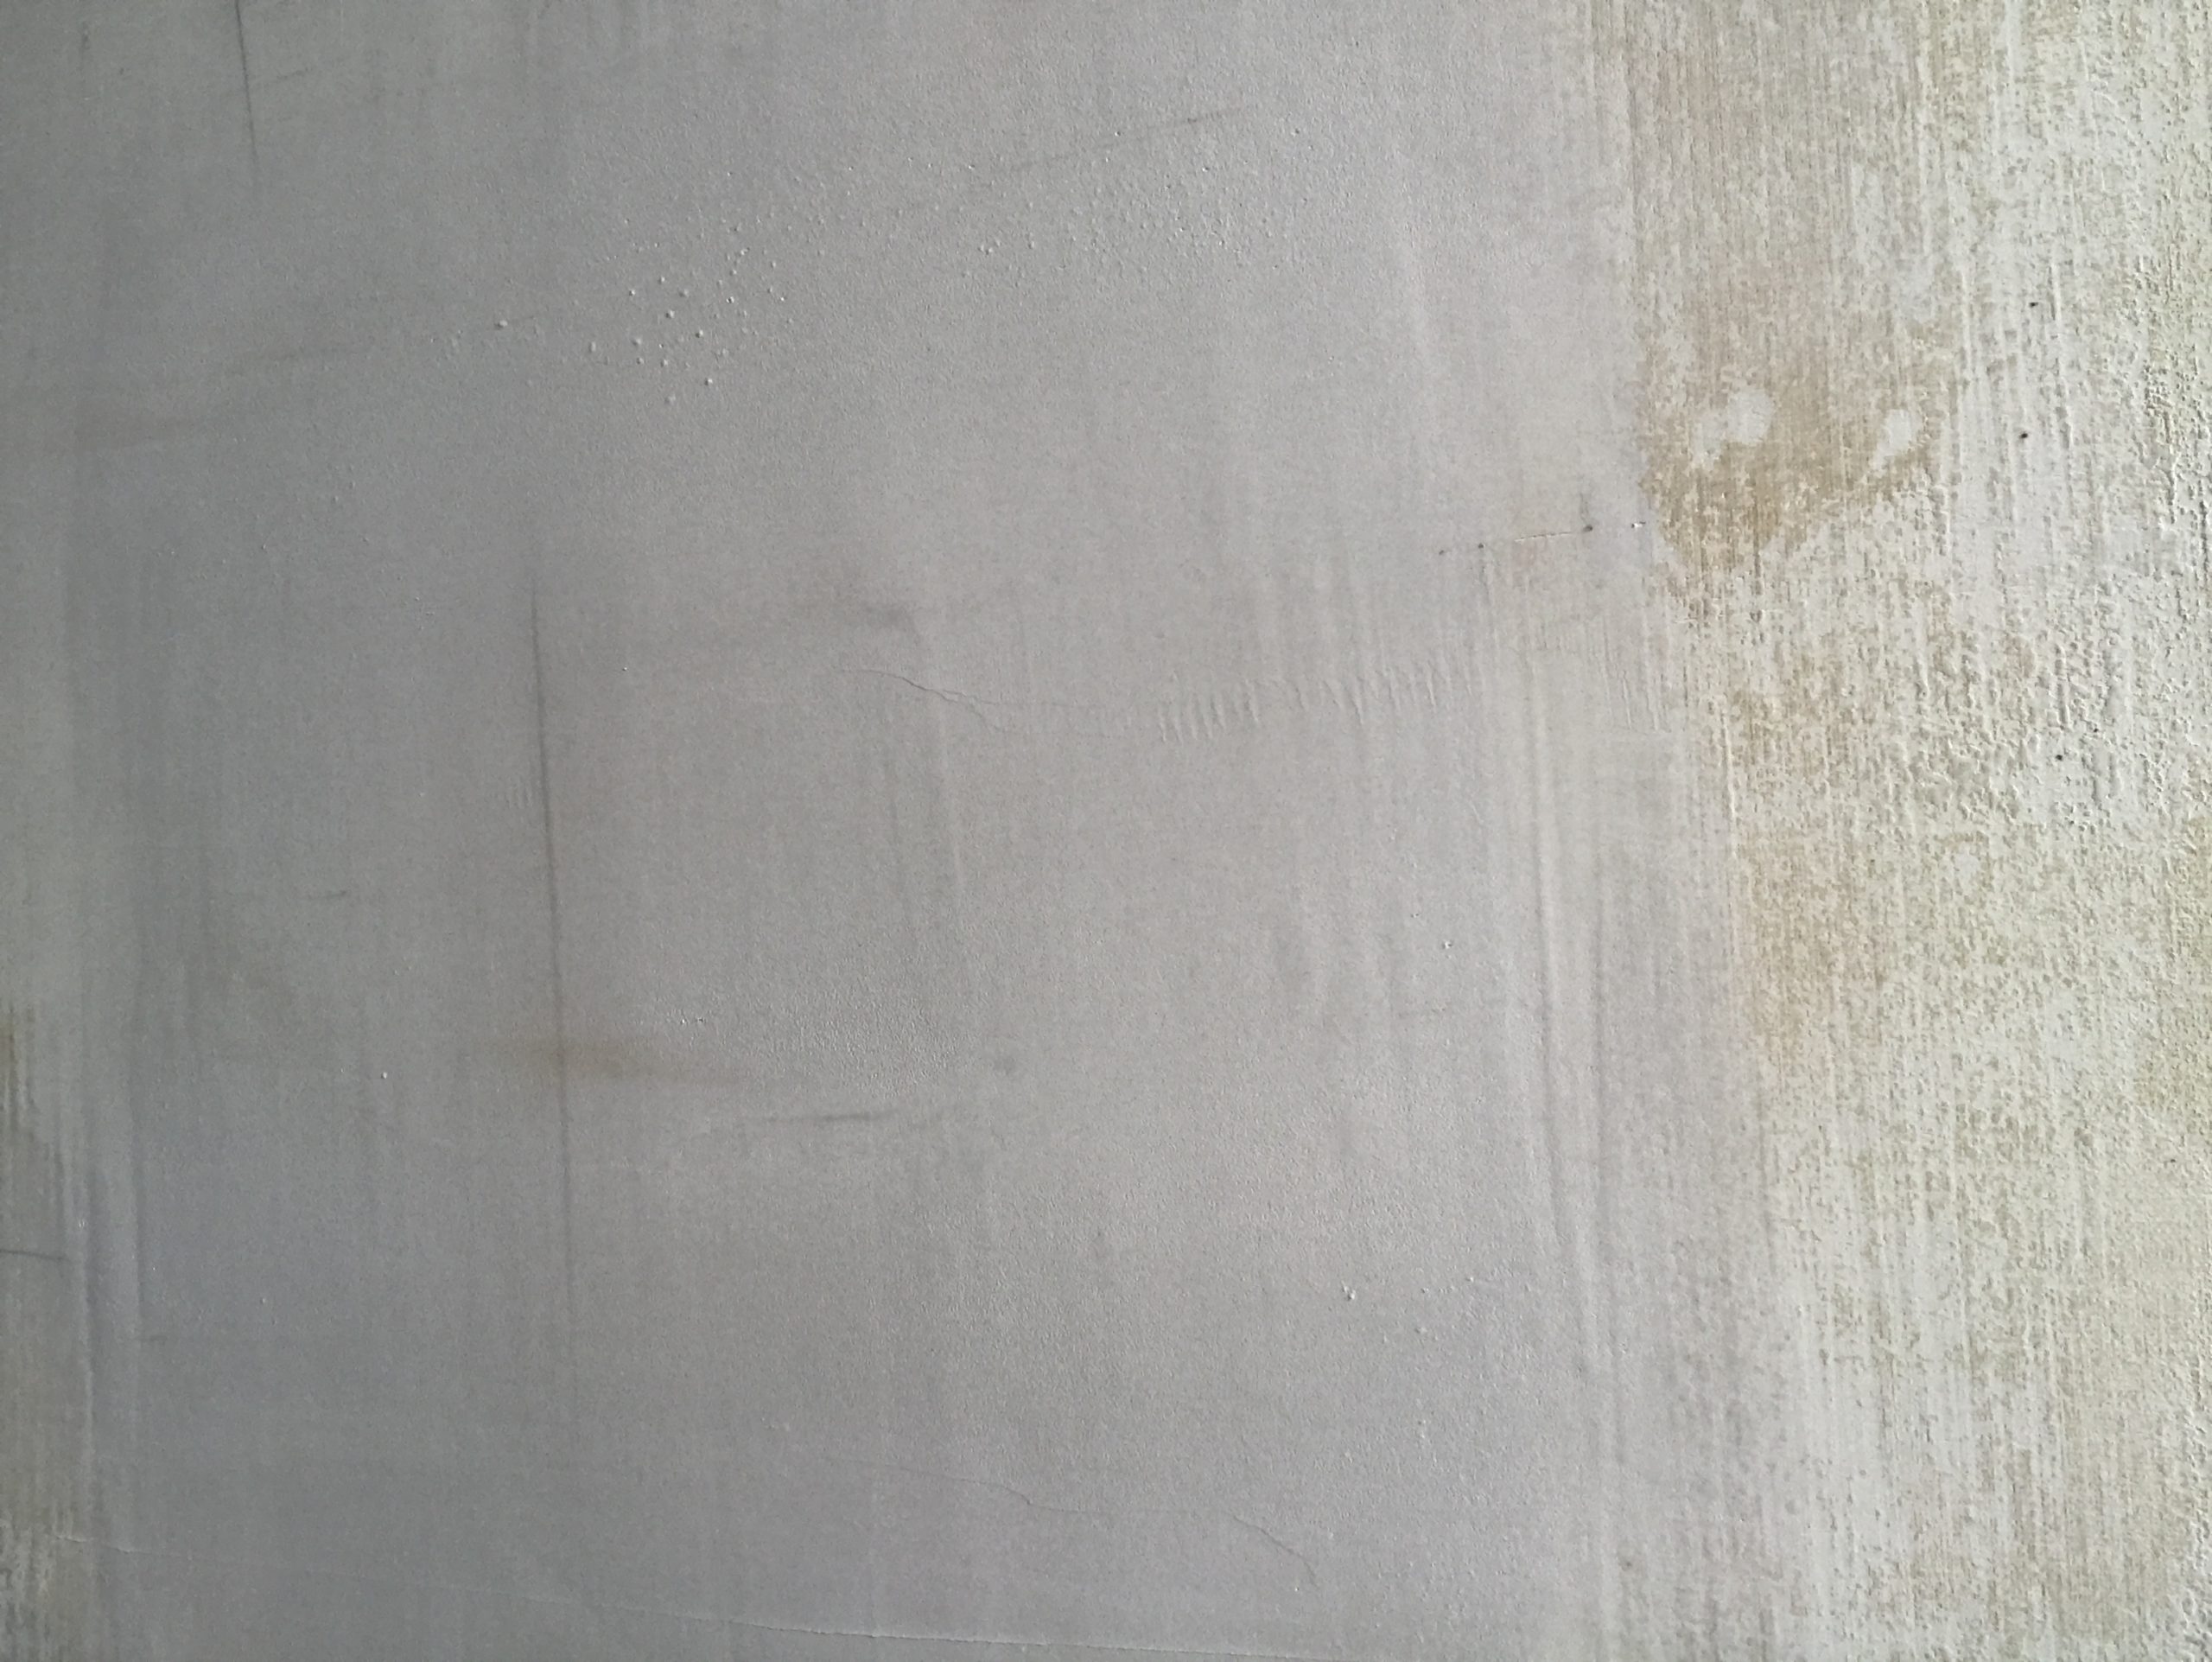
Step 9: Once it finally dries you can put a skim coat on for good measure. I like to skim perpendicular to the first coat. This ensures that I have filled any voids and have a gradual ramp from all directions. I start with a pass down the middle with a 12” knife and then make a couple of passes to the top and bottom, keeping it nice and tight. The goal here is to fill any pinholes that came up because you didn’t wait for it to dry between coats like we told you to in steps 6 through 8. This is where patience would have been helpful.

Step 10: Now you’re ready to sand. And that’s the amazing thing about drywall: it saves the worst part for last.
At this point, you’re finished with the patch. Now it’s just a matter of priming and painting. Which, if you have done things correctly in the past, your significant other thinks you are incapable of. But that’s another tutorial altogether.
So bring on the electricians and pool cues. You have nothing to fear!
The next time you find yourself with a fresh new hole in the wall, don’t panic. With a scrap piece of drywall and a little gumption, you can fix it yourself with a California drywall patch.


I’m 52 single female and am
Failing miserably at fixing my hole. I have got lumps and bumps I should have just left the hole.
Wow!Nice content
Ha dude this was a great read. I totally have your same sense of humor. Super helpful step by step instructions and pictures too. Nice work!
I’ve done the patch the hard way before… losing a couple of boards behind the wall?. Indeed, went through the five stages of grief! Love your sense of humor, illustrations, step by step quide and list of tools.
I personally have gone through the five stages of grief referenced here. Thanks for the laugh.
Haha. I imagine we have all been there. Hopefully this brings some comfort to grieving homeowners 🙂