

I’m a pretty big fan of light. I like when light is around. After all, I can’t see without it and when there’s a lack of light, I’m the first to alert everyone within shouting distance by immediately stepping on a Lego and screaming out in panicked pain (and shedding a quiet tear in the dark). So, after the three thousand four hundred thirty second time of stepping on some sort of sharp toy in my daughter’s dark cave of a room, I decided to install a light kit on her ceiling fan.
Now that she’s older and I’m not worried about her jumping on her bed and smashing her head into a glass light over her bed, I decided it was time she needed a brighter light for her room and announced to her delight that she could pick out the light for her ceiling fan. So we got in the Jeep and headed down to our local Lowe’s to pick up a light kit for her room. And that was when everything changed from an “easy as pie” job to a long and tedious task that could have been comparable to a courtroom appointment and dentist office visit at the same time.
Your Honor, I Rest my Case

It wasn’t as if we had a lot of selections to go through at the store, just four different lights to choose from. Two of them weren’t even the same color as the fan: one was more like some strange chandelier UFO light that I’m sure never would have fit her fan anyways. The fourth light was a perfect fit three-bulb affair that I knew was the fan light kit that we needed to get.
After much debating over which light was the best, (I was sure I had a pretty good case why only one light was suited for her room) she had her heart set on the fancy chandelier that I was sure wouldn’t fit.
My daughter came back with a quick rebuttal and stated her case that it was the chandelier that matched “her style” best and that “it didn’t look like a UFO” and that it was what she wanted – or else. With arms crossed and a pouty face in effect, I was starting to lose my case quickly. But I knew the best place to attack the defense was in their weak spot – and that weak spot was ice cream.
So I scooped up the three bulb wonder, zipped out of the line with daughter in tow and sped to the ice cream shop in record time for a total compromise. Case closed your honor.
I thought I was home free. It could only be downhill from here, right? That’s where I was wrong.
Dentist Hours – The Installation Begins
After the court room deliberations were over and I had the light secured in my possession, it was time to work off all of that delicious ice cream – time to put in the light kit. The “ceiling fan install” was something I have been familiar with in the past and I felt like I knew what I was doing. This is where it went from “smooth sailing” to just like going to the dentist office and getting your teeth scraped with some sort of medieval hook.
Step One – Get your Stuff and Get a Friend
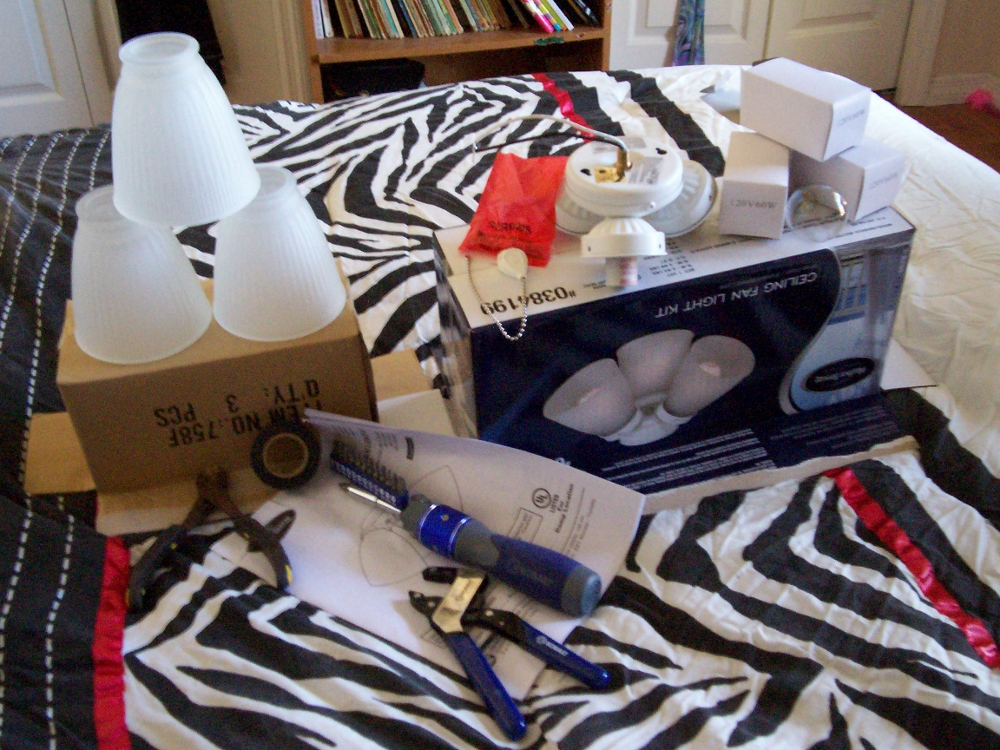
I gathered up all of the tools I needed, got all of the stuff out of the box and called my friend over to help feed me materials, tools and beer. OK, he drank the beer (it’s best not to mix electrical work and alcohol). It was the best decision I made that day. Besides taking the photos, he helped me out tremendously while I was holding the light kit and attaching it to the fan. Prep Tip: Always prep your materials and tools, but without a helper you’re helpless to use them when your hands are full of light fixture and wire.
Step Two – Turn it off or You’re Asking for It

Turn off the juice to the room or else you’re going to get shocked. Once you turn off the breaker, check the fan for power. It’s a good idea to get an inexpensive voltage detector. For a few bucks, you could save your life. I used my voltage detector to test for a hot line before moving to the next step. Shocking Tip of the Week: Don’t forget the flashlight!
Step Three – Pulling Wires
On the bottom of her fan, a small cover holds the wiring harness in place. It’s held in by three screws on the side of the housing. Once the cover plate is removed, it provides a connection for the light kit. Typically, there are two wires with a big white label that reads “fan light kit wires”. Hook-up Advice: If not clearly labeled, a pair of blue or black (hot) and white (neutral) pigtails are the two wires you’ll need to power the kit.
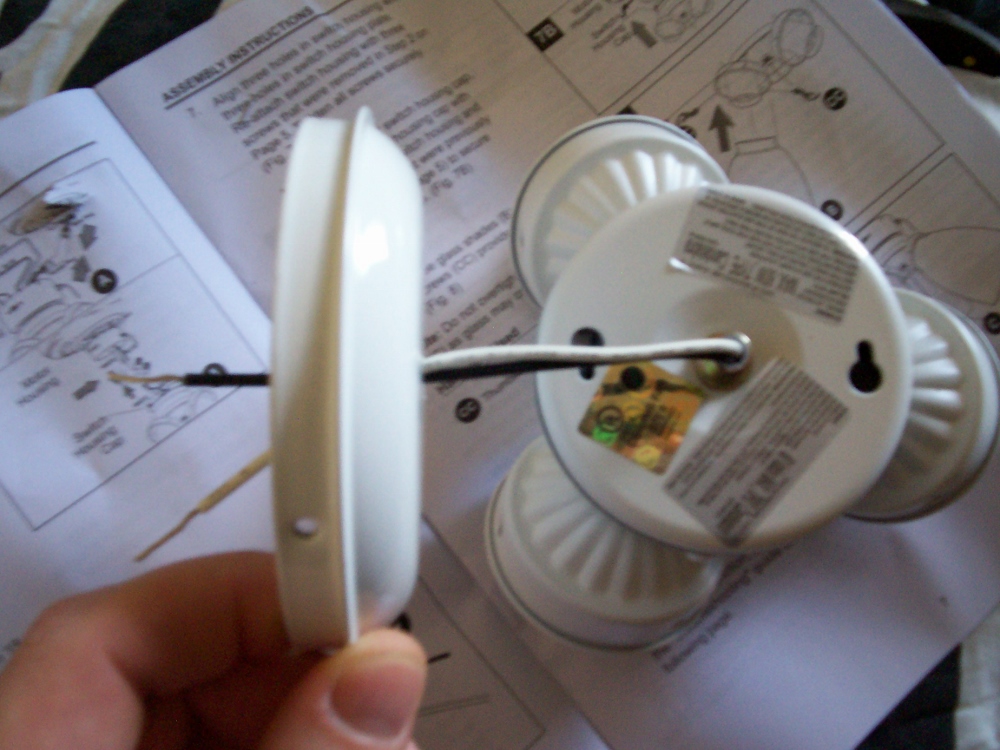
Step Four – Some Assembly Required
Like most directions that are written in seven different languages, they are bound to be wrong. Once I was directed to assemble the fan light kit in the air – piece by piece, I thought I’d make it easy on myself, skip the directions and assemble the light kit safely and easily on the ground. Super Sweet Assembly Tip: Put everything together first, then attach the light kit to the fan (Important – see step FIVE below!)
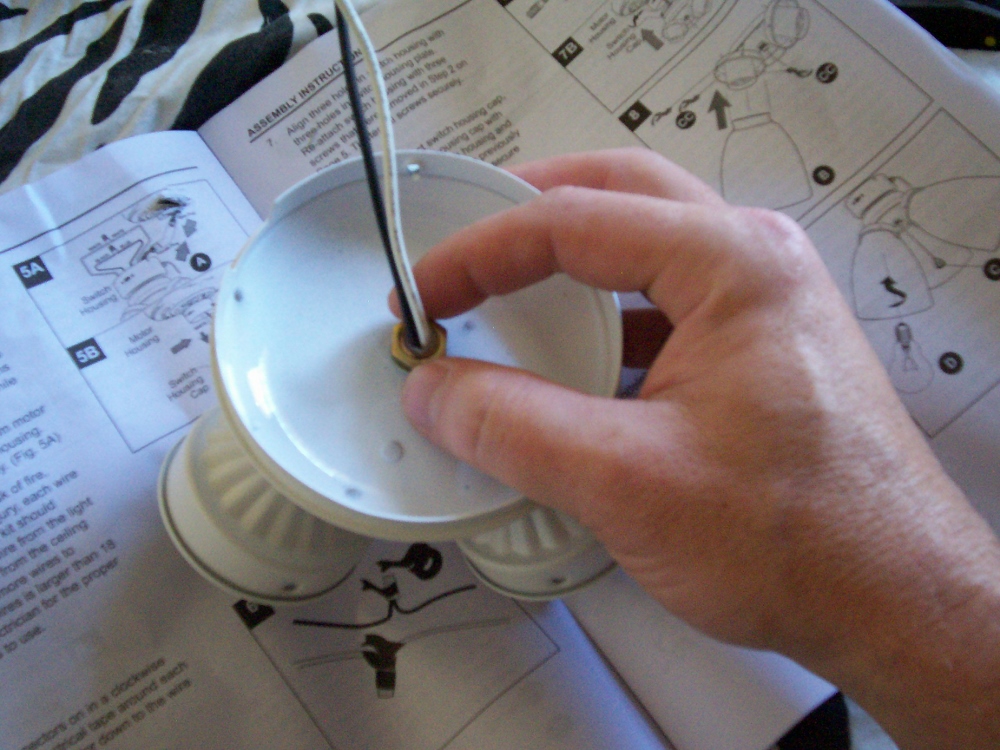
Step Five – Circus Balancing Act
Now That’s Talent – Not only can I pat my head and rub my belly at the same time but I can also hold onto a light kit with my ring and pinky fingers while tightening the wires[/caption]
Have you ever seen a circus act where the guy balances all of those plates on those poles while they’re spinning? That’s going to be you as you attach the wires together with one hand, holding the light kit with the other. There’s a reason they want you to put everything together not safely from the ground on your daughters comfy bed, but dangerously balancing on a ladder and working overhead – because it’s heavy and awkward to attach to the light kit to the fan once it’s assembled. Really Super Sweet Assembly Tip: Don’t listen to my advice in step number four. Instead, put the light kit together as directed.
Step Six – Testing the Light: Bang or Dud?
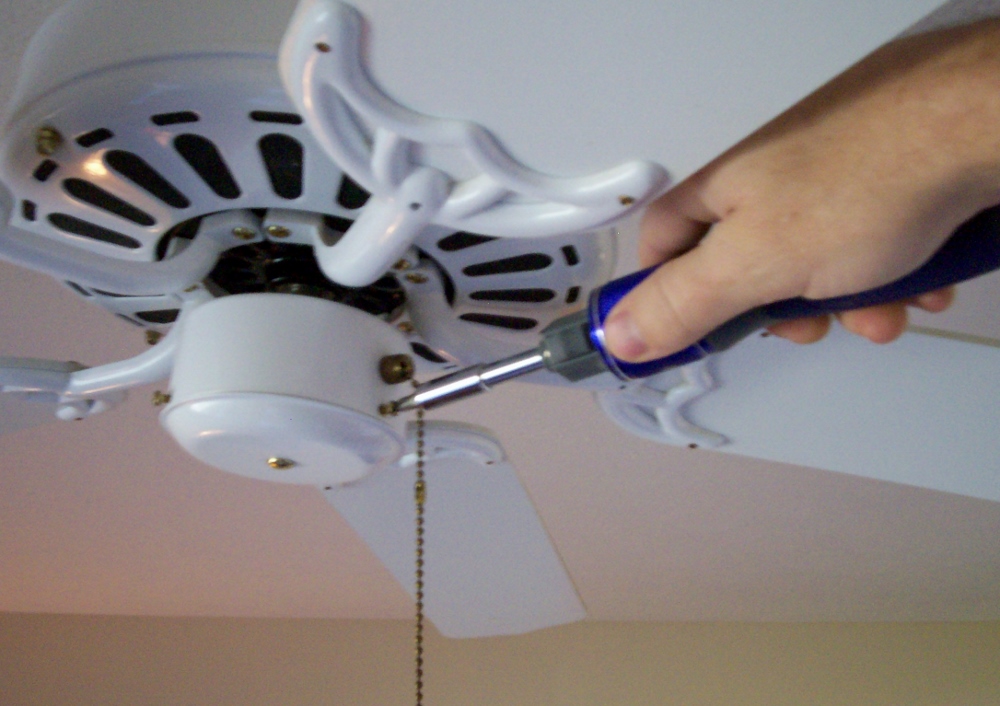
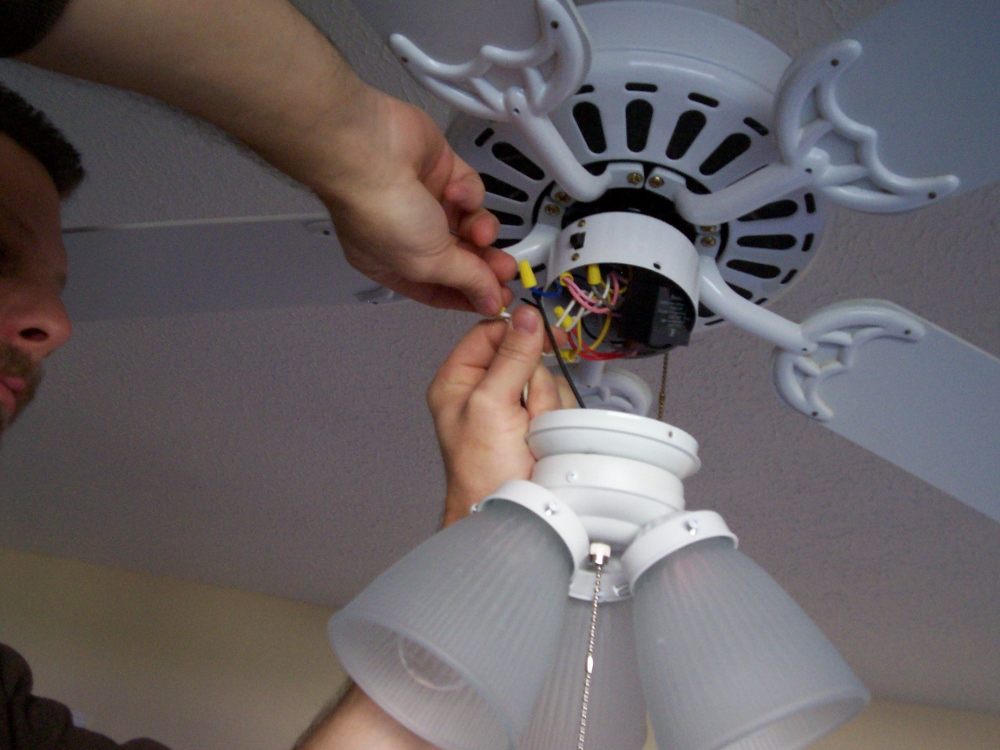
After you’ve twisted the black and blue wires together as well as the two white wires tighter, you need to wire nut them together. I like to wrap black tape around them for a little extra peace of mind. Once they are secure, stuff them into the fan housing and attach the light to the fan. Since my fan light kit attached directly to the light housing cover, it just took three screws to attach to the fan.
Turn on the power breaker at the main panel and SHAZAAM! Light, right? Wrong! What the heck happened?
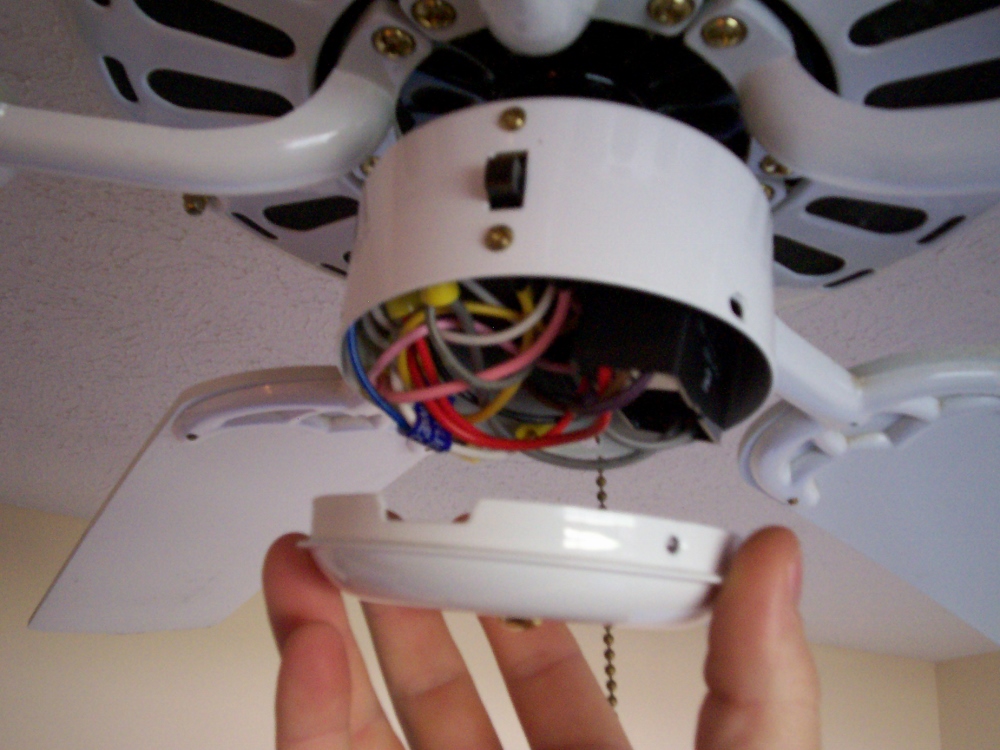
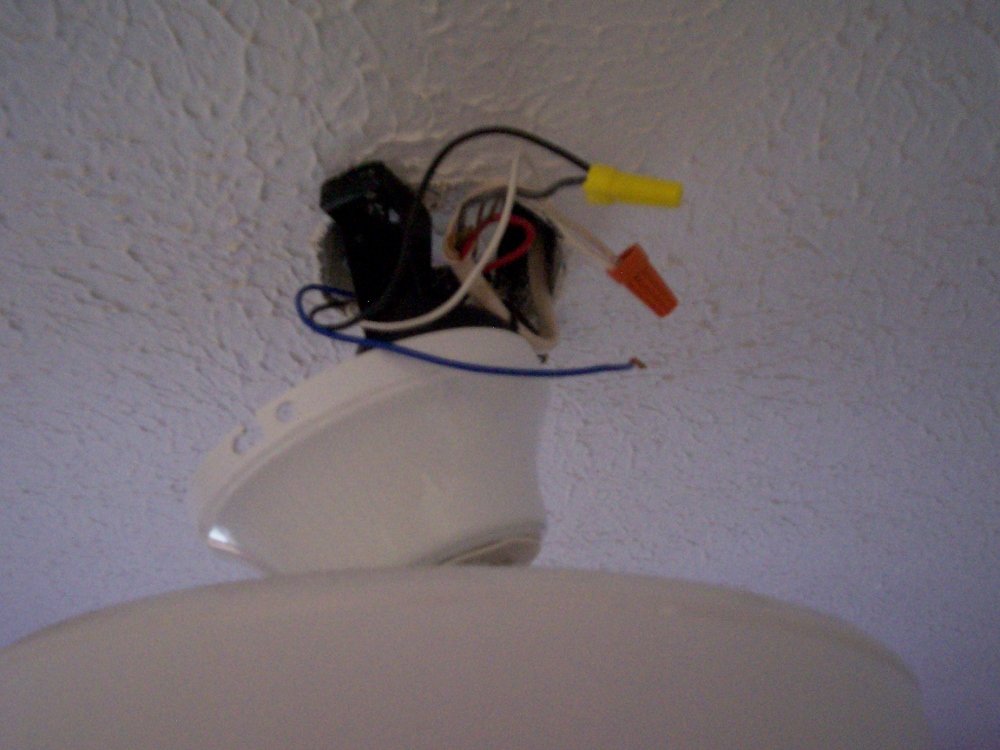
The fan itself wasn’t wired for the light kit. I pulled down the housing on the fan and immediately found a dangling blue wire labeled “connect blue wire for fan light kit”. Once I attached that, we were in business. Anger Management Tip: Check the fan connection at the ceiling first to ensure it’s wired up for the light kit.
There you have it, ceiling fan light kit installation as easy as 1,2,3. . . 4,5,6!


I connected a blue wire from the fan with the black wire from the light kit and the two white wires from the fan and light kit. I see no other dangling blue wire. Am I missing something? Could it be that the fan is not wired for the light kit. There are no other dangling wires.
Thanks guys. After 30 minutes of teetering on a high ceiling to add a light kit that would not light, I pulled the fan’s ceiling cap and found that the idiots who installed the fan didn’t take the extra (what) three seconds to connect the blue (light’s hot) wire to the black incoming line. People like that give good installers a bad name. Lazy!
Connect the blue wire to what ?
I also have a red wire ??
“….a dangling blue wire labeled “connect blue wire for fan light kit”.
Dear sir,
Thanks for this! I owe you a beer.
RW
A smart electrician/homeowner would have wired the upper canopy as if the light kit was going to be installed, so the whole fan does not have to come down to install a light
Awesome article! I’m in the middle of renovating a 1950’s brick ranch that my wife and I just moved into, and she’s definitely been wanting a ceiling fan in the bedroom. Your articles are a great guide for us DIY’ers! Thanks so much!
Thanks John, glad we could help!