

From garage sale to my garage, this how to build a vanity project has finally come to life. In the last two episodes, we attached an antique wrought iron castor to the bottom of a newly reworked vanity. We also created a form and poured the concrete vanity top. Now comes the final three steps: grouting, sealants and stain. Not to mention a few essential cold beers to celebrate!
Removing the Concrete Countertop Form
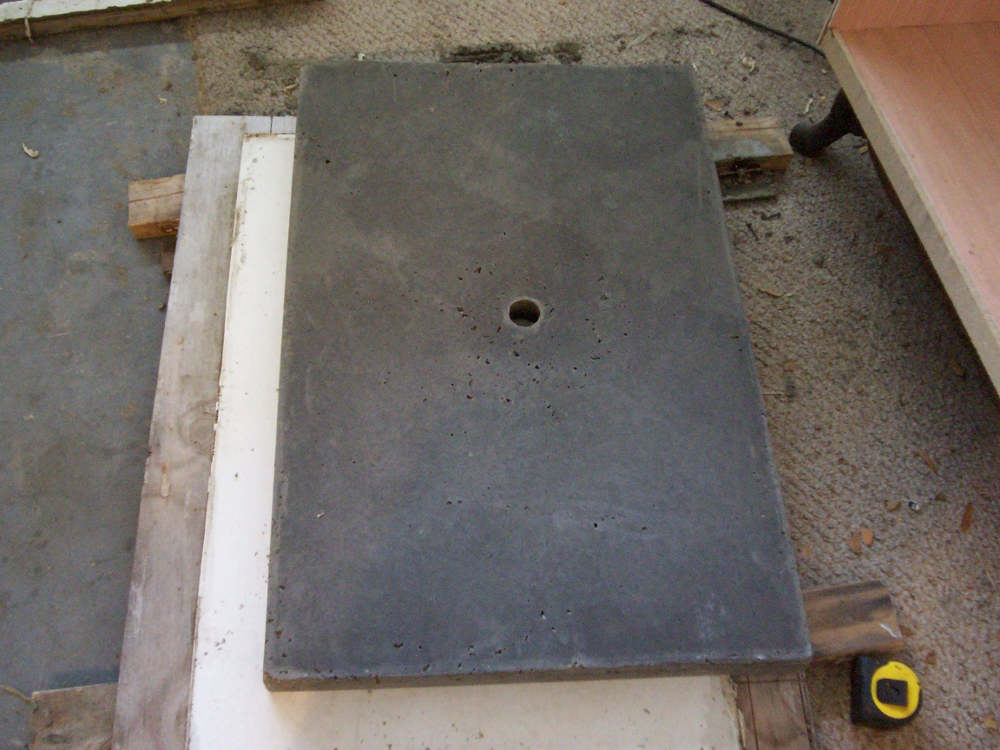
In the last article, we poured the concrete into a smooth plywood form. We caulked all the seams to make it as smooth as possible. We poured the high-strength concrete into the forms, finished the back and let it dry for a couple of days to allow it to come up to test.

Peeling the forms off of the countertop can be a bit tricky. For one thing, it weighs as much as I do and can be hard to manipulate alone. And tilting it up on the edge to remove the screws that hold the forms in place was no picnic. I had my buddies on hand with plenty of extra hands to help things run smoothly.
Once the four pieces of 2×4 were removed from each side of the form, we set it back down onto the floor so that it would lie flat again while we peeled away the smoother inner forms. Carefully, like a surgeon removing gauze off of a face transplant patient, we peeled back the sides of the form to reveal the edges. Success! The forms did their job and made the corners nice and smooth. Now all we had to do was gently lift the countertop onto its edge and peel the remaining form from the bottom (really the top) of the countertop. After we flipped it over, it was as smooth as a summer lake at dawn.
Grouting the Concrete Vanity Top
Of course, when I say as smooth as a summer lake at dawn, I meant one that had small pockmarks in the surface. When we originally poured the slab, we used some pretty stiff mud to pack in the corners, around the drain and on the top of the form. This created a sort of wrinkling effect that leaves unique imperfections in the slabs surface.
It’s no mistake; we designed the slab that way so that we could fill these small voids with colored grout to match the sides of the vanity. For the grouting job, I didn’t need a big bag of grout. They sell small cups of grout for smaller grouting projects like backsplashes or touch up work.
We choose a brown sort of rust colored grout to match the wrought iron base and soon to be stained sides and interior. I’ve never used a small batch of grout like this, but it turned out to be really easy to use. You just pop open the top and fill the cup to the designated water line. Close the lid, give it a good shake and voila! You’ve got fresh grout that’s ready to go after its set up for a few minutes.
I used a float sponge and my tile sponge to finish the grout just like any other tile job. Because the concrete was pretty dry, it absorbed the grout’s water pretty quick, so I ended up using a little more water in the grout than the directions required.
We worked every inch of the surface and sides with the grout-covered float sponge. This helped to stain the concrete countertop’s surface a little darker than the old gray color it once was. After we floated in all of the voids, we let it sit for about ten minutes, or long enough to get a beer. We then wiped it clean with a damp sponge and let it dry overnight before we sealed it.
Staining the Wood Vanity
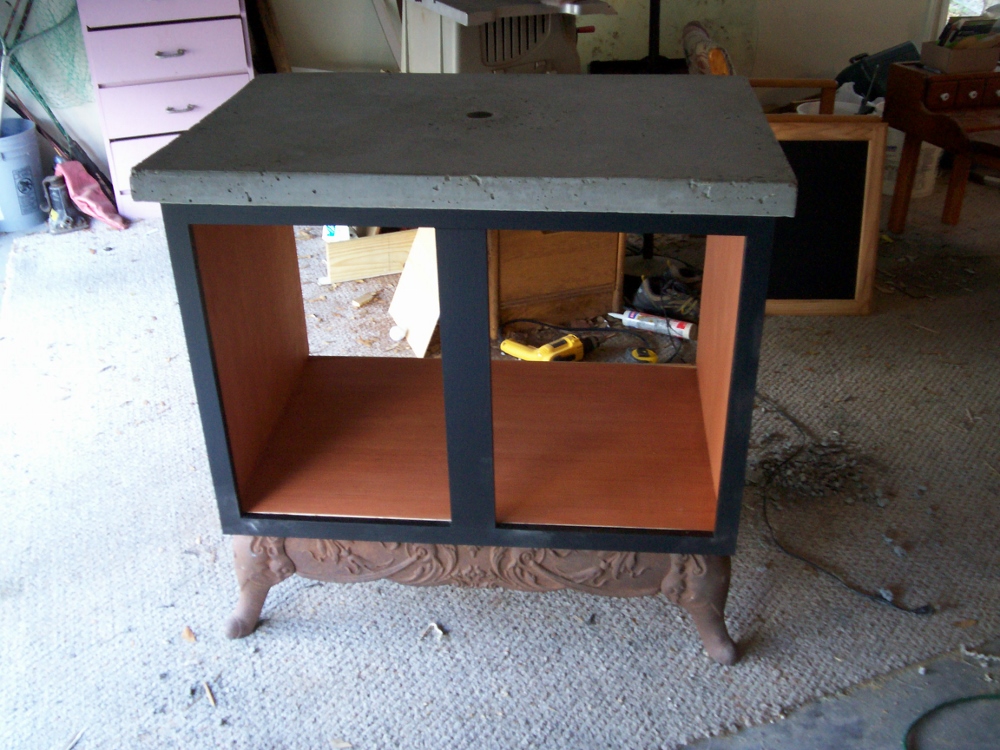
Before I wrapped up the concrete vanity portion of the project, I had some wood to stain still. The veneer on the sides and interior of the vanity were not your typical veneer paneling. This stuff looks weird and acts even weirder when you cut, sand and stain it. I thought I’d hit the surface of it with the hand sander to get it nice and smooth for the stain and poly. What ended up happening was I removed some of the veneer because it was so thin and flaky. Thankfully it was only a small spot and I caught it before I did even more damage.
After a now super light sanding, I brushed off the veneer and pulled out the stain. Instead of using a brush to apply the stain, I used an old rag to do the job. This allowed me to make some areas a little darker than other spots. I also used a swirling motion that changed the look of the stain so it would more resemble rust spots—just like the wrought iron base below.
Once the stain dried overnight, I applied three coats of poly to the inside and sides of the vanity. After that coat dried, I used a piece of 00 steel wool to smooth the surface imperfections before I applied a fourth and final coat of poly.
Concrete Vanity Top Sealer
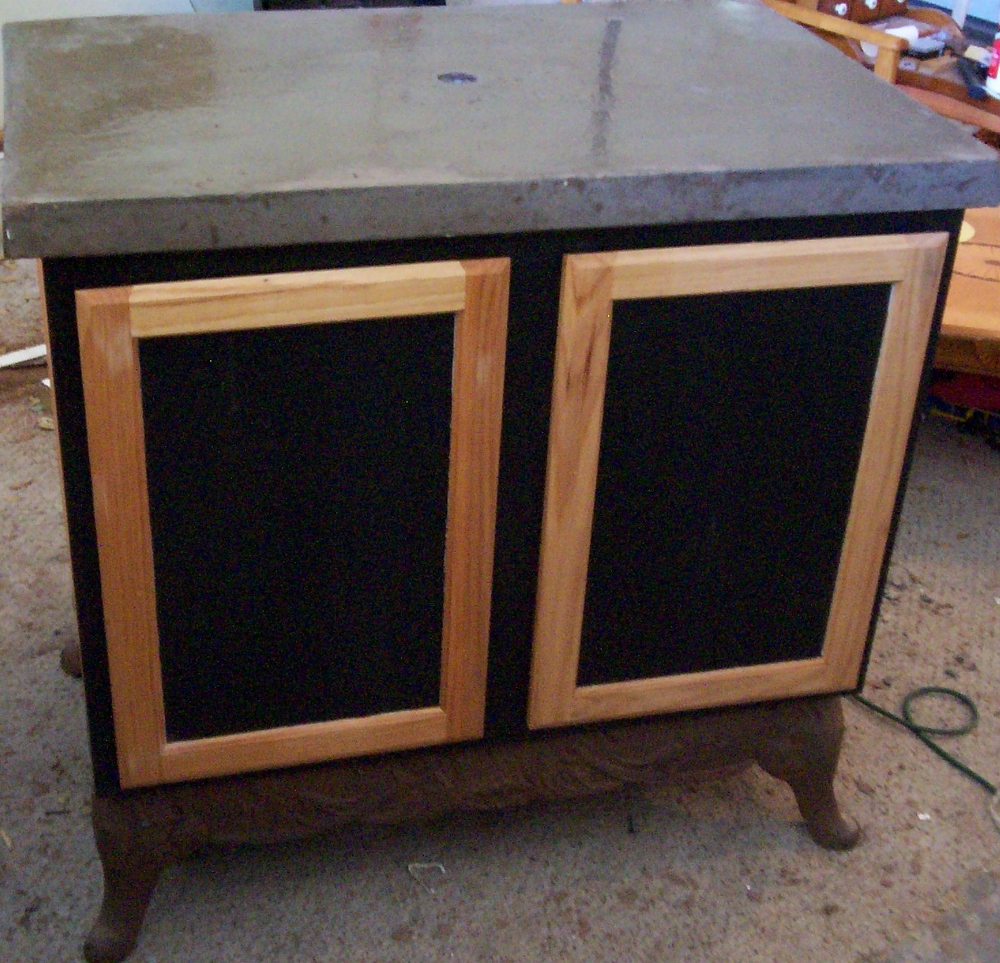
There are a ton of sealers out there for concrete and most of them are designed to be pretty resilient to water. They also stink to high hell and are mostly oil based. We found a nice water-based product that had low VOC’s and was perfect for indoor use. Another good product to use can be grout sealant, but it may need to be reapplied every few years. The concrete sealant we used is designed to last five years or more.
To apply the sealer, we used a paint roller, heavy nap roller cover and roller tray. To seal the surface of the concrete, we applied three coats and let them dry for about four hours between coats. After a few days of dry time, it was ready to be installed into a bathroom. But we’ll save that story for another day. Hope you enjoyed our unusual concrete vanity project!


Rusty Griswald? They should have spelled it Griswold. They could have a Clark color and an Uncle Eddie color. It would be a semi-solid with a similar color as the stuff pumped out of his motor home!