

The toilet, the porcelain throne, it is one of those features of our home that is often taken for granted. . .until there is a problem. This is the point in time that everyone in the house is suddenly greatly concerned with the status of the toilet, the diagnosis, and the timeline that it will be returned to its former noble glory. There are as many possible solutions as there are potential problems. Whether it is an action figure who was sent down on a covert mission or a ball of toilet paper nearing the size of a softball, sometimes you simply have to pull the toilet to address the issue. Recently I had just such an “opportunity” and found two very different issues – one was a ball of toilet paper that was hung up on the exit rim of the toilet (an easy fix) and the second was a broken flange where the bolts that secure the toilet to the floor lock in. If you’re dealing with a similar toilet repair, or you just want to be prepared if it happens to you in the future, read on to learn about how to fix a toilet flange using a simple but clever product called Hydroseat.

Prepare for Your Repair
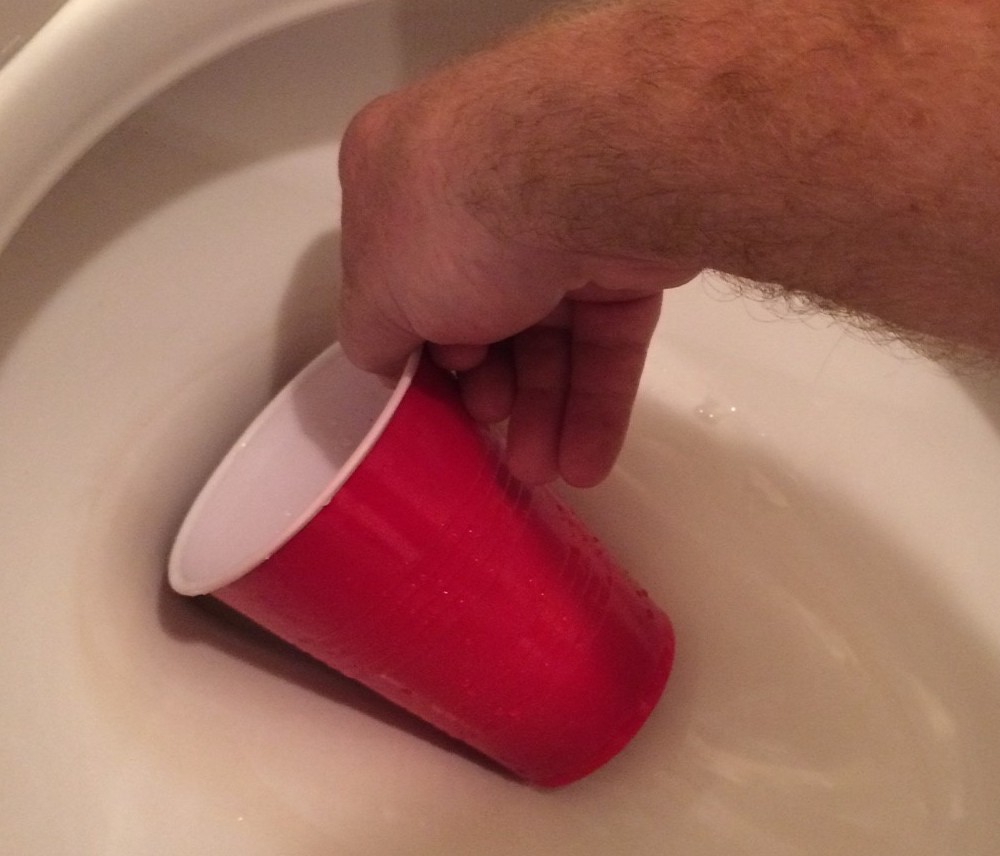
First things first, I shut off the water line to the toilet and flushed the toilet to drain the water from the tank. I then used a small plastic cup to scoop out as much water from the tank and the toilet bowl as possible.
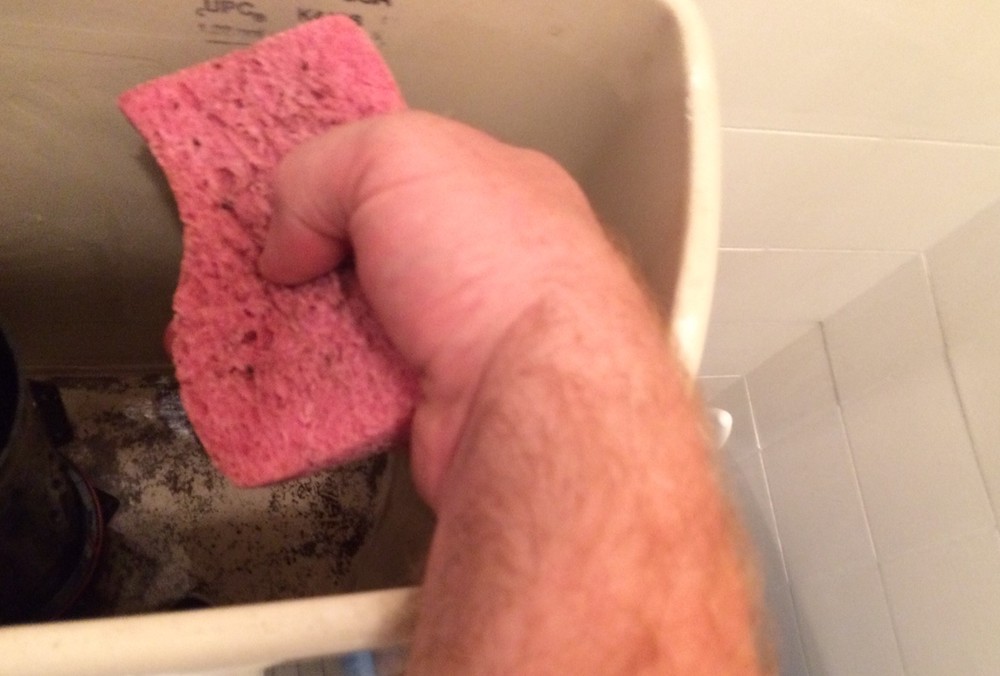
If you have hard water or mineral build up in your tank, this is a great time to use a sponge to get the last of the water out of the tank and clean out any of that debris that can eventually cause issues with the flushing mechanisms and process.
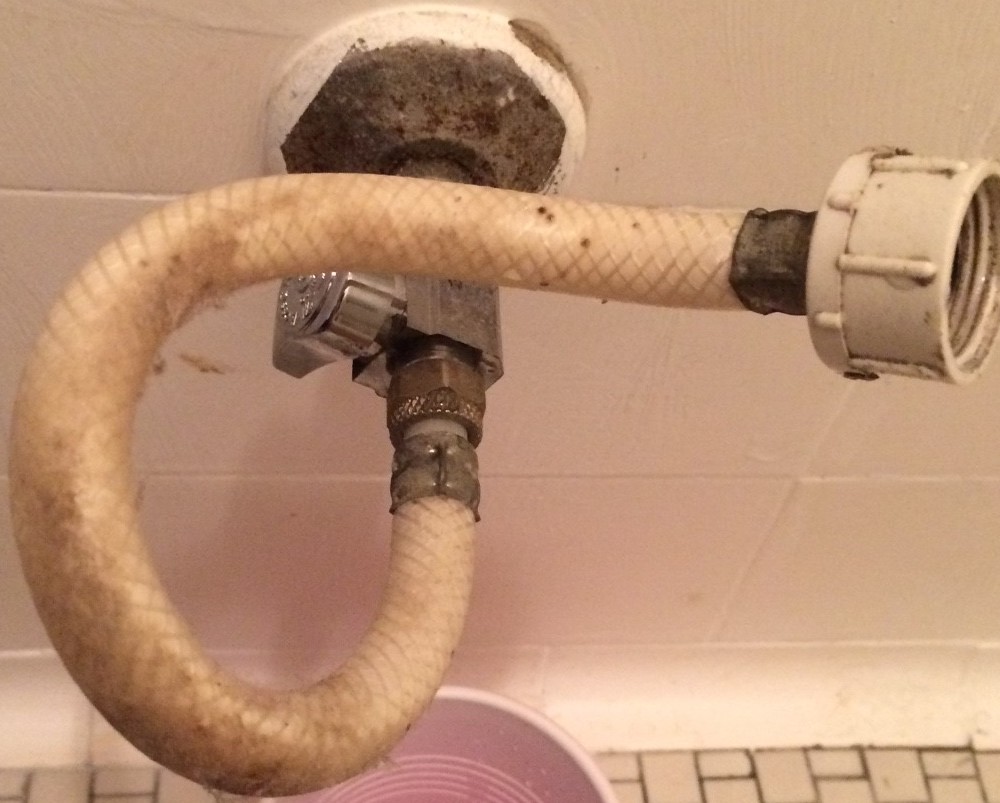
This is also a good time to consider updating your shut off valve and water supply line to the toilet. These two items will cost less than $30 and require shutting off the main water line for a time, but having a properly functioning shut off valve is something close to priceless. If you do replace the shut off valve (or angle stop) get a good quality one, the cheap ones are notorious for failure in the future.
Does a Broken Toilet Flange Equal an Empty Wallet?
Once I had the toilet cleaned and pulled, removed the blockage, and cleaned away the old wax ring, I could now assess the issue of the broken flange. I was struggling with the notion of paying a plumbing outfit to come out to address the flange and plumbing that is nearly 100 years old and is emerging from a bathroom floor that is cement with embedded ceramic tile. I don’t know how exactly they mixed cement back then, but this floor destroyed 2 masonry bits in the completion of this project. Looking for inspiration, I went to my local Home Depot to wander the isles and problem solve the broken flange.
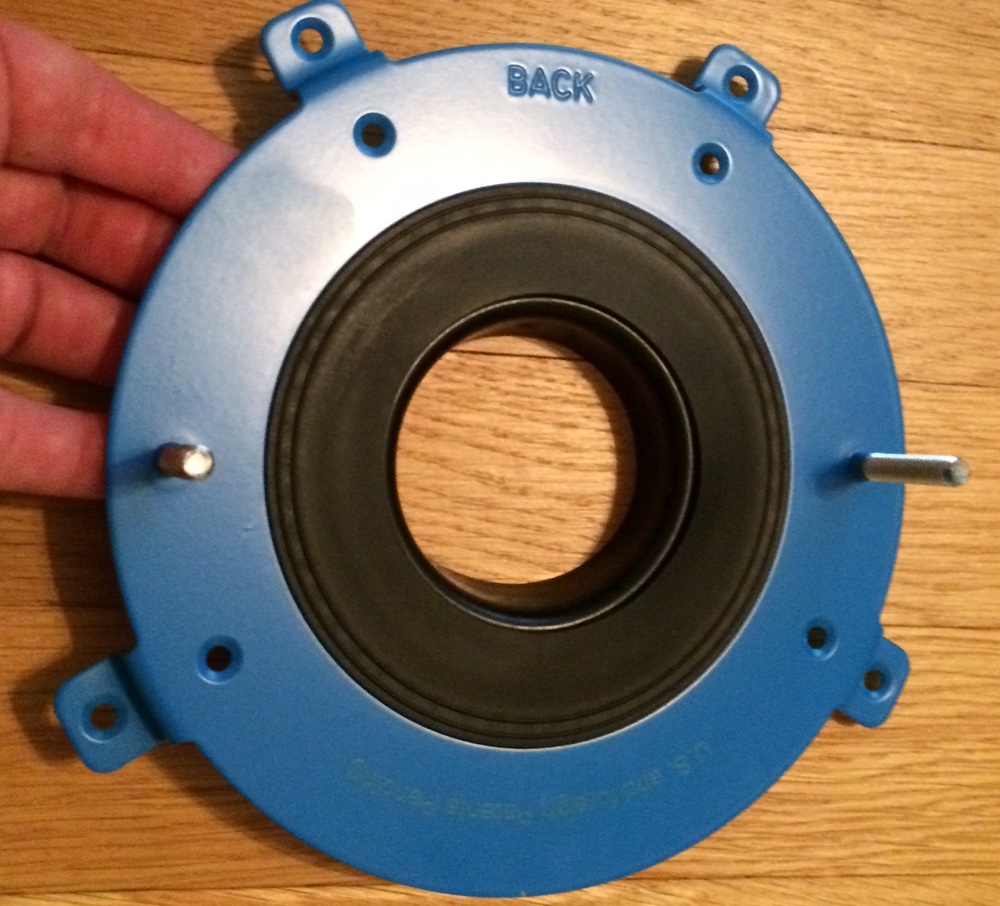
Enter the Hydroseat Toilet Flange
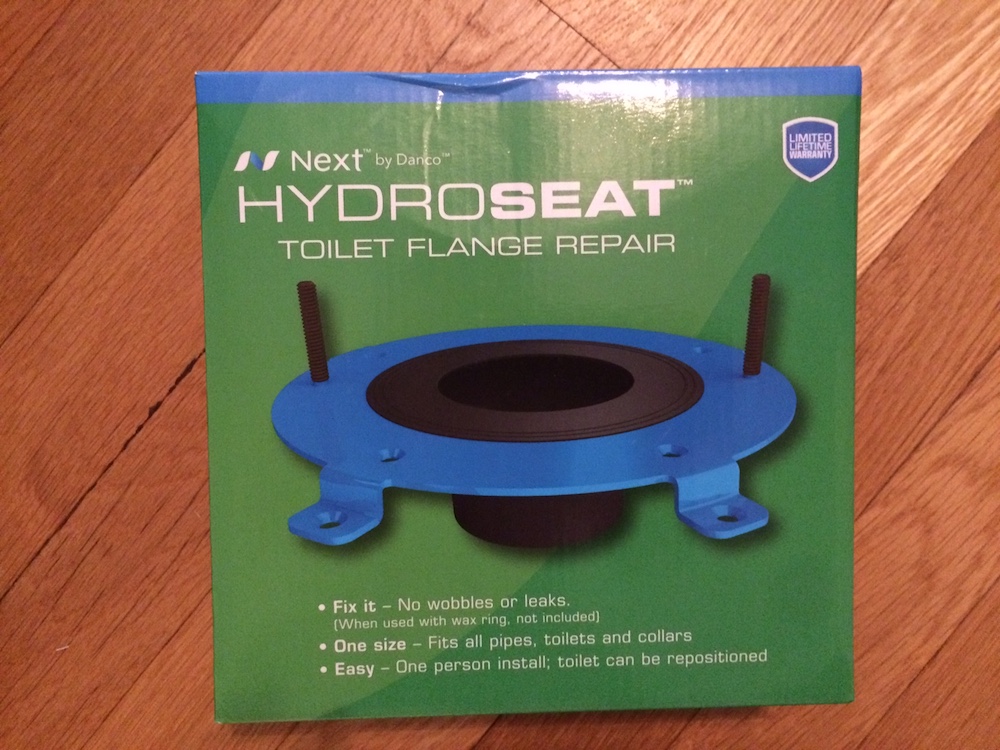
That is where I found the Hydroseat Toilet Flange Repair by Danco staring right at me. For less than $20, this repair is clean, simple and rock solid. It seats with a wax ring, not included, right over the original flange. You secure it to the floor with 4 screws, making sure that the two tabs located at the rear are parallel to the back wall. The integrated bolts will end up located directly over the slotted portion of the flange that held the old bolts. There are 4 additional holes that are conveniently countersunk for tapered fasteners in the circular plate if you have a constraint that prevents using the tabs. If you have a tiled floor Tapcon fasteners are a good solution to securing the Hydroseat.
How to Fix a Toilet Flange, and the Challenges that Follow
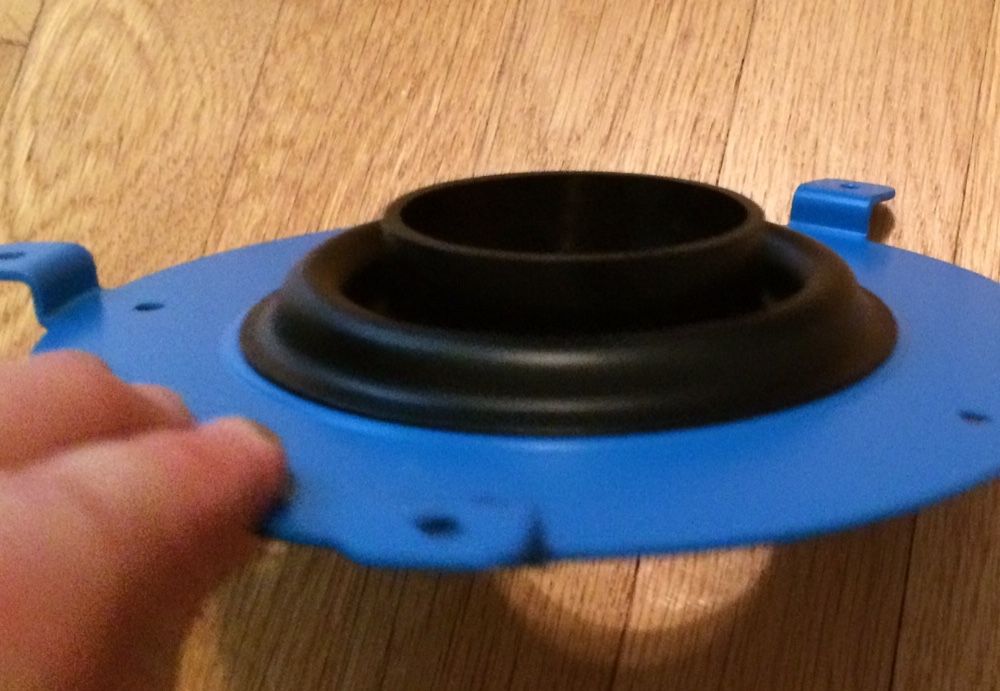
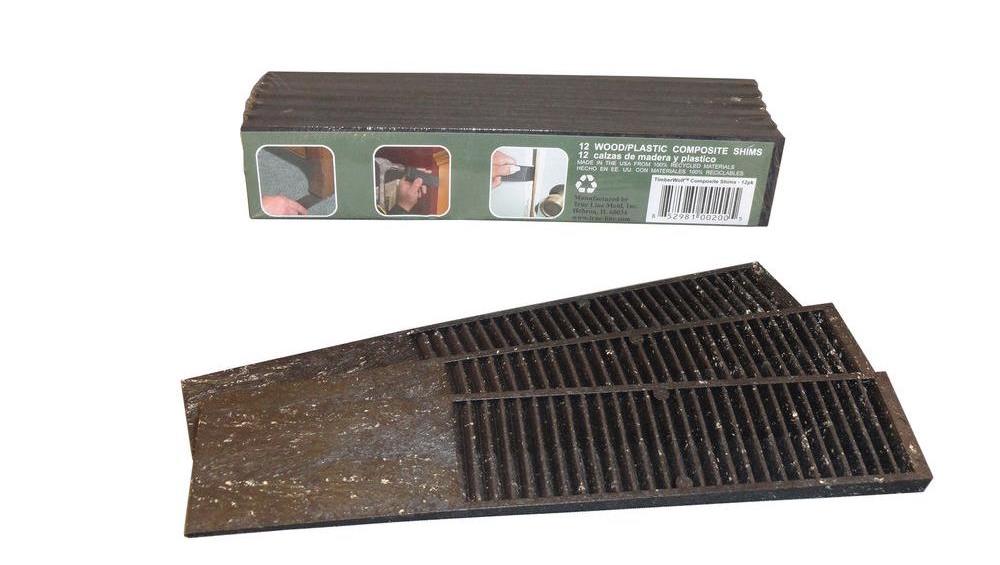
The Hydroseat Toilet Flange ultimately proved to be exactly what I needed. However, thanks to Karma, life often provides me with the opportunity to problem solve a couple of additional issues. The Hydroseat suggests 3/8″ inch between the mounting tabs and the floor when it is sitting on the wax ring. This provides enough compression of wax prior to securing to the floor. My original flange is raised above the floor and would not allow the tabs to touch the ground before the wax ring was added. I opted to utilize composite shims that do not absorb water, swell, rot or mold to level the Hydroseat and provide the appropriate wax ring compression once secured to the floor. To dial in the height and leveling more precisely I used some plated washers between the shims and the Hydroseat flange. To clarify, the Hydroseat goes on top of the wax ring, and then the Hydroseat’s rubber gasket is what makes the actual connection to the toilet.
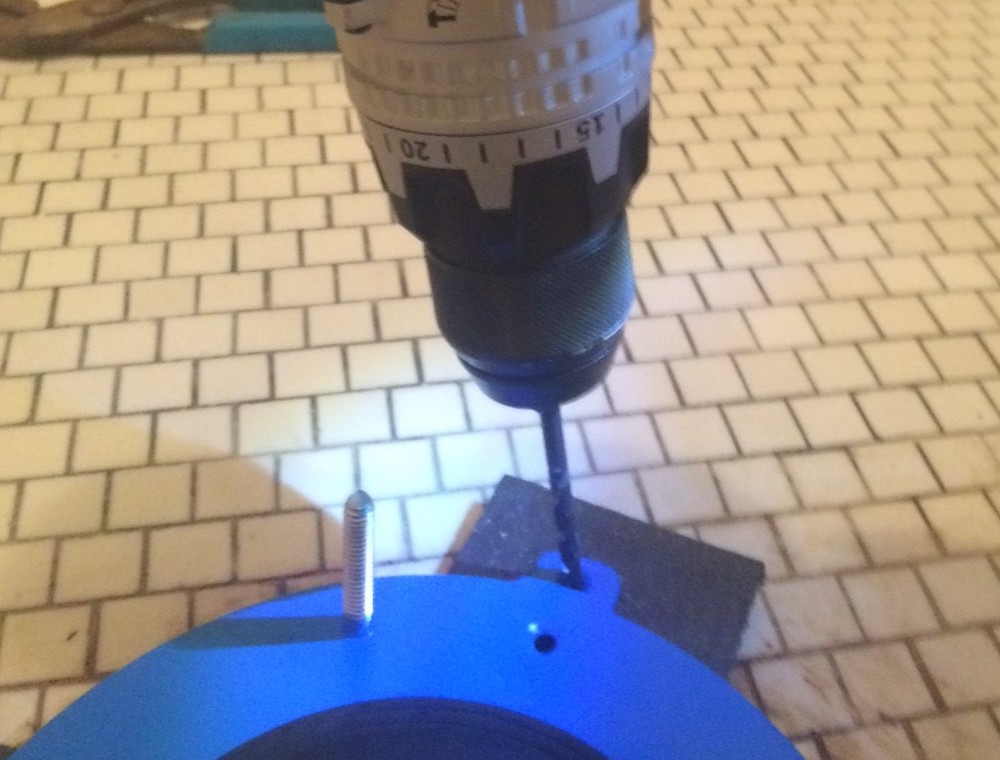
I predrilled the holes for the Tapcon concrete fasteners with a Bosch HDH183B hammer drill, pilot drilled my shims and placed the wax ring in place.
Now I was able to place the Hydroseat in place and tighten down the four fasteners. The toilet slipped right over the new threaded posts/bolts and seated on the rubber seal that is integral to the Hydroseat design. The rigidity and stability is tremendous. I secured the toilet with stainless washers and nuts on the bolts, connected the new water supply line and slowly turned the water shut off valve back to the open position to fill the tank.
If you’d like to see a similar Hydroseat installation (with a slightly different approach than mine), check out this video from our friends at This Old House:
https://youtu.be/sqOKC2pgb98
Testing your Toilet Flange Repair
Once you’re done with the install, it’s time to wrap things up and double check your work. Before turning on the water line, remove all tools and debris and clean and dry the floor. I like to have save some paper towels on hand. Any moisture will show up well on a paper towel, so I place one under the water supply line and use another to check around the base of the toilet and where the tank secures to the base of the toilet. Paper towels are helpful tools that enables you to see slow leaks that you may not notice until there is a larger mess or possibly water damage.
You see, the answer to how to fix a toilet flange doesn’t have to equate to writing a check to your local plumber for $400. Even with the added adventures that our soon-to-be century home provided, the Hydroseat Toilet Flange Repair from Danco was exactly what I needed. It is a great design, well-constructed, and at a price that is more than reasonable (about $19).
It is just a matter of time until the next scuba action figures goes in for an exploration or someone flushes a ball of “flushable” wipes and you need to pull your toilet. When that happens, if you find the toilet flange is chipped or broken, the Hydroseat toilet flange repair is there waiting and ready to restore your throne to its majesty.


I did exactly what you did cause i had a concrete floor and i had to place a new commode and flange.
Thanks for sharing.
I like what I’m seeing I think a subscription is in my future!