

Do you Pinterest? My wife does. It’s more than a passing fancy for her, it’s practically a career.
“Peter, I saw a bird feeder on Pinterest.”
“Uh huh, that’s nice dear.”
“You don’t understand, I want it.”
“Well, then you should get it…”
“My thoughts exactly. So?”
“So what?”
“When are you going to build it?”
And that is how I “decided” I wanted to build a glass bottle bird feeder.
It’s not an overly complex project and I do think that it really adds to the look of the backyard, but it does have a few steps. To start you will need some rot resistant wood (cypress in this case) and a cool glass bottle of some sort.
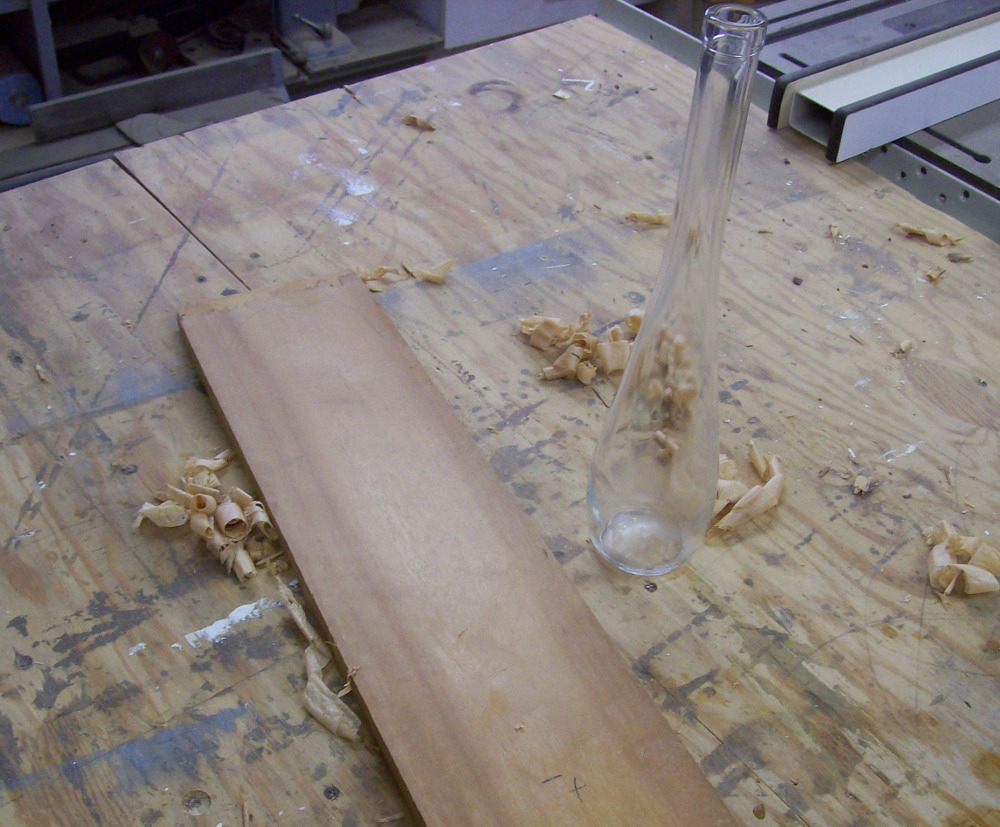
I would recommend picking out the bottle ahead of time, as it will dictate the dimensions of the feeder. Ours was $1 at the local Goodwill. The cypress was a cut off from my kids outdoor play set.
Dimensioning the Wood
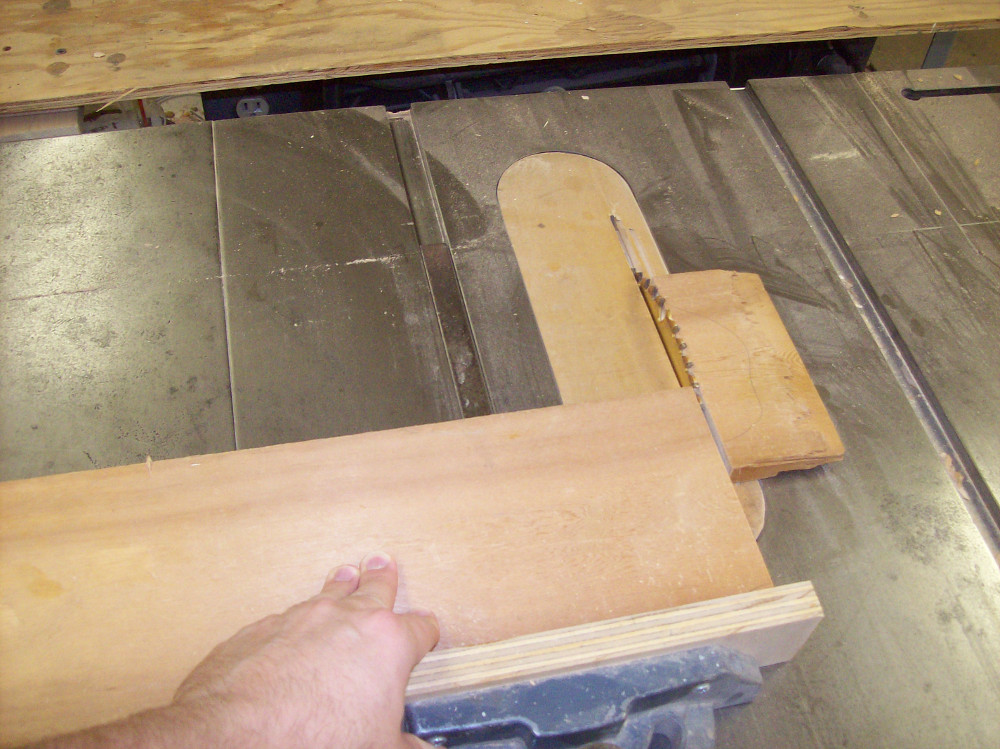
I cut the wood to 16” in length and then ripped it to 3 1/2” wide on the table saw.
Adding Some Interest
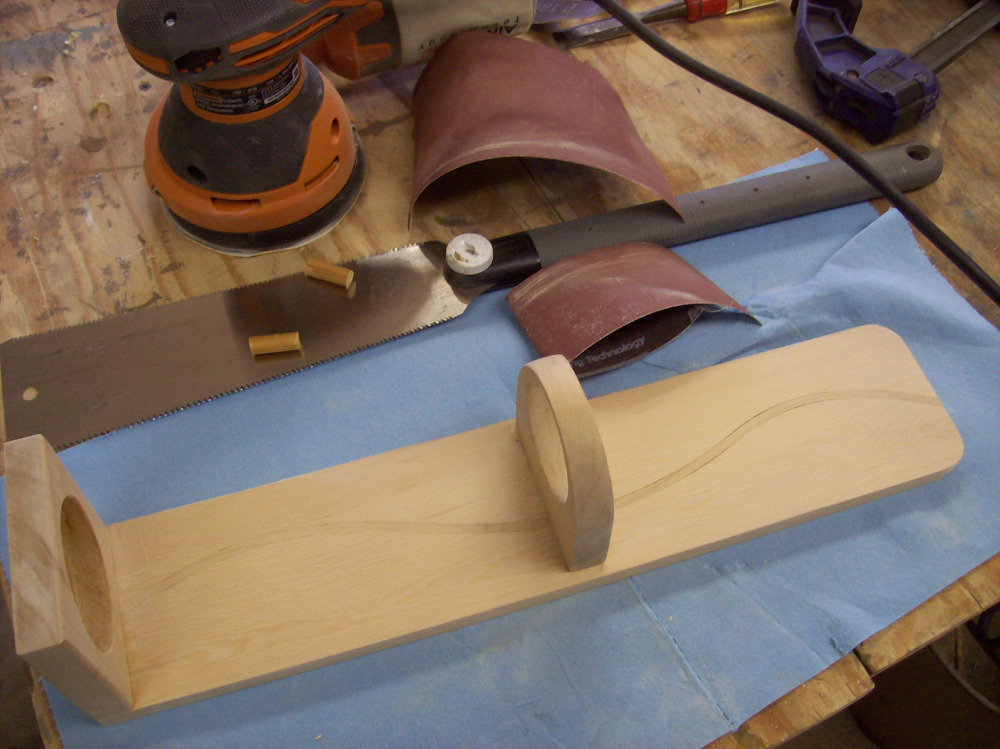
I then decided it needed a little extra pizazz. So it was off to the band saw. I cut a curve down the length of the piece. The trick to cutting a smooth curve at the band saw is a steady feed rate.

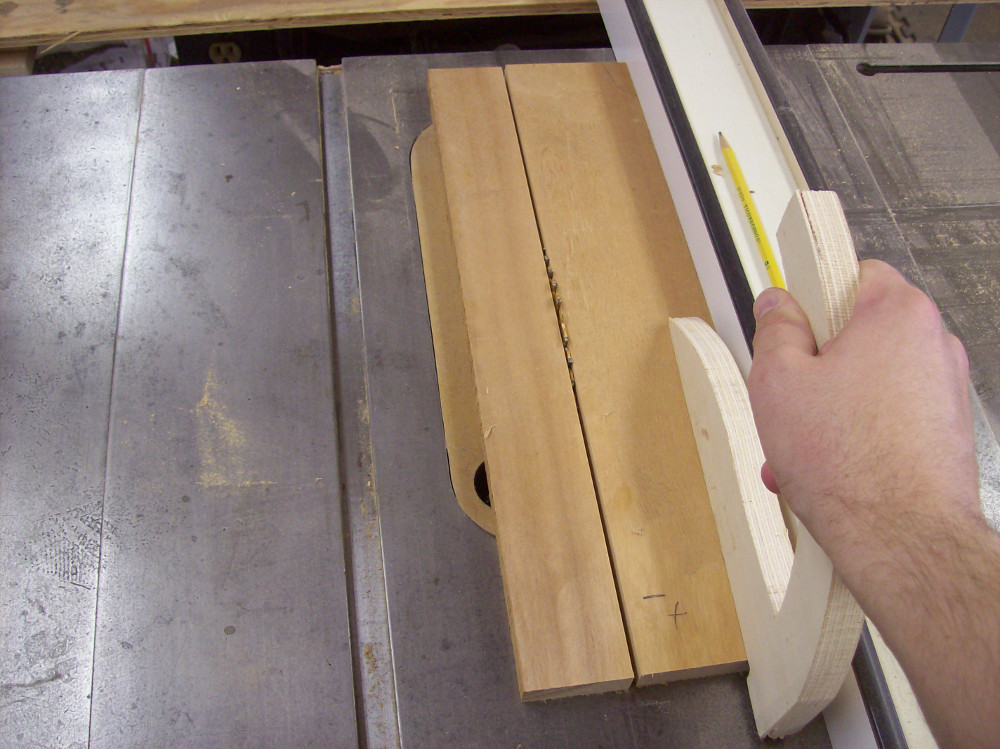
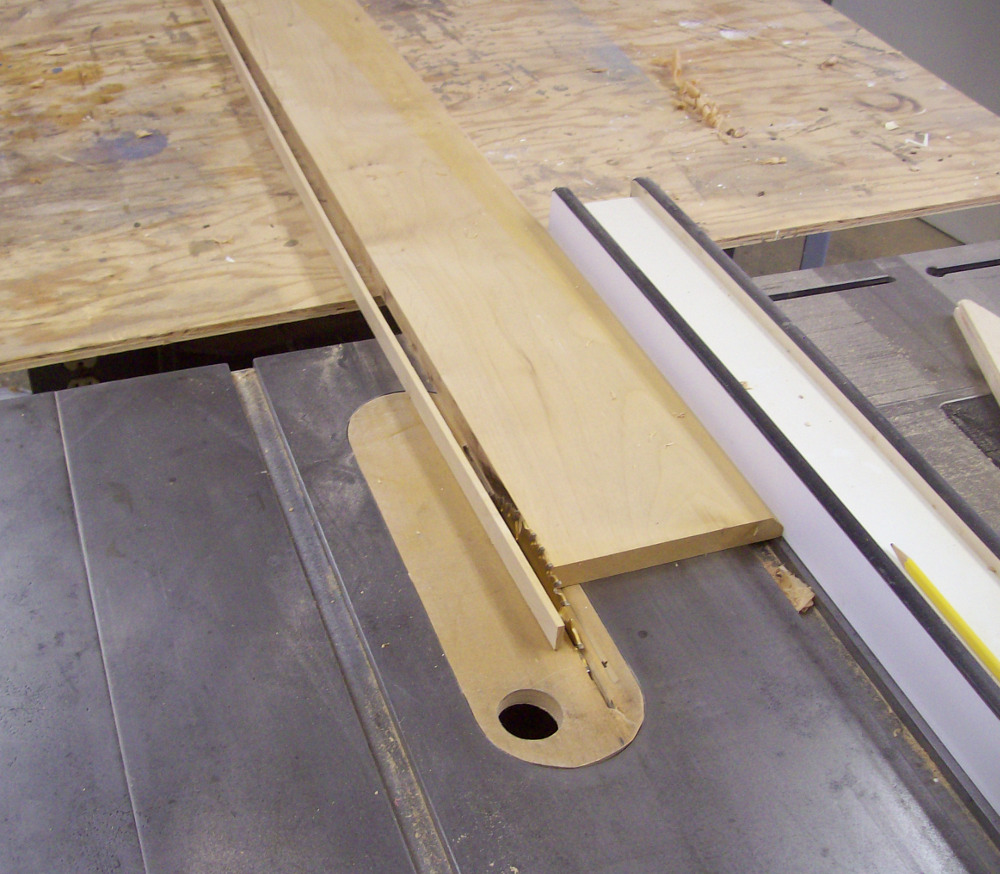
Next add a strip of contrasting wood. I picked maple as I had a lot of it in the shop. I ripped it to 1/8” at the table saw.
Gluing up the Lamination
There are few things as stressful in a project as a glue up and while this is a pretty minor one, it does have it’s challenges. You want to use plenty of glue on all the surfaces.
Get your clamps ready ahead of time and tighten from one side to the other. Breaks can happen. I had to rip a second piece of maple for this project as the first one split on me. Second time worked without issue.

Shaping the Bottle Holders
While you wait for the glue to dry (at least 4 hours) you can be working on the seed and bottle holders. These are just a couple of square blocks with holes in them. Their dimension should match the width of the bird feeder. 3 5/8” square in my case.
I use a 2 5/8 forstner bit to create the bowl for the bird seed.
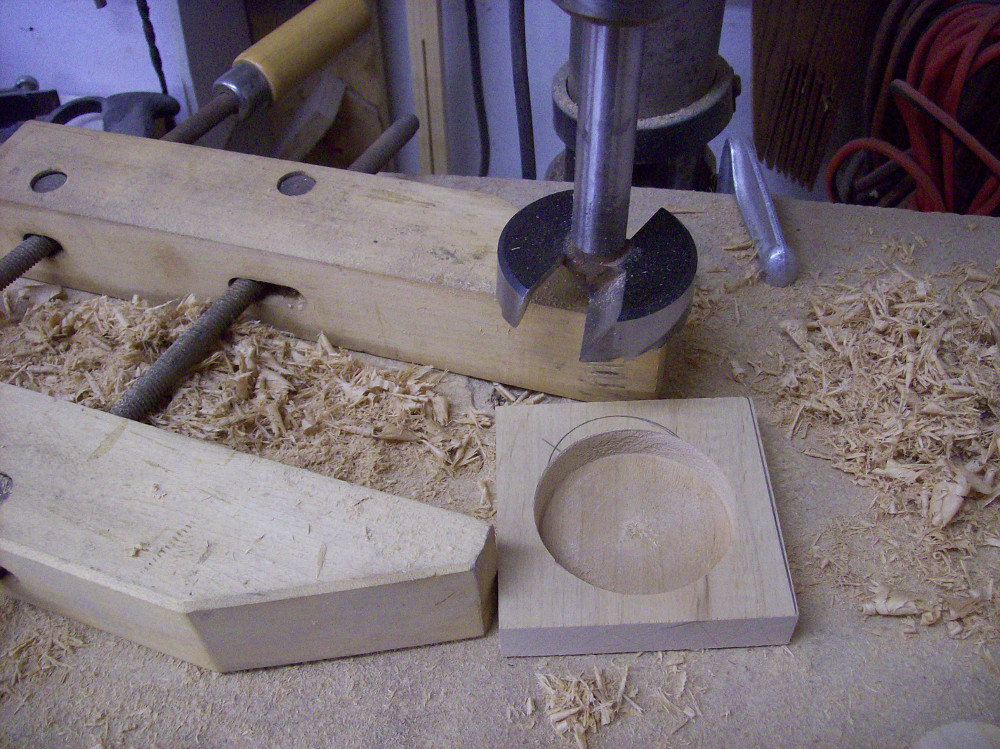
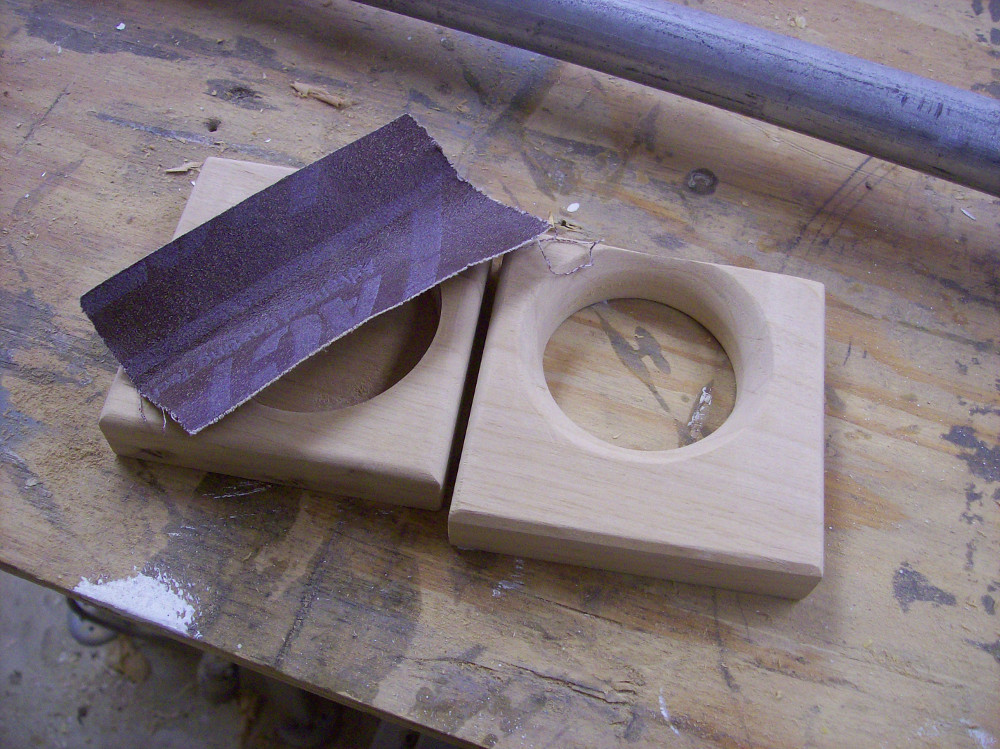
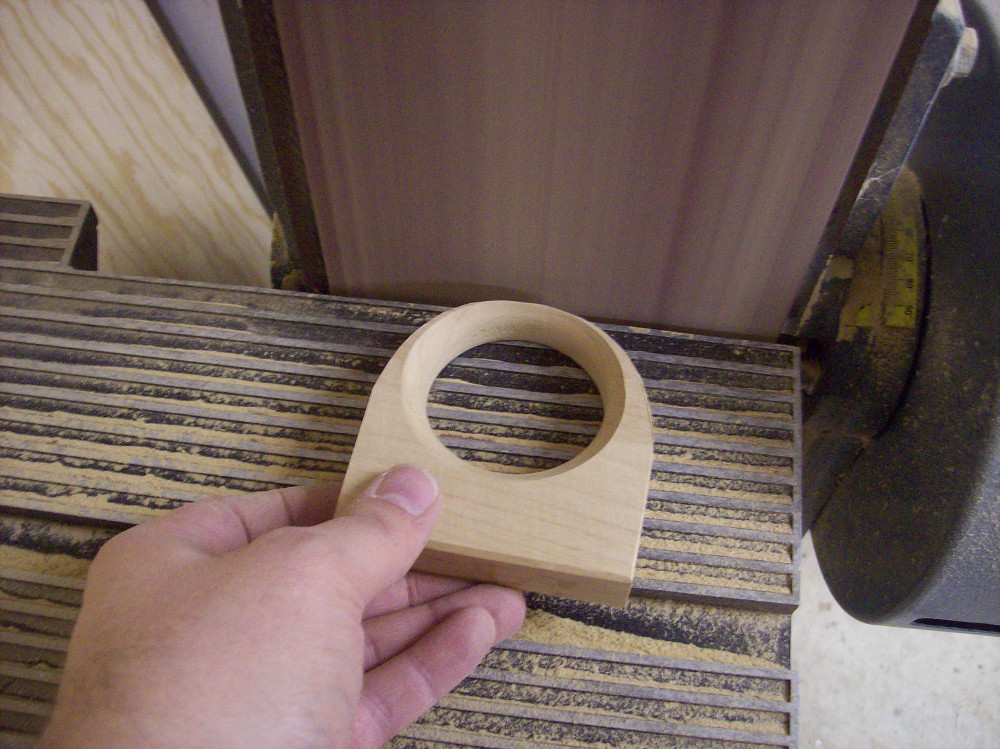
I then switched to a 2” hole saw for the bottle holder. After looking at it, I decided to soften the corners at the sander. I ended up completely sanding them away. In retrospect this would have been an easier job at the band saw. Hindsight!
Flattening the Board
Once the glue has dried on your holder you can take it out of the clamps. It will be a bit gnarly at this point and will have to be flattened before joining the holders to it. You can do this in a number of ways.
You can use a hand plane here but…. I’d rather just fire up the machines and send it through a couple times. Plus I like the deafening sounds of post industrial era progress as smooth boards are spit of my power planer at a lightening pace.

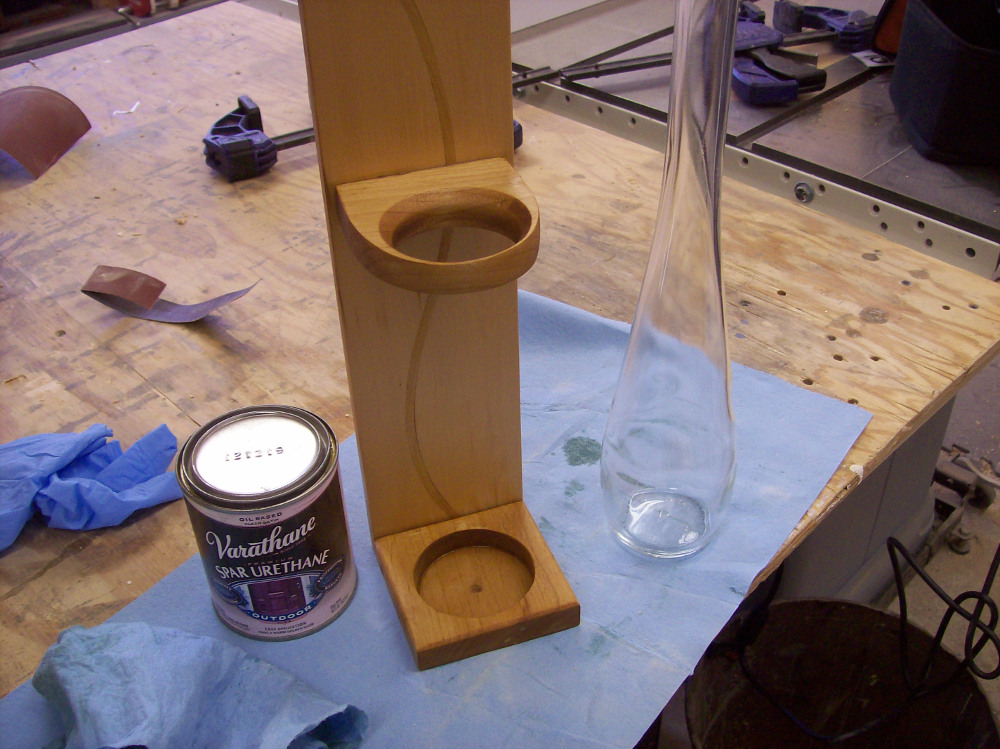
Putting It all Together
I used 3/8 dowels and wood glue to assemble the piece. I simply drilled two 3/8 holes through the back of the feeder into the seed tray then glued in some dowels. Clamp it up and wait a couple of hours. Screws would also work, but don’t forget to pre-drill to avoid splits.
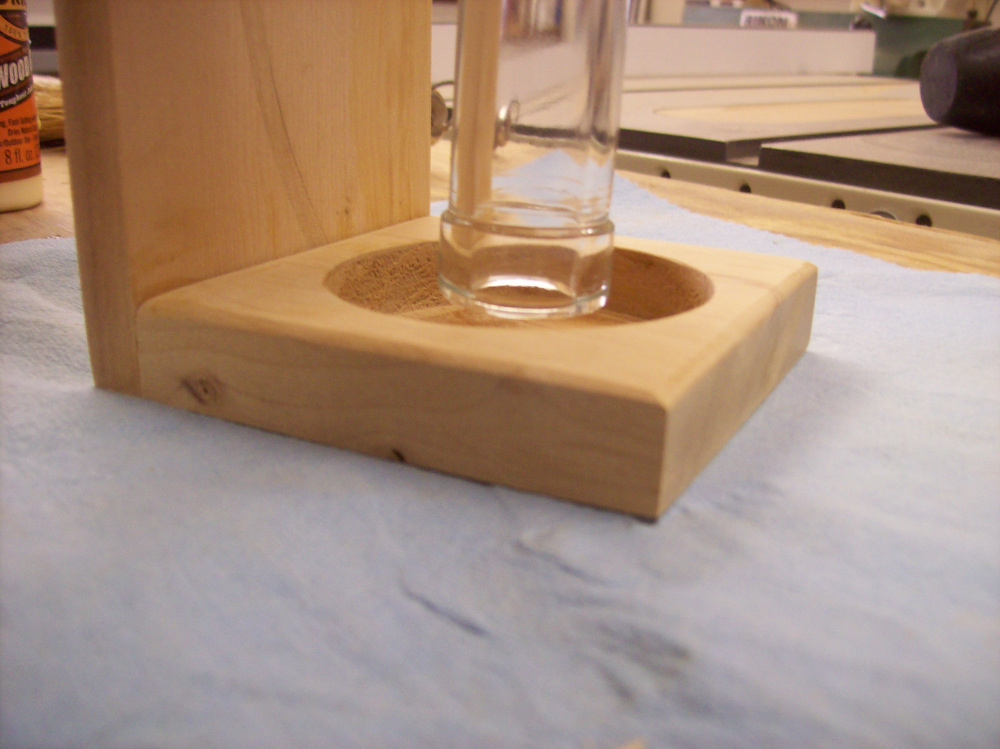
Repeat the doweling process for the bottle holder. The trick on placement is to make sure that the opening of the bottle hovers just inside your seed tray. Otherwise you’ll spill your seed everywhere. And then your wife will not be able to pin this project up on her wall. And who is going to get the blame for that? So, take the time and get it right.

Sanding Time
Once the glue is dry, trim up the dowels with a flush trim saw.
Now comes my favorite part. Just kidding, it’s the tedious sanding section. I like to listen to music while sanding. It passes the time and helps me not to rush. The better you sand a project the better it will look once finished. 100 150 220. You will need to spend some time hand sanding the tight places.
Oil Based Finish
I used a urethane outdoor oil finish. There is nothing like an oil finish to bring life to a wood project. Put on a couple of coats and wait for them to dry.
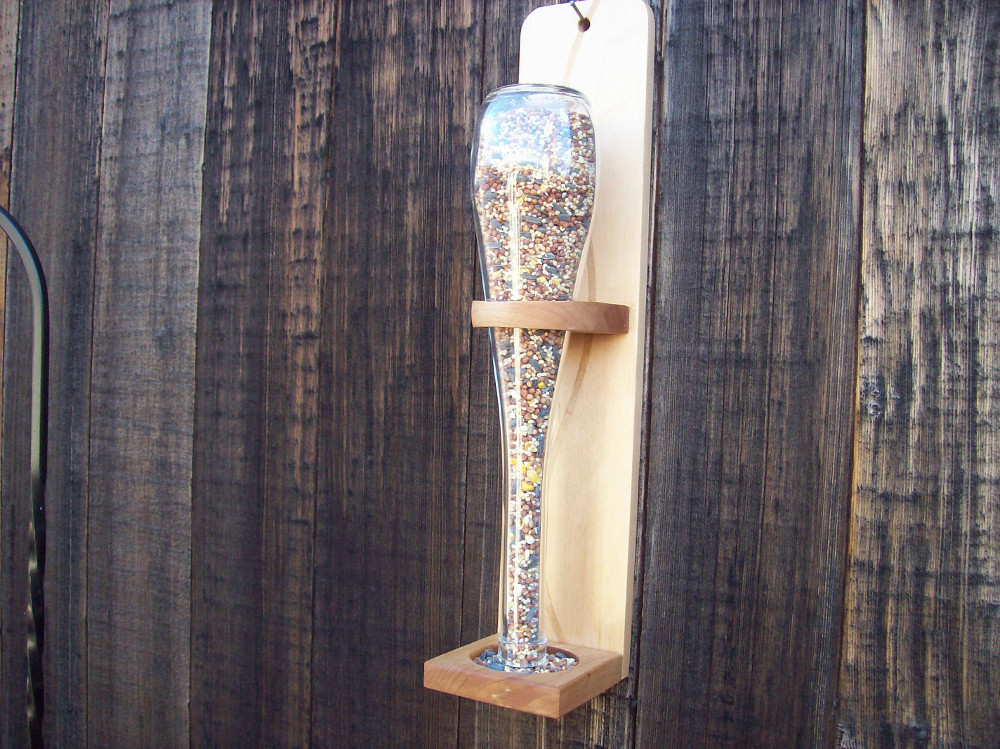
My Seeds Bring All the Birds to My Yard
I drilled a 3/8” hole in the top center and hung the feeder outside the shop. We’ll see how many birds actually come to use it, but it is quite striking. And the main point is that the wife is happy. That makes my day in the shop, time well spent!


Ahhhhhhhh, retirement, time to kick back and relax!! Wife’s voice … “Honey, I was just looking at Pinterest, and I found some stuff for YOU to do” ………………………. Oh, crap!!!!! It appears I am starting my new ‘career’, see you later folks!! …………, me “Coming ‘honey’ “
Images and illustrations make all the difference in situations like this. I love being able to see the steps rather than see them in bullet points down the page. You did a really nice job — Pinterest is perfect way to learn how to build these things.
Squirrels don’t eat everything up? It looks like they could easily get to it. It is rather attractive, however.
Absolutely gorgeous! You are right in saying that sanding sucks but has to be done correctly! Thanks for sharing!
Cher @ Designs by Studio C
Cher-
Thank you! I’ve found spending a little extra on better sand paper helps move things along too!
Hey guys, great site you’ve got going here! Just found it, but I subscribed and will definitely be coming back.
Peter, your bird feeder turned out great. The maple accent is a nice touch.
My wife has also “involved” me in a Pinterest project or two. But you have to admit, it is a great place to find inspiration.
Charlie:
Glad you found us!
Thanks, I even had my first visitors the other day. I do have to admit it, Pinterest is great place for ideas!