

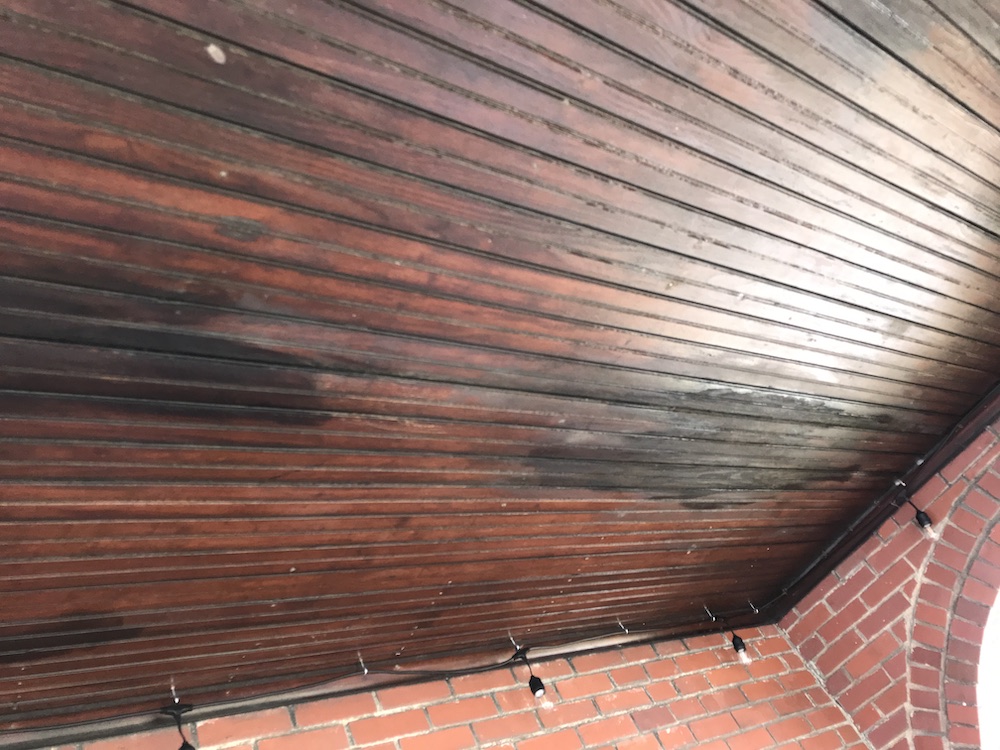
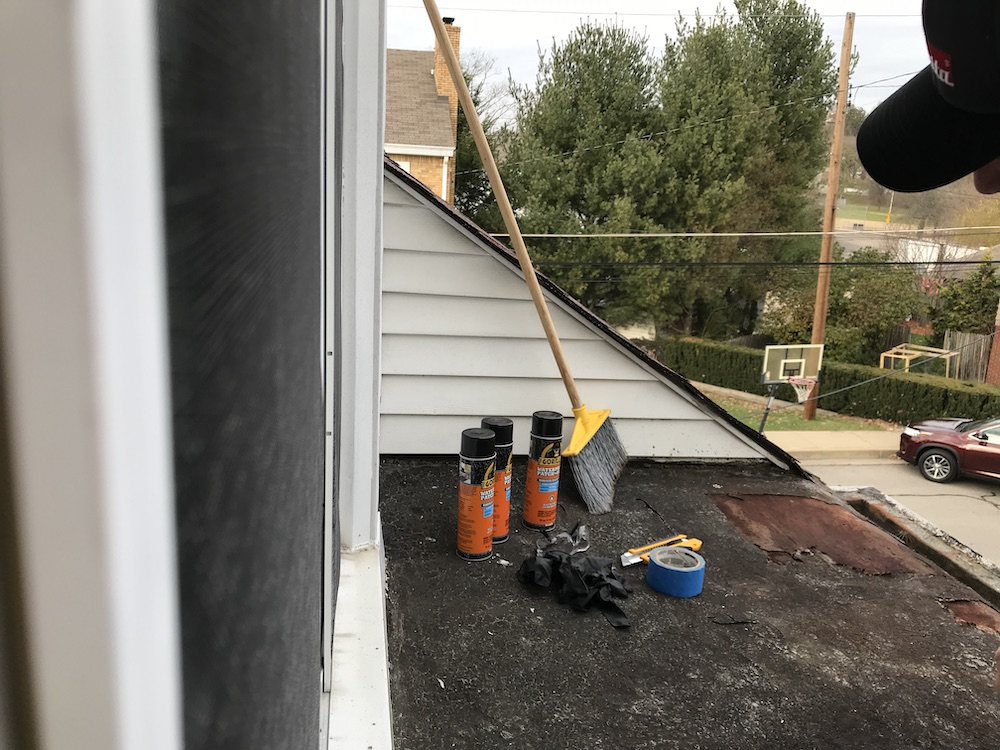
![]() This is a sponsored post written by me on behalf of Gorilla Glue. All opinions are 100% mine. When our son bought his first house a few years ago, there were plenty of items on the “to-do” list. Item number one was to replace all the plumbing. The house had been vacant, and the heat had been shut off – but the water had been left on, and all the pipes had burst. Once the plumbing was restored, he began slowly tackling the remaining list of improvements and repairs. While he has limited time and funds to accomplish his goals, he doesn’t want delayed repairs to result in further damage. One area in dire need of repair is his side porch roof; it’s years past its useful life span, and leaks have already damaged sections of the tongue-and-groove beadboard ceiling below. To halt further damage – and keep the raindrops from falling on his head until he can replace the roofing next spring – we patched the numerous leaky spots with Gorilla Waterproof Patch & Seal Spray.
This is a sponsored post written by me on behalf of Gorilla Glue. All opinions are 100% mine. When our son bought his first house a few years ago, there were plenty of items on the “to-do” list. Item number one was to replace all the plumbing. The house had been vacant, and the heat had been shut off – but the water had been left on, and all the pipes had burst. Once the plumbing was restored, he began slowly tackling the remaining list of improvements and repairs. While he has limited time and funds to accomplish his goals, he doesn’t want delayed repairs to result in further damage. One area in dire need of repair is his side porch roof; it’s years past its useful life span, and leaks have already damaged sections of the tongue-and-groove beadboard ceiling below. To halt further damage – and keep the raindrops from falling on his head until he can replace the roofing next spring – we patched the numerous leaky spots with Gorilla Waterproof Patch & Seal Spray.
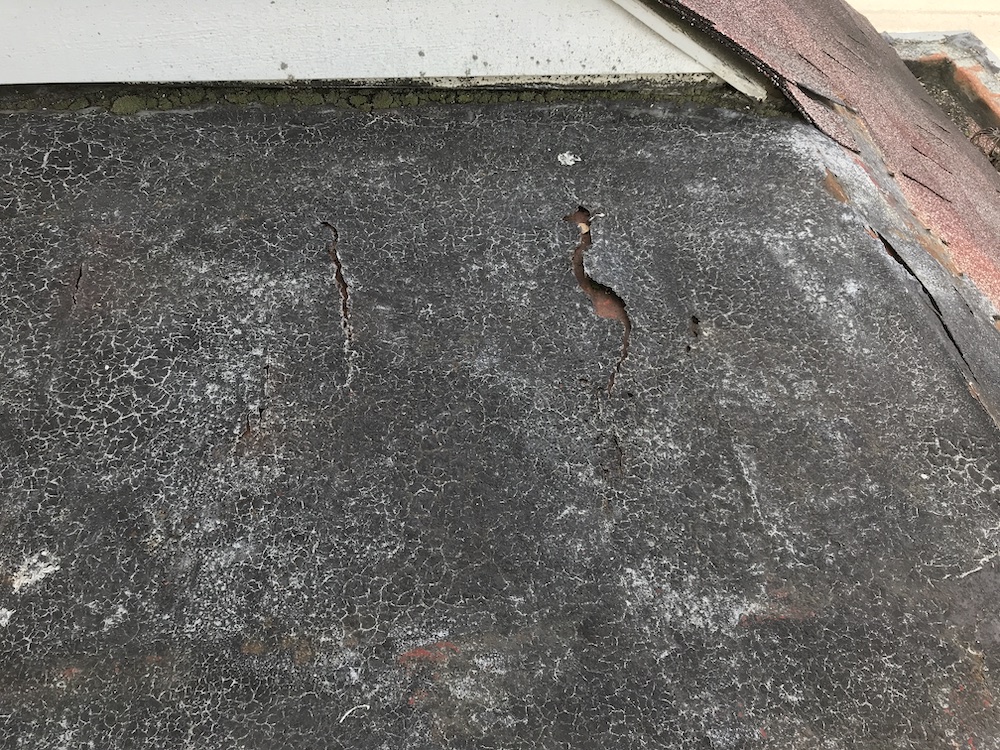
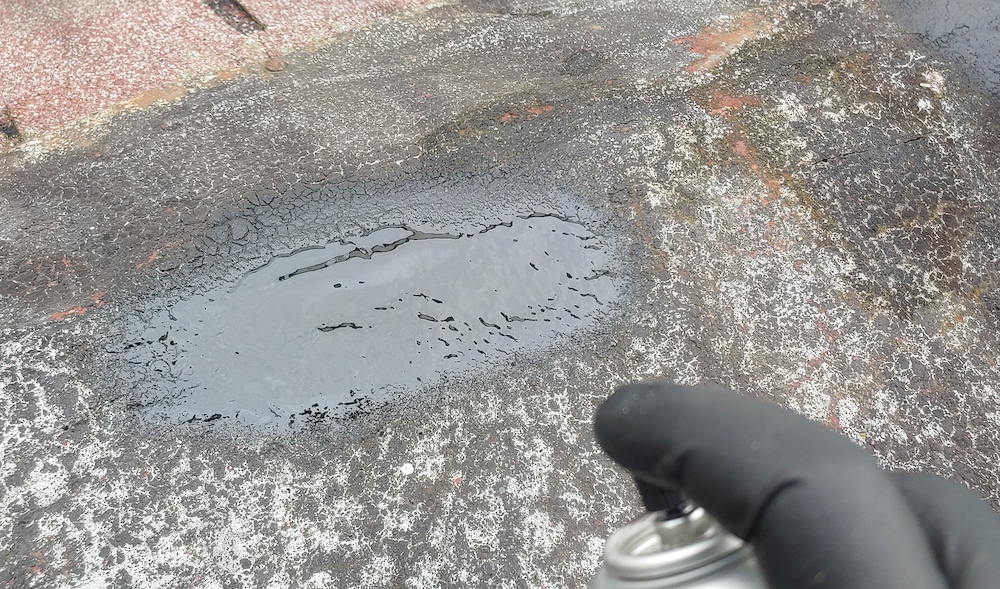
The porch’s original roof was metal, and was probably installed 75 or more years ago. When metal roofs are properly maintained, they can last decades; unfortunately, they don’t always get the upkeep they need, and eventually they do rust out and disintegrate. That’s what happened to this roof, and someone covered it over with a rolled asphalt roof. That was a LONG time ago, apparently, and now the asphalt roofing is brittle and disintegrating, letting in lots of nice juicy, destructive water.

The eventual plan is to pull up all the flaking, leaking material, replace any rotted structure, and cover it with ice and water shield and some nice, fresh rolled roofing. In the meantime, we ventured out onto the roof, in an attempt to seal up the numerous leaky areas with Gorilla Waterproof Patch & Seal Spray. After this 15-second promo from Gorilla, we’ll tell you step by step how we did it, and share the final result.
Step One: Break Out The Broom – And The Scrapers, And The Utility Knife…
As with most projects, good prep greatly increases the odds of ending up with a good finished product. The roof should be free of any dirt, leaves, pigeon poop and the like before you start spraying the magic goo. Dig out any loose caulk or previous cracked repairs, and if there are any areas where the old roof is torn and peeling, cut them back to where they’re (relatively) solidly attached.
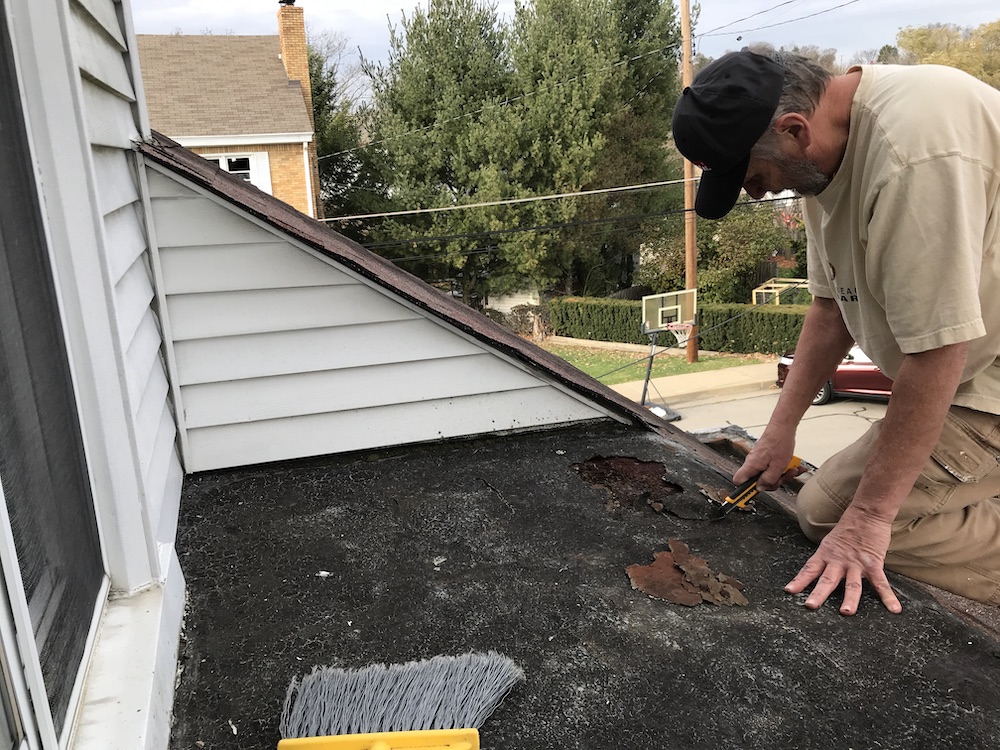
If you’re patching a metal roof, use a wire brush to scrape off any flaking paint, rust, or other loose debris. If there’s rotted wood in there, cut it out and replace it. Gorilla Waterproof Patch & Seal Spray does a great job filling in gaps and adhering to just about any surface, but it won’t work well with crumbling wood or huge gaps. Sweep or vacuum everything up when you’re finished, and make sure all the areas you’ll be spraying are dry.
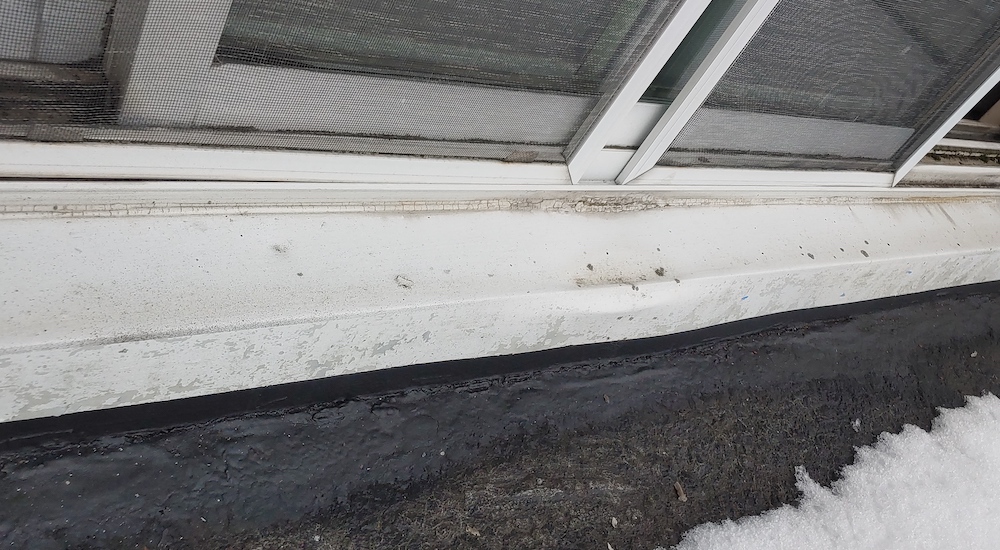
One of the many portions of my son’s roof that was in dire need of some attention was the area where the roof meets the siding. The old caulk – or what remained of it – was dry and crumbling, and we dug it all out.
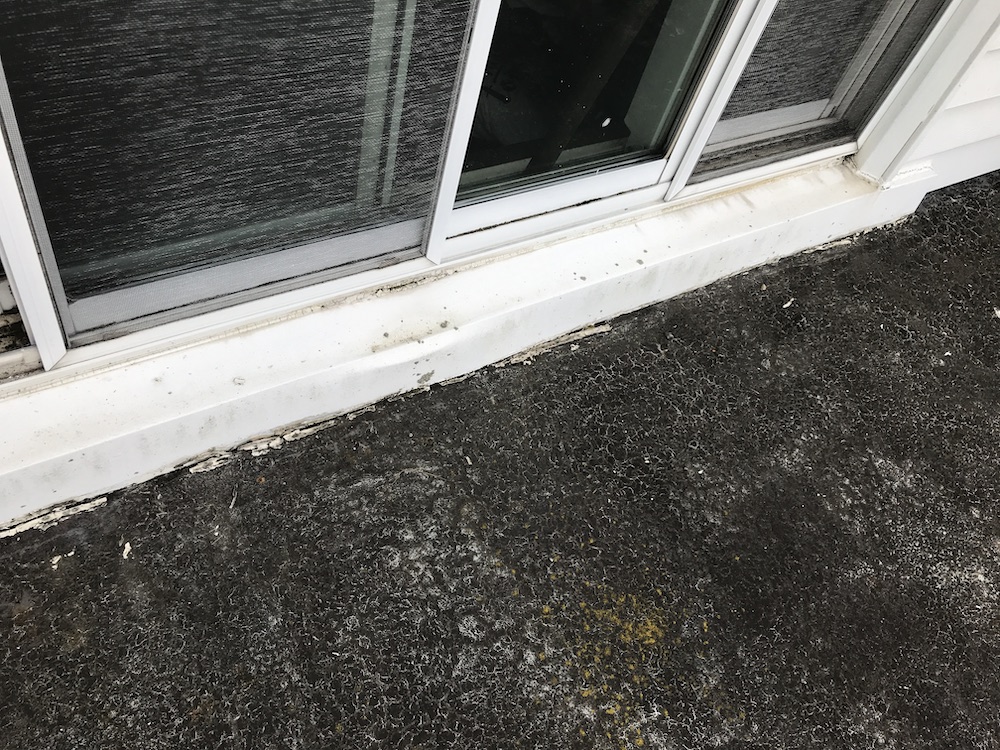
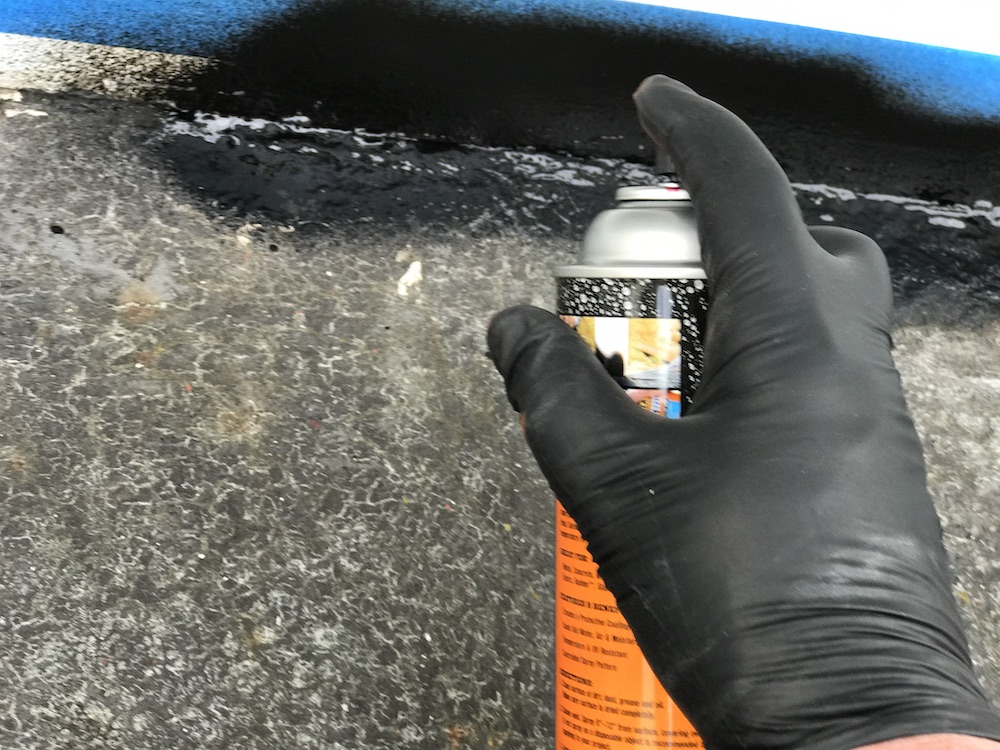
Although Gorilla Waterproof Patch & Seal Spray comes out of the can in a very nicely controlled pattern, we wanted a nice, clean line where the material overlaps the siding. To accomplish this, we applied some painter’s tape a short distance up on the wall. After one final sweeping of the roof, we were ready to spray!
Step Two, Getting Ready For The Goo: One Final Key Step Before Applying Gorilla Waterproof Patch & Seal Spray
Before you start spraying, there’s one other step to the prep: Grab your PPE (Personal Protective Equipment). You may be thinking, “Protective equipment for a spray can? That’s crazy talk!” We say, “No way, Hose A!”
One of the key advantages to Gorilla Waterproof Patch & Seal Spray is how well it adheres to almost any surface. If you’d prefer those surfaces don’t include your hands – or your eyes – grab a pair of nitrile gloves and some safety glasses. You might consider donning a face mask, too – if you don’t already have it on.
Step Three: Let The Gorilla Waterproof Patch & Seal Spray Fly!
With the prep out of the way, we’re ready to get on with the fun part: Applying the sealant. Gorilla Waterproof Patch & Seal Spray can be applied in temps ranging from 50°F – 90°F. Once it’s on and cured, it’ll work its magic as long as the temperature is between -40°F and 160°F. That pretty well covers anywhere I’M ever likely to be!
Before you pop the cap and start spraying, make sure the contents are well mixed. Just like with a can of spray paint, shake the Gorilla Waterproof Patch & Seal Spray can for about a minute, listening for the little magic metal ball inside to blend everything together.
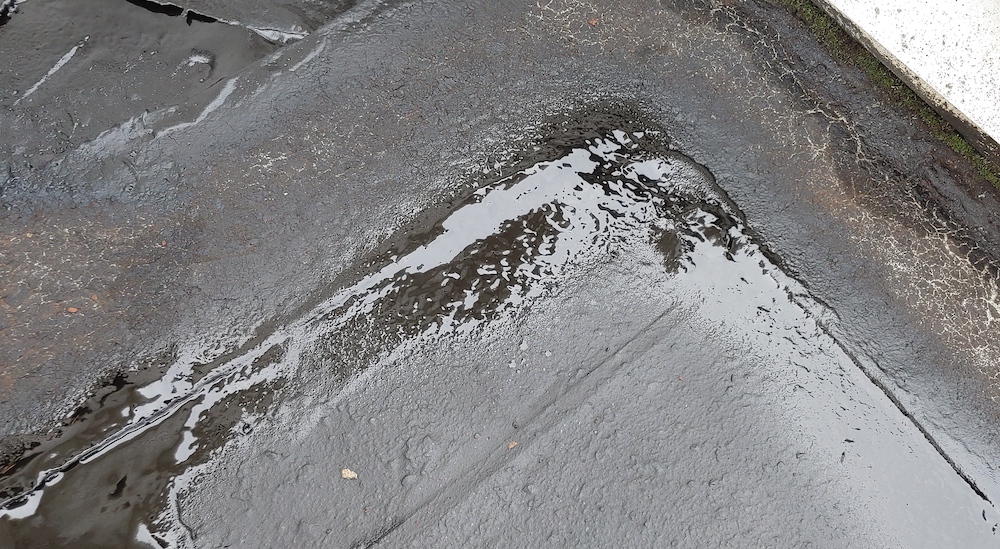
Once you’re finished, remove the cap, find a likely spot, and let ‘er rip! Hold the can about 8 – 12″ above the surface, and apply the sealant in several passes, building it up a bit with each pass. Give any small gaps an extra pass or two, and make sure you get a good shot of Gorilla Waterproof Patch & Seal Spray into all the crevices. The sealant is self-leveling, and does a very good job of spanning and sealing the nooks and crannies.
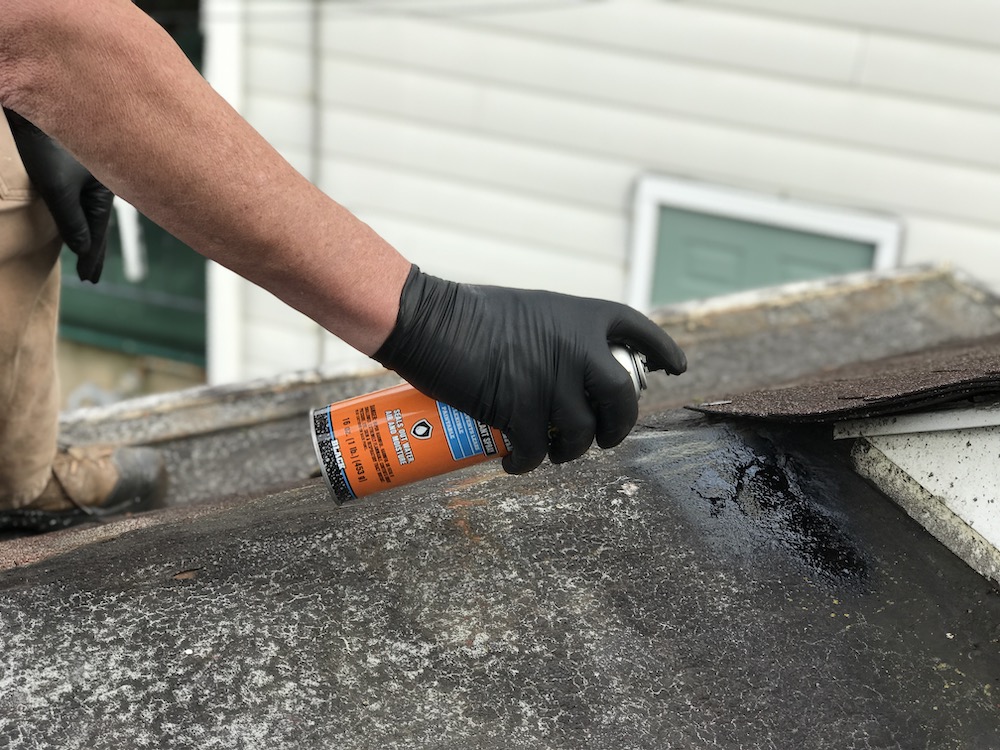
As I mentioned, on our project, we had taped off the roof/wall junction. There was a fairly good gap there, so we gave that area an extra helping. The spray pattern was very easy to control, though, and we had zero overspray onto the siding above the tape.

Keep going until every problem surface has a good coating of Gorilla Waterproof Patch & Seal Spray. Don’t overdo it, though; on areas with a lot of surface area to repair, or with wider gaps, you’ll need to let the first coat cure overnight. The next day, come back and repeat the process. That’s what we did on our repair project, and after the second coat was applied, we were confident we had a watertight repair.

Step Four: The Finishing Touches
Depending on your project, you may want to “pretty up” the repaired area afterwards. It wasn’t necessary on our repair; the area covered by the Gorilla Waterproof Patch & Seal Spray isn’t where anyone will see it, and the repair is only intended to hold the fort for a few months, until a full replacement can be done on that section of the roof.
If your repair is in a more conspicuous spot – or you have a bit of overspray, because you didn’t tape off your siding or whatever – you’ll be happy to know you can conceal the evidence. After it’s cured, Gorilla Waterproof Patch & Seal Spray is paintable, with both oil and water-based paints.
My son is very happy to know his porch ceiling is safe from further water intrusion. The waterproof barrier created by the Gorilla Waterproof Patch & Seal Spray is flexible, so it will withstand changes in temperature over the winter. Hopefully, he won’t be testing it down to its rated minimum of 40 below, but here in the northeast, you never know…The finished product is even UV resistant, so he’s covered even if the sun decides to come out!
Where Can Gorilla Waterproof Patch & Seal Spray Help YOU In Your Battle Against Nature?
So where is YOUR problem spot? Water is a wonderful thing, but not when it’s seeping into your house through the roof, chimney, walls or wherever. Or dripping on your head as you relax on the porch. Gorilla Waterproof Patch & Seal Spray, available in either black or white, provides a fast, easy way to keep water – and air – from invading your space.

The primates at Gorilla recommend Gorilla Waterproof Patch & Seal Spray for use on roofs, gutters, skylights, flashing, around chimneys (but not IN chimneys, unless you’re very heavily insured!), on PVC pipe joints, windows, on RVs…almost anywhere nature tries to intrude. It adheres to metal, concrete, wood, aluminum, brick, tile, fabric, most types of rubber, glass, and more.

We were impressed with how easy the product is to use, and how well it seals out the elements. We’ve had a lot of rain – and a few inches of snow – since finishing the project, and there have been no further leaks. Now that his ceiling is protected, he can start the prep work to re-stain it (with something other than water) in the spring. Meanwhile, he’s keeping an extra can of Gorilla Waterproof Patch & Seal Spray on hand, because Mother Nature never sleeps.


I purchased a can of Gorilla waterproof patch and seal , rubberized sealant spray. I HAVE A LARGE PLASTIC SINK . I originally sealed all the corners and sides with silicone I’ ve removed the silicone and have this Patch And Seal. I read the warnings on the can. I am terrified about the dangers of this product I will be working in a small room . I replaced my drain which rusted out /made a mess and caused mold / what precautions do I take to use this product safely. I’m 76 and I need this to work. I will
probably give this a couple of applications . This is in my basement. Please get back to me with with advice on how to do this thankyou James Hertel
Hi James. I suspect that repairing indoor plastic sinks with this type of product is not something the manufacturer (or we) would recommend. I would recommend you (if you have the suitable DIY skills) or a licensed plumber install a new plastic/utility sink rather than trying to patch cracks or leaks. Good luck with your project!