

![]() This post is sponsored by The Home Depot. When we lived in a more densely populated area, our front porch served as an observation platform of sorts. We could see the entire goings on in the neighborhood, whether we wanted to or not. We are far more rural now, and the view is a lot more interesting. The variety of birds alone is staggering, from chickadees right up to bald eagles. We have bears, deer, fox, coyote and all manner of wildlife inhabiting the property. Join us as we put a M18 FUEL Cordless Hammer Drill and Impact Driver Combo Kit to work as we show you how to build a deer stand far away from any power outlet.
This post is sponsored by The Home Depot. When we lived in a more densely populated area, our front porch served as an observation platform of sorts. We could see the entire goings on in the neighborhood, whether we wanted to or not. We are far more rural now, and the view is a lot more interesting. The variety of birds alone is staggering, from chickadees right up to bald eagles. We have bears, deer, fox, coyote and all manner of wildlife inhabiting the property. Join us as we put a M18 FUEL Cordless Hammer Drill and Impact Driver Combo Kit to work as we show you how to build a deer stand far away from any power outlet.

We have a network of trail cams set up and enjoy looking at the pictures we collect, but first hand sightings are pretty thrilling. I still vividly remember the massive black bear in the back yard appearing unexpectedly, fortunately he was more frightened of me than I was of him. We also hunt on the property, we feel as though since we feed a good deal of our produce to the deer, though not of our choosing, that they could contribute to our dinner table as well. We take one or two deer a year and the venison is well appreciated. We have a number of tree stands throughout the woods, and have seen some dramatic stories play out in front of our eyes, from mating deer to foxes hunting mice through the snow pack by leaping in the air and diving through the snow.

Why a Deer Stand Platform?
We wanted the opportunity to see more of these natural tales play out, and to possibly record them on camera. We also wanted a steady and safe platform to hunt from. Doing some research on the internet I found specially made brackets that incorporated standard dimensional lumber into a sturdy and safe platform that should suit our purposes nicely. At about the same time the new Milwaukee M18 Fuel 18-Volt Lithium Ion Brushless Cordless Hammer Drill and Impact Driver Combo Kit showed up at Home Fixated for evaluation. The timing being so serendipitous we went right to work on the platform. Follow along as we put these tools to work in this how to build a deer stand tutorial. For your safety and compliance with local codes and zoning, be sure to check with your local building inspector before starting such a project.
Specifications from Milwaukee
M18 FUEL™ 1/2″ Hammer Drill/Driver
“The M18 FUEL™ Hammer Drill/Driver is the most powerful 18-volt cordless hammer drill/driver in its class. This lightweight, versatile hammer drill/driver offers up to 10X longer motor life, 2X more runtime and 25% more power for maximum performance on the jobsite. The POWERSTATE™ Brushless Motor outperforms all leading competitors with constant power output, yet runs cooler with no wearable components. The REDLITHIUM™ Extended Capacity Battery Pack delivers more work per charge and more work over pack life than the competitors (not included). The onboard fuel gauge helps you monitor the charge more accurately, so there’s less downtime on the job. REDLINK PLUS™ intelligence ensures maximum performance and protection from overload, overheating and over-discharge. The M18 FUEL™ Hammer Drill/Driver’s all-metal ratcheting locking chuck provides maximum grip, bit retention and durability. The hammer drill/driver features 31,450 BPM for fast hammer drilling through masonry. A new contoured soft grip gives you ultimate comfort during prolonged use. The kit includes the new multi-voltage charger, so you can charge all M12 and M18 lithium-ion batteries with one charger.”
Features
• POWERSTATE™ Brushless Motor: Delivers up to 725 in lbs of torque with maximum sustained torque to complete the toughest of applications
• REDLITHIUM™ Battery Technology: Superior pack construction, electronics, and performance deliver more work per charge and more work over pack life than any battery on the market
• REDLINK PLUS™ Intelligence: The most advanced system of cordless power tool electronics. Provides optimized performance and overload protection using total system communication between tool, battery and charger
Product Specifications
Voltage 18V
Length 8.1″
Warranty 5 Year Limited Warranty
Peak Torque 725 in-lbs
Chuck Type 1/2″ Metal Single Sleeve – Ratcheting Lock
Speed 0-550/0-1,850 RPM
Tool Warranty 5 Years
Power Source Cordless
M18 FUEL™ 1/4″ Hex Impact Driver
“The M18 FUEL™ 1/4″ Hex Impact Driver is the most powerful tool in its class. This hex impact driver provides up to 3X longer motor life, 50% more runtime, and proprietary Milwaukee® 3-Mode DRIVE CONTROL™ for better control over the power and speed required for specific applications. The POWERSTATE™ Brushless Motor outperforms all leading competitors with constant power output, yet runs cooler with no wearable components. Use with the REDLITHIUM™ Compact Battery Pack or Extended Capacity Battery Pack (sold separately), which deliver more work per charge and more work over pack life than the competitors, as well as best-in-class performance in extreme jobsite conditions. The onboard fuel gauge helps you monitor the charge more accurately, so there’s less downtime on the job. REDLINK PLUS™ intelligence ensures optimized performance and protection from overload, overheating and over-discharge. The M18 FUEL 1/4″ Hex Impact Driver offers up to 55% faster application speed, and a range of 200 in-lbs to 1600 in-lbs of torque. Its compact size and weight allow access to tighter areas and reduce user fatigue. The built-in LED light illuminates work surfaces in dark locations.”
Features
• Milwaukee® POWERSTATE™ Brushless Motor runs cooler, lasts longer and delivers up to 55% faster application speed
• REDLINK PLUS™ Electronic Intelligence allows the operator to choose between 3 fastening modes with Milwaukee’s proprietary DRIVE CONTROL™ feature
• The Milwaukee® REDLITHIUM™ Battery Pack is the most durable pack on the market and provides up to 50% more run time
• DRIVE CONTROL™: Three fastening modes provide variable power and speed for precision work and heavy duty applications
Product Specifications
Voltage 18V
Motor Type Brushless
Length 5-1/2″
Warranty 5 Year Limited Warranty
Peak Torque 1,600 in-lbs
No Load Speed 0-2,900 RPM
No Load IPM 0-3,600
Battery System M18
Power Source Cordless
How to Build a Deer Stand – Location, Location, Location
We wanted to build in a location that would give us good viewing opportunities, but it had to be in a location that we could access easily enough for construction. Another consideration was accessibility for the grand kiddies, as well as aging bodies. The deep woods at our place are on some pretty rugged terrain, so we eliminated the deep woods from consideration. The site we ultimately selected was on the edge of a small pasture I had cleared last year and was slightly elevated as it was on the edge of the woods as well. We had seen a good deal of activity in the meadow, and the elevation afforded a view of a large hayfield as well as an area where we plant potatoes, squash and garlic in the summer. We also utilize that area in the fall and spring by planting turnips, and an oat, pea and radish mix that acts as a food source for wildlife as well as a cover crop to improve the soil.

Sizing the Deer Stand Platform
Since we already have a game blind we decided to build the platform slightly larger than the game blind footprint. We went with a 6’x6’ platform as it used the lumber most efficiently and exceeded the footprint of the blind. There may come a point when we want to enclose it with framing, but decided to see how the current configuration works out. We will start with 8’ long 4×4’s for elevation and see how that works.
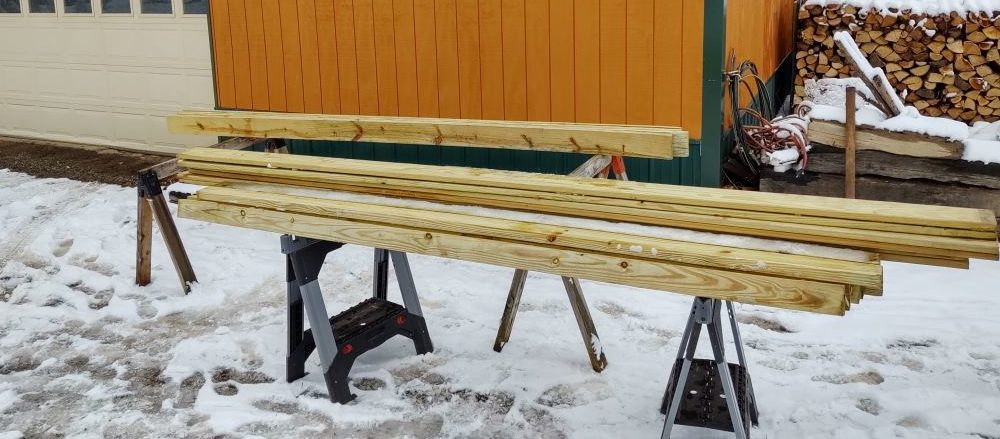
How to Build a Deer Stand – Starting the Construction
I started the construction on the bed of my trailer, thinking I could transport the partially completed framework and the rest of the lumber out to complete construction at the site where we intended to erect the deer stand. I started by making a frame out of 2×6 pressure treated lumber, and framed the floor joists 16” on center, which left one short cavity.
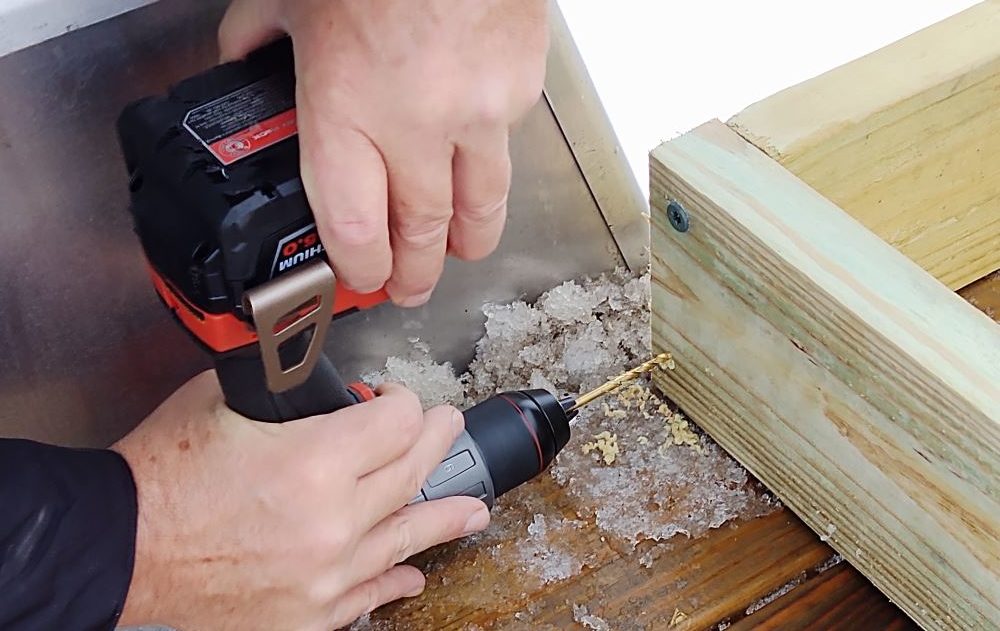
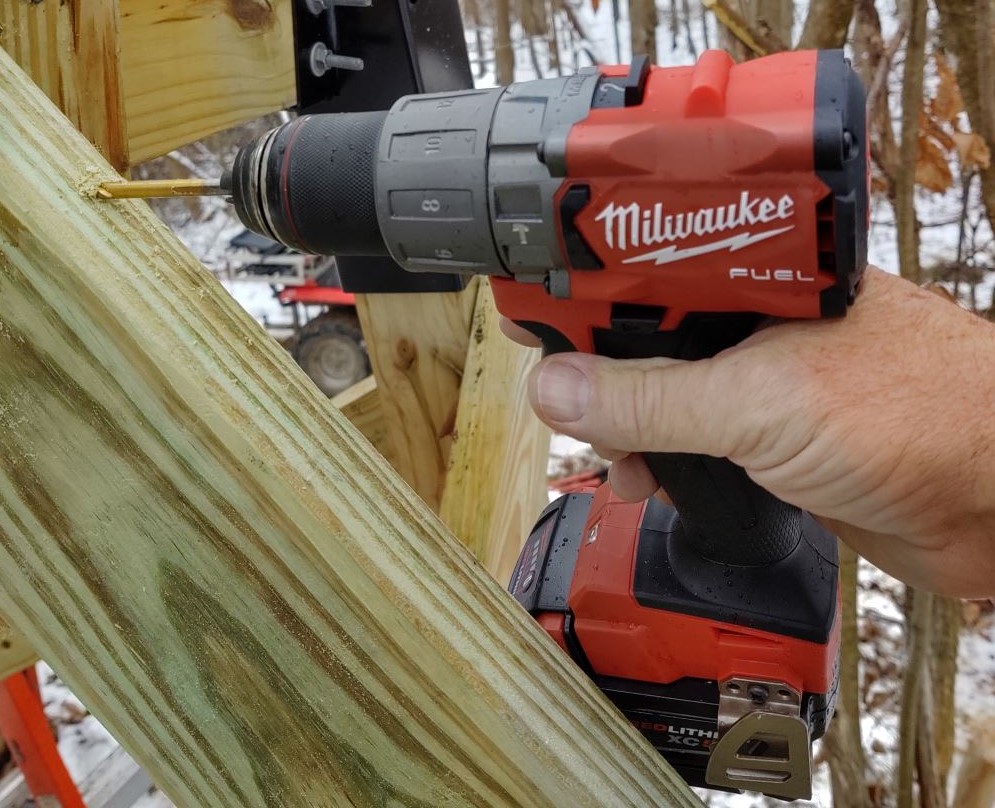
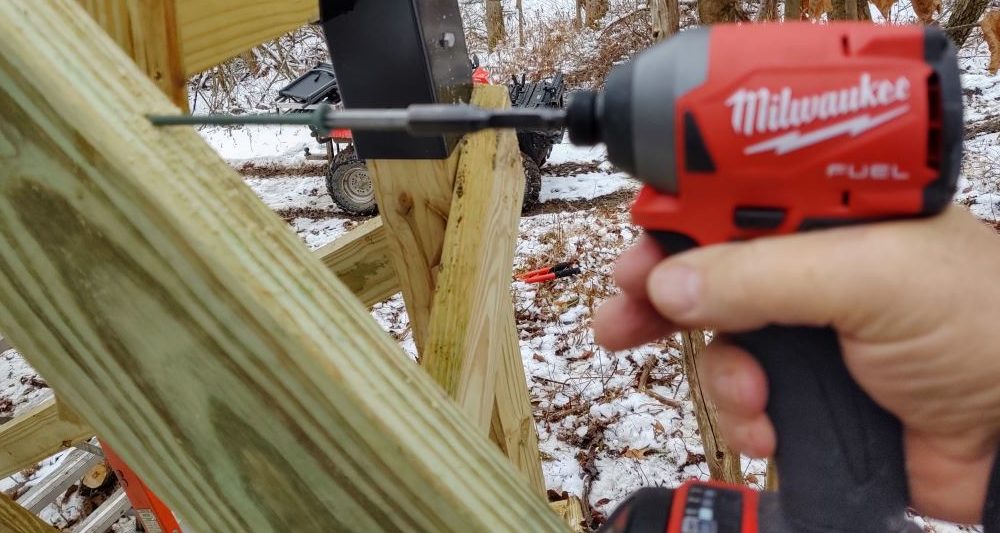
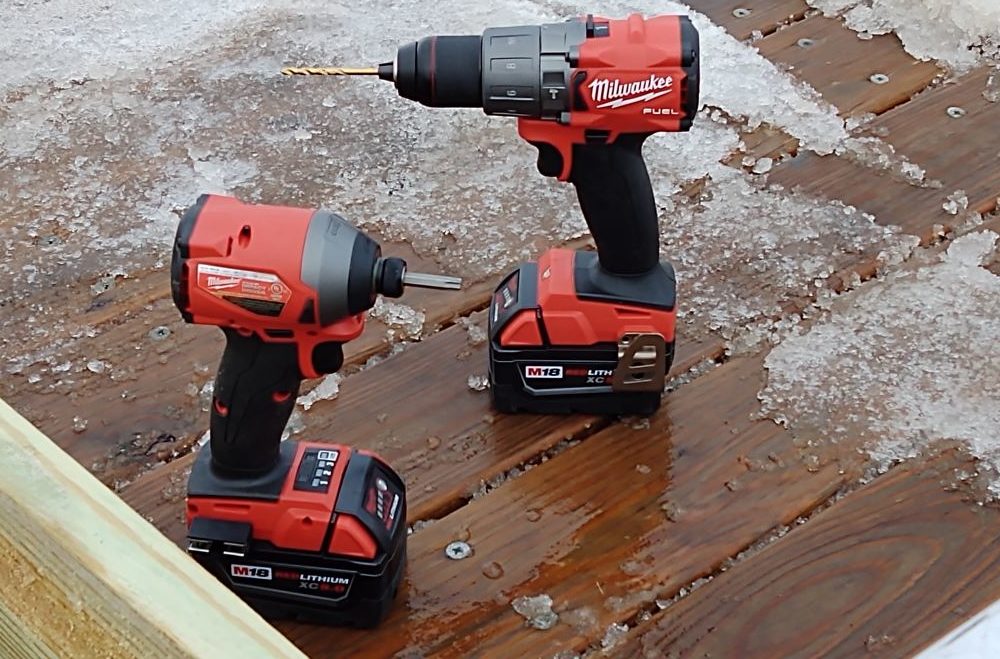
I used 6” long Timberlok screws on the outside corners of the frame to get started. I used the Milwaukee Fuel 18v Hammer drill to drill pilot holes for the screws to ensure they were driven in straight and square to the frame. I then used the Milwaukee Fuel 18v Impact Driver to drive the Timberlok fasteners. As expected, both tools were more than up to the task – both operations were effortless. The impact driver in particular was well balanced and very powerful, making the head of the 6” long screw easy to engage smoothly throughout the operation.
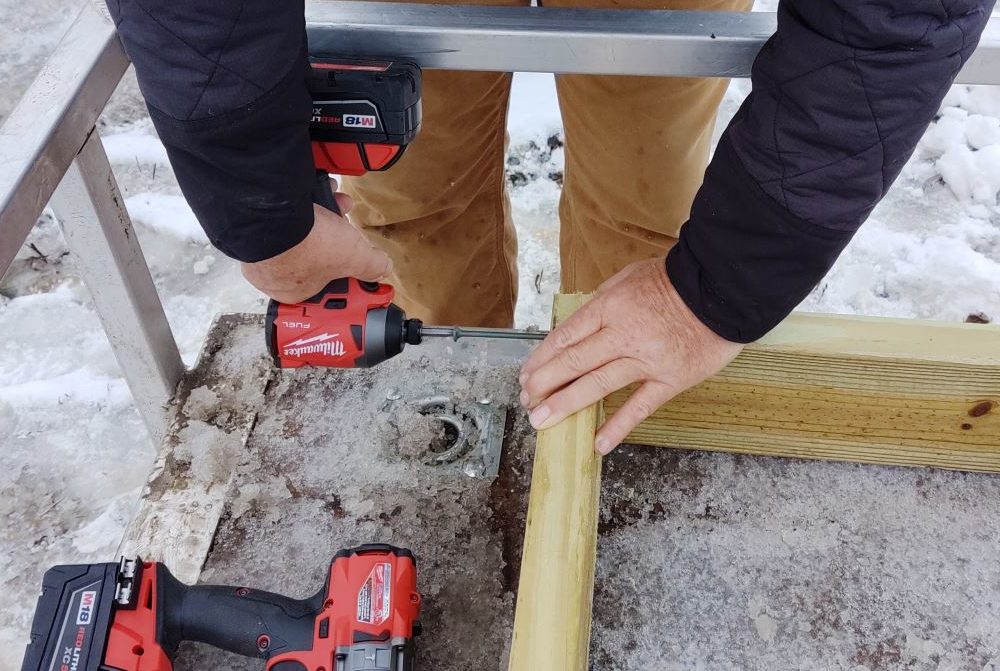
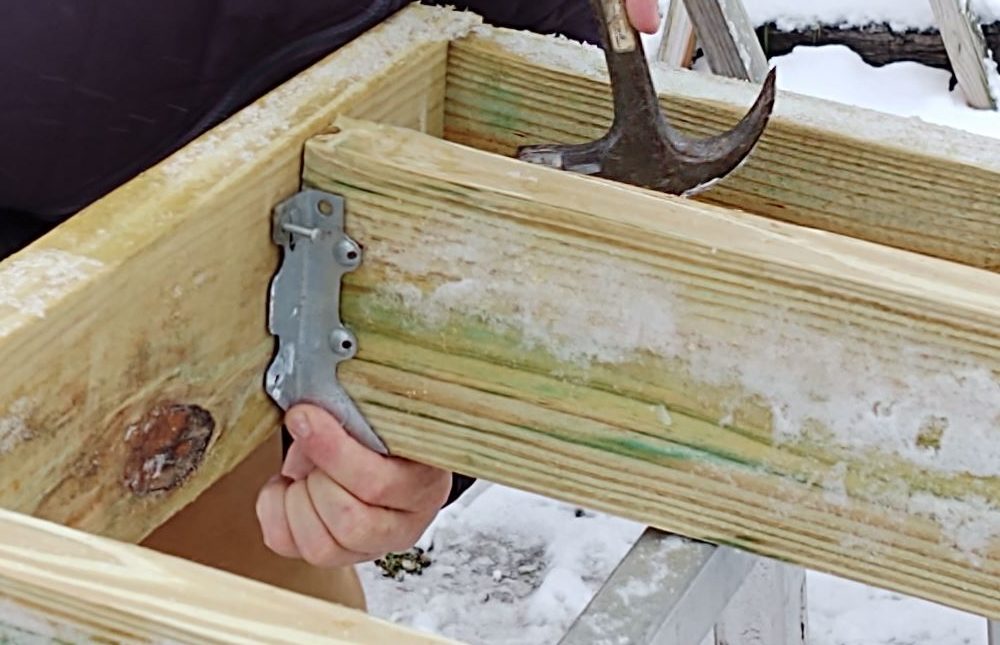
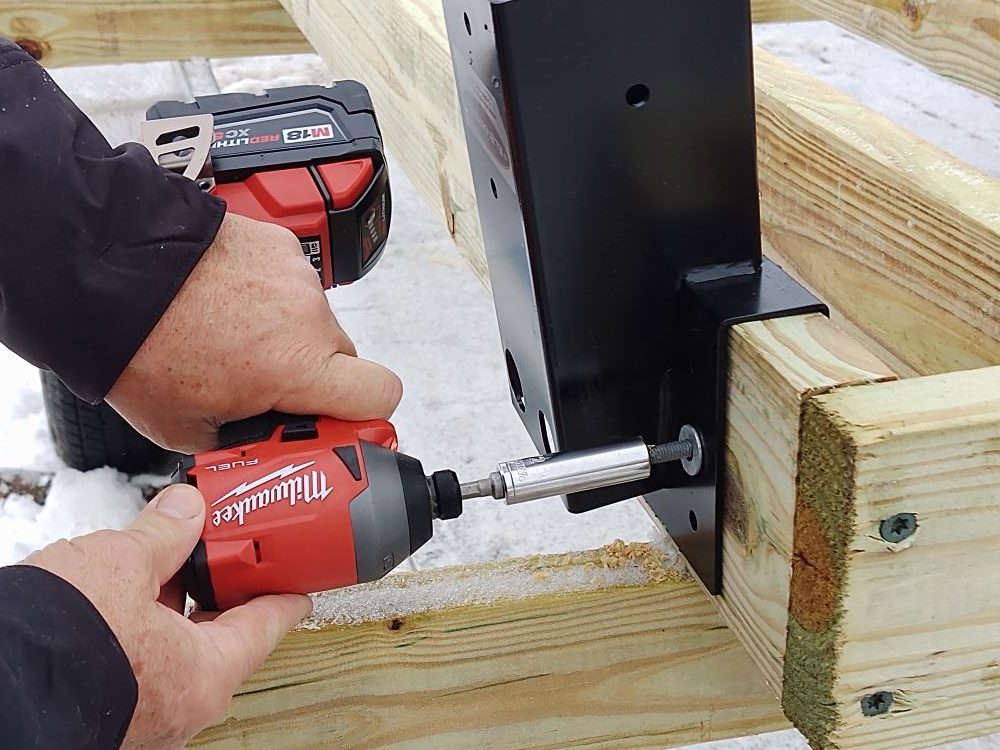
Next, I used standard joist hangers to set the floor joists within the deer stand frame. I used all galvanized nails for this step as I expect this platform to provide years of outdoor service. I then bolted the Elevators 4×4 Compound Angle Brackets I purchased to the frame, spacing them 4” from the end. The platform brackets were specially designed for this type of project. I used 3”x5/16 galvanized carriage bolts to secure the brackets to the frame. I again used the Milwaukee hammer drill the holes through the frame and then the impact driver to secure the nuts on the frame. I had to use caution as the impact driver could have pulled the carriage bolts right through the wood framing – it is very powerful.

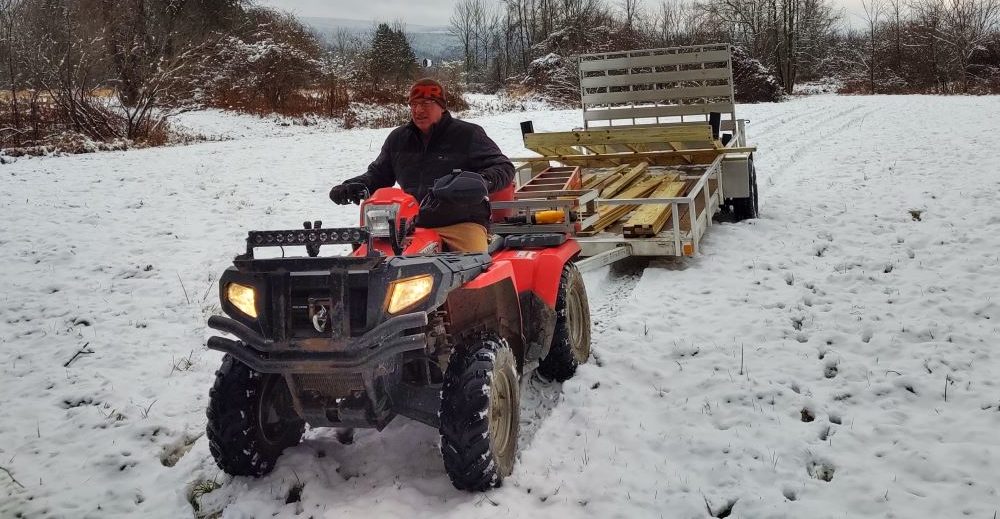
Moving the Deer Stand
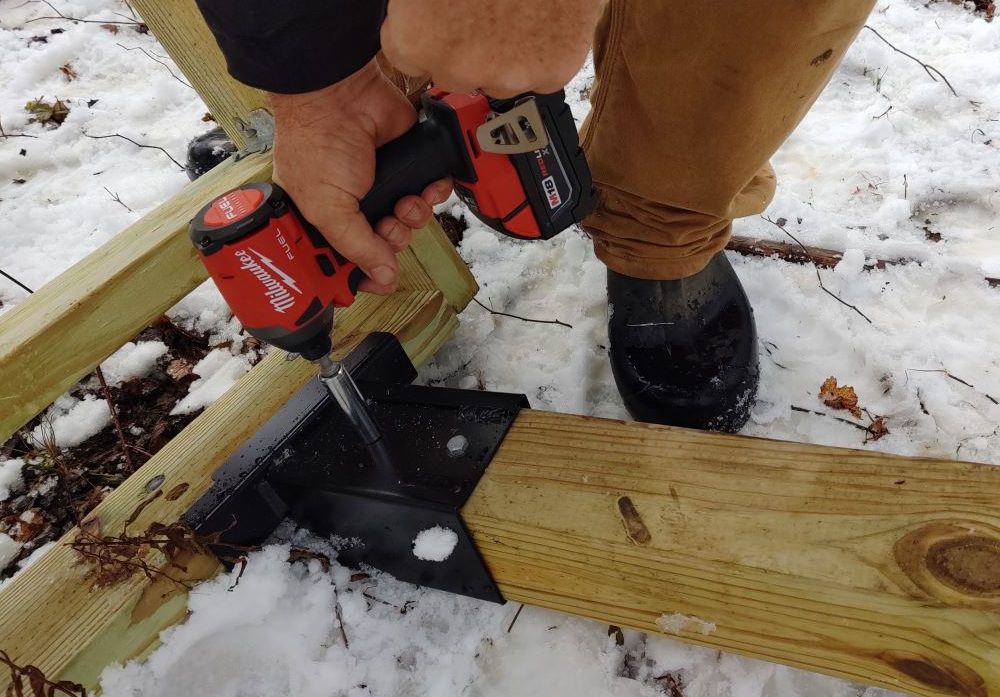
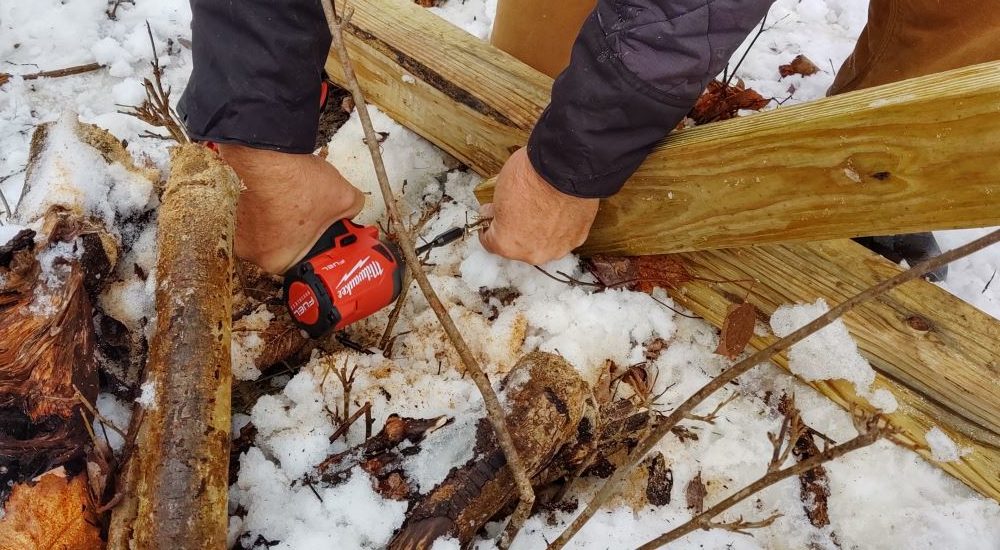
Once we completed this initial work, we loaded the rest of the lumber onto the trailer and gathered up the tools. We hooked the trailer up to the ATV and pulled the whole works out to the site where we wanted to locate the deer stand / wildlife platform. We moved the frame into place and set it on its side and attached the legs to the brackets with 2”x5/16” galvanized lag bolts, again using the impact driver and a socket. The lag bolts were easily driven into place and tightened nicely. We then added the leg bracing and fastened them with 3” deck screws driven in with the impact. We didn’t add all the bracing at this time, just enough to stabilize the tower so we could rotate it upright.
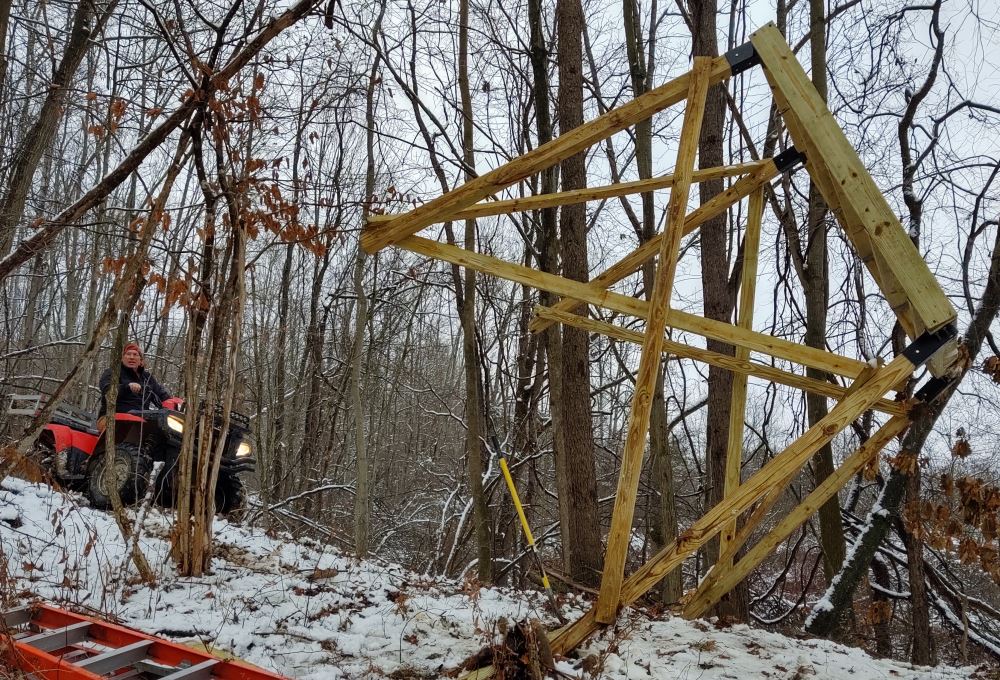
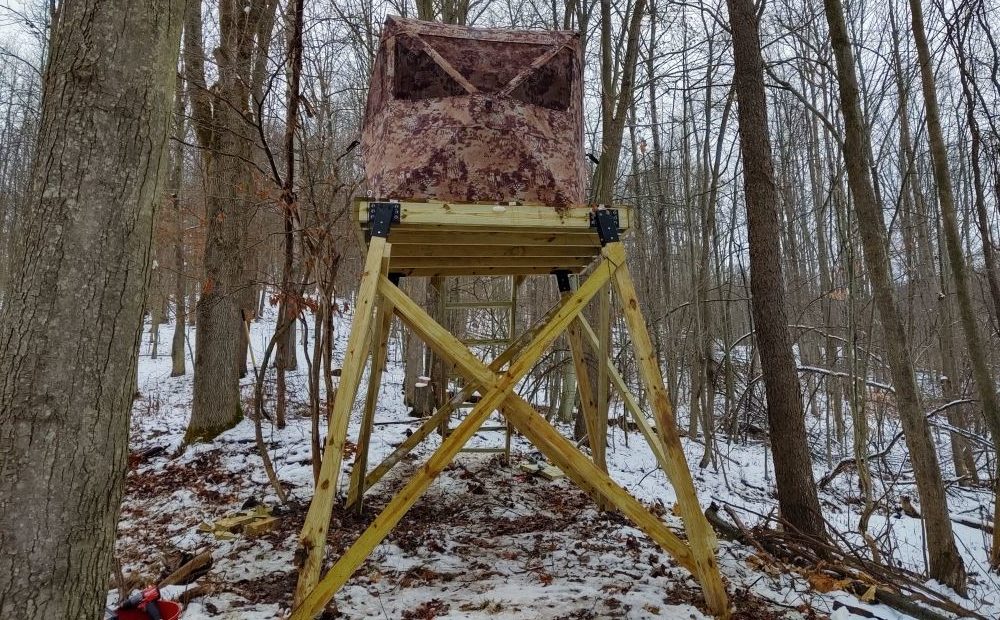
Making Things (Up)right
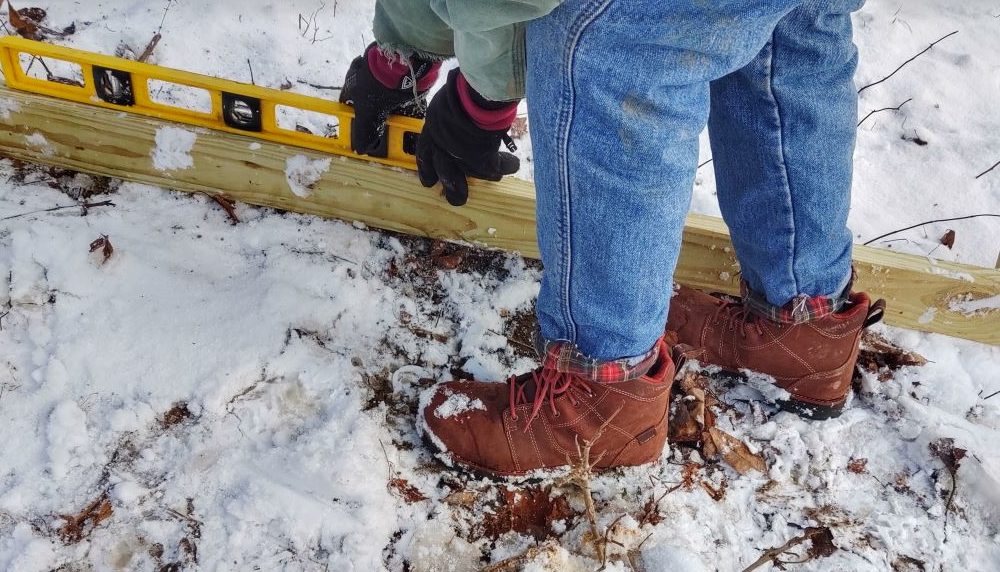
Once we had sufficient bracing in place, we attached the cable from the winch on the ATV to one of the top frame members. This was the moment of truth as we were uncertain if the winch would pull the tower upright. At first it wanted to drag the assembly across the site. At the suggestion of my faithful assistant, (my ever-patient and helpful spouse), we placed a board across the back legs to prevent them from dragging and the tower rotated into an upright position. We finished adding the bracing as before using the Milwaukee impact driver. Since the tower was located on a slope we ran a board across from front to rear with a level and determined how much of the rear legs to remove to get the tower to sit level. We used a reciprocating saw to cut the legs and the tower for the deer stand and game blind settled nicely into a solid level attitude.

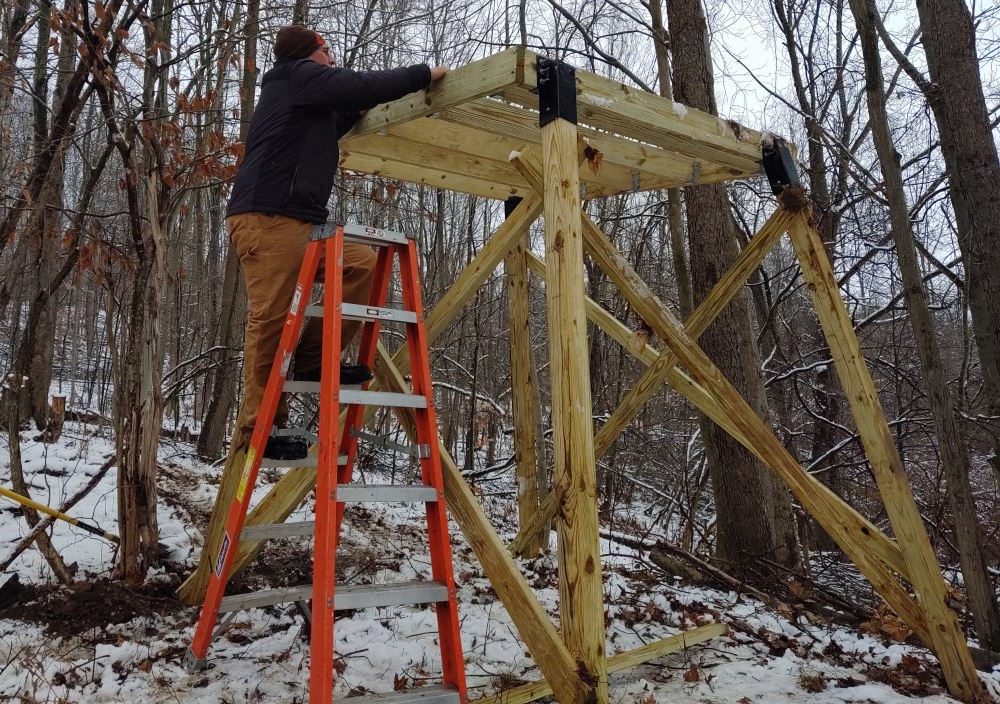
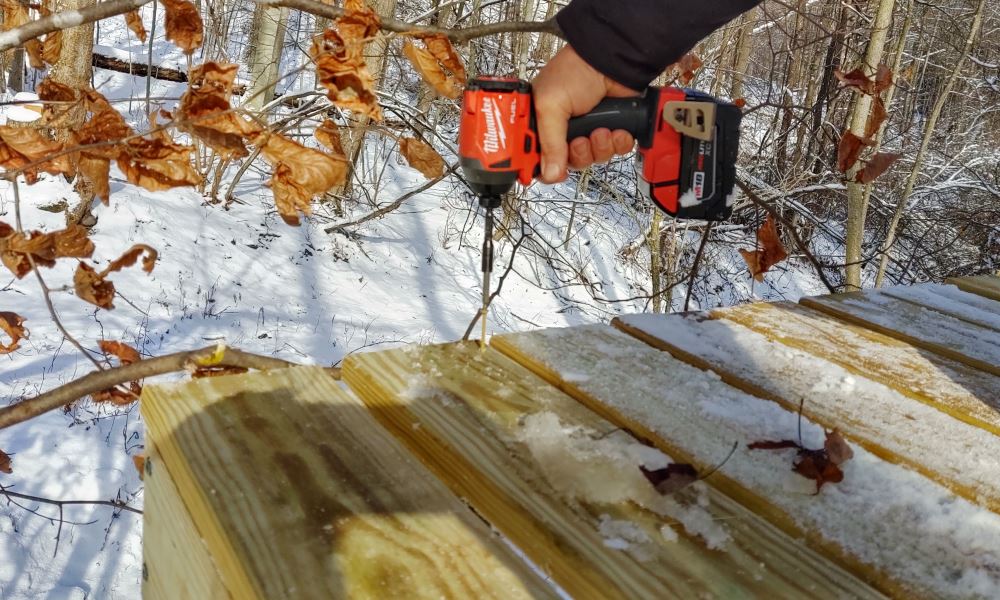
Topping the DIY Deer Stand Off With Decking
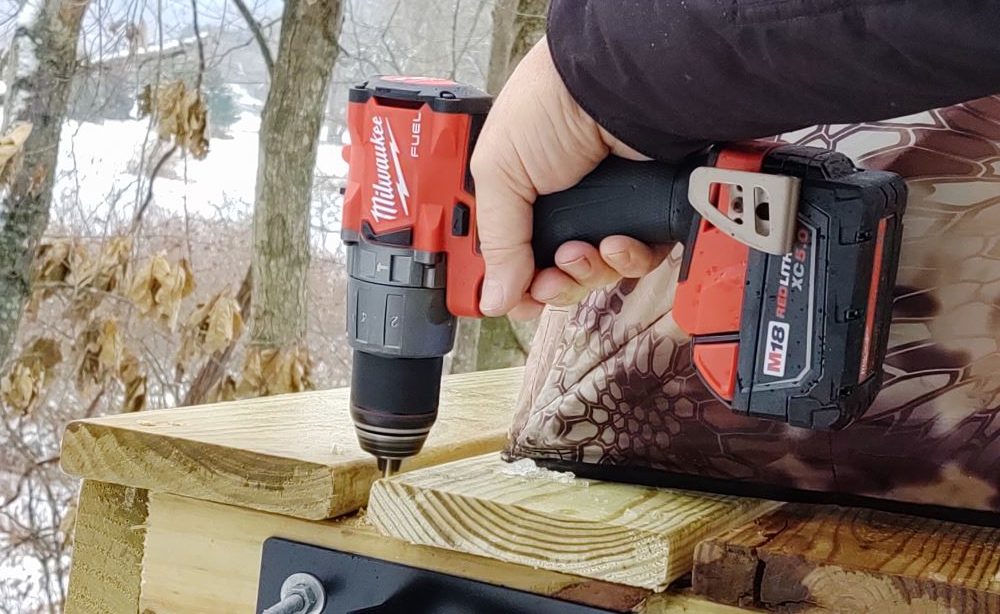
The next step was to add deck boards to the top of the framing. You guessed it; once again we called on the Milwaukee impact driver to screw the decking down. The impact driver was perfectly suited to the task, plenty of power, well balanced and easy to control.
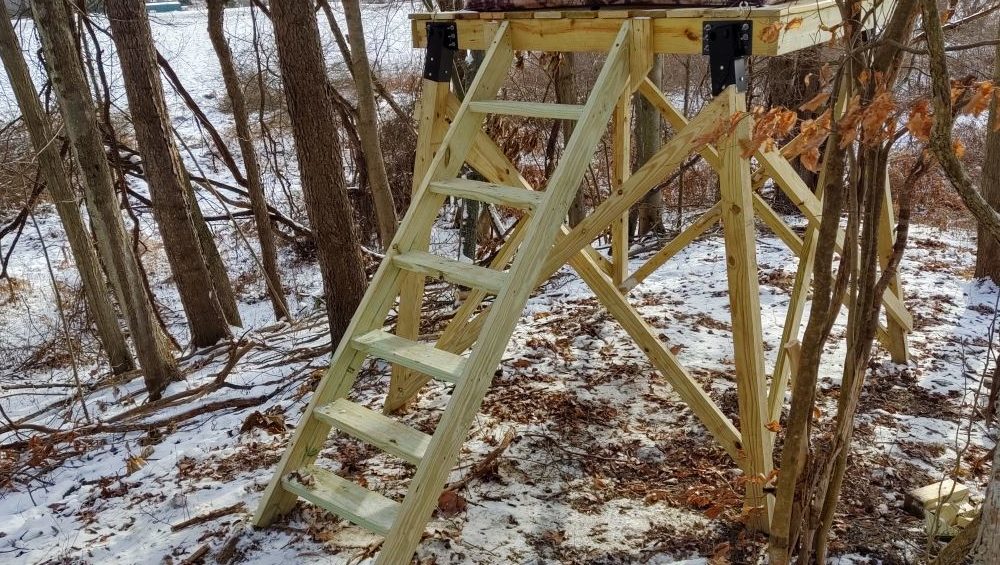
Building a Stairway is a Lot Easier than High Jumping
We wanted to be able to easily access the platform, so we decided on steps rather than a ladder. We used 2”x6” pressure treated boards for the stringers as well as the treads. We built the steps in place again using the impact driver to fasten the treads to the stringers with the 3” deck screws. We then drilled pilot holes with the hammer drill to prevent splitting and fastened the stringers to the platform with more 6” long Timberloks. We then added cleats and threw in additional screws to securely fasten the steps to the deck of the deer stand.
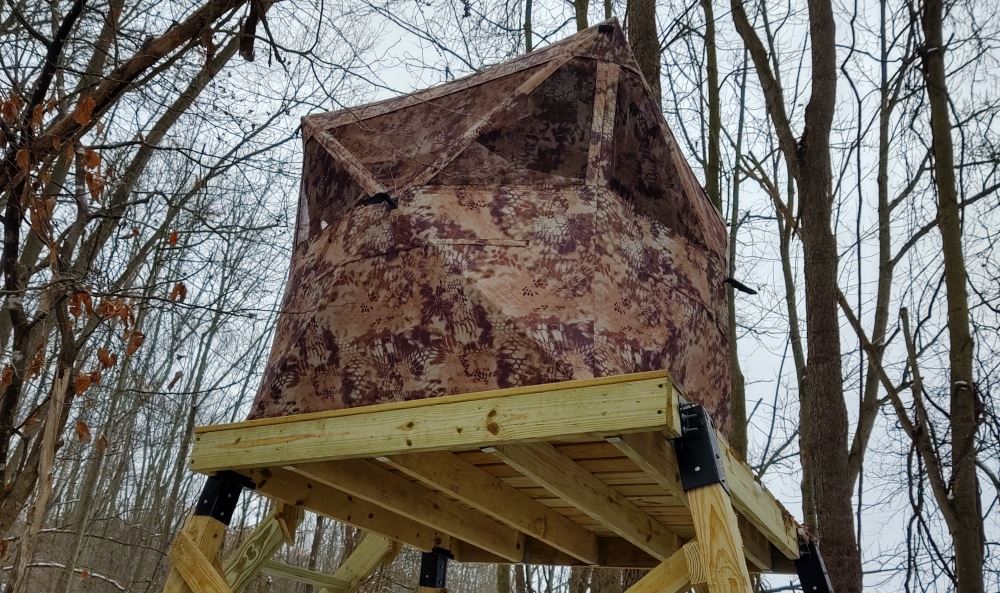
Hiding From Nature with a Portable Game Blind
As a final step we attached a portable collapsible blind to the deck of the deer stand tower. First we used the hammer drill to drill pilot holes in the four corners of the deck and then screwed in eyelets to fasten the blind to. We can now sit up in the blind without being detected, at least visually, by any of the wildlife moving through the vicinity.

More Thoughts on the Milwaukee M18 FUEL Brushless Cordless Hammer Drill and Impact Driver Combo Kit
I was thoroughly impressed with the Milwaukee M18 Fuel Brushless Cordless Hammer Drill and Impact Driver Combo Kit. Both tools worked flawlessly throughout the diy deer stand project. We certainly never challenged the capacity of the hammer drill during this project, but it is a solid and powerful drill. I can’t see that I will ever use my corded hammer drill again.
I was also impressed with the capacity of the 5ah batteries that accompany this kit. The deer stand construction spanned several days and I never recharged the batteries throughout the project. Additionally, the impact driver proved to be everything you look for in a tool of this nature. Powerful and well balanced, it should give years of excellent service. Milwaukee has certainly improved an already robust set by utilizing the brushless motors in both of these tools as well as the advances they’ve made in battery technology. The tough carrying case is also a nice touch. The set includes a charger that will accommodate an M18 battery as well as an M12 battery. The Milwaukee M18 Fuel 18-Volt Lithium Ion Brushless Cordless Hammer Drill and Impact Driver Combo Kit is available at Home Depot for $399.00
I acknowledge that The Home Depot is partnering with Home Fixated in sponsored content. As a part of the sponsorship, Home Fixated is receiving compensation for the purpose of promoting The Home Depot. All expressed opinions and experiences are our own words. This post complies with the Word Of Mouth Marketing Association (WOMMA) Ethics Code and applicable Federal Trade Commission guidelines.


