

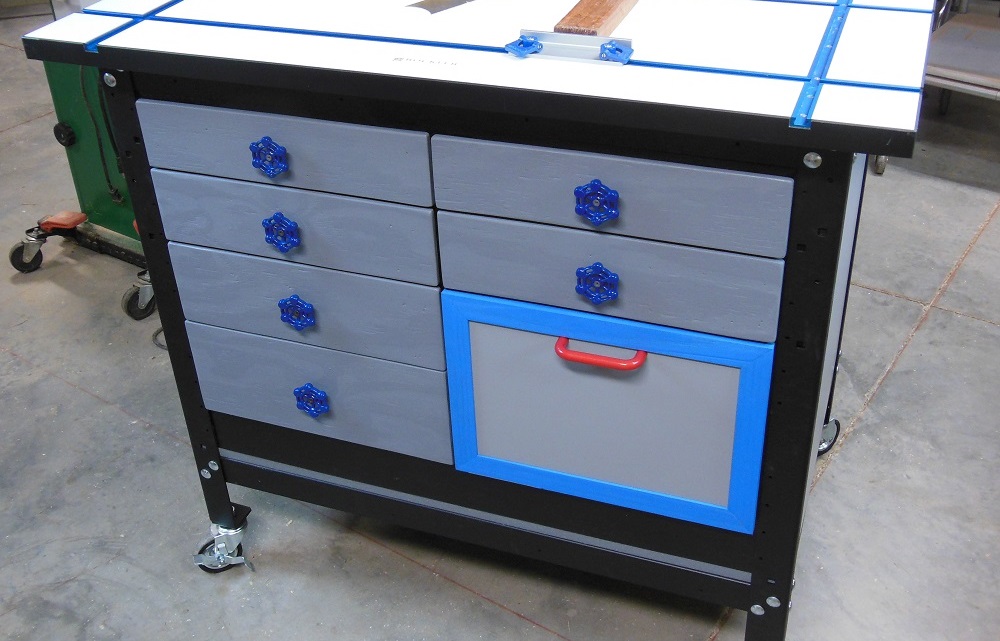
For me and my “organizationally-challenged” brothers and sisters, garages and workshops are zones of chaos, where storage deficiencies and surplus “stuff” become life partners. The more tools and toys we acquire, the more we need places to put them. Tools without homes are destined to either never be found again or to forever be in the way; there is no middle ground. Every surface teeters above the jaws of clutter. But today we pop a breath mint into those foul jaws by building a shop storage drawer cabinet into the bottom of a popular worktable. This dense storage solution tames the wild workbench and makes your tools feel right at home. Come along, we’ll walk you through the process.
Add Drawers For Efficient Use Of Your Valuable Space
Many workbenches have a large, open shelf somewhere near the bottom. If not, one can usually be added. But that space is often only good for larger (or taller) items. To get the most out of your volumetric space, consider adding shelves, drawers and/or cabinets. Shelves are easy. Drawers are just shelves that slide. And cabinets are just shelves with doors. Our drawered storage cabinet uses the latter two.
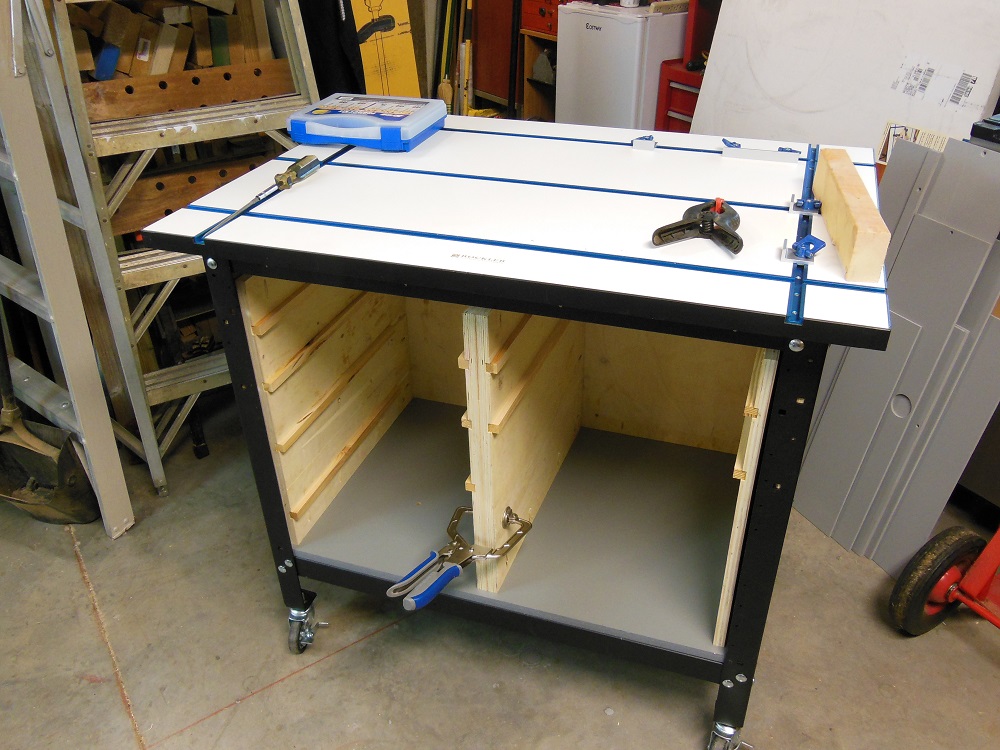
This project features a Rockler metal shop stand we recently reviewed. But we aren’t necessarily presenting a solution for that particular unit (To that end, you could just buy their drawer mounting kit and be done with it). Instead, it’s more about general techniques that you can adapt to suit your own storage needs. Because sometimes the hardest part is just figuring out how to begin.
Determine The Space Available For Your Shop Storage Drawer Cabinet

I’m a cheap “frugal” woodworker who uses as much harvested material – and 70% off home center cull – as possible. The only thing purchased specifically for this project are the drawer pulls. And even those are a thrifty alternative, as you’ll see.
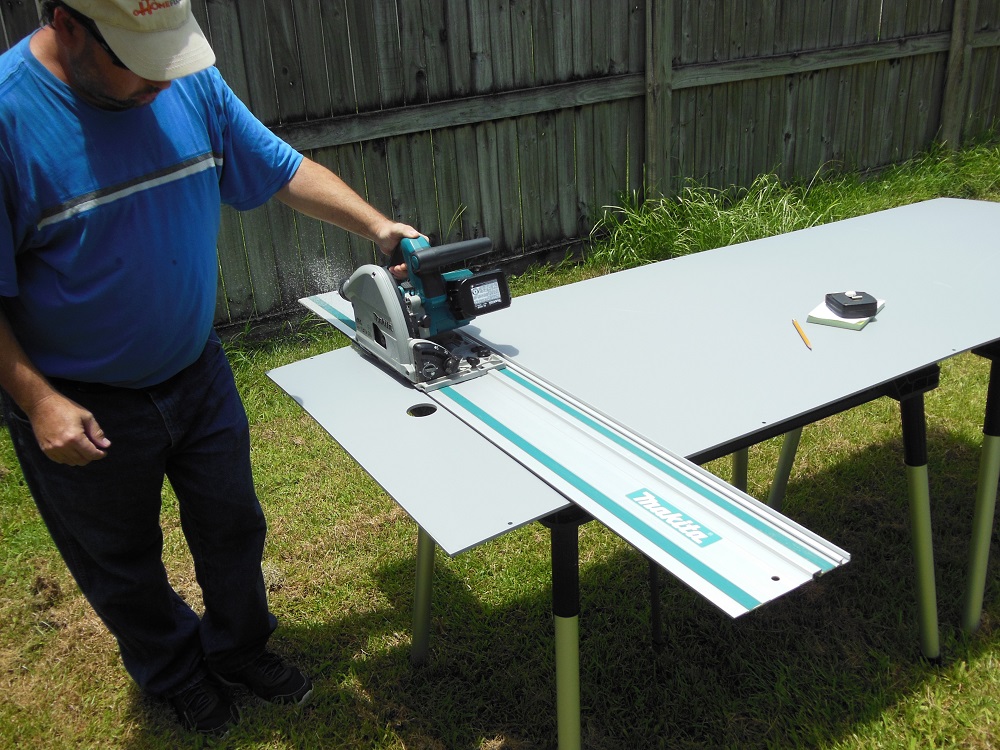
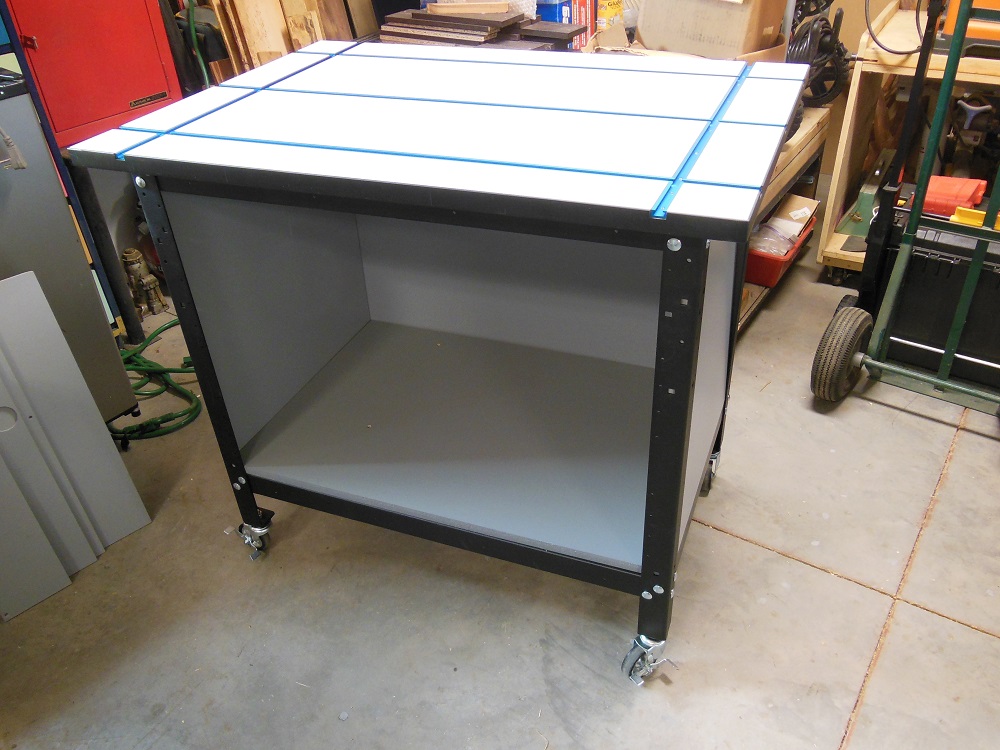
There are many ways to go about building a drawer cabinet. But the first thing you need to do is measure the space you want to fill. In this case, I had to first create that space by adding a shelf. If you’re making a freestanding unit, decide how large you want it to be.

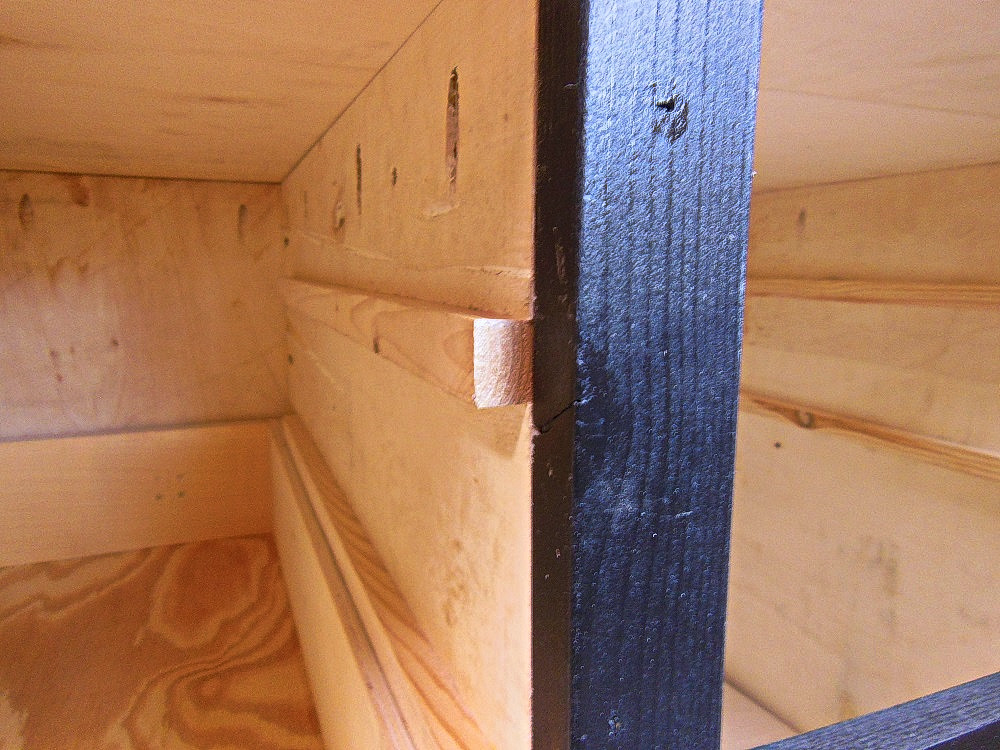
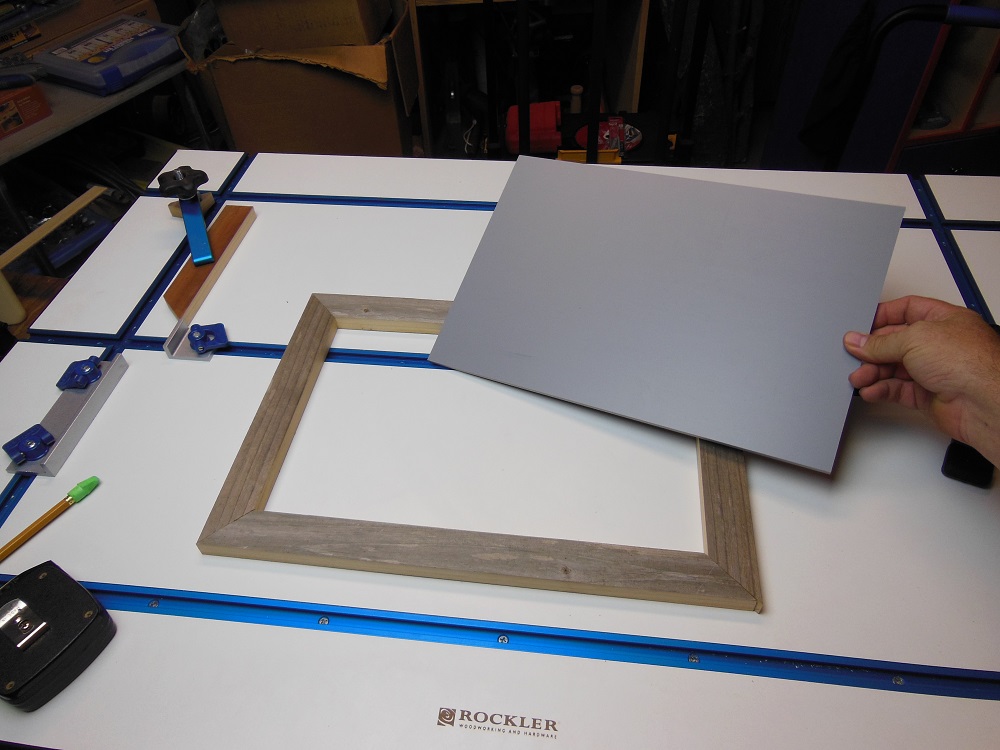
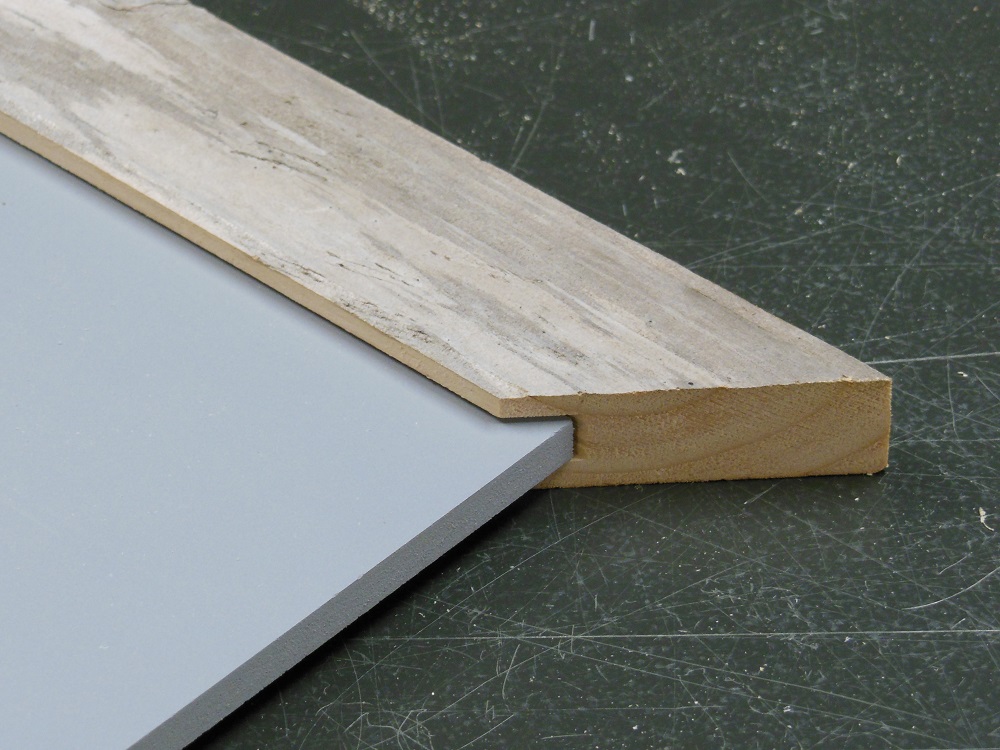
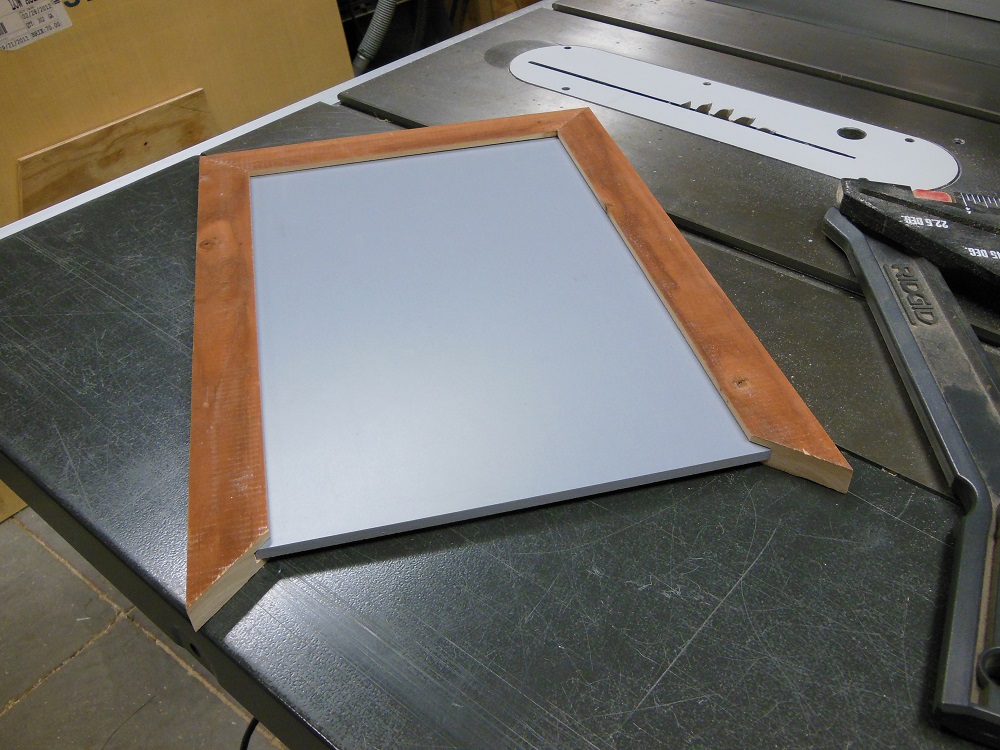
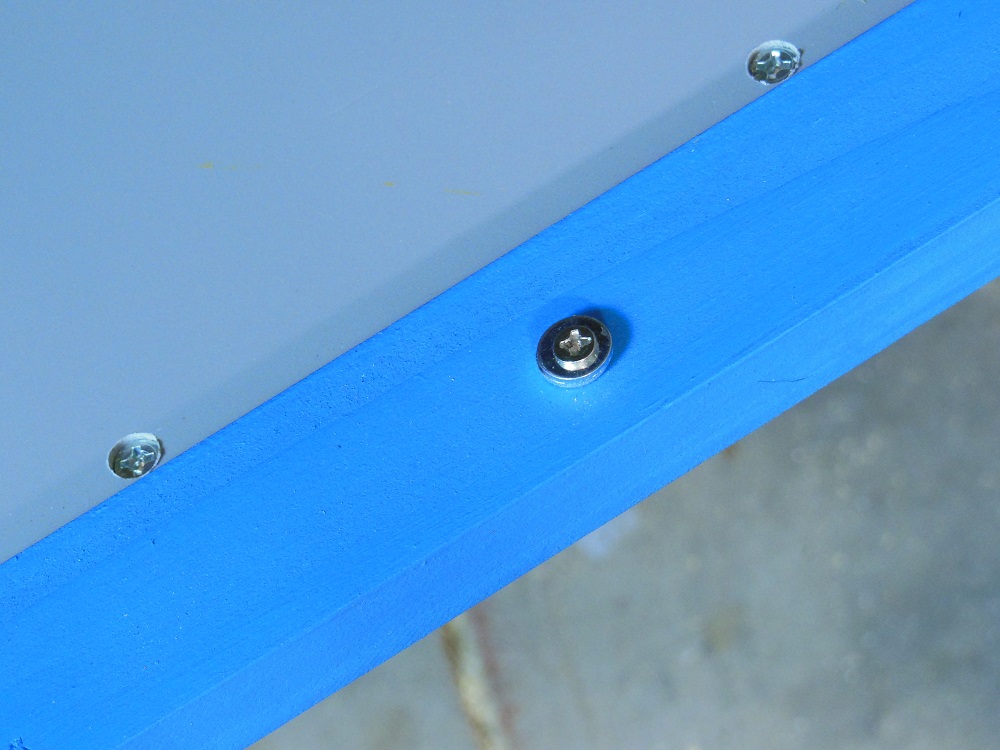
The gray PVC board is just for cosmetics. Once in place, I backed it with 3/8” plywood left over from another project and screwed both to the metal frame. Speaking of the metal frame – before installing any of this I made sure all of the bolts were tight and had plenty of thread lock. Once the cabinet is built in, they won’t be easy to get to. If I was ever forced to re-tighten, I can drop the cabinet through the bottom. But it would a chore I’d rather not have to deal with.
Making Sides For The Shop Storage Drawer Cabinet
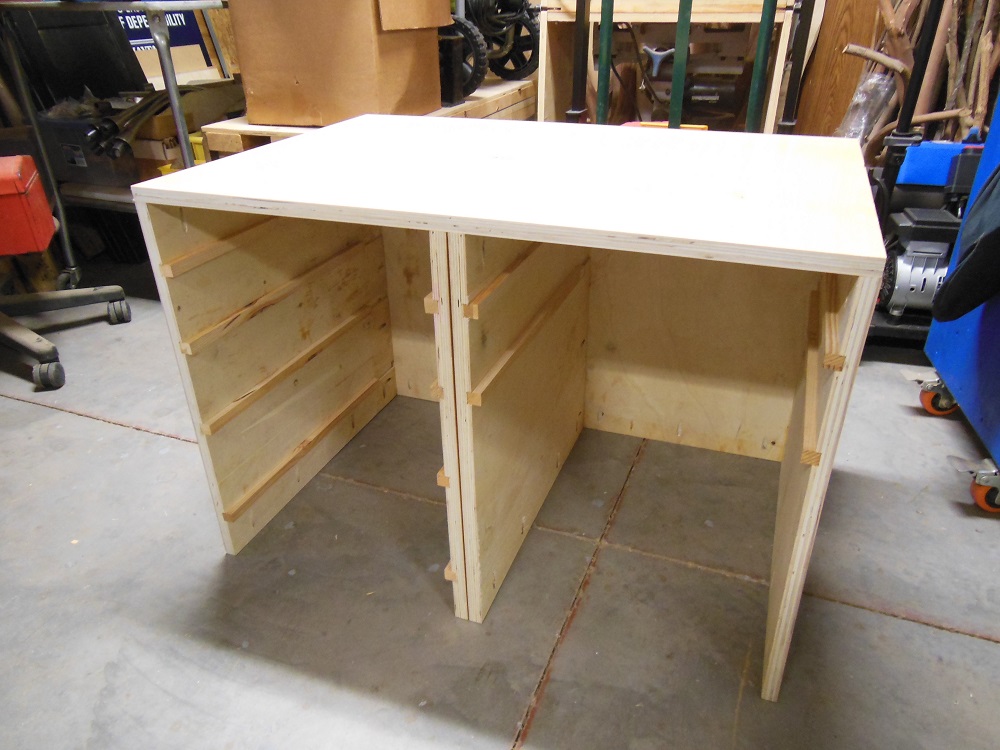
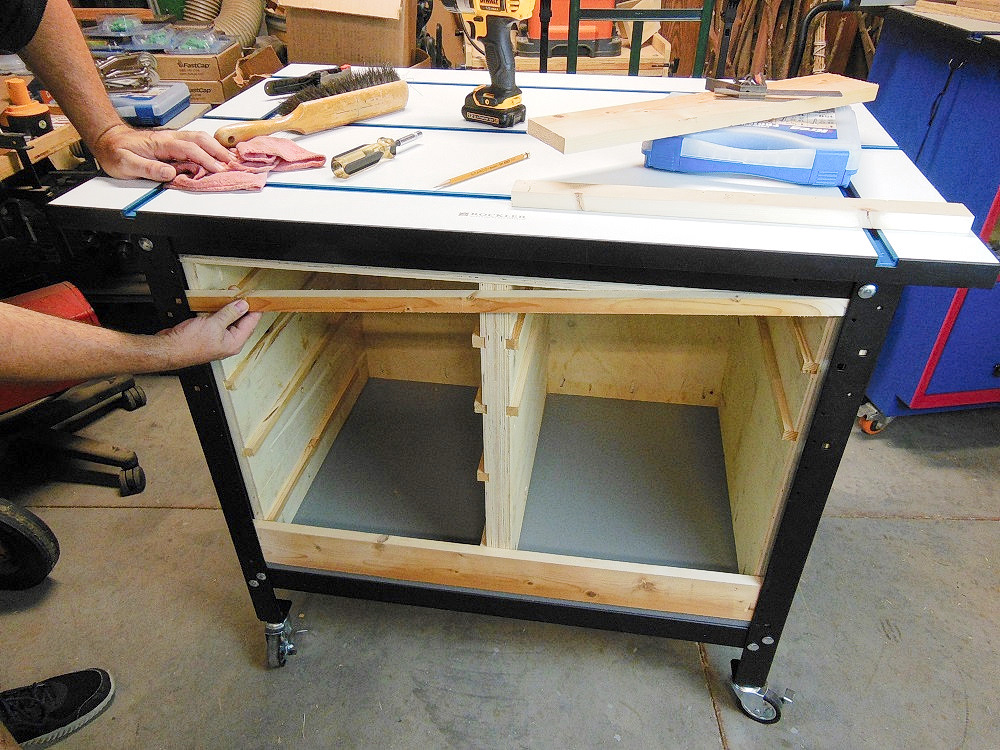
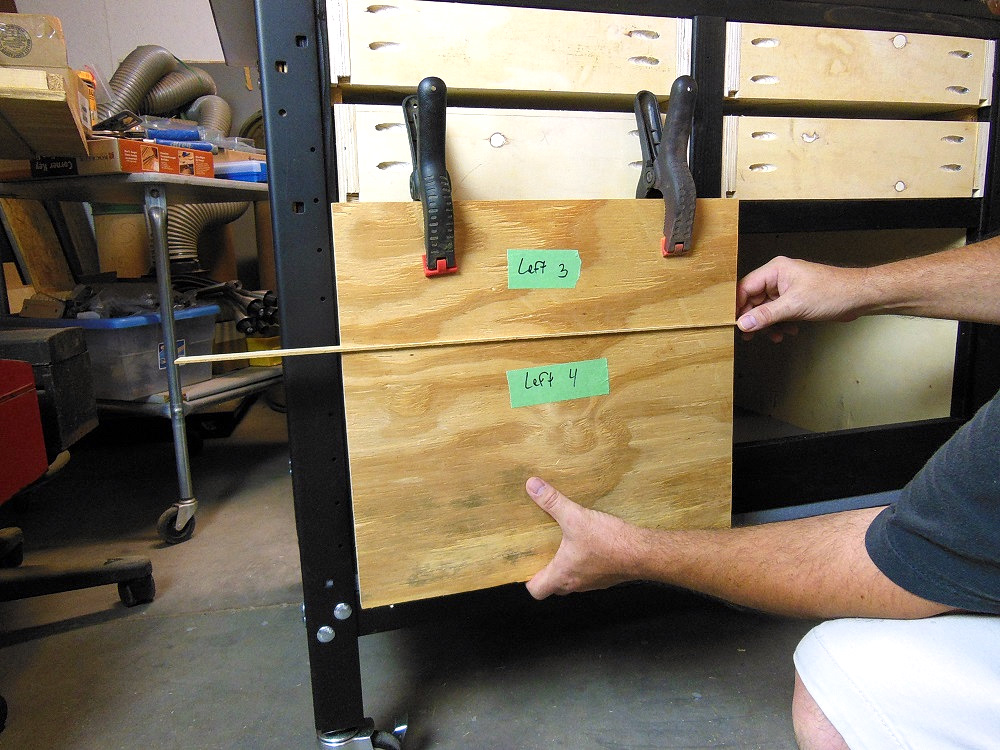
In the case of Rockler’s shop stand, the openings are smaller than the interior. To make better use of the available space, I built this cabinet as two smaller units and joined them together once in place. The completed cabinet will be a little too large to fit through the opening; this is an effective work-around.

With the bottom shelf in place, I measured the height of the opening and subtracted 3/4” (the thickness of the plywood I’m using) to account for a top panel. The resulting measurement is how tall my sides and backs need to be. To determine how wide the sides should be, I measured the depth of the opening (front to back) and subtracted twice the thickness of the wood (1-1/2”). This leaves room for backs and a face frame.
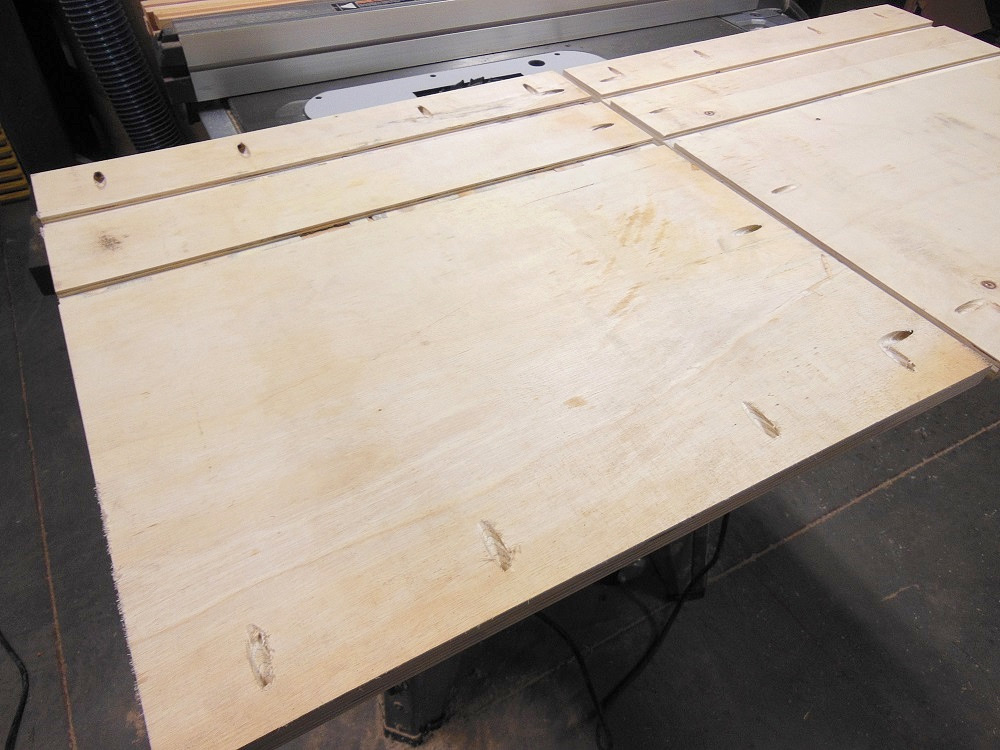
In The Pocket – Pocket Hole Drawer Cabinet Construction
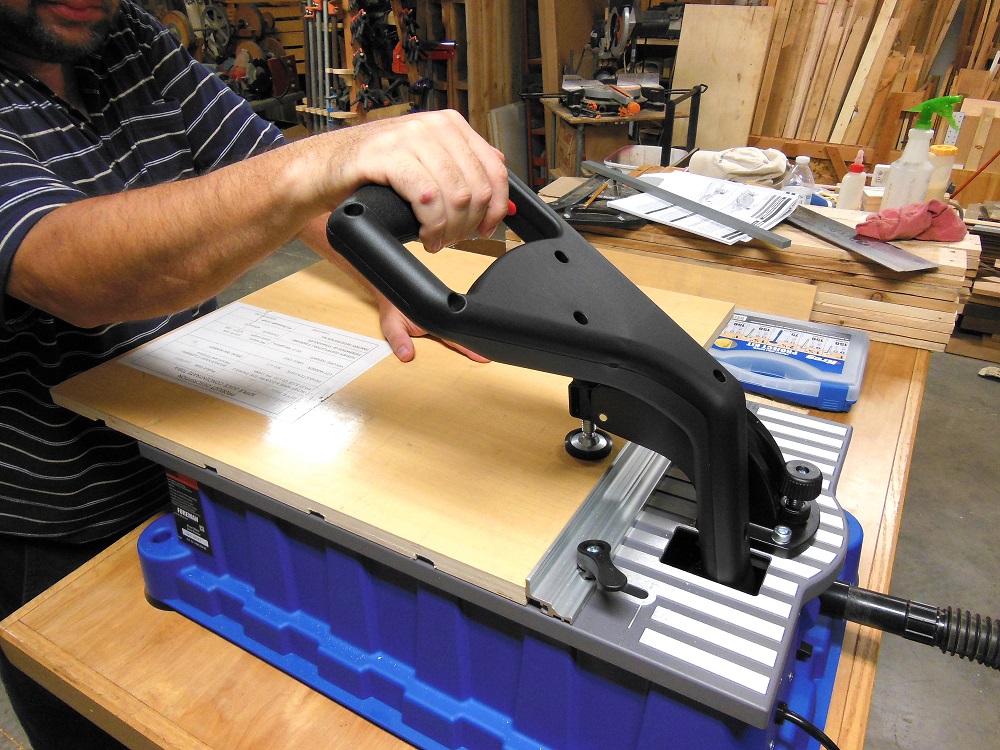
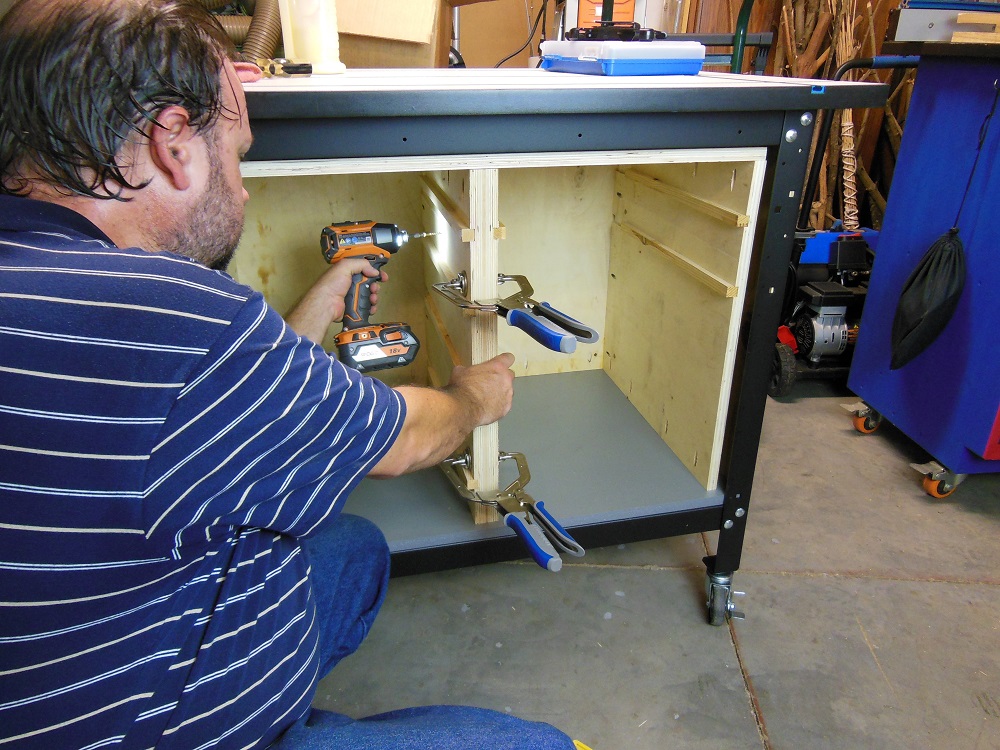
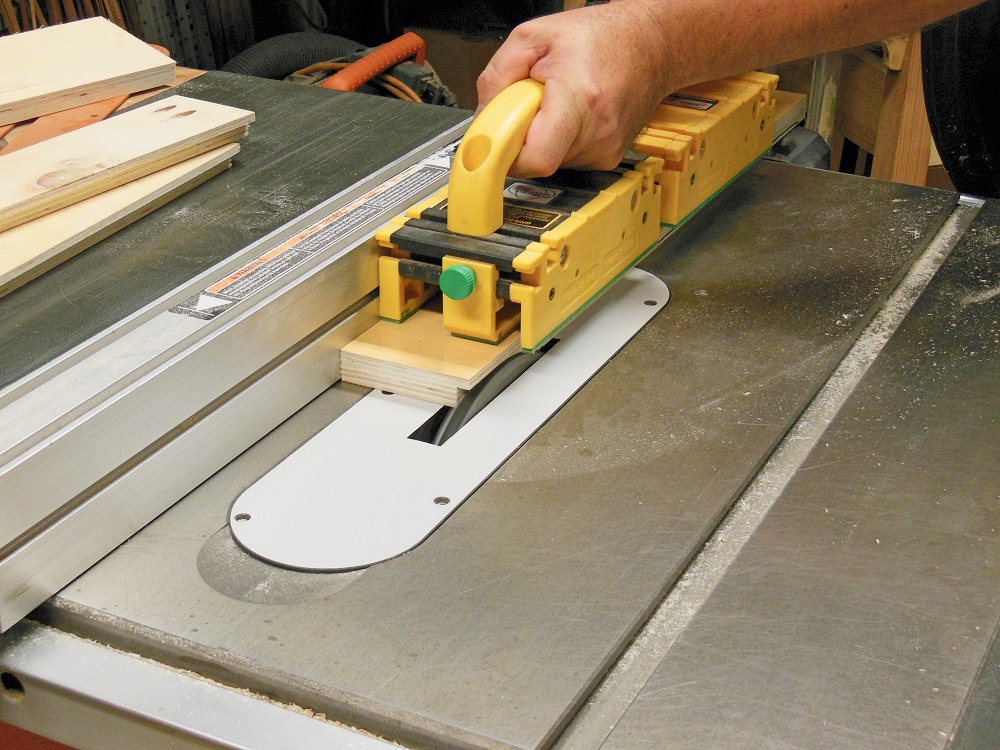
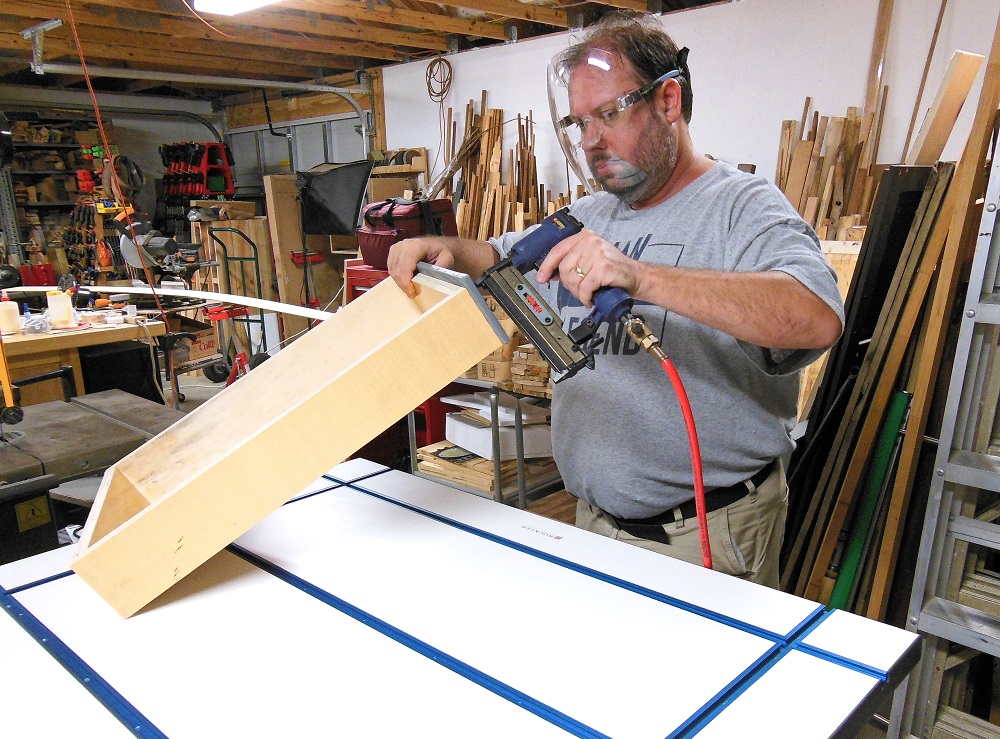
The sides will be attached to the backs, top and bottom with pocket screws. This project is one of the things made while reviewing the Kreg Foreman pocket hole machine. While the Foreman made this step quicker and easier, any pocket hole jig will do the trick.
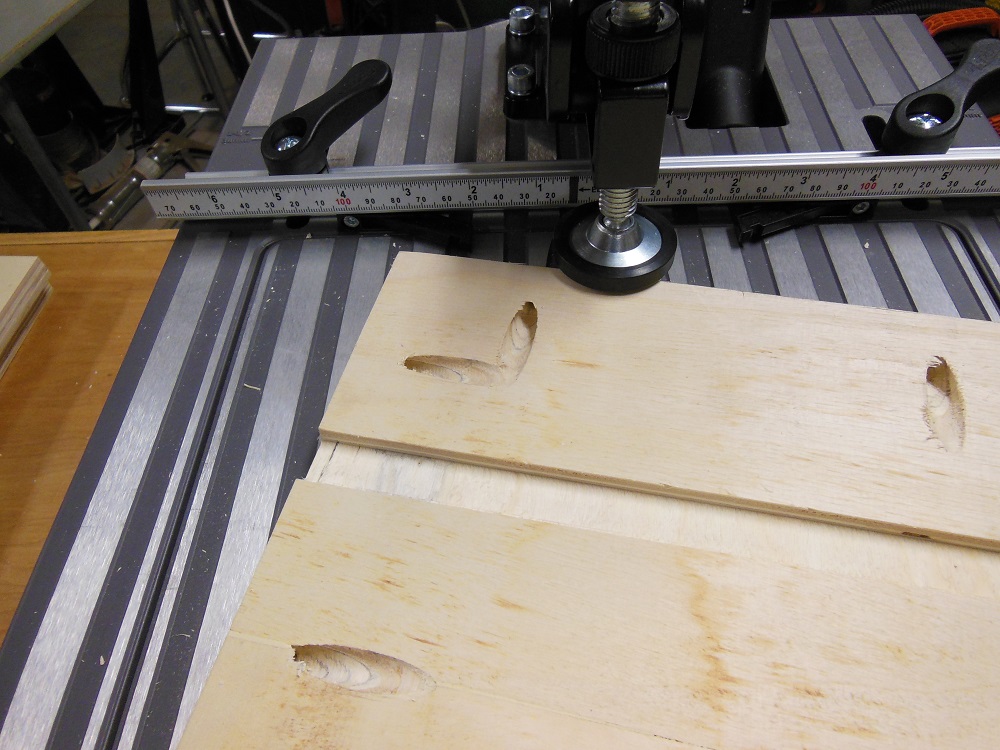
I drilled four pocket holes along the top, back and bottom edges. The pieces are small enough, however, that I could have gotten away with fewer.
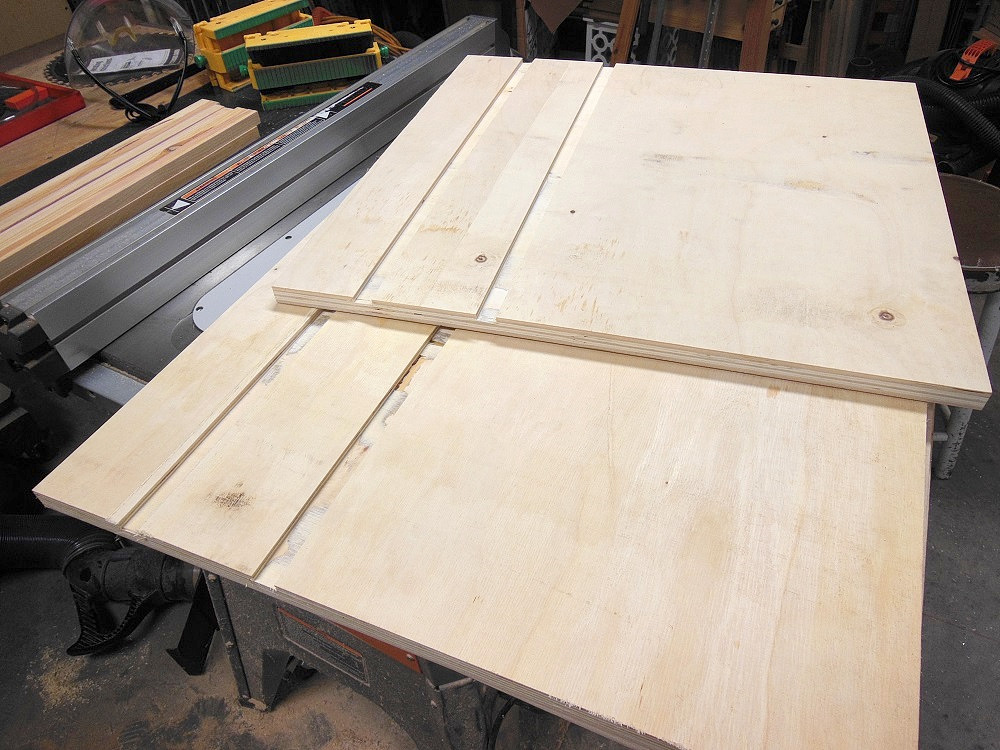
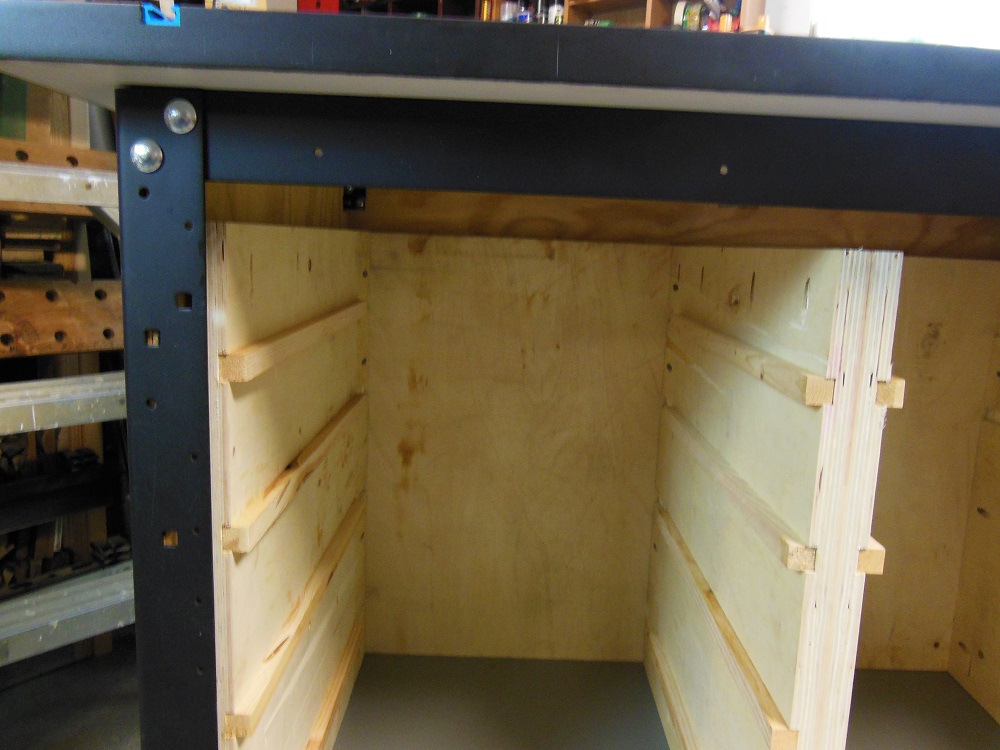
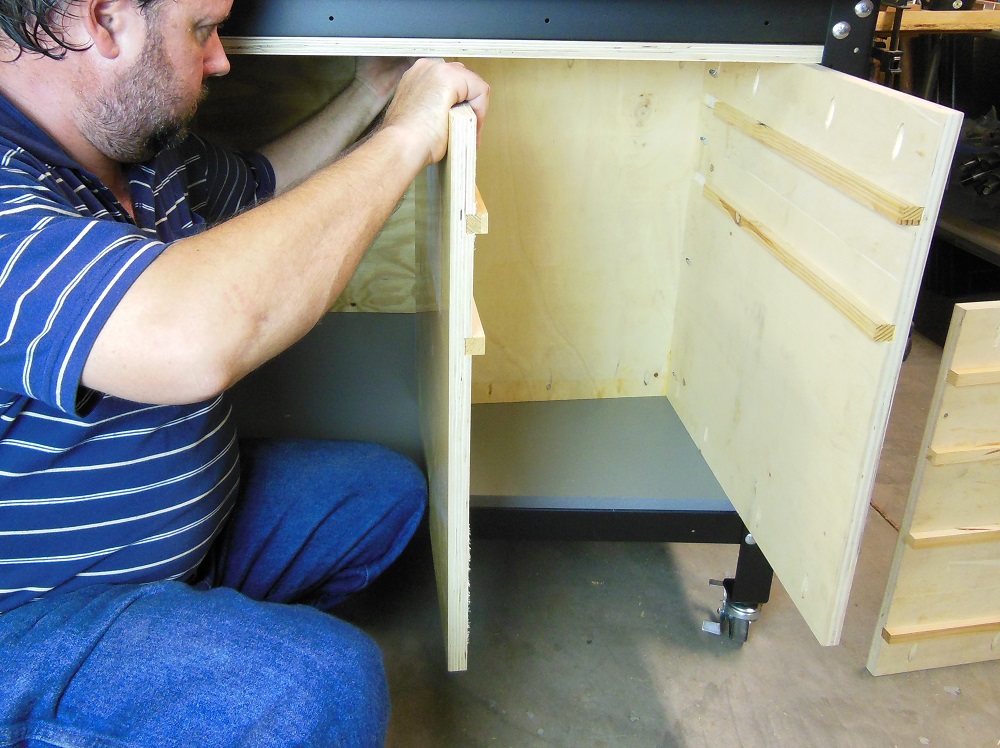
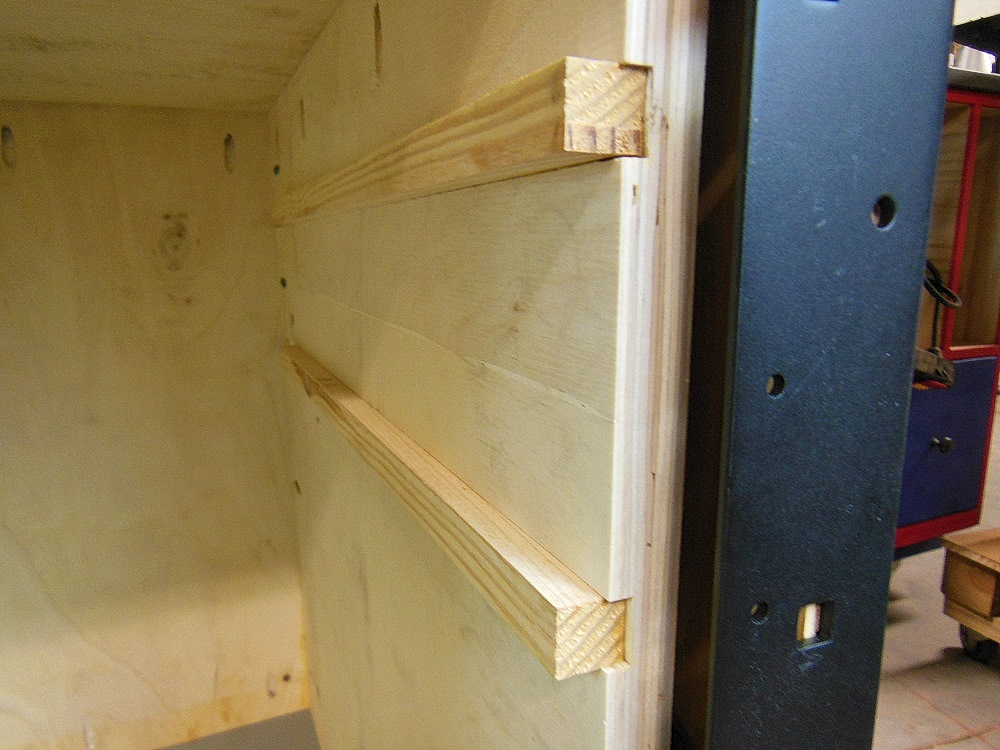
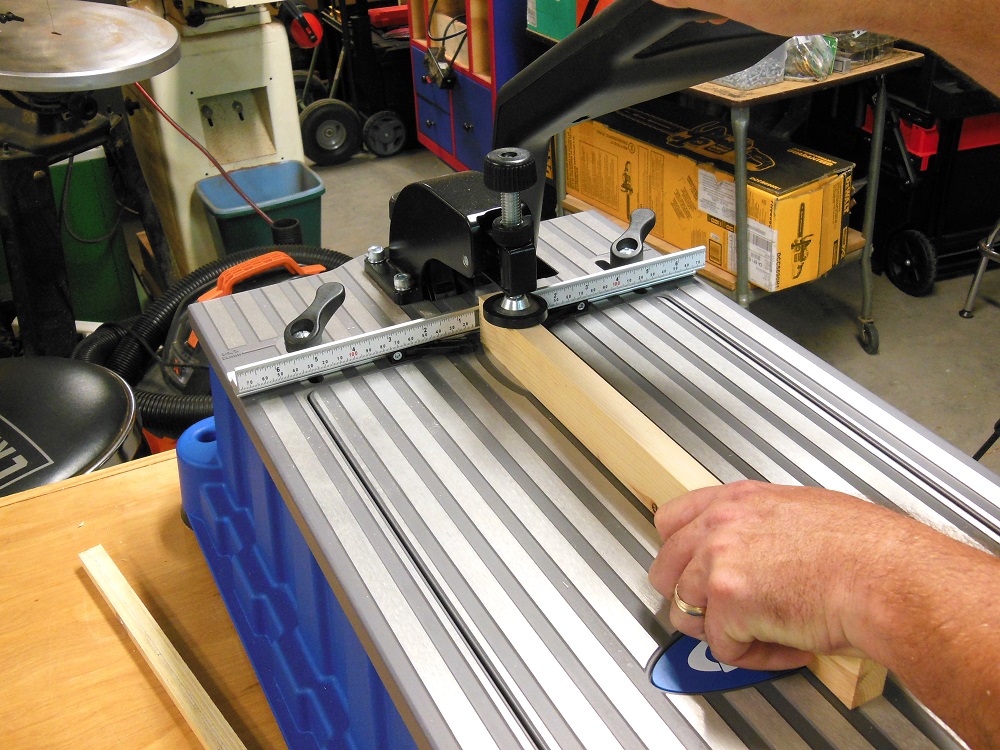
Drawer Supports – We Could All Use A Little Support
Make sure the pairs of drawer supports are the same height by cutting dadoes for all of the top ones first. Then reset your fence, reference off of the same edge of your workpiece and cut the next ones. And so on until all the dadoes are cut.
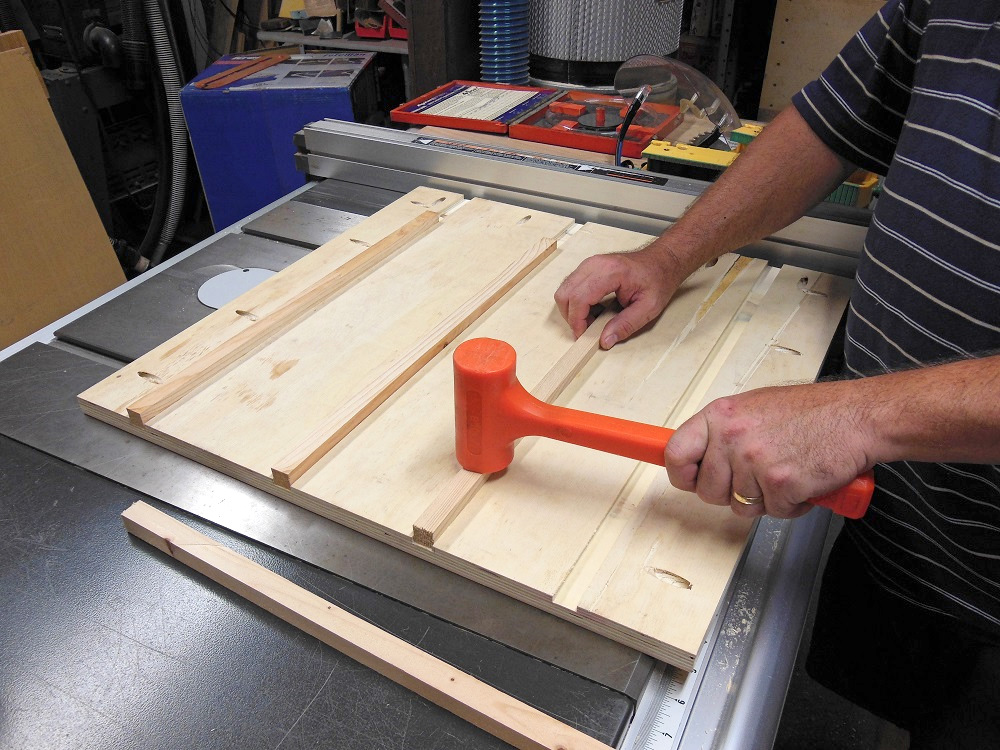
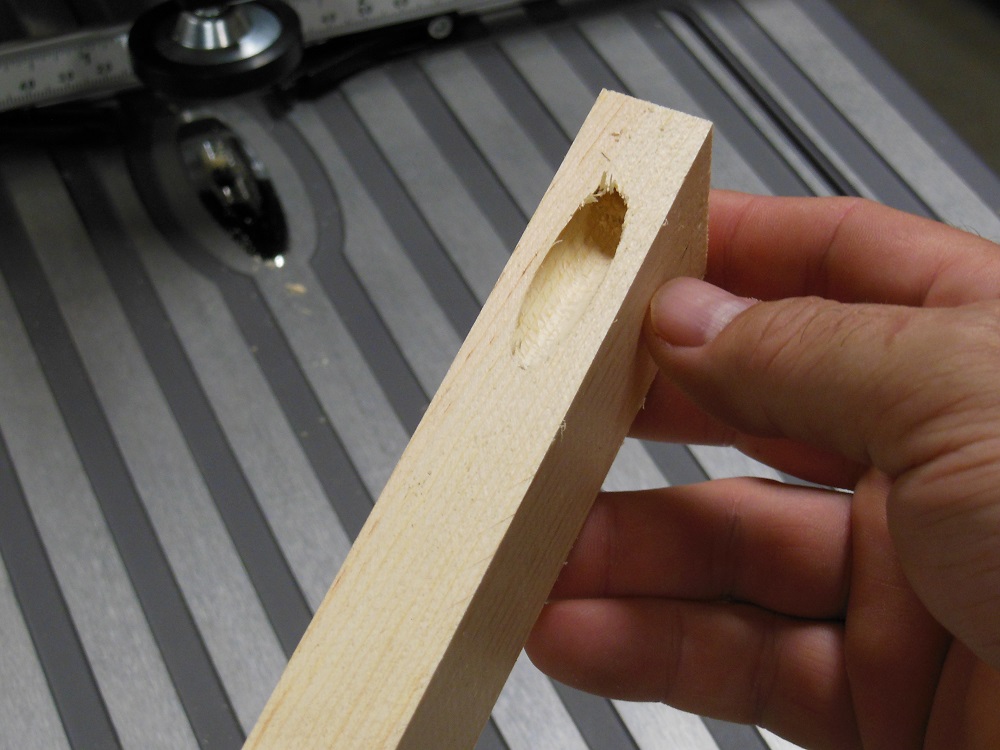
I grabbed a piece of 3/4” pine from the scrap pile, but only because I had a brain fart. It will work, but a harder wood (such as hard maple or oak) would be a better, more durable choice. Rip the board into 3/4” square rods and glue them into the dadoes. Align them flush with – or slightly set back from – the front edge.
If you prefer shelves to drawers, skip the support rails and glue your shelves directly into the dadoes.
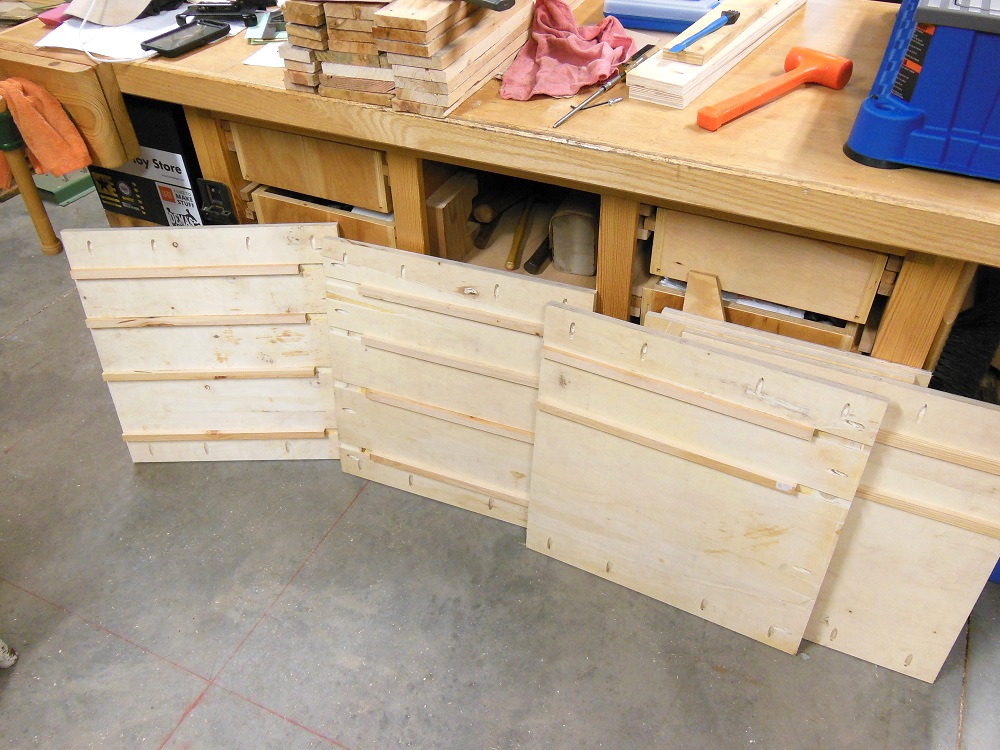
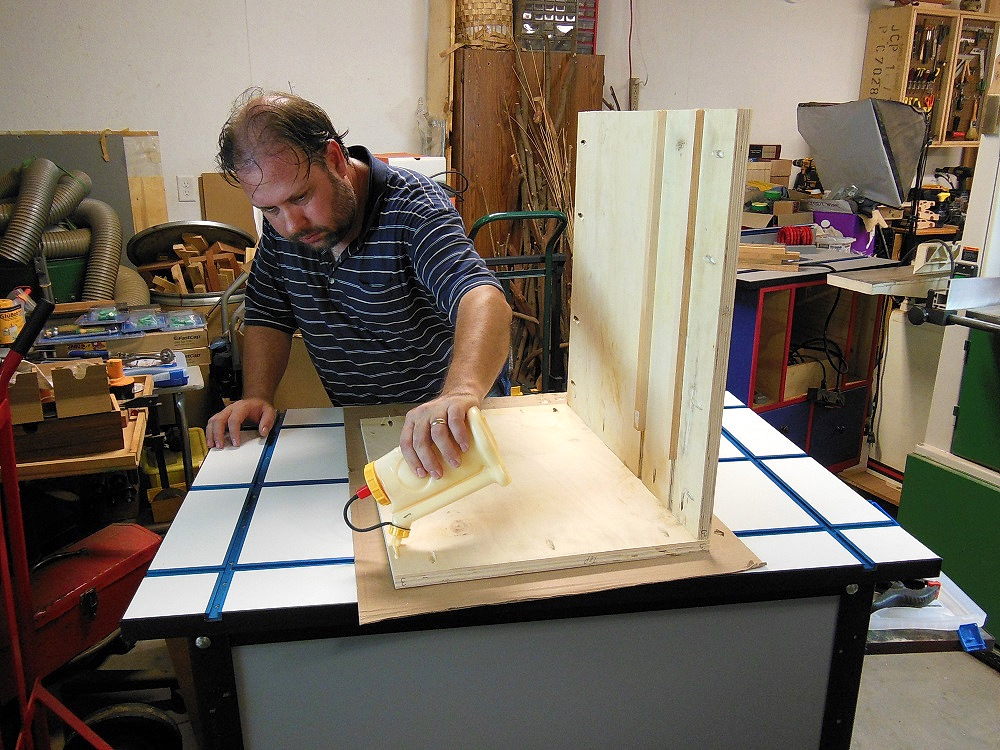
Baby Got Back – Making And Attaching The Back Panels
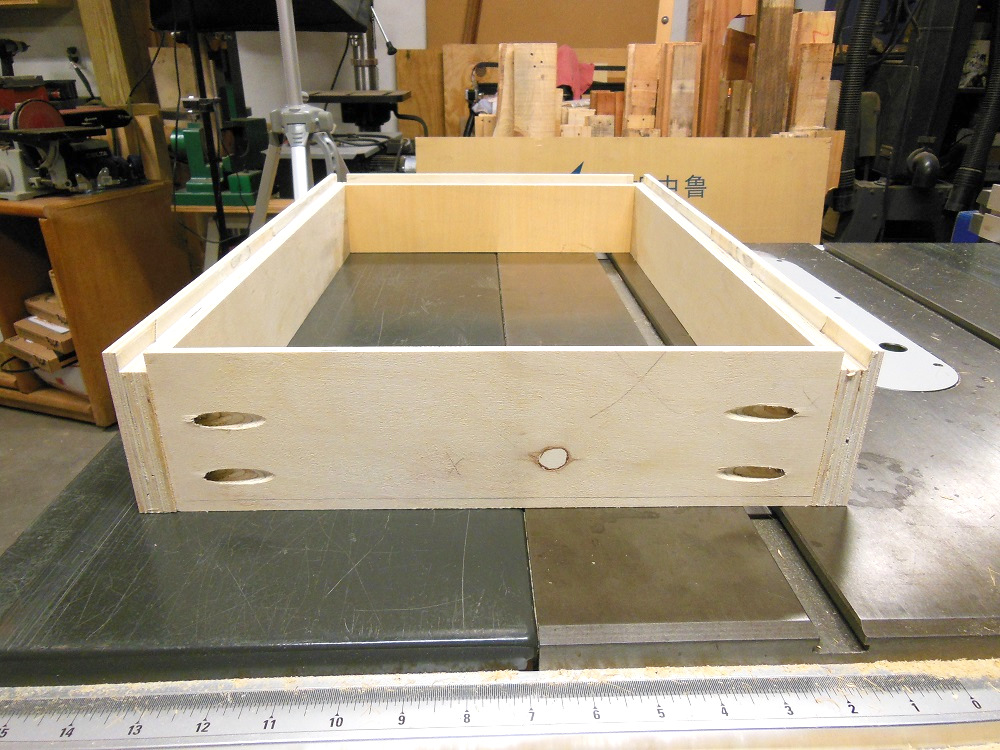
If this was a normal cabinet, the back would just be one big piece. But since it’s being built in halves that have to be placed individually, each has its own back. The backs are the same height as the sides. To determine their length, I measured the width of the stand opening, added 3/4” (the thickness of the plywood), then divided the sum in half.
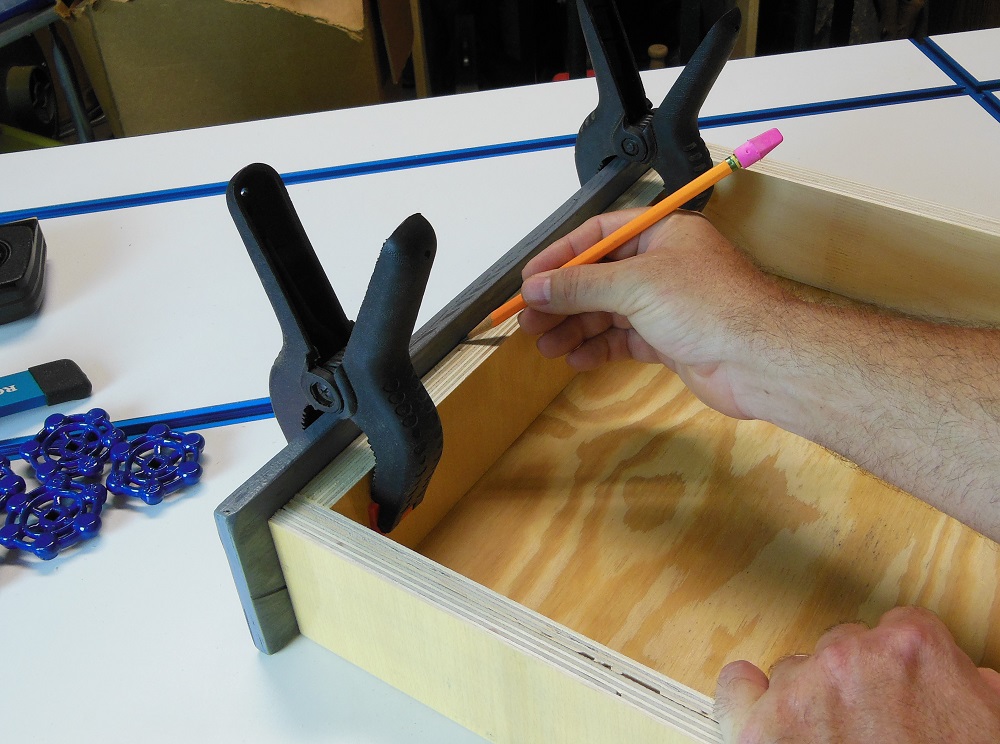
Be sure to drill two or three pocket holes along the top and bottom inside edges of the back panels. I noticed during the test fit that I’d forgotten these holes. But that’s exactly why you do a test fit before gluing things together.
After you’ve verified the fit, mark the parts where they meet. That way you know which goes where so that the screw holes line up during final assembly.
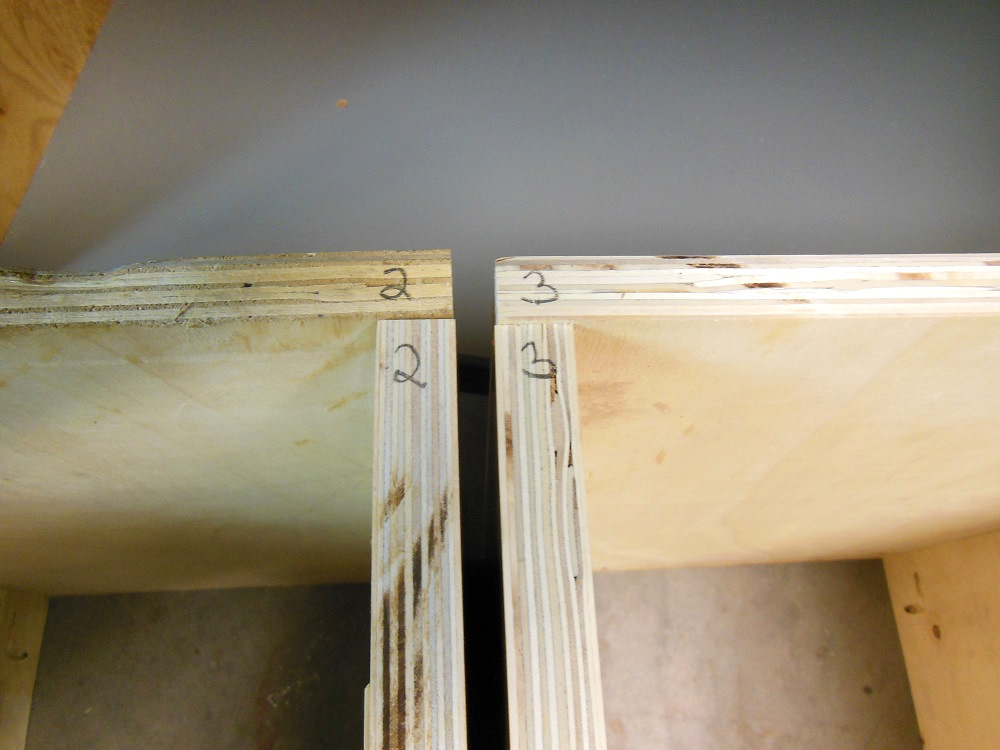
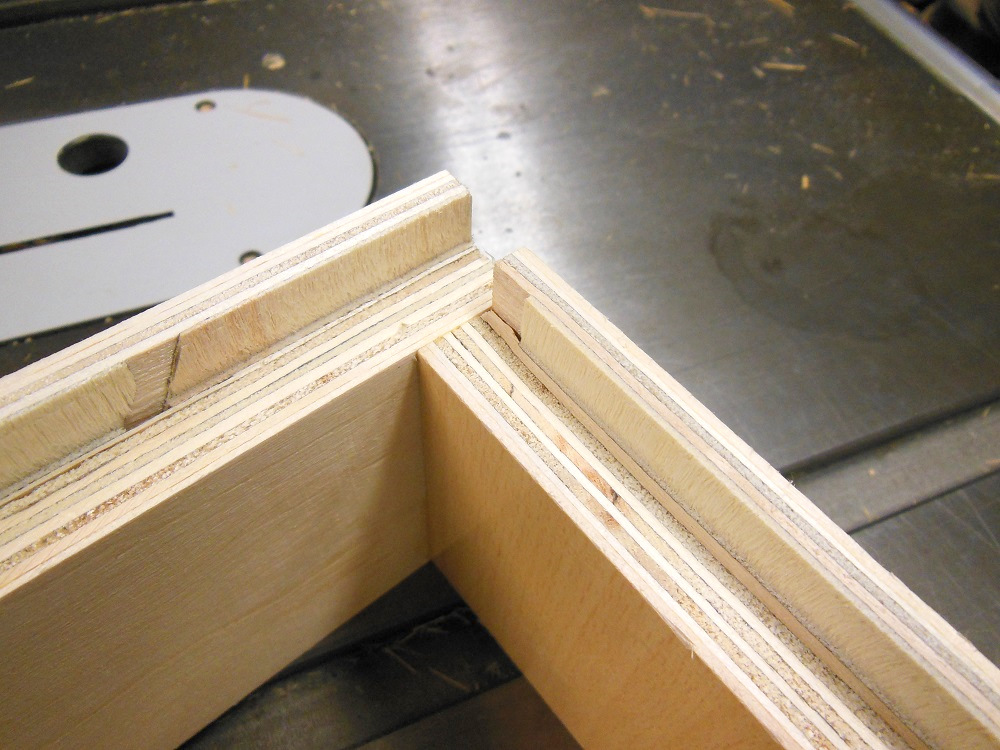
Remove all of the screws, apply a bead of glue and screw the backs and sides together again. Double check that all of the pocket holes (and drawer support rails) are facing inward, accessible from within the cavity.
Top O’ The Cabinet To Ya, Laddies! – DIY Shop Storage Drawer Cabinet
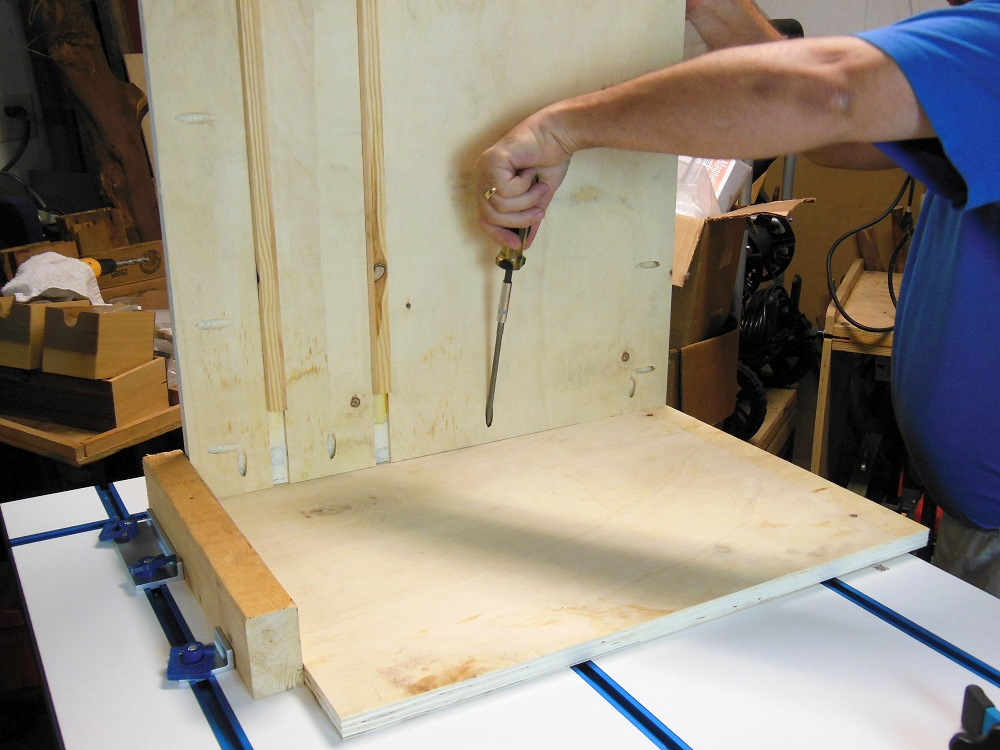
You might be tempted to omit the top panel since this cabinet is going into an already enclosed space. Don’t. Its purpose is to keep the sides stiff and prevent them from ever splaying outward and dropping its drawers (however appealing that may sound). Place the sub-assemblies side by side, measure the overall top dimensions and cut a panel to fit.

Once the parts are inserted into the metal shop stand, there will be no way for me to hold the top in place while I get the first few screws started. To solve this issue, I set the two sub-assemblies on the floor – side by side – and the top was set in place.
Next, I attached the top to ONLY ONE of the sub-assemblies using three pocket screws (one in each side and one in the rear) and then pulled the screws back out. Now I have three perfectly positioned holes for screws to grab onto.
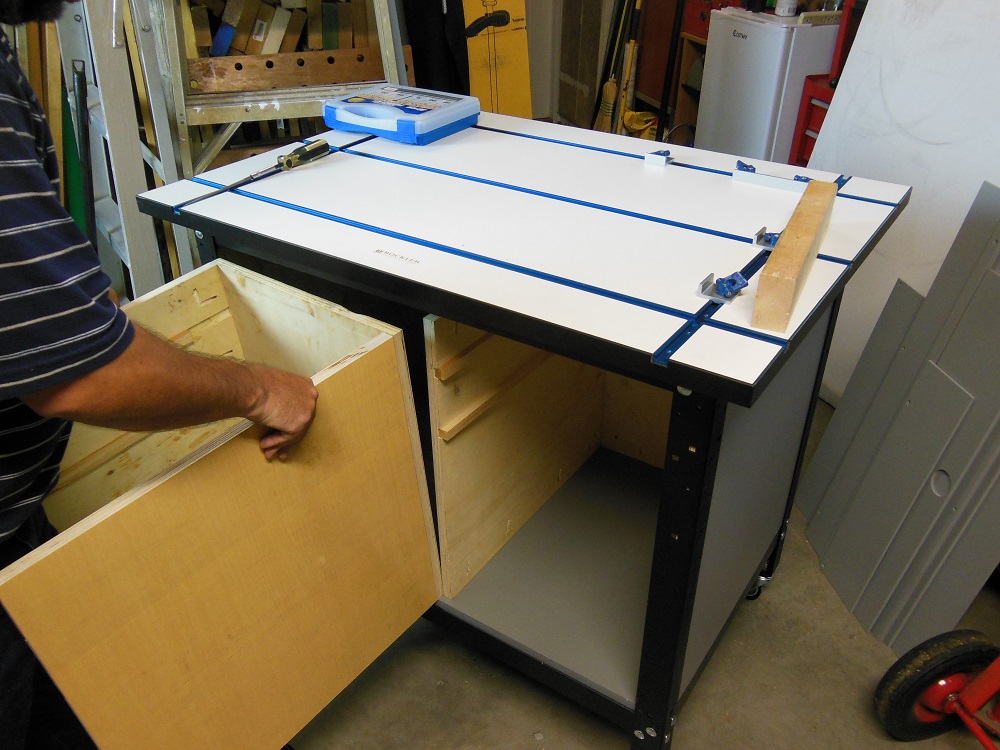
Installing The Carcass Into The Metal Shop Stand
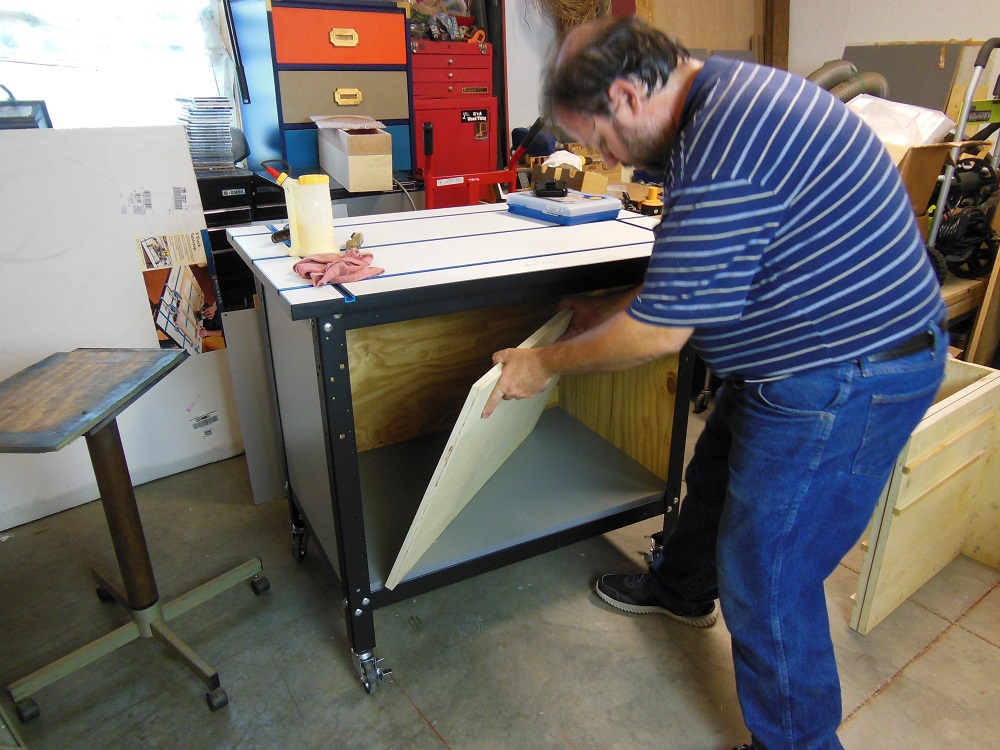
The next step is to get everything into the shop stand. The top panel goes in first and is lifted to rest on top of the sub-assemblies as they are inserted.
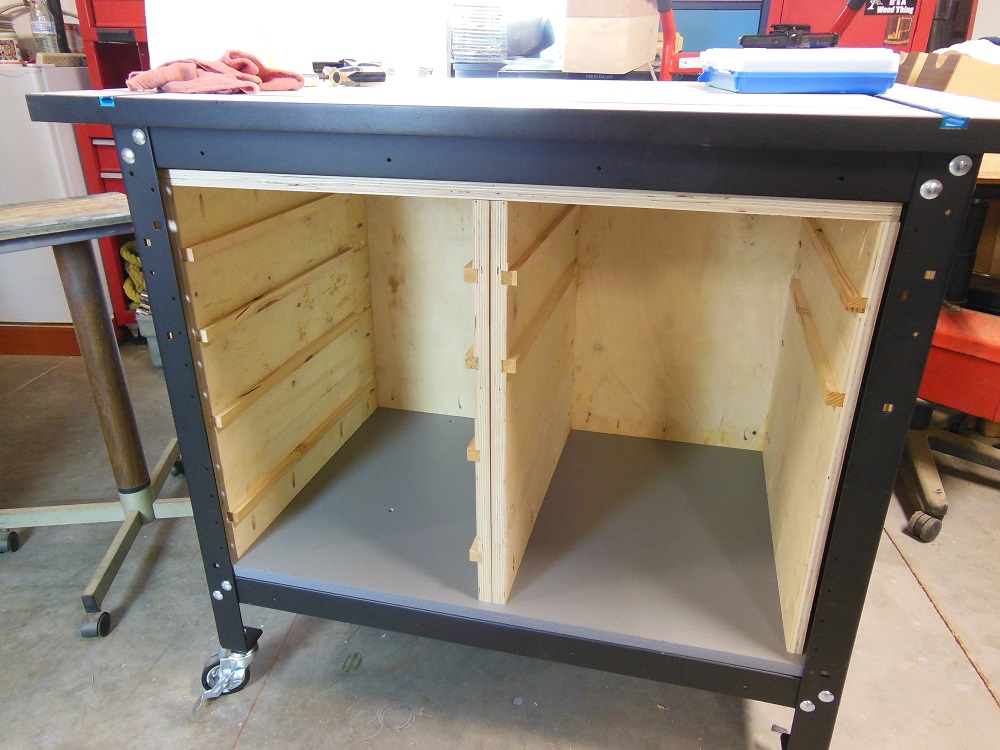
Next, join the two sub-assemblies as one then attach the top, starting with the three screw positions we established earlier.
Center the unit side to side and seat it all the way to the rear. Then screw it down to the base.
Face It – You’re Being Framed!
A face frame isn’t always needed, but it is a nice way to dress up the front of a cabinet and hide plywood edges. Back to the scrap bin, I plucked some more pine and cut my face frame parts.

The top, bottom and sides were all cut long and wide enough to cover the plywood edges and tuck behind the metal shop stand members, for a clean, gap-free appearance. The bottom piece merely encloses the bottom edge of the cabinet and hides plywood only at the ends.


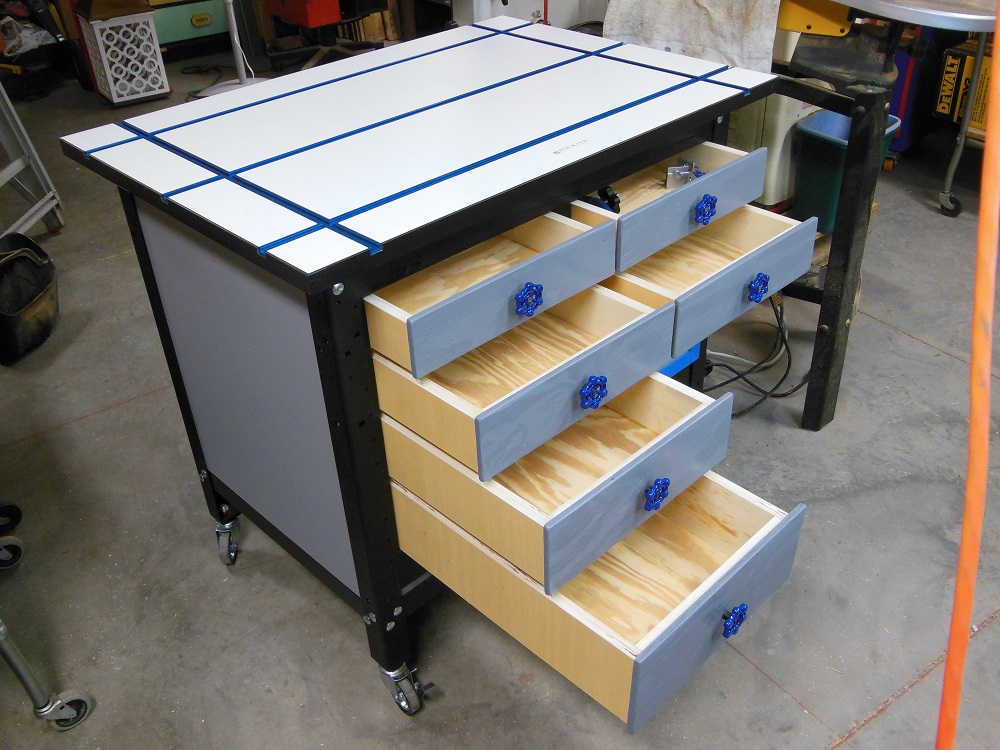
Drawer Monger – Fighting The War Against Clutter

We’ve reached my favorite part of the project. Partly because this is where everything really starts to come together. And partly because there’s some easy fodder for witty puns. A little while ago we showed off a cool new way to make drawers using the Miter Fold Dado Set Plus. But we realize most of our readers don’t have one of those hefty blue beauties lying around the shop. So this time we’re going with a more traditional method.

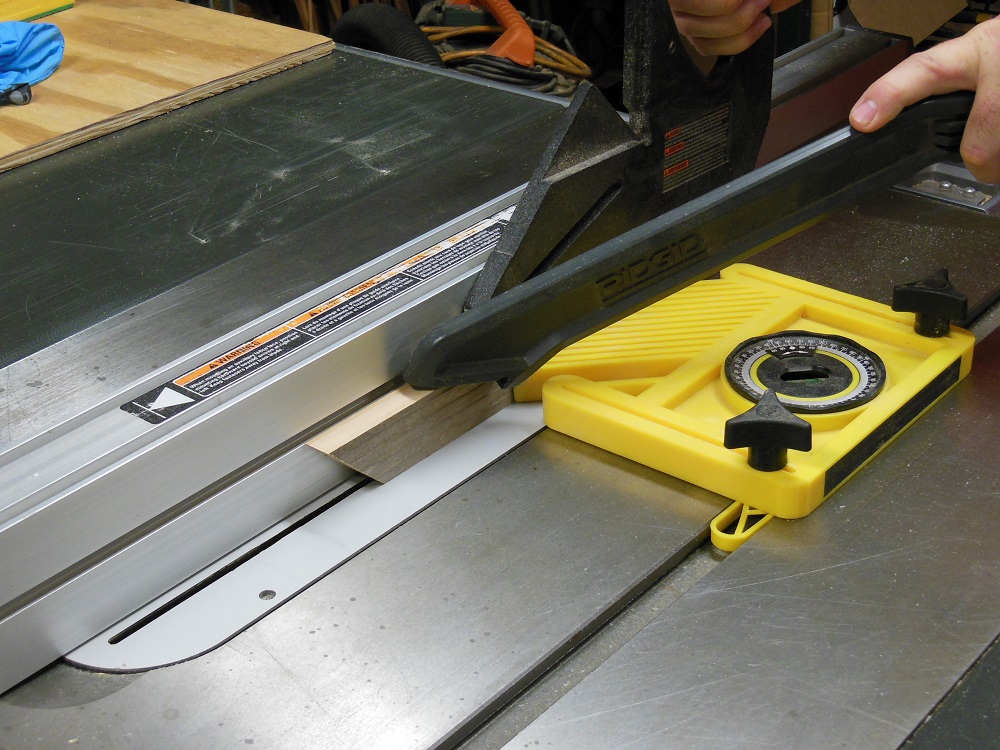
You’ll need four pieces for each drawer frame. The sides (the longer pieces) were cut to match the depth of the cabinet opening, measured from front to back (in this case, 22” long).
The length of the fronts and backs were determined by measuring the width of the drawer opening and subtracting twice the thickness of the drawer material (the plywood is 3/4” thick, so subtract 1-1/2”). Then subtract another 1/16” or so to give a little side clearance so the drawer can slide freely.
The overall dimensions of my drawers are approximately 22” x 14-5/8”. Yours, of course, should be sized to fit your particular project; or at least your thighs and glutes.
Finally, the width (or height, depending on your perspective) of the pieces is determined by the distance between a drawer support rail and the one above or below it (minus a small 1/8” gap). My drawers get taller as you go down the cabinet.
This Is A No Sagging Zone – Pull Up Those Drawers!
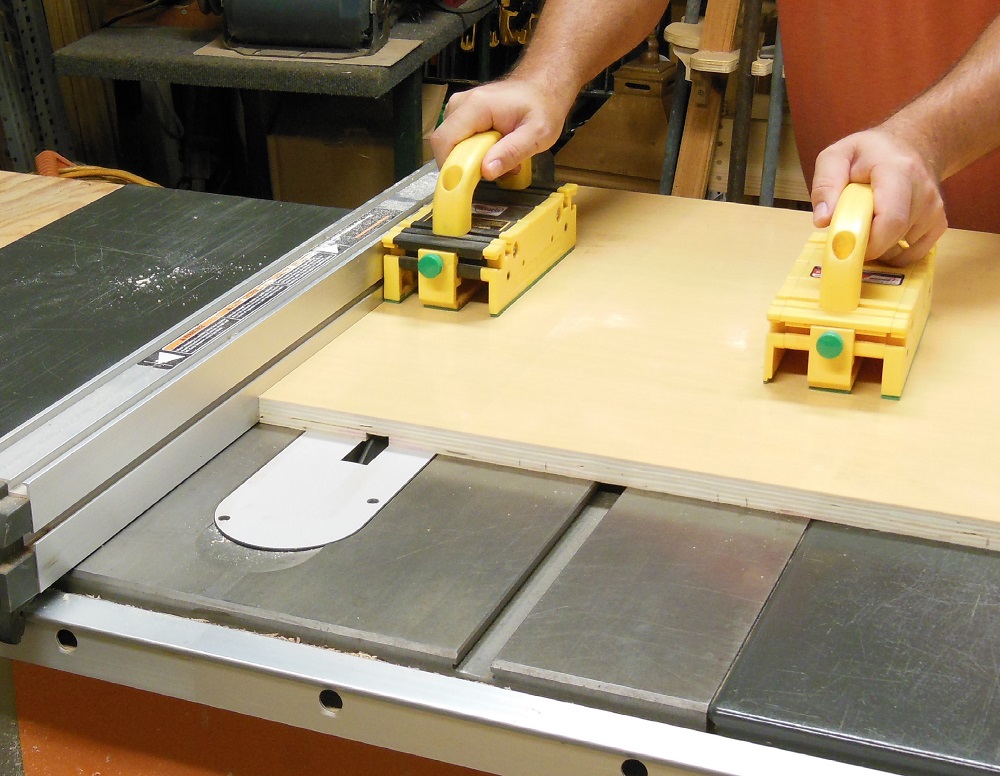
To give these drawers a good shot at never sagging, we could either buy them a belt or use plywood for the bottoms. I opted for the latter.
It’s All A Front – Behind Closed Drawers
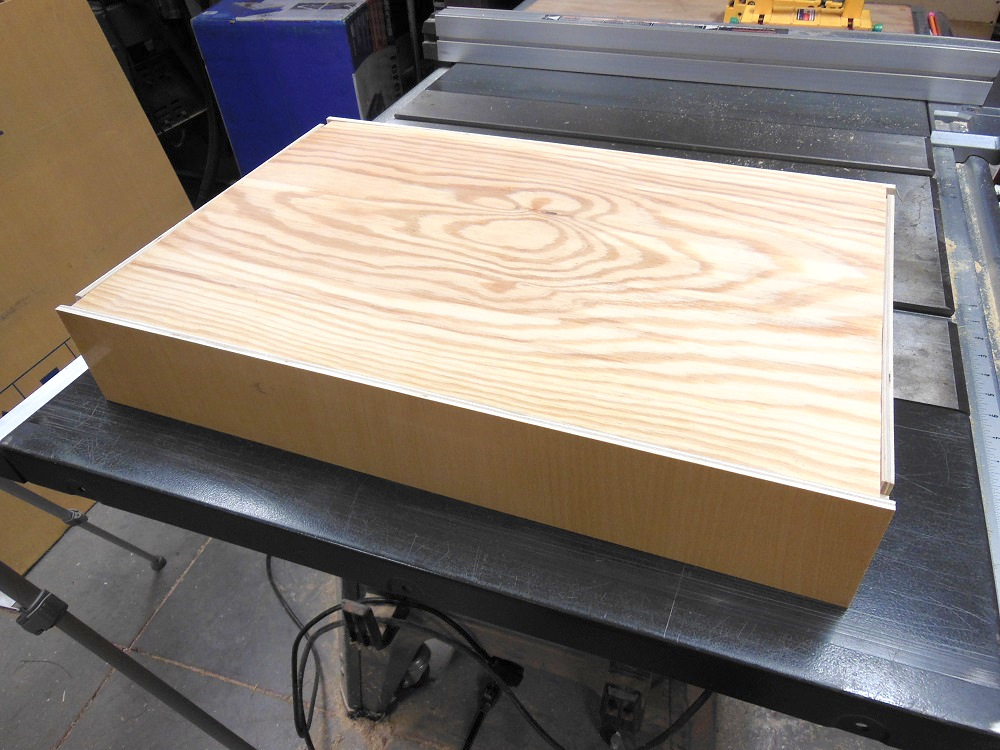
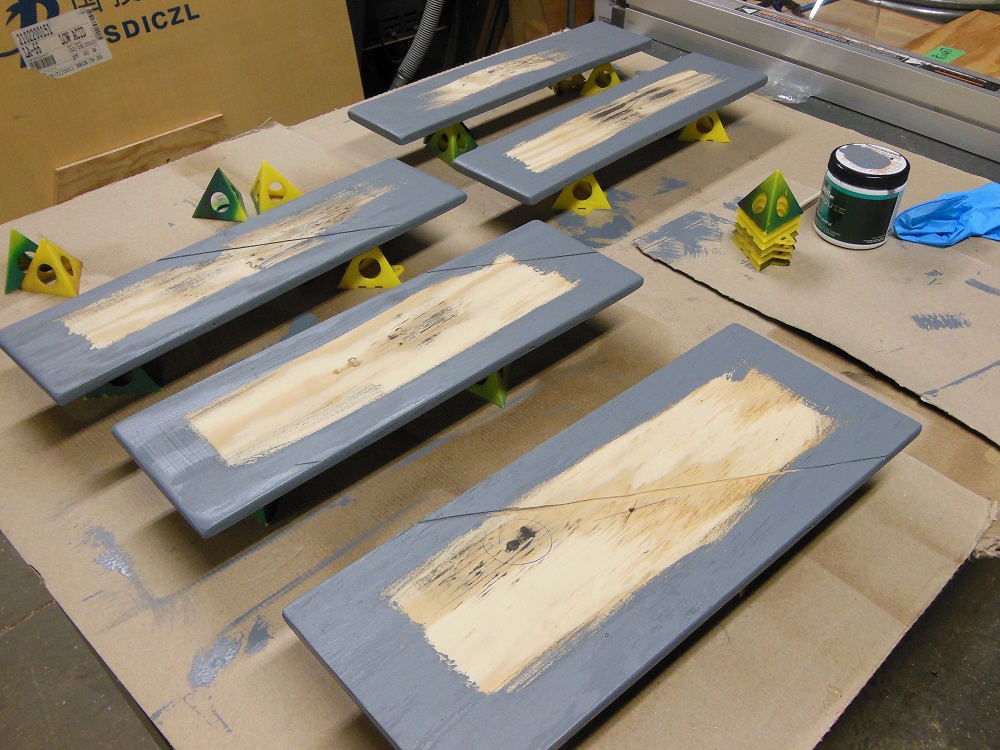
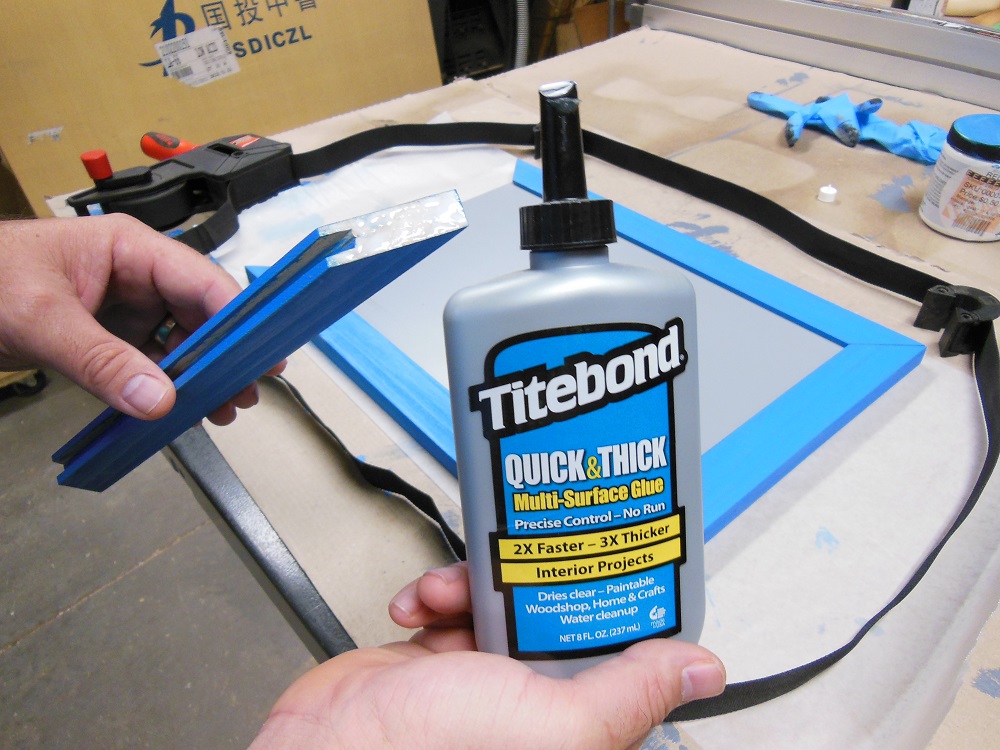
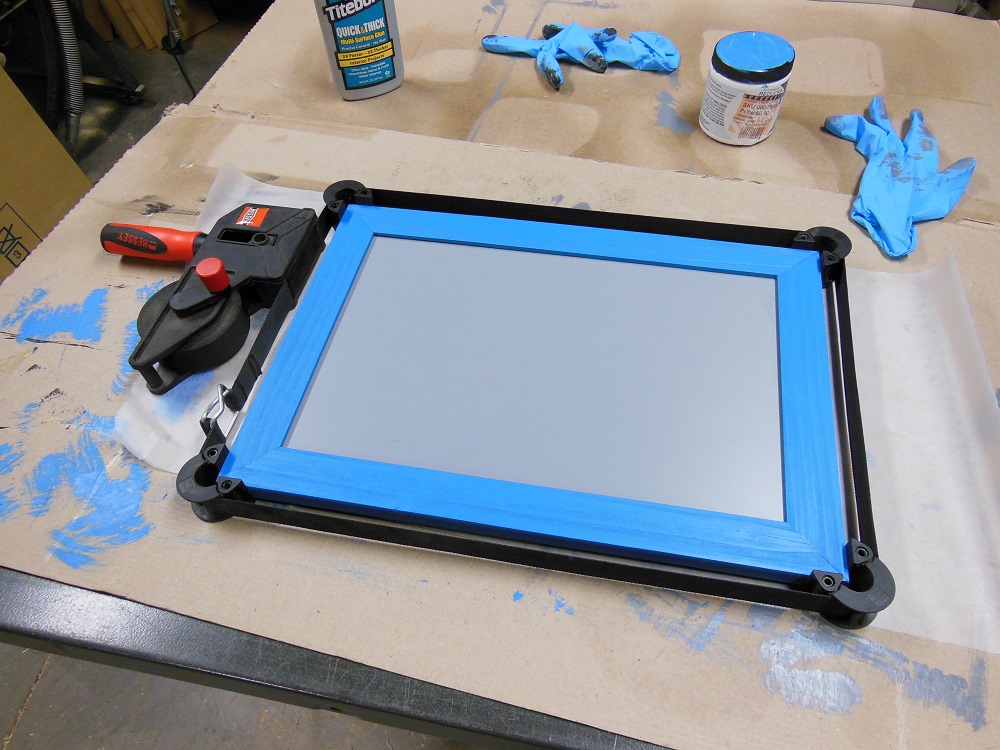
The drawer bodies are complete. But they aren’t very attractive at this point. That’s where drawer fronts come in. I considered making fronts from the same PVC board that was used to dress up the other three sides of the shop stand. But 3/8” plywood feels like a better, more durable way to go. So I grabbed some scrap long enough to cover the left and right banks and cut it to width.
After you cut all of the drawer fronts, label the backs so you know which goes where (and which end is up, if you want to highlight “flowing grain”). Then sand both sides and all edges, knocking down any hard corners in the process.
Don’t Get Hosed By High Pull Prices!
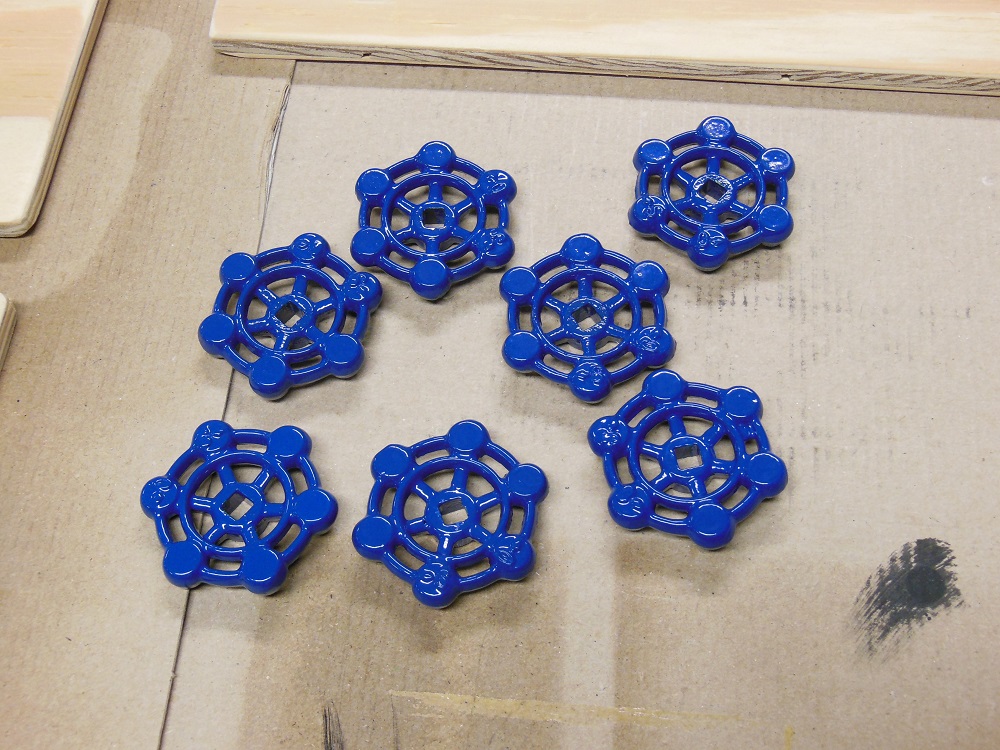
My first thought was to buy some inexpensive drawer pulls. Then I shopped the home center and was reminded of a painful reality I’d apparently wiped from memory: drawer pulls are insanely over-priced. There are no “inexpensive” drawer pulls. Even the cheapest ones were $4 a piece. My other options were to find a cheaper alternative or make my own.
Backing slowly away from the drawer pull display, I proceeded to meander through the home center in search of alternatives fitting of workshop decor. Then I saw it: hose bib replacement handles. And they were only $1.60 each!
You Be Frontin’ – Attaching The Drawer Faces
By now, you may be getting a bustle in your britches. But keep your pants on, we’re almost done with the drawers. And soon, the entire shop storage drawer cabinet.

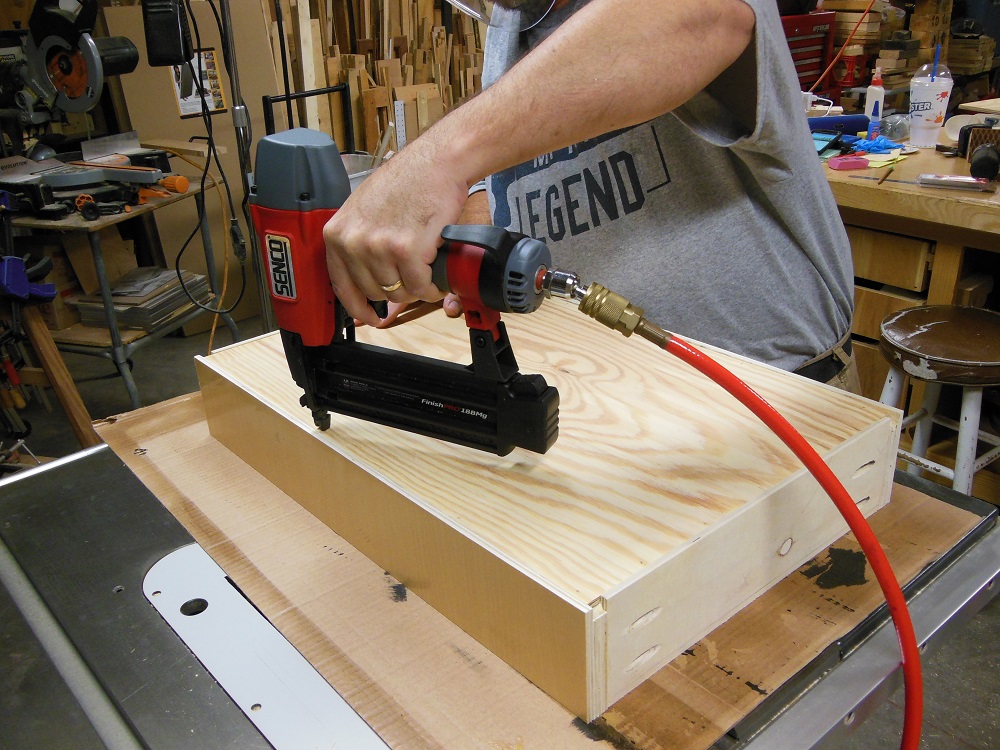
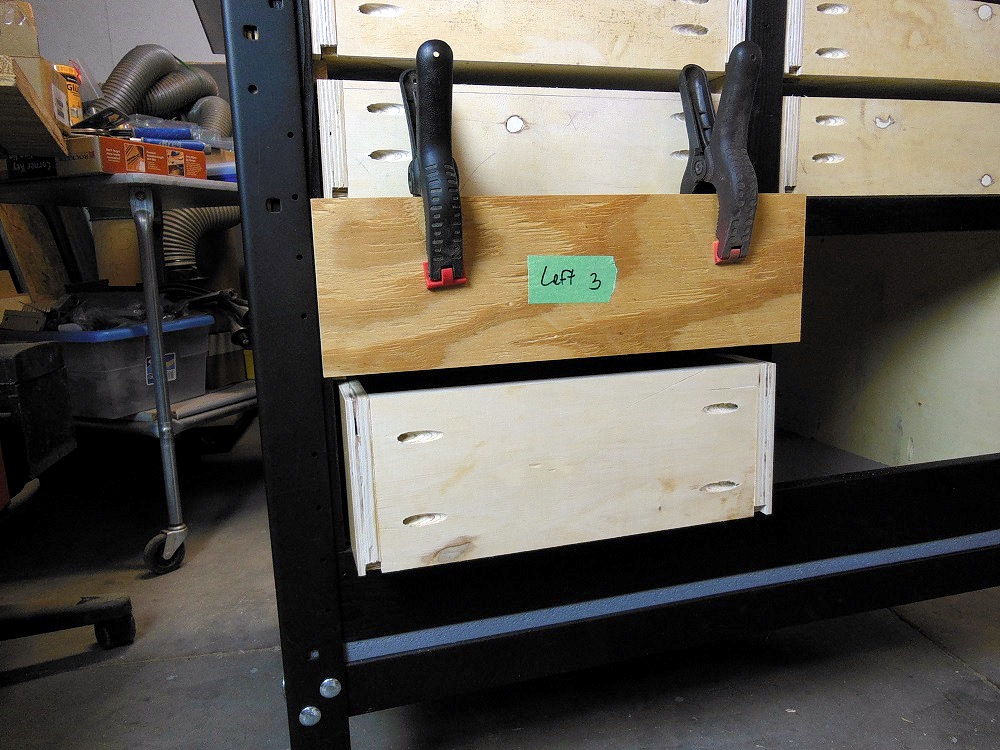
After finishing the drawer fronts, align them to their corresponding drawer and use a pencil to mark their exact position. Then glue and clamp, pin, or screw them in place.

One More Member To Face – Building The Shop Storage Drawer Cabinet
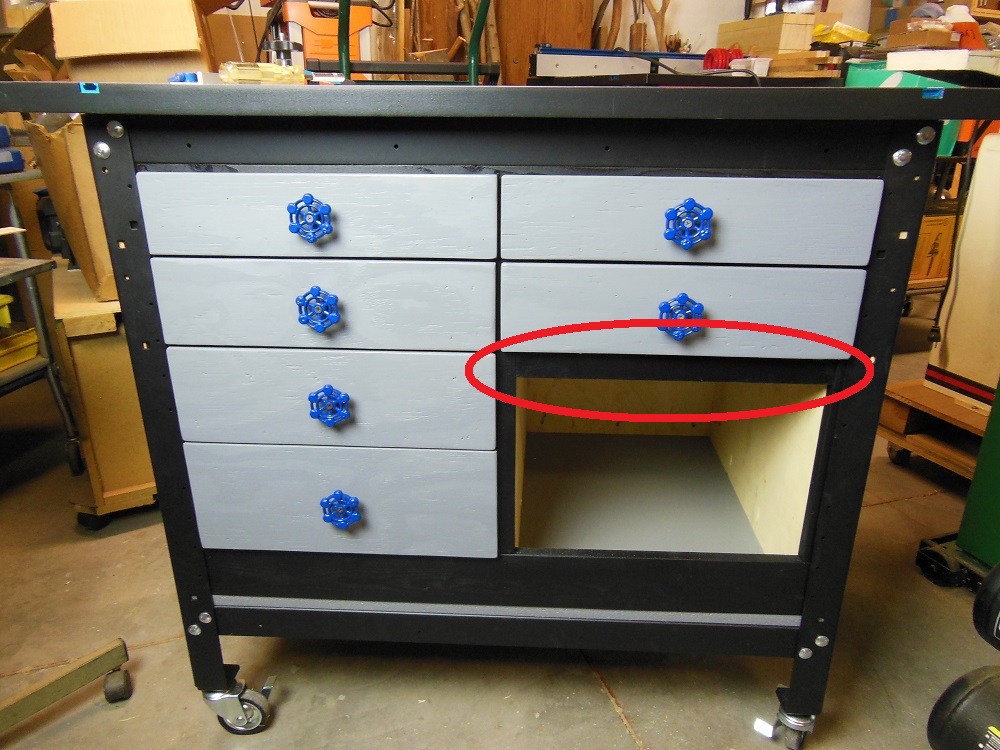
The last thing to do is address that open space on the lower right. That means first adding one more piece to the cabinet’s face frame, below the bottom drawer.
To be honest, I would rather have made the door swing open to the right. But I didn’t have any hinges on hand that would extend it out far enough to clear the metal stand. I also didn’t want to miter the side of the door (though that may have been an acceptable solution) or build out the face frame. Instead, I hinged it at the bottom. I don’t anticipate putting any weight on it, so I’m OK with that.
I Choose Door #1 – Monty Hall Has No Problem With That
We’re making a “frame and panel” style door. First, determine how large you want the door to be then cut wood for the frame. Leave the parts a little long at first.


A Channel For The Panel – Frame And Panel Door For The Shop Storage Drawer Cabinet
After mitering the frame, cut a panel that’s 1/2” larger than the opening in the frame (in both directions). That way, the frame can secure the panel by about 1/4” all the way around.
Next, dado the inside edge of the four frame parts. Start shallow and sneak up to the final depth. The panel should gently “float” inside of the frame, not be held tightly.

Close The Door! – Were You Raised In A Barn?
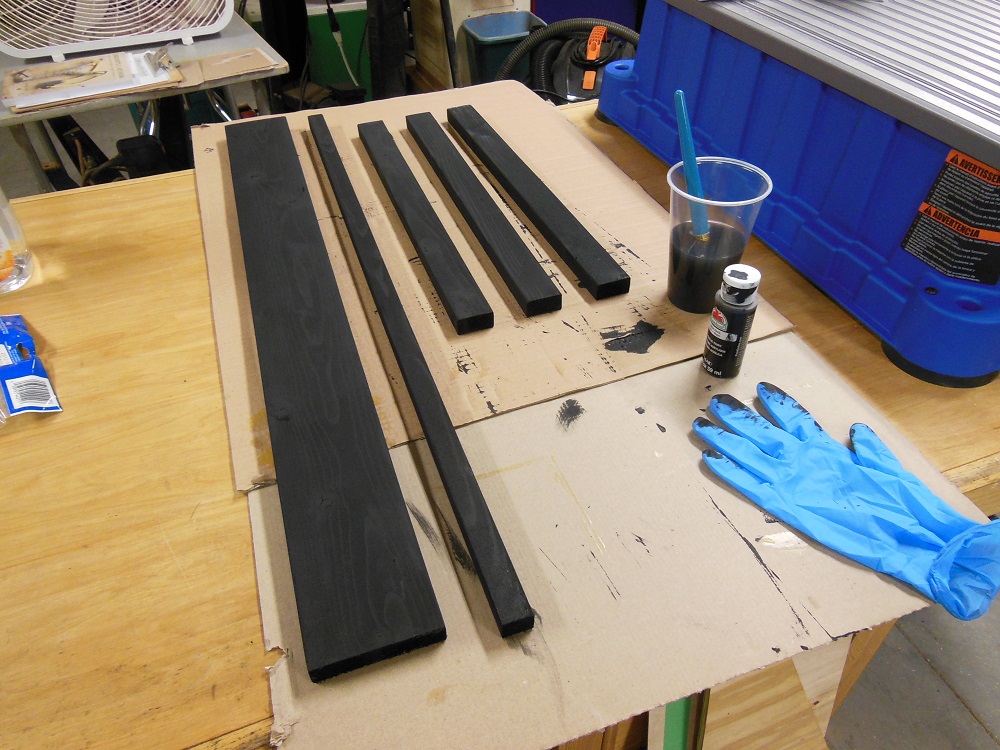
We’re almost ready to slam the door on this project. There’s just a few more little details to tend to. Some may not be thrilled with my color choice for the door frame; it does make the door stand out in a strong way. But I like bold color in my shop. And I have a ton of paint samples that I need to get some use out of before father time renders them useless.
When assembling the door, only glue the wooden frame. The panel should remain loose. Captured, but free. And now, after all this work, you deserve a break.
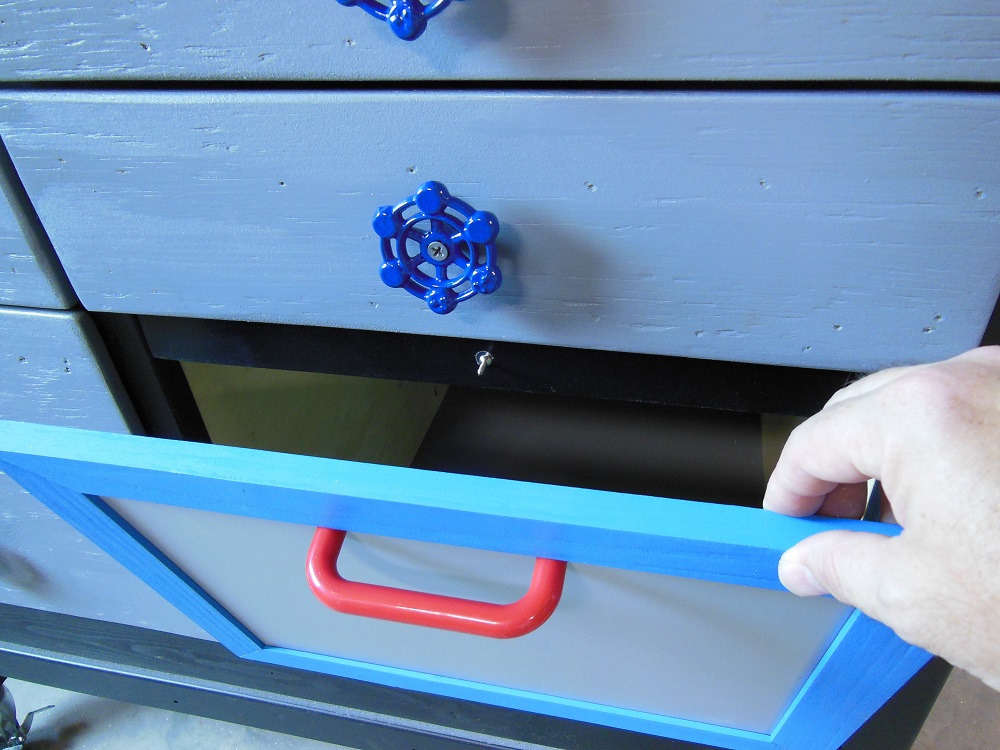
Alright, breaks over! Up and at ’em! The finish line is literally right there! Install a door handle/pull (I used a plastic one I’ve had laying around for about 15 years) then attach your hinges.
But Wait, There’s A Catch!
A magnetic catch, that is. Rather than round up a purpose-built door catch, I made my own with a 7/16” neodymium magnet. Use a brad point bit to drill a hole matching the diameter of your magnet (drill deep enough that the magnet seats ever so slightly below the surface).

I’ve used this sort of magnetic catch in a lot of magic prop builds and have found them to work rather well. Secure the magnet into the hole with original Gorilla Glue. The glue will foam as it dries, so you have to tend to it for about 10 – 15 minutes.
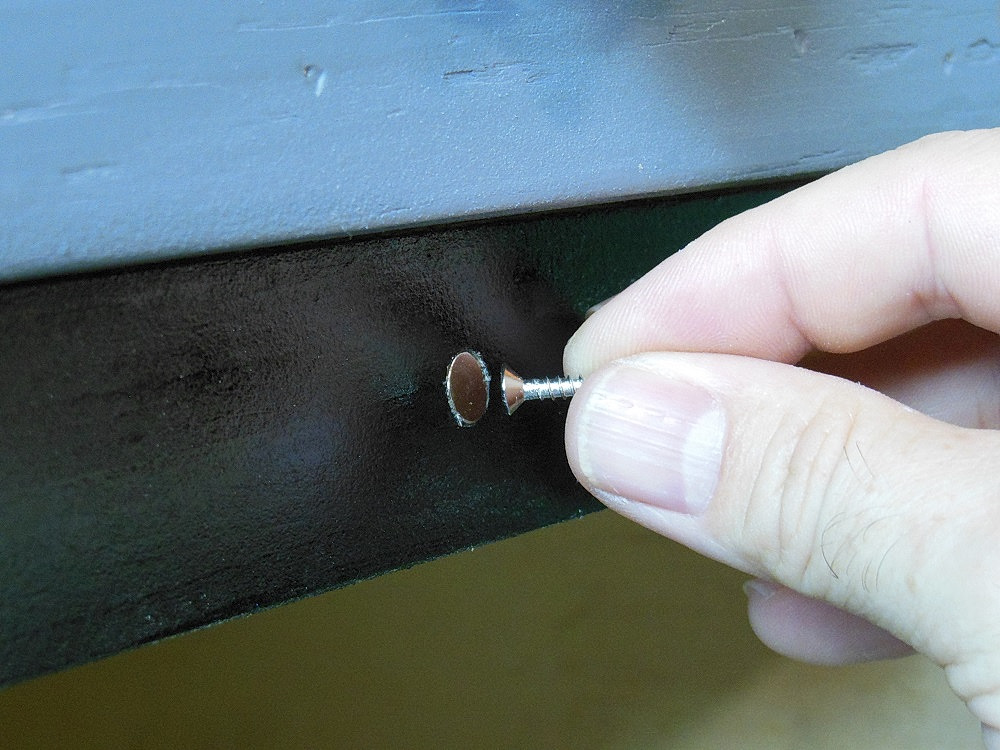
Swab away any foam that seeps out around the edges and press the magnet flush with the surface as needed. This foaming polyurethane glue will occupy a little of your time, but believe me, it works extremely well for this. Once it dries, the magnet is NOT coming out.
With a door like this, it’s often desirable to add a support chain to keep it from over-extending when in the fully opened position. But this door is light enough that a chain doesn’t seem necessary. I started to attach one, but felt like it might just be in the way. If I ever change my mind, I can add it later.
Keep It In Your Drawers (Your Shop Storage Drawer Cabinet)

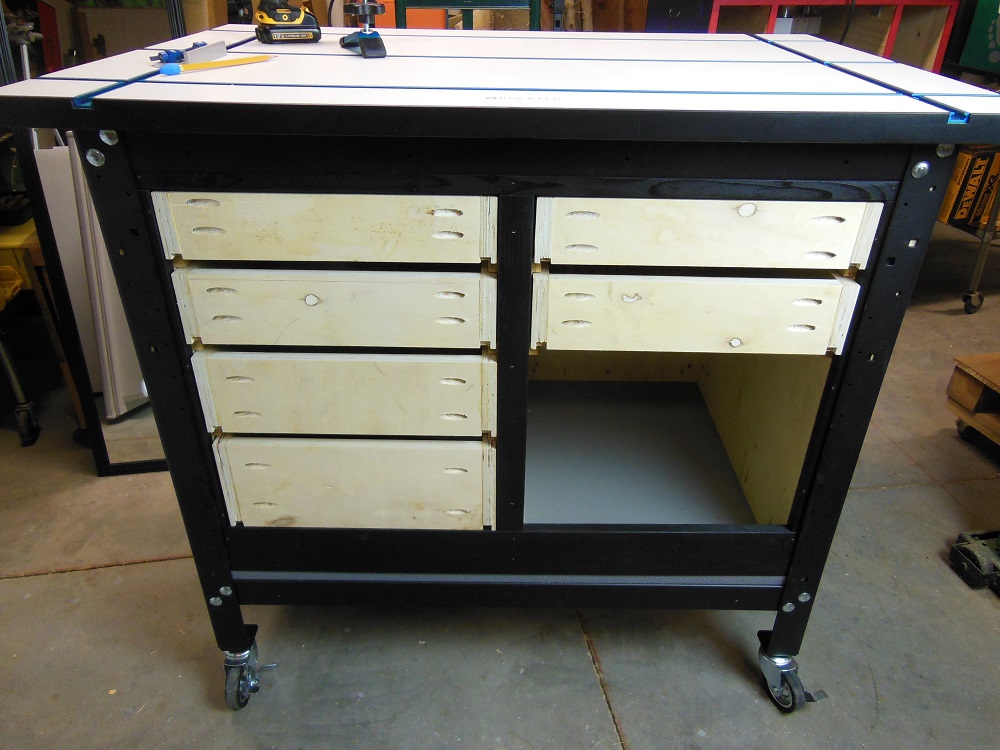
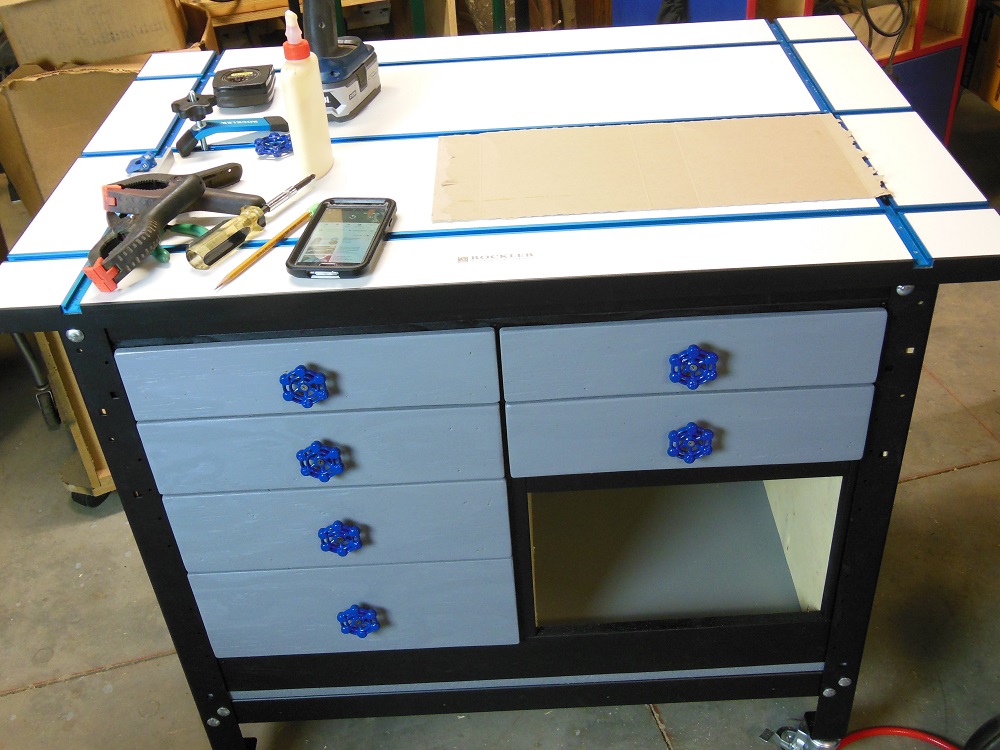
This drawer cabinet was built into a 24” x 36” metal shop stand, but it’s easily customizable to fit your own space and needs. You can change any of the dimensions, change the number/spacing of drawers, add a bottom to make it a freestanding unit, add casters to make it mobile or install shelves instead of drawers. Use some or all of the ideas and make it your own.
Whatever you do, that chaotic pile of tools, hardware and assorted bric-a-brac isn’t going to organize itself. And even if you don’t “organize” any of it, so to speak, you can at least get it out of sight. That’s worth something, right? That hidden mess; it can be our little secret.


Thanks, once I get my shed up, and tools moved in, you’ve provided me with the inspiration (and advice on what¬ to do) on fitting it out. So I hope you don’t mind my downloading this page for reference. Thanks again.
PS I’ve not subscribed bcos I use my pc so infrequently that I always have about 2-3dayswoth of emails to go thru’ b4 getting a chance to look at the stuff I want to look at. Grrrr.
Hey Rob, I’m glad we could provide you with a little inspiration! I know firsthand that many times the inspiration can be the biggest hurdle to overcome. Thanks for reading and giving your feedback.
What great idea and thanks for the info!!!!
Marla White – Thank you for your comment and support!