

![]() This post is sponsored by The Home Depot. When you think of rock carvings, you may envision large, powerful tools or heavy iron chisels. But did you know you can actually carve rocks with a handheld rotary tool? We’re all aware of the myriad things these versatile jacks of all trades are capable of. So today we’ll explore a lesser known use – how to carve rocks with the new Dremel Lite cordless rotary tool.
This post is sponsored by The Home Depot. When you think of rock carvings, you may envision large, powerful tools or heavy iron chisels. But did you know you can actually carve rocks with a handheld rotary tool? We’re all aware of the myriad things these versatile jacks of all trades are capable of. So today we’ll explore a lesser known use – how to carve rocks with the new Dremel Lite cordless rotary tool.
How Do I Use Thee – Let Me Count The Ways
Dremel is pretty much the “Coke” of rotary tools, to the point where many people think they’re one and the same. I’ve used “Dremels” since my teens for everything from repairs, cutting, cleaning, polishing, grinding, sharpening and carving to slotting stripped screw heads in order to back them out with a slotted driver.

To be clear, the Dremel Lite is not necessarily made for carving rocks. But as a rotary tool – a general purpose machine with countless uses (depending on which bits and accessories you install) – rock carving is definitely on the résumé.
Between A Rock And A Carved Place
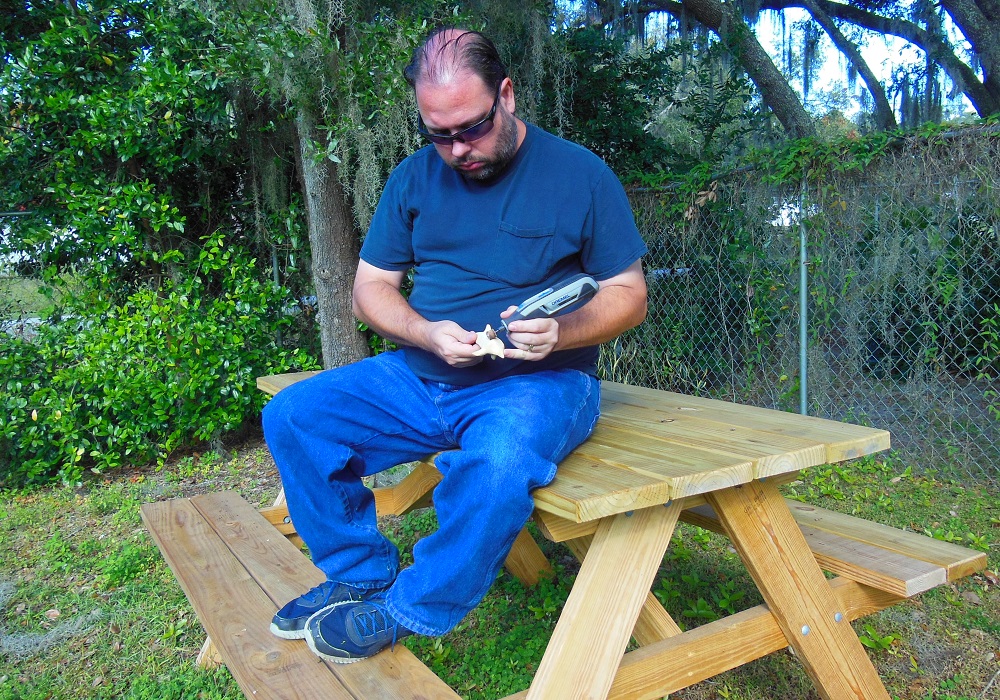
The new Dremel Lite model 7760 is a cordless variable speed (8,000 – 25,000 RPM) rotary tool designed for light jobs. And I could think of no lighter job than carving a rock (hehe, I know). This project let me test the Dremel Lite with bits ranging from really thin – which barely loaded the motor – to a buffing felt and 3/4” brush that gave the Lite more of a workout.
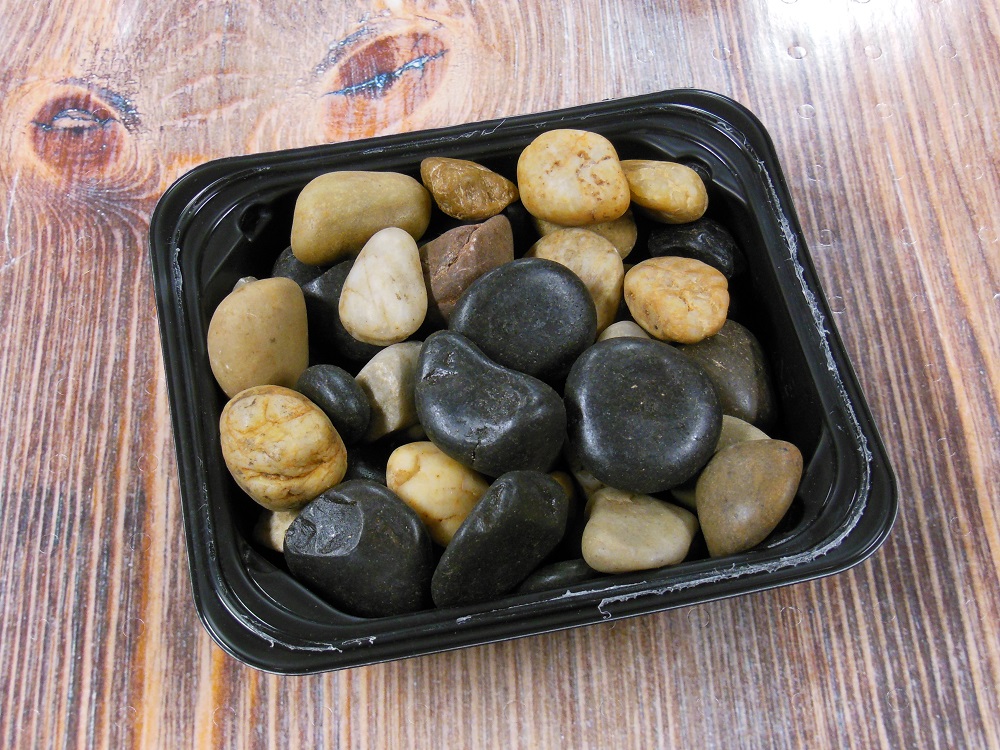
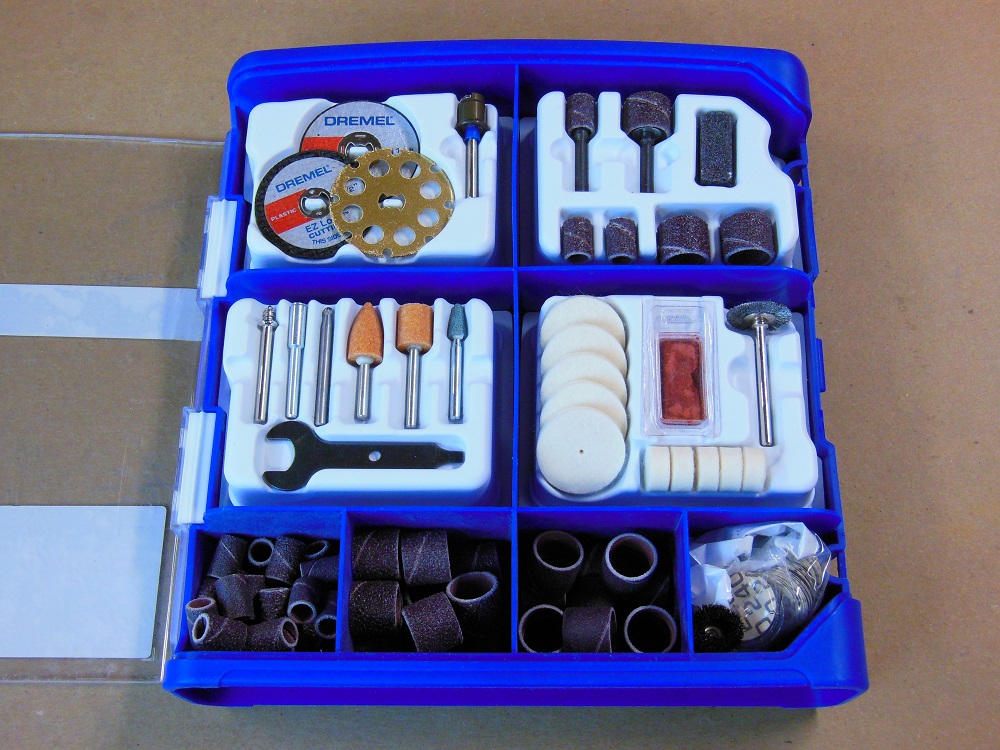
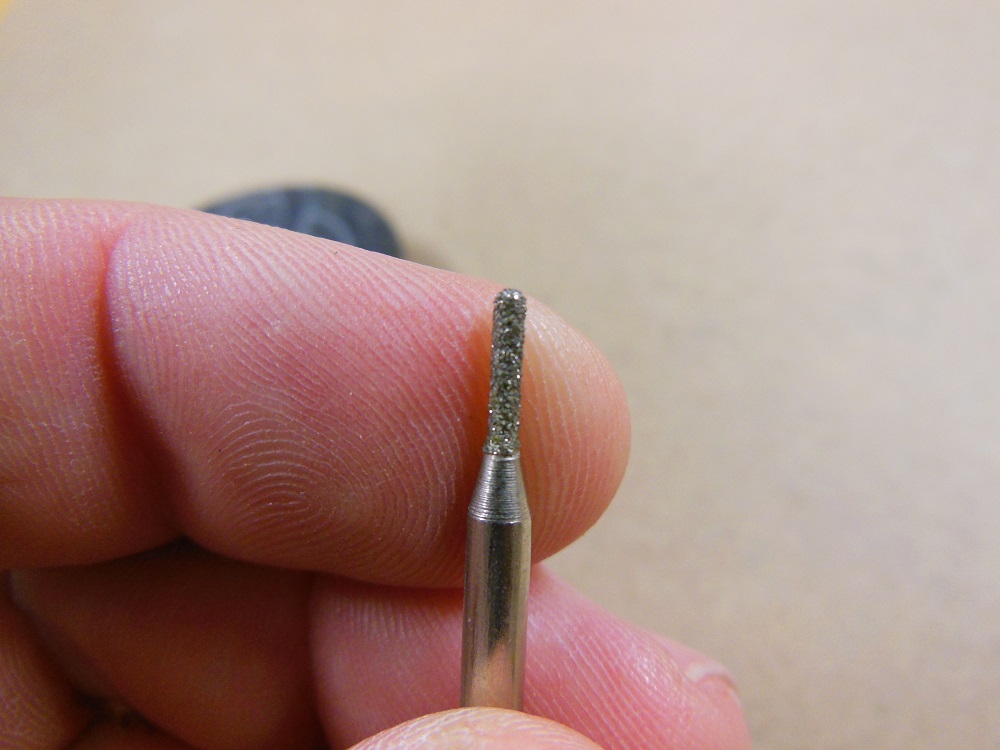
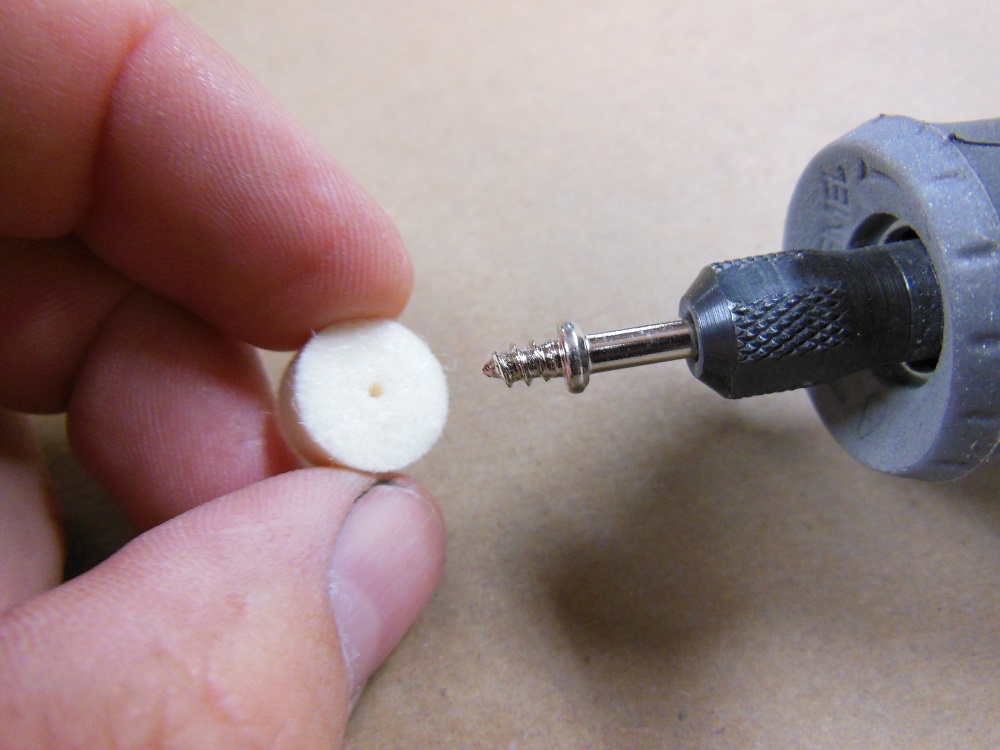
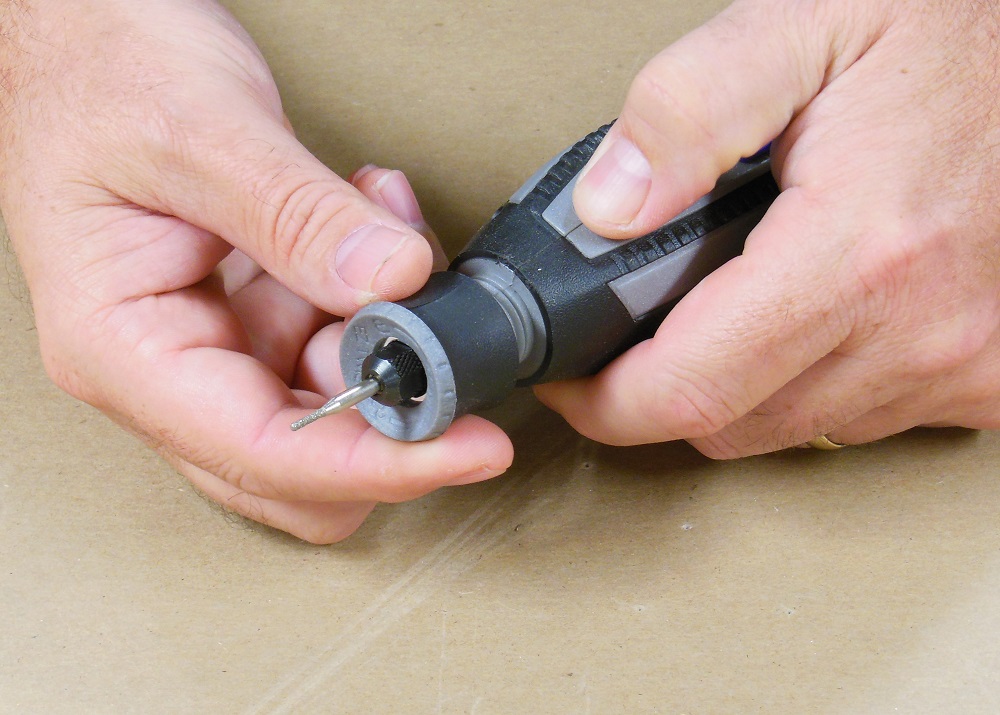
Carving small rocks is surprisingly easy; we’ll walk you through the process. The key to rotary tool success is selecting the right bit or attachment for the task at hand. For rock carving, you need diamond bits. If you can’t find what you need in the Dremel lineup, look for inexpensive 3rd party kits. There are lots of size and shape options out there, including cylinders, tapers, balls, cones and discs.
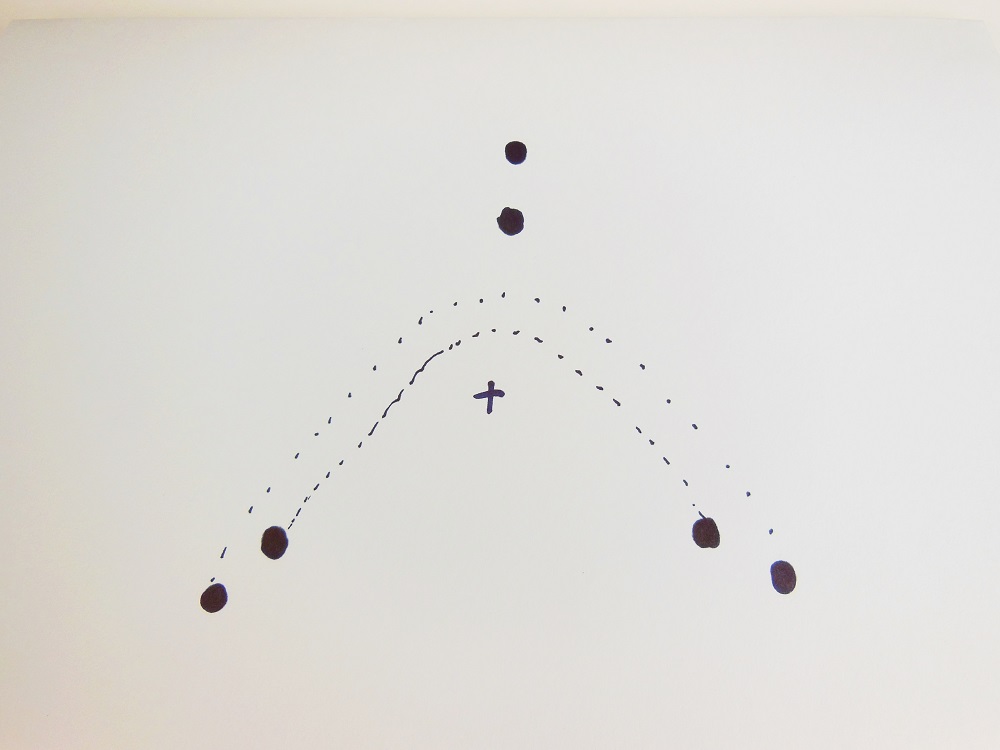
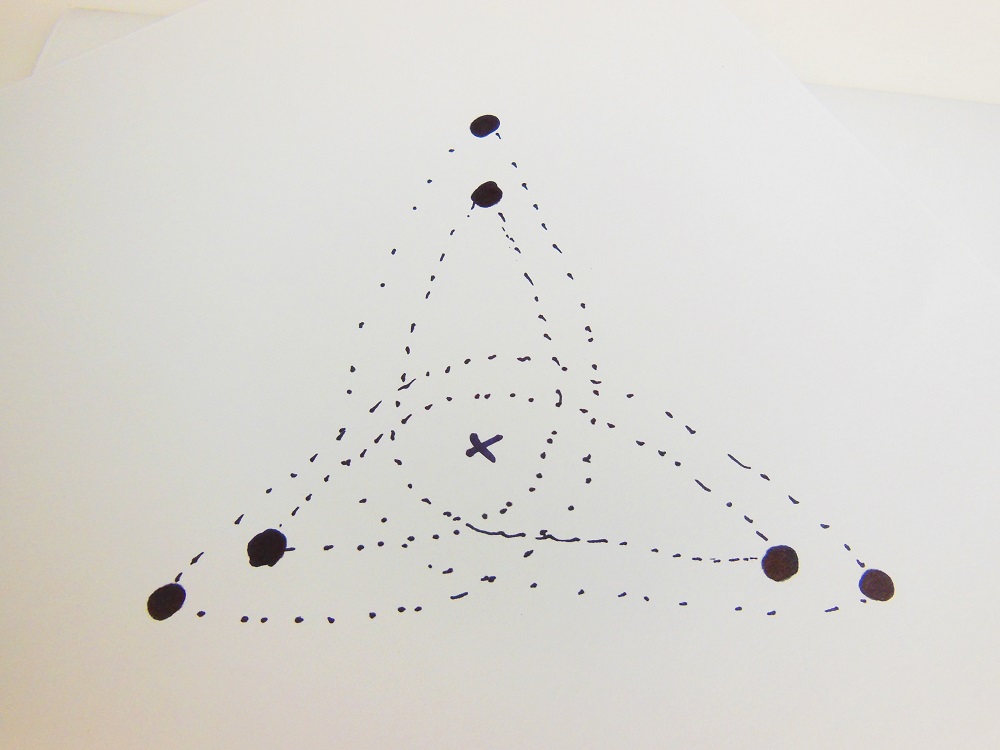
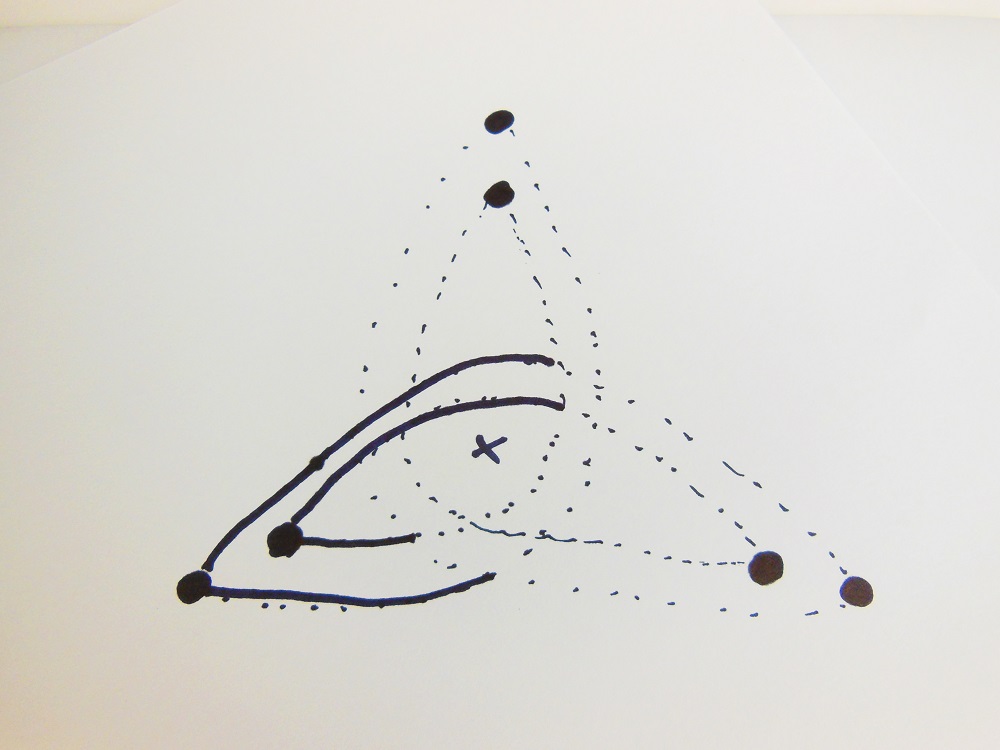
Be A Rock Star – Laying Out Your Design
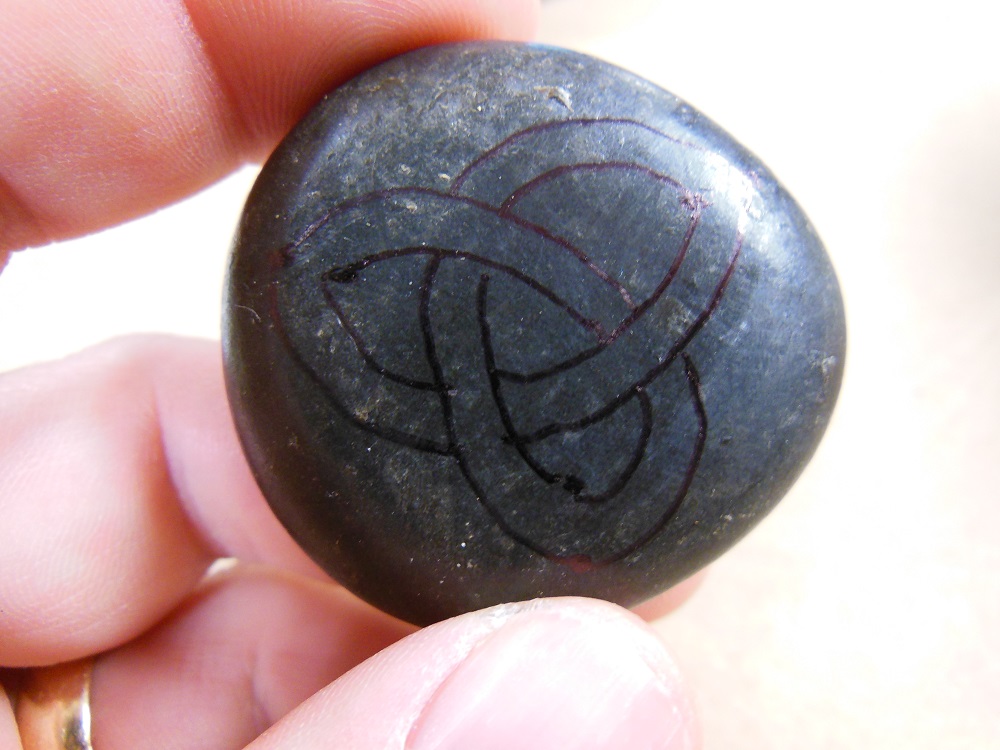
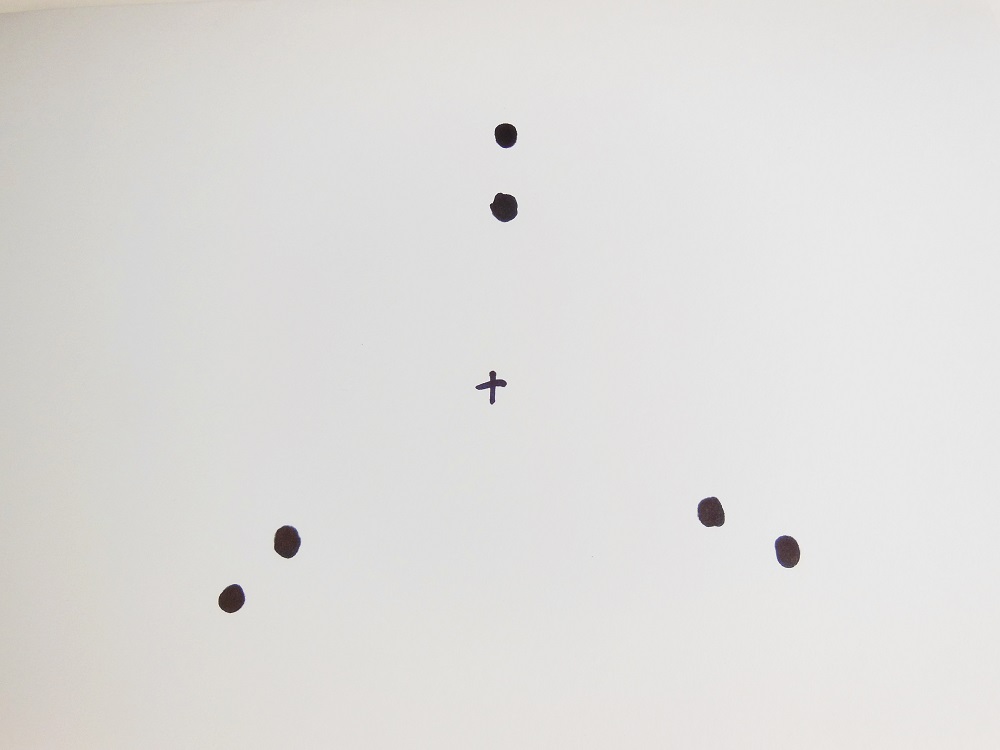
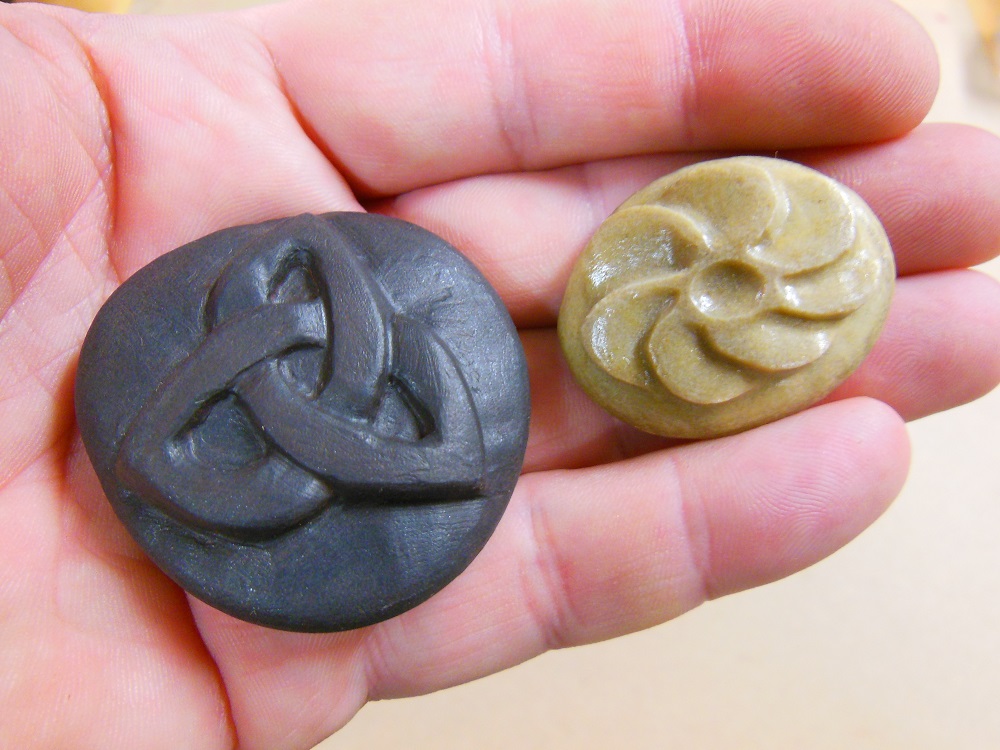
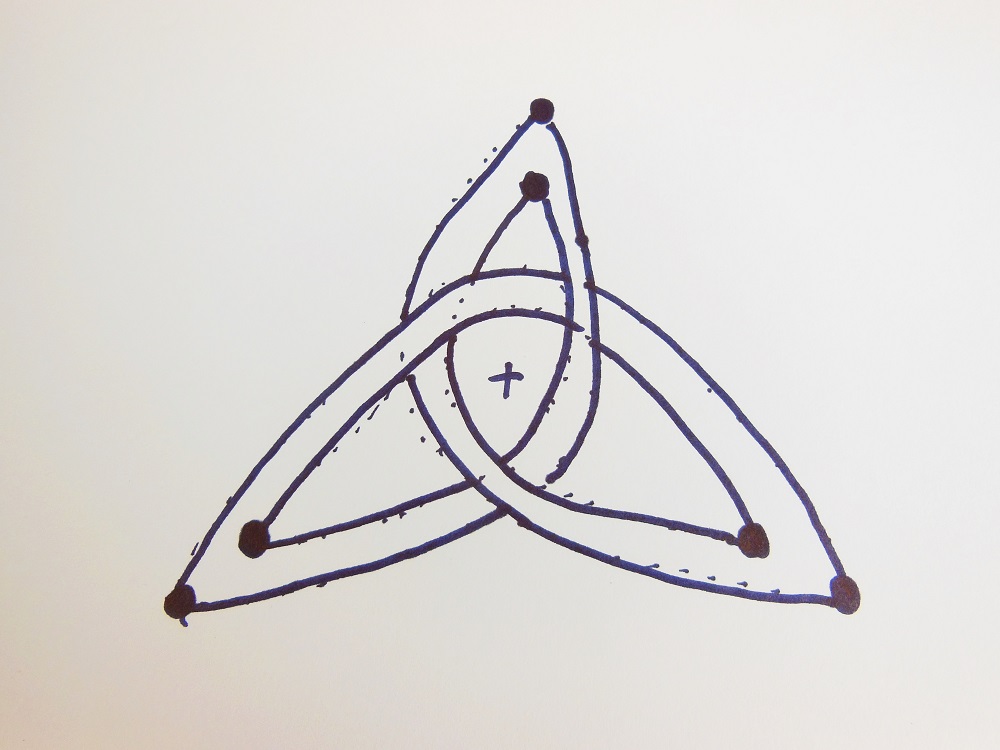
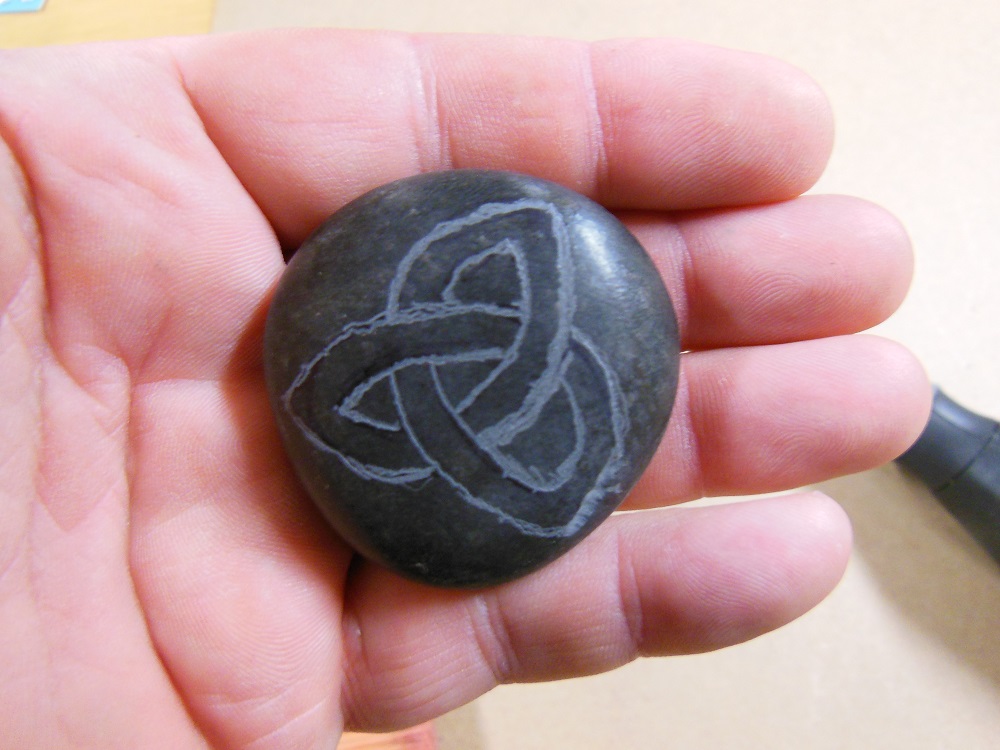
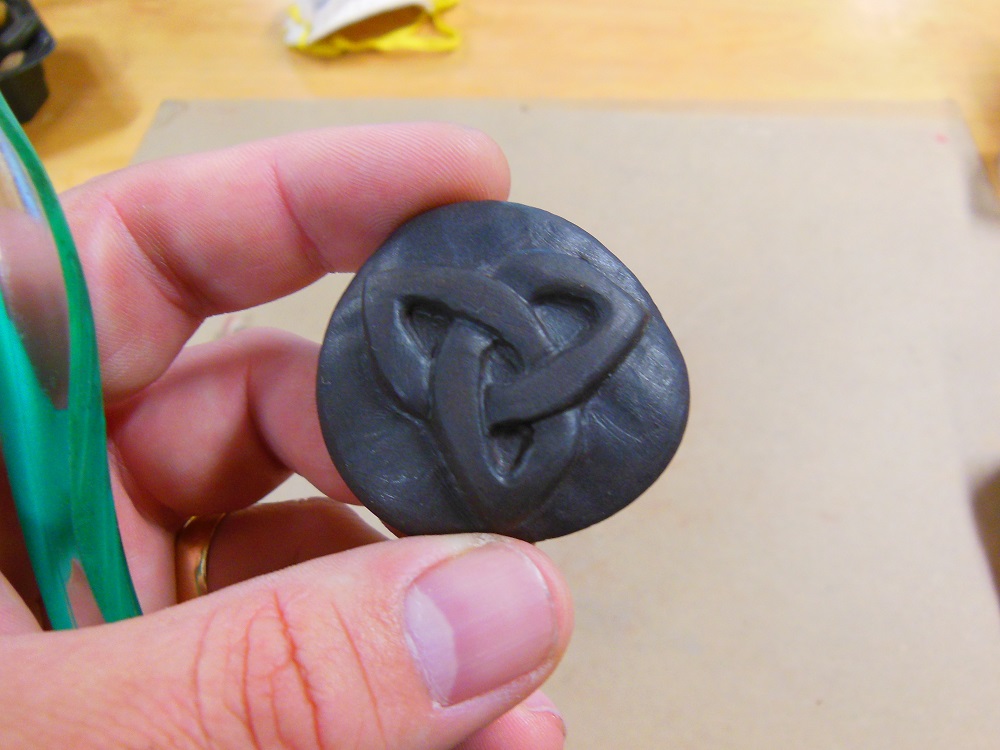
This design was selected solely for its simplicity and visual appeal. It’s one variation of the so-called “Celtic trinity knot” and is also known as a “triquetra” or “trefoil” (with pointed loops). You may be able to freehand the pattern, but this series of drawings will help you visualize the layout.

If you make an error, you can erase the marker lines with denatured alcohol. Especially on smooth or polished rock.
Carving Stones Won’t Break My Bones – But Bits And Debris Can Hurt Me
A few safety notes before we get started:
* I did not wear eye protection while carving this piece. I’m not saying you shouldn’t (you should), but these diamond bits are extremely unlikely to ever throw rock chips (unless you create really thin ridges that can break and fly off). You’re basically just sanding the material away. However, with more aggressive bits and accessories (especially cut-off wheels and wire brushes), eye protection is a must.
* You’ll see that I have my fingers pretty close to the bits during this project. These small diamond bits “dissolve” (grind away fine particles) the material with grit akin to fine sandpaper. If my finger was to touch a small diameter diamond bit like this while it’s spinning, the most that would happen is a light sanding burn.
However, the more aggressive the bit, the greater the danger of personal injury. More aggressive (and larger diameter) bits are also at higher risk of grabbing the material and kicking the tool. So keep those digits out of the line of fire.
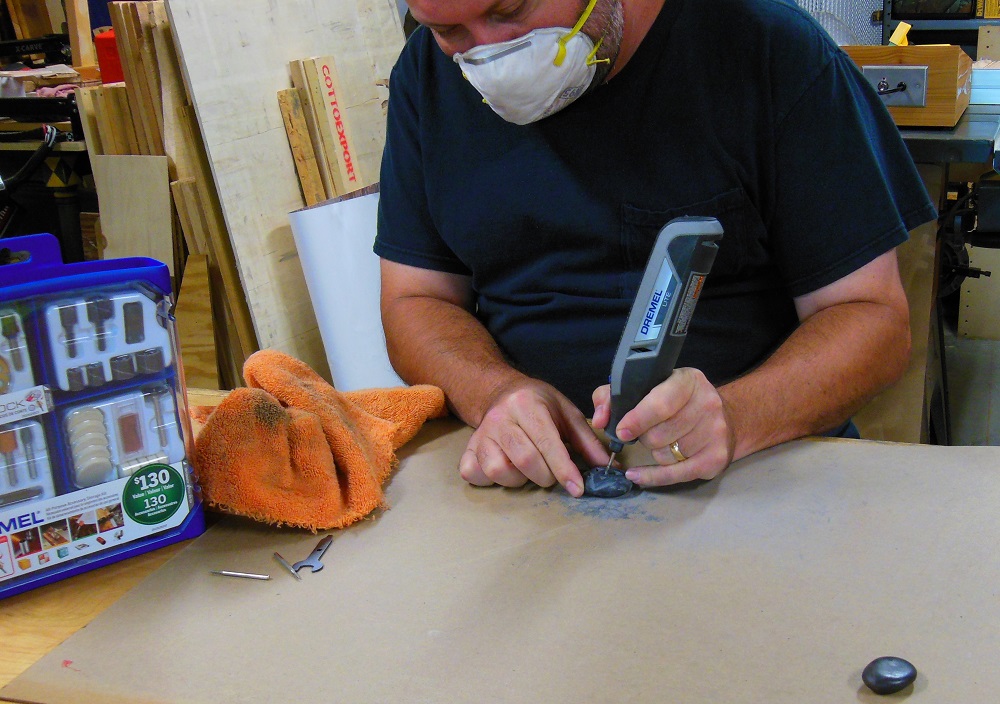
* The main hazard with diamond burr rock carving is the fine, powdery dust; you do not want to breath it in. So work either over a downdraft table or with a fan blowing the dust away from you. And ALWAYS wear a proper fitting dust mask or respirator while grinding rock (and other materials).
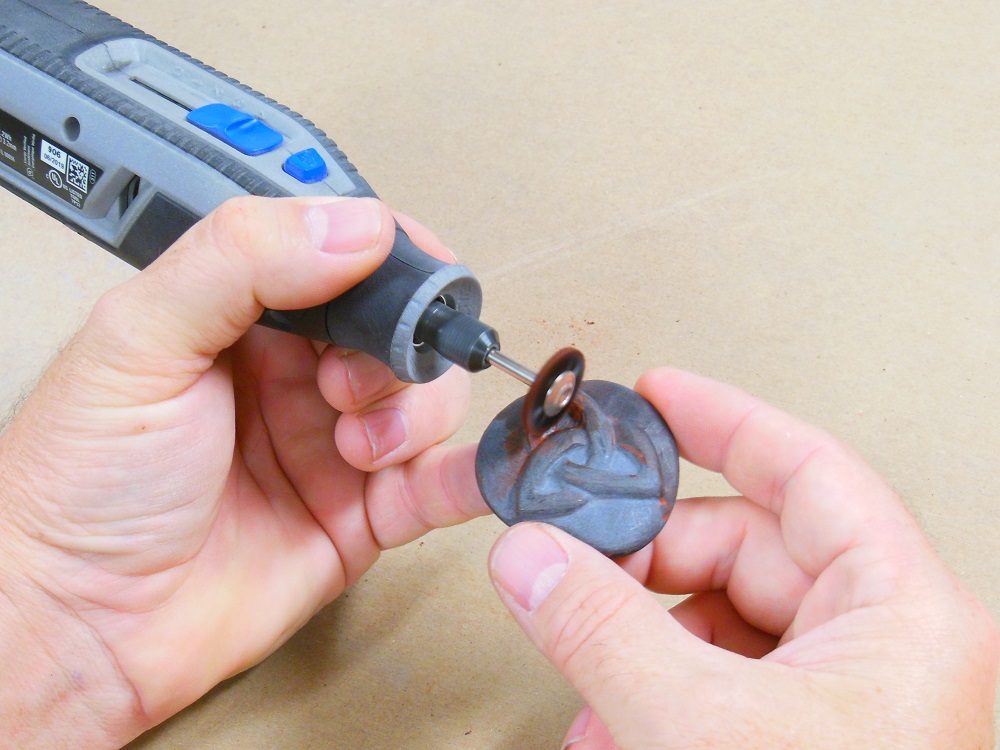
A Diamond In The Rough – Rock Carving With Dremel Lite
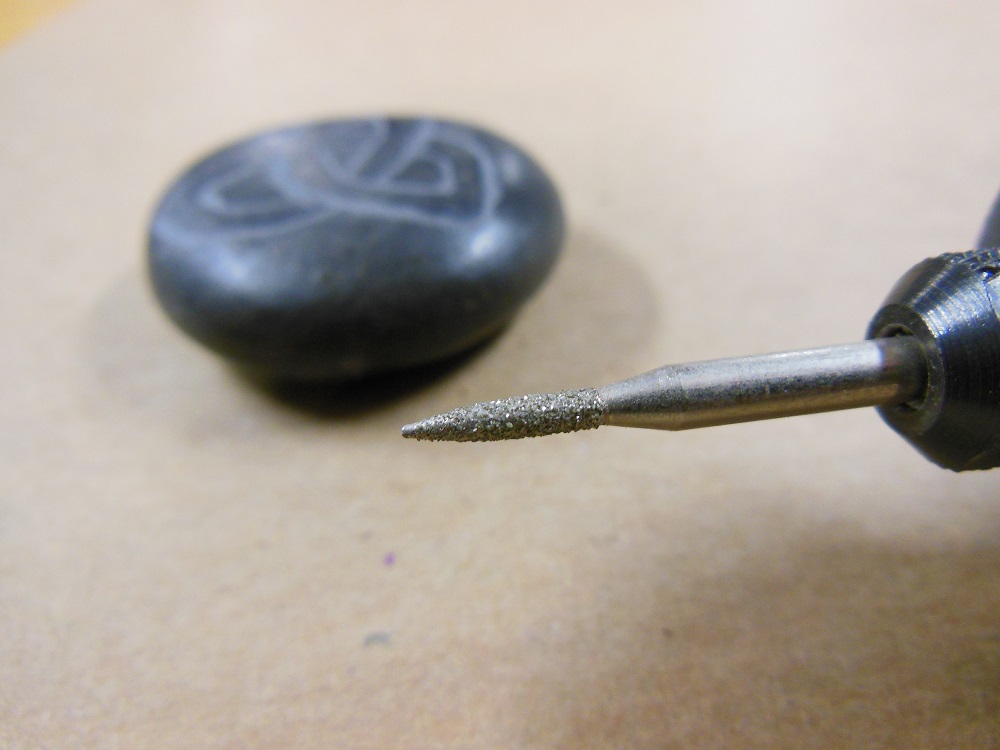
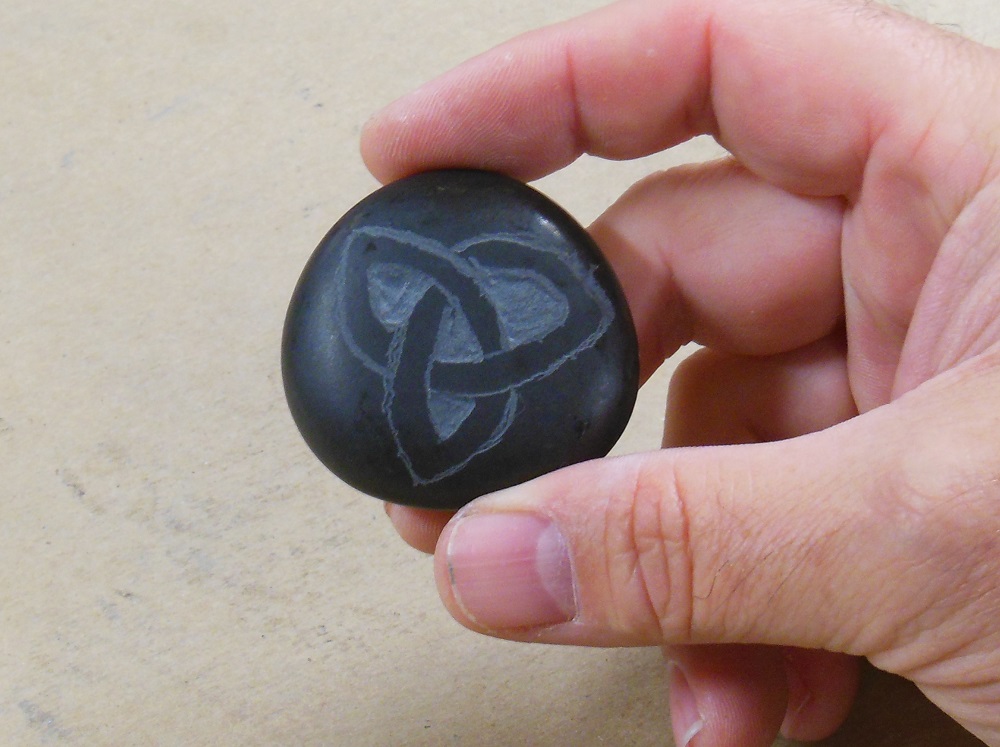
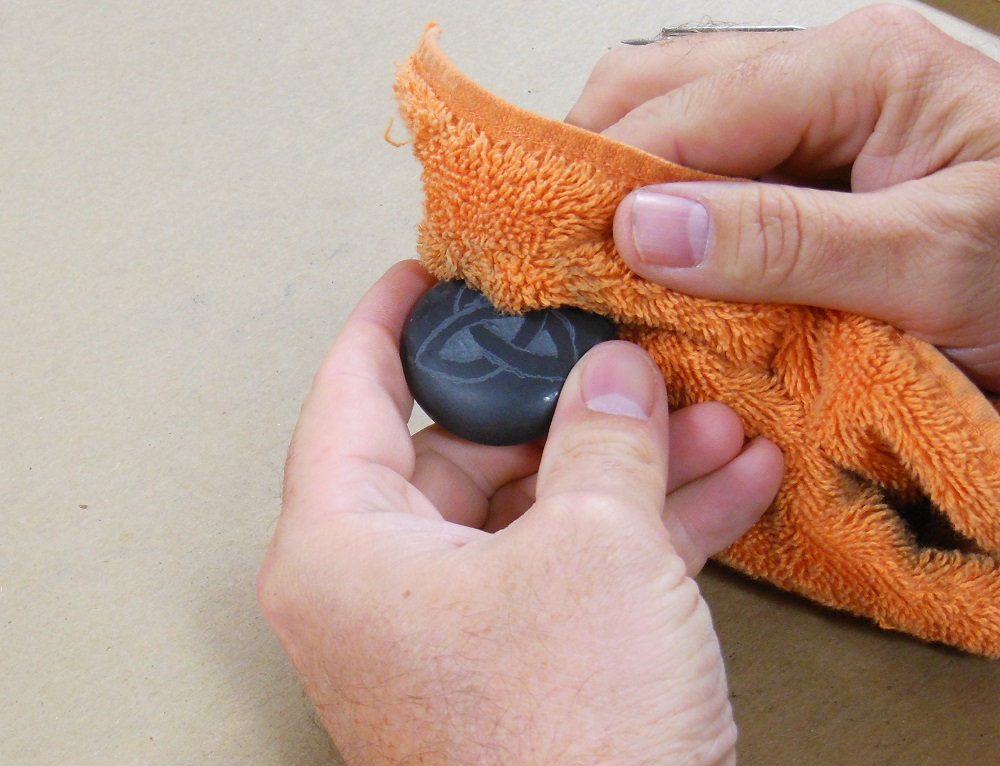
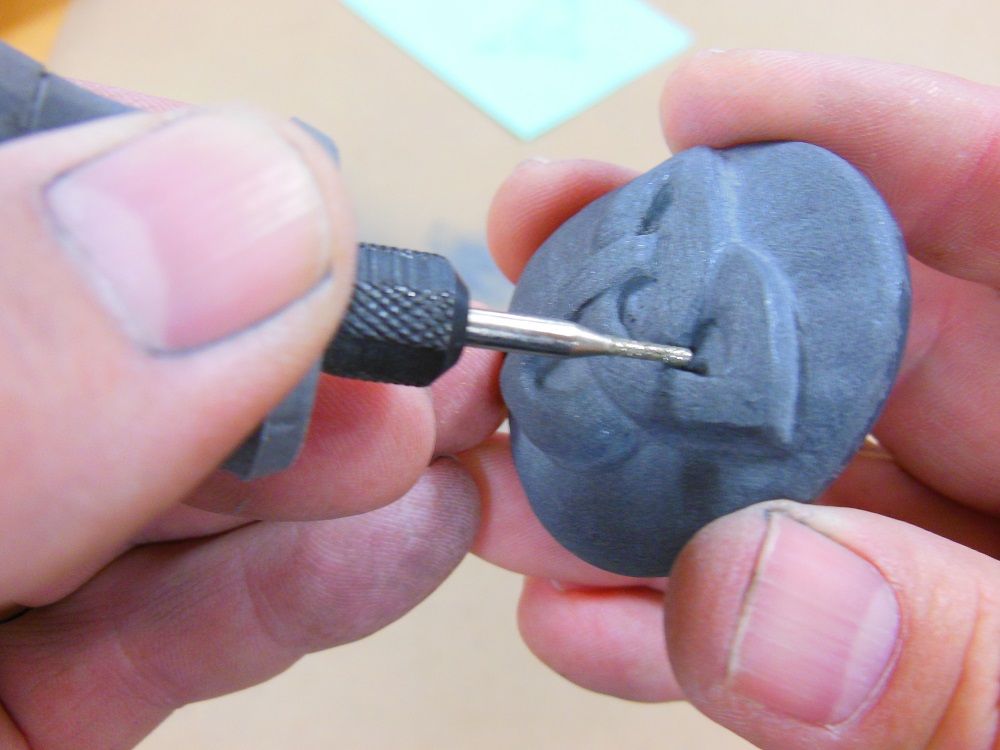
The stone will be handled a lot (and wiped with alcohol) during the carving process. To prevent the pattern from disappearing on you, you should engrave it with a small, pointy diamond burr.
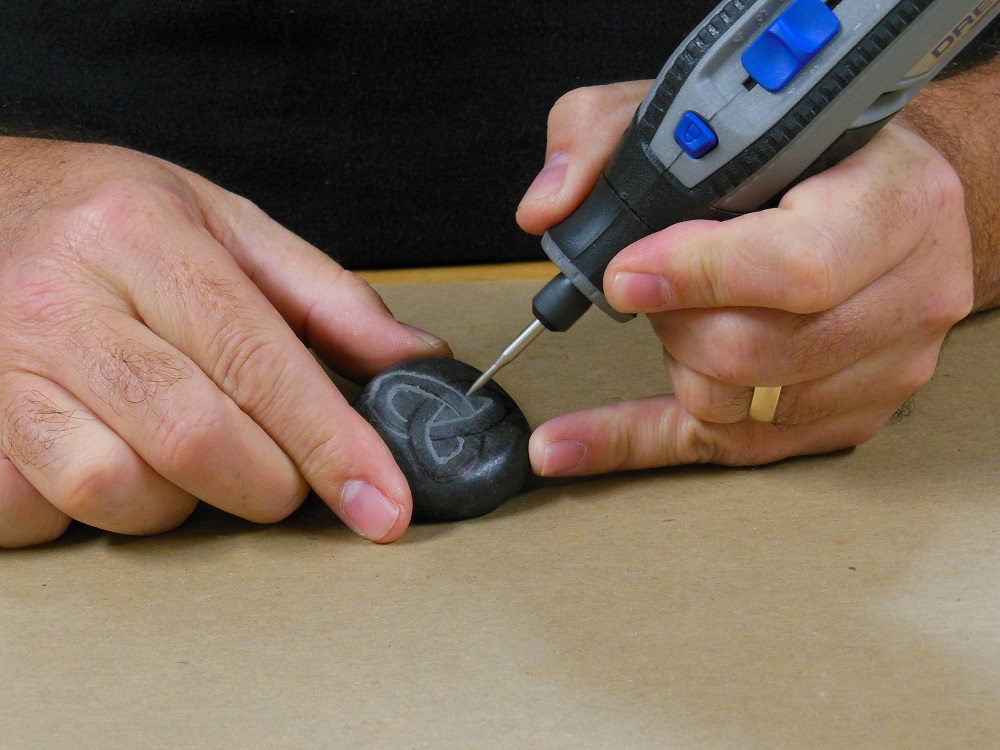
Personally, I’ve always found the idea of neatly engraving stone or glass free-handedly to be laughably impossible (even with specialized vibratory engravers). For the life of me, I just can’t stay on the line. The spinning bit is going to want to skate around. But that’s OK. Get as close as you can.
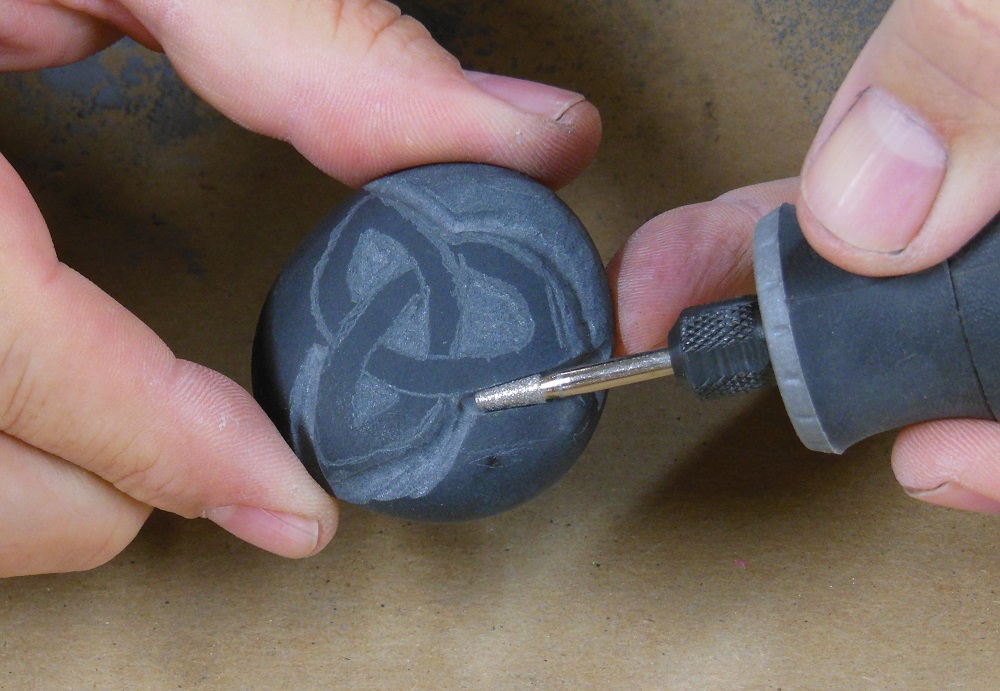
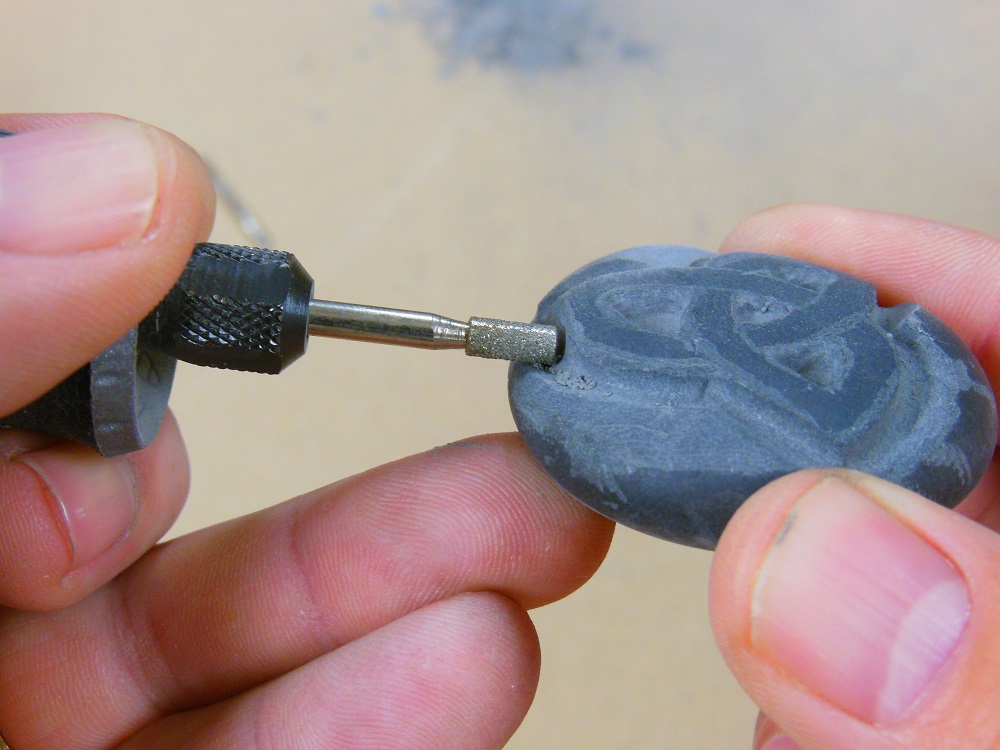
Start With The Inside
Start with the inside details. That way, if you overshoot the line you can adjust your outside border to compensate. Carve shallow at first then slowly work your way deeper. Once you’ve defined the outline, it will be a lot easier to stay on course.
Defining Boulders Borders
Now that I’ve established my inside spaces, I installed a larger, slightly tapered bit and cut a groove around the perimeter of the design. I was able to dig in fairly aggressively without a problem. But don’t force it; it’s still a relatively slow process and the more you load the motor, the faster the battery discharges. For perspective, this entire project took just over two full battery charges to complete.
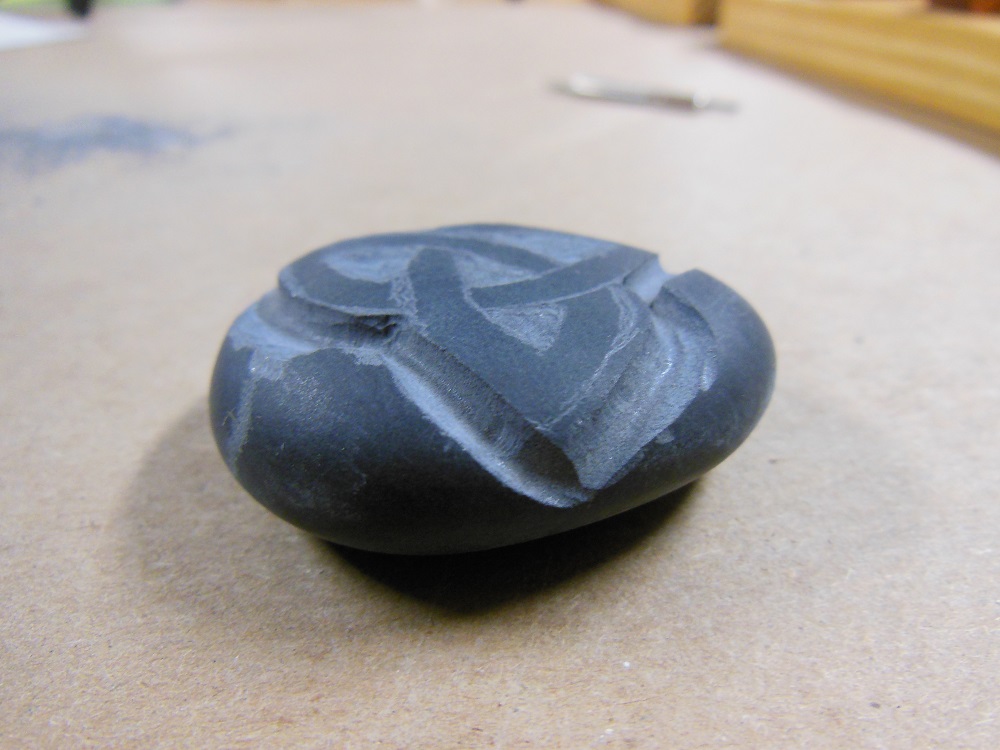
Level The Surrounding Area – Rock Carving with Dremel Lite
Having the design raised above the the surrounding material is going to really make this rock pop. I switched to a larger diameter bit and started grinding away at the background.

Wrestling Announcer: Can You See How The Rock Is Looking!? [Crowd Goes Wild!]
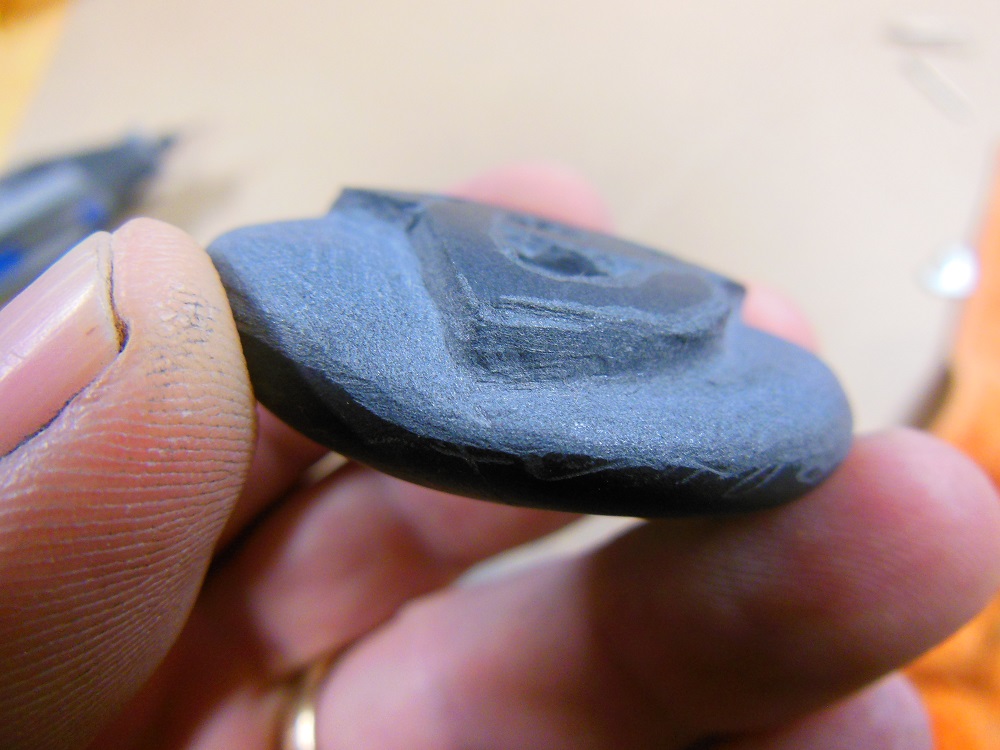
There are still a lot of rough edges and corners to take care of before polishing the surface.
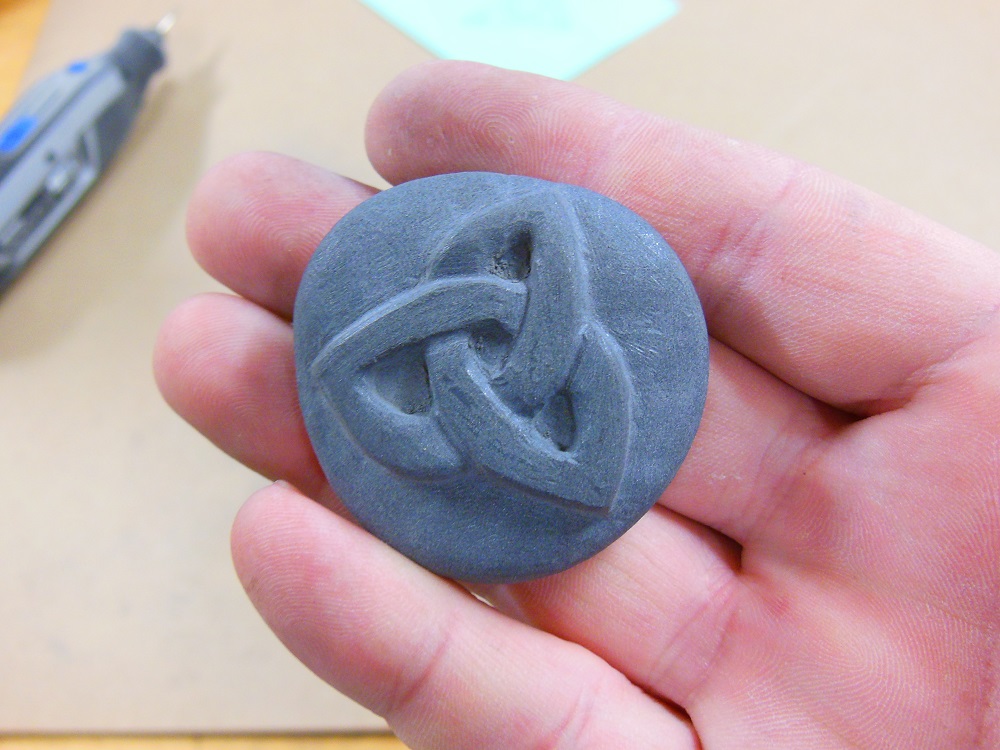
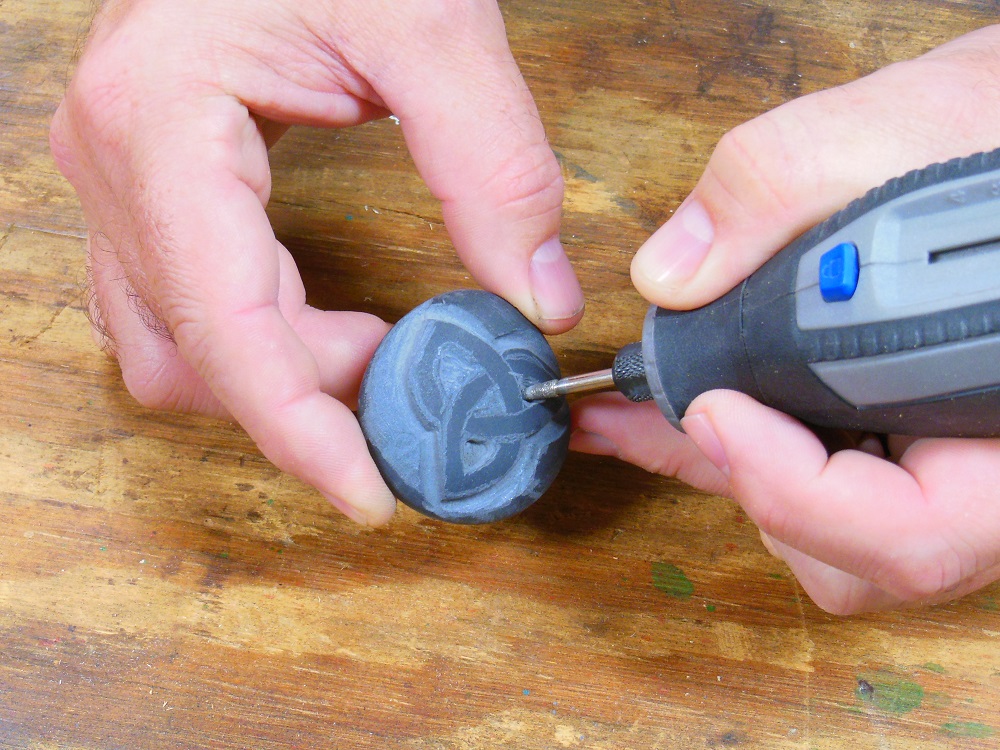
Romancing The Stone Carving
At this point, the carving looks dull and unrefined. There are several ways to make it more presentable. The easiest would be to spray it with clear lacquer or enamel. But the best option is polishing.
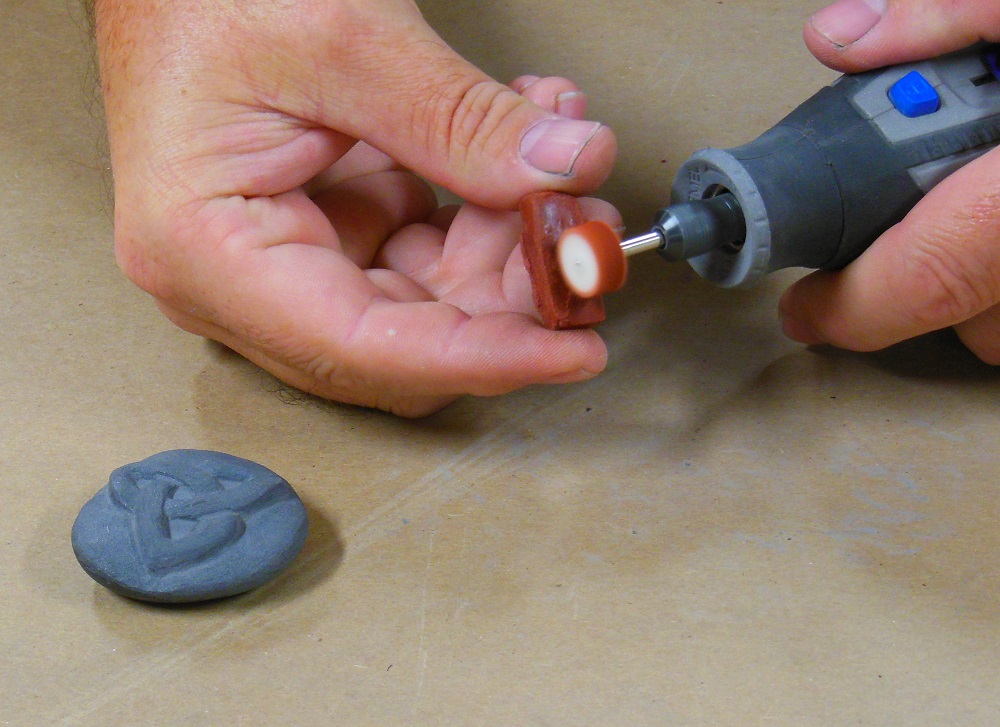
With light colored rocks, you may want to use a white polishing compound, rather than the red that comes in the kit (especially if the rock is porous) to avoid possible staining. Or go with a clear wax based polish. When in doubt, test on another, similar rock.
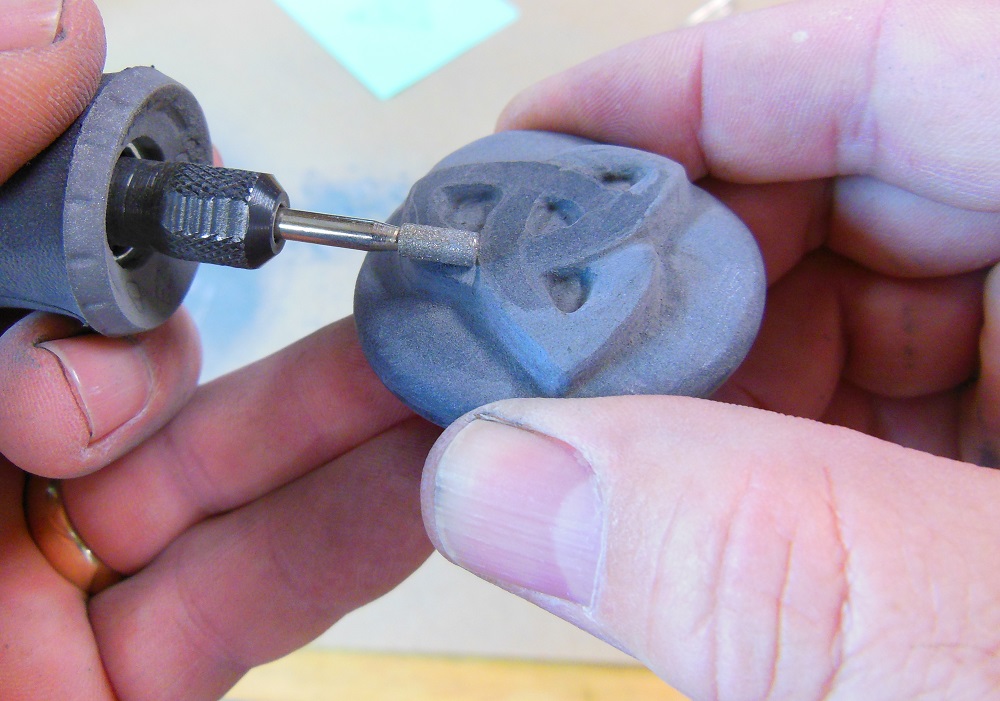
If The Dremel Lite Is ‘A Rockin’ Don’t Bother Knockin’ – Come On In
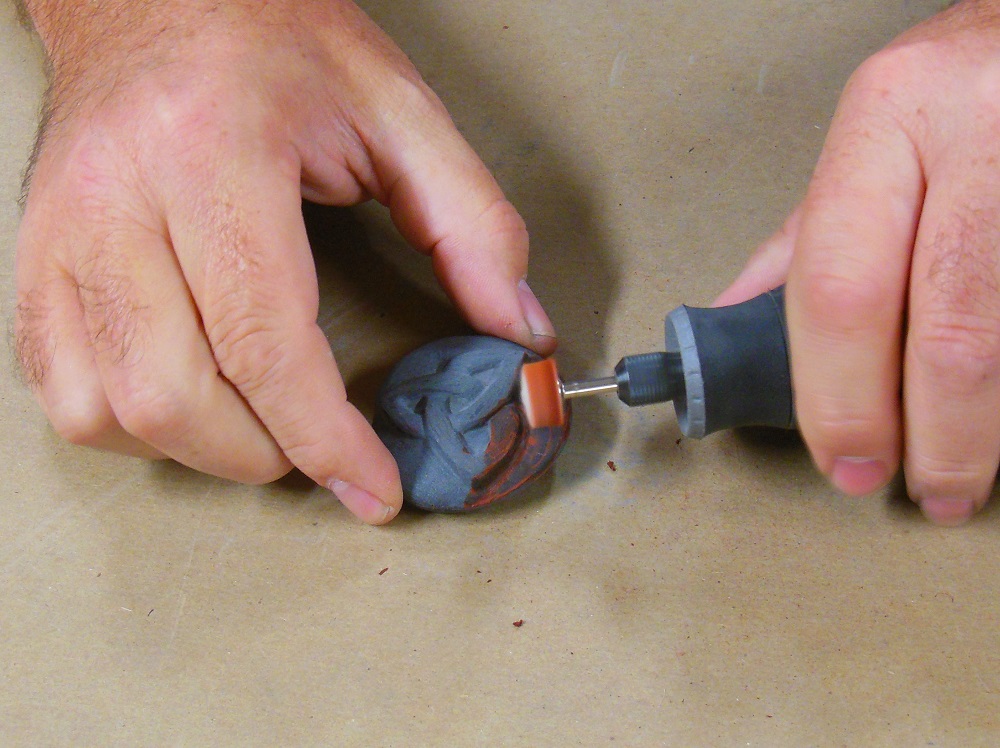
A high relief surface like this is going to be hard to polish with a 1” felt wheel. So I used a 1/2” felt (the smaller of the two included sizes) to polish the more exposed surfaces of the rock. Then I got the tighter areas with a rotary brush.

Final Thoughts On The Dremel Lite
Every workbench I’ve ever had (and all of my former techs’ electronics benches) has been equipped with at least one Dremel rotary tool. I’m not a fanboy; I’m just a fan of tools that deliver. As for the Dremel Lite, the name says it all: it’s a light duty tool best suited for smaller bits, and smaller jobs and craft projects. If you’re a heavy rotary tool user, this is not a replacement for your corded unit.
The internal 4V MAX lithium ion battery takes nearly 3 hours to charge and you’ll get around 30-45 minutes of use per charge in most situations. The motor also slows down as the battery drains. But it’s cordless and does an admirable job in the time you have; and that goes a long way towards a recommendation. Especially considering most small jobs will be done long before the battery dies.
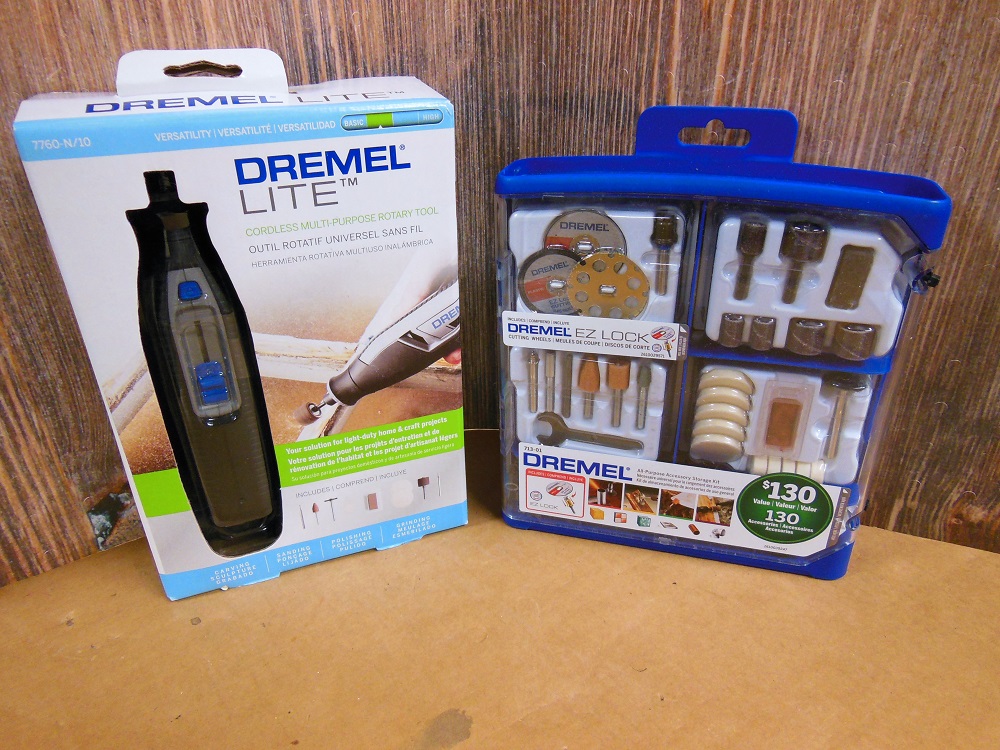
Get the Dremel Lite 7760 variable speed 4-V Li-Ion rotary tool w/10 accessories for around $50
Get a Dremel 130-pc. rotary tool accessory kit under $35
I acknowledge that The Home Depot is partnering with Home Fixated in sponsored content. As a part of the sponsorship, Home Fixated is receiving compensation for the purpose of promoting The Home Depot. All expressed opinions and experiences are our own words. This post complies with the Word Of Mouth Marketing Association (WOMMA) Ethics Code and applicable Federal Trade Commission guidelines.


I’d like to remove some very old soot from two long stones above and below my fireplace. I’ve used liquid products and they’ve gotten the first layers, but I’d like to remove the rest so that the stone looks “clean.” The stones are each 6″ tall by 36″ wide and the soot I want to remove is in spots. Is this a good dremel for this purpose; if not, suggestions? Thanks so much.
Steve might want to add,to use water every few seconds 15 -30
At least Steve is on the internet and knows what he’s doing I have one.but I would of bought it..hope this helps.you and Steve.
Is it necessary to keep the rock wet while diamond bit rock dremeling?
Yes, use water. I try to keep mine wet enough that I typically don’t have a dust problem, however I do have a speckling mud problem lol
I keep a shallow container of water that I will either work in or dip my fingers in to transfer to the stone to keep the area moist.
I see you hold the rock with your hands? Does it get hot? No water necessary?