

So, you want to spruce up your lawn or garden, but you are not sure where to start. One relatively quick project is to refine your lawn and planter areas with some bender board edging. Bender board edging helps to define and contain different elements of your landscape. Most of it is relatively inexpensive, and it’s something that you can likely install yourself without it occupying weeks of your time. However, if you have ever shopped for bender board edging, you’ll know it comes in a baffling array of sizes, colors, materials and thicknesses. We’ll cover the basic types, a few of their pros and cons, and some vital installation tips on how to install bender board edging that looks great.
When shopping for bender board edging, you’ll soon find yourself confronted with a potentially overwhelming array of options. Let’s talk about a few of the more popular types and which one might be best for you.

Cheap, Thin, Plastic Edging
Sounds great, right? Given its low price point and bend-ability, this type of bender board edging is probably the top seller. It’s what I used over a decade ago. Although it served its purpose, I can now say with the clarity of hindsight that the cheap, flimsy stuff usually looks cheap and flimsy too.
The very thin plastic is so flexible you can wind up with uneven curves, rather than smooth graceful lines. In terms of advantages, it’s inexpensive, easy to transport (it’s usually coiled up into a tight roll) and easy to install. Many, like the variety shown here have a design aspect that eliminates the need for stakes to hold it in place. In this version, the bottom forms a “V” that, once backfilled with soil, helps keep the bender board edging from migrating up and out. Ours stayed in place without stakes for over a decade.
My recommendation? Unless budget is your primary consideration, I would avoid this type of edging. It just doesn’t look nearly as good as some of the other options.
Metal Bender Board Edging
Another option I considered for our front yard and lawn is metal edging. The metal comes in different finishes and colors, with the most common being silver, black, brown and green. The two main metal edging varieties I came across were made from aluminum or steel.
The aluminum options are light and pretty easy to bend. Aluminum is also less prone to corrosion (particularly with a good coating) than steel. However it’s also prone to unwanted dings and bends thanks to your lawnmower wheels, foot traffic, etc. Getting a truly smooth curve can be tricky too. I have mainly seen these used on very contemporary yard designs, often to provide a very thin, minimalist barrier between stone beds, decomposed granite, etc. I would not recommend them for any lawn edging, intricate or tight curves, or in areas that get a lot of foot traffic.
Steel bender board edging is also available, although you may need to visit your local, specialized irrigation or landscape supply store to find it. Our landscape architect friend advised against using them as the paint that coats the steel is prone to chipping. Not only does the chipped paint look bad, but rust will inevitably take hold and make things worse. The steel edging variants are going to be harder to bend smoothly (especially for any tight radiuses), but they’ll be less prone to accidental damage than their aluminum siblings. They’re often sold in long lengths of 15′ to 20′, so don’t plan on putting them in your trunk. However you can find some shorter lengths at your local big box home improvement store.
Recycled Plastic / Synthetic Bender Board Edging
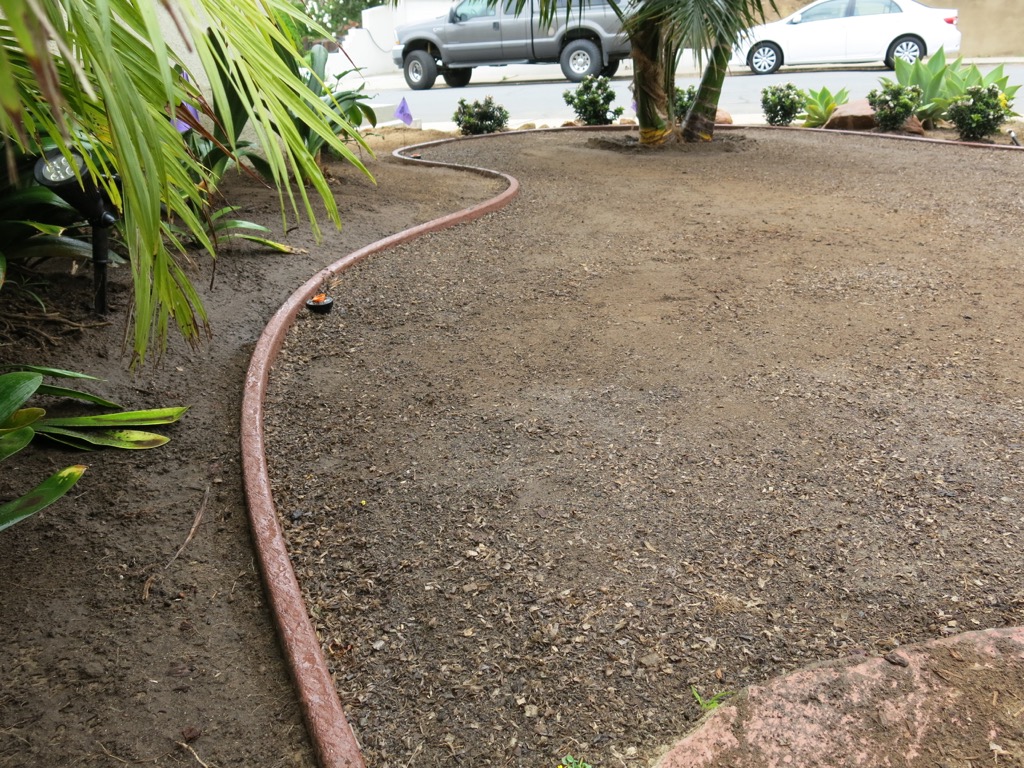
Unlike the plastic options detailed at the start of this article, this variety tends to be thicker. We’re talking about typical 1x or 2x dimensions here. Think Trex decking material in terms of visualizing what this type of bender board edging looks and feels like. These options tend to look more like wood bender board edging, but are more flexible than wood, won’t splinter or degrade like wood, and they often come from recycled materials.
This type of edging will tend to expand and contract with temperature variations, and the quality of material varies. Some looks really “plasticky” and other versions look a lot like wood bender board. We purchased “Benda Board” from Epic Edge Plastics. It comes in 1x and 2x thicknesses, and 4x or 6x height. Most of the boards are around 20′ long. The Benda Board 2×4 size we used was quite flexible for curves, but I would definitely recommend the 1x version if your plans are highly curvaceous. Ours was a real challenge to bend in the tighter radiuses, and when a seam between boards was mid-curve, it was even more difficult. The thicker 2x looks better in my opinion, but is not ideal when dealing with tight radius curves, small areas or undulating topography.
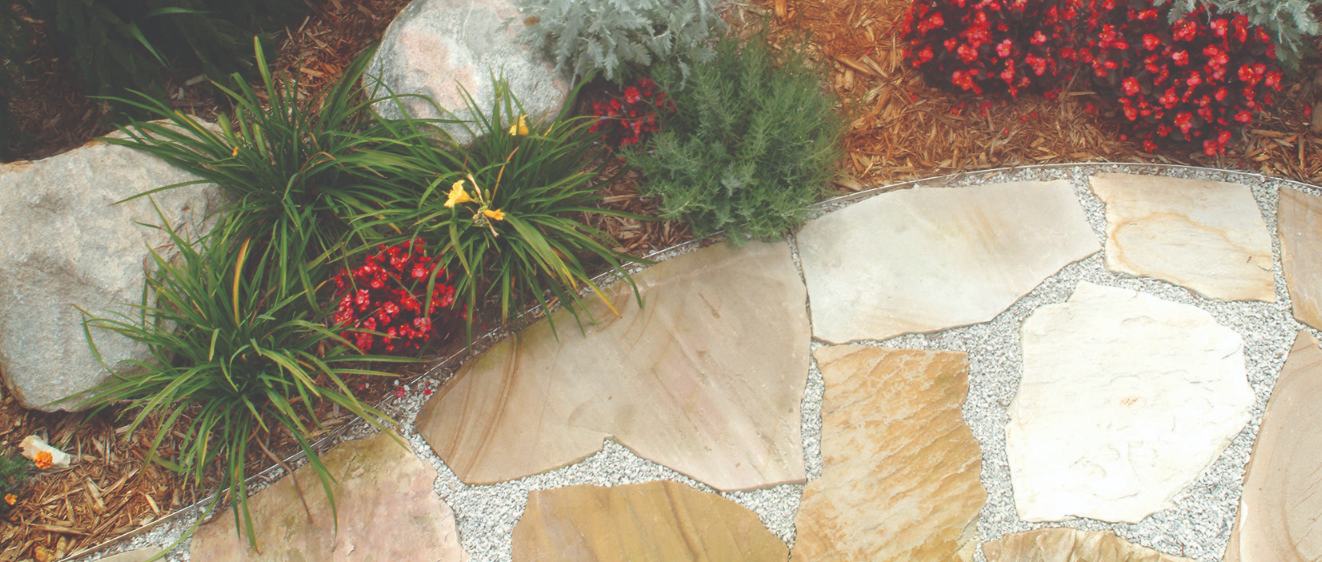
Getting Straight to the Point – Add Some Curves
If you have a very formal or contemporary garden with nothing but straight lines, you can probably disregard this section. For most gardens and landscapes, adding some curves to lawn areas and planter areas is a great way to make a yard flow. Curves can soften the look of different elements in your landscape and they’re generally more pleasant to look at than sharp angles.
How to Install Bender Board Edging, Three Words at a Time
Lay It Out

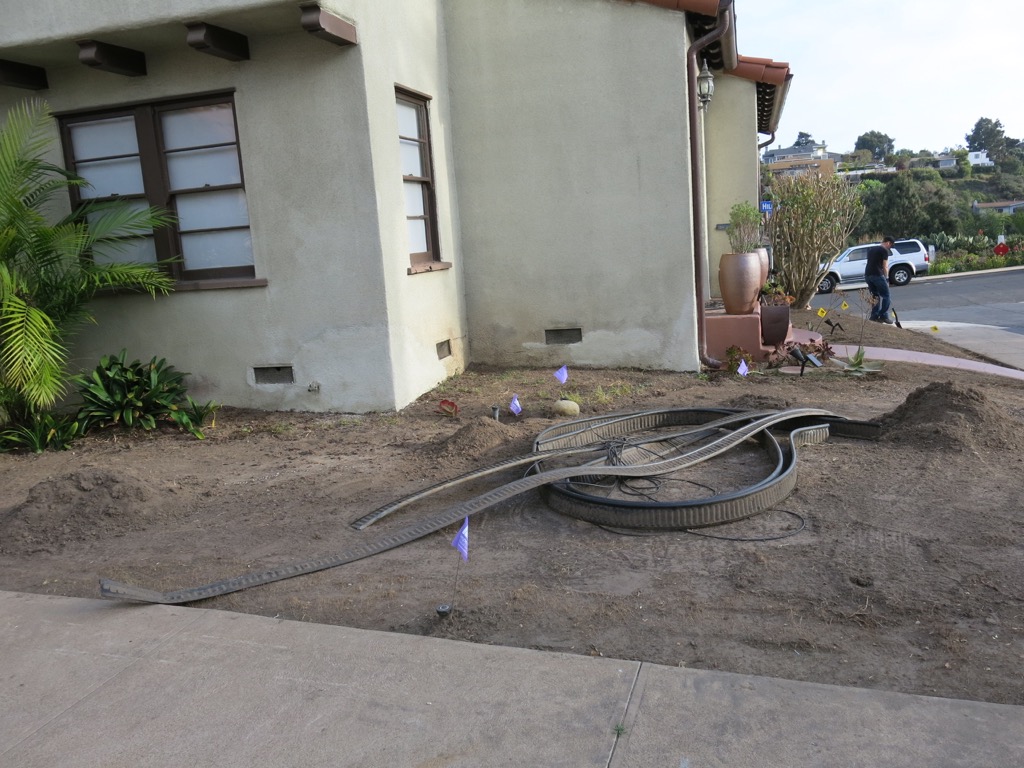
For straight lines, stringing a chalk line or finding a long straight board can help you plan where your bender board edging will go. For any installations that involve curves, my preferred layout tool is a nice, rubbery hose. Don’t try using a thick hose that retains its coiled shape. You want something bendable that you can create graceful lines with. Play around with the hose layout and take a few steps back and view it from different angles before you settle on the ideal position. Once you have the design settled, you can sprinkle powdered chalk along the hose, carefully dig along the hose (more risky for your hose), or spray with a landscape marking paint (which might result in a new color for your hose. Some people just wing it and freehand it, but I think you get a better end result with a planned and marked line.
Dig It Out
Trenching for edging is pretty minimal and you can do it with a shovel, or even a pickaxe. How deep you trench depends of course on how tall your bender board is and also how much surface material like mulch you might be wanting to retain. 4″ tall board is fine for most level yards, but 6″ is recommended if you have changes in the level of the soil that exceed a couple inches. Whatever size bender board you go with, you’ll want your trench just slightly less than that deep (keep in mind that the 4″ or 6″ size is actually more like 3.5″ and 5.5″) I liked the look of having the top of the bender board just slightly proud of the grade, so the trench I did was around 3″. Go more shallow if you need more of the board exposed to retain mulch. Keep the soil you dig up close to the trench for the backfilling phase.
Put It In

Since no more than 25% of the height of your benderboard should be visible, you’ll want to fine tune the elevation of your board as you lay it in. It’s easier to do this if you went a little extra deep on the digging phase (it’s easier to add a little soil under a section of board than it is to try to excavate out more soil when the board is already in place). For the most part this phase involves
Stake It Out

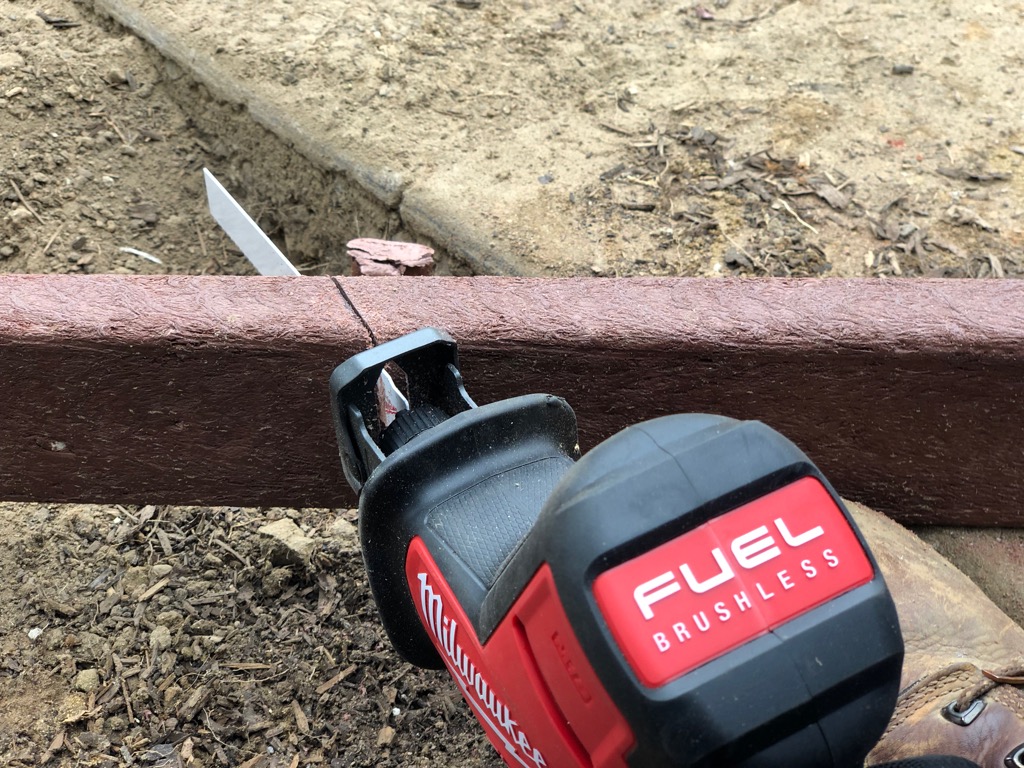
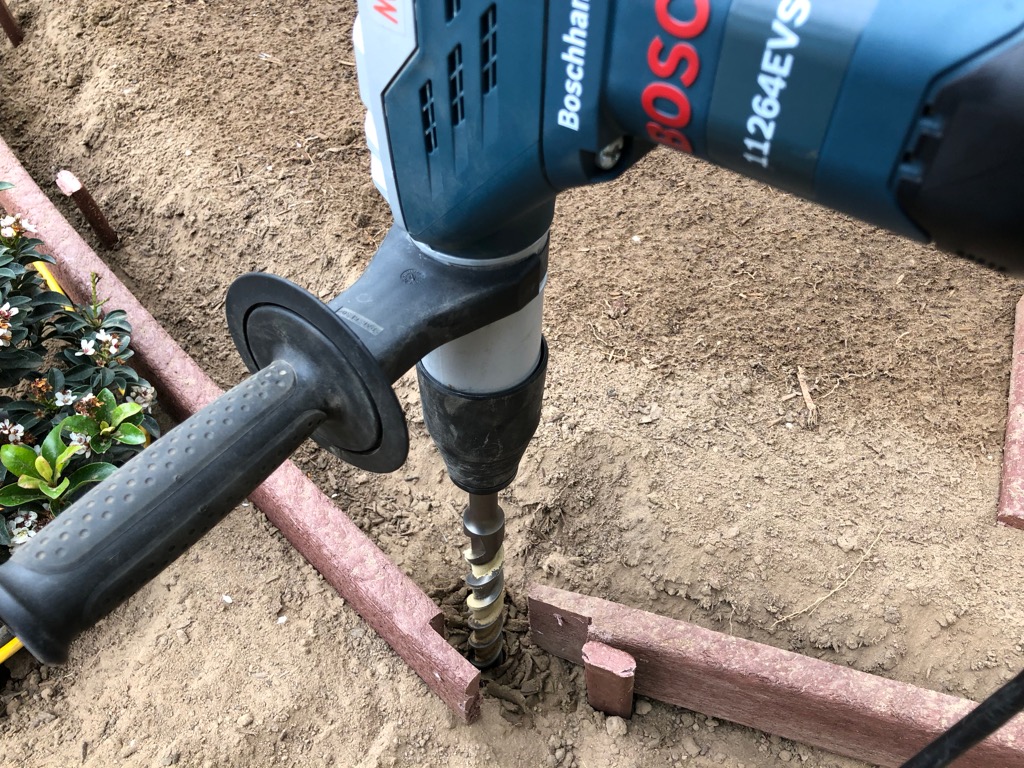
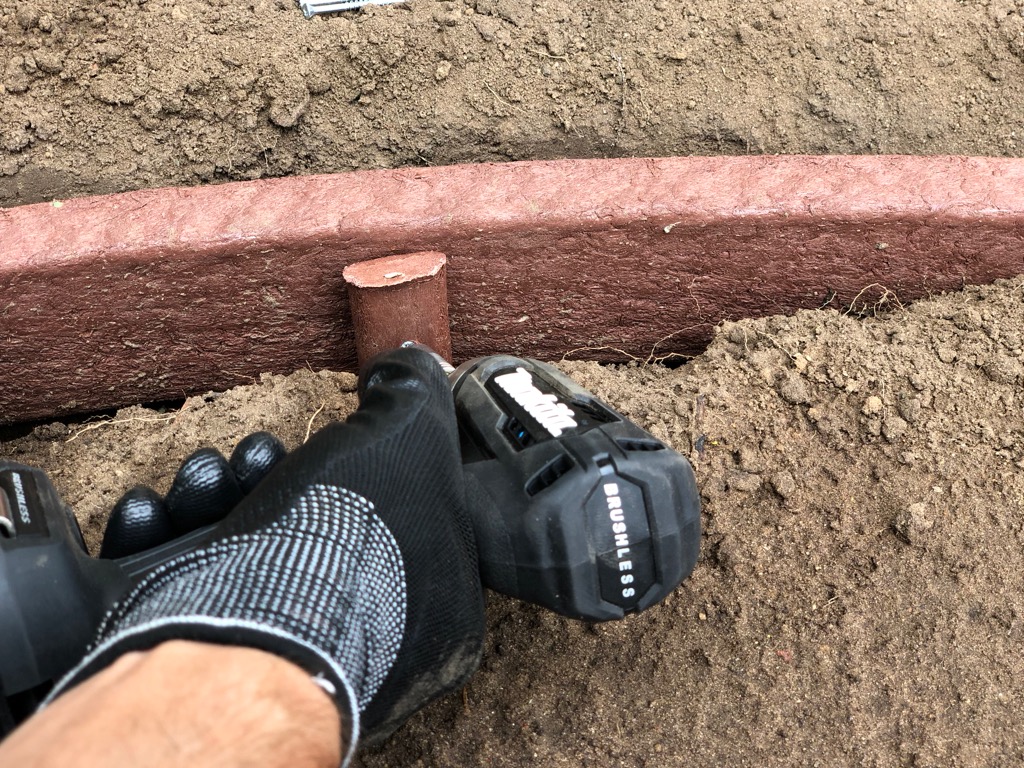
Staking things out is one phase of your project that can be very challenging. Whatever stakes you use, make sure they’re strong, especially if they’re helping your bender board edging conform to a tight radius curve. I actually hammered in several of the stakes for my project before putting the bender board in to help me bend the board into place. You’ll want to hammer to an inch or two below the top edge of the board so the stake is not visible once backfilled. I used an oscillating multitool to cut the stakes off.

In this project, about half the soil I was attempting to drive the stakes into was insanely hard. After breaking several of the nearly indestructible stakes I had and uttering a variety of curse words I’m hoping my neighbors did not hear, I decided to work smarter, not harder. I busted out my trusty Bosch Rotohammer, popped in a massive SDS-Max bit, and literally pre-drilled the concrete soil for the stakes. No cursing required, although this is definitely not a manufacturer-recommended use of the tool.
You’ll want a hand-held sledge hammer for hammering in the stakes (you might get by with a regular hammer if your soil is super soft). Once you have the stakes in place and hammered and/or cut to the appropriate height, it’s a good idea to secure the bender board edging to your stakes. I used some stainless screws since the area around the bender board will be watered regularly.
Backfill The Soil
Congrats! You’re at the most satisfying stage of installing bender board – backfilling! Take the dirt you excavated in the trenching phase and use it to backfill all along both sides of your freshly-installed bender board edging. Tamp it down, step back, and behold your new addition to the landscape.

Epic Plastics also has a handy install video detailing a number of these steps:
Hopefully one of the edging options we discussed is right for you. If not, some people use stones, blocks and mortar, or even concrete to create a more permanent edging solution. These hardscape options can really look great when done right, but they are more involved than the edging options and installations we detailed in this article. If you have a favorite bender board edging solution, tell us what it is and why you like it in the comments below. Happy landscaping!


After a very long day of trying to pound in steel concrete stakes to attach Benda Board, I came home to search for a better way and across your article. It’s now on my wish list to get that rotary hammer. Can you please share some additional info: What diameter drill bit were you using? Is it wide enough or do you need to work it a little wider? Any experience with a less expensive rotary hammer that you would recommend for this exact application? Beautiful work — thanks for sharing!
Thanks Patrick! I think the bit was around 1-1.5″ in diameter, and just about any rotary hammer should do the trick. You can sometimes rent these at Home Depot or a local tool rental outfit if you just plan a one-time use. Good luck!
Potential issues we’re trying to figure out: buckling in hot weather (the benderboard expands); heaving so benderboard is locally rising slightly (possibly due to our expansive heavy clay soil which bakes dry in the summer, gets wet/sticky in winter). We used 12-inch concrete form stakes, and screwed thru those into the benderboard. Thoughts on mitigation? Thanks.
Can you let me know where we can buy the thick edgings as displaye$ here . They look nice
Hi Sam. The product links are at the end of the article. We bought ours locally in San Diego, CA. but they can be purchased elsewhere too. Good luck on your edging project!