

There are many hobbies in which one might indulge. Some like spending time in the workshop. Or hanging out with the band. Or maybe you’re into casually cracking open a few long necks whilst singing a round of Kumbaya, slapping mosquitoes and actively dodging the malicious, eye-stinging smoke of a campfire. With this project you can combine all three exciting hobbies into one! [Pro tip: woodworking is dangerous; buzzes and buzz saws don’t mix.] Save the bottle caps from your backyard gatherings and be the life of the next jam session… or the death of it, if your rhythm sucks. Once you’ve sobered up, go ahead and grab 32 caps, a scrap of pine board, a wire coat hanger, some spray paint, meet me in the workshop and read on; we’re going to make our own bottle cap tambourine!
Night Cap

Obviously, I’m making light of drinking. But workshop safety is never a joke. Always work sober and safely. Understand your tools and use personal protective equipment when applicable.
I had a bartender friend save up a bag full of caps, allowing me to batch out a bunch of these bottle cap tambourines without sending my liver into shock. Not that I didn’t toss in a few of my own, mind you.
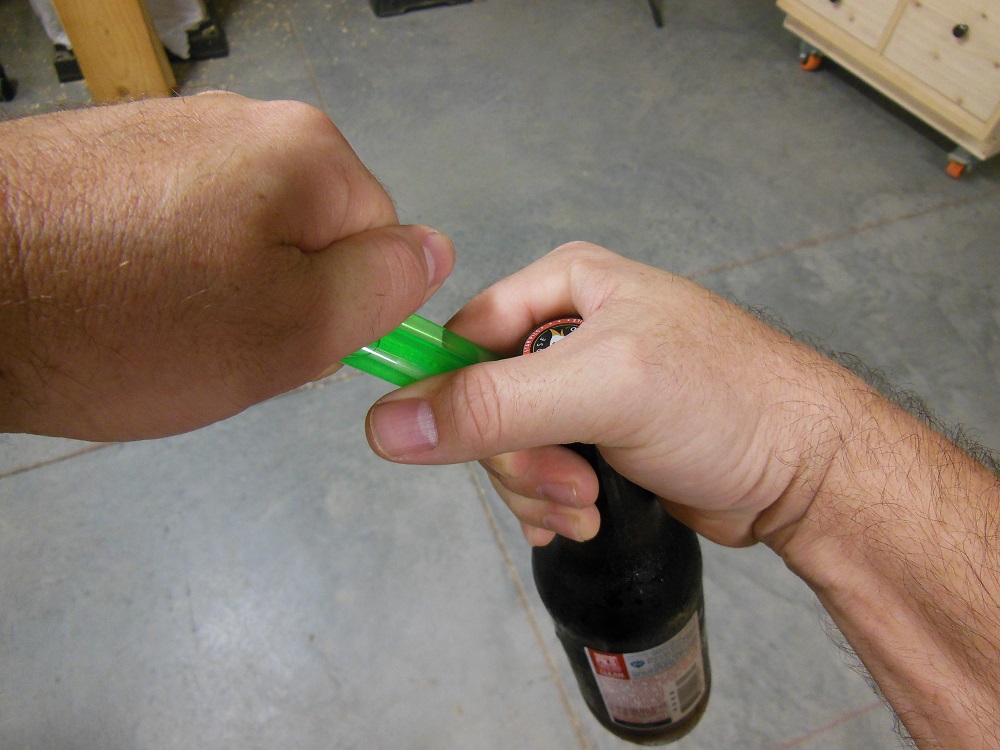
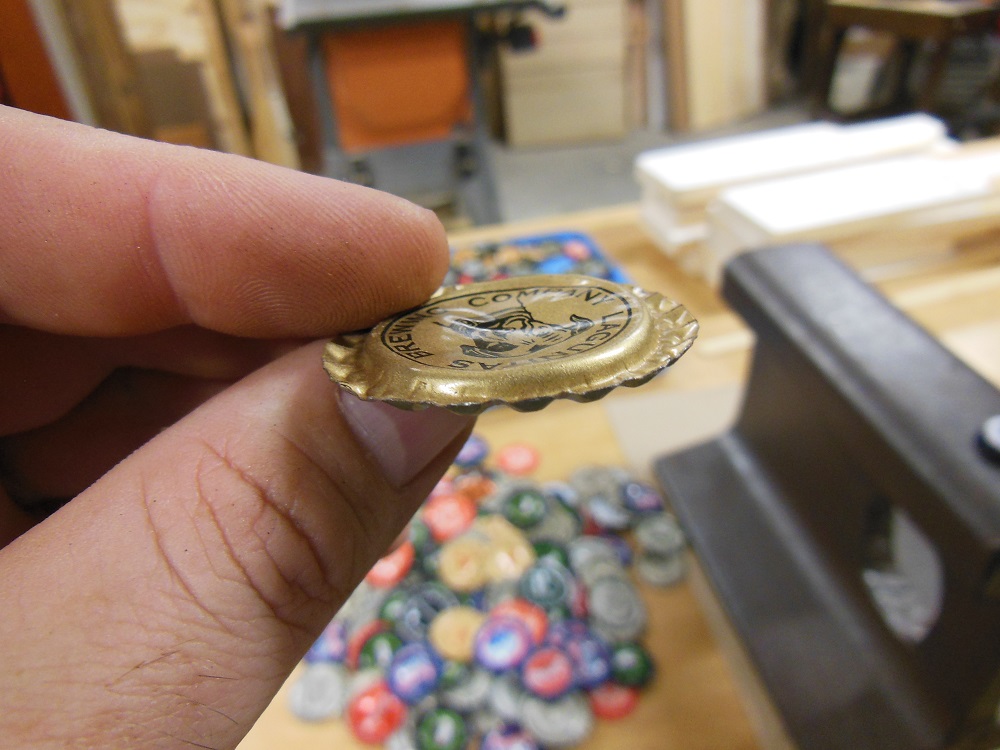
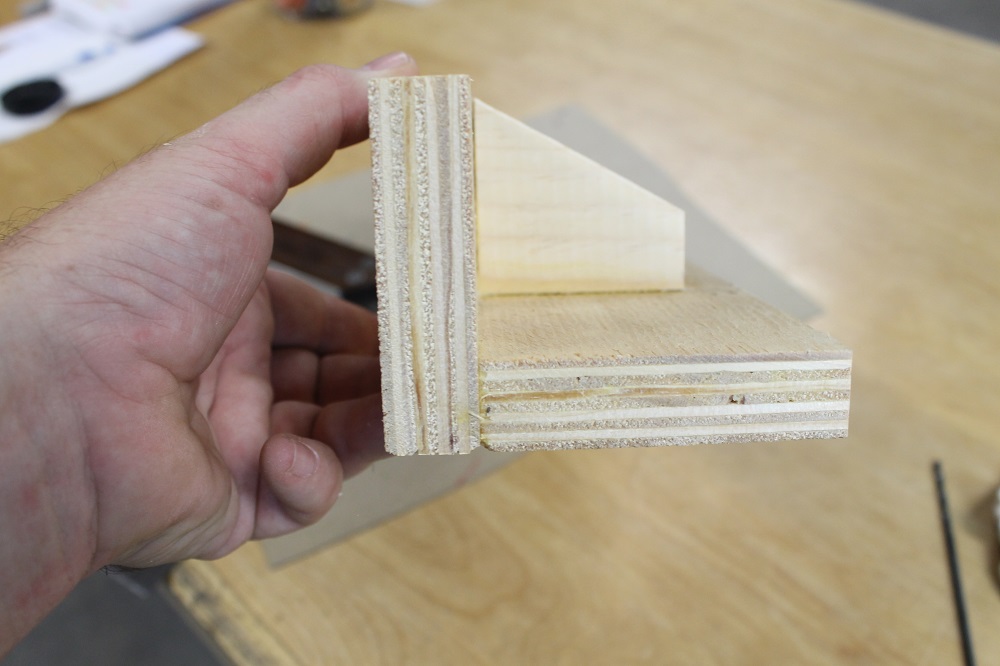
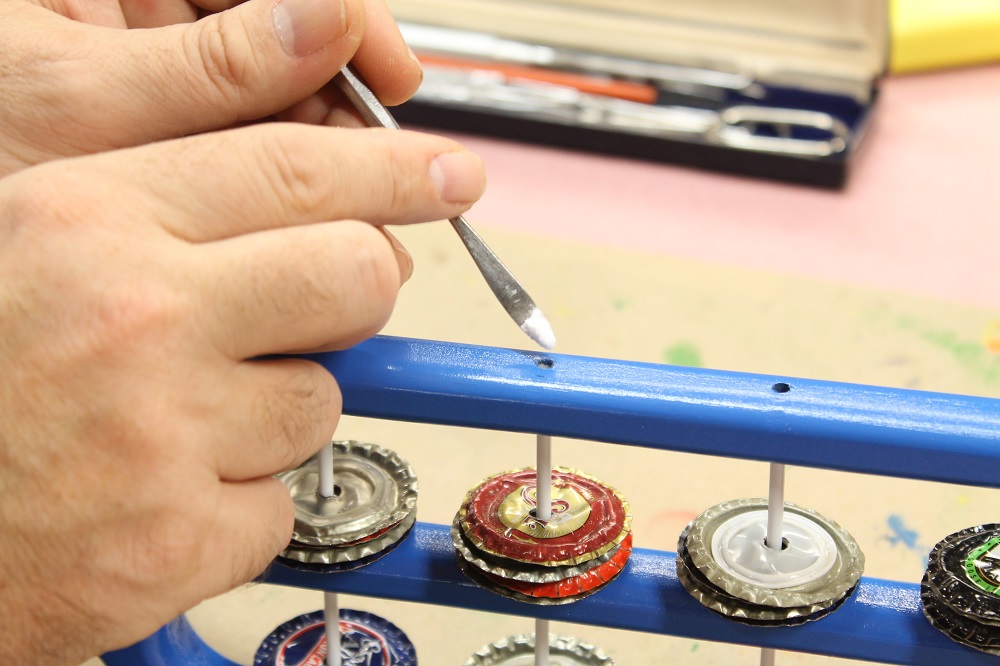
Use whatever caps you can get your hands on, soda or beer. I prefer mine not start off too mangled. Twist tops are usually in great condition. With pop tops, the leverage method shown above – and a little practice – makes it easy to remove them in pristine condition, often accompanied by a satisfying cork-like pop. To keep the tambourines interesting, I like to mix it up with a variety of different caps.
Flat Caps – Bottle Cap Tambourine Zils
Since we’re already on the topic of caps, let’s go ahead and make the jingles. Tambourine jingles are called “zils” (the singular form is “zil”) and I’ll be using the terms interchangeably. This bottle cap tambourine uses 32 caps to make 16 pairs (2 pairs per section) of zils. For a fatter sound, add an extra pair to each section.
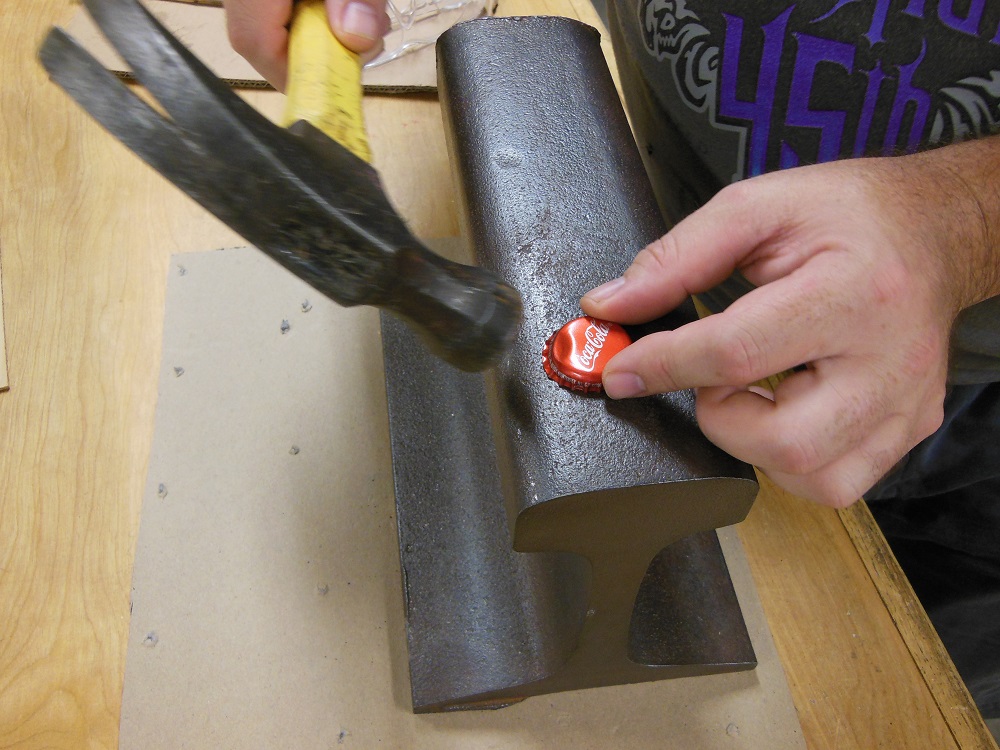
I get the irony of preferring pristine caps only to beat them with a hammer. But there’s reasoning behind that: caps that have been bent in half may not sound as bright, don’t look as nice and are more of a hassle to work with.
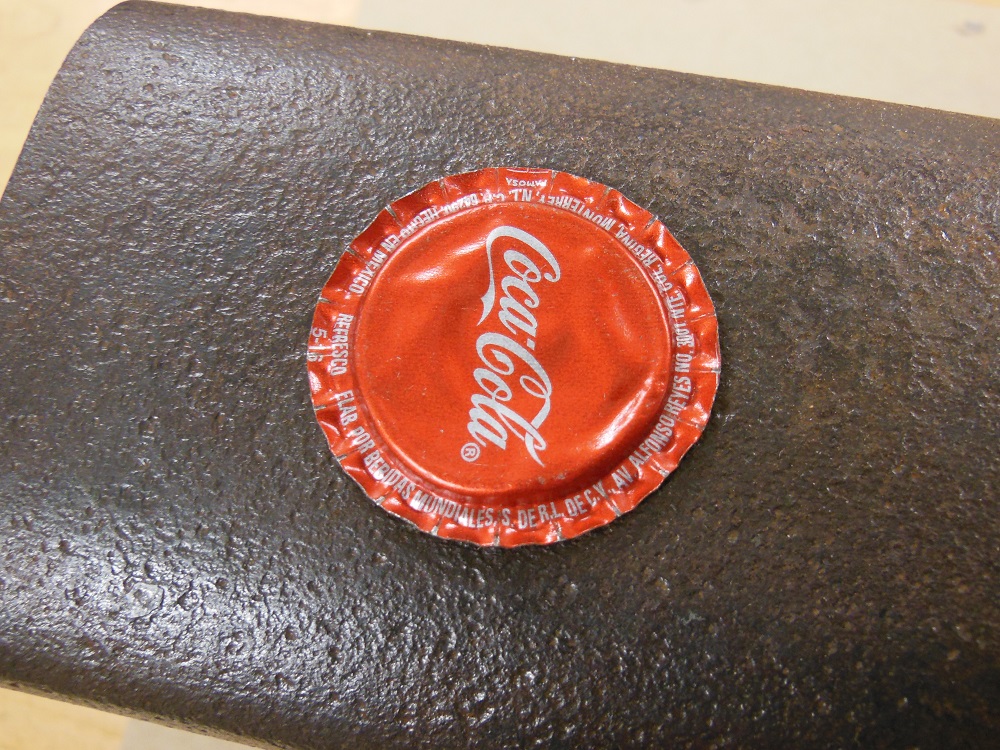
To flatten the caps, gently hit the edge at an angle with a hammer. Try not to flatten your fingers in the process. You want the rim to splay outward rather than crumble underneath. Once you get it started, rotate the cap, working all the way around. Finally, hit the center of the cap to remove the dome.
Holey Zils, Capman!
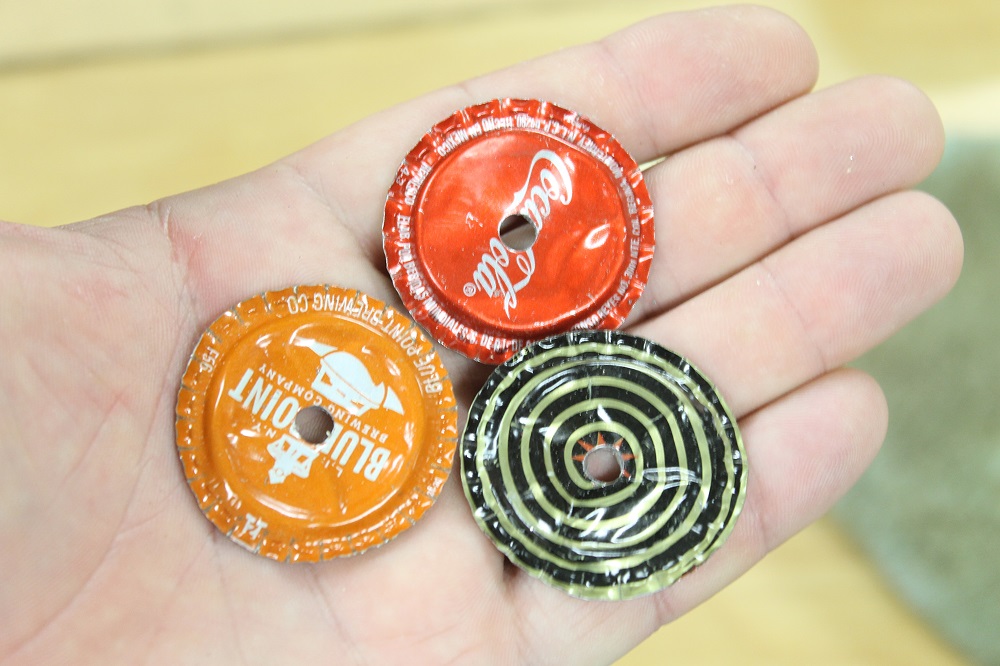
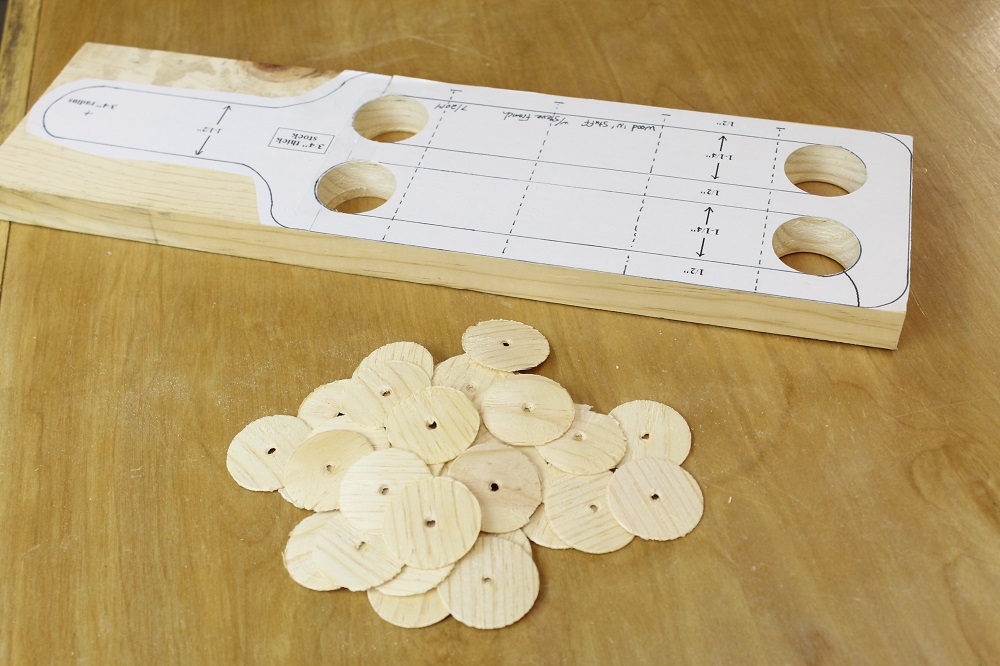
To finish off the bottle cap tambourine jingles, drill a hole in the center that’s about 1-1/2 to 2 times the diameter of the wire you’re going to use; that way the zils are free to slide around unhindered. I’m using plastic coated wire hangers, so my holes are 3/16”. But most wire hangers are thinner.
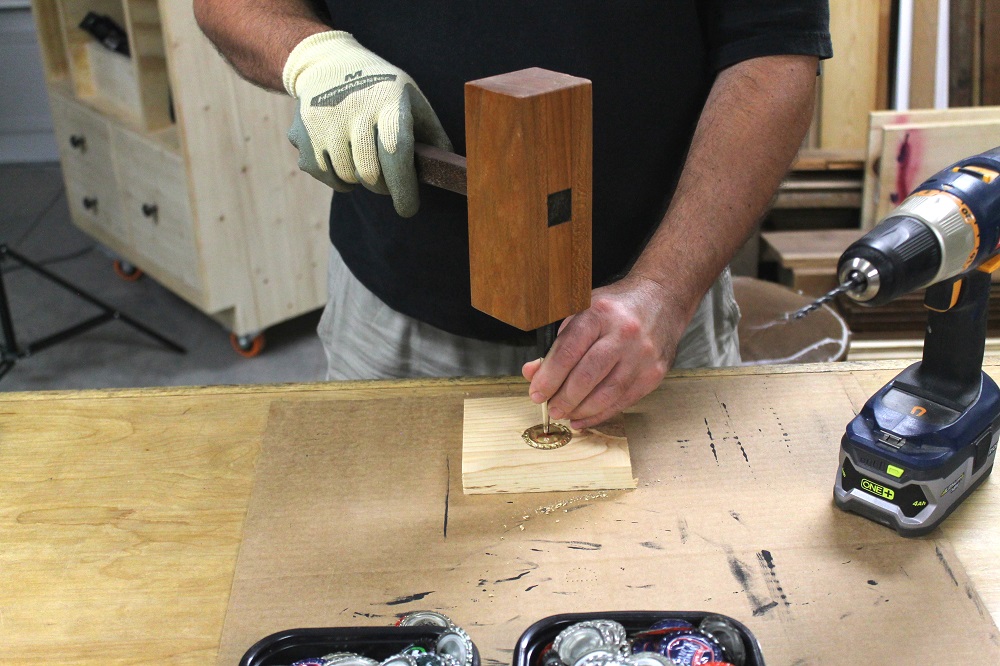
Set a zil on a piece of scrap wood – top-side up – and use a center punch to dimple the middle. Then drill the hole. To take care of any burrs that might develop on the bottom side of the cap, either use a deburring tool or break off what you can and tap the rest flat (away from the hole).
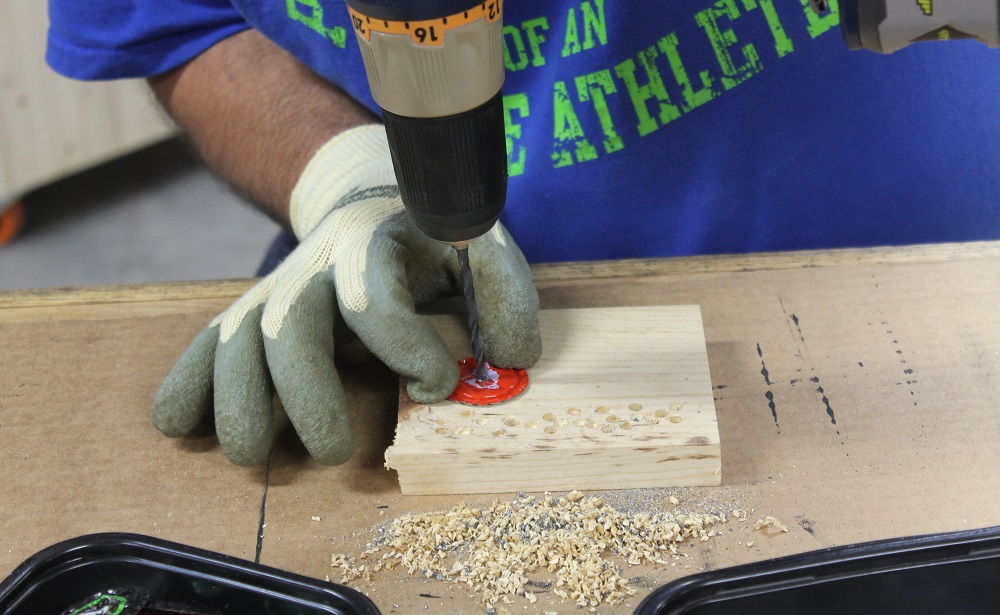
Be careful not to let the cap spin in your hand while drilling. I recommend wearing a protective glove to reduce the risk of injury if the bit decides to grab.
Make The Wooden Frame – Bottle Cap Tambourine
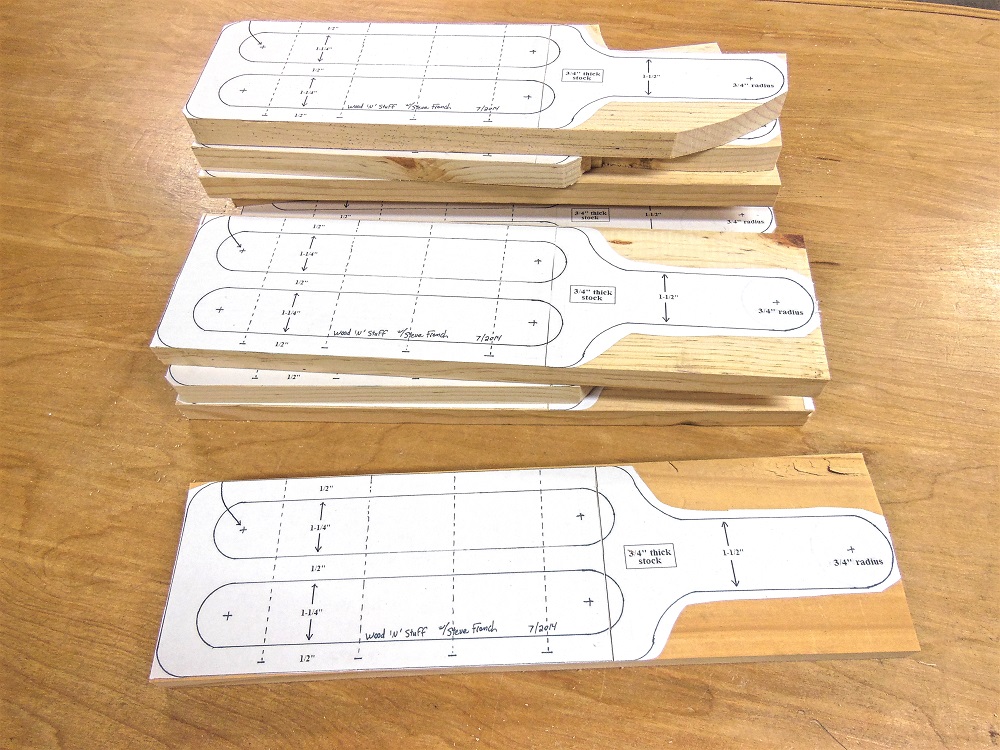
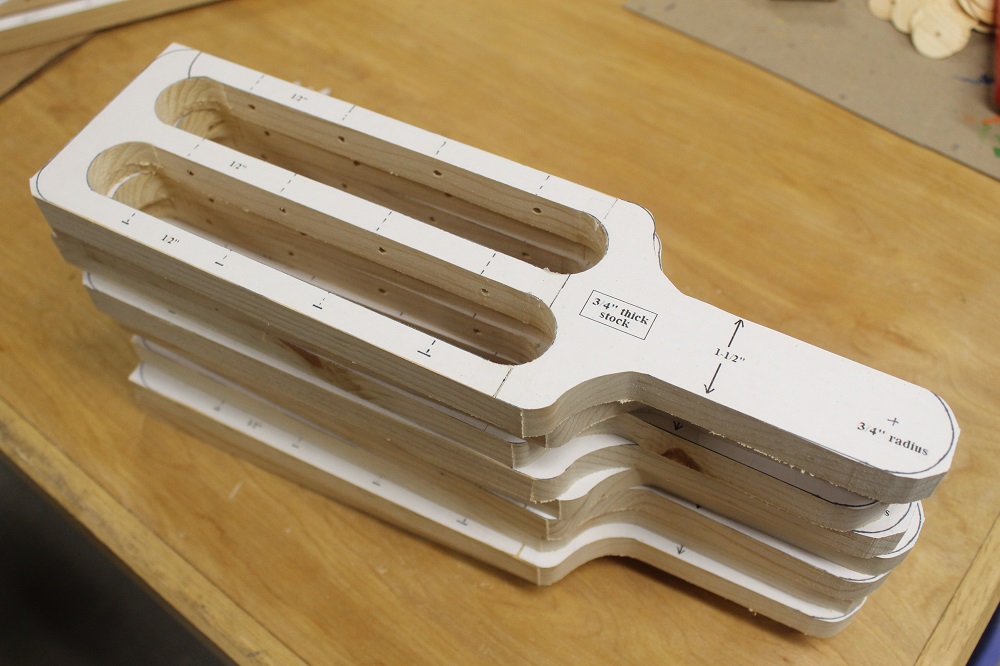
The frame of the bottle cap tambourine is cut from a 3/4” board. I used pine that I harvested all by myself from the cull bin at my local big box home center; I’m more of a lumberjoke than a lumberjack. The only downside to using pine is that you may have to dodge knots. But the frame isn’t very large so that shouldn’t be too much of an issue.
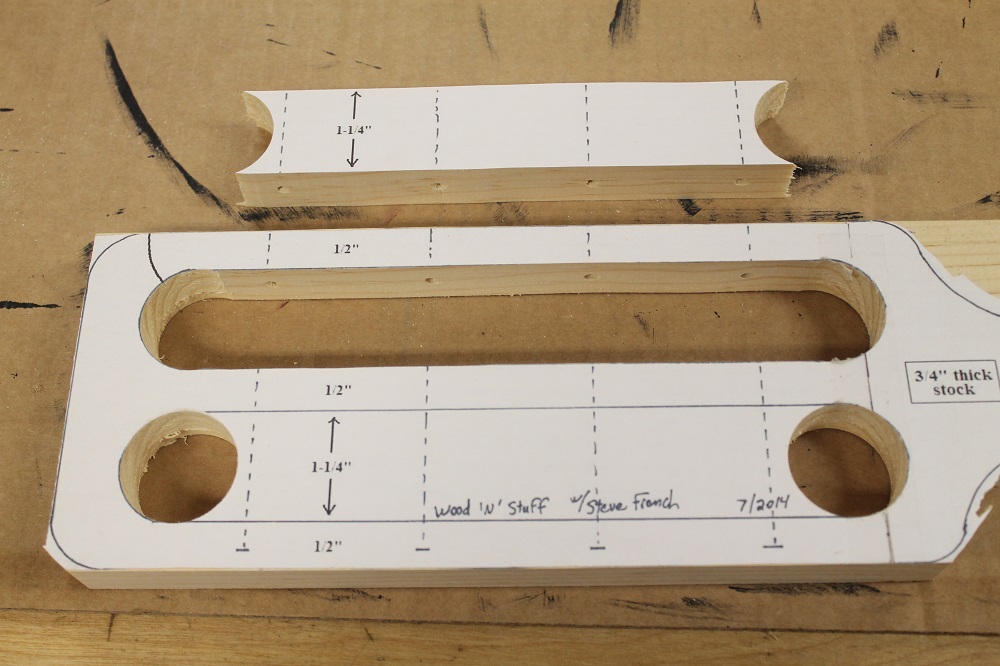
The pattern is broken into two sections, which you can download here: Bottle cap tambourine pattern. Print and stick them to your material, but cut your board to the proper width before adhering the pattern. I sized the pattern to print the correctly on my printer. But it seems like printers all have minds of their own, so you may have to re-size them to proper scale.
This Is Only A Drill – And A Bottle Cap Tambourine
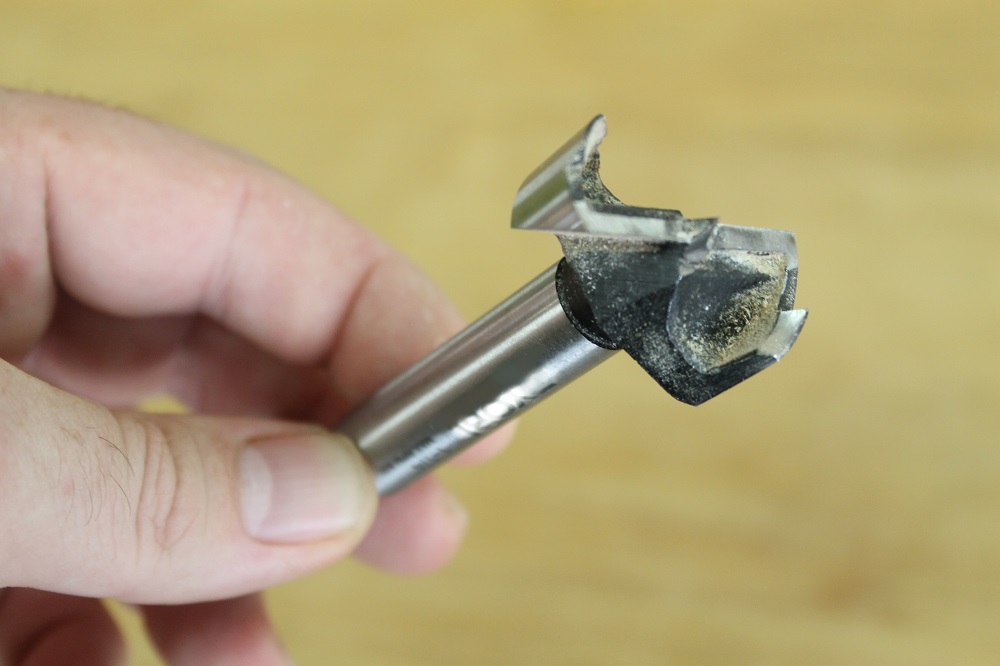
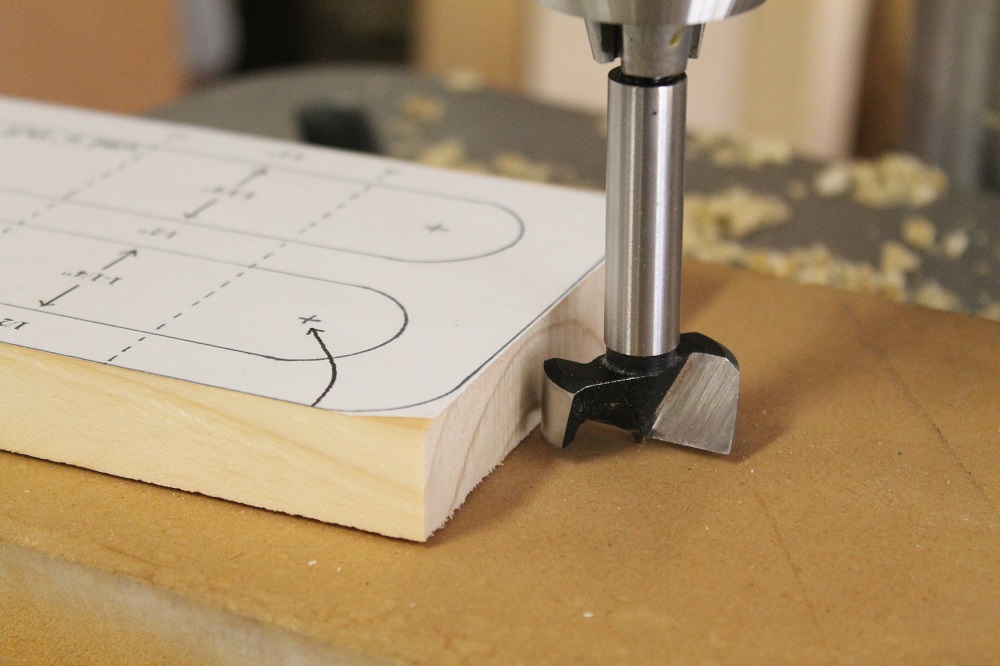
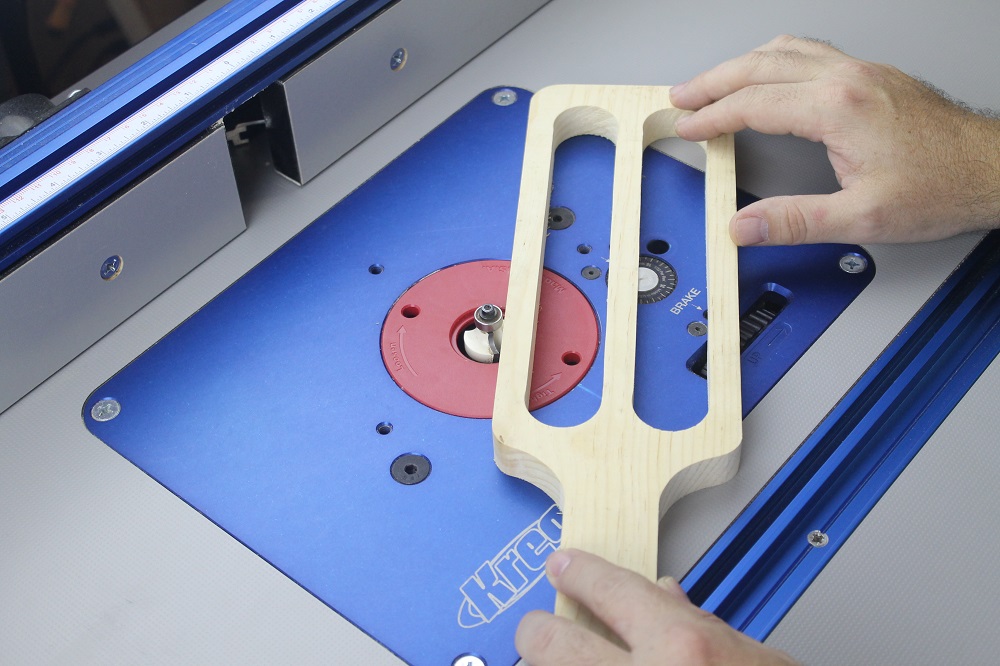
The next two operations are performed at the drill press. First, drill the ends of the two slots with a 1-1/4” Forstner bit. The crosshairs on the pattern indicate where to position the bit’s center point. Drill from both sides – to prevent tearout – rather than drilling all the way through from one side.
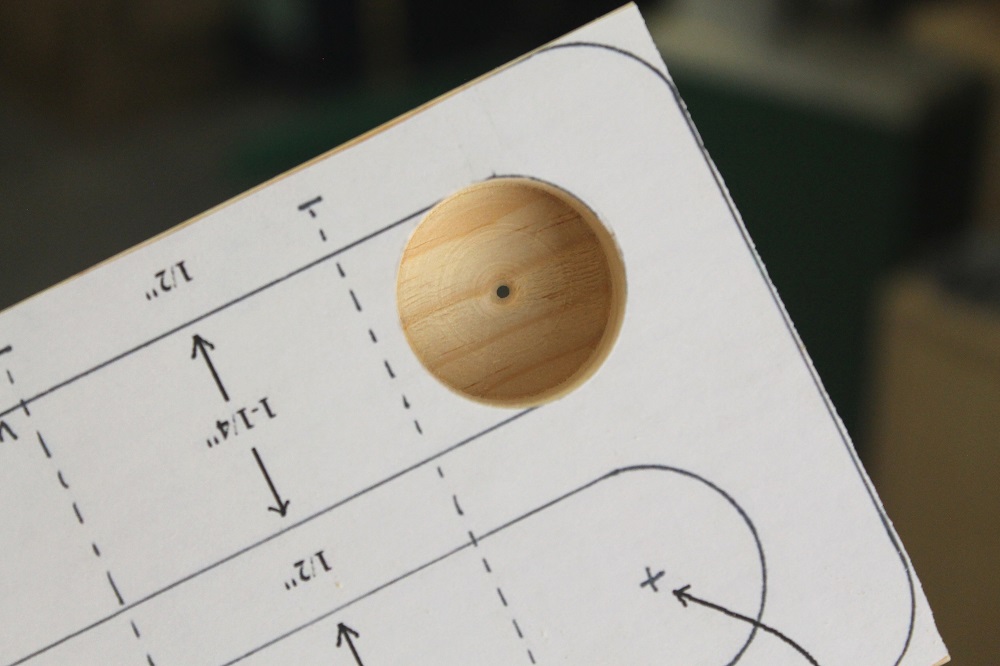
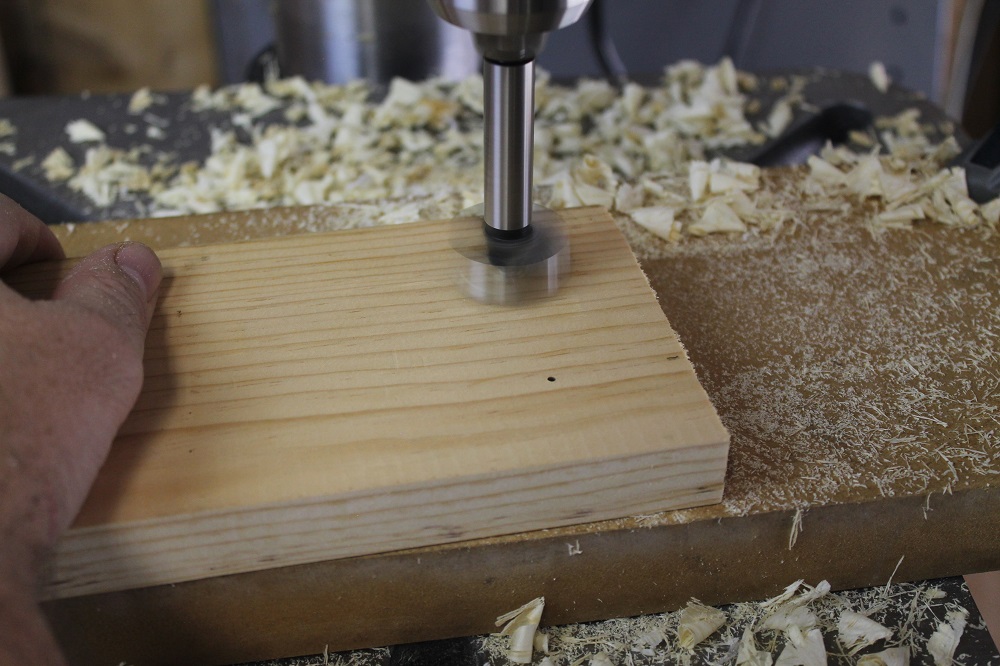
Drilling this way leaves you with disc shaped scraps that kind of look like tambourine jingles. They aren’t going to make much sound though. But they may come in handy for some sort of a craft project one day, so I’ve been saving them just in case. Hi, my name is Steve and I’m a wood hoarder! But I can quit any time I want. Maybe.
Drill Wire Holes In The Bottle Cap Tambourine
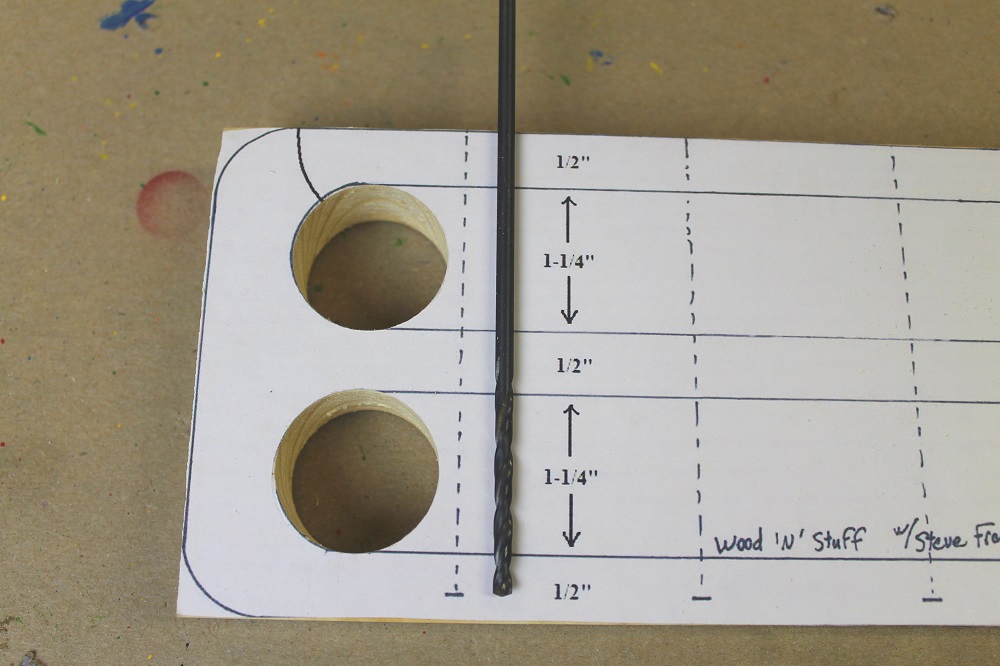
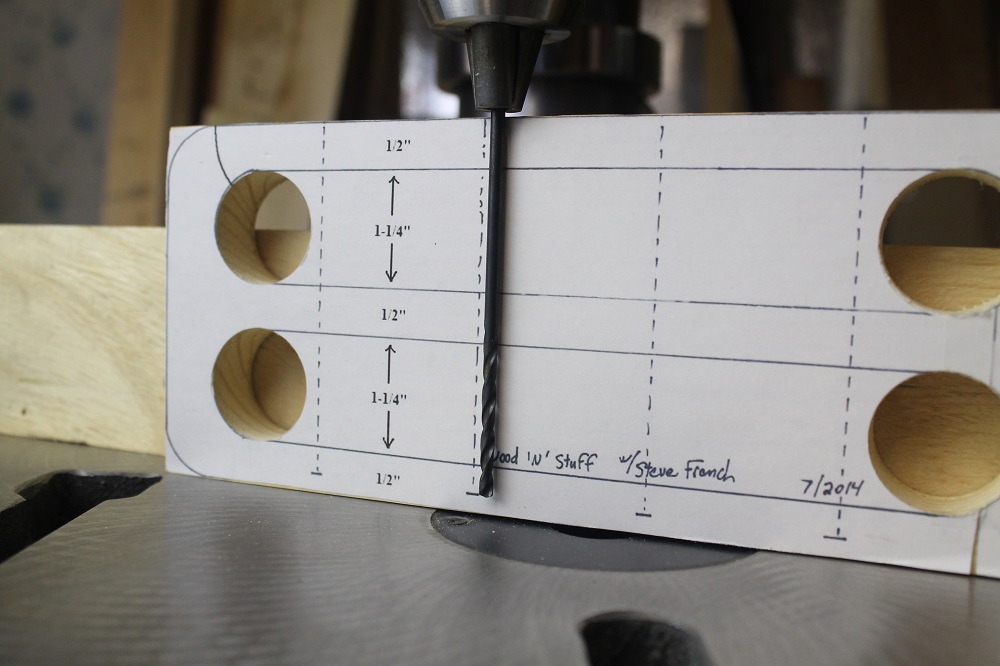
Earlier, we drilled the bottle caps so they can be threaded onto the wires. Those holes were intentionally over-sized. These last four holes should match the thickness of the wire. For them, we need an appropriately sized twist drill that’s long enough to reach the depth indicated on the pattern and still chuck securely.
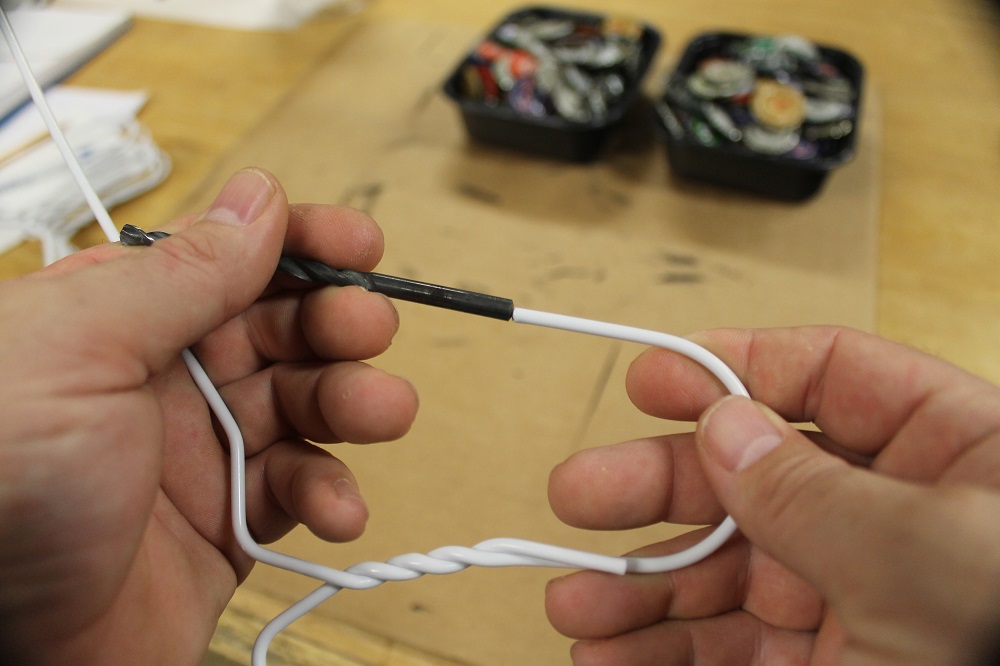
I didn’t own a bit the right length. I do have a bunch the correct diameter, but they’re either too short or ridiculously long. So I cut a really long one down to 5-1/4” using a rotary tool with an abrasive cutoff wheel.
Fence Sitter

Before proceeding with the wire holes, set up a fence to hold the workpiece perfectly vertical while drilling (And, if needed, set up an auxiliary fence to keep the neighbors’ kids off your lawn). Otherwise – with a workpiece this wide and a hole that long – it’s going to be difficult to keep the holes parallel to the faces of the wood.
Building Fences
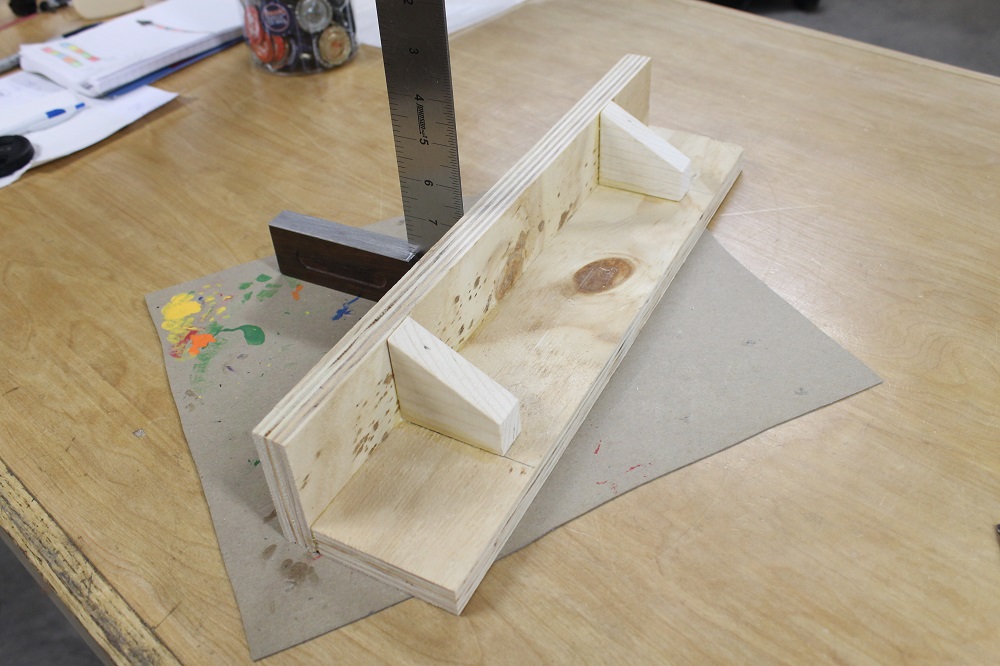
If you already have a decent fence for your drill press, you’re good to go: proceed to the next step. If not, it’s really easy to construct one out of scrap 3/4” plywood or MDF. Dimensions are mostly arbitrary. Just make it long enough to clamp at the ends and a little shorter than the workpiece is tall (so it doesn’t interfere with the chuck).
If you think you can hold the wood steady enough by hand alone, you’re probably wrong. This fence is simple to make and a great addition to your basic workshop arsenal. Depending on which face is down, you have your choice of two different heights. A recursive project like this may seem like a waste of time, but you’ll find plenty of uses for it during many different projects. So take the time to build one and use it; it’s worth the effort.
Back On Track – Bottle Cap Tambourine
Set up the drill press to stop at the depth indicated on the pattern.

Align the fence so that the drill bit falls in the middle of the workpiece’s edge, then clamp it firmly in place. Now you have a solid support to hold against while drilling. If the wood has a lot of density contrast between the growth rings and the softer, lighter colored wood, drill at a slow enough pace that the bit doesn’t deflect part of the way through the wood.

It’s a deep hole, so raise the bit a few times while drilling to clear the chips.
Wired For Sound – Bottle Cap Tambourine
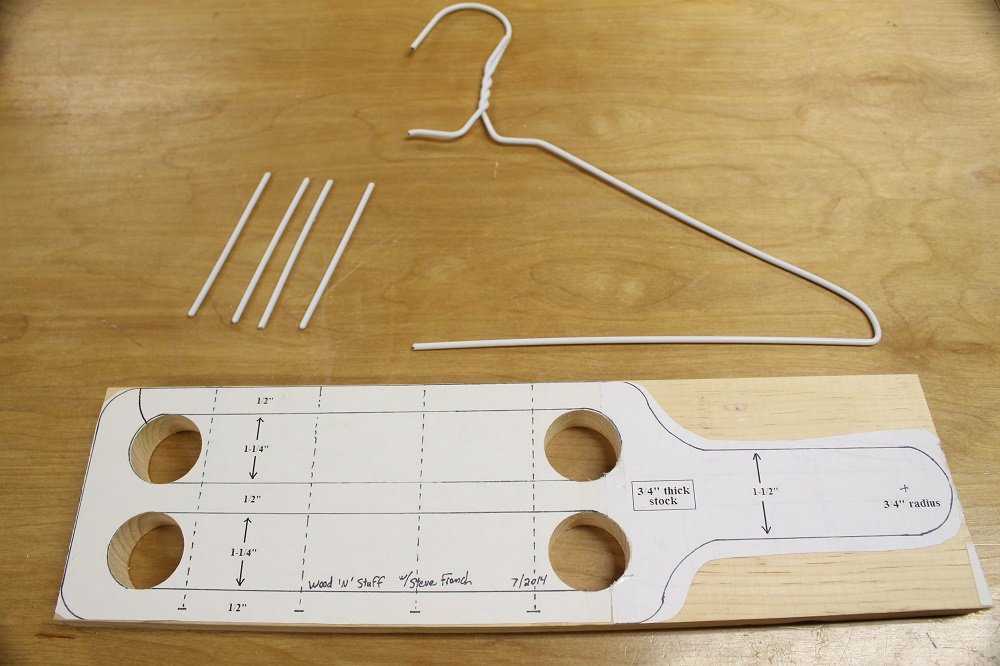
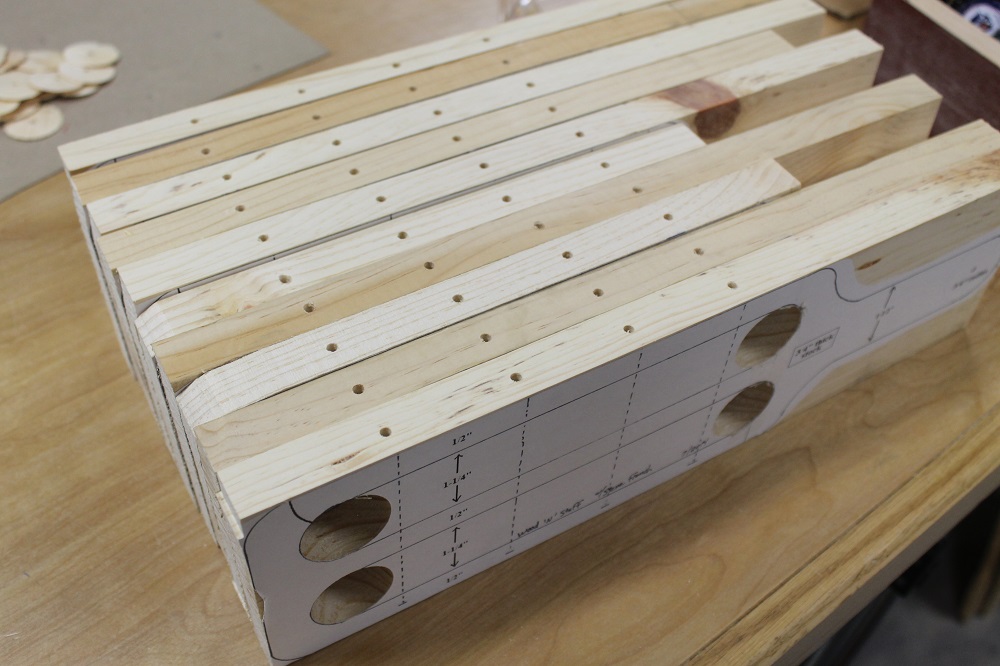
Now’s a good time to cut the four wires that will hold the zils. Wire coat hangers fit the bill perfectly; they’re stiff and will resist wear for years to come.

Shaping The Bottle Cap Tambourine Frame
Cut out the slots with a scroll saw or coping saw. Take your time and make the straight lines as straight as you can. Then make the outside cuts. I find it best to leave some waste wood around the outside curves and clean it up later with sanders.

A Sandy Dandy Super Duper Bottle Cap Tambourine
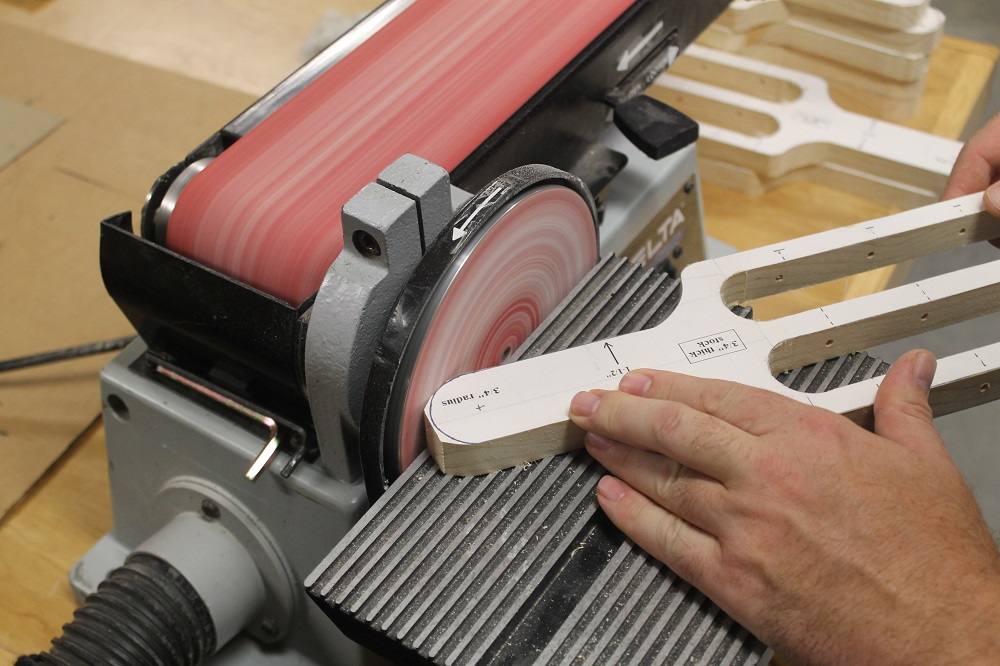
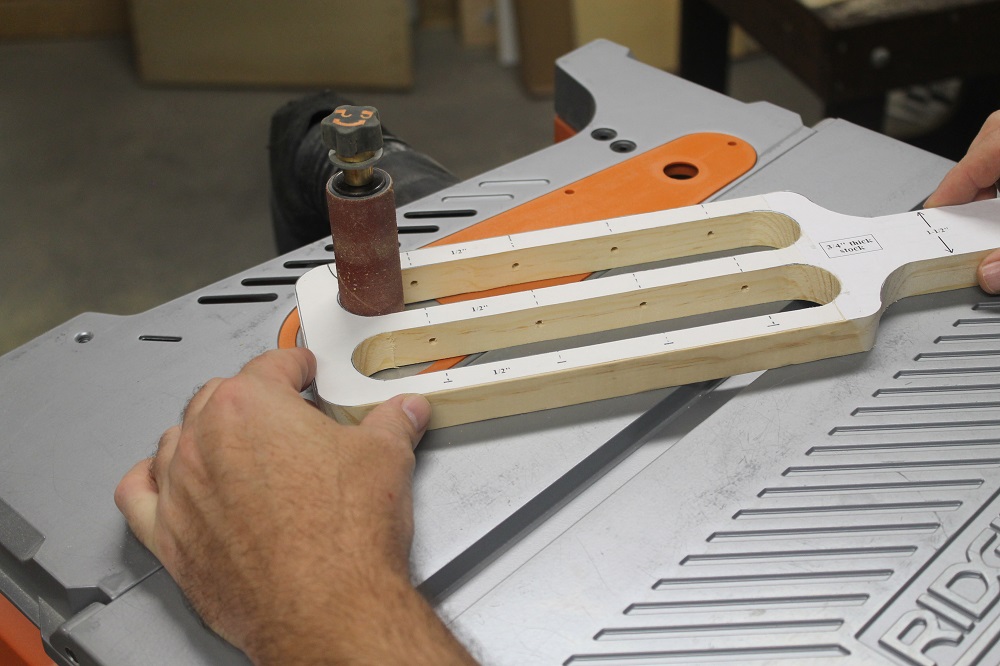
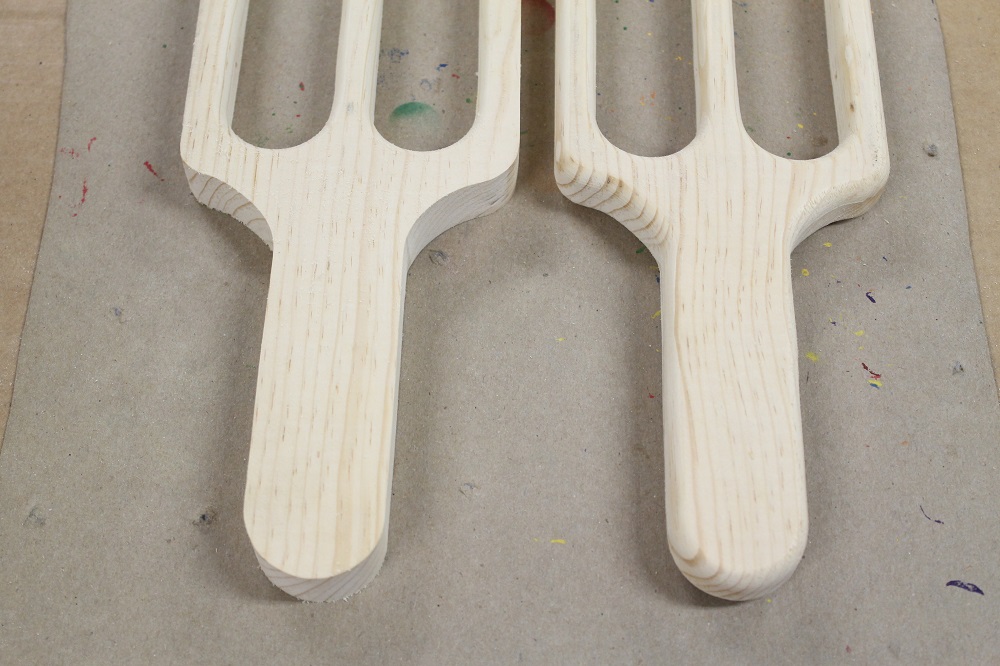
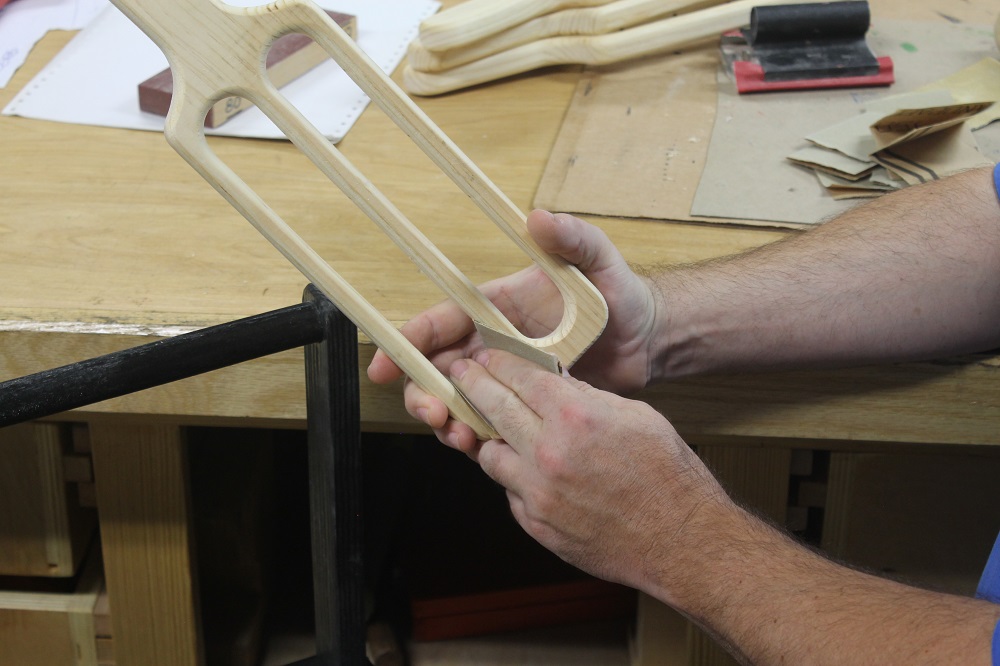
When you cut these out, leave a little extra meat on the outer curves. Then sand or file to the line for a nice, smooth contour. If you have the luxury of power sanders, this step is effortless.
After sanding all the edges and curves, remove the paper pattern and sand the faces as needed.
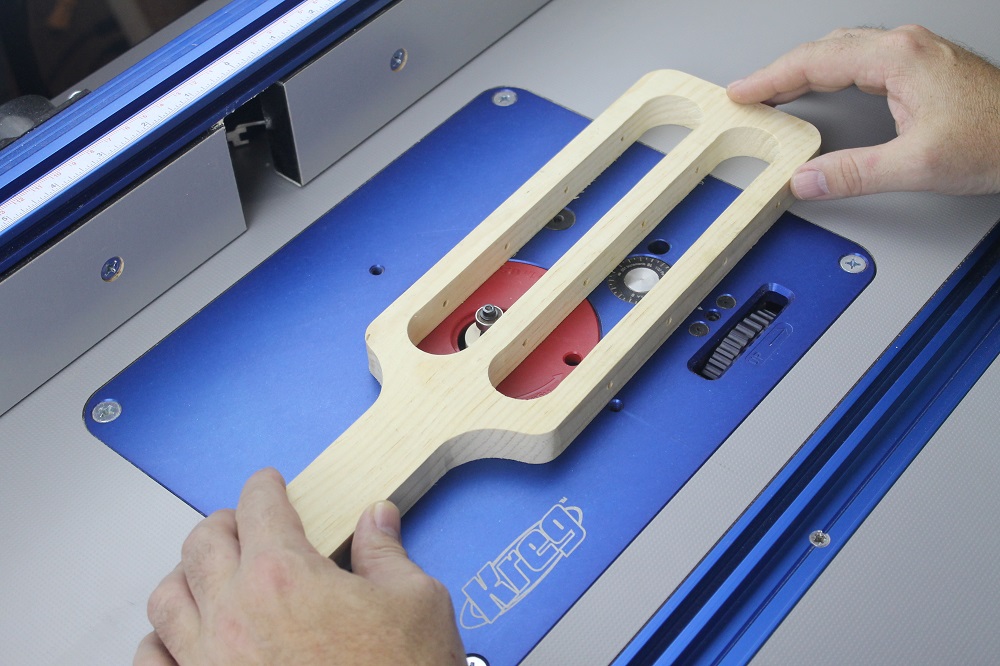
Rout A Roundover Over At The Router Table
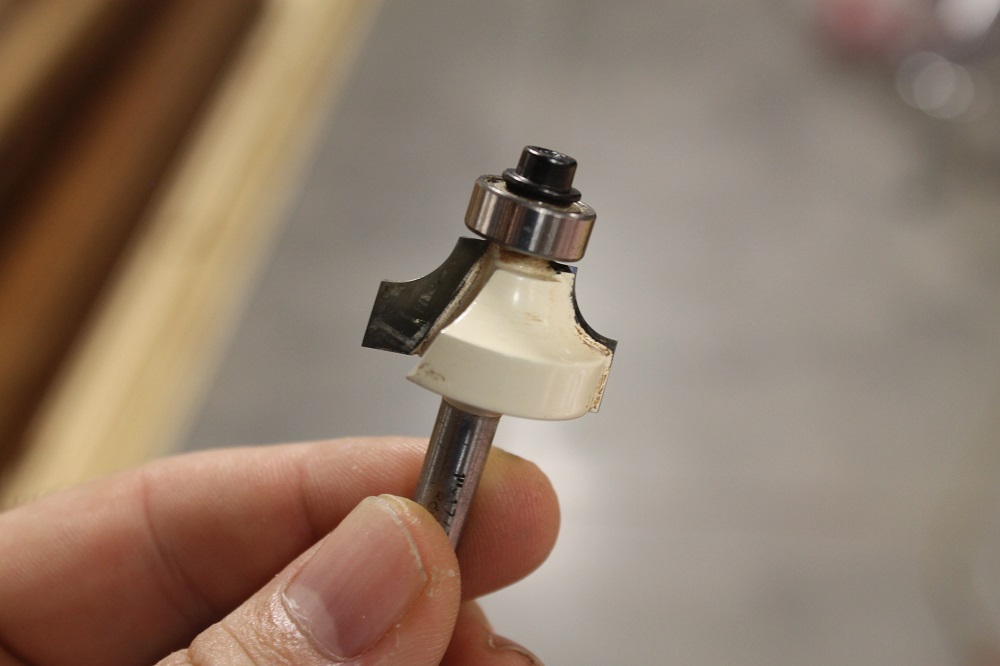
For comfort and visual appeal, all edges should be treated with a bearing guided, 1/4” radius roundover bit. The easiest and safest way to do this is with a table mounted router. Alternatively, a handheld trim router can be used in conjunction with a good gripping router mat, such as this one from Rockler. Sans router, you can always sand the edges round (but it’ll be a lot more effort).
Wear eye and hearing protection and watch those fingers! Workshop injuries are music to no one’s ears. For safety’s sake, let’s touch up on the basics of feed direction.
Router Feed Direction – Safely Round Over The Bottle Cap Tambourine
If you’re new to routing, feed direction may not be intuitive. Take a moment to wrap your head around it before proceeding. Basically, imagine which direction the bit wants to throw the workpiece and feed so that the workpiece travels along the bit in the opposite direction (so that you’re fighting the bit’s momentum).
With a table-mounted router, the bit rotates counter-clockwise (when viewed from above). That is, the edge nearest you is moving towards the right. So any wood fed across the edge of the bit closest to you should be traveling right to left (against the rotation of the bit). When using the far side of the bit, it’s left to right. Right side of the bit, move the wood towards you. And left side: away.
One final note: When routing the outside perimeter on a router table, it’s generally safer to rotate the workpiece – keeping it between you and the bit – than to guide it all the way around the bit. For the inside edges, it’s OK to move the piece in a circle around the bit.
Finishing The Bottle Cap Tambourine Frame
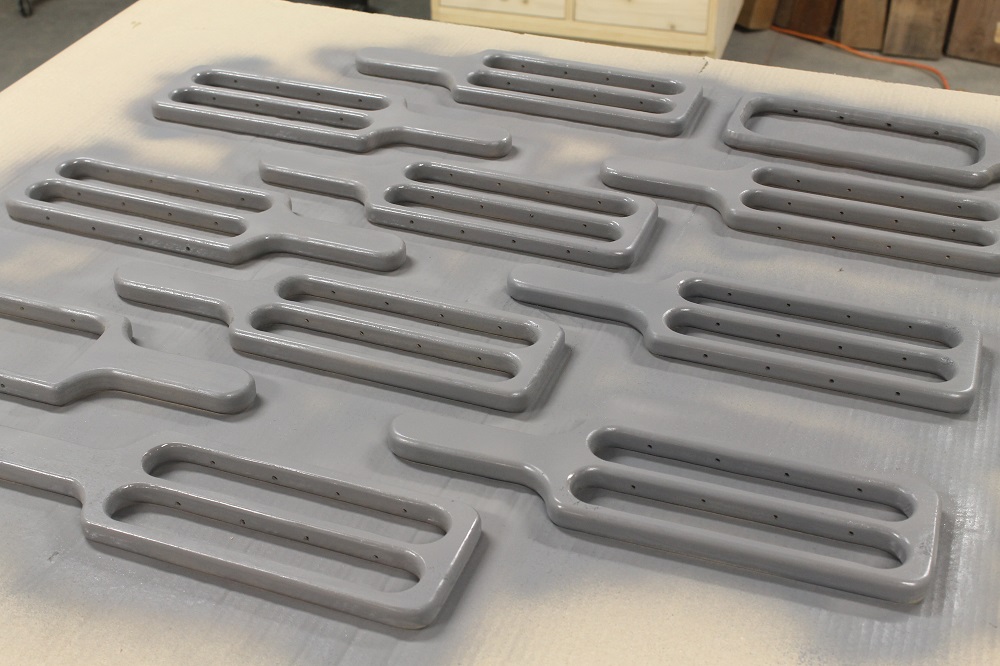
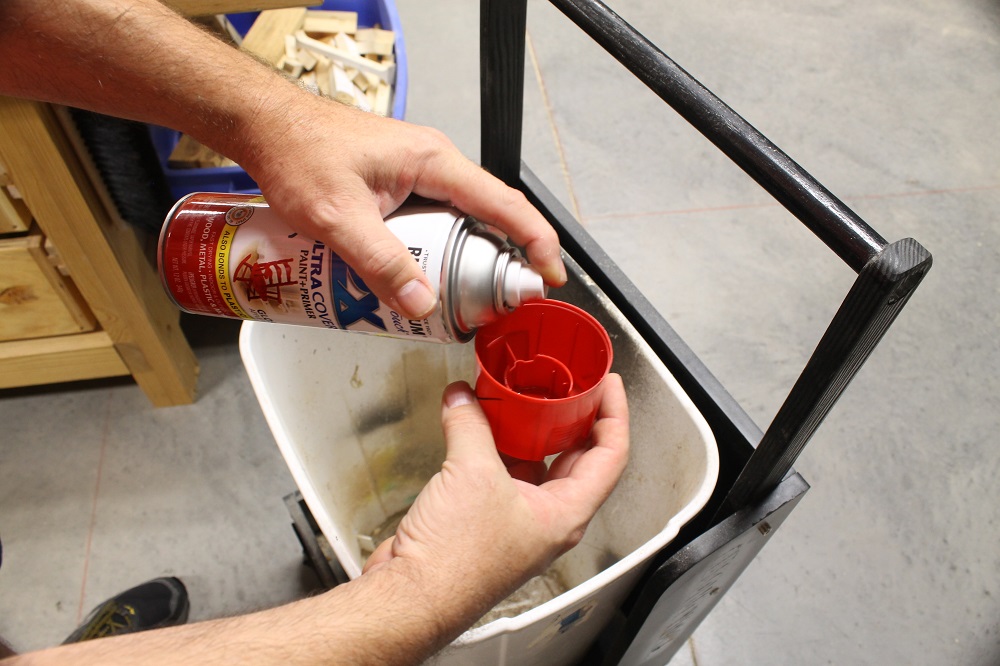
Use whatever finishing method you prefer. If you’re using nice wood or stain, you may opt for a clear coat. I prefer to make my bottle cap tambourines out of pine and paint them bold colors for a glossy, almost plastic-like appearance. My finishing process begins with a coat of gray primer.
Silky Smooth Bottle Cap Tambourine
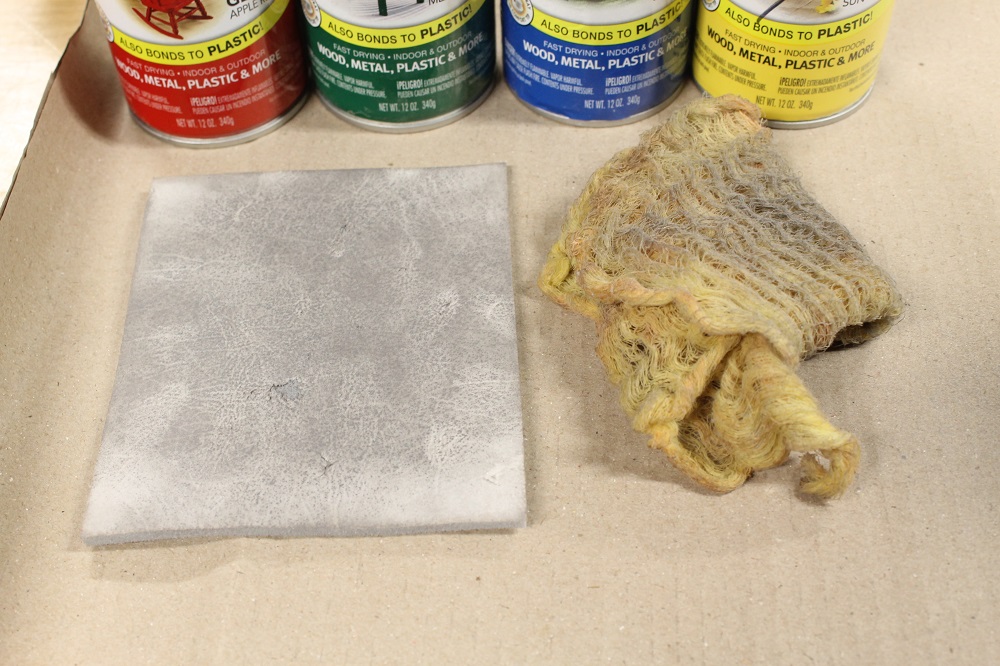
Once the primer has dried, lightly sand with a fine grit sanding sponge to remove the rough, raised-grain texture caused by the first coat of paint (it doesn’t take much), then remove the dust with a tack cloth. This is partly why my first coat is gray primer: the same sanding sponge and tack cloth can be used for the entire batch without cross contamination.
Unlike the first round of sanding, this should only take a minute (maybe less). And it makes a huge difference to the final results; so don’t get lazy on me now!
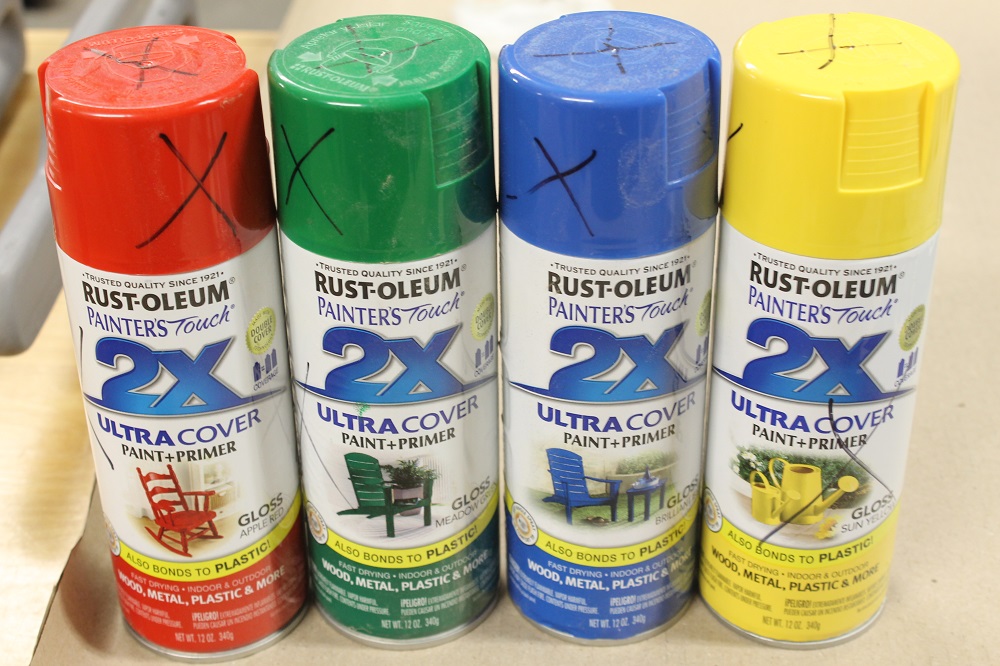
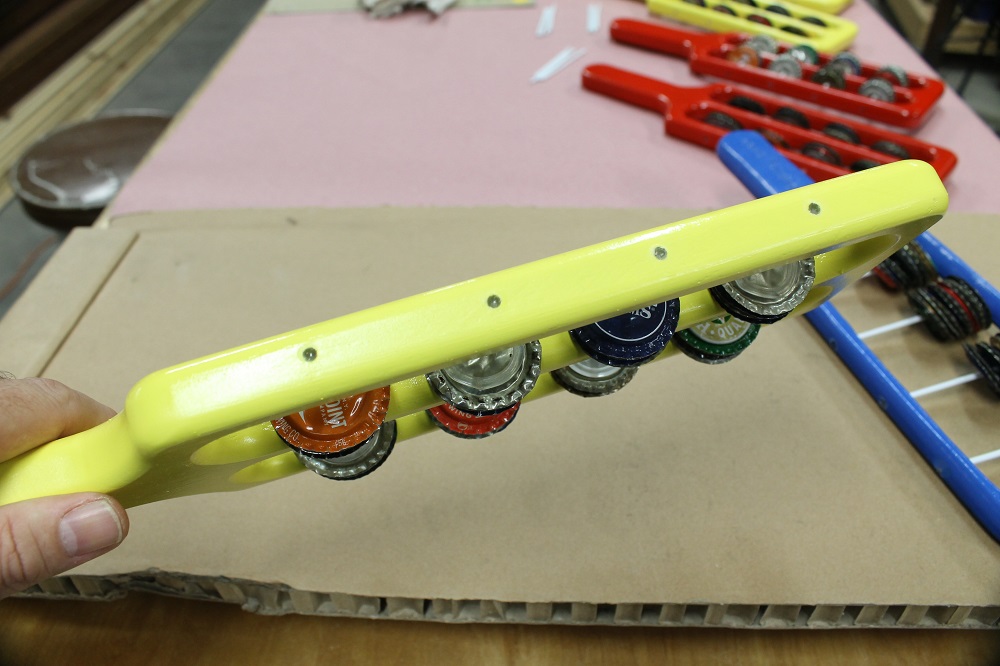
I usually spray each side with two coats of the final color, allowing each coat to dry and alternating which face is up before applying the next.
Assembling The Bottle Cap Tambourine
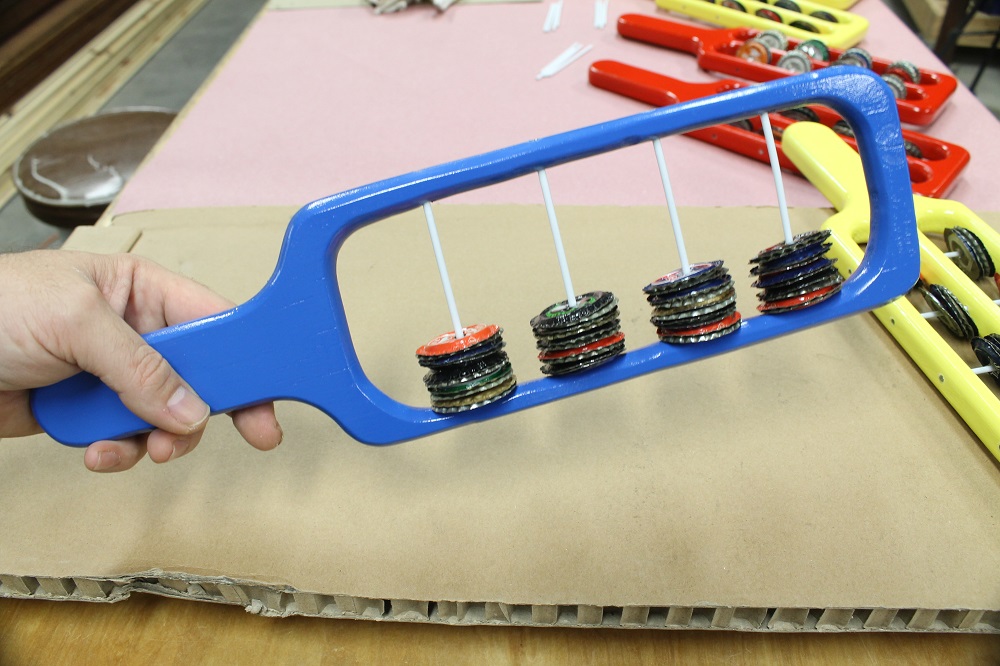
There are two highly technical sounding configurations I use for the zils: “Insides together” and “outsides together”. Both have nice qualities and I generally go with half and half for a rich overall sound. You may be tempted to try peeling the rubber gaskets from the insides of the caps. Don’t waste your time; it’s not worth the effort.
Threading Zils On The Bottle Cap Tambourine.
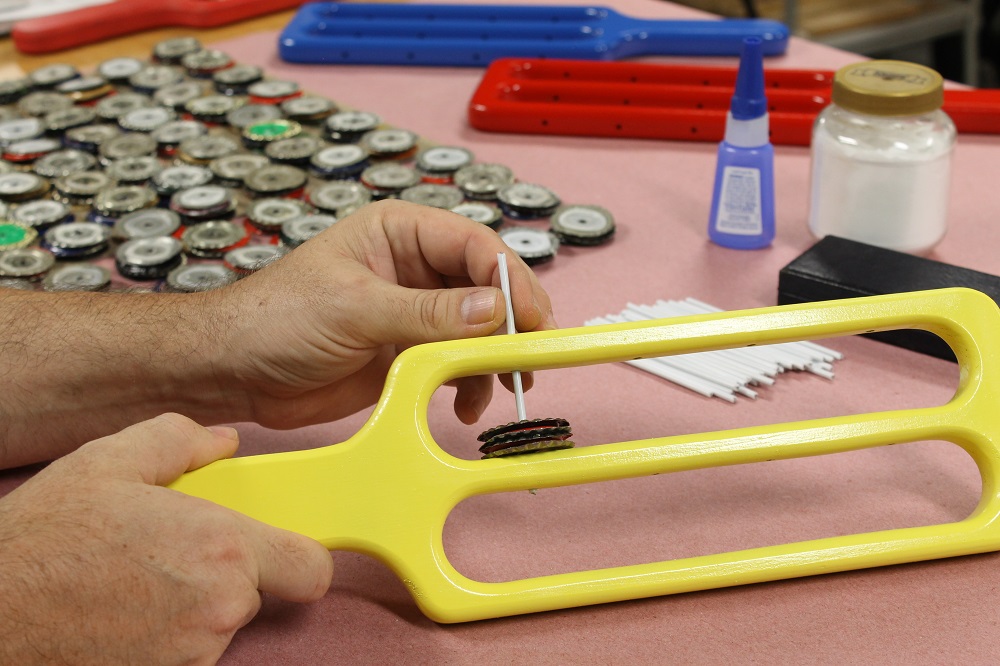
Each section gets two stacked pairs of zils in the same configuration.

The Super Glue And Baking Soda Trick – Another Jingle In Your Arsenal
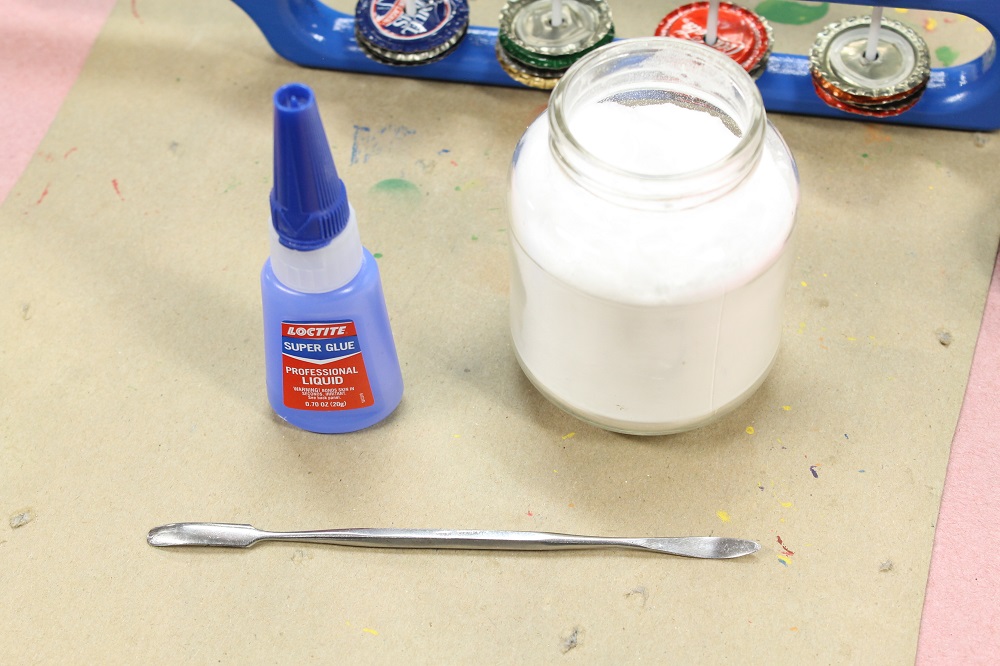
The era of my life that inspired this bottle cap tambourine design also allowed me to learn some interesting tricks from a seasoned luthier. Guitar techs use this trick to build up the grooves in a guitar nut when they wear and cause string buzz.
It creates a hard, translucent, plastic-like material that can be filed, drilled and used to fill small holes. Thickness can be built up quickly (in a way that epoxy can’t duplicate) and it’s useful for an amazingly diverse range of applications: I’m talking, of course, about the so-called “super glue and baking soda trick”!
Securing The Jingle Wires
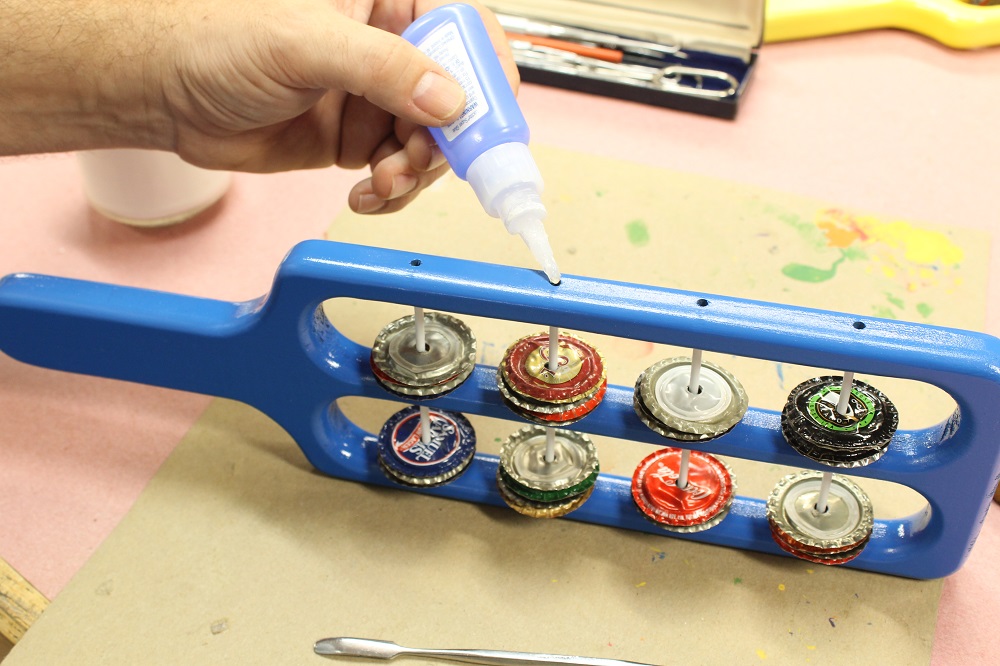
To capture the jingle wires in place, we’re going to plug the open hole using regular/thin super glue and baking soda in alternating layers. Alternatively, you can glue in dowels or slivers of wood.
First, apply a couple drops of super glue, then sprinkle in baking soda until it’s saturated. Blow or brush off the excess and apply more glue. Completely saturate the baking soda from the previous coat (it’ll become translucent), plus a little extra glue. Repeat until you reach your target and give it a top coat of glue.
If you’re using this trick in an application where a smooth finish isn’t important, baking soda can be the top layer, allowing you to touch it immediately afterwards without getting stuck! Practice a couple times and you’ll be adding this trick to your repertoire. You’re welcome.
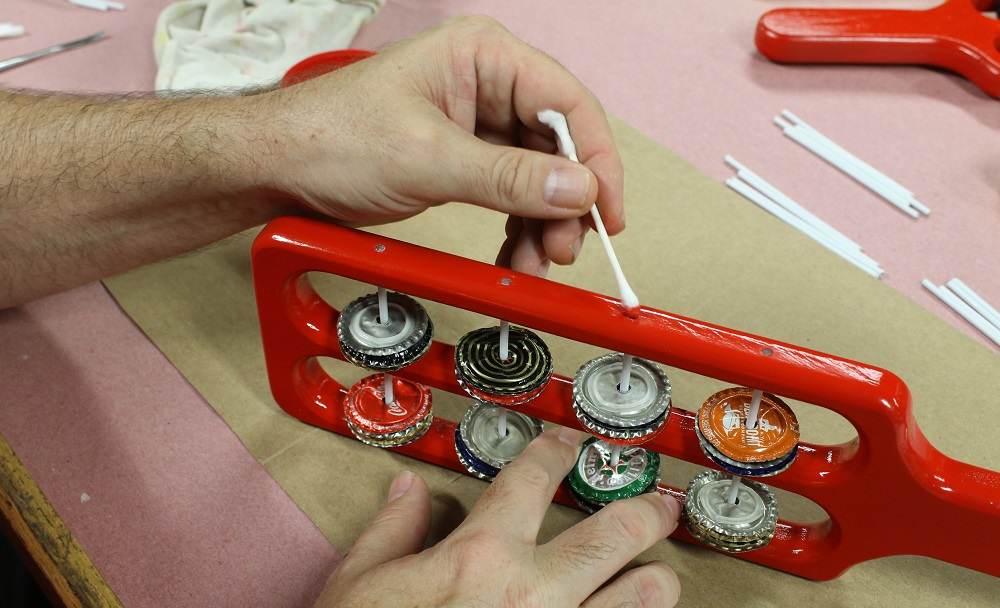
Bottle Cap Tambourine Touch-up
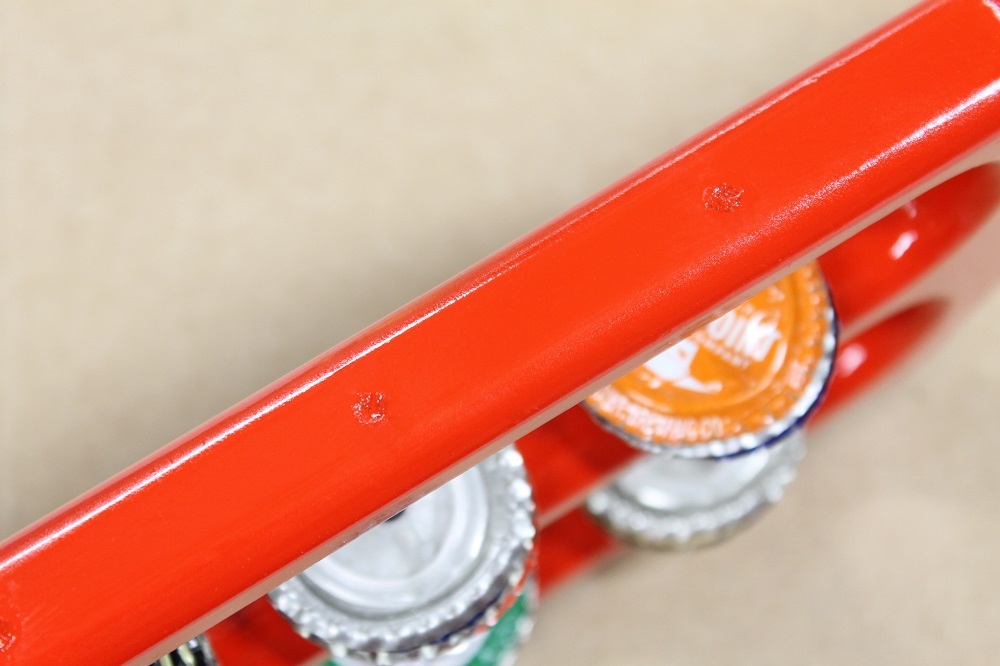
There’s one last step before shaking our groove thang: painting over the four filled holes. Spray a small puddle of paint into the can lid then dab a cotton swab to touch up the holes.
What This Song Needs Is More… Tambourine!

This project was inspired in the mid-90’s by two crude bottle cap tambourines a friend brought home from Africa. His were made by Kenyan locals from found, rusty bottle caps strung between the Y’s of small tree branches. I found them so endearing I ran with the idea and have made several batches over the years.
The unique design coupled with the charm of upcycled bottle caps has always gone over really well for me. From teetotalers to rock ‘n’ rollers, you’re sure to enjoy enthusiastic reception from anyone who can appreciate unusual, jingly, percussion instrument-y, doohickeys – such as a tambourine.
With the exception of there being no skin, this tambourine can be played pretty much just like any other. Jam on, my friend. Jam on. And save those caps.
In some of the above pictures you can see a red bottle cap tambourine I made several years ago for a video. You can watch that build in all its amusing action here (you may notice that I’ve tweaked a few aspects of the build since then):


