
Divisions
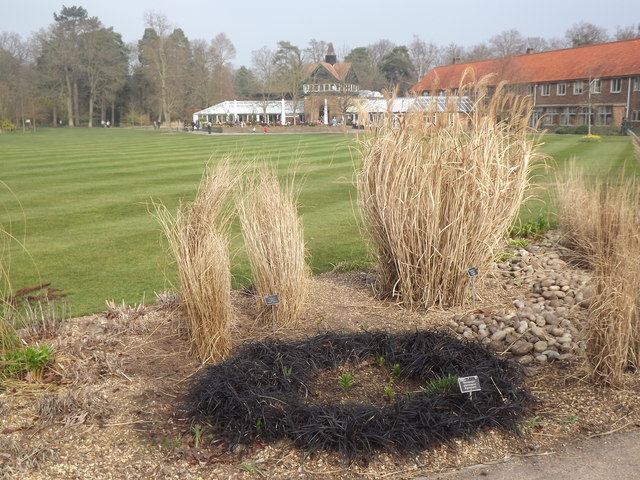
You’ve probably propagated plants before and not even known it. The plant propagation method of division is incredibly simple and is done quite often even by the most novice gardeners. Division, as you may have guessed, is done by simply dividing a plant into sections. This can be done a number of ways depending on the size and type of plant. Most commonly, at least for me, is the division of strawberries at the end of the season. Strawberries grow new plants by runners that take root. These runners, after leaves have developed can be cut off and planted as new fruiting plants for the next season. Many of the large mounding ornamental plants can be propagated through divisions. For example, large ornamental grasses can be dug up and divided, using a spade, into smaller pieces. As long as these pieces have a portion of a root ball and are transplanted quickly to their new home they will grow and flourish. Plants like mums, hostas, black berries even bananas are good plants to divide. Plants that have single stems or trunks will not divide though. Finally, when dividing plants it’s best to divide them during their dormant season, which for most of us is mid-fall to early spring. If you divide them after they come out of dormancy you run the risk of killing both parent and offspring. This is more a general guideline than rule though; some plants like bananas tend to do better when being divided when they are most active and robust.
Layering
Ah, the lazy man’s way of propagating, I should know. The simplest form of layering is done by bending the stem, typically a deciduous plant, down near the soil and then… layer dirt over the bend and keep it buried. The stem of the plant that is under the dirt will/should produce roots. Given some time and these can be cut back beyond the roots and then planted into the plant’s new home. I’ve done it with grapevines with moderate success. If I could just keep the dog from digging the stems up that is. A good tip from Mike McGroarty, a propagation specialist, is to cut the bark or cambium of the stem prior to burying it. This will stimulate the root growth even more.
There are a couple of ways to layer propagate. The above is known as simple layering because it’s SIMPLE. Continuous layering is a little more involved but you can get more bang for your buck. By creating an S shaped bend in your stem you can layer one stem several times creating multiple plants. So imagine you had a long grape vine un-trellised. You could snake it in and out of the soil several times to create several individual vines. Sometimes this happens because you’re even lazier than normal and let the plant go untrained and its finds itself weaving along the soil thus creating its own roots.
Mound layering is another method of layering which also combines division. Here you take a dormant plant and prune the stems back close to the soil layer. Then layer dirt over top of all the pruned stems and wait. These shoots will begin to bud and also produce individual root systems which can be divided into individual plants. You can try this on your blueberries this fall. The best time to do any type of layering is early spring just when the plants are coming out of dormancy and root and leaf growth starts to take off.
Cuttings
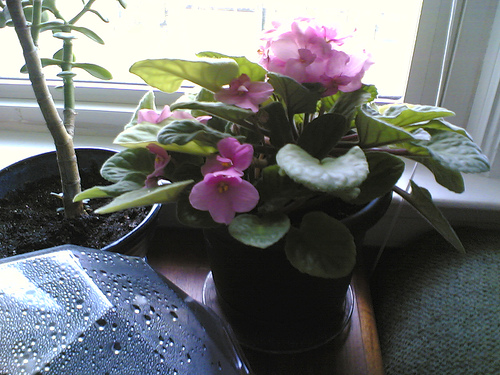
Cutting propagation maybe the most commonly known of the propagations. It was the one we were taught about and tried in science classes. I guess because cutting propagation is so visual. We would always use either geraniums or African violets when we did cuttings. The trick is to break or cut the leaf off where it meets the main stem leaving you a leaf and a small node. Then you place it in a cup of water and, ideally, watch the roots grow. Back then it was the coolest thing ever. Now I’ve seen the practical side of it as well. Aside from growing house plants through this form of propagation, a number of herbs, shrubs, ground plants, fruiting plants and even trees can be grown like this.
There are two basic kinds of cuttings leaf cuttings like the geraniums and stem cuttings. Stem cuttings take a little bit longer to grow (typically) than the leaf cuttings. Stem cuttings are taken from larger plants like grape vines or blackberry or sugar canes or even trees and shrubs. However, even herbs like basil and lavender and vegetables like tomatoes can be propagated from stem cuttings.
Either way, with leaf or stem cutting, it’s important to cut the plant leaving an apical node. That’s the tip where leaves grow from; it often looks like a bud and sometimes will be called a bud. This is where the upward growth will occur. To better your chances of getting new plants there are a couple of products you can use to help with rooting. These products are rooting hormones and come in liquid, powder or gel form. The gel form is the most expensive but because it is so viscous sticks to the cut end of the plant better. I like to use the powder form myself. It’s very simple, dip the cut ends of your plants into a small cup of water and then dip them directly into the rooting compound. After that just stick them into a pot of well-draining soil mix or vermiculite and keep them moist. I’ve rooted, blackberry canes, grape vines, apple and plum whips this way before and they have rooted very well. Make each of your cutting 4 to 6 inches long and make sure that there is a bud and that you keep plenty of water on them. In 4 to 6 weeks you should have little roots poking out of the stems.
For some plants it’s also possible to take root cuttings as well. Take a small piece of root 3 to 4 inches in length from a healthy plant, cut it, dip it in rooting hormone and bury it in well-draining potting soil. Make sure to keep it moist and in a few weeks you should have small leaves poking out of your soil.
Grafting
Grafting is by far the most technical and most involved form of propagation. There are a variety of grafting techniques out there including: bark grafting, side grafting, saddle grafting, splicing, t-budding, cleft grafting and much more. These varieties define the specific cuts and additions of plants but all grafting is done in a similar method. There are two parts to a graft a scion, the top leafy part of a tree (although in some cases there maybe two or more varieties of plants used as scions) and rootstock or stock for short, which ironically is done for the roots. In some cases, such as the bark graft and t-bud method, the scion is just a small piece that is fitted onto the stock. In others, like the splice graft, the scion and rootstock are the same approximate size.
To graft the plants a notch is cut into the stock either just under the bark or deep into the cambium to receive the scion. The scion is then notched to fit into the stock. It’s important that the angles be very similar so that when the cut is sealed there is good interaction between the scion and the stock. The notch is then often sealed with a grafting wax and then taped with a grafting tape to seal the joint from the elements and diseases.
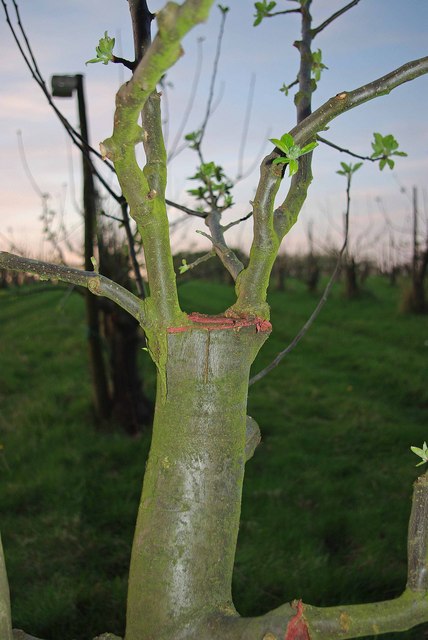
There are a couple of benefits to grafting including increasing the variety of plants grown in one area, increased plant production, control over plant variety, and the ability to grow specific varieties or sizes in certain areas. For example, my apple trees are golden delicious, a common variety, however they are semi-dwarf size to ensure they don’t get over 10-15’ tall. This was done in a nursery by grafting a golden delicious apple scion onto a different tree’s root stock. Generally for apple trees these tend to be crabapple trees which stay much smaller than apple trees. If you were to look carefully a small knot near ground level can be seen where the trees were grafted. If I were to simply take a cutting of the apple tree and grow it as is, I could end up with a 40 foot tree growing in my backyard, making harvesting difficult. And, if I were to take the seed I could get the same thing. However, by completing a similar graft I would get a golden delicious that wouldn’t grow any taller than 10-15’. In larger orchards this is done to preserve the varieties. Instead of taking the seeds which could be from two different varieties that cross pollinated, taking cuttings and grafting them or simply planting the cuttings ensures that the same variety can grow again.
Other plants can be grafted as well including tomatoes and blueberries. Some gardeners, mostly for the oddity of it, will graft tomato plants onto potatoes (they are both solanaceous plants) but the production decreases because both ends are trying to produce fruit.
What you need to get started
Regardless of the type of propagation you’re going to do there are a couple things you’ll need. First is a sharp knife. There are special gardening knives for cutting plants or sharp pruning shears work well too. The sharper the knife, the better, you want to do as little damage to the plants as possible. Use alcohol wipes between cuttings of different plants to minimize the passing of any diseases from one plant to another. It’s also a good idea to get some rooting hormone regardless of the style of propagation you’re doing to just help things along. You’ll also need some fertile well-draining soil for any transplanting or cutting that you do. When you graft, you’ll want to get some grafting wax and grafting tape to protect the graft as it grows. Either way you can save money and make great new plants for cheap through plant propagation.
For more information on basic propagation check out James Carville look alike Merridith Jiles below.


Great article! I received a birthday bouquet that contained a “dry” curly willow branch. That branch – twig really – rooted. I planted it in the yard and now have a tree that is over 12 feet tall. Have taken subsequent cuttings and rooted them in a bucket of water and have planted these too.
My grandmother took cuttings from non hybrid roses and would put them under canning jars to start new bushes. That trick works well with wild roses found along roadways. The wild roses still have the great rose scent most hybrids lack.
Very cool Liz, thanks for sharing!