

So you’re back for more Ikea Kitchen Cabinets fun? Didn’t have enough in our Ikea Cabinets 101 article? Or just couldn’t wait to find out how it all turns out? Well, be glad you tuned back in because this is the fun part. Here we take a bunch of plain white boxes and make a beautiful custom casework installation out of it all. We pick up after having hung our boxes and taking a well-deserved break…possibly with some delicious Swedish meatballs, or Swedish fish, yum!
SemiHandMade – Handmade Craftsmanship for Your Ikea Kitchen Cabinets?
Quite likely you’ve already purchased and received all of your Ikea cabinet doors and drawers. You may also have purchased your hardware from Ikea when you selected your kitchen layout and ordered the boxes. Ikea has some great looks in its own catalog, but if you’re not happy with the choices, there are some other options out there.
These can take customizing your new Ikea Kitchen to a new level. While not the only option on the market, Semi Hand Made is the first that comes to mind. They offer an easy and not too expensive way to take those Ikea boxes and put your personal touch on them. They work with your plans and figure out the faces and trim that you need for your installation. They can also provide finish samples for you to select from.

Open a Door
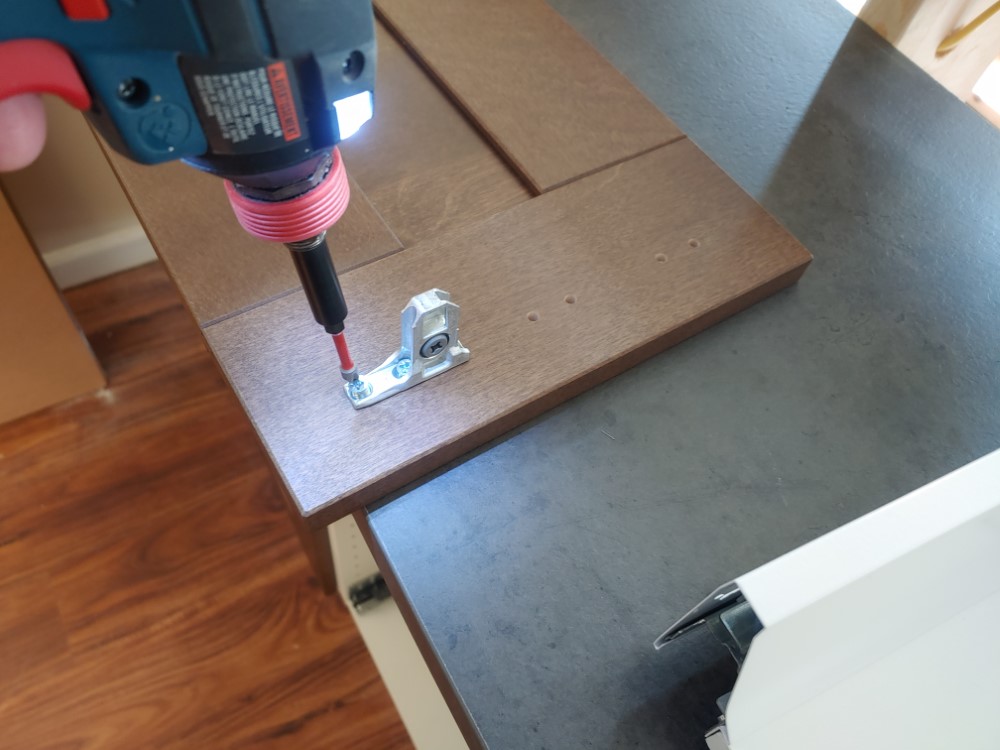
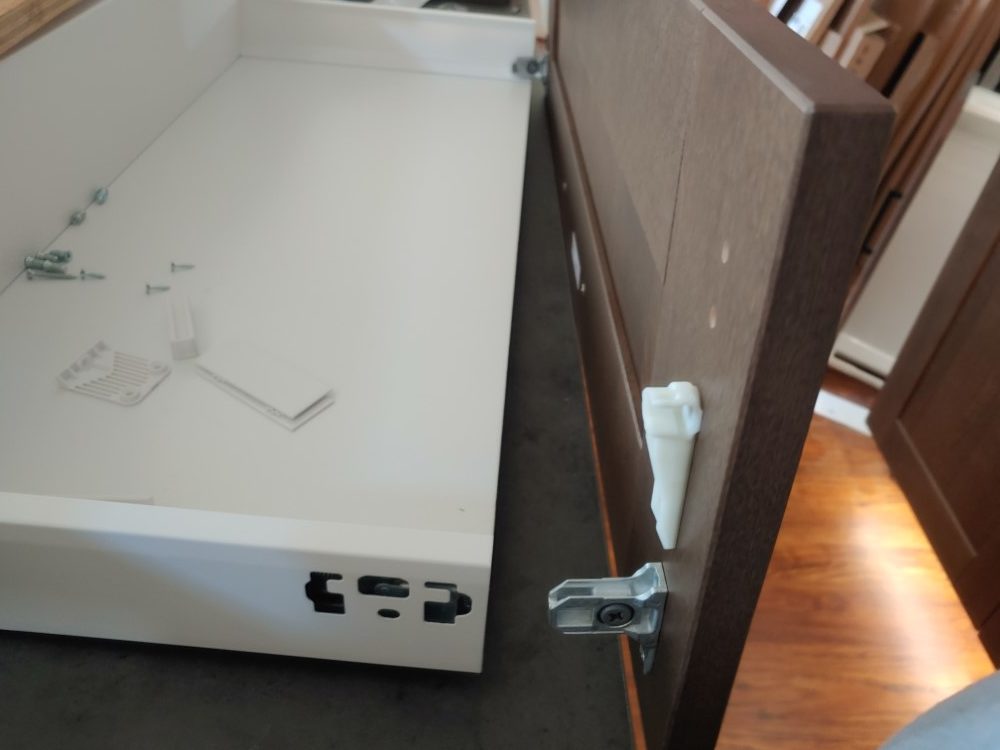
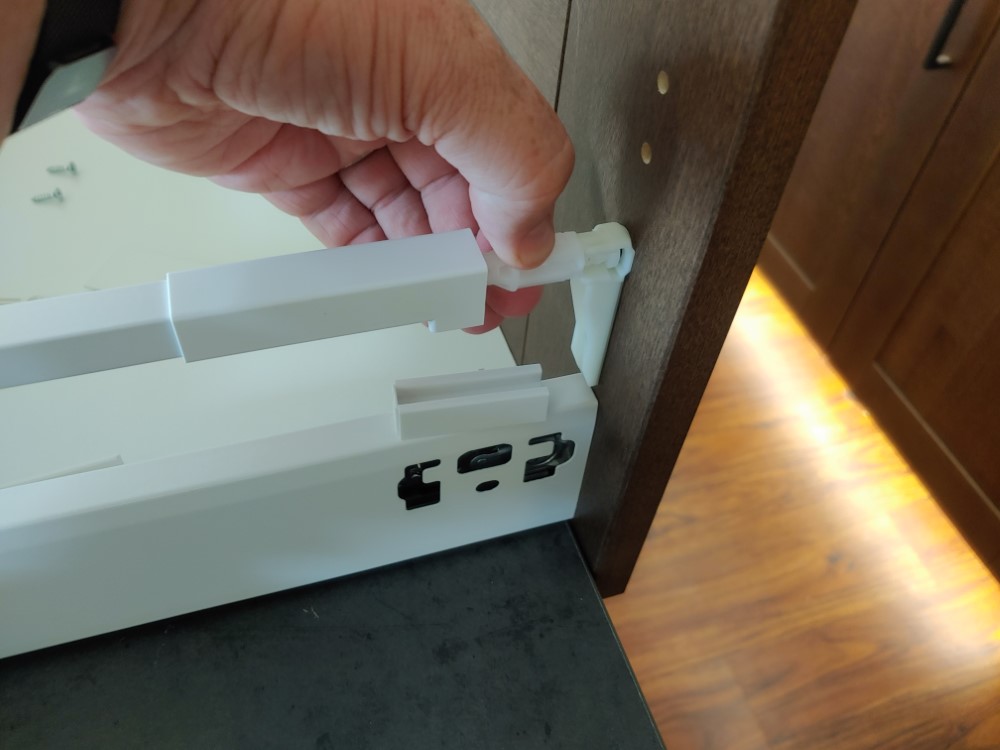
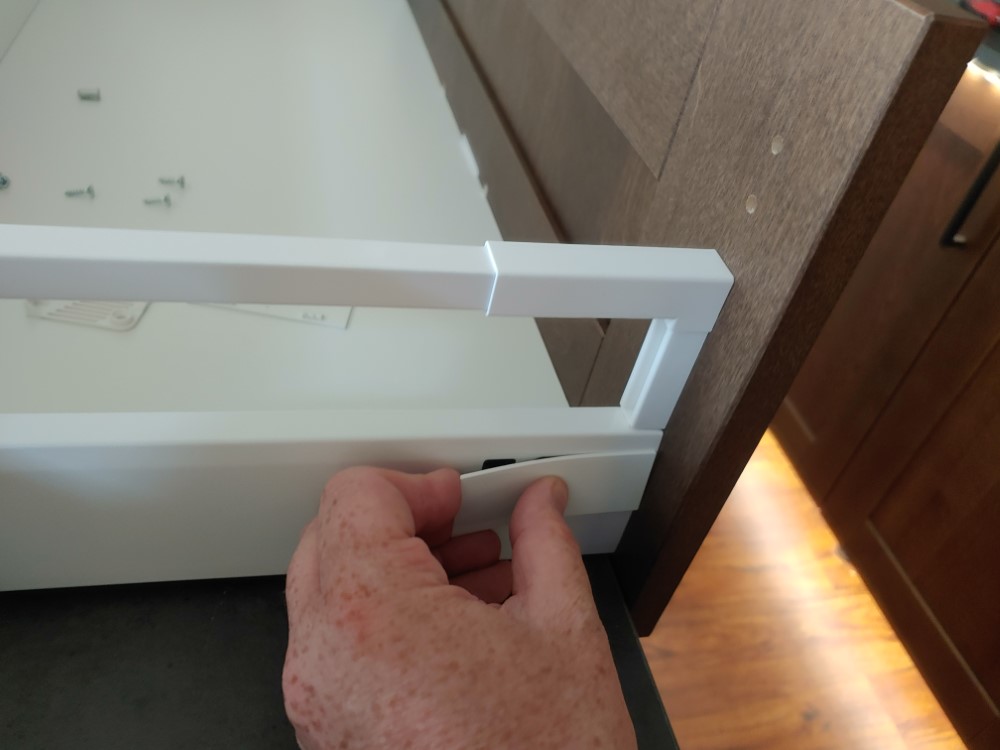
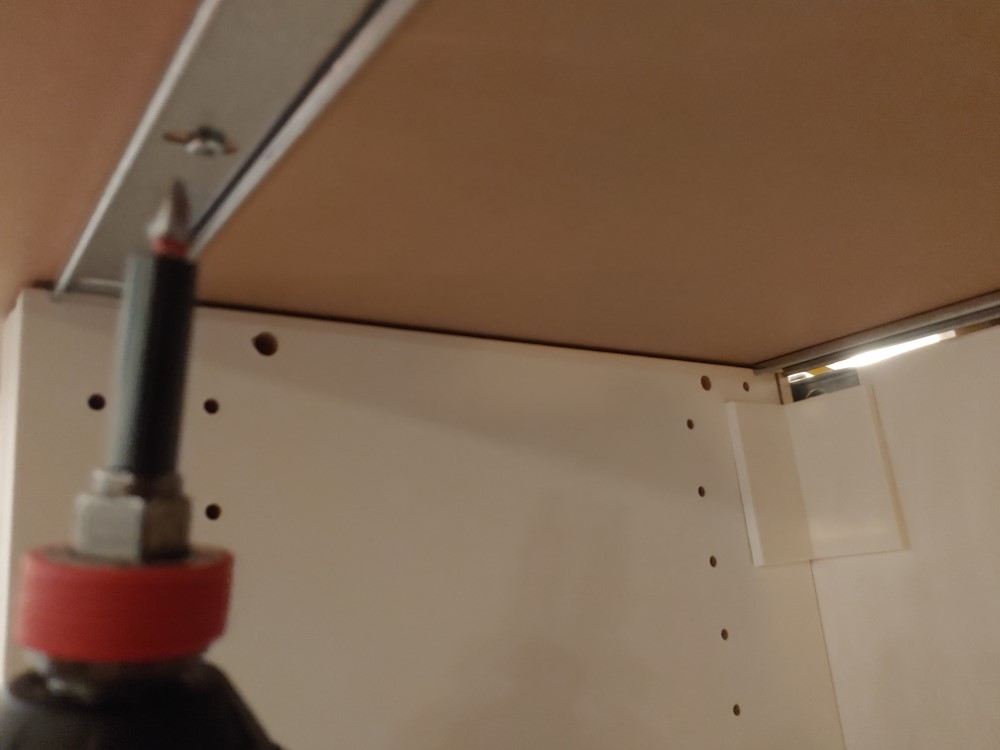
Once you’ve received your door fronts from Ikea or elsewhere, mounting and adjusting them is quite easy. Ikea hardware (the behind-the-scenes stuff like the door hinges and drawer glides) is quite good stuff. Unless it has changed recently, it is made by Blum, a leader in cabinet hinges and hardware. Almost all Ikea Cabinet Hardware has soft-close technology built right in. Ikea’s cabinet fronts come pre-drilled for the hinge, and it’s a toolless installation on the door itself. Set the big round side in the big round hole and press down the hinging clamp to lock it in place.

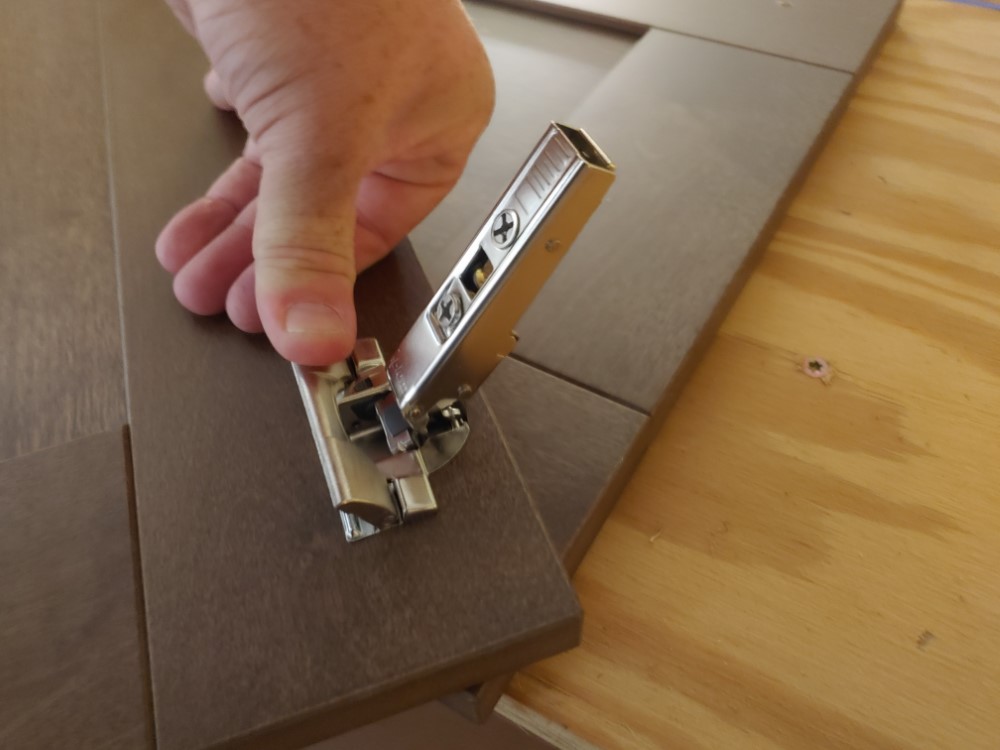
Next, you can do one of two things: take your door, hold it up and mark the pre-drilled holes where the cabinet hinge will fit in. Then you can remove the hinges from the door and screw them into place. Then hold the door up and snap those hinged clamps back to secure the door.
Or, you can do it the hard way and hold the door in place with one hand while simultaneously trying to line up your driver bit with the small screw head and secure it before you lose your grip on the door. I like a challenge, so it seems like I’m usually going the hard route, but either way works.
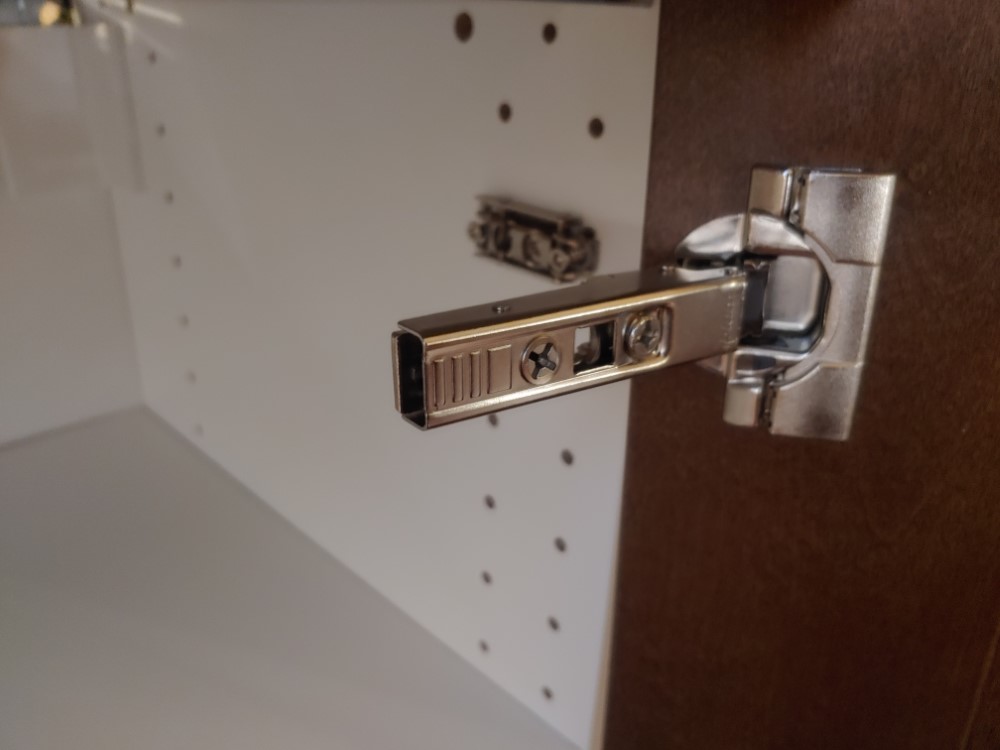

Each hinge comes with several set screws that allow you to adjust the hinge (and door with it), in and out, left/right, and up/down. You can fiddle with this now, but unless it’s way out of whack, you’re better off to leave it as-is. Complete the rest of your door installation first. Once you have them all installed, you will better see where the adjustments need to be made to keep gaps parallel and consistent and get doors to close smoothly. It likely will take a little tweaking but there is a good amount of adjustability to help you get it right.
Ikea Kitchen Cabinet Installation – Don’t Drop those Drawers
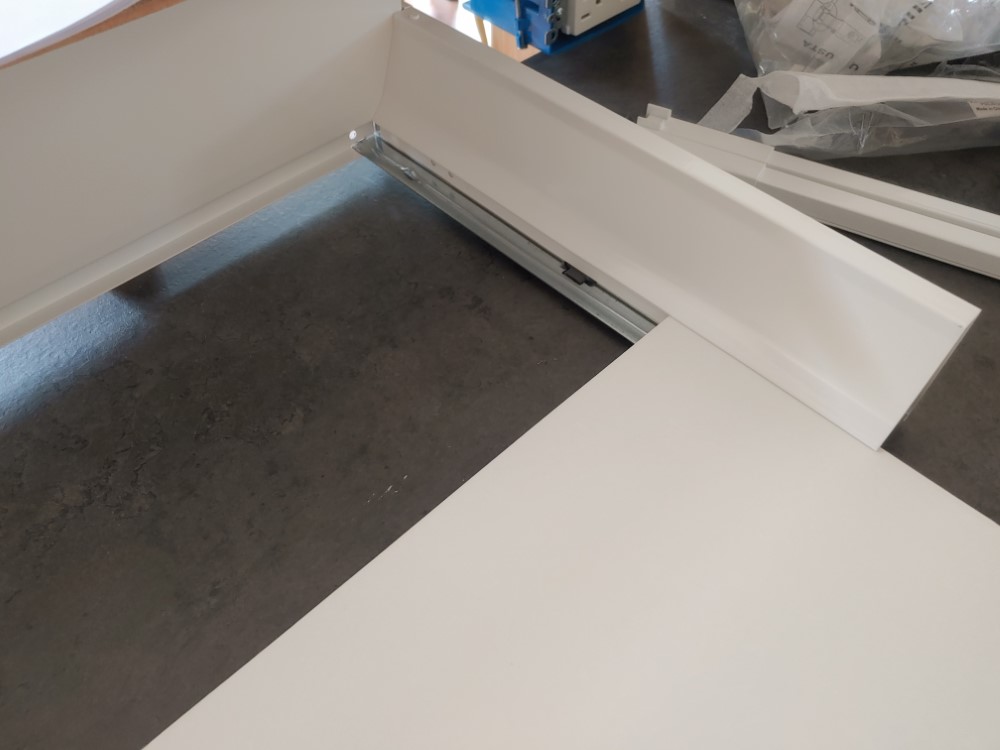
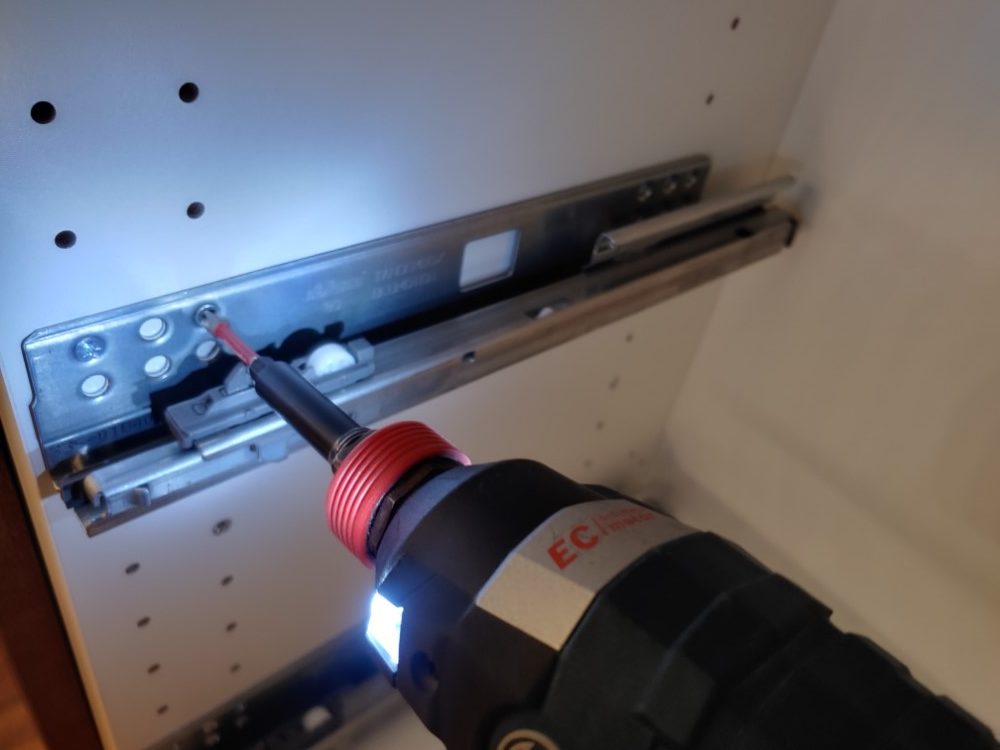
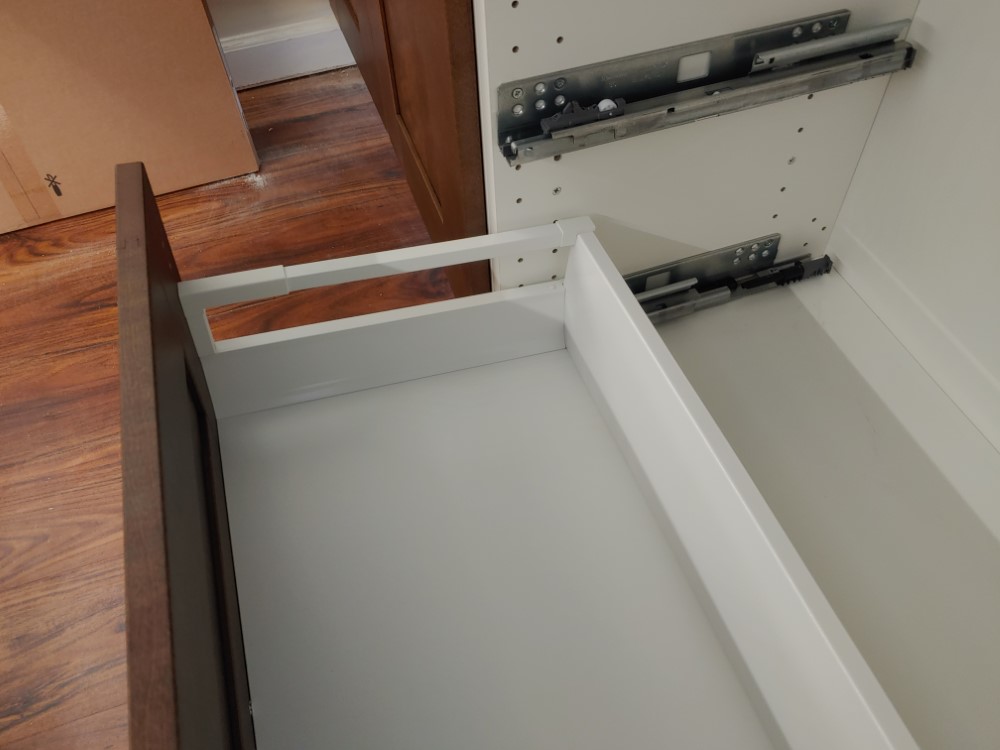
Ikea has a couple of different options for their drawers. Depending on your layout, you may have hidden drawers, with standard white faces. Or, you may have gone with cabinet-faced drawers. Ikea’s instructions tell you which screw holes to use inside the cabinet, depending on your drawer configuration. There are also different holes on the back of the door faces, depending on which size drawers you’ve gone with. Sometimes you have a choice, other times not so much.

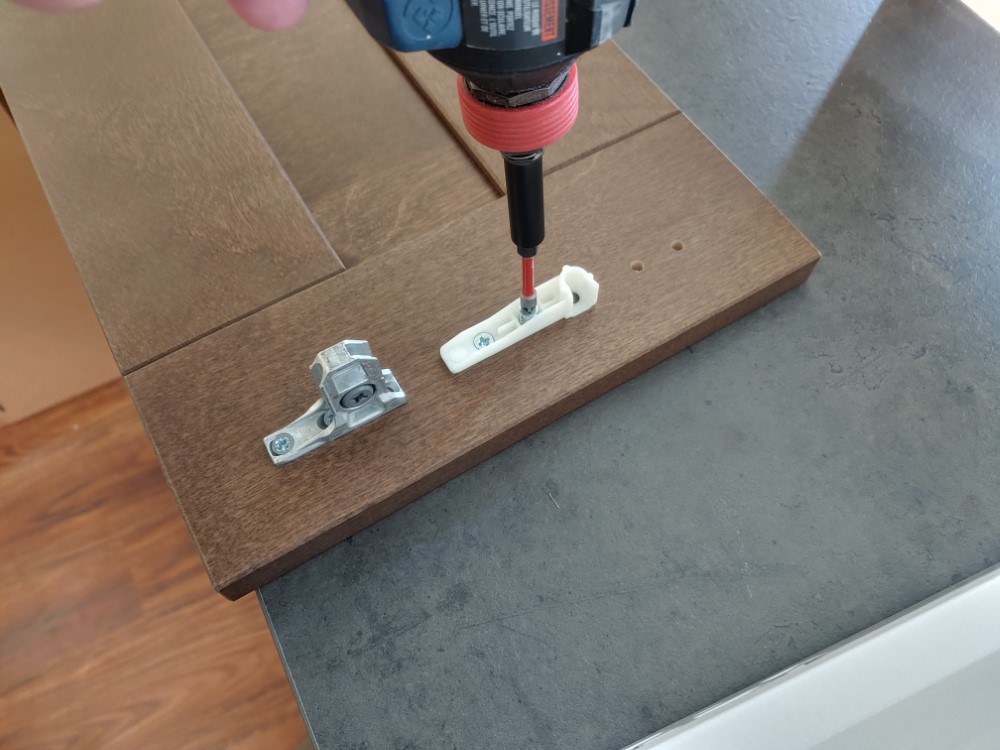
Another word of warning. The holes on the back of the drawer faces appear symmetrical, such that there is no up or down – at least on the three drawer standard faces. I made the mistake of believing that was true. In my haste to test out a cabinet hardware jig, I drilled my door handles at the bottom side of the drawer instead of the top. While it so happens it sits on the backside of a bar, and isn’t visible, it is a bit of an annoyance. Don’t rush the process. I suggest setting everything up on the drawers first to be sure which end is up, before drilling and installing your hardware.
The drawer installation is pretty straightforward and the included instructions will help. I typically build and install my boxes first, then go back and install all the drawer hardware later. I do this so it’s not popping out and hitting me in the shins or face when installing the cabinets. However, you can do this before installing the boxes.
Despite the instructions, it seems Ikea uses a different method of counting, and I almost always have to adjust the drawers up or down a rung to get them lined up. Once that’s complete, some adjustments can be made on the drawer themselves to raise and lower, and tilt the door face, much like the hinges. Adjustments complete? Slap the little coverplates on, push your drawers in and enjoy the satisfaction of the soft-closing hardware preventing a loud slam.

Hardware – Get the right tool for the job!
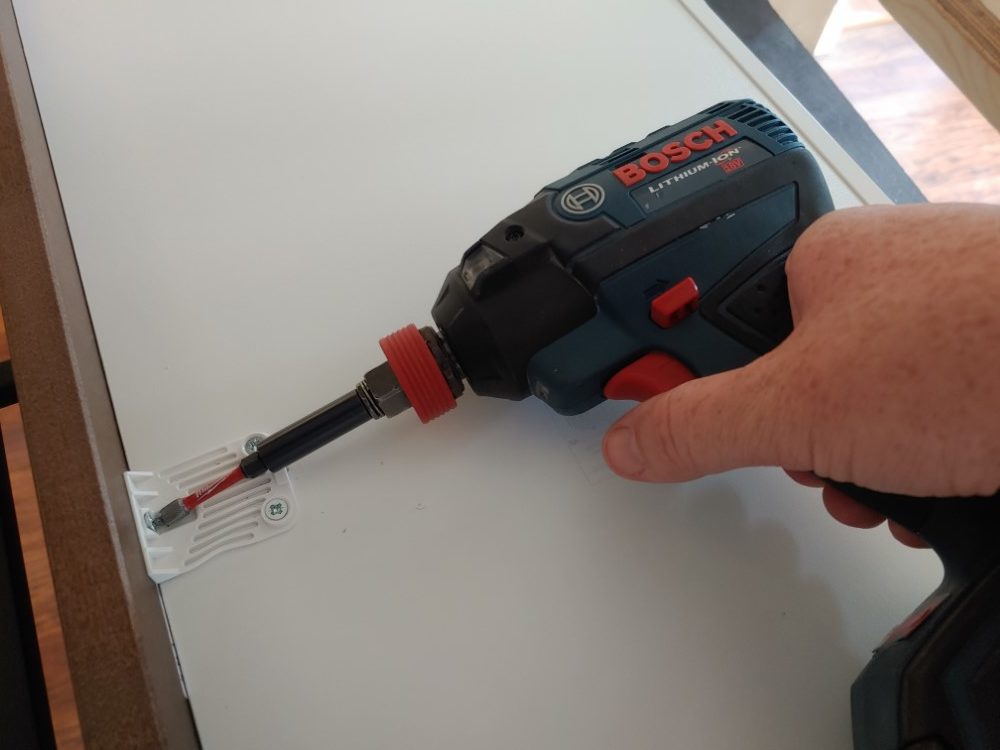
Next up is hardware for your Ikea kitchen cabinets. This part can be fun but also a bit tedious. You really don’t want to screw things up here because one mistake can cost you a door panel. That means you’ll likely need to wait some number of weeks and spend good money replacing it. Let’s not do that! I highly recommend you use a hardware jig. If you’re super handy, they are not too difficult to make – see our article here on crafting your own hardware jig: How To Install Kitchen Cabinet Hardware Without Coming Unhinged.
If you’re less inclined to make your own, True Position Tools makes a fantastic cabinet hardware jig. While it may be pricier than some of the cheaper options on the market, it’s quality stuff and worth the investment, especially if you have a bunch of these to do. You can read more about that in our review here: True Position Tools – Cabinet Hardware Jig

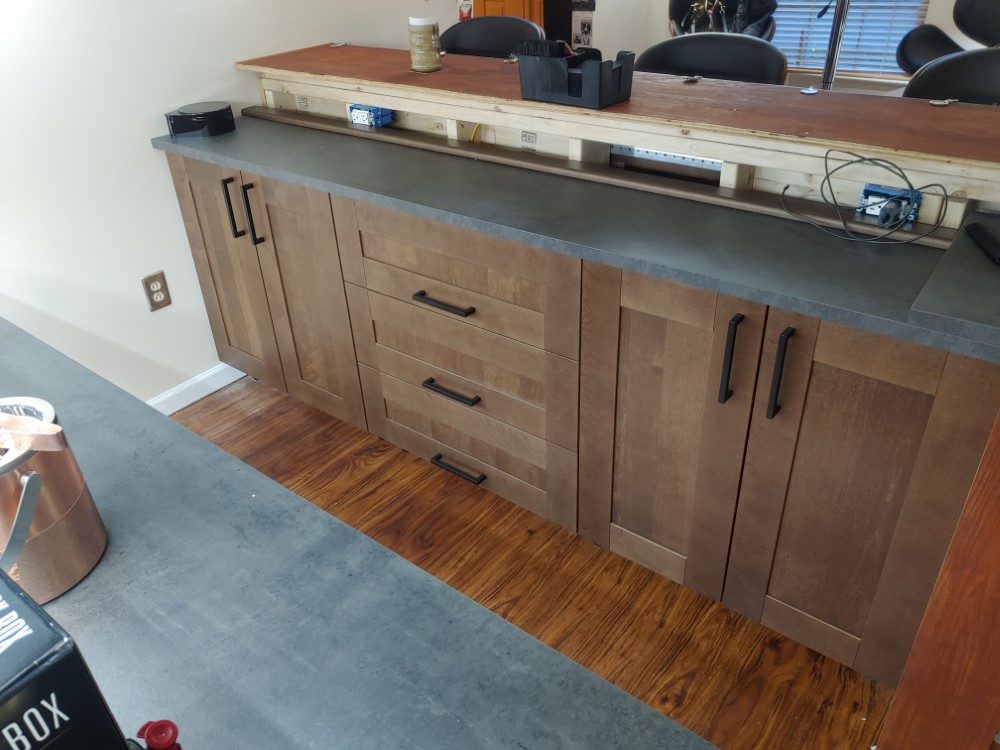
The good news again is that you have the run of the entire cabinet hardware world when selecting door and drawer pulls. Ikea has some nice hardware options in their selection, but you can look just about anywhere. Take some time and find the ones that really speak to you. Hardware makes a huge difference in the overall look. For my most recent two projects featured here, I actually had purchased hardware from Ikea, but decided to return it when I found these large, 7.5” black pulls on Amazon of all places.
Your friendly Home Depot and Lowe’s Stores (in person or online) also offer a wide selection, and there’s loads of custom options out there on the net as well. See my article on the True Position Cabinet Hardware Jig for some tips and tricks on installation itself. And note, you usually will have the option of installing the hardware in place. Or before the doors and drawers are in, so either should work. If you haven’t made your mind up on hardware, install your cabinets and come back to it.

Counter-point and Finishing Touches for Your Ikea Kitchen Cabinets
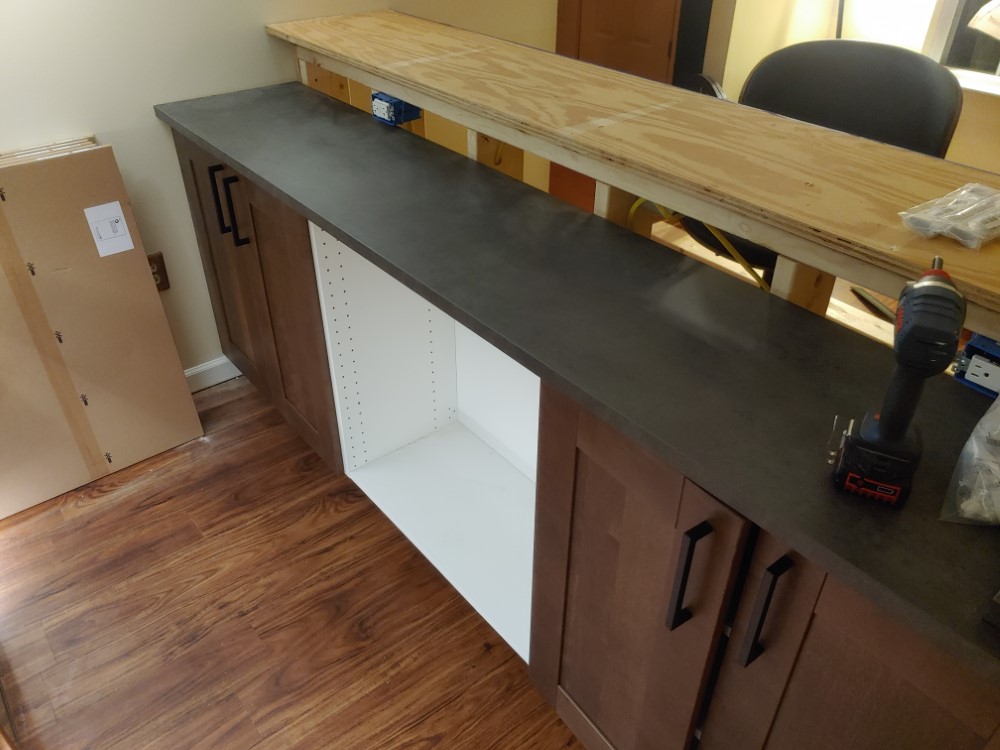
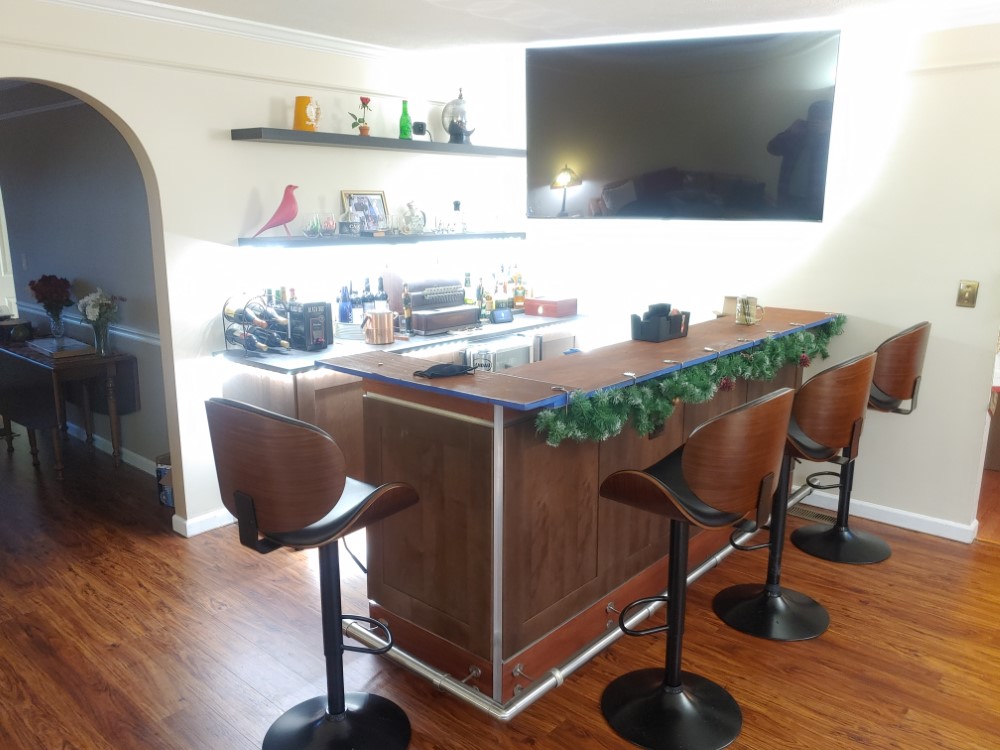
Counters are the finishing touch. Ikea again has many options, from laminates, to solid surface, to stone. They used to sell beautiful birch and oak butcher block counters, but sadly that has been discontinued. Once again, you aren’t beholden to using Ikea’s counters. Feel free to shop at the local store for granite or quartz or butcher block or laminate. For the two installations I had here, I actually did use counters from Ikea, though the upper bar top will likely be natural stone. One top was a knockoff butcher block look (real wood but MDF core). The other is a concrete looking laminate.
Both Ikea Kitchen Cabinet Counters were easy to trim, and look great installed. For a butcher block or laminate counter, it’s an easy installation again. Once your counter is in place, simply use the included short screws that Ikea provides to screw through the top rails of the cabinets. Screw up in to the underside of the counter to secure in place. If you’re doing stone or quartz, a professional installer is your best resource for attaching the countertop.
After that you’re ready for any finishing touches on your kitchen remodel. Check out our HF Article for tips on installing a tile backsplash. Not up to slapping on mastic and grouting tiles? Here’s an easier option: peel and stick metal tiles.
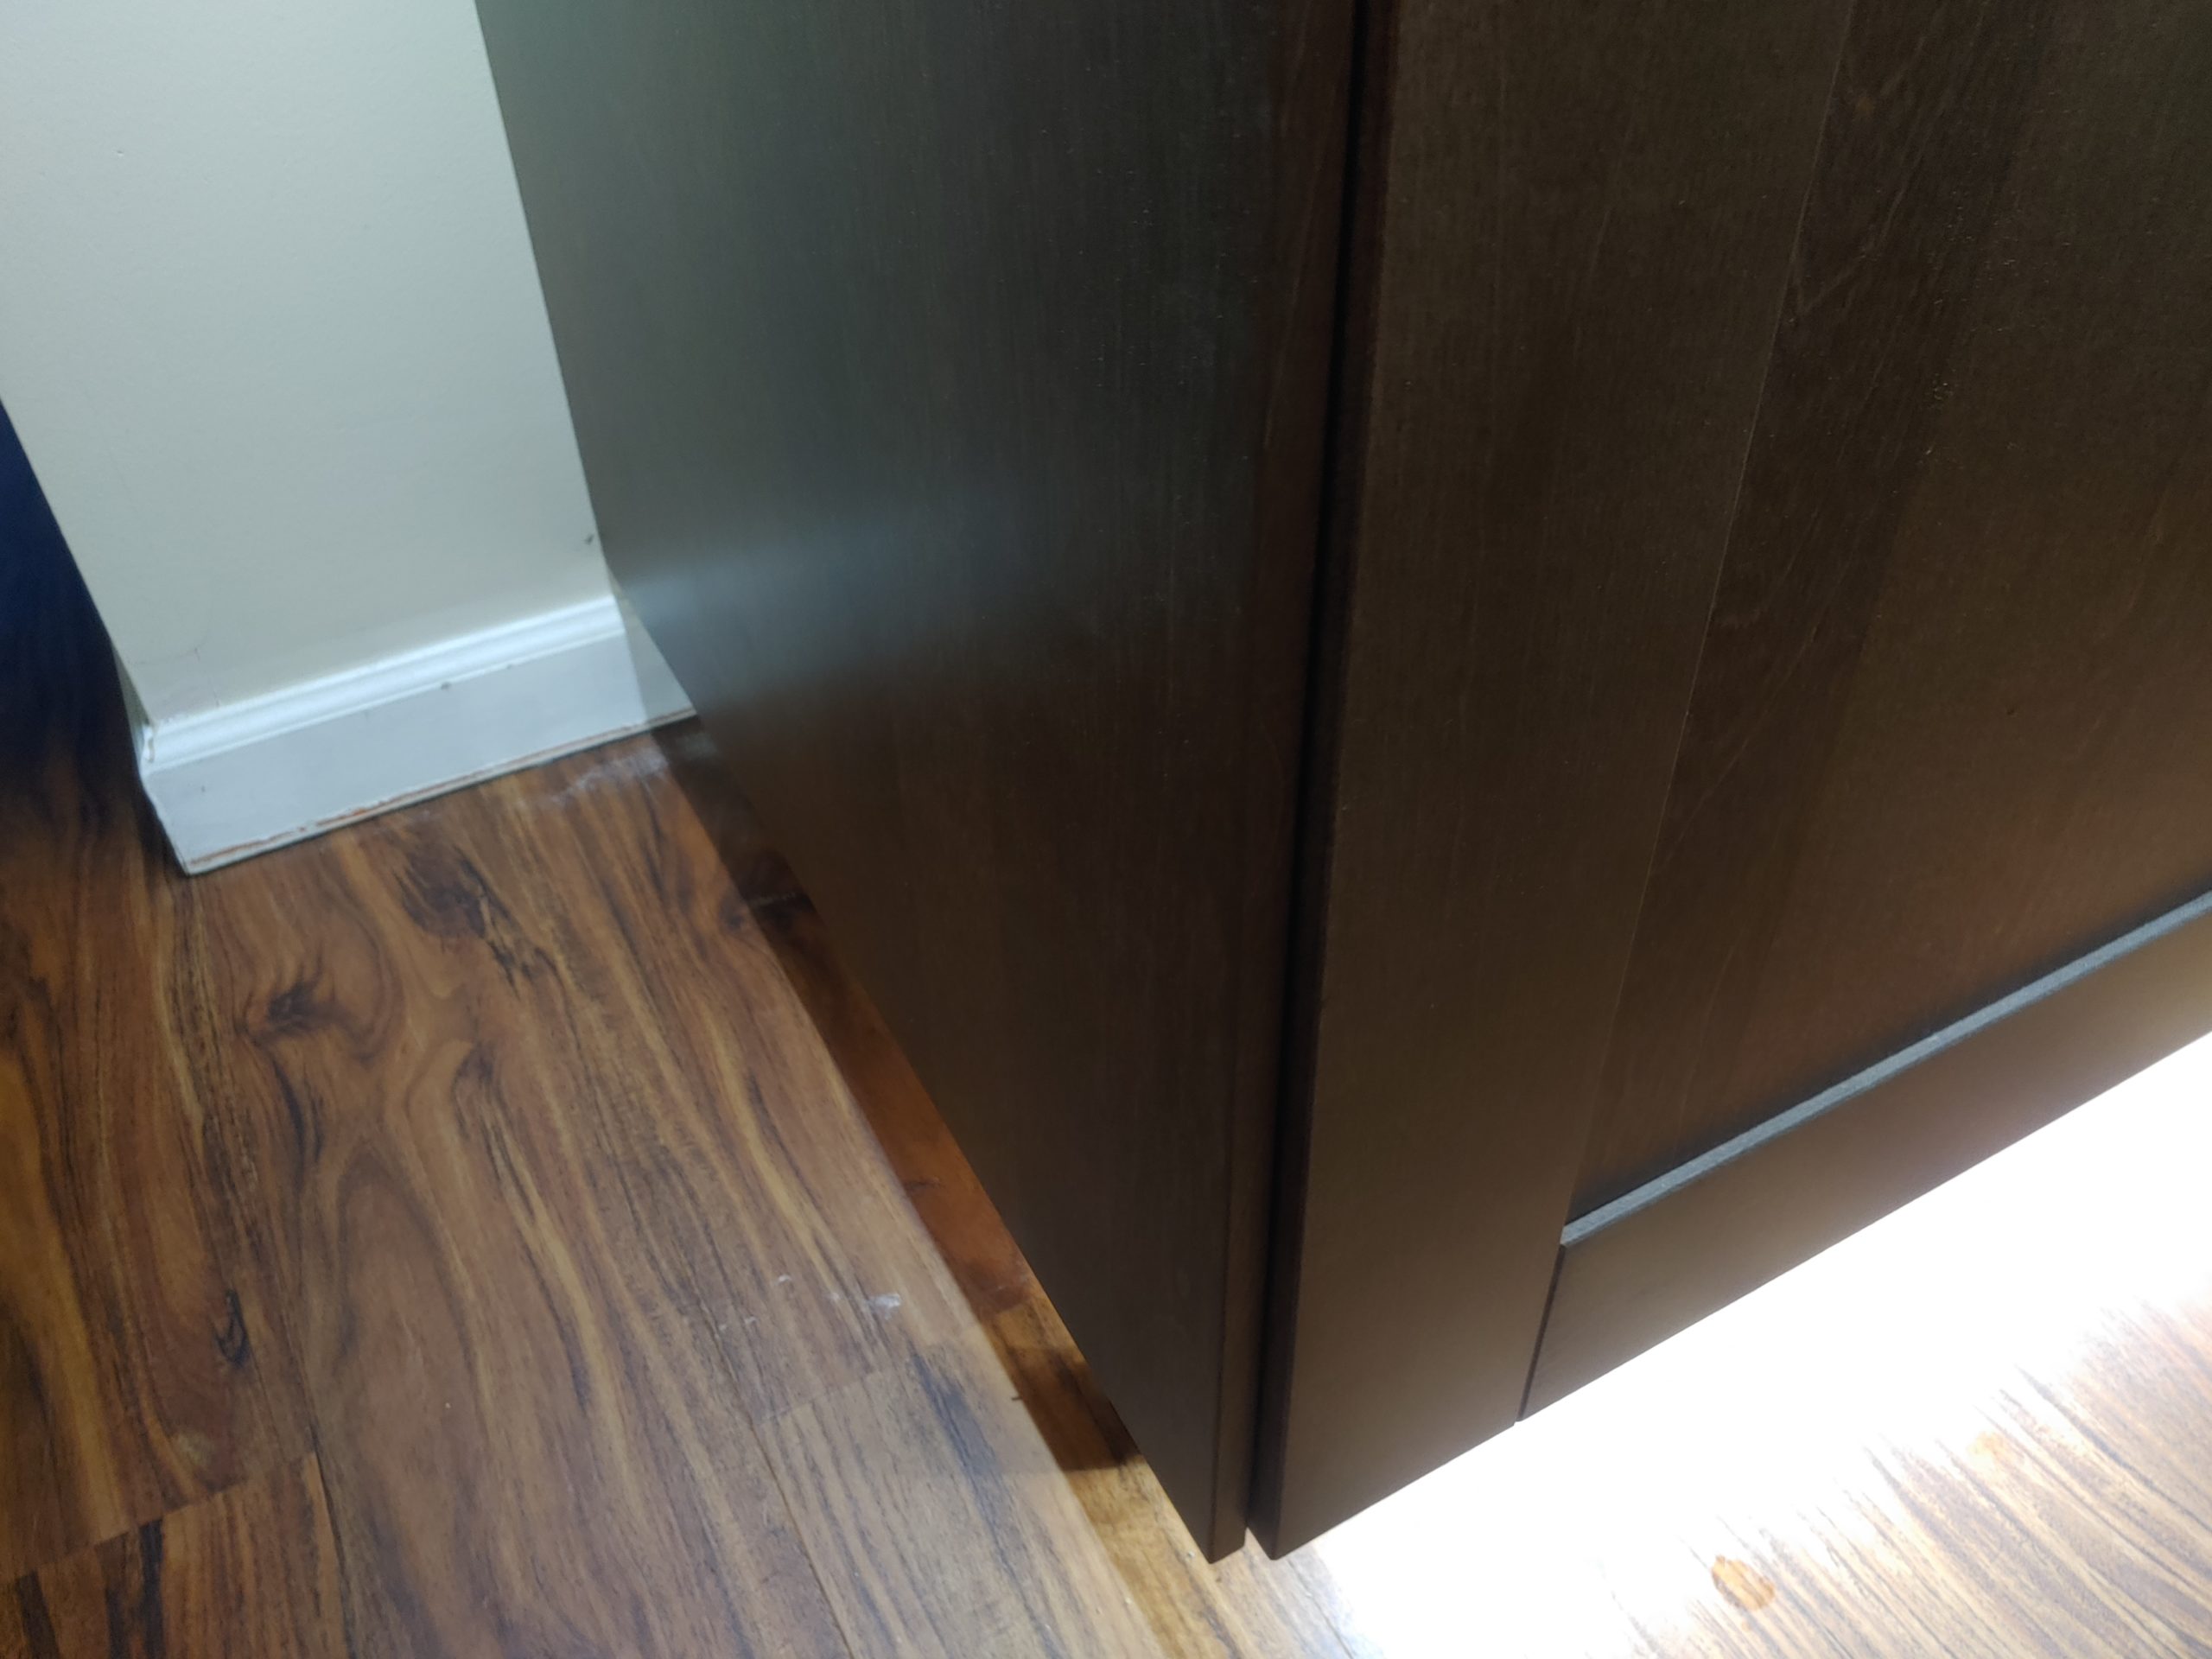
There are a couple other finishing touches for your Ikea kitchen cabinets, like end panels and toe kicks. Ikea’s end panels can be secured to the cabinet through the same method used to attach two boxes together. Be sure to use the correct screws and screw from inside of the box to the backside of the finished end panel – trim as needed first! Toekicks are a very simple install on to Ikea’s feet – simply trim to length needed and snap the toekick on to the plastic brackets at each leg. And that’s it, Ikea kitchen cabinets in a nutshell!
Graduation – Ikea Kitchen Cabinets 102
Well congrats on making it through Ikea Kitchen Cabinets 102! Thanks for sticking with me for what we hope was an entertaining and educational walk through the basics of Ikea cabinet installation. If it was neither of those things to you, please lodge your complaints at whitehouse.gov. I’m pretty sure that’s the right place for Home Fixated complaints. Anyway, hopefully this article will help you in making the decision to take on a kitchen or other cabinet related renovation with Ikea cabinets.
Almost anyone that actually has an Ikea kitchen loves it. We had ours in our last home for about 5 years. While our new kitchen is twice as big, we still miss the Ikea kitchen we had before. We had really put the time in to design and customize it exactly for us. At the end of the day, that’s the best selling point for Ikea. I’m also certain it helped us receive multiple offers over asking the very first day our home was on the market.
With Ikea kitchen cabinets, you can have a custom kitchen, exactly suited to your needs. And for far less cost than any custom, semi-custom or most off the shelf cabinet brands will run you. It’s also something the average DIY’er can do themselves without a lot of specialized knowledge.
Any questions about our past experiences, feel free to post in the comments below! If you’re interested in learning more about Ikea Cabinets you can visit their Kitchen Design Center.


