

![]() This post is sponsored by The Home Depot. In the past, when I’ve had gutter and downspout or other sheet-metal work to do, I’ve relied on my ancient manual rivet tool. It works pretty well, most of the time, although it frequently takes a few squeezes to set the rivet, and once in a while I’ll get a jammed mandrel. I don’t need to do a lot of riveting on a regular basis, so it’s no big deal. Anyone who DOES spend a lot of time – and energy – installing rivets should be very interested in checking out the new Milwaukee M12 Rivet Tool. We’ve been trying one out for the past couple of weeks, and we think you’ll find the results riveting. Sorry – had to get that out of the way.
This post is sponsored by The Home Depot. In the past, when I’ve had gutter and downspout or other sheet-metal work to do, I’ve relied on my ancient manual rivet tool. It works pretty well, most of the time, although it frequently takes a few squeezes to set the rivet, and once in a while I’ll get a jammed mandrel. I don’t need to do a lot of riveting on a regular basis, so it’s no big deal. Anyone who DOES spend a lot of time – and energy – installing rivets should be very interested in checking out the new Milwaukee M12 Rivet Tool. We’ve been trying one out for the past couple of weeks, and we think you’ll find the results riveting. Sorry – had to get that out of the way.
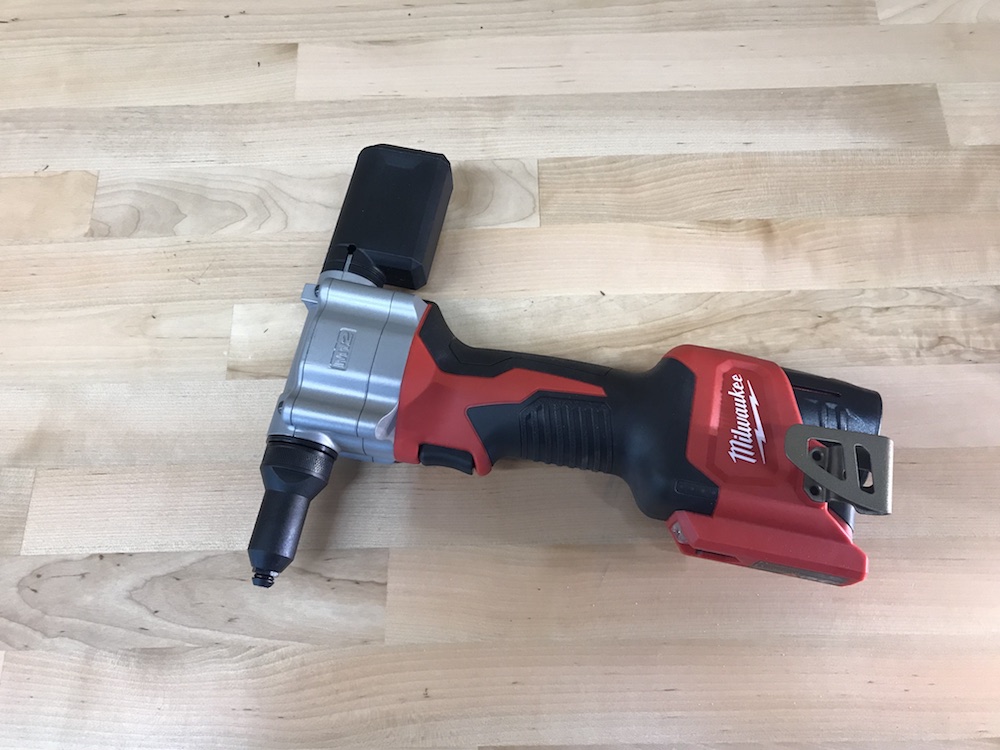
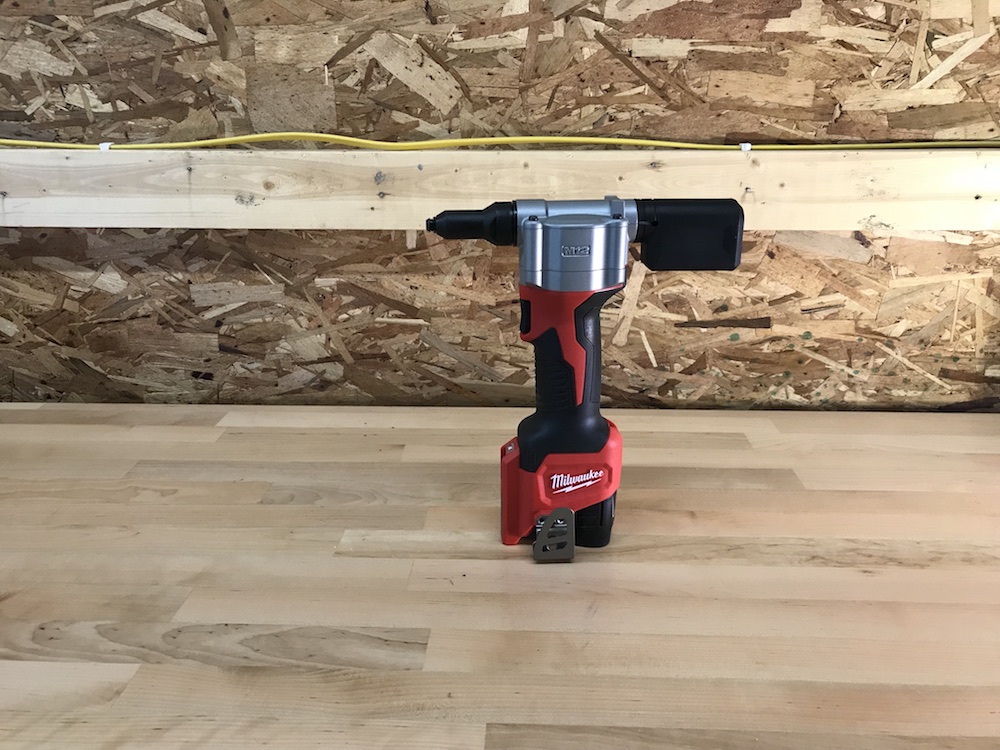
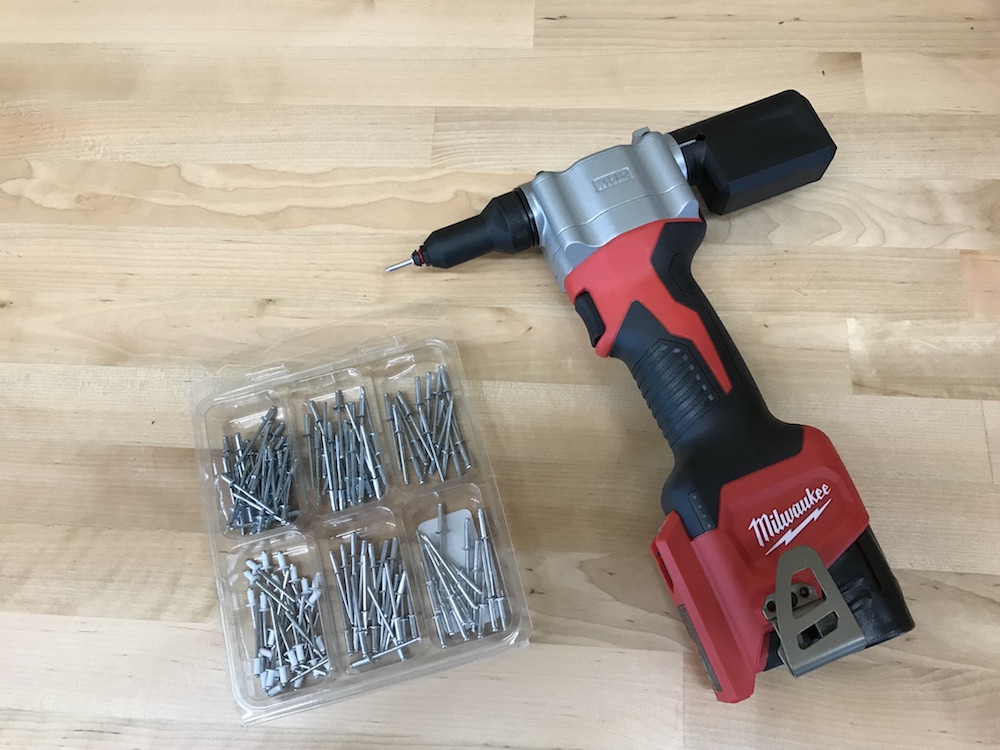
Available in kit form or as a bare tool, the Milwaukee M12 Rivet Tool impressed us from the moment we freed it from its red packaging. The tool looks and feels like a pro-quality item. It’s very solidly built and has a good heft to it, and it’s very well thought out.
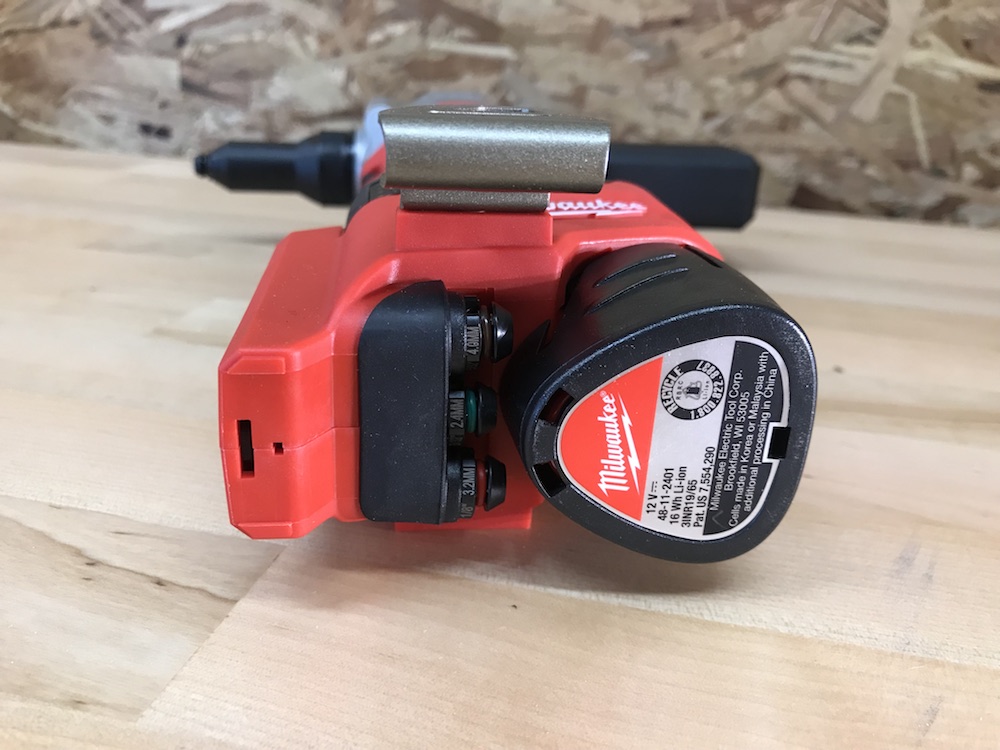
The tool comes with four nosepieces, and can pull 3/32″, 1/8″, 5/32″, and 3/16″ rivets. The three that aren’t being used stow snugly behind the battery, and the little wrench used to change them clicks solidly into place nearby. The tool is designed to fit into relatively tight spaces; Milwaukee claims the Milwaukee M12 Rivet Tool is the most compact cordless rivet tool on the market. And anyone doing production work will likely be thrilled by the opportunity to ditch the compressor and hose needed for a pneumatic rivet tool.
The Milwaukee M12 Rivet Tool will run on any Milwaukee M12 battery. For our evaluation, we got the kit, which comes with two 1.5 Ah batteries, along with a charger and a canvas contractor bag to schlep it all around in.
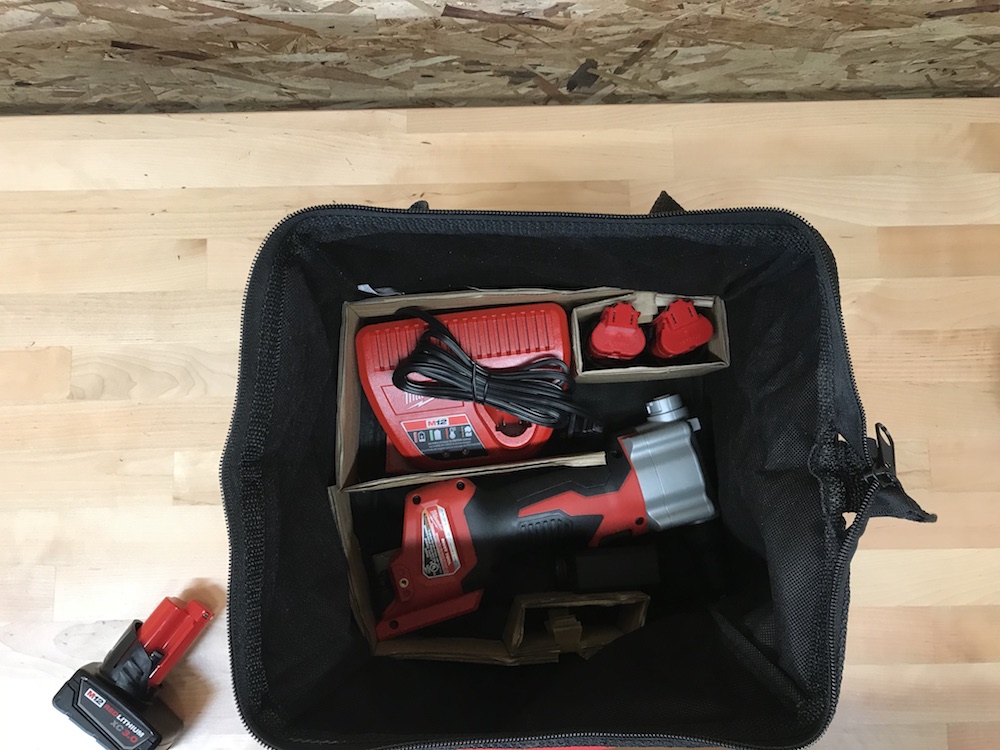
The bag has plenty of room for the tool and components, with space left over for a good assortment of rivets so you can get some work done. Here’s the full list of features and specs for the Milwaukee M12 Rivet Tool:
• Pull up to 3/16″ stainless steel rivets
• 450 1/8″ steel rivets per charge
• Part of 90+ solutions on the M12 platform
• Pull 3/32”, 1/8”, 5/32”, 3/16” rivets
• Aluminum, steel, stainless steel – capacity
• 0.8” stroke length
• 2,000 lbs. pulling force
• Tool holds rivet in any orientation
• Nose reach: 1.55”
• Includes Nose Pieces: 3/32”, 1/8”, 5/32”, 3/16” rivet sizes
• Head depth: 6.5”
• Height: 10.75”
• Width: 2.63”
• Kit includes: 2550-20 M12 rivet tool, (2) M12 compact battery pack 1.5Ah (48-11-2401), M12 battery charger 48-59-2401, contractor bag
Nosing Into The Milwaukee M12 Rivet Tool
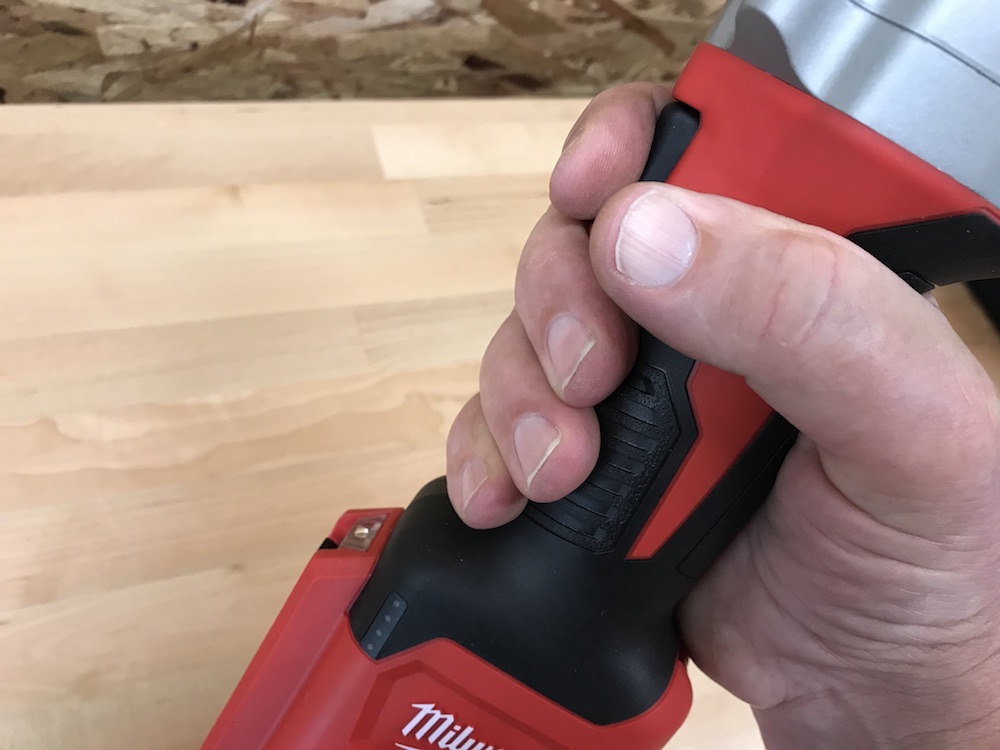
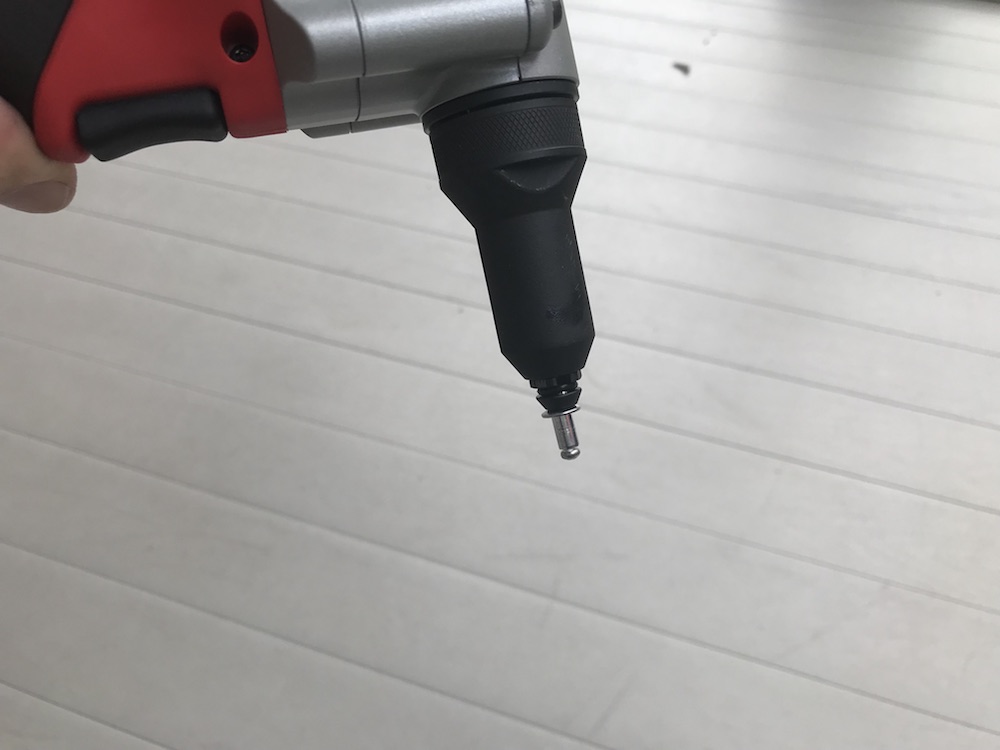
The Milwaukee M12 rivet tool is a pretty intuitive tool to use: Stick the mandrel into the nosepiece, stick the rivet into the hole, pull the trigger. When I was getting ready to use it for the first time, I found the little wrench, and the extra nosepieces, all tucked securely into the base, and changed the nosepiece. I then used the tool for a few days, all without ever glancing at the manual.
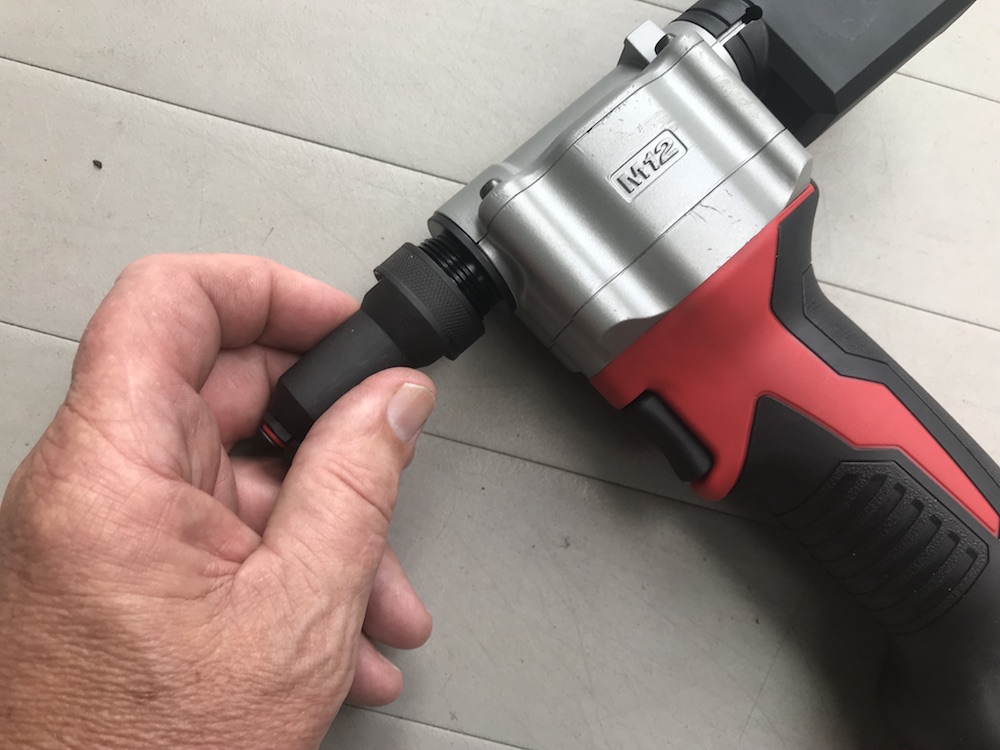
When I finally did crack the manual, looking for specs and other interesting tidbits, I discovered there was an easier way to change out the nosepieces. I had just popped the little wrench out of its nook, loosened the nosepiece that was already in the housing, and inserted and tightened the new nosepiece. It was pretty straightforward, but there’s a spring in the inner mechanism that wants to pop the nosepiece out.
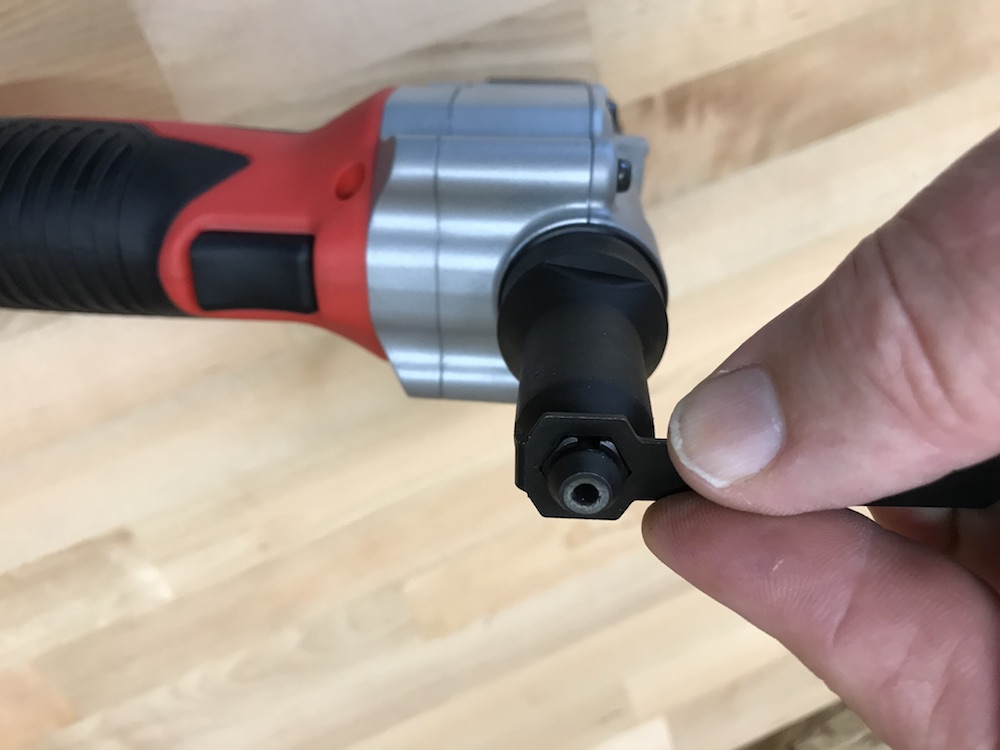
The recommended method for swapping out nosepieces is to remove the entire nose housing, and inserting the nosepiece into the wrench while it’s still in place on the tool. This eliminates the issue with springiness. The housing gets threaded back into place afterwards, and only has to be finger-tight, although I needed a wrench to get it off the first time.
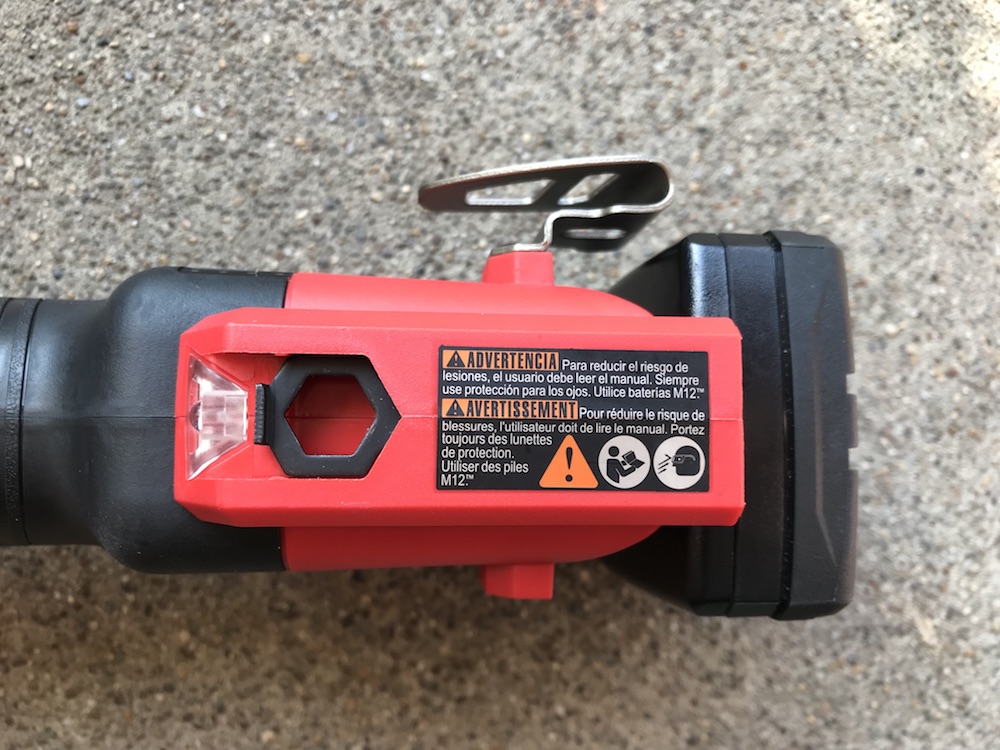
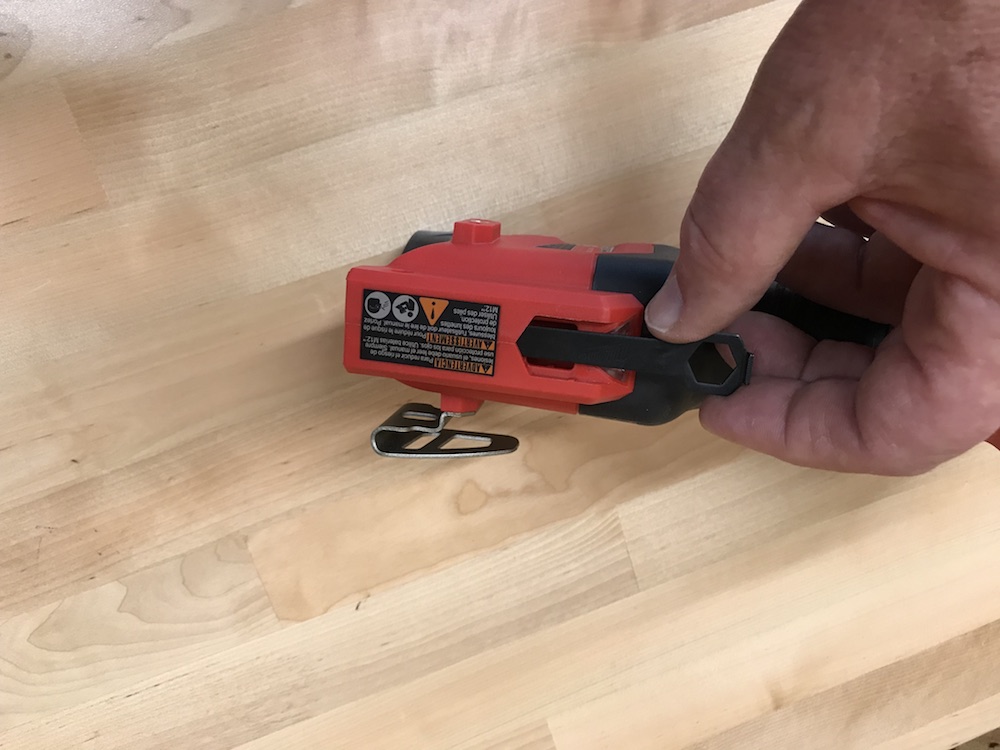
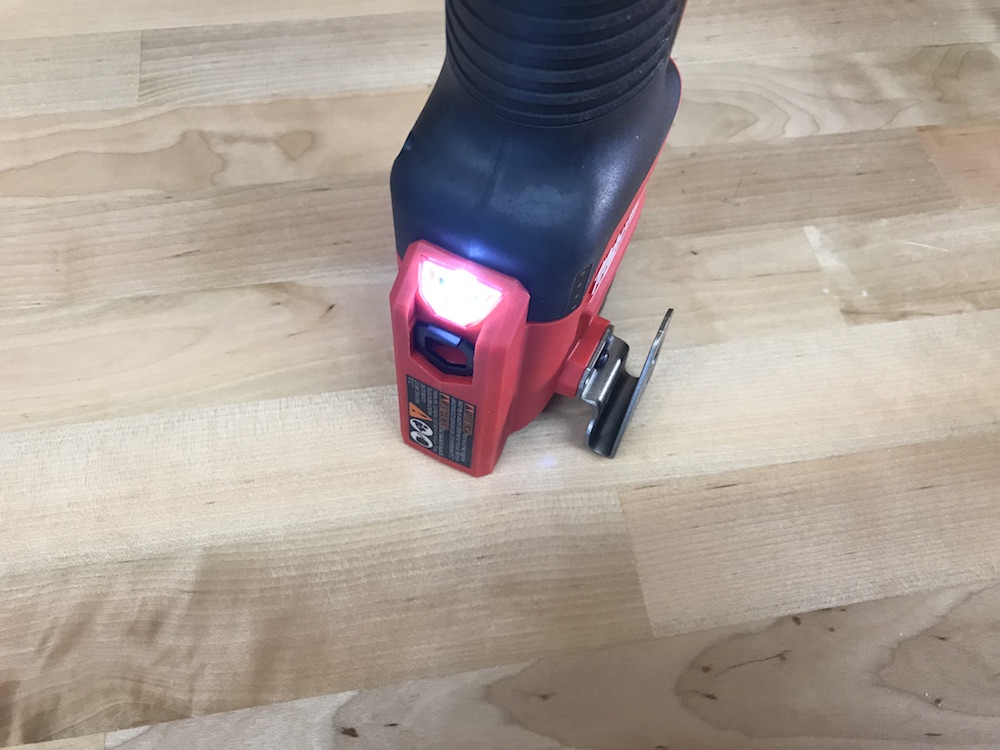
The Milwaukee M12 rivet tool is very nicely balanced, and the handle is comfortable and less slippery, thanks to a rubber overmold coating. There’s an LED light that comes on when you pull the trigger, along with a row of tiny lights that show how much juice is left in the battery. There’s a reversible belt hook, which comes in very handy when working on a ladder.
Getting My Mind – And Some Water – Out Of The Gutter With The Milwaukee M12 Rivet Tool
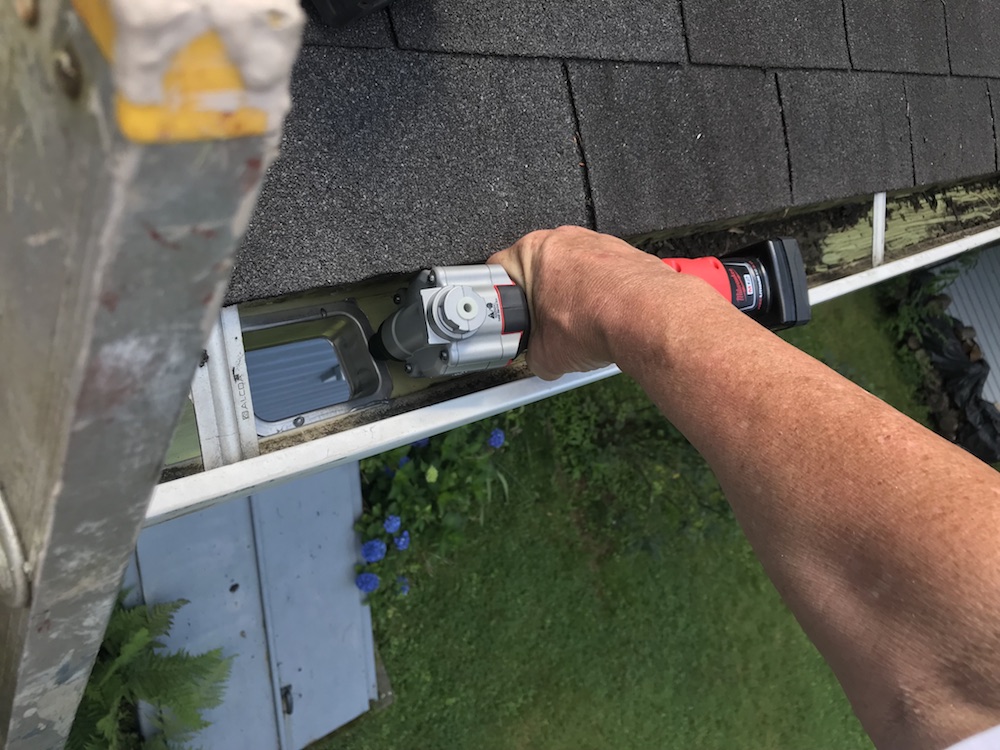
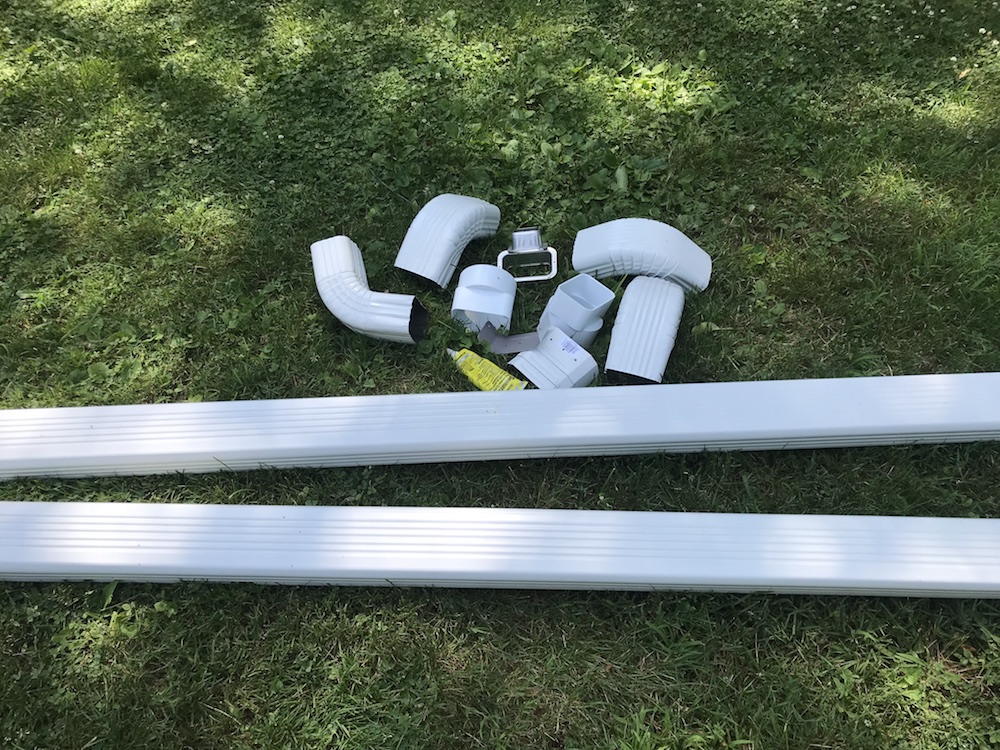
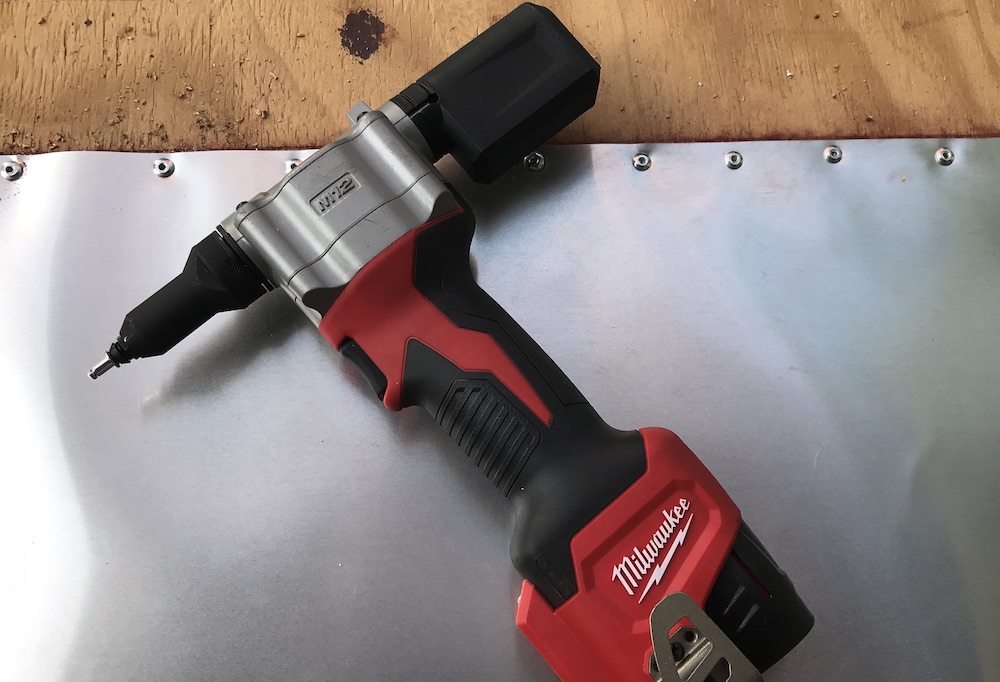
I recently had to add a downspout to a stretch of gutter that regularly overflowed during heavy rains. Aluminum rivets are the ideal fastener for attaching gutter and downspout components, and this provided an excellent opportunity to put the Milwaukee M12 rivet tool to work.
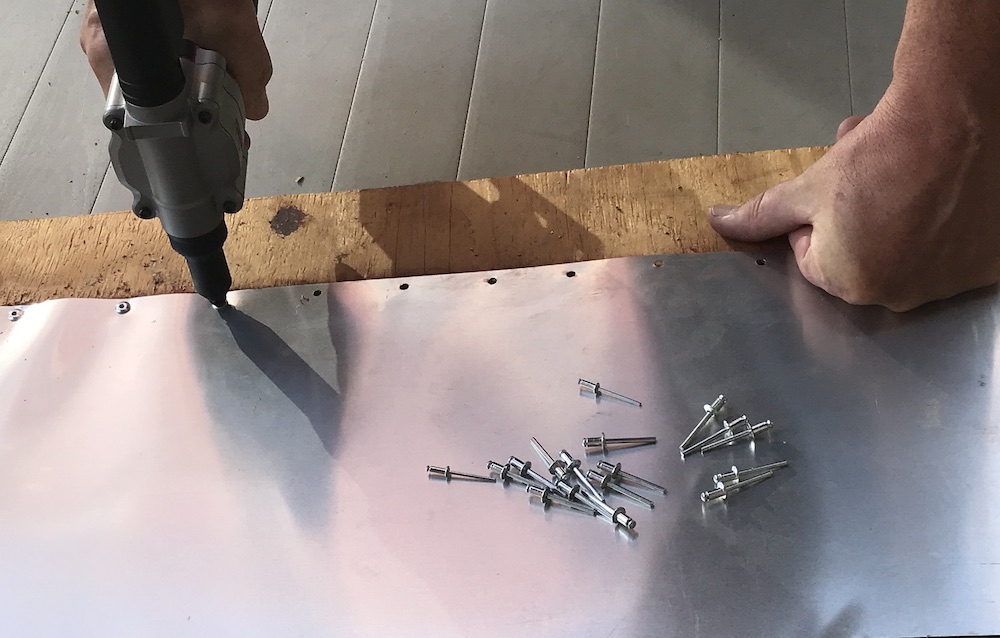
I made the cut in the gutter for the downspout adapter, and drilled the holes for the rivets. I put down a bead of seam sealer, inserted a 1/8” rivet into the Milwaukee M12 rivet tool, and maneuvered it into the gutter. It fit into the somewhat cramped quarters of the gutter with no problem. I wiggled the rivet into the hole, squeezed and held the trigger, and a second later, boom – rivet set! The rivets drew the parts together, and made a perfect riveted connection.
I added rivets to the other three holes connecting the adapter to the gutter, then worked my way through the remainder of the downspout attachment. I riveted the elbows together, connected them to the adapter, then added the downspout. Using the the Milwaukee M12 rivet tool, the process went very quickly.
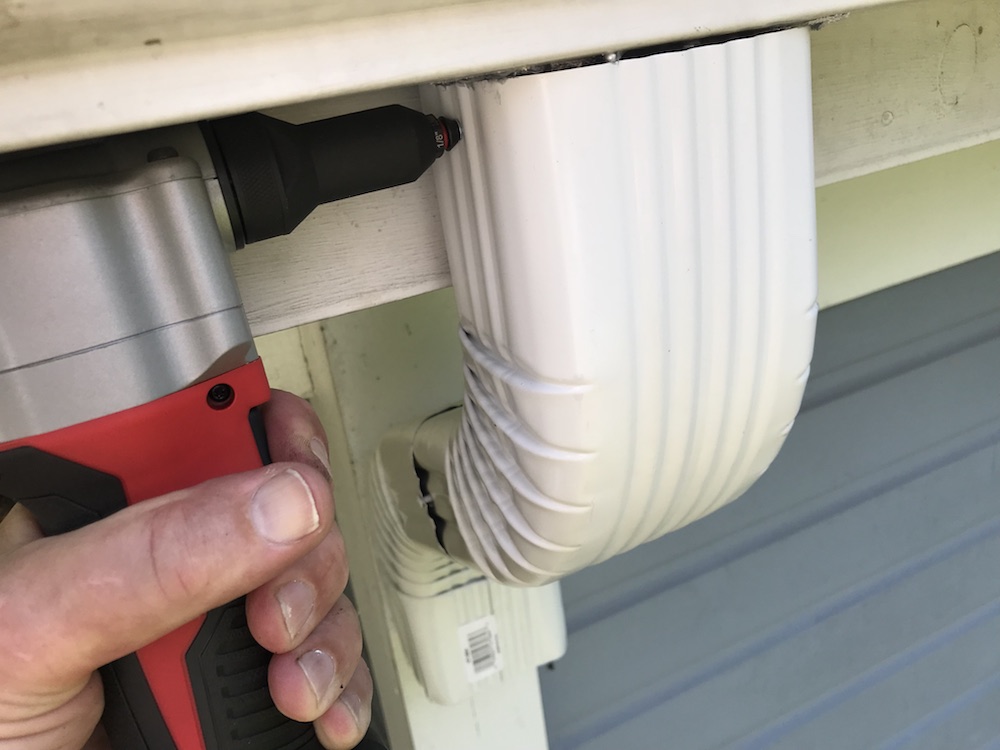
I especially appreciated how easy it is to use while balanced on a ladder, which is not one of my favorite places to be. Once the mandrel is inserted into the nosepiece, it doesn’t fall out, even if the nose is pointed downward and shaken. That’s a very nice change from my manual rivet tool.
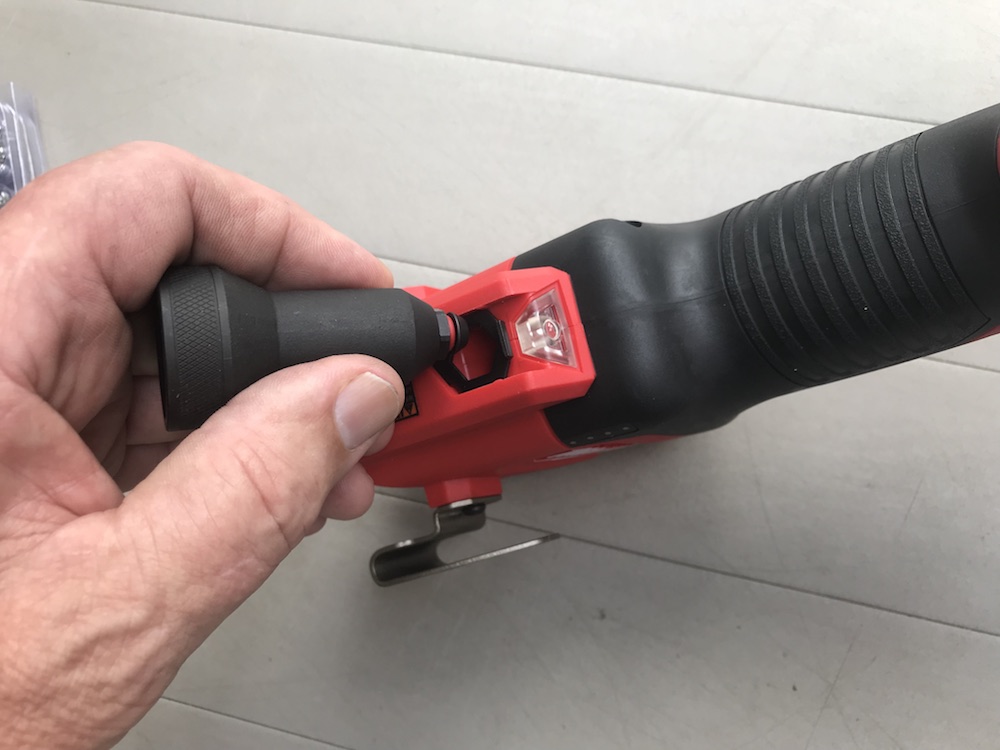
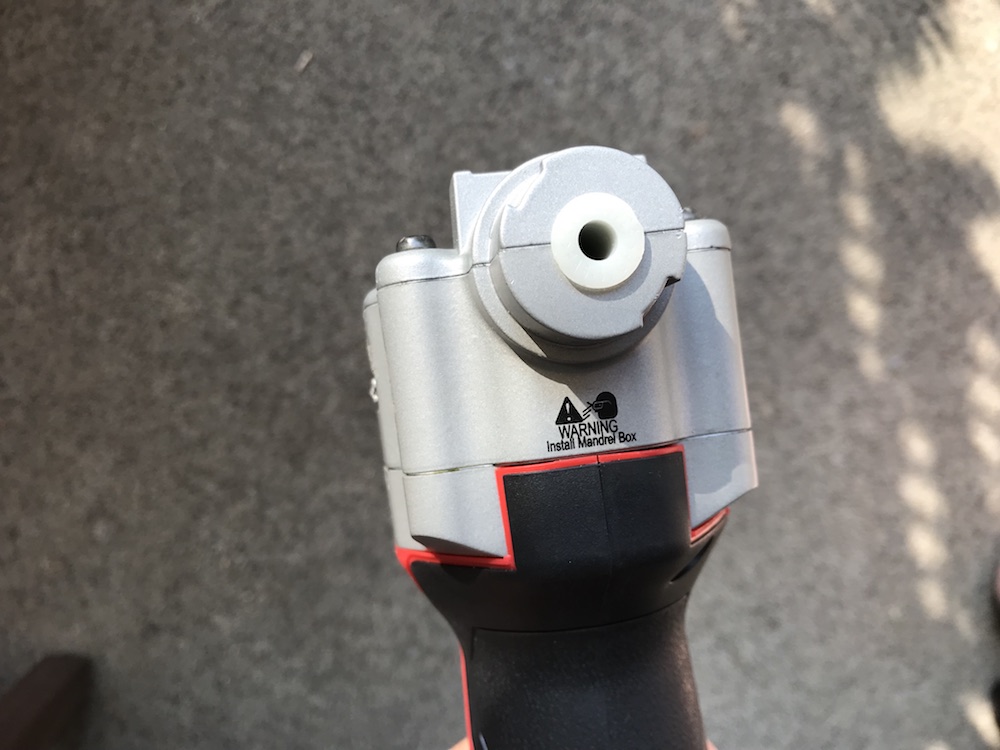
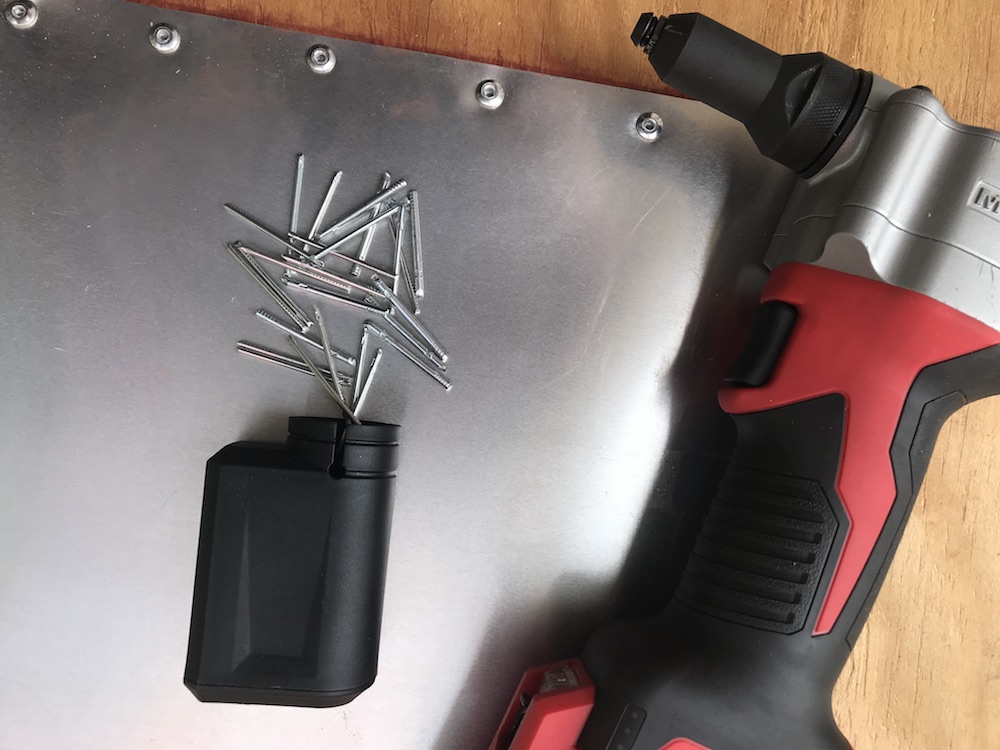
The Milwaukee M12 Rivet Tool comes with a mandrel box, which attaches quickly to the rear of the head with a simple twist. It will hold 100-150 mandrels, depending on size, and is a handy way to keep them corralled. The manual cautions you to keep the box attached at all times, but when I left it off while using it, I had no issue with turbo-ejected mandrels streaking through the air. Still, I lead a charmed life; follow the directions, and use the box.
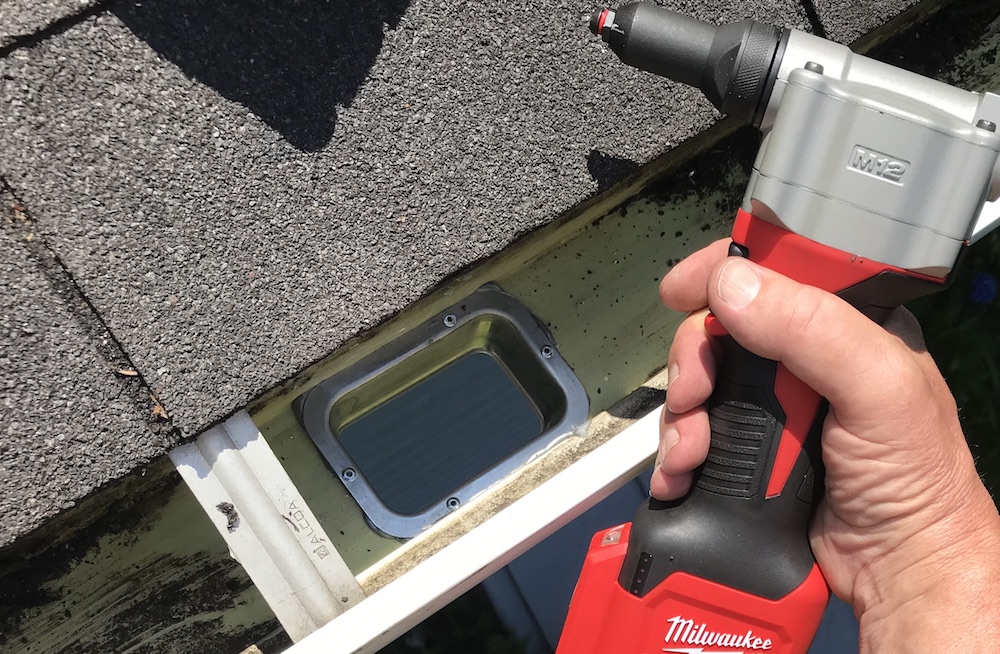
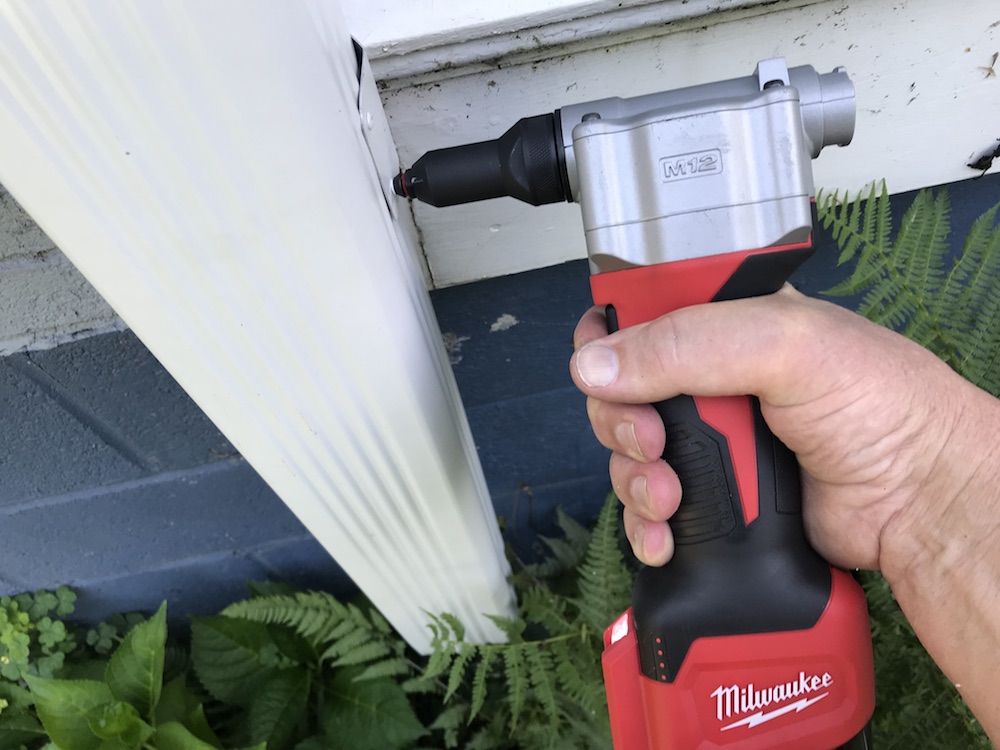
Part B of the project was to replace two existing downspouts. The gutter drains a pretty large area of roof, and someone had installed 2×3” downspouts, which worked about as well as trying to drain a swimming pool through a straw. I bought 3×4” elbows and downspouts to replace them, and with the Milwaukee M12 rivet tool along for the ride, the replacement was fast and painless.
The largest rivets the tool will pull are 3/16”. I wanted to see how the Milwaukee M12 rivet tool would do, so I drilled some holes and pulled a bunch of the 3/16” rivets through a piece of sheet metal and plywood. All easy peasy; the tool pulled all the rivets quickly and smoothly. During all our testing, there were no jams or other problems with the tool.
The kit comes with two 1.5 Ah batteries. I used the Milwaukee M12 rivet tool with one of these batteries, as well as with an XC (Extended capacity) 3.0 Ah battery. The tool performs equally well with either battery, and will stand on its base with either.
Milwaukee claims the tool will pull 450 1/8” rivets on a charge with the smaller battery. That’s a lot of rivets; for someone working on an assembly line or doing production work, using one of the XC batteries would probably provide roughly double the number of pulls per charge. You’d never have to stop working; how great is that!
Ready To Form An Attachment With The Milwaukee M12 Rivet Tool?
For gutter installers, sheet metal workers, or anyone doing production work that requires pulling a lot of rivets, time is usually money. Anything you can do to speed up the job helps maximize your ability to keep the money coming in. And if it keeps you from getting hand cramps, or doing a face plant after tripping over an air hose, all the better.
The Milwaukee M12 Rivet Tool is a solid, well-made, pro grade tool. It’s fast and easy to use, even for rookies, and should speed up the riveting process in pretty much any work environment. The Milwaukee M12 Rivet Tool is backed by a solid warranty: Five years on the tool, and two years on the batteries. It’s also covered by the Home Depot’s 90-day return policy, giving you plenty of time to form your attachments risk-free. Pull the trigger, and give it a try.
Buy the Milwaukee M12 Rivet Tool Kit from the Home Depot:
Buy the Milwaukee M12 Rivet Tool bare tool from the Home Depot:
I acknowledge that The Home Depot is partnering with Home Fixated in sponsored content. As a part of the sponsorship, Home Fixated is receiving compensation for the purpose of promoting The Home Depot. All expressed opinions and experiences are our own words. This post complies with the Word Of Mouth Marketing Association (WOMMA) Ethics Code and applicable Federal Trade Commission guidelines.


