

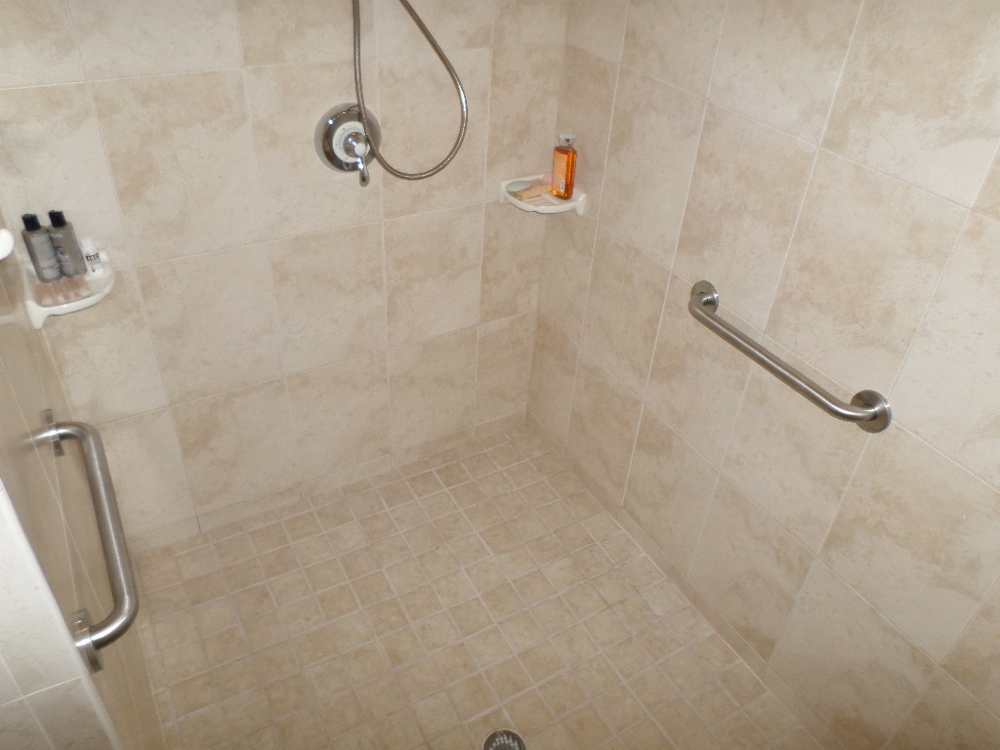
A shower grab bar is a great way to add additional safety measures to a slippery tile floor, although they always seem to end up as a towel rack or shampoo caddy instead. Some of these bad boys can support up to 500 lbs. So, even if you’re swinging from the handle with both hands like a chimpanzee, it’s not going to rip out of the wall – that is; if it’s installed correctly. Use these tips for installing a shower grab bar and save yourself the humility of a bruised backside from a fall in the shower.

I love working with repeat customers. In fact, I wish I could work for them exclusively. When the Florida housing industry took a turn for the worse, it was these repeat clients that saved the day when it came to work. So when one of our favorite repeat customers told us she had cancer, we were devastated. We asked her if she needed any help and she asked if we could install a few grab bars in her shower. The chemotherapy had made her weak and she was in fear that she might accidently slip when she was showering. We happily obliged her request and picked up a few 18-inch Moen grab bar kits along the way to her home.
Size Does Matter – At Least for your Shower Grab Bar
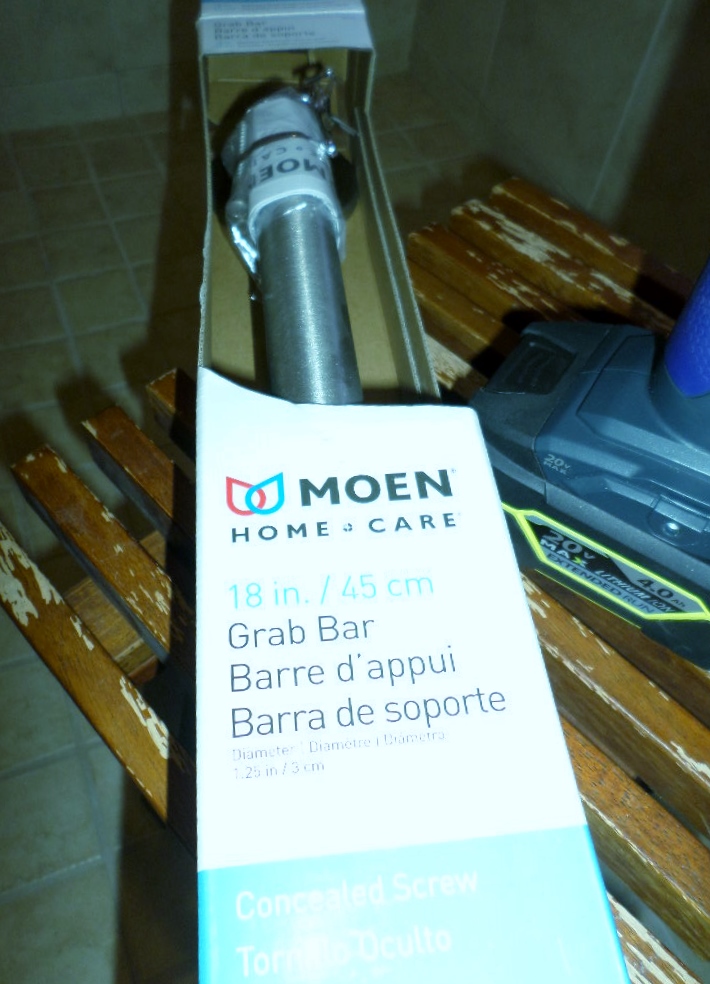
It’s true: size does matter, at least when it comes to grab bars. Since most stud layouts are 16-inches on center, I prefer to install 18-inch grab bars so that you can easily hit two studs and still keep the grab bar nice and level. However, stud layout in a bathroom or shower space that has plumbing pipes in the wall doesn’t always end up on a 16-inch center because more often than not, the location of the plumbing pipes coming up through the slab are in the way and the studs have to be adjusted to fit. It’s always a good idea to find the studs before you buy the shower grab bars so you can be sure to get an appropriate sized shower grab bar that will end up hitting two studs. In some cases, I’ve had to turn the grab bar at an angle to ensure it lines up with the wall studs correctly. Check your local building codes, as the grab bars must be horizontal and a designated height in some jurisdictions.
My Stud Finder is Sandwich Powered
A lot of people use electronic stud finders to help them find well-disguised wall studs located behind the tile. They work especially well when you have to attach a grab bar to an all tile wall. Because I built the house a few years back, I was pretty confident that I was going to find the studs with no problem. And seeing as how my dad the human stud finder was with me, I knew our chances to quickly find the studs were better than great. After all, my stud finder doesn’t need batteries; he just needs a sandwich every now and again to get the job done.
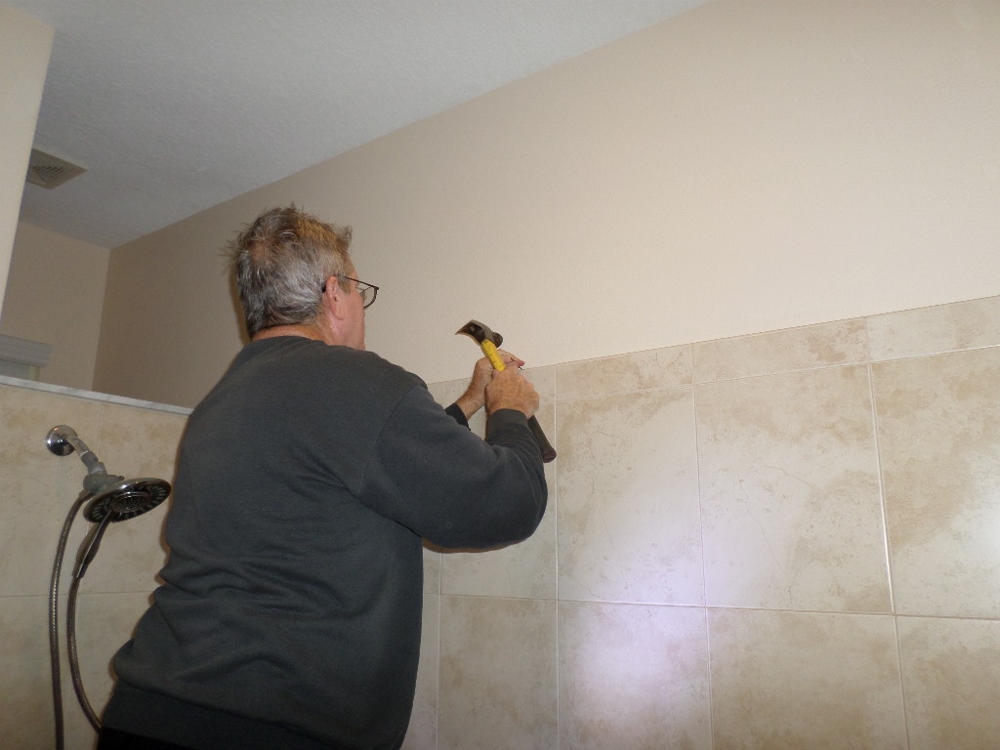
I prefer to do a little sound reverberation testing to find the studs, or as I like to call it knocking on the wall and listening to the change in pitch. Once we were fairly certain we found a stud close to where we wanted to install the grab bar, we stuck a little finish nail in the drywall above the tile to double check its location. After that, a quick measurement from nail to wall allowed us to transfer the marks to the exact location on the tile below.

After locating the stud’s vertical location, we measured down from the top of the ceiling to get a nice and level horizontal mark for the grab bars height. I don’t like to use a level because sometimes, the tile isn’t quite straight and even though the grab bar is level, it gives the illusion of being out of plumb. If you measure up from the ground, you’re going to run into trouble as well because more often than not, the tile floor isn’t the same level from one spot to the next. Once you’ve got your marks in place, line up the shower grab bar to ensure the shower grab bars screw holes match up with your marks on the wall.
Little Bit, Little Bit Let Me In – Not by the Hair of my Chiney Chin Chin
One of the most annoying types of drill bits to me are ceramic tile drill bits. They cost way more than they should, they wear out too fast and I end up having to buy one of them for every grab bar because they get dull so quickly. Yet they are essential to a grab bar install that involves drilling through tile. Don’t try to do it with a masonry bit or else the tile will crack—I know; I learned that mistake the hard way long ago.
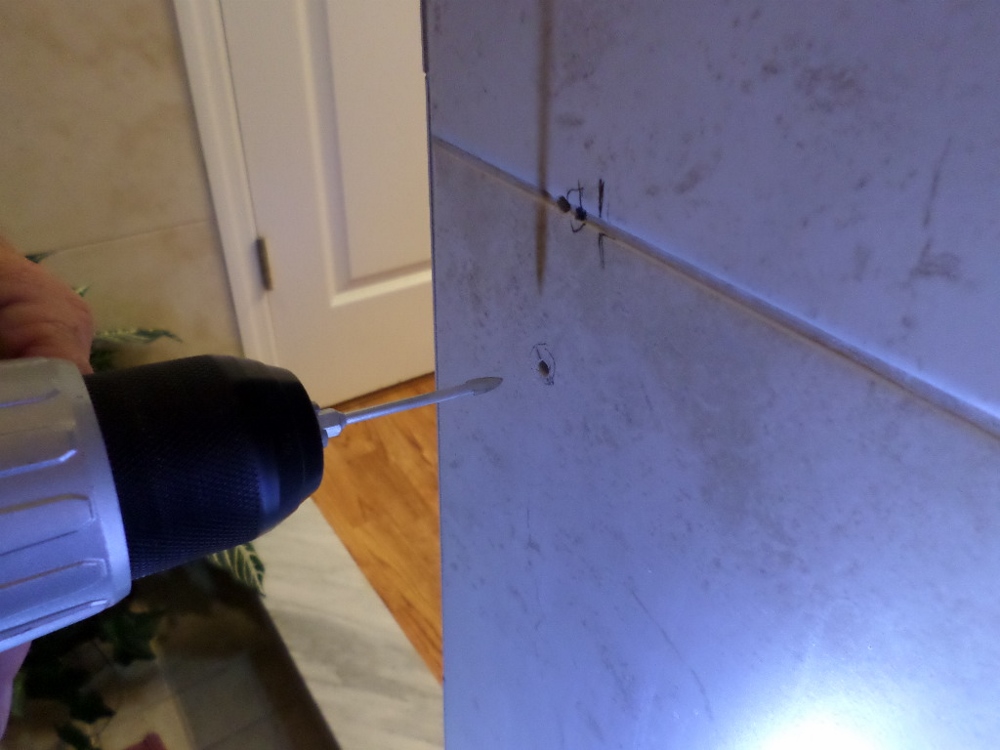
Also, it’s a good idea to put a towel down to catch not only debris, but it gives you a safe place to rest your tools so you don’t scratch the tiles on accident. Besides, a nice fluffy towel or two feels pretty good under your knees during the install. Not to mention it works great for drying off after someone turns the shower on you as a practical joke. (Thanks Dad)
Escutcheon is not Spelled like it Sounds
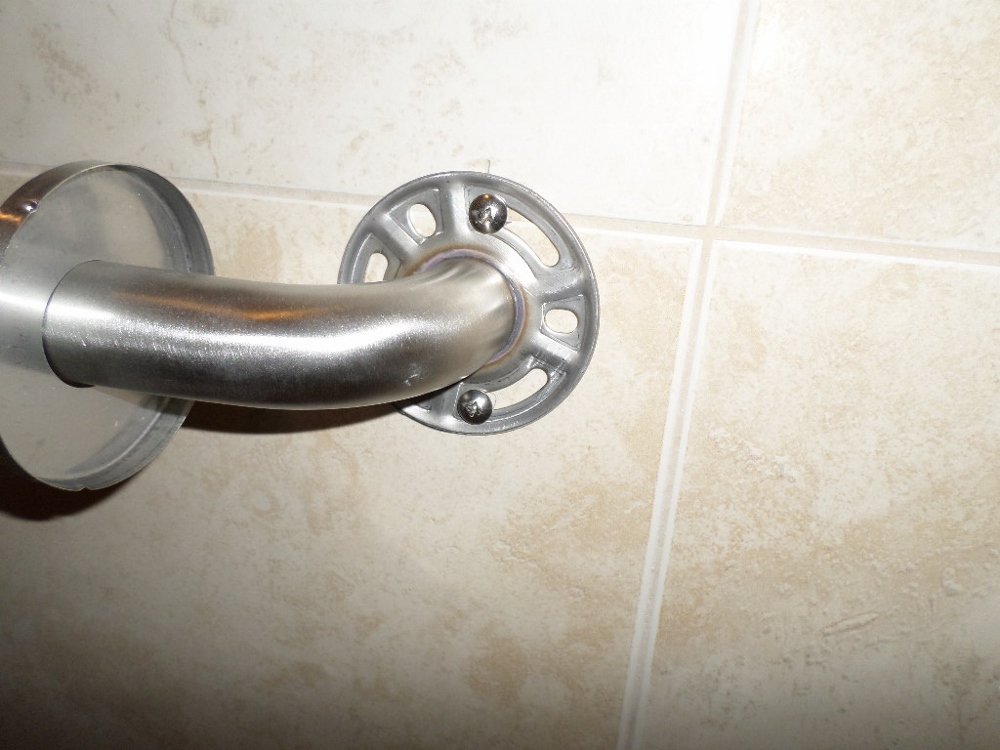
We got lucky and the provided screws were long enough to go into the stud deep enough to give it a firm grip against the wall. I used just a dab of caulk to fill each hole before I screwed on the shower grab bar so in case the escutcheon plate didn’t do its job of protecting the screws from water, the caulk would be back up. This weird word “escutcheon” should be spelled like it sounds: eh-scut-shun. Once the screws were snug on each side of the grab bar, I tested it out by putting all of my weight on the grab bar. After that, those crazily-spelled escutcheon plates get pushed back in place with a nice tight fitting snap. A quick wipe down with a rag and we were on our way to get the stud finder another sandwich.
You can find a wide variety of Moen grab bars options on Amazon, where prices range from $6 to $35 for most models and finishes. Shower and bathe safely my friends!


there is no way to install an 18 inch bar on 16 inch studs without angling the bar. that’s because the 18 inches is measured from center to center of the mounting flanges. don’t believe me? look at the spec sheets. delta is especially bad about this.
Bar length is based on center of grab bar, be sure to consider distance between screw holes on flange.
Moen makes a Securemount system for installing grab bars without two studs.