

Fast! Easy! Simple! No, I’m not reminiscing about my first girlfriend, I’m describing the Simple Scribe scribing tool. It’s a one of a kind tool that’s useful for all sorts of projects ranging from cabinet installations, flooring projects to sink openings and more. But what’s really great about this neat tool is that it fits nicely into my tool pouch and it even doubles as a backup pencil. Read on for a tool I can only describe as marvelous!
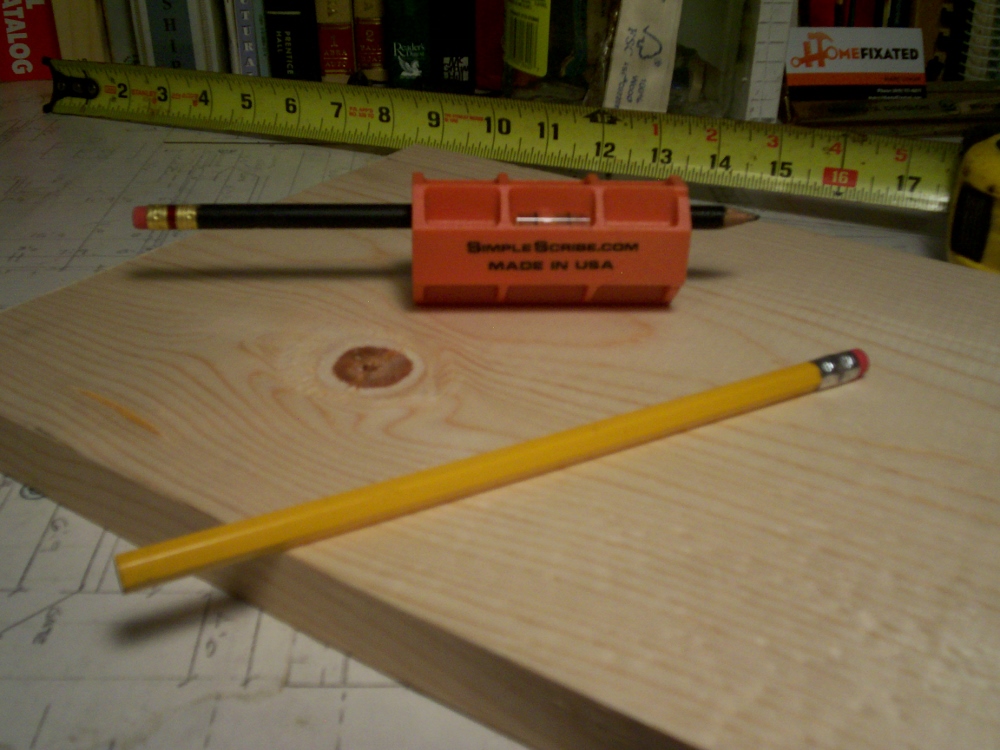 I wasn’t sure where to start with this tool when it first arrived. It came in a box with a very nice pencil inserted snugly into the end. At first, I thought the pencil might be glued in place because it was lodged into the orange oddly-shaped tool so tightly. I dared not pull it out. I found out later that the pencil is actually threaded in place to prevent it from slipping. The threading also lets you easily feed more through as you sharpen the pencil.
The tool simply read “SimpleScribe.com” on its side, along with a proud “Made in the USA” logo blazing underneath the company logo. I decided I needed to look up the website for myself and see how this oddly shaped tool really works. That’s when I started to get amazed.
Scribing Wall Paneling, Skins, Cabinet Hinges and Building a Base Cabinet
When installing wall paneling, you always end up fighting the contour of the wall by shaving a little off here or a little bit there. Not with the Simple Scribe. It lets you scribe in different measurements up to an inch so you can contour just about any uneven surface and make the cut tight and right, all without making multiple mistakes in the process. It’s a huge time saver and results in a very professional fit.
Marty Crochet takes you through the many uses of his unique invention in the website videos. Being a self-employed carpenter, he created the tool simply because he needed an easier way. When he invented it, it made things that much simpler, and other tradespeople were clamoring for a version they could buy. His creativity proves the old adage once again: necessity is the mother of all invention. Take a look at the video found here at the Simple Scribe website for wall paneling. The beginning of the video gives you a great overview of how the tool works and what it can do for you.

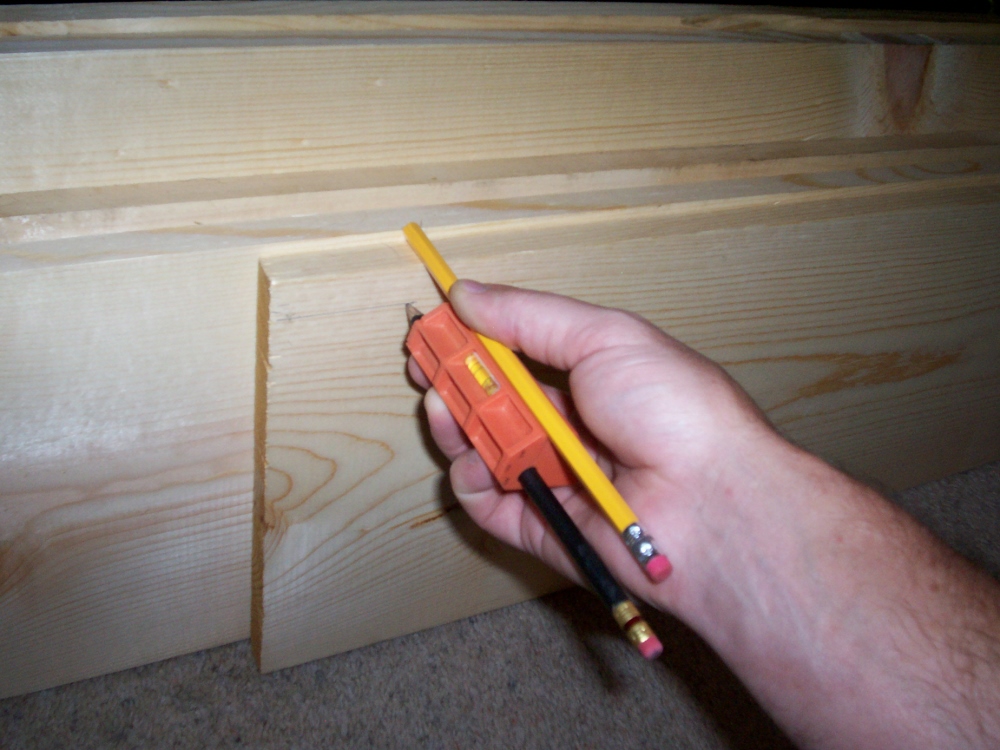
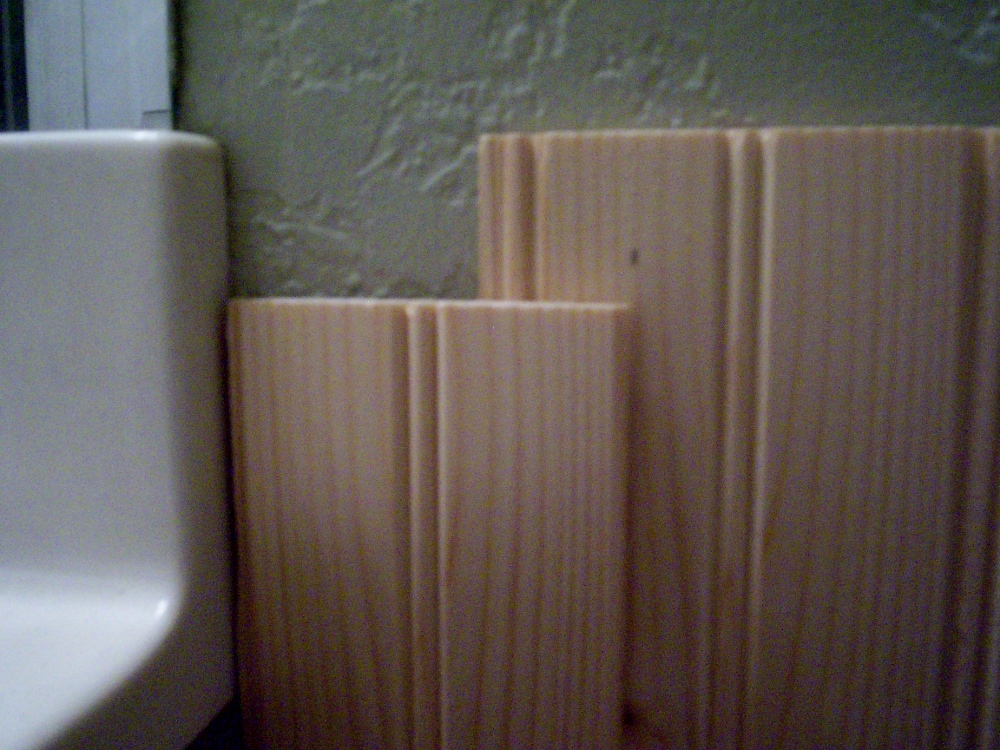
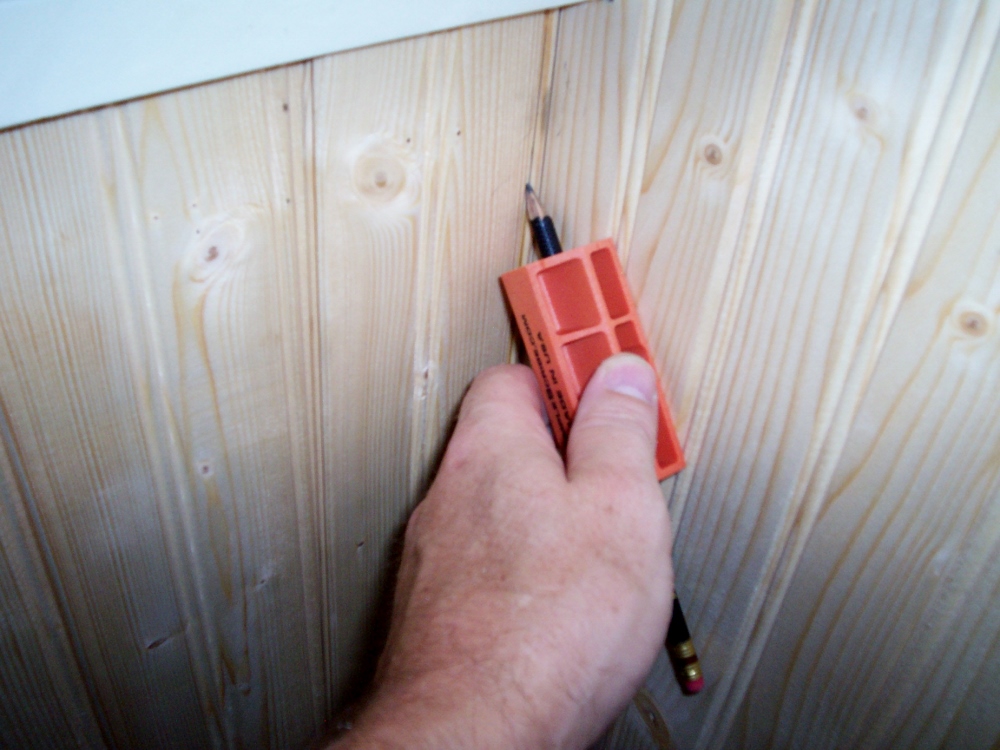
I found it very useful for the recent beadboard wall panels that I installed in my bathroom. The process was simple once I got the hang of what I was doing. First you have to make a top and bottom mark and connect them to make a reference line on the wall the width of your panel. I used the back side of the board to make the mark. Then you back-set the line ¾” so I had plenty of room to use the scribing tool on the opposite side of the board.
Next, I flipped the ¾” side of the Simple Scribe to the wall and pressed the beadboard onto my ¾” reference mark. Zip! I scribed the side in a couple seconds with perfection. Once I cut the mark using a combination of my table saw, miter saw and coping saw, it fit perfectly against the wall. Simple Scribe success!
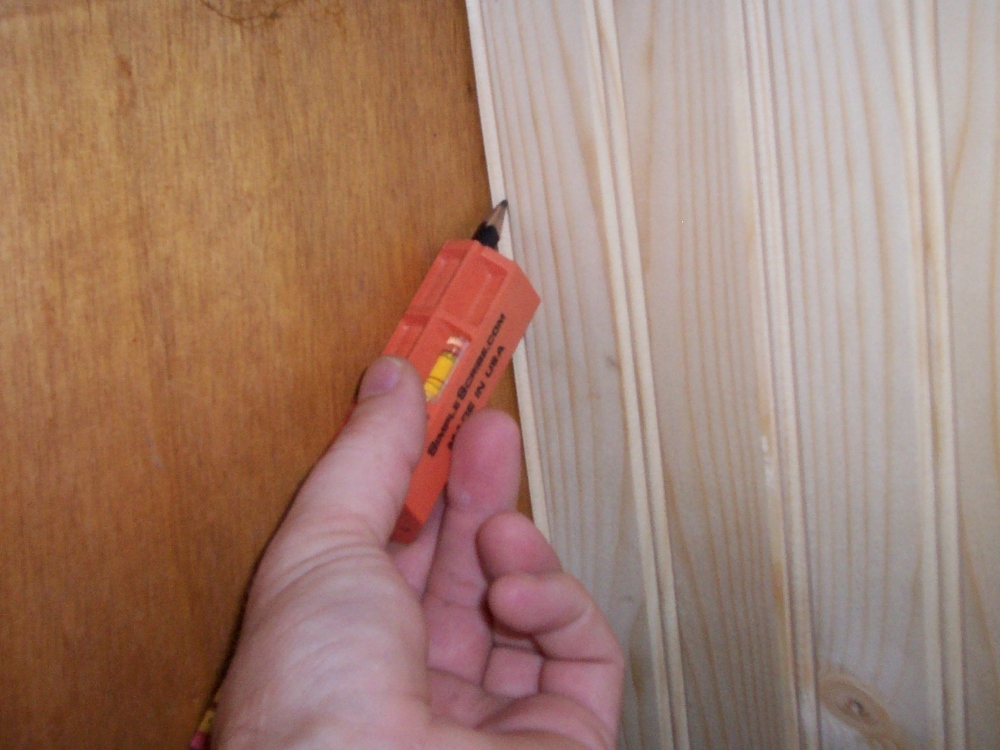
I also covered my old vanity cabinets with beadboard as well. I used the Simple Scribe the same way to scribe the odd curving edge along the backsplash of my vanity. Again I used the ¾” side. It seems to be the ideal one to use for those common “against the wall cuts”. My natural instinct was to use the flattest side of the Simple Scribe, but come to find out, that’s the ¼” side and it didn’t really provide enough margin to cover the variation in my particular application. Make sure you select the distance that works best for you project. Some projects require more margin to account for larger variations.
The videos about the base cabinet installation, hanging cabinet doors and top cabinets are really detailed. They show you how to build all of the cabinets from scratch. I think Marty does a better job of demonstrating how useful this tool really is than I could ever do – after all, he did invent the Simple Scribe.
Simple Scribe for Installing a Countertop, Sink, Top Cabinets and Floor Templates
Just when I thought the Simple Scribe could do it all, there were even more tutorials that showed me just what I’d been missing all these years by not having this nifty tool in my tool pouch. It works fantastic for installing countertops and even cutting out sinks. It also works like a champ for creating floor templates for laying linoleum. And like frosting on the cake, it has one more nifty little trick up its sleeve – it’s a torpedo level too. Heck, I bet it would work pretty well for rough framing projects; even though they don’t have a video for projects like those. I plan on trying to use the Simple Scribe with my next conventional framing project to see whatever other tricks it has up its sleeve.
 All in all, the Simple Scribe is a handy tool to have. It’s highly portable and it’s not all bells and whistles – it actually does lots of stuff while remaining cleverly simple. In a way, it kind of reminds me how useful a speed square is and yet it has no moving parts. Sometimes the simplest designs are the most useful. And for a retail price of $9.95, you can bet that it’s well worth the price to keep one or two lying around your workshop, stuck in your work van or stuffed in your work bag. Order one here, watch a video or just read Marty’s story, but either way, it’s well worth checking out.
How to Order the Simple Scribe
You can order the Simple Scribe directly from SimpleScribe.com for just $9.95 each.
If you’re a retailer looking to purchase Simple Scribe wholesale, please visit our hosted Simple Scribe Wholesale order page.
Editor’s Note:
I thought this review warranted a little additional disclosure. I first spotted Simple Scribe at the National Hardware Show a couple years ago. Marty and I stayed in touch and he sent us a couple Simple Scribes to check out. I gave one to Eric and asked him to consider it for a review on HomeFixated (assuming it met our standards for being recommended to friends). While Eric was reviewing the tool, Marty contacted me about helping him with distribution and sales for the Simple Scribe. That’s not something typically in my job description, but I felt the Simple Scribe was such a great tool, it made sense. Marty and I came to a compensation agreement, and I’ll be attempting to help get the Simple Scribe wider distribution both wholesale and resale. Bottom line, I think the tool is so great, I’m stepping a bit out of my usual role to try to get it exposed to the broader market.
-Marc


I ordered one and it is everything that was said about it. Simple and easy to use with many undocumented features, like the hole that is centered on the bottom side. Wish I knew what that was for…
So Doug, let me dispel the mystery. When the Simple Scribe was first designed it was intended to have a set screw to secure the pencil in place. That was replaced by the threaded design, however the set screw was still built into the mold and thus remains on the tool. While I wish it was some awesome secret feature, it’s more a legacy of early design. But if you find a cool use for it, let us know! 😉
These look great, where can I buy them in the UK?
Thanks Steve. Unfortunately, I don’t think Simple Scribe has international distribution setup yet, but stay tuned!
Next version could have a pencil sharpener on board. Seems to be enough space for that.
Good thought Jeff. The pencils actually thread / screw into place, so putting a sharpener on the tool itself probably isn’t real desirable since you’d have to unthread the pencil entirely each time you need to sharpen it. It does come with a level vial integrated though. 🙂