

If a picture is worth a thousand words, an emoji is worth, well, still only one emotion. But that one emotion is worth a thousand words. So, tuh-may-toe, tuh-mah-toe. Emojis, smileys, emoticons, kaomojis, emotive pictographs; whatever you call them, these playful text accoutrements have found their way into and onto pretty much every aspect of modern culture (they’re even movie stars now). Today, we bring whimsy to the kitchen with the irresistible cuteness of emoji magnets. It’s easy, it’s fun and it’ll save you the grueling hassle of laboriously spelling out entire words like a played sucka. 😀
In Print, Get It. I’m Not ASCII-ing You – I’m Telling You
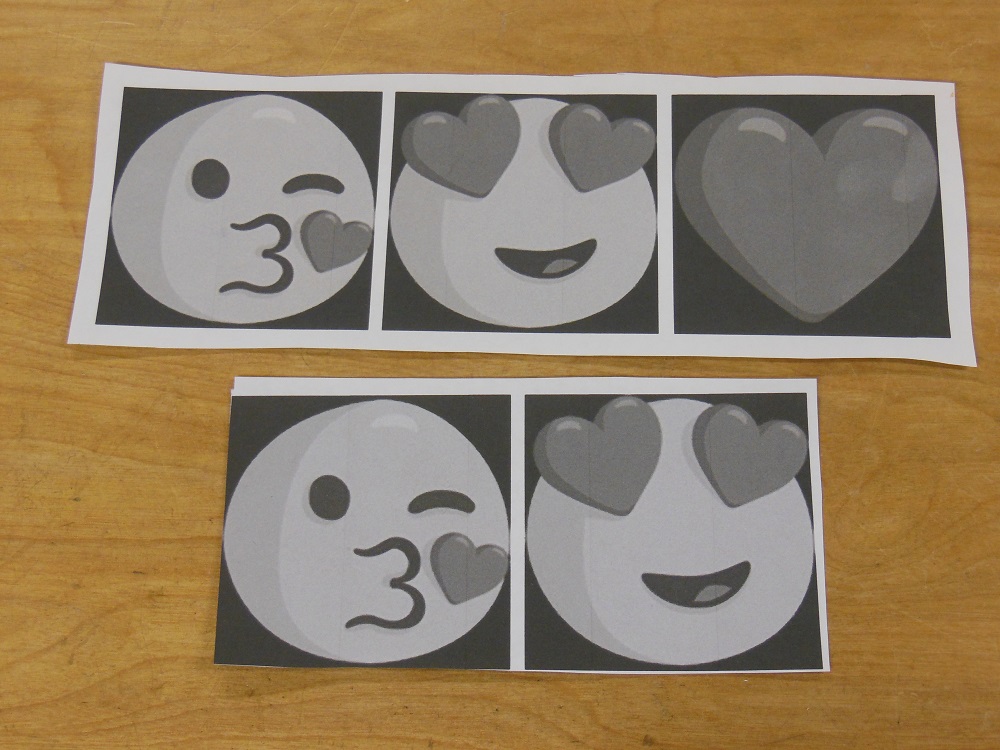
The first step is to print out your favorite emojis. A quick Google search will turn up sites like https://getemoji.com/. Copy the ones you want and paste them into your favorite image program. Size as needed, then print.
The print-out is our cutting template. For emojis that have details (such as faces), print a second copy as a pattern for the eyes, mouths and other features. (-_-)
Cut And Paste
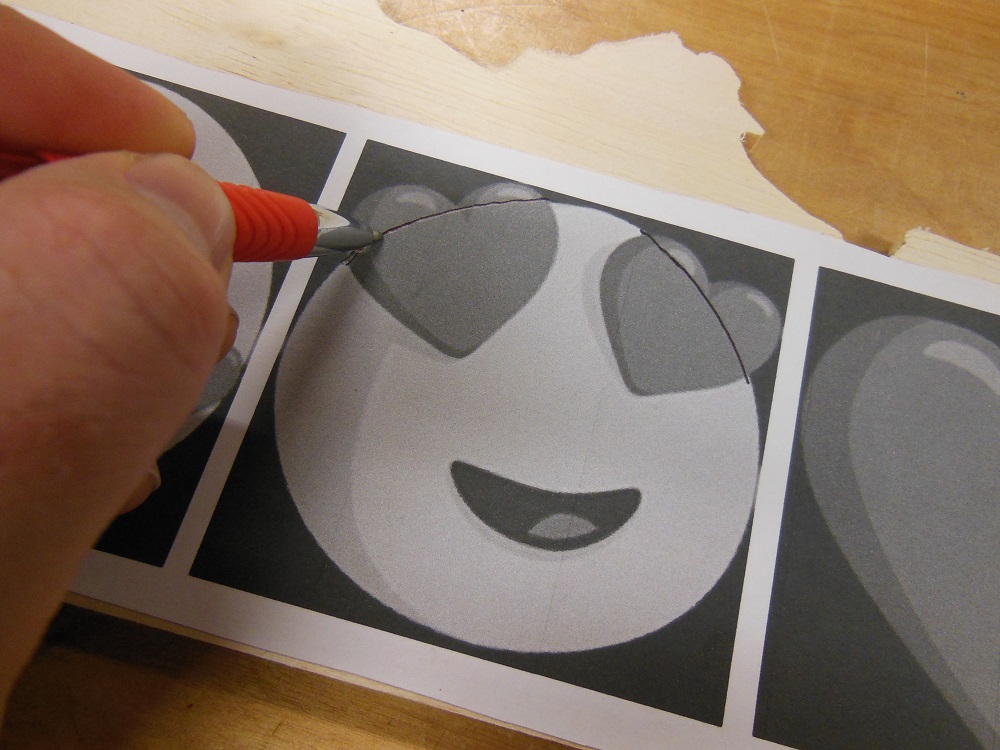
Coat the back of the pattern with spray adhesive, let it stand for 15–20 seconds, then adhere it to your material. In this case, I’m using 3/16” plywood. Cut out the shapes with a scroll saw or coping saw.
Transfer The Feature Locations
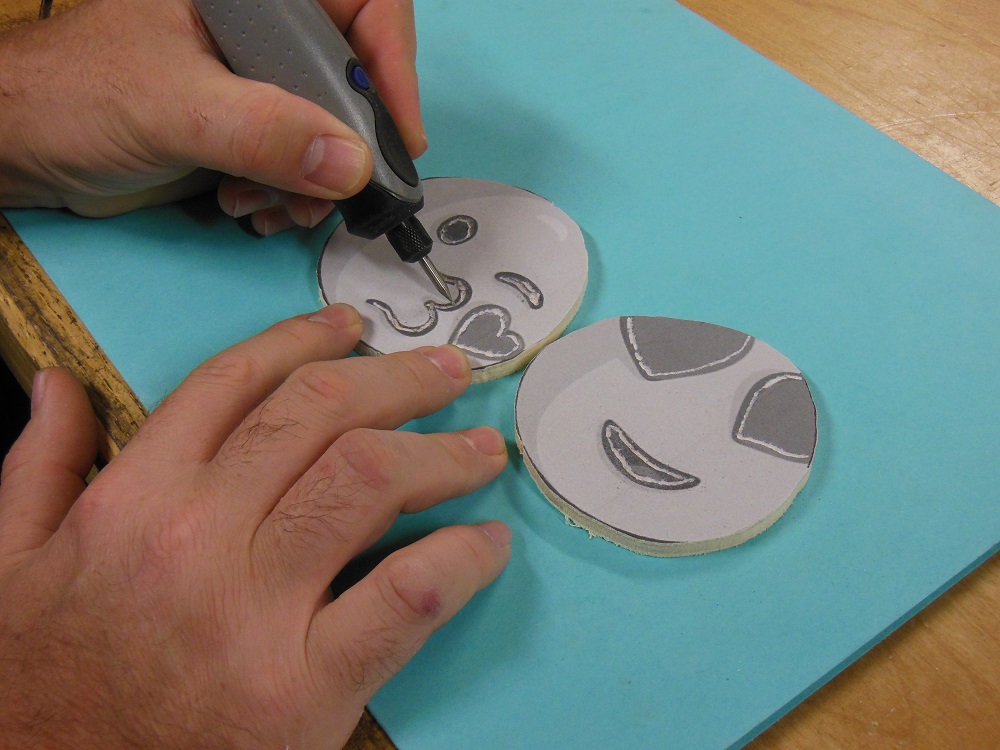
Next, score the underlying material with an X-Acto style razor knife, scratch awl or by tracing heavily with a ball point pen so that you can accurately position the features once the patterns are removed. You want some sort of mark or indention that won’t be lost when painted. Here, I’m using the Dremel Stylo+ (a future Home Fixated tool review) with an engraving bit to gently score the surface of the emoji heads.
Stay slightly inside of the lines. That way they’ll be hidden once the features are applied.
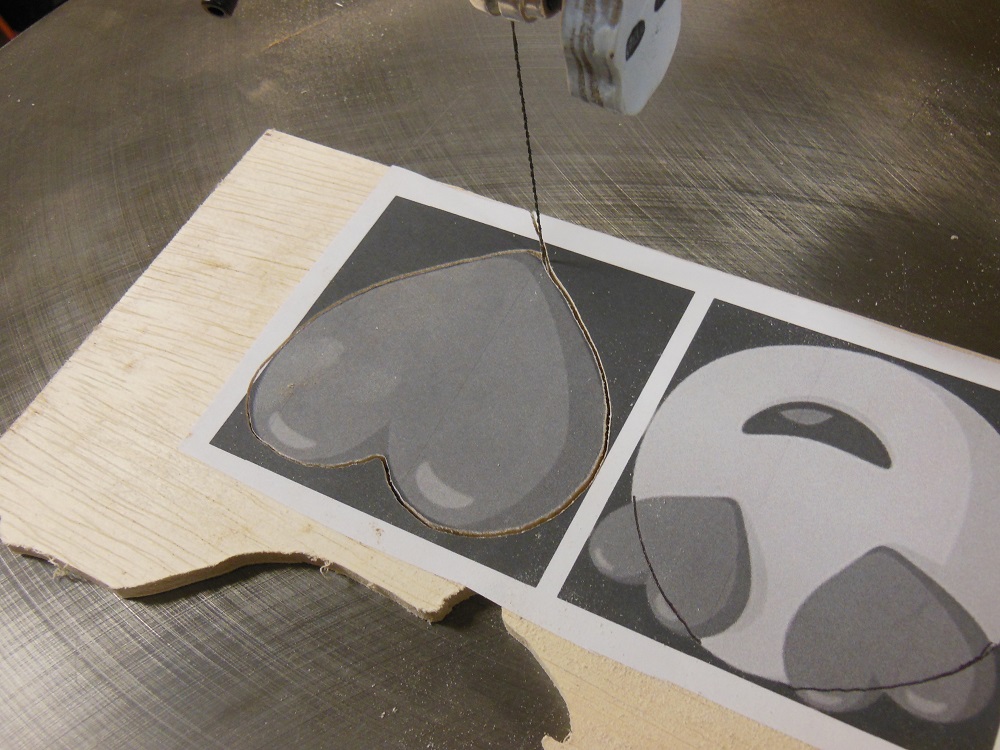
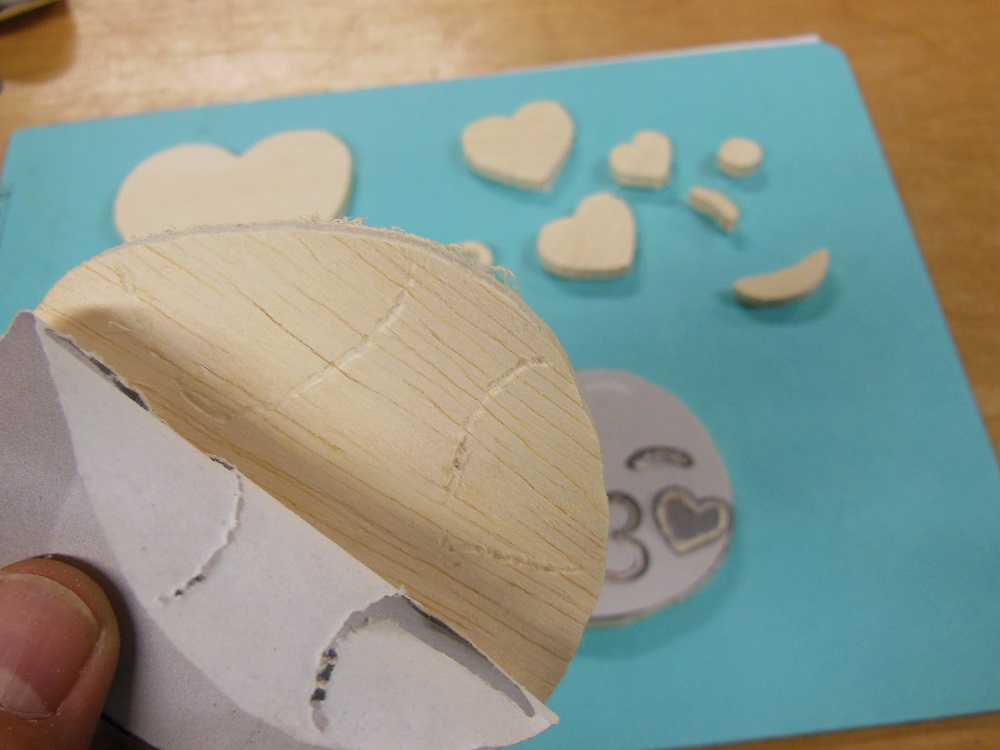
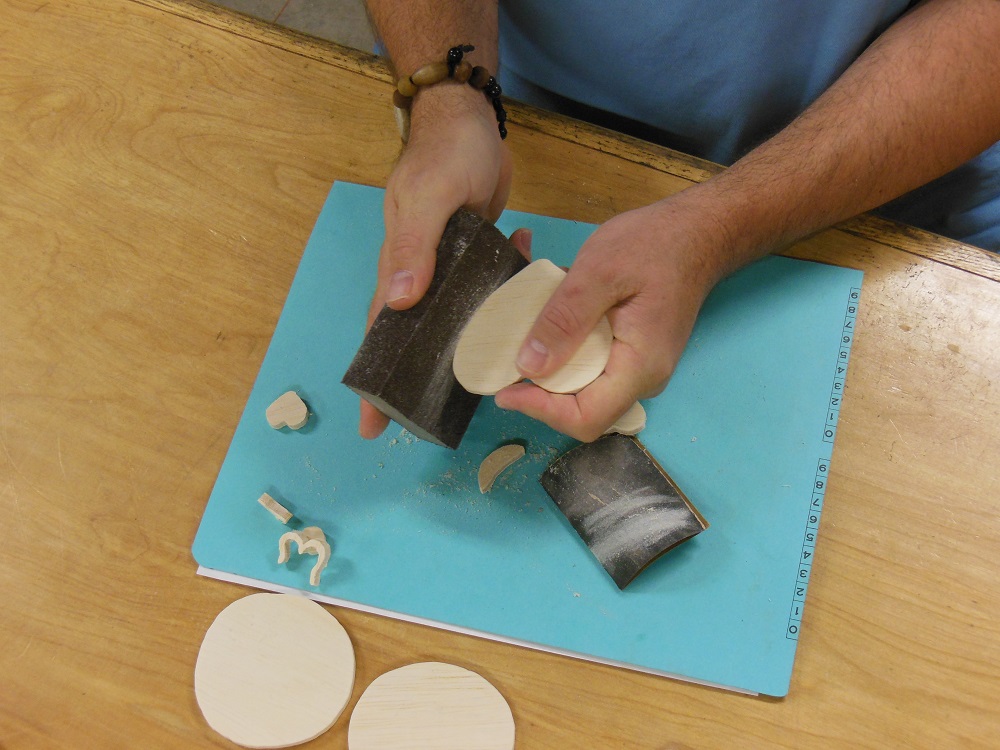
Remove The Patterns And Sand The Edges
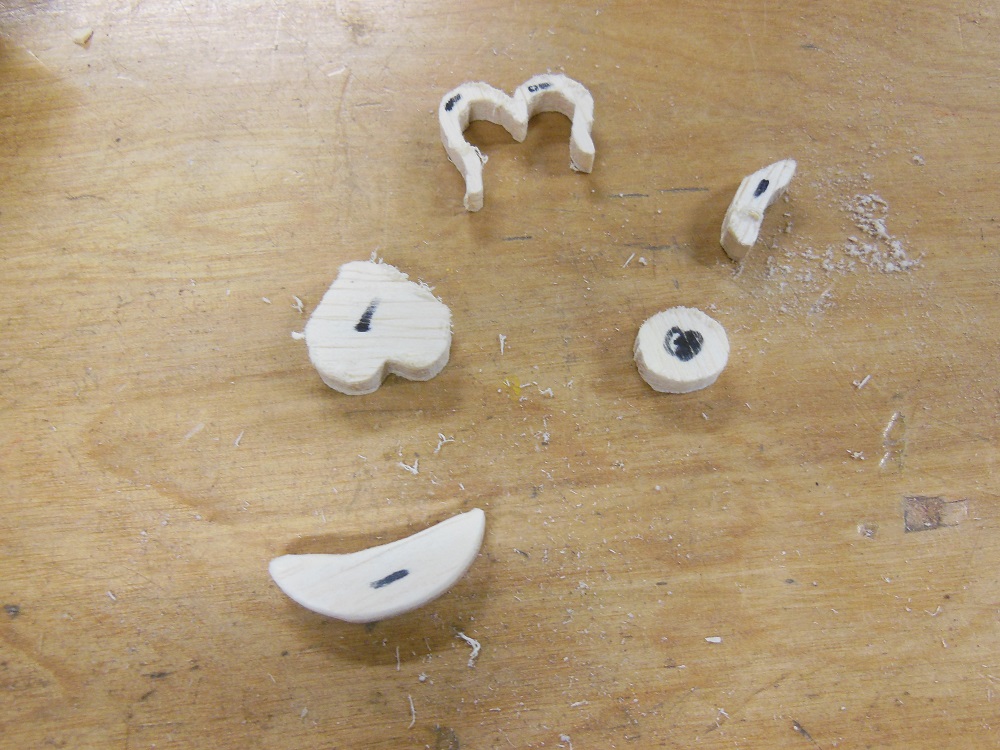
Mark the backs of each piece then peel away the patterns and sand everything smooth. Each of my parts took a minute or less. Most of the work was along the edges. Especially the bottom edges, where the blade exits the cut.
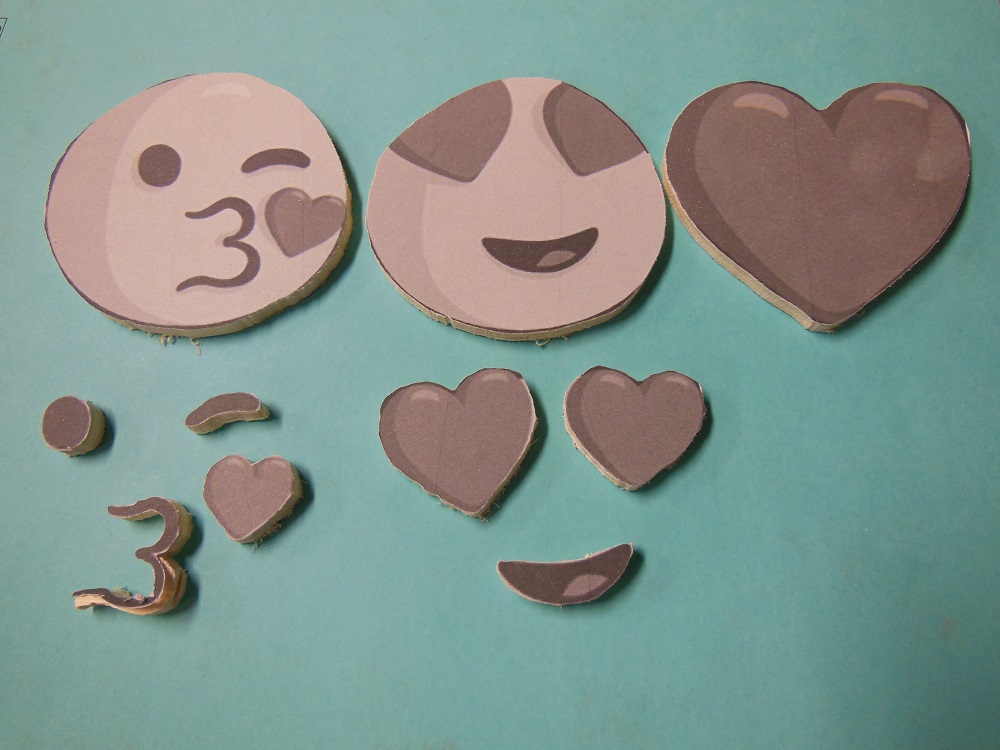
Colors Worth Smiley-ing About 🙂
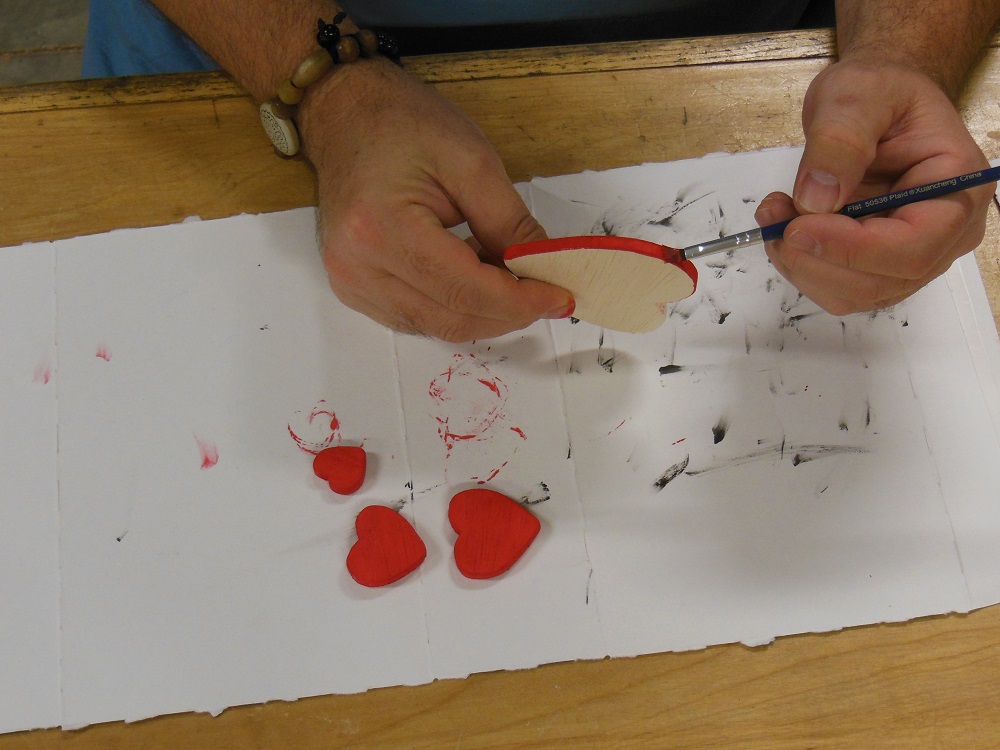
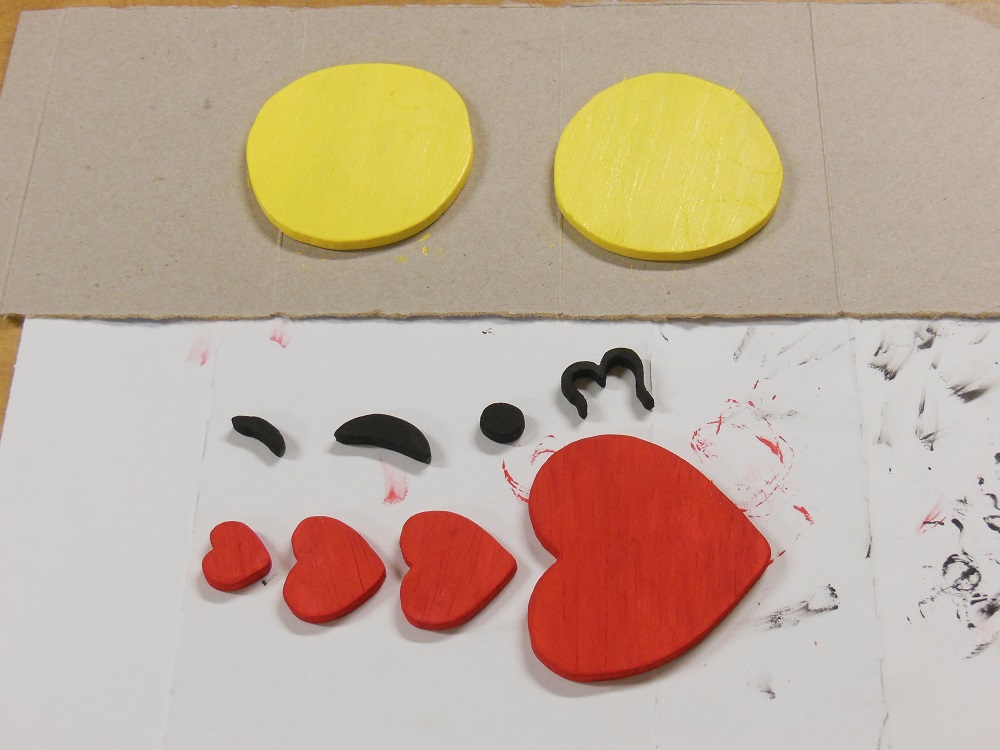
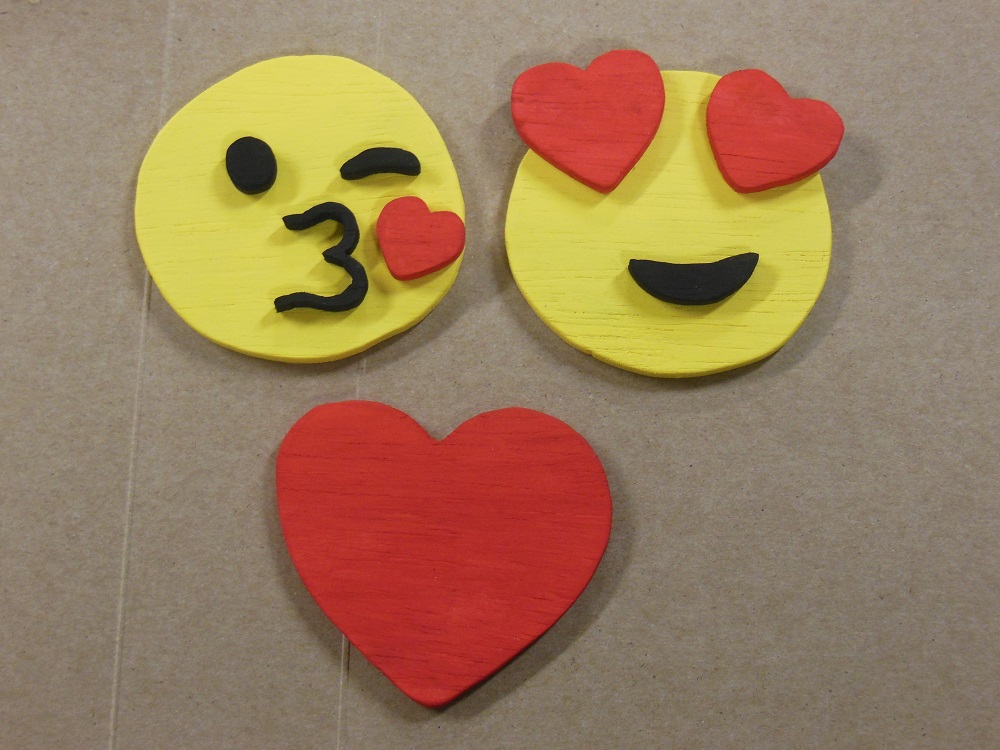
What’s an emoji magnet without color? I’ll tell you what it is: boring! To make my emojis the vibrant emotive icons they’re intended to be, I colored them with acrylic paints. They leave a surface that’s easy to glue to and dry quickly, allowing me to move on without much of a wait.
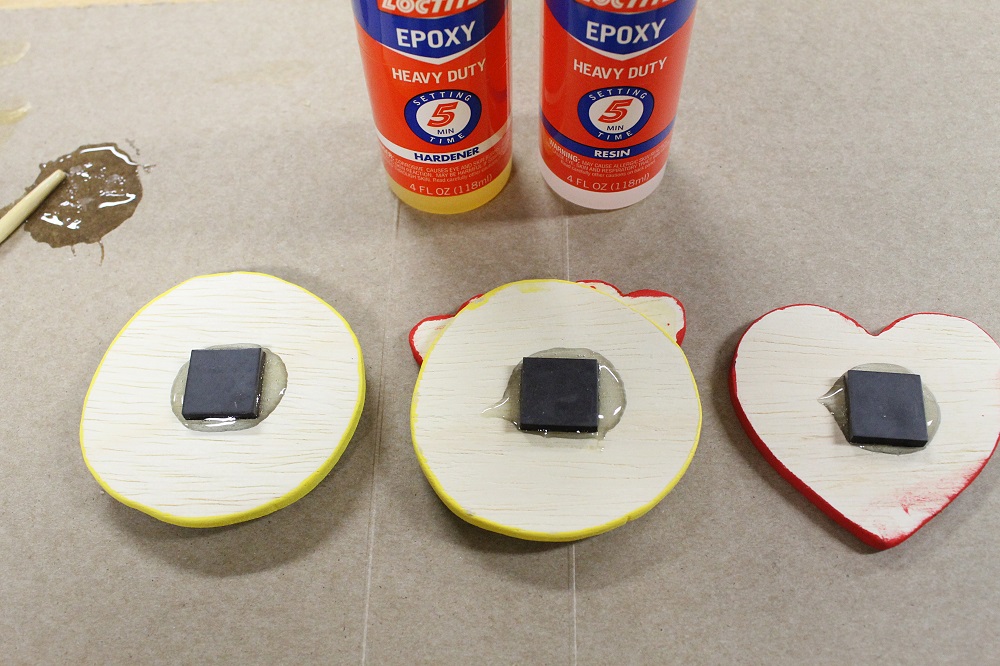
All Glued Up And Ready To Go

Put a little glue on the backs of the feature pieces and stick them to the heads. No clamping necessary.
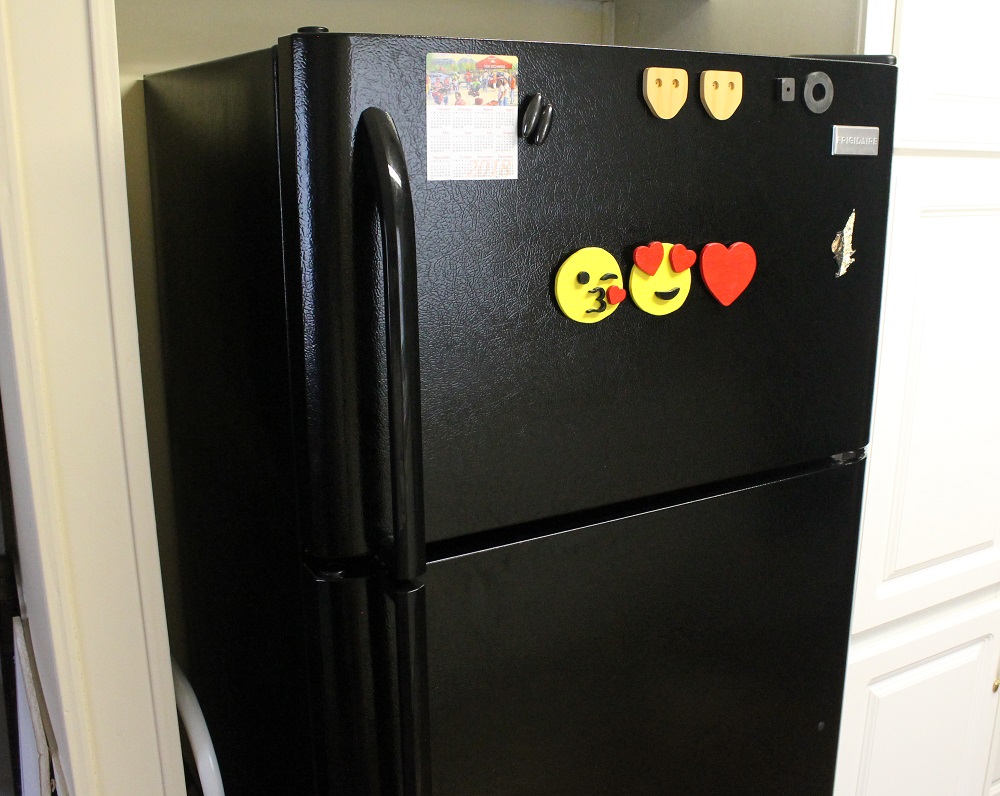
Make Your Emoji Magnets More Attractive
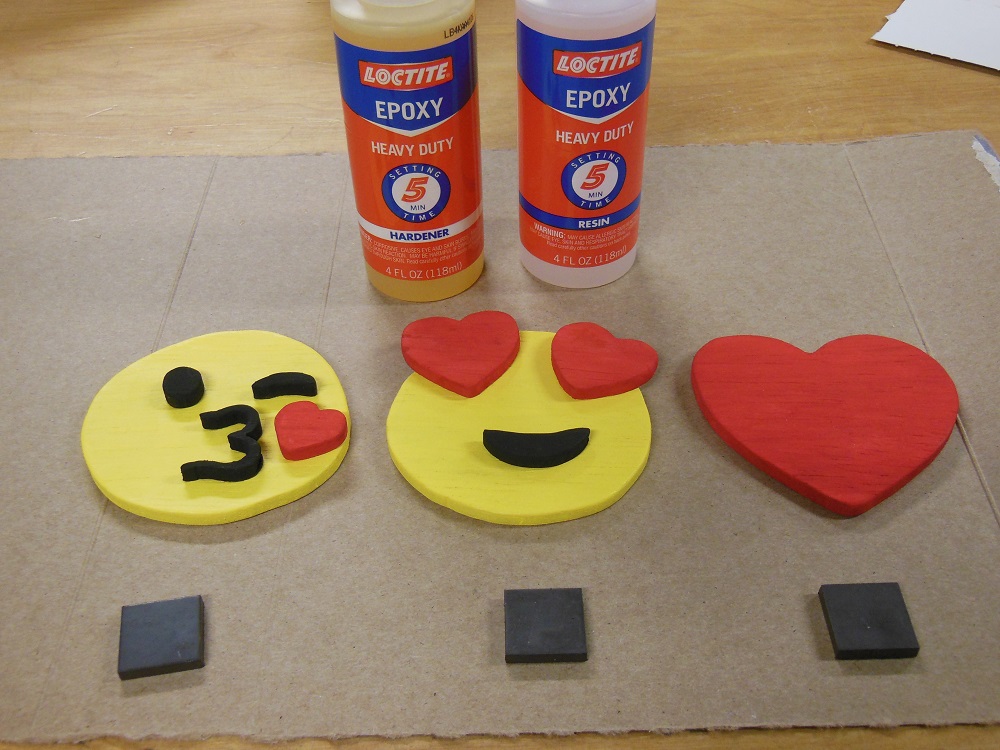
Not to make you blush or anything, but we at Home Fixated find you quite attractive! No, really. 😀 And we think your emojis should reflect your magnetic personality. Because, frankly, you’d look kind of silly standing there manually holding these things against the refrigerator all day and night. Especially at someone else’s house.
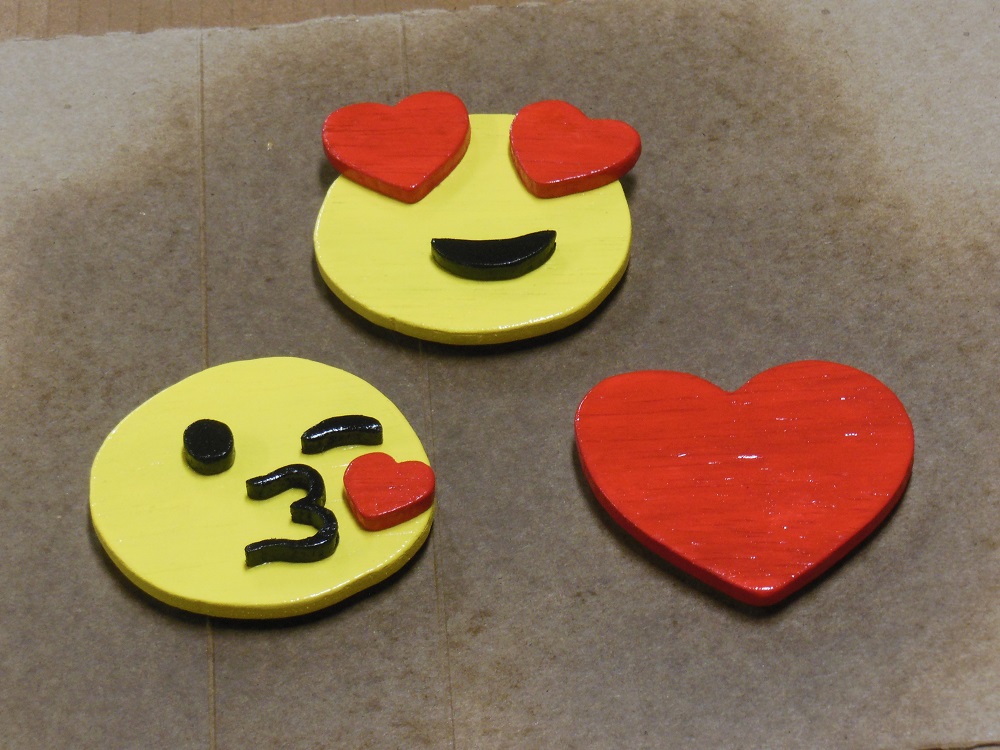
Know Your Poop Emoji From Shine-ola
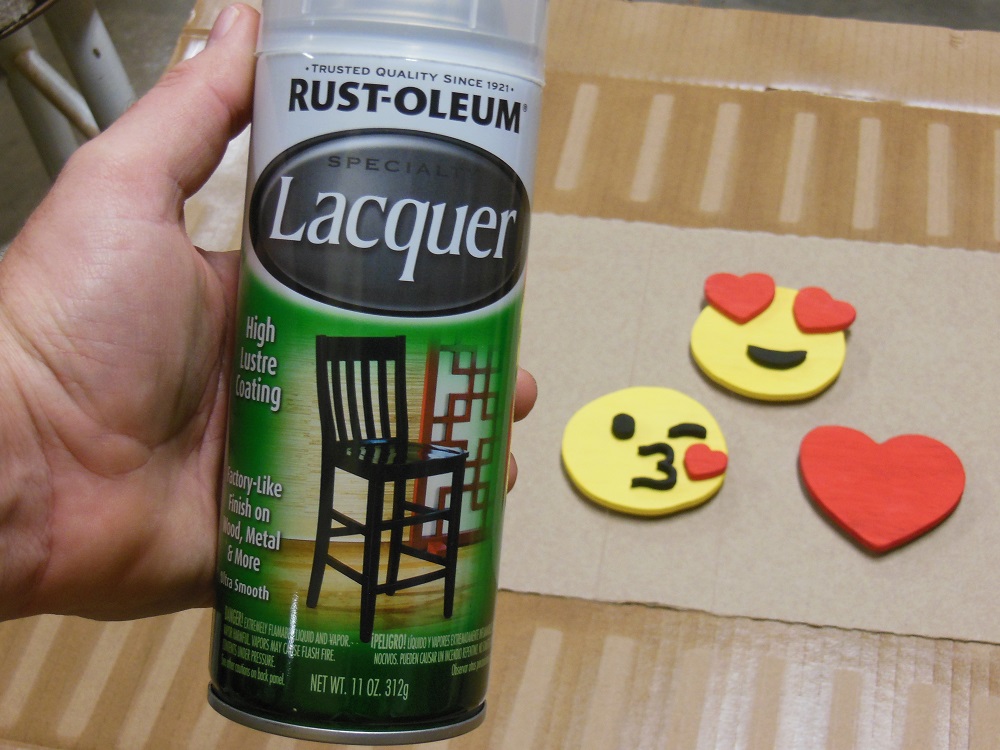
Give the front and back of your emoji magnets a few coats of your clear finish of choice.
You can see this build in action here:
What Emojis Will You Choose For Your Emoji Magnets? ¯\_(-_-)_/¯
Love them or hate them, you can’t deny the power of emojis to convey expression and intention, the subtle social cues that are often missing from the written word. Their absence can inadvertently turn a playful tease into a hurtful insult and your LOL into a WTF.
Granted, these emoji magnets may not do much for your next SMS conversation, but they’ll be there to remind that special someone that you’re thinking of them. Or, perhaps, to let them know what a frowny-face eggplant they’ve been lately. 😀
Wow, those are some cute emoji magnets. Really loved them. I’ve found some custom refrigerator magnets here: https://www.custommagnetsdirect.com/Custom-Refrigerator-Magnets