

As I gaze out my front window at all the pretty daffodils, in anticipation of summer, I can’t help but remember some high points from last summer. Unfortunately, it is but one, low memory, (and all its accompanying imagery), imprinted on my brain: that infamous day when I casually remarked to my husband, “Something smells funky.”
He offhandedly replied, “The dog probably got into something again”, and proceeded to hop on the mower and begin to mow the lawn. Not ten minutes later, the mower’s engine abruptly stopped, he unleashed a stream of cursing which made me thankful our nearest neighbor is a quarter mile away and I ran outside to see the mower sitting at an “odd angle”, with one of its front wheels seemingly buried. “Did you hit a woodchuck hole?” I innocently inquired. The pulsating vein on his temple seemed to speak of its own volition; “That’s no woodchuck hole…I’m pretty sure that’s the distribution box for the septic system.
The Situation (And I’m Not Talking Jersey Shore):
The cap to the box had broken, allowing sewage to seep into the lawn, creating an impressive sinkhole. At least we had isolated the source of the smell. No way could we blame this one on the dog. After making a couple phone calls to local septic-service companies (try Angie’s List.) and getting quotes from $600 to $1,000 and everywhere in between, we had to make an unpleasant decision. You will too, if you ever decide, (don’t do it), to go this route.
First, invest in a HazMat suit deck yourself out in heavy duty work gloves, clothing and boots you’re willing to burn and either a face mask, clothespin, or both. Dig out the distribution box on all sides to determine the size, design, number of outlet pipes, etc. Purchase a new box of the exact, same specs in order to minimize the already colossally, repugnant task ahead. The distribution box isn’t particularly costly; we got ours for around $50. The real price will be paid in sweat, loss of dignity and potentially, permanent olfactory damage.
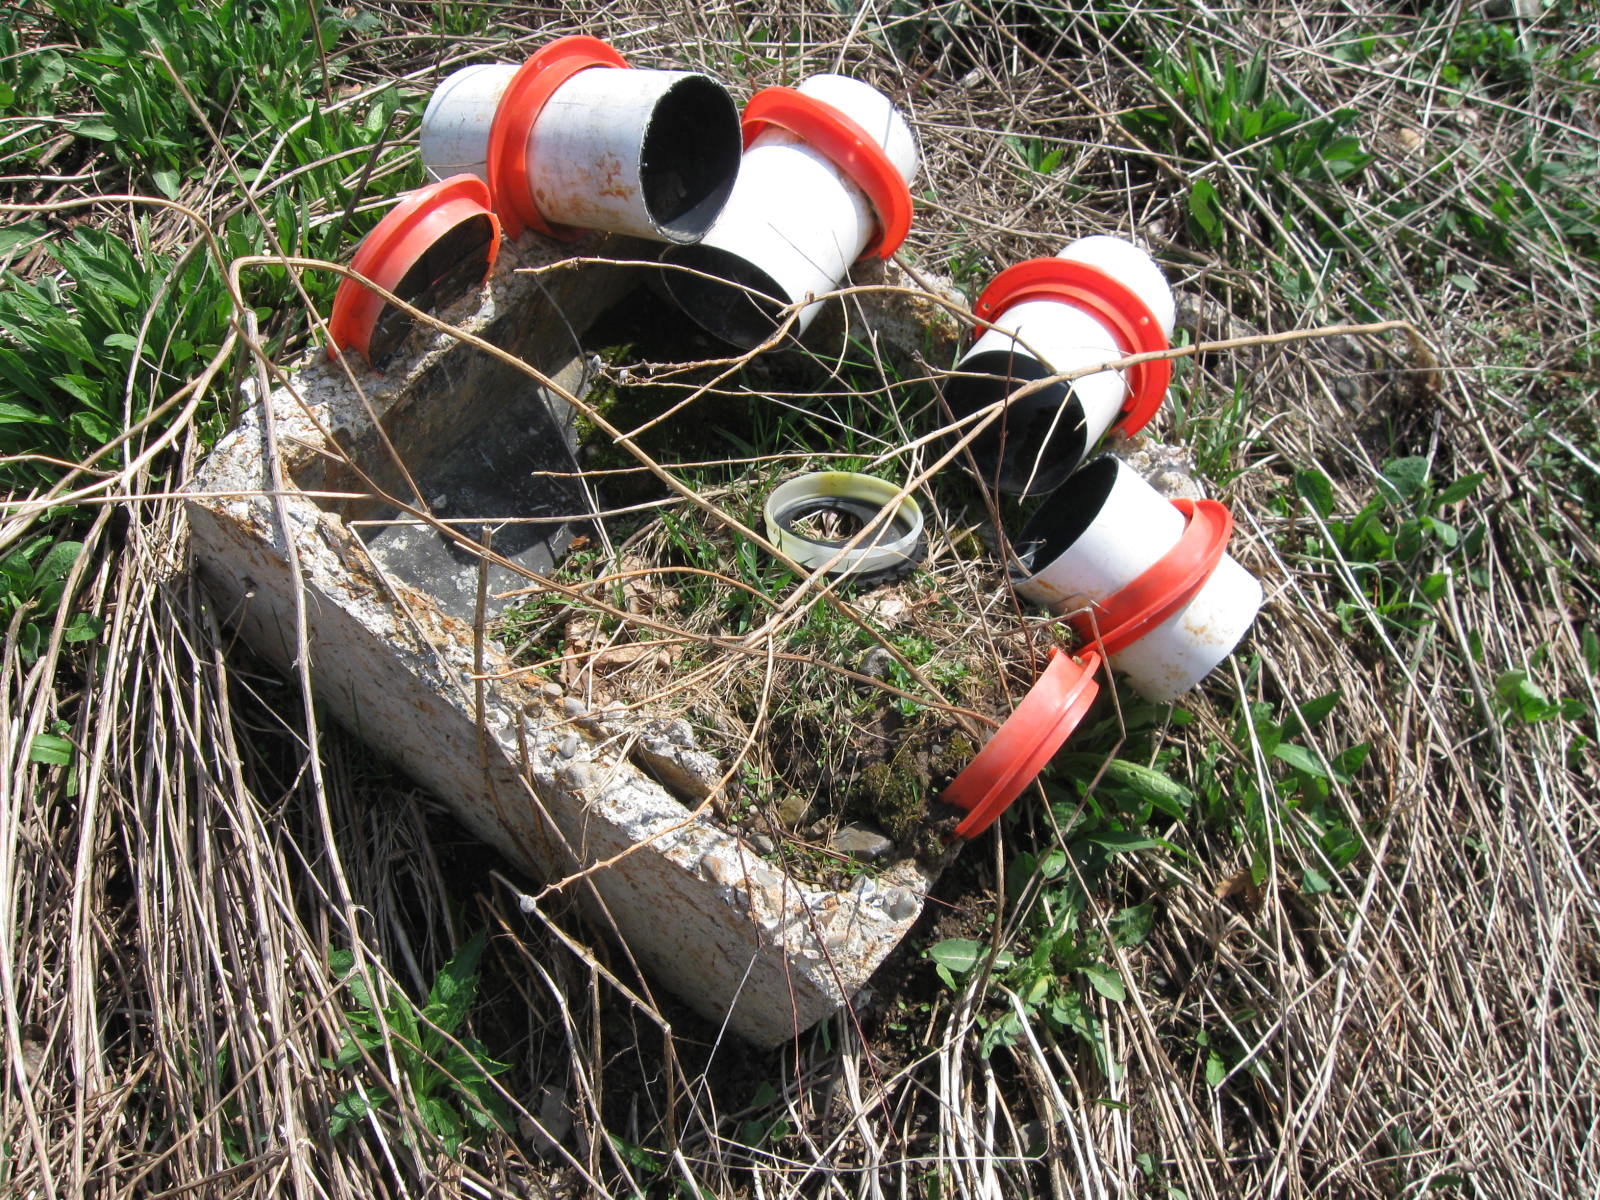
Next, cut the outlet pipe stemming from the sewer line to the distribution box and the outlet pipes stemming from the box into the leach field. We just used a hacksaw, as the pipes were PVC. At this point, the box is free, but with its concrete base, weighs about a metric ton, so break it into pieces with a sledgehammer for easier removal. This activity also helps redirect your focus from the overwhelming stench and general assault to the senses. Load the box into a wheelbarrow and get it out of the way.
A Side Note:
(In our continuing effort to “keep it green”, we dumped the old distribution box over the side of a hill on our property. We like to imagine small animals are repurposing the exposed pipes as winter shelter. Within another year or so, the whole thing should be completely, concealed by weeds and dandelions…it’s win-win!)
Now, place the new distribution box into the hole, being careful to line up all pipes to inlets and outlets. It’s important the box is sitting level. Why, you ask? Well, because the water should flow through each distribution pipe at a consistent rate. Otherwise, one or some of the pipe(s) get overused and break down quicker than usual. So, you also need to backfill the hole. Use gravel or crushed stone to ensure a stable, level base. Attach all pipes and fit sleeves over the joints for a nice, tight seal. We used a heavy, rubber, plumber’s sleeve.
Do a few test runs to make sure there isn’t any leakage and the flow rate is good; flush the toilet and run the sink or bathtub to get an idea. If all is working as it should be, put the cap back on and…bury that sucker! There should be at least 8-12 inches of packed dirt and sod on top of the box to keep it as protected as possible. (The elevation and grade of your lawn will dictate the amount of coverage necessary and/or possible.)
 Usually, I feel pretty darn, good and very proud of myself after a DIY project, but not so much in this case. I would happily eradicate this memory if I possibly could, but no amount of showering, shampooing, scrubbing or prayer has been able to get rid of it so far. So, here’s a bit of friendly advice from me to you: CALL A PRO WHEN YOUR PROBLEM IS POO.
Liz….. I just got the results of my septic inspection and in what seemed like 3D bright flashing Neon wording I read; “Distribution Box Failed due to unlevel placement and collapsed box walls.” So being a DO IT YERSELF kinda guy I thought I’ll do a little research first. 20mins after finding your story I am still chuckling. Beautifully Told.
Wish me luck……. I’m going in.
Phil (please send showers gel donations)
Hi Phil, did you receive quotes for this replacement or repair?
Wondering if you’re quote was in the same ballpark as Liz’s.
Thank you,