

We’ve all seen furniture and home accents made of pallet wood, with that rustic, weathered aesthetic. But where does this versatile material come from and how does one obtain it? For the uninitiated, refined pallet wood can simply be purchased from brokers, like The Home Depot. In its crude form, however, pallet wood is a natural resource harvested from the ore-rich veins of surface mines, colloquially known as “backs of stores.” Pallet wood can be dangerous to separate. But with a little knowledge, elbow grease and some simple tools, the hobby prospector can safely extract usable pallet wood from raw ore; no industrial chemicals or blast furnace required. Come along and we’ll show you how it’s done!
Mining Your Own Pallet Wood Ore
Pallets are great for keeping things off of the ground and making them “forklift-able”. But to a crafter, they’re even more valuable as a source of project wood. HomeFixated has done several articles on utilizing pallets for all kinds of projects. The rough wood has character, it’s dirt cheap or free (providing you break it down yourself) and, for the most part, can be used just like any other wood.
Sourcing your ore doesn’t require heavy machinery. Depending on the area, stores may pile them out back or toss them in the dumpster. But just because they’re behind a building, unguarded, doesn’t necessarily mean they are free for the taking. Some businesses reuse them or pay a deposit, which is credited back upon return. When in doubt, ask before taking. Otherwise, you may be stealing (or even trespassing).
My main local source is a chain flooring retailer that goes through dozens of wooden crates and pallets every week. They pile them out back and welcome scavengers like myself to haul them away, sparing them the headaches and costs associated with disposal. If you can’t find free-for-the-taking pallets out in the wild, check Craigslist and your local Facebook yard sale groups. There’s almost always listings for free or cheap pallets.
Cherry Pick The High Grade Ore
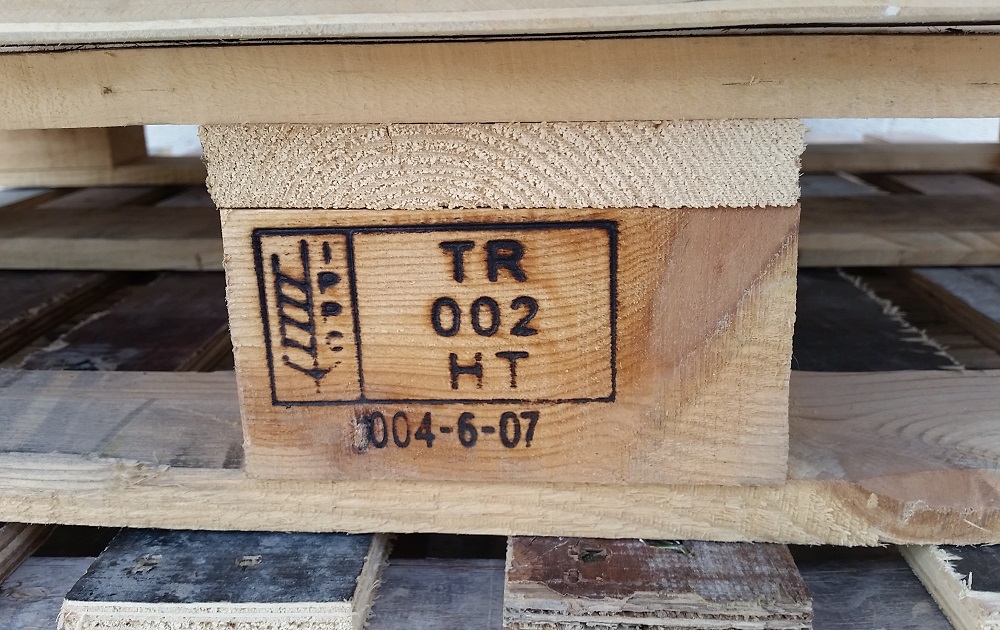
Not all pallets are created equal. Of course, you want ones with good, usable boards, interesting character and so on. But the ones that are best for you depend on your needs. However, there are some you should always avoid: those with excessive grime, for example. Painted pallets (often solid red or blue) are usually owned by specific companies or “pallet pools” and private possession may be considered theft. Pallets with oil stains or used for chemicals should be avoided. Others (usually marked “MB”) have been fumigated with poisonous methyl bromide pesticides.
For more information on identifying which pallets are most likely to be safe, review the segment “Which Pallets Are Palatable – And Which To Avoid” in our article “Make Your Own Pallet Wood Hall Table – An Easy Upcycling Project”.
Finally, avoid using any pallet wood for food-contacting projects, such as cutting boards, cheese boards and pizza peels. It’s not worth the risk to your health.
Refining Your Pallet Wood Ore
Now that you’ve mined your pallet wood, it’s time to begin the refining process. Extracting usable boards can be a dangerous chore if you’re careless; that’s no joke. You won’t come down with black lung, but if you dive in head first, it’s easy to sustain gashes, pinches and puncture injuries.
Let’s lower a canary into the mine shaft and approach this from a rational perspective. To help you quickly go from pallet wood to usable boards, we’ll share some tricks to make your upcycling and reclaiming adventures as safe and easy as possible.
The preferred approach depends on the pallet; and some require more than one line of attack. There is no one-size-fits-all solution. And no one tool can disassemble all pallets. Some factors to consider when deciding how to get the greatest yield and the least amount of breakage are:
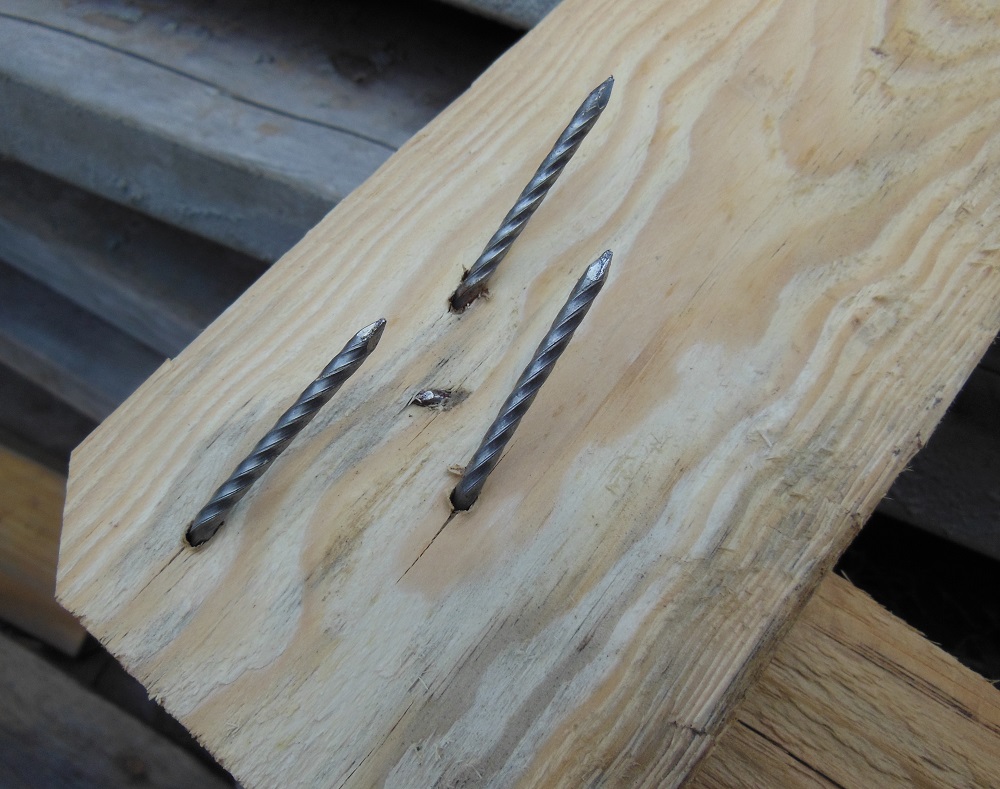
1) The number, size and type of nails. More nails, thicker nails and spiral nails add to the required prying force.
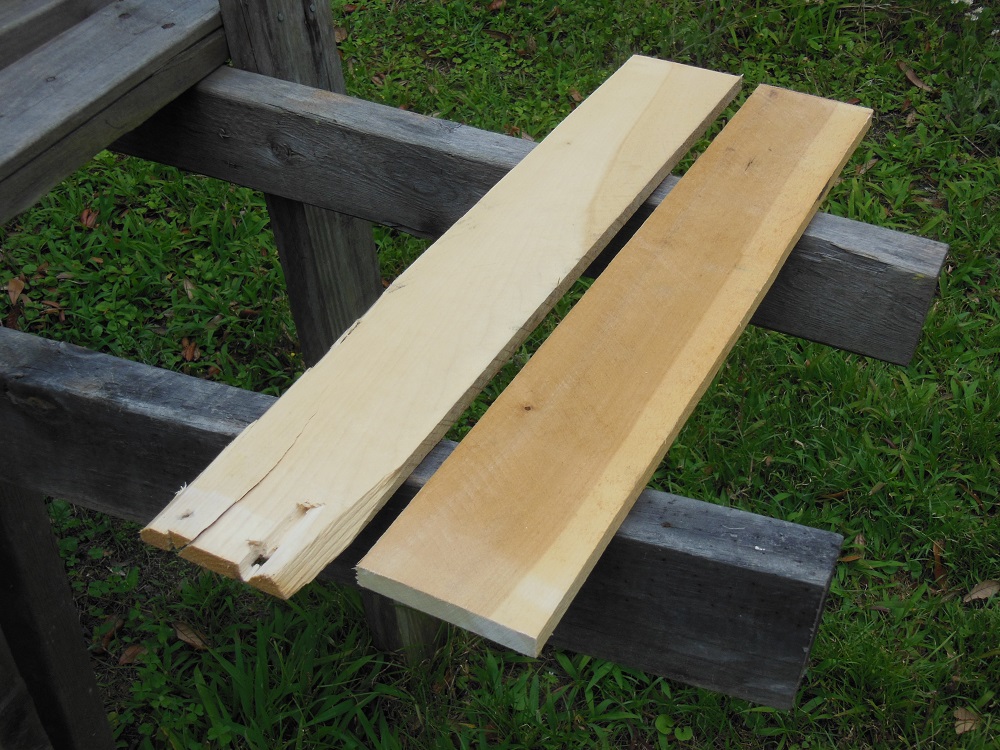
2) The species, thickness and grain of the wood. Thick oak pallet decks, for example, can usually be pried apart. But thin pine – or slats with bark inclusions or wonky grain – may break apart under the stress.
3) The pallet’s construction. Some pallets are built in such a way that they cannot easily be pried apart without breaking the slats.
You Got The Gold Mine – Don’t Get The Shaft

As mentioned previously, busting pallets apart can be dangerous. The most notable hazards are nail punctures, splinters and those self inflicted gashes, busted shins and crushed fingers caused by undersized pry bars. Oh, and explosives; let’s not take this cheesy mining metaphor too far!
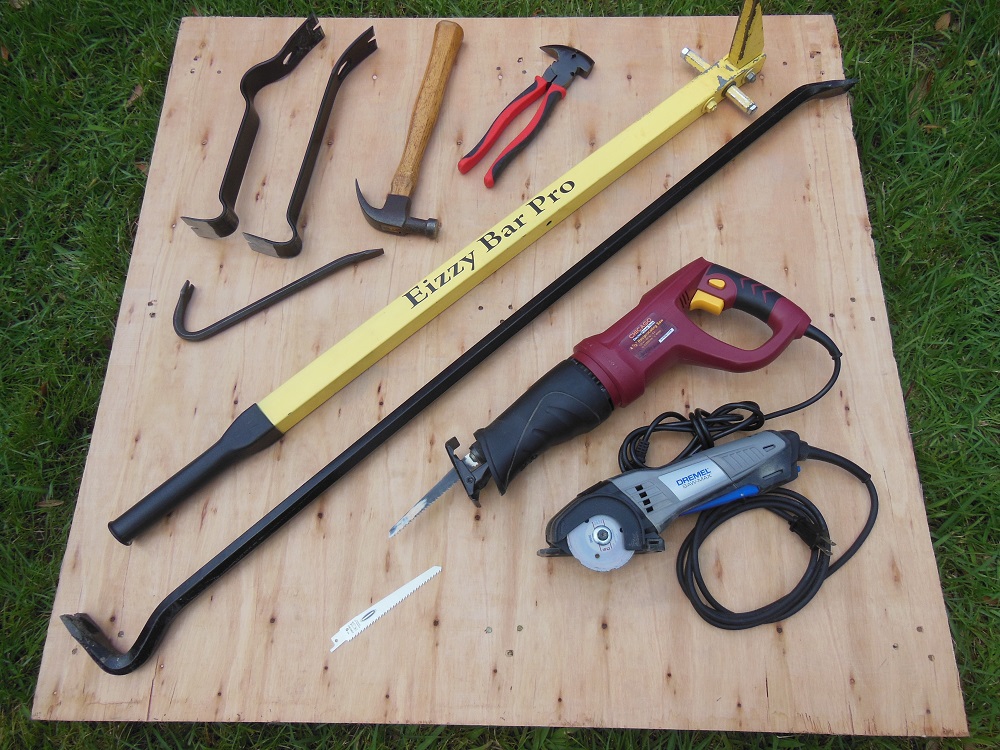
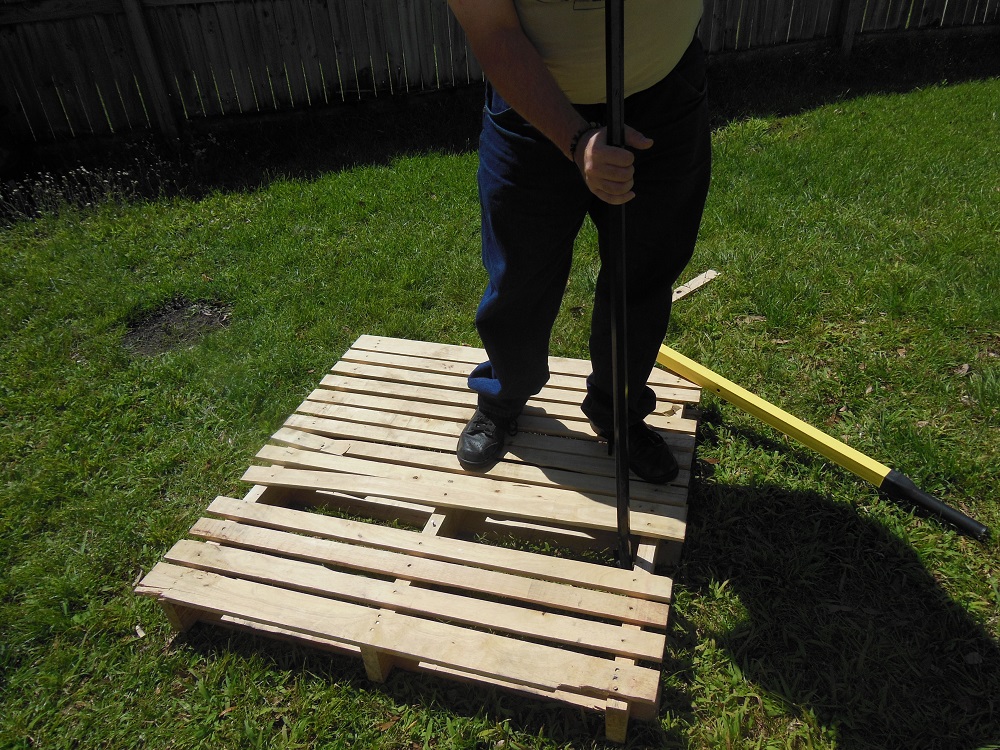
For sufficient leverage, a proper pallet pry tool should have a handle that’s at least 4 feet long (longer is better) and strong enough to withstand the necessary forces without self-destructing.
Be aware of your surroundings. As soon as you separate the deck boards from the pallet stringers, get them out of your immediate work area: immediately. Even the best work boots are unlikely to keep nails out of your foot in the event of a misstep. This “obvious” danger is easily overlooked, but it’s something to be hyper cautious of when stripping pallets.
I’ve heard too many horror stories; I even watched a friend (in a YouTube video) step on an uprighted pallet nail. He ended up in the emergency room for a tetanus shot and had a sore foot for weeks. If you heed only one piece of advice from this article, let it be this: beware of the nails!
Safety First When Harvesting Pallet Wood
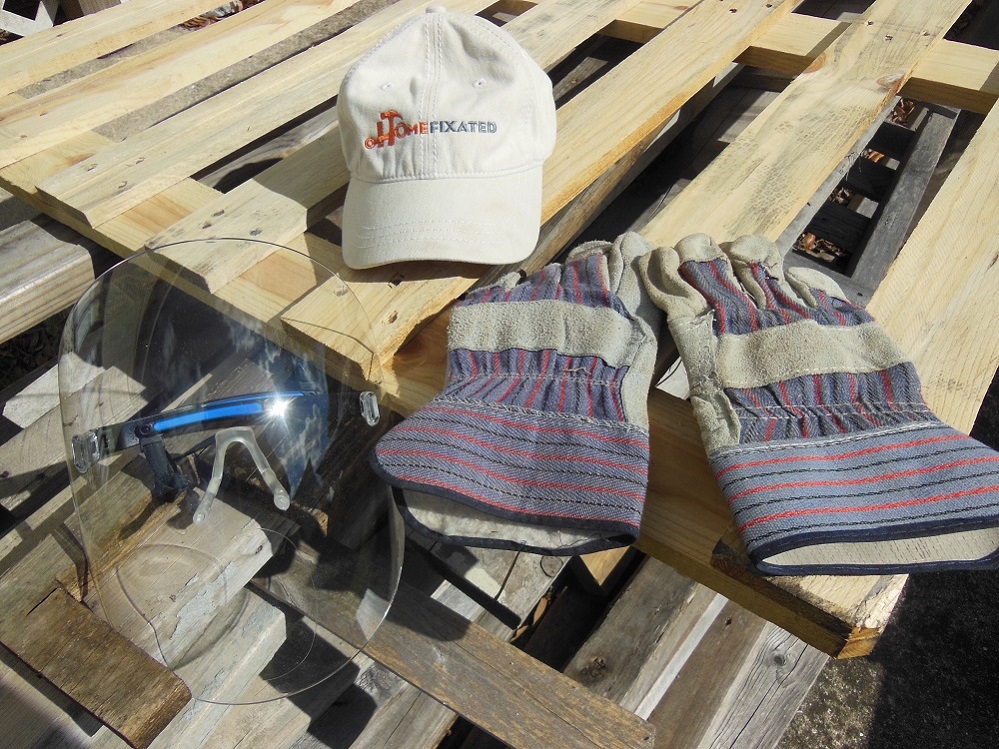
Pallets can be made of shamelessly rough lumber, meaning lots of super-sized splinters lying in wait to elicit expletives and challenge your pain receptors to the ultimate showdown at the Not-O.K. Corral. It’s a good idea to wear leather work gloves when handling pallets.
Start With The Big Tools – Then Downsize
If you’re trying to use a 12” pry bar to break down pallets (especially hardwood pallets, which can require a lot more “oomph”) – and it breaks loose under all your might – it’s probably not going to end well.
Remember, the longer the lever, the less muscle you’ll have to put into your end of the tool. And the less likely you are to draw blood if it slips. If you feel like you’re exerting too much force, you probably are; it’s time to switch up your technique. Save the smaller tools for after the boards have been separated
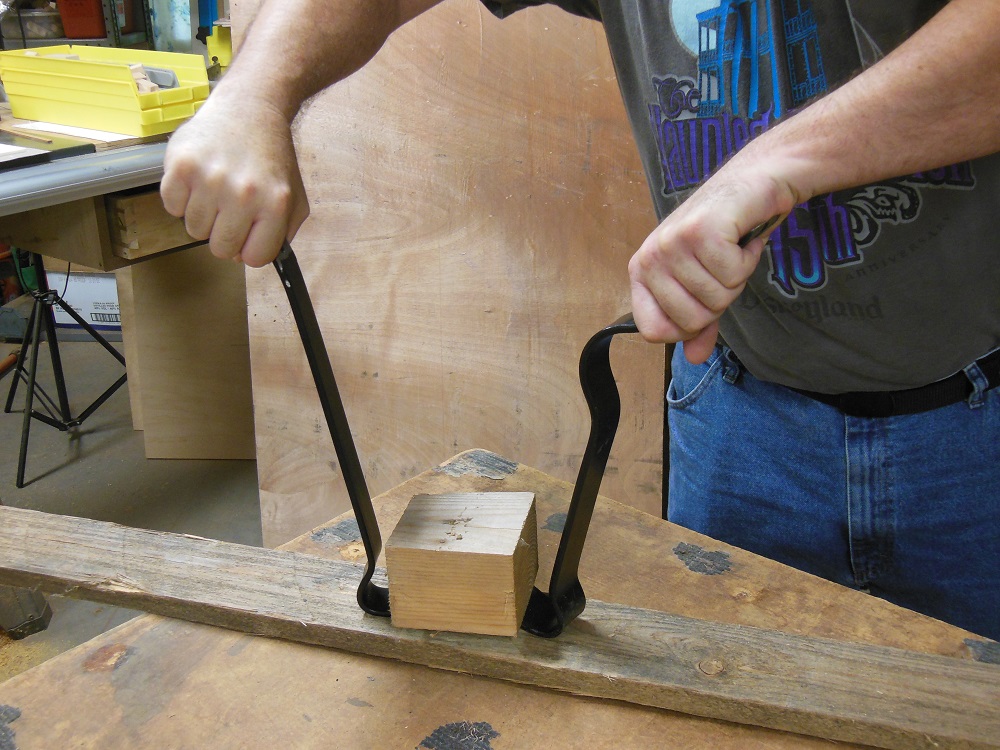
Some Helpful Techniques For Pallet Disassembly
The most common – and obvious – method for busting pallets is good old fashioned brute force prying. Providing there’s enough clearance between slats (technically, “deck boards”), you can get a pallet pry tool in there and have at it. But before going to town, take it slow and see if the boards can handle the stress.
Sometimes, the best approach to avoid breakage is to work the slats off with short, jerky movements rather than trying to lever them in one continuous arc. Also, there may already cracks and splits that make the boards weaker (but not necessarily unusable or undesirable).

With all prying and percussive disassembly methods, keep the force as close to the nails (next to the stringers) as possible. That way the boards flex as little as possible.
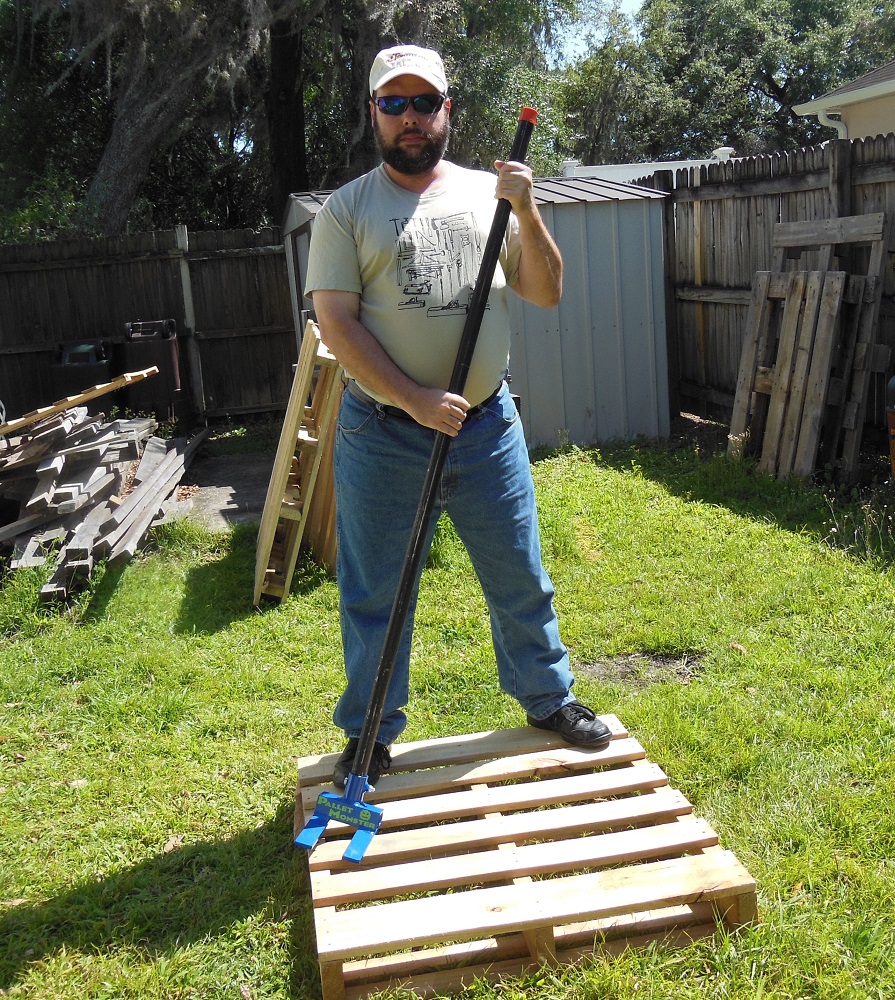
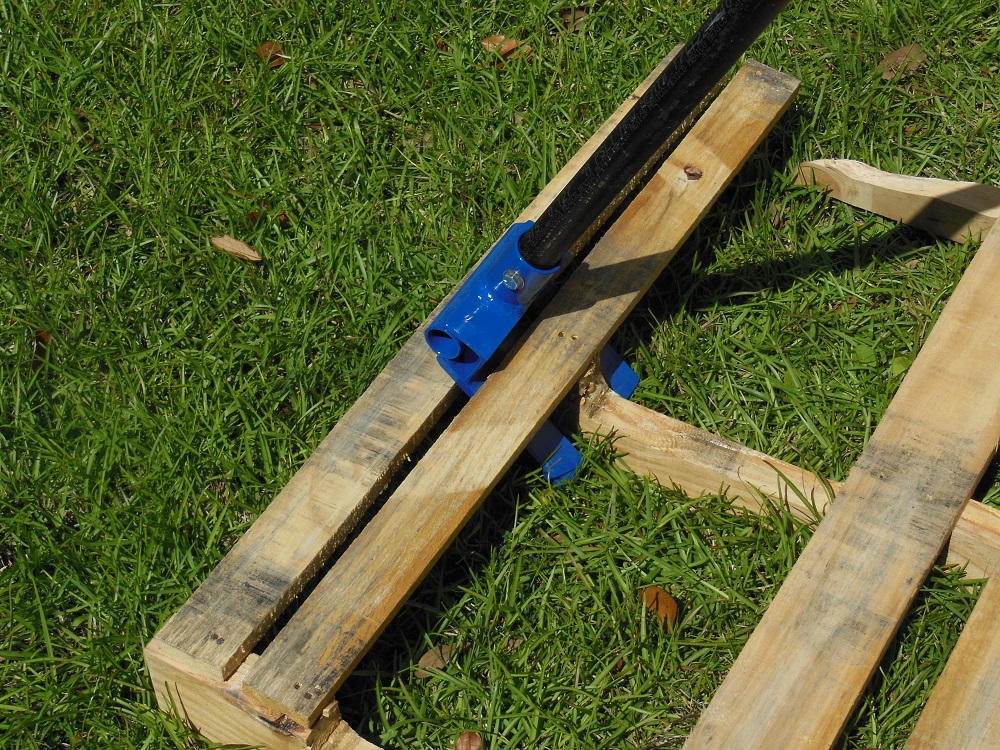
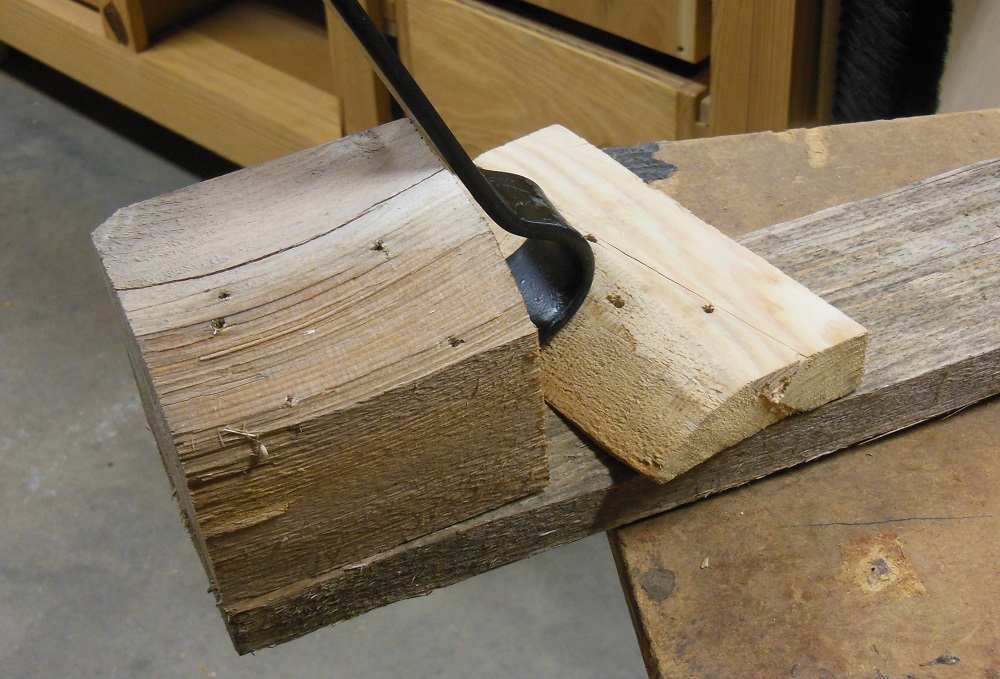
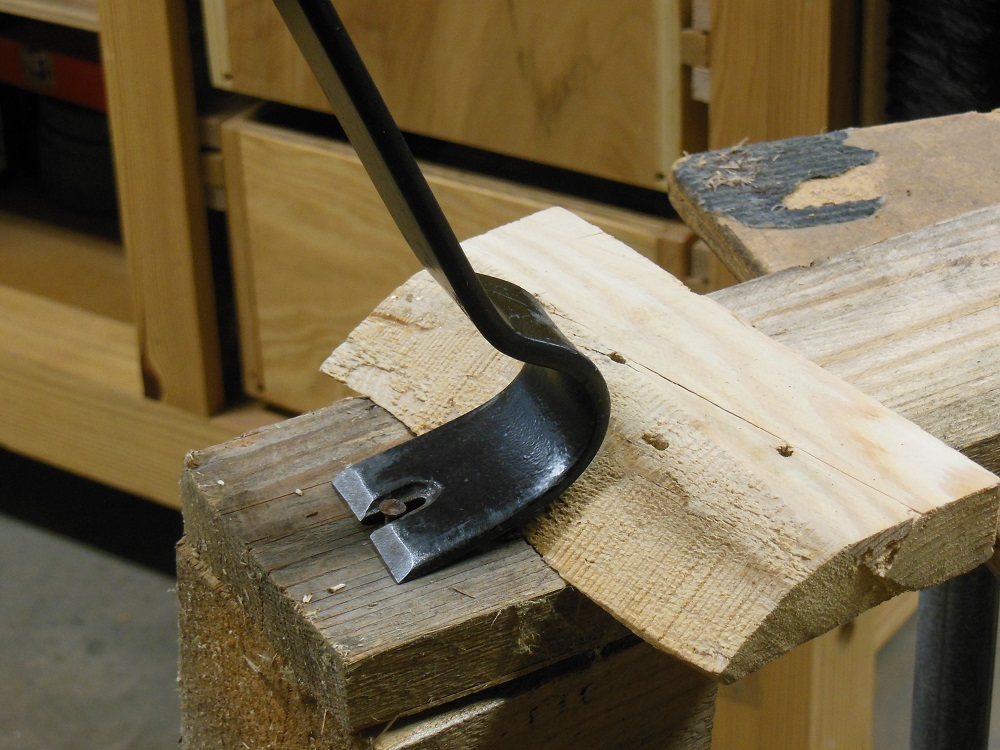
Different Pallet Busters For Different Pallets
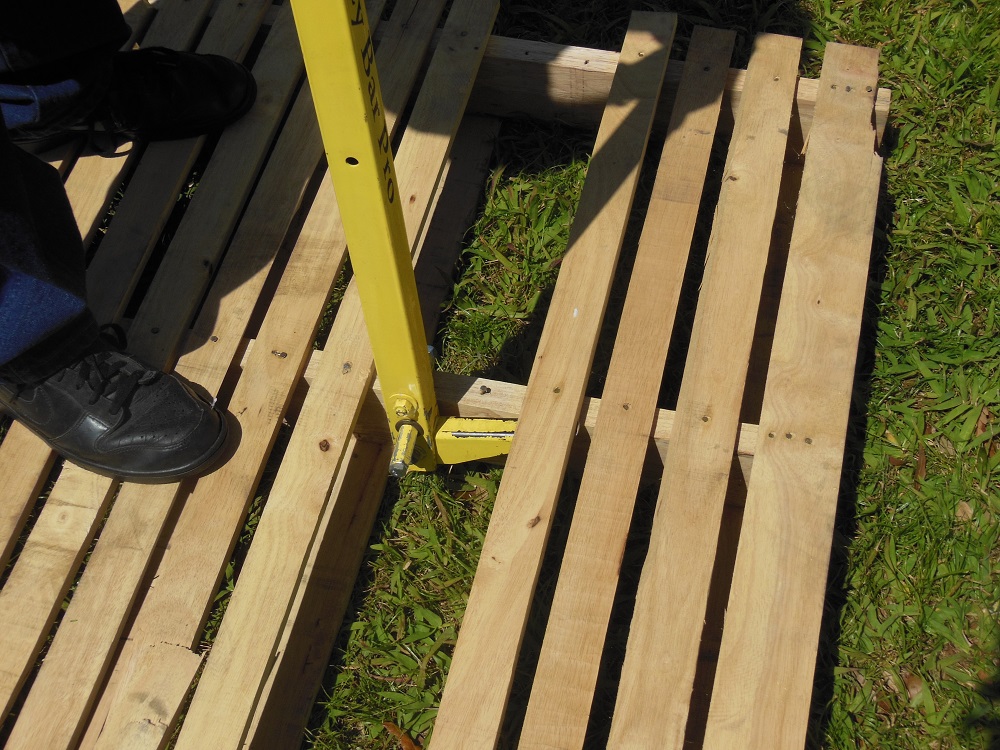
I have two styles of pallet pry tools in my shop. The Pallet Monster allows you to straddle the stringer for more evenly distributed pressure. I purchased this blue beast directly from the maker, who claims to be the originator of this particular design, which works exceptionally well. It’s the narrower (2-1/2” gap) of 2 versions; or you can get it with wider spacing for use on pallets having 4×4 stringers. But there are other options out there for those who want to shop around.
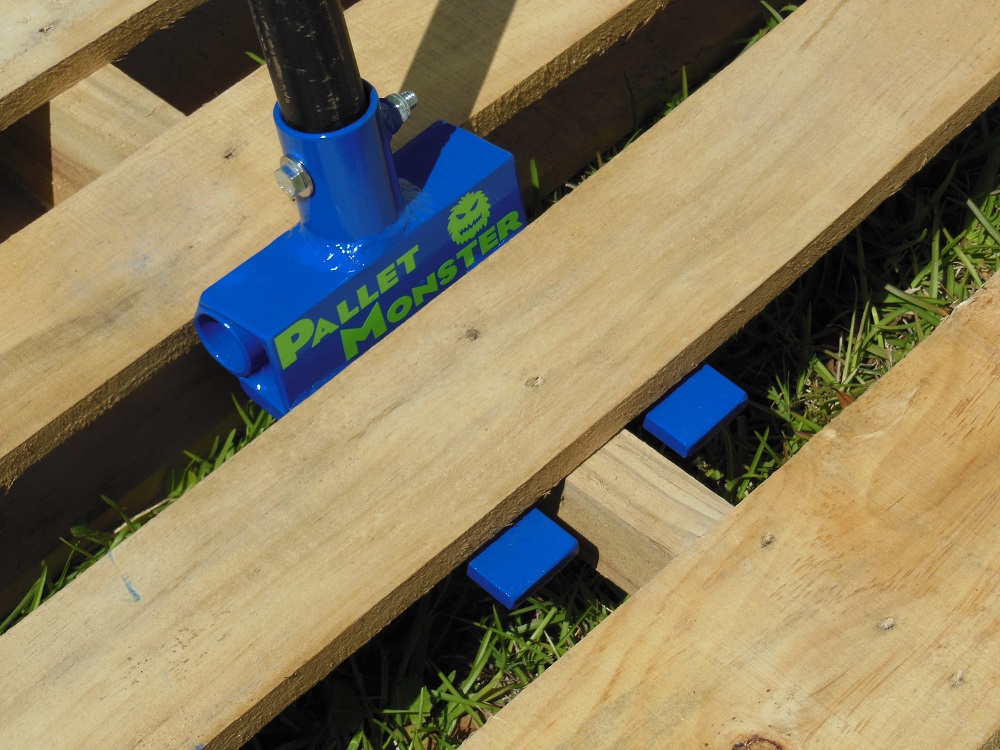
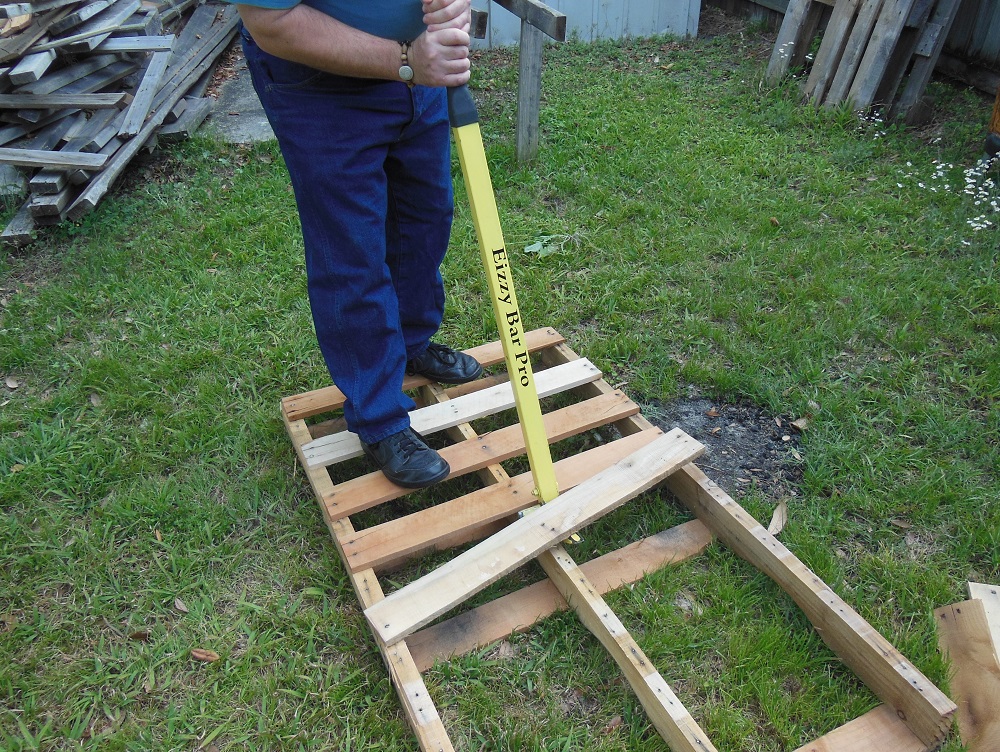
Not all pallets allow for such a tool; that’s where the yellow Eizzy Bar earns its keep. In many situations, either tool will do the job. But there are a lot of exceptions where only one or the other will work. Therefore, both styles are nice to have.
Using A Standard 4 Foot Pry Bar
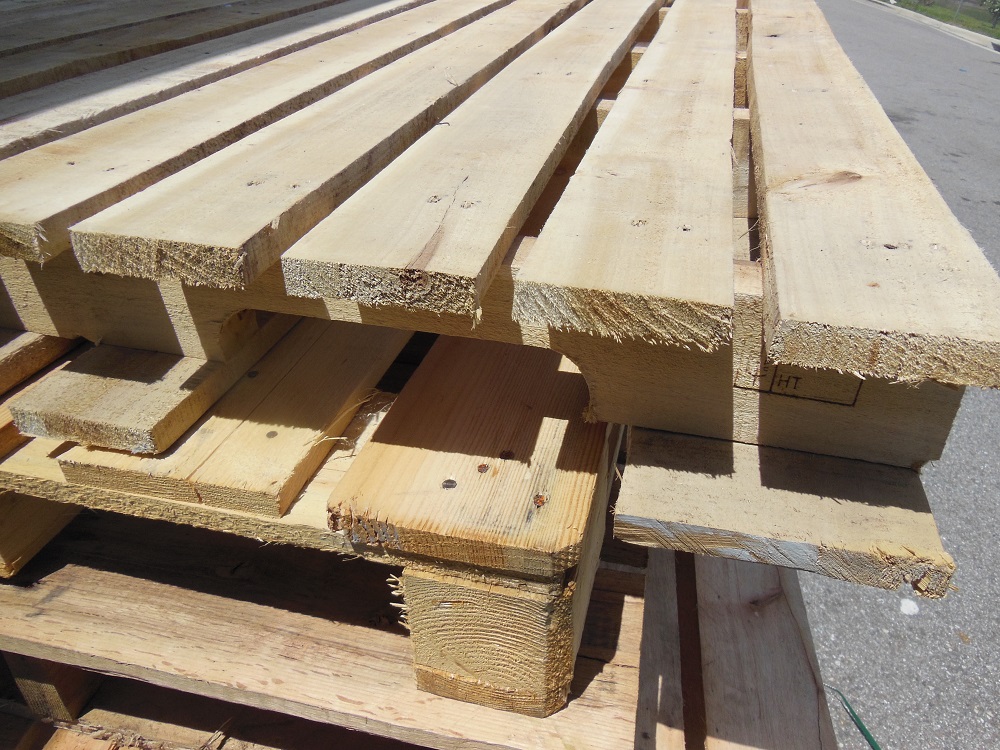
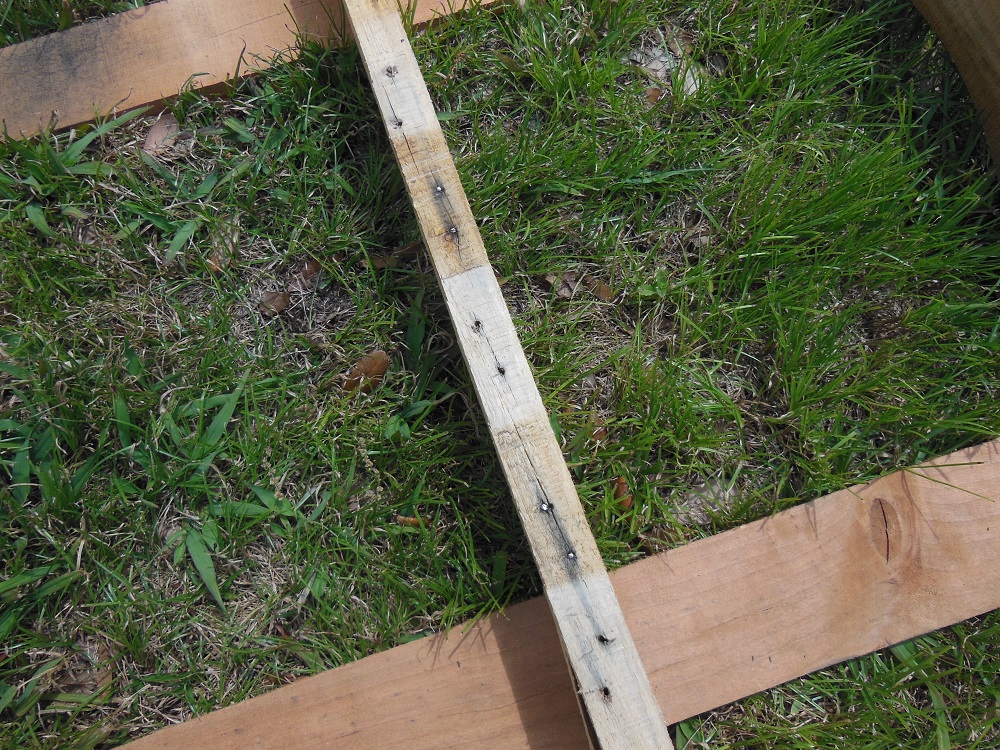
You’ll encounter many different scenarios; pallets, skids, crates and other wooden ore come in many forms. For the record, “pallets” have slats on the bottom and “skids” don’t (though some people use the terms interchangeably).
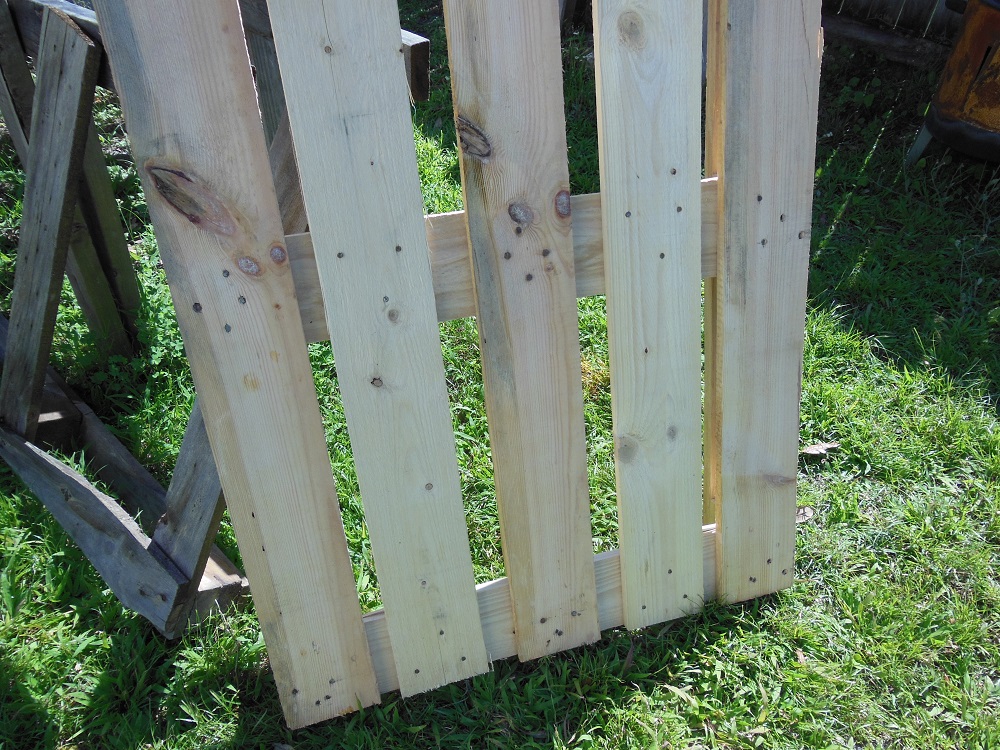
With the pallet pictured above, I used the mass (as opposed to the prying action) of a heavy 48” pry bar to drive out the slats. The inertia of the bar delivers a percussive force – much like a dent pulling slide hammer – to work the nails out. This trick is limited to certain rare cases, like here, where there is only one nail per stringer and the slats are thick enough to withstand the blows.
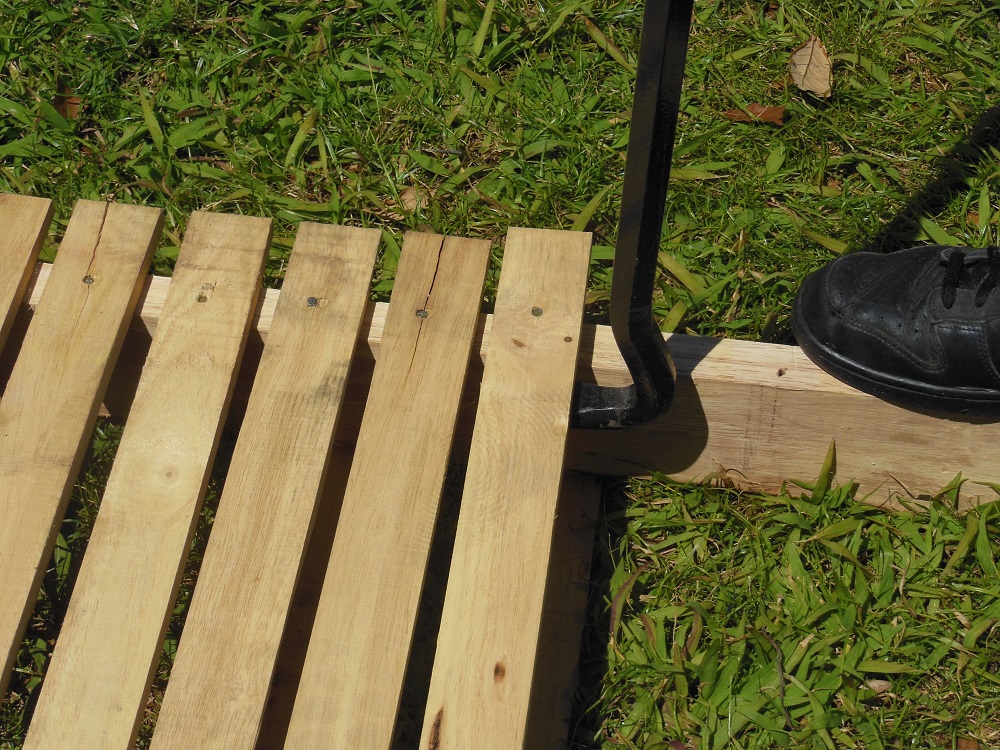
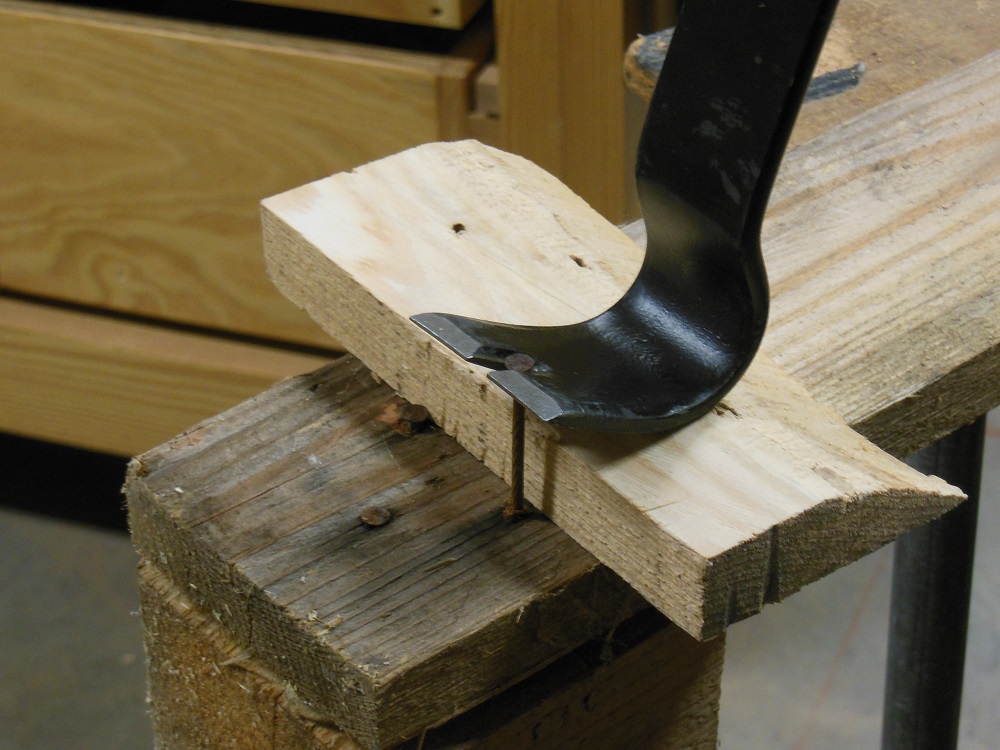
You can sometimes use a 48” pry bar to pry off some of the slats by first filling the gap between the top and bottom decks with scrap wood to give you a fulcrum. Spread the contact point on the underside of the slat over a wider area by using another piece of scrap wood.
Once you’ve removed enough boards, however, there will be nothing left to lever against. If instead you pry the edge of the boards (using the stringers as your fulcrum) you’re likely to crack them. Overall, a regular pry bar isn’t exactly the best tool for the job. Specialty pallet pry tools are generally a much better way to go.
Sledge-hammering the Pallet Slat From Behind
In desperate times, pallet slats can sometimes be hammered off from the back side. Use a foot or so length of 2×4 and a 2 pound sledge hammer. Place the 2×4 on the slat – up against the stringer – and deliver a few hard blows to force the nails out. It’s not the most elegant solution, but it often does work. Be sure to raise the slat you’re trying to remove off of the ground and brace the surrounding area.
If At First You Don’t Succeed, Don’t Pry, Pry Again – Just Cut To The Chase

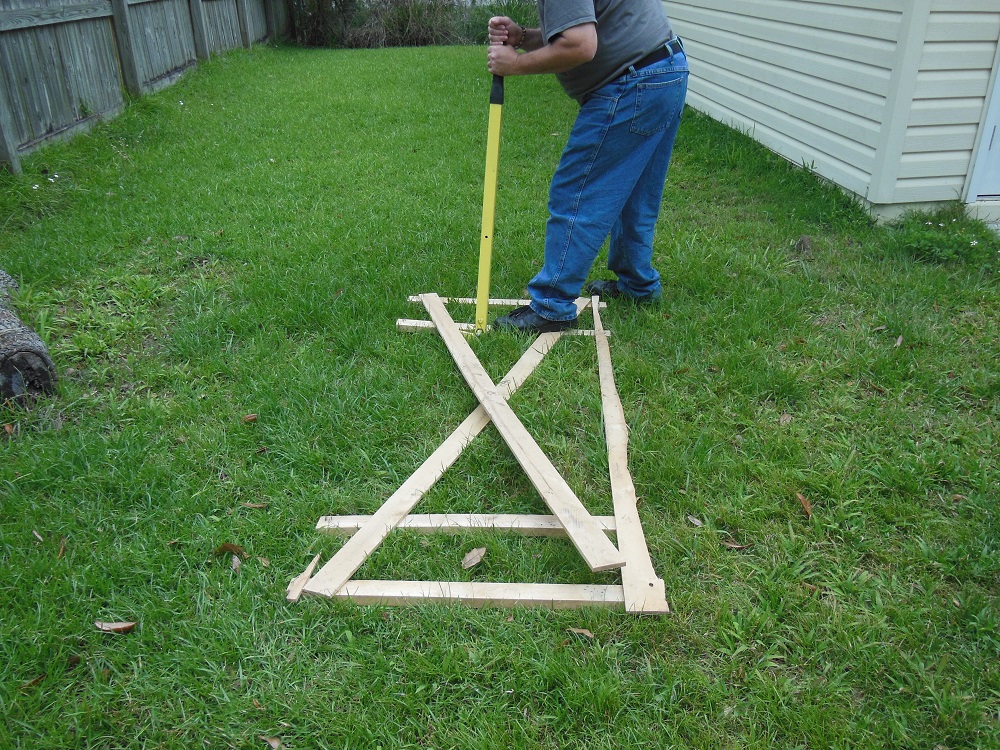
Brute force and leverage will only get you so far. A lot of pallets can’t be pried apart without destroying the wood you’re trying to salvage. In this case, you can cut them apart. Depending on your tool and technique, this may yield shorter pieces, but that’s OK. Sometimes you take what you can get.

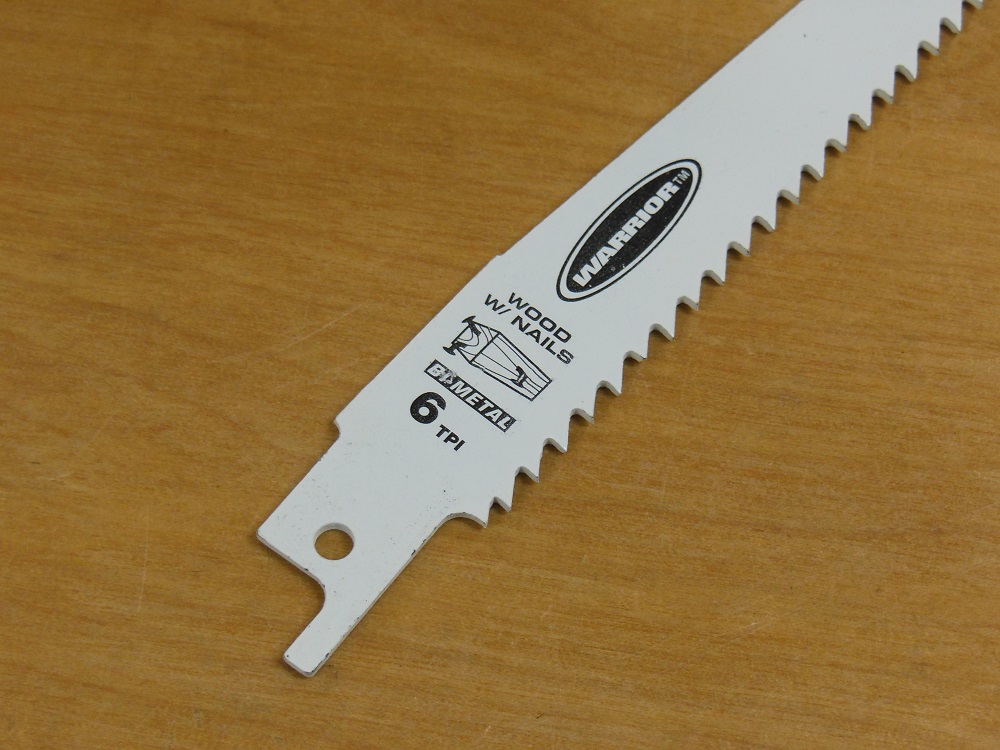
Three tools I use to cut apart pallets are: reciprocating saw, jigsaw and the Dremel Saw-Max. If you read our review of Dremel’s Saw-Max, you may remember that it immediately became a favorite of mine. In fact, it’s completely replaced the jigsaw as my cutting tool of choice for pallet slats.
It’s worth sharing this quick Demo video again:
https://www.instagram.com/p/BcZB_uDDRSZ/?taken-by=homefixated
Recip Saw To The Rescue

For slatted pallets, a reciprocating saw can be used to remove the outer stringers. Then you can cut the slats loose from the middle stringer(s), one board at a time. Work the blade between the stringer and deck boards to cut the nails. Note that this may whittle away a small amount of the wood as well.
Clearance between the top and bottom deck is shorter than the length of a reciprocating saw blade, so keep it at a low angle if you use one to cut the deck boards. Or consider using a jig (saber) saw or the Dremel Saw-Max instead.
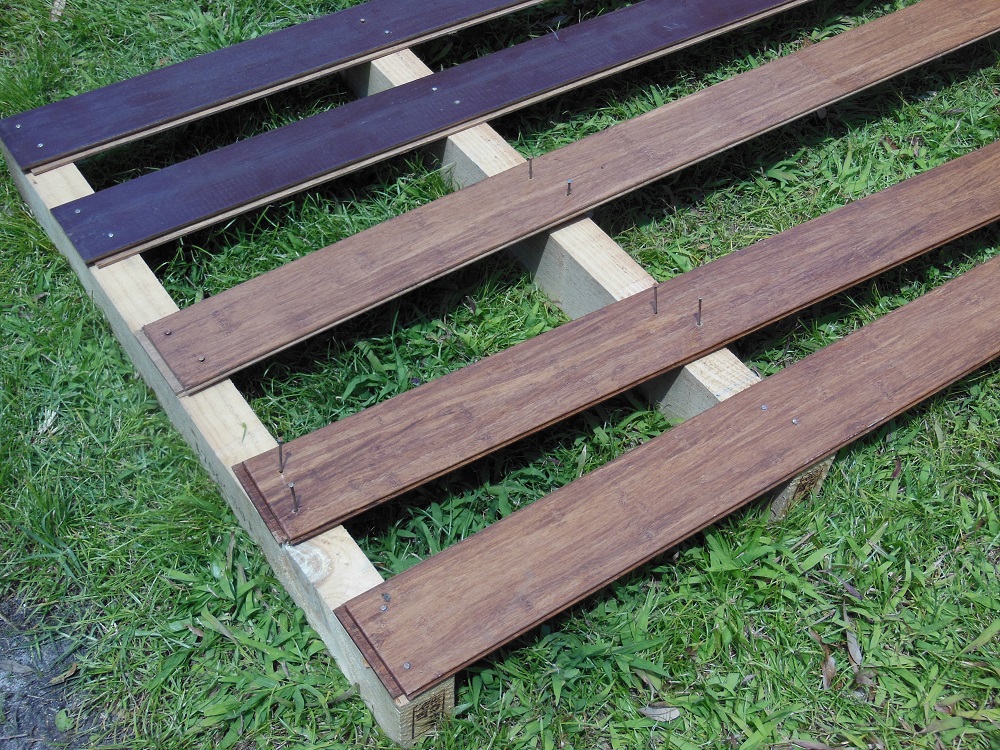
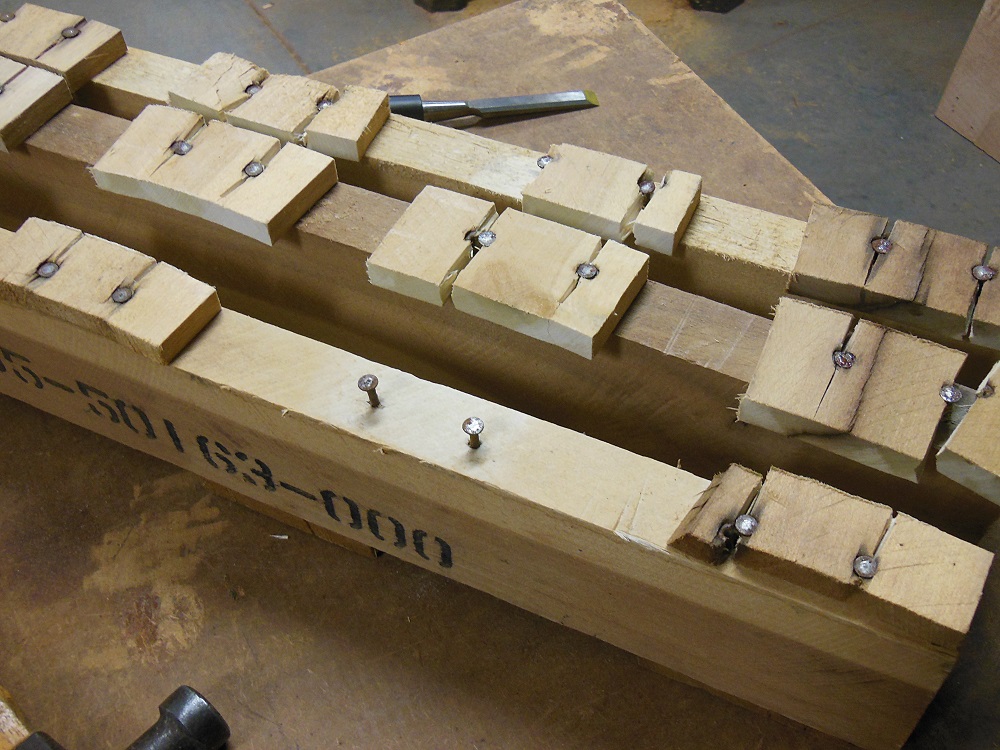
Plywood Pallet Decks – Dismantle Without Destroying
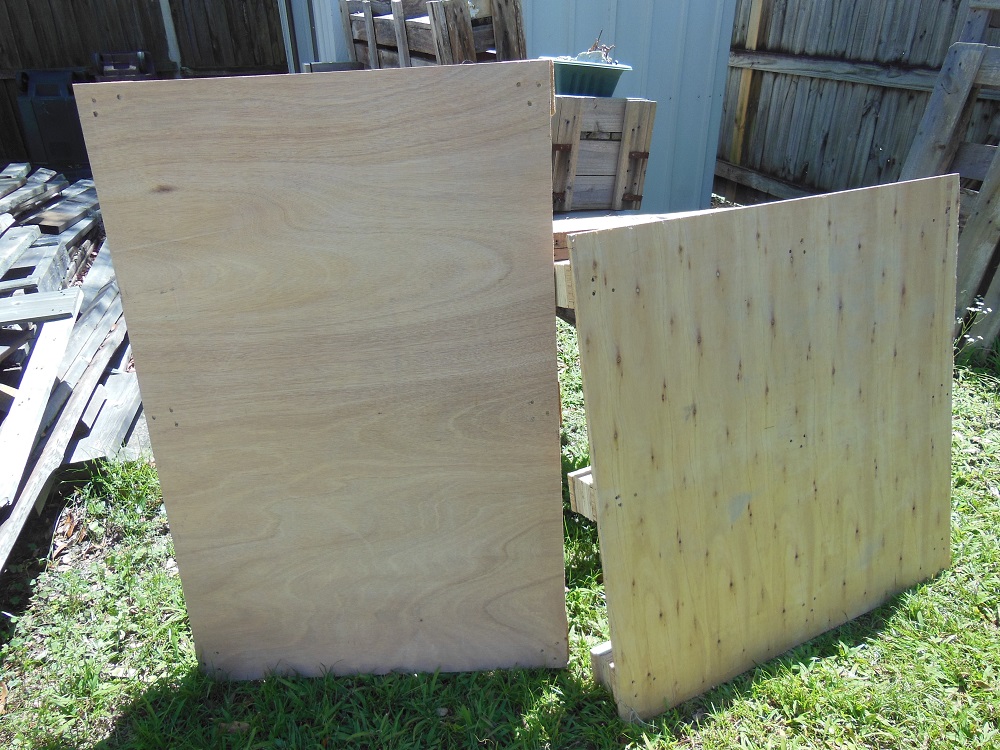
Every so often I get plywood-decked pallets. It’s usually not the highest grade of plywood, but it’s free and great for many utility projects.
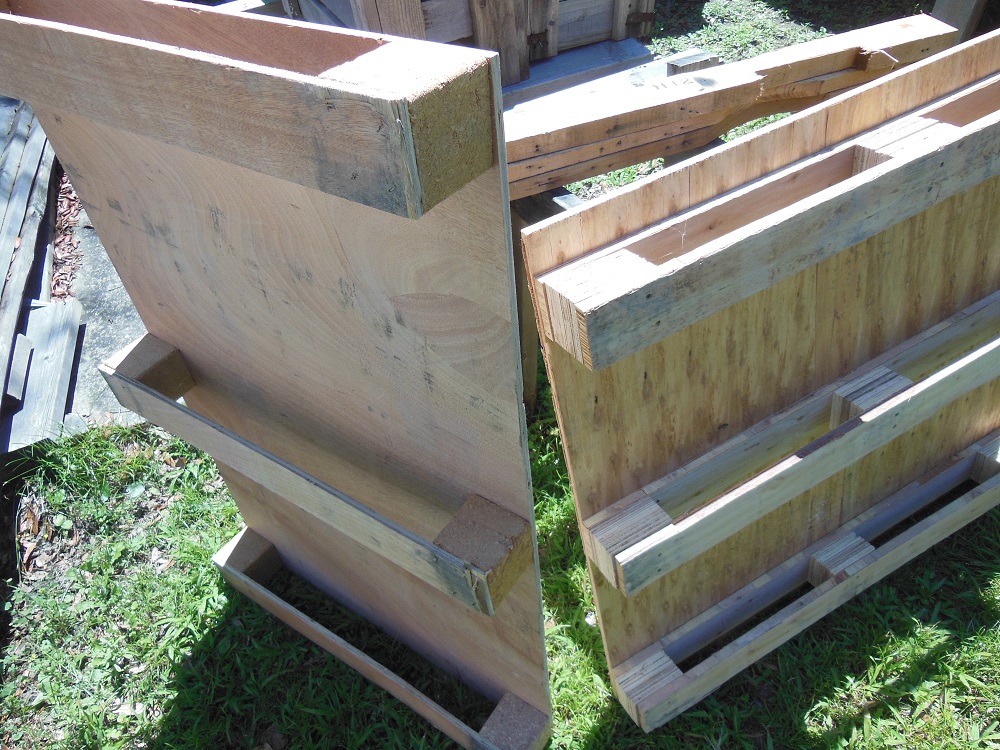
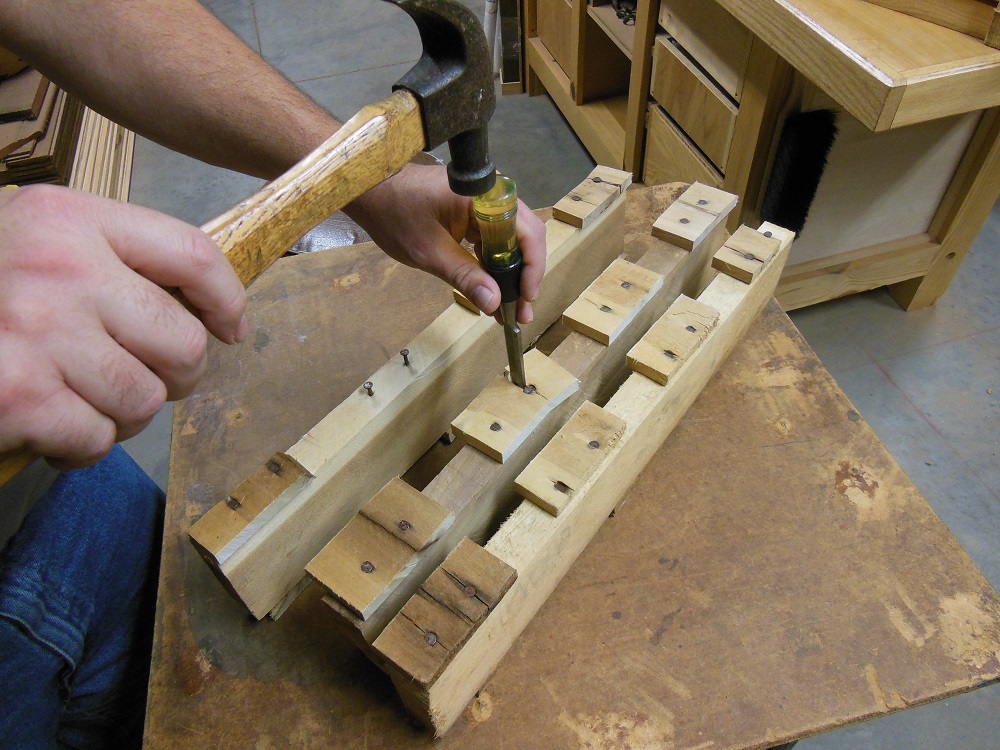
If you insist on saving the riser blocks (sometimes they have cool markings branded into them and would make great project parts) you can try prying with a pair of flat bars. Otherwise, your best bet is to cut the blocks with a recip saw.
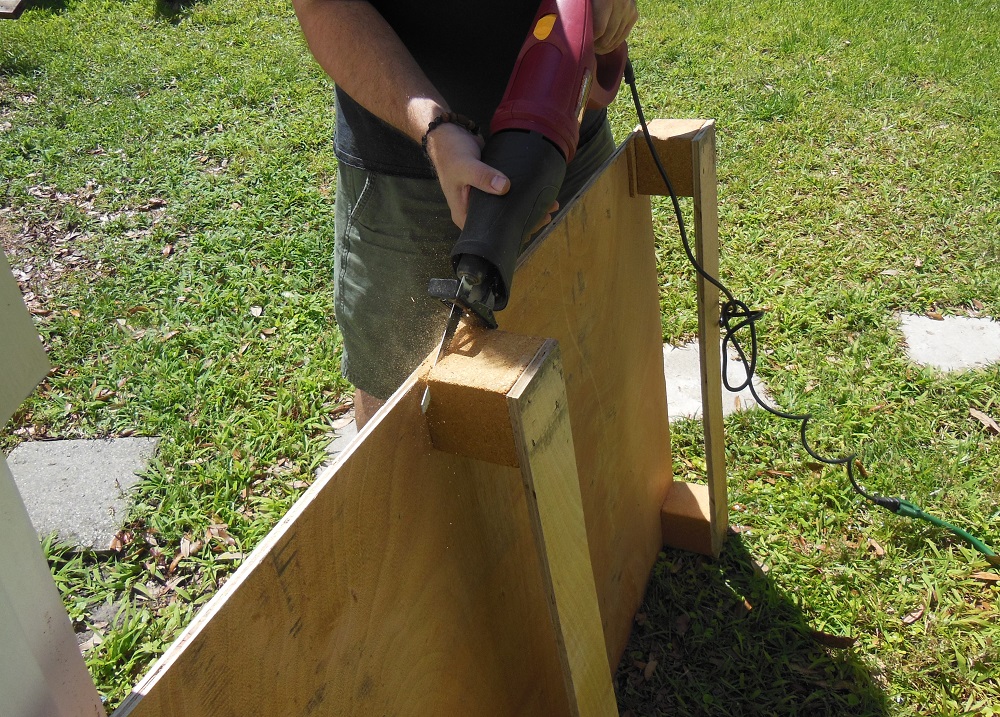
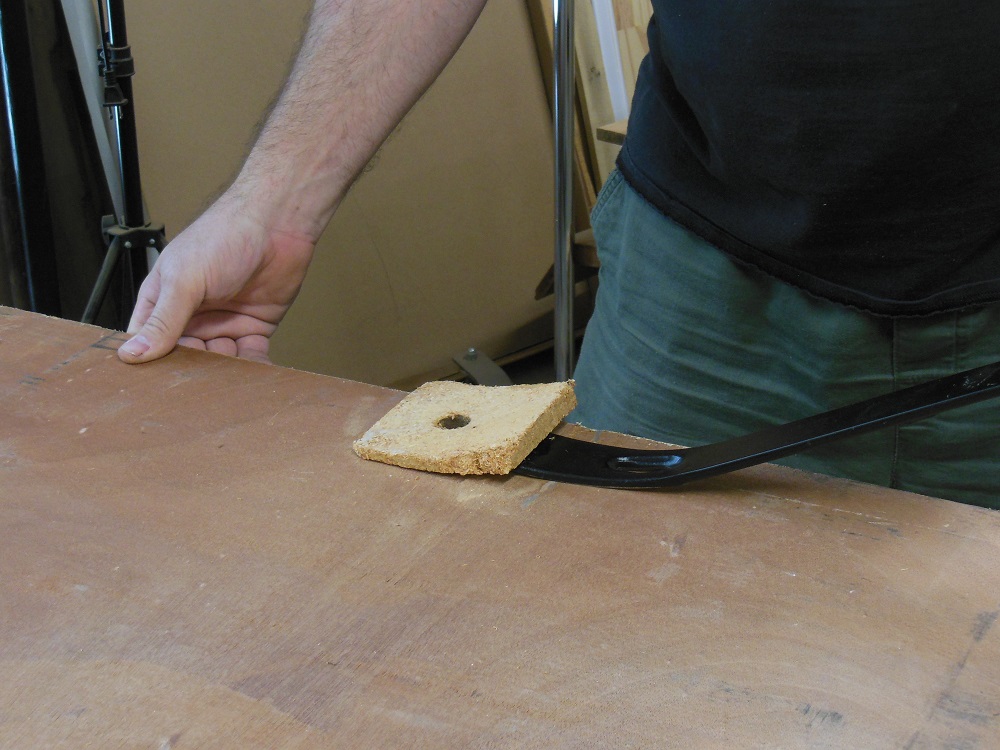
Then you can pull off what remains of the block, tap the now-short nails through with a hammer and pull them out.
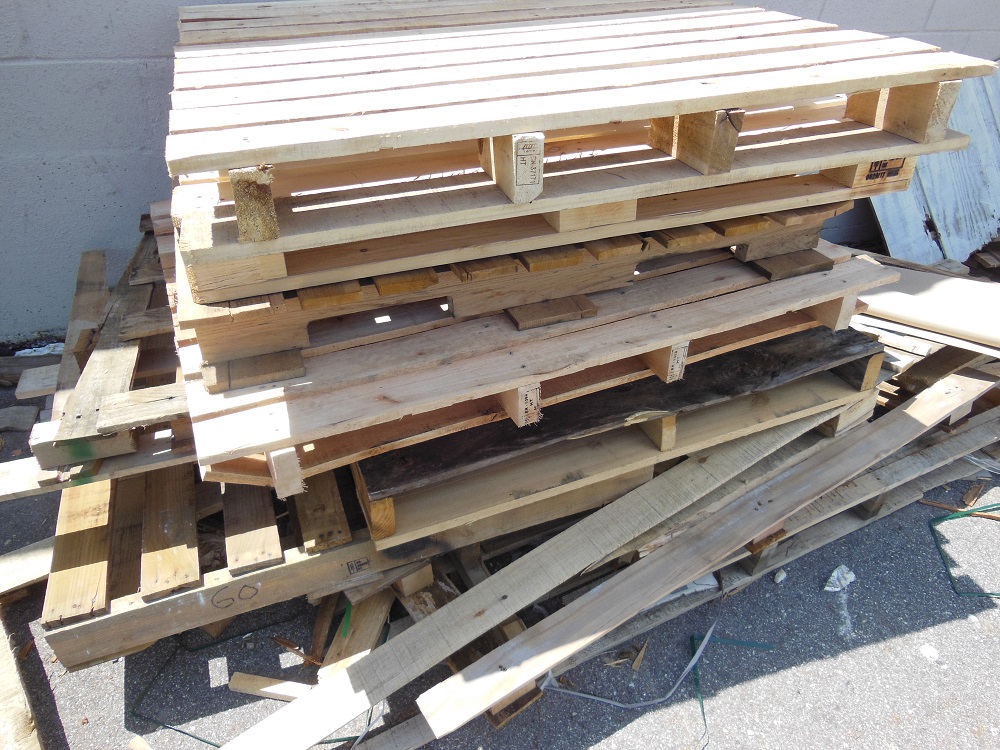
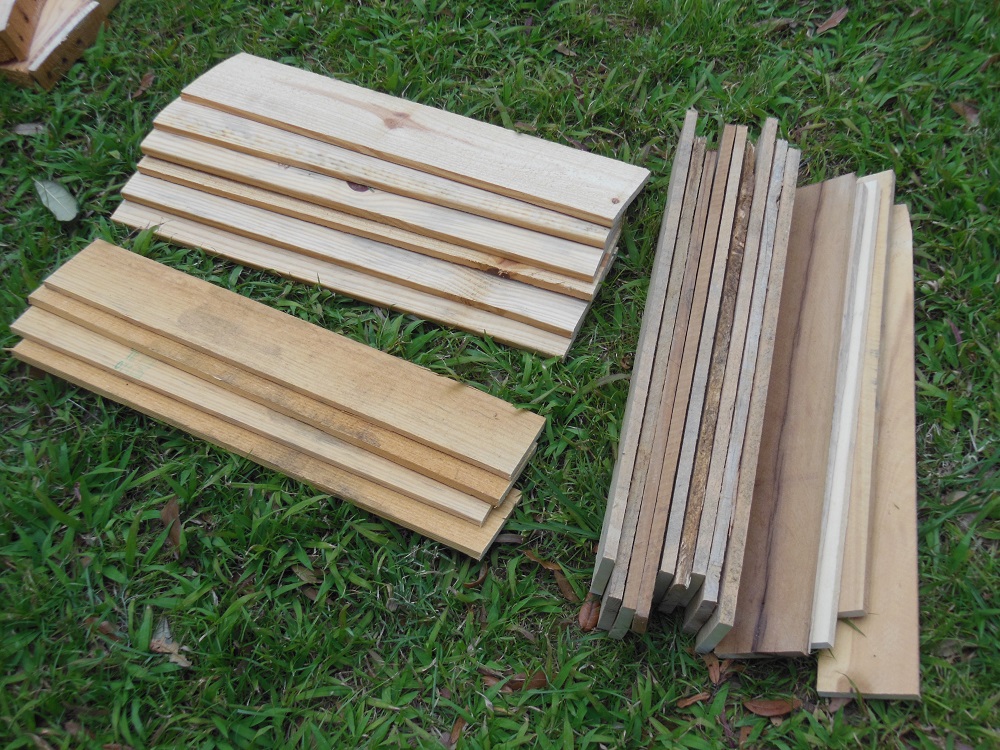
Toss The Dross – Refining Pallet Wood Ore
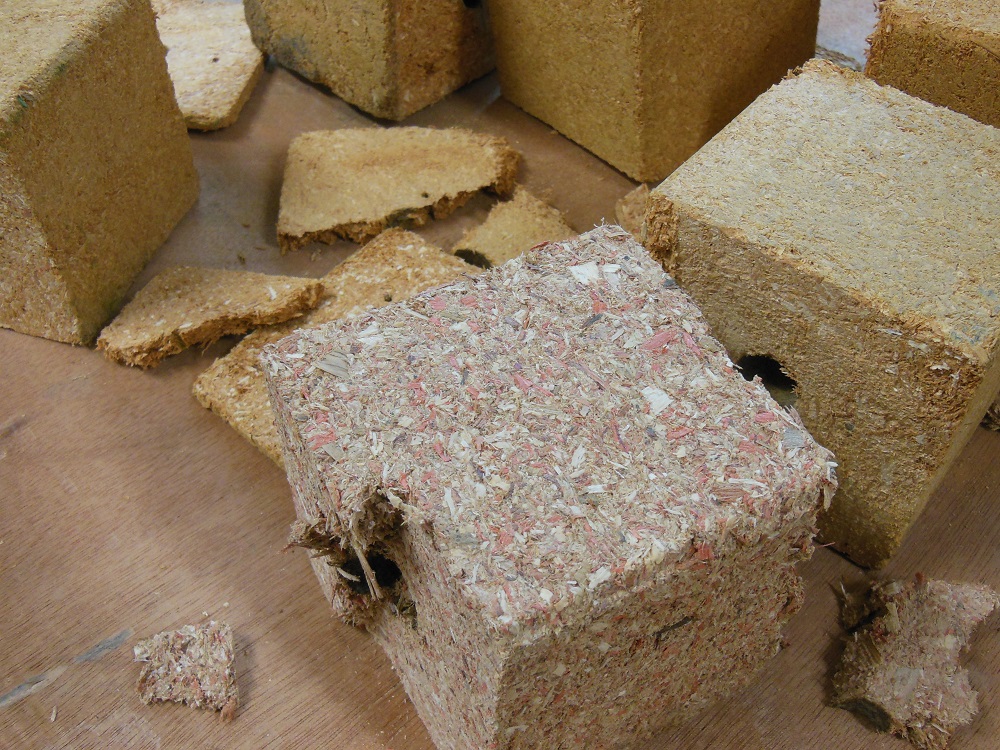
Few mining expeditions are completely without waste. Some boards are going to break and some other parts are going to be useless. You can dispose of the minor waste in good conscience; you did your part to salvage and reuse what you could. Or maybe you will find a good use for these. Who knows?
I Don’t Mean To Pry – Who Am I Kidding? Of Course I Do!
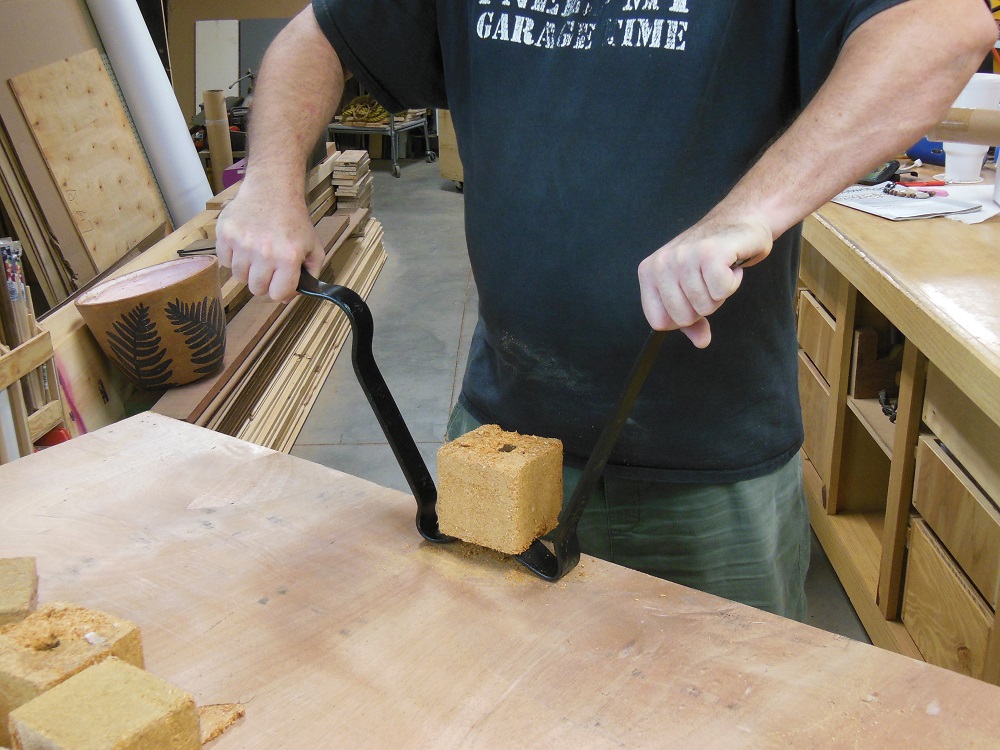
When you’re down to that last block or odd structural part, you may want to use a pair of flat pry bars. “Flat” because it drastically reduces damage to the material you’re trying to harvest (the plywood, in this case).

And “pair” because it doubles your power and applies leverage evenly to both sides of the nails.
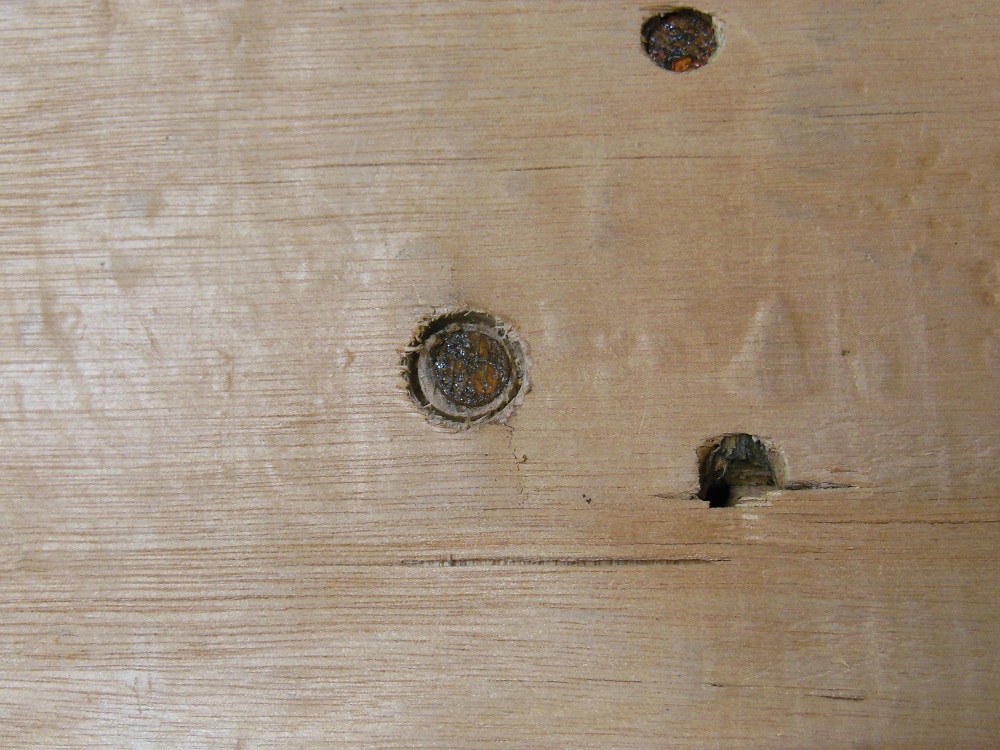
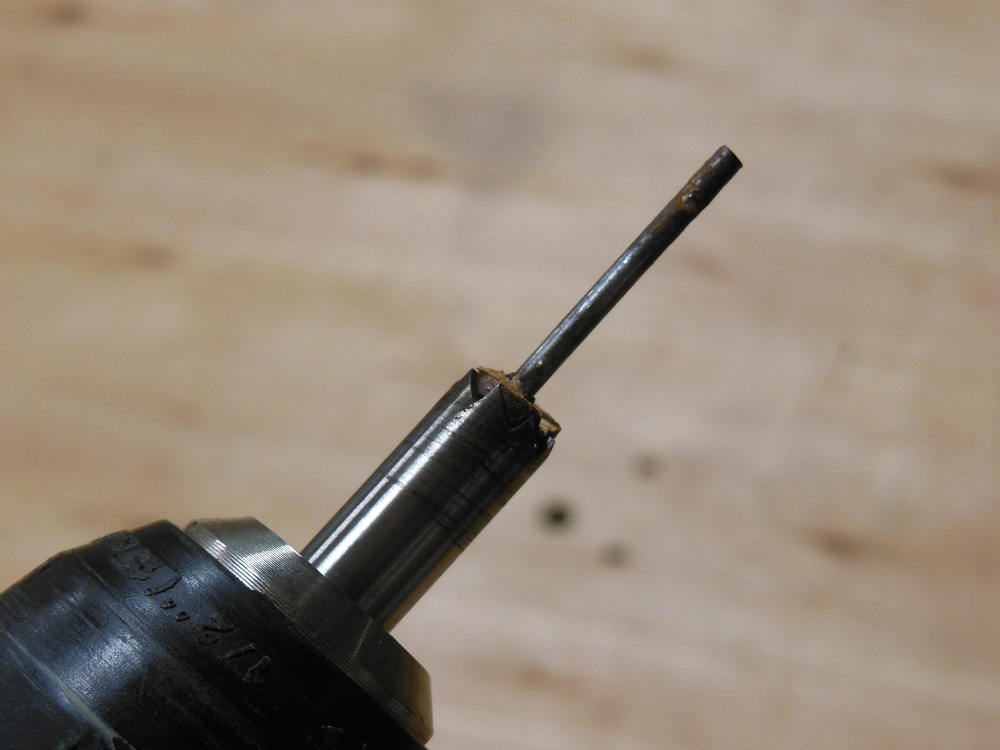
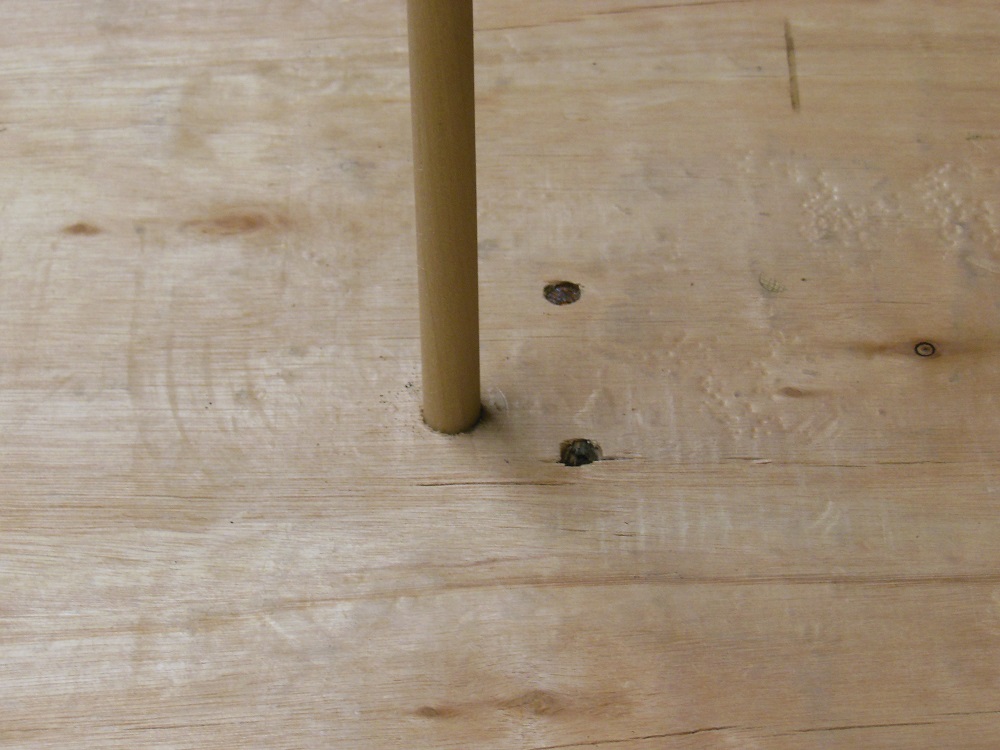
You Know The Drill

In some cases you can core out the wood surrounding the nail with a small hole saw, but you’ll probably have to make your own from steel tubing. With smaller-headed nails, however, this 3/8” diameter screw extractor from Rockler Woodworking and Hardware can be used. It’s not a perfect solution, but it’ll do in a pinch. Just take it easy so it doesn’t overheat.
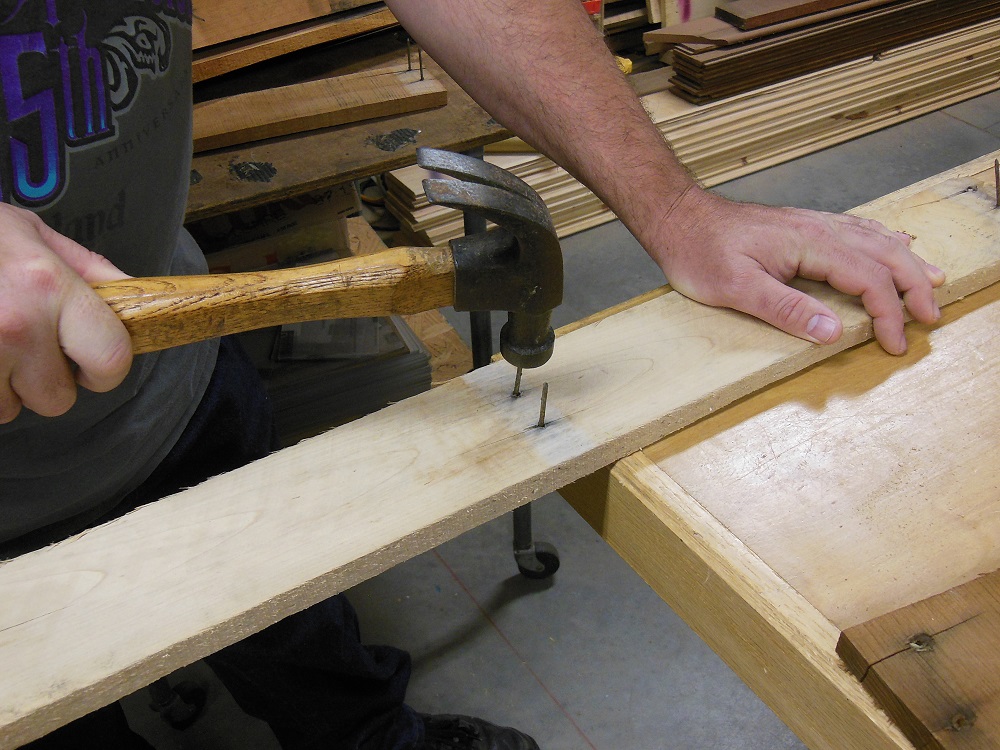
Another trick that sometimes works (if you’re dealing with soft wood) is to simply drive the nails in deeper – completely through the slats – with a hammer and punch. Then the boards will lift right off.
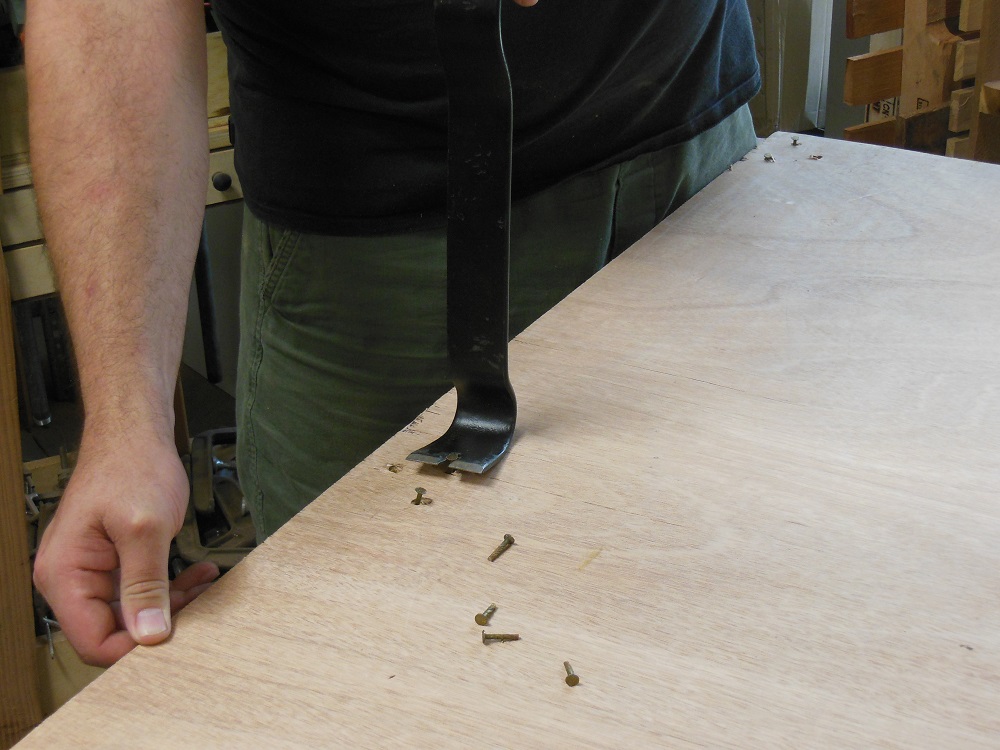
Nailed It! – Safely Harvesting Pallet Wood
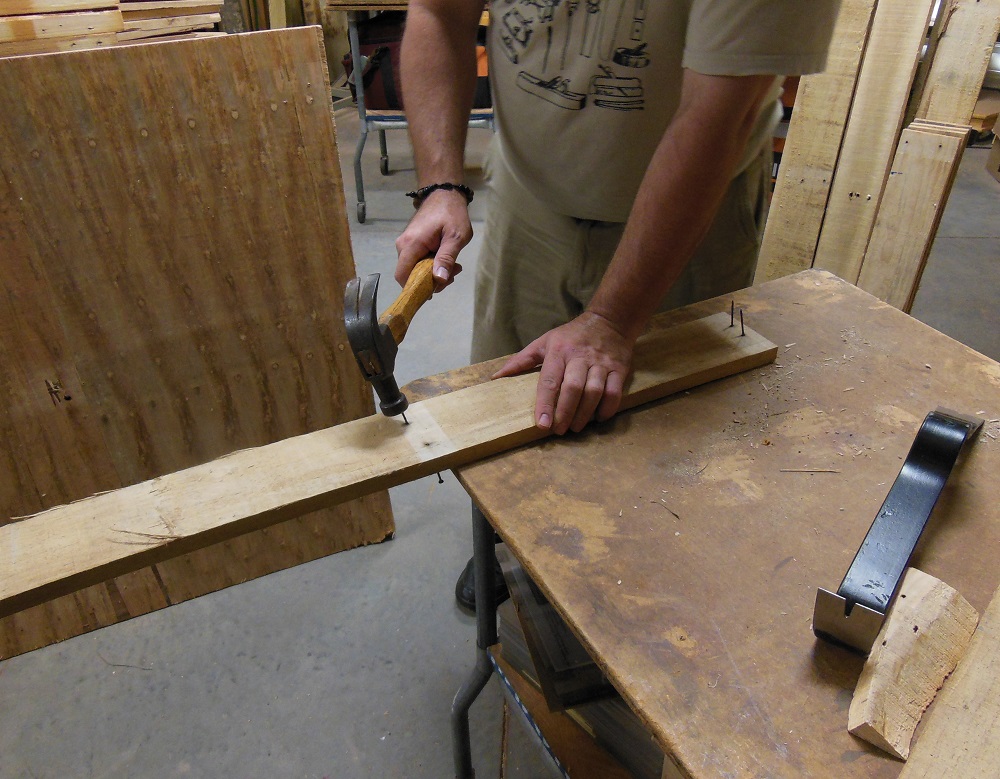
Separating the pallet members from raw ore was the hardest part of the process. But you’re not done yet; now you’ve got to remove the nails. Use a claw hammer to straighten and tap the pointy end flush with the board. Then turn it over and pull them the rest of the way out. Use scrap wood to raise the hammer head and protect the wood from damage.
Removing the nails from a stubborn riser block at the end of a board can be tricky; there’s no way to get a pair of pry bars in there. Begin by raising one end a 1/2” or so.
Then tap the block back down and pull the nails from the other side.
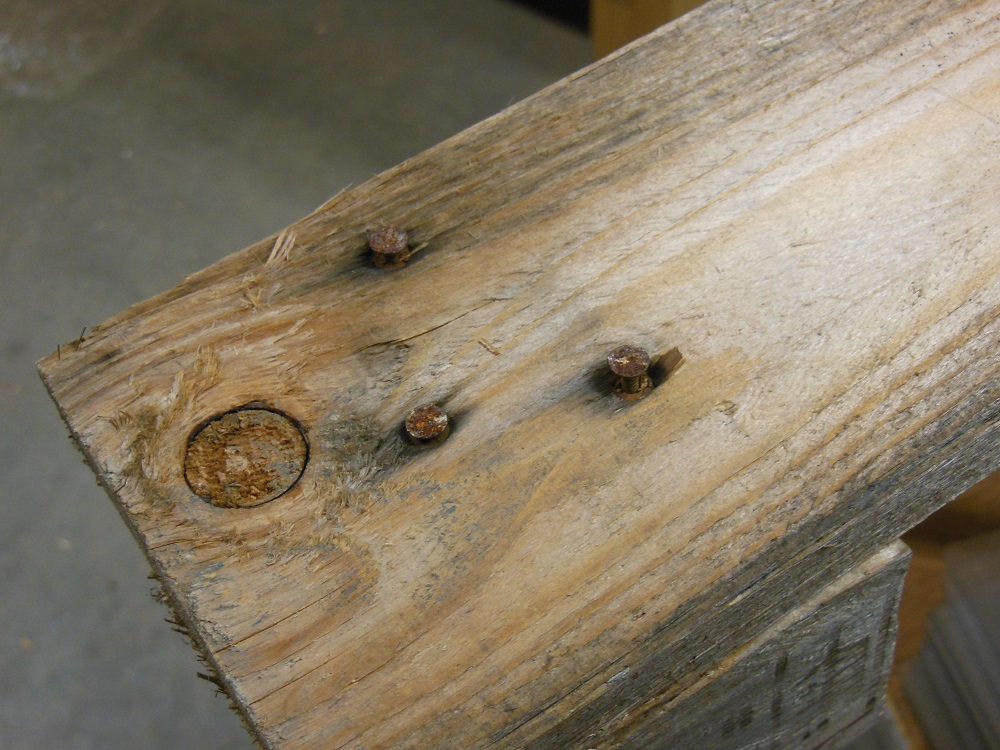
Many times the nails will come out in good enough condition to be reused (for non critical, low stress applications only). Minor contortions can be hammered out. But if they’re too mangled, the head is damaged, or they have more than light surface rust, throw them away.
Removing Nails From Pallet Stringers
The pallet stringers can be just as valuable as the deck boards. But sometimes there are embedded nails that you’re just not going to remove. Especially if the pallet has been rebuilt at some point. These pieces are still useful, but save them for structural components that require little to no machining. Embedded nails don’t play well with drills and bladed tools.
Earlier, we used the Dremel Saw-Max to cut fragile deck boards from 2 pallets. Now, to really beat this mining metaphor to death, we’ll smelt the stringers of ore.
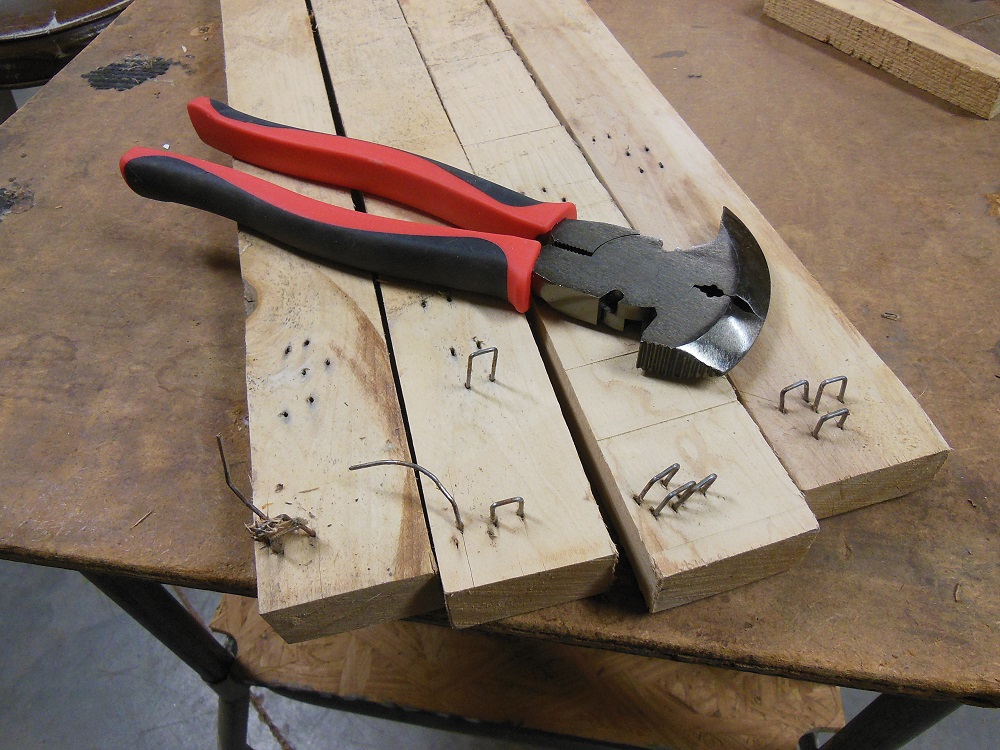
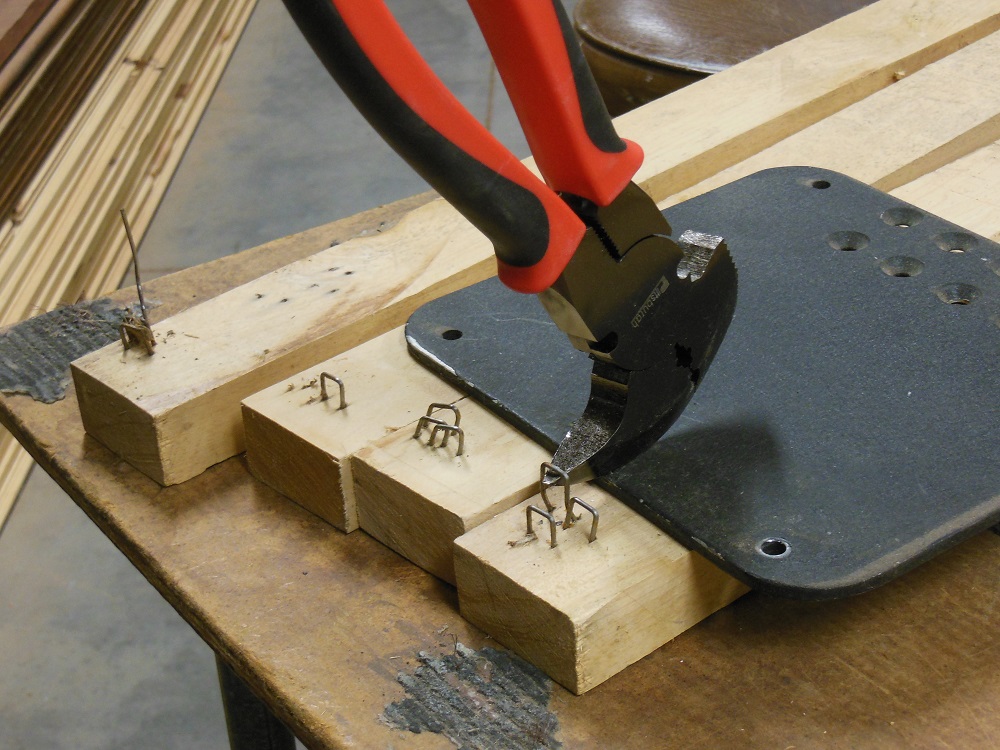
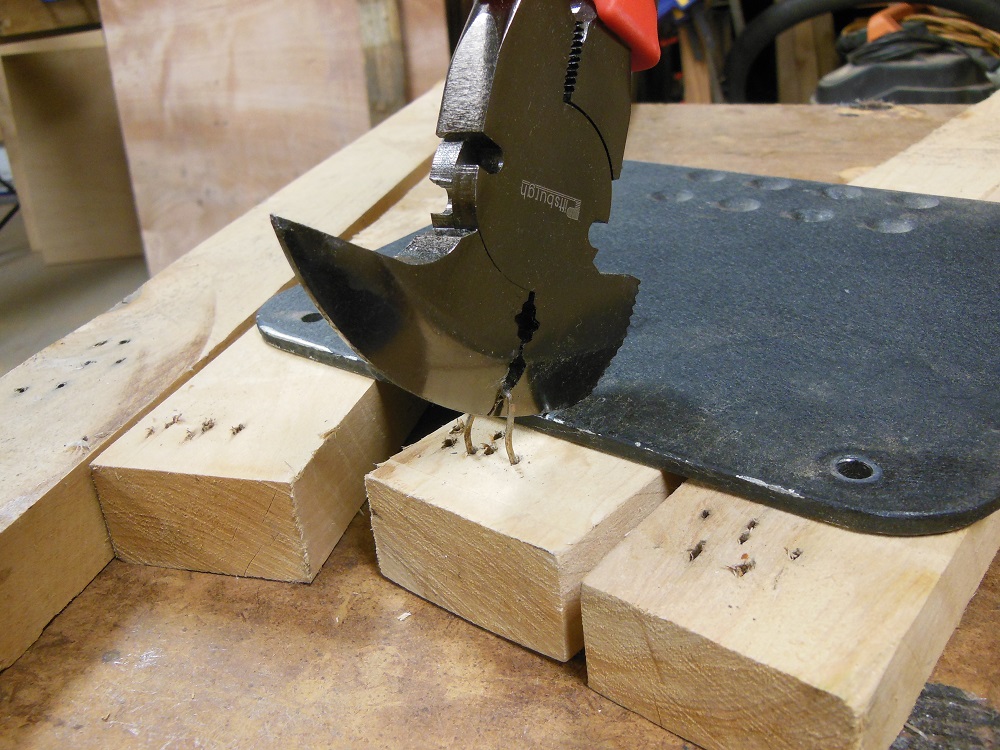
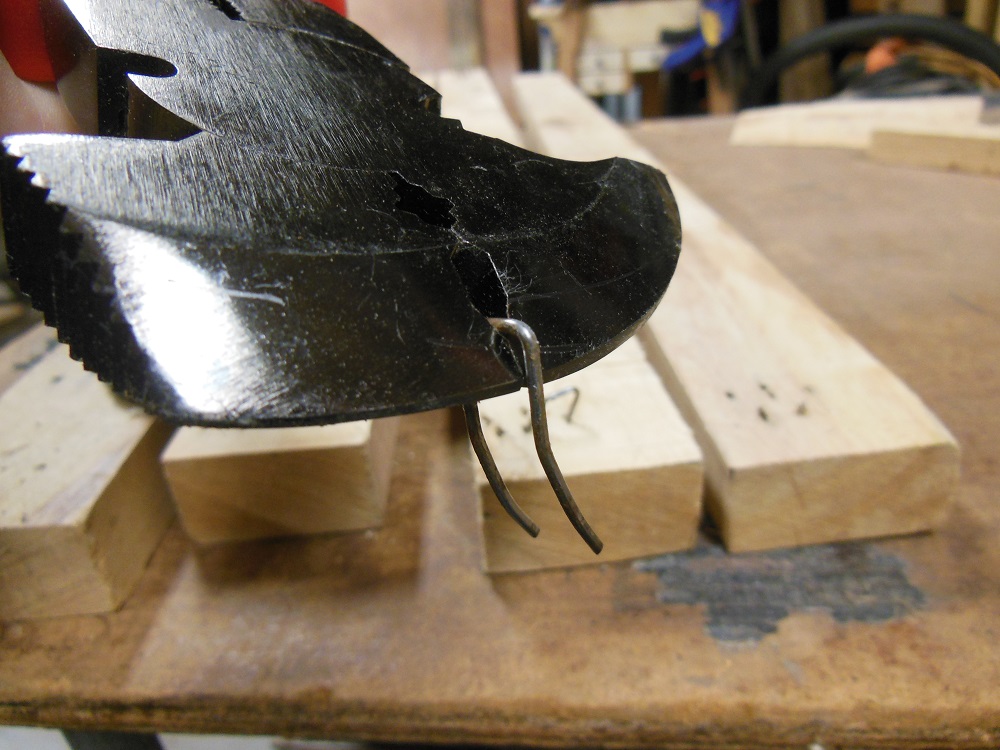
Pulling Staples
Nails aren’t the only fasteners used to assemble pallets and crates. In rarer cases, there are staples to contend with. Fencing pliers are the perfect tool for this.
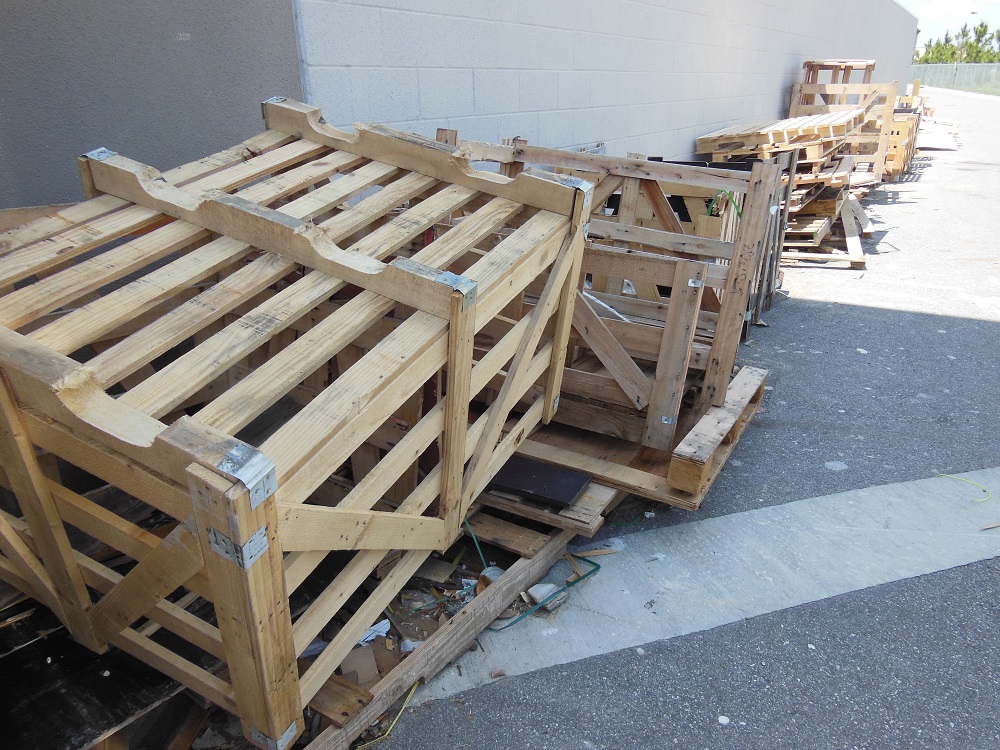
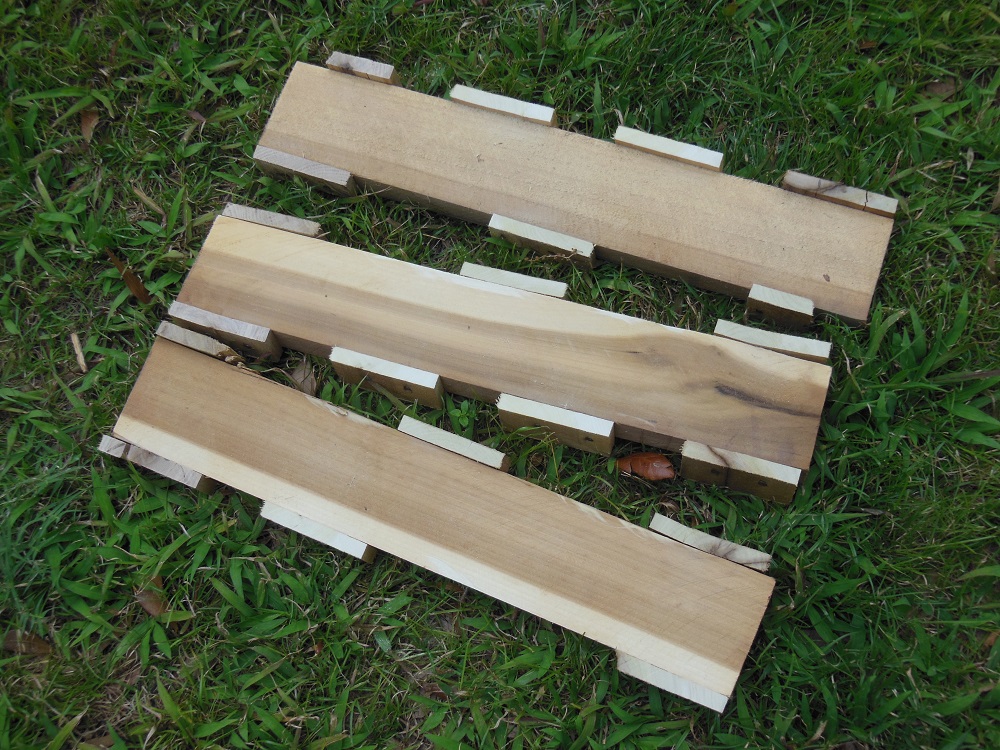
Should I Tear This Pallet Apart?
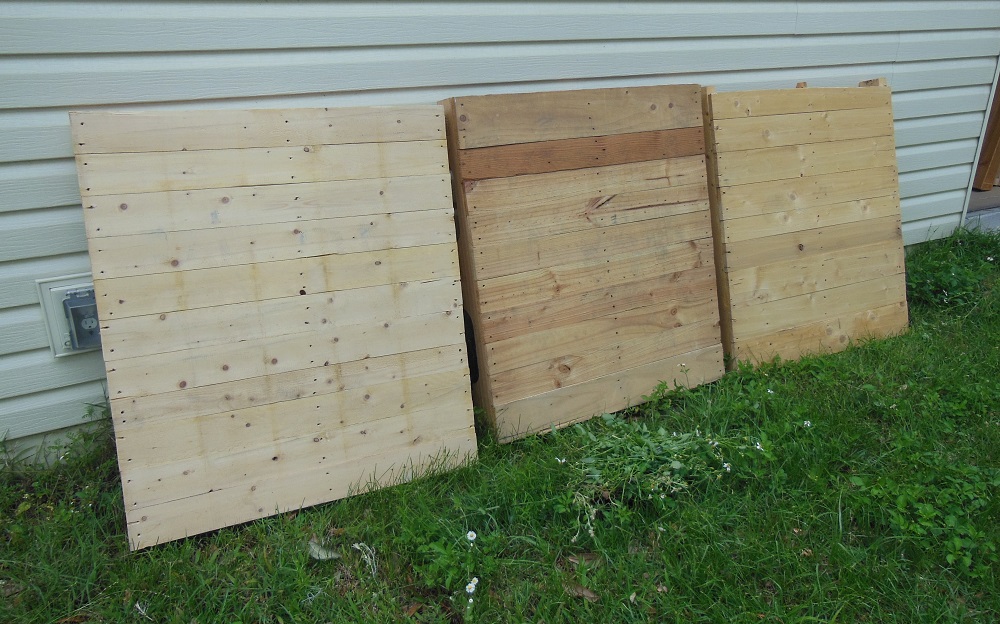
Sometimes the question isn’t “how to bust it apart”, but “should I bust it apart?”. Some pallets – and other ore – just beg to remain intact. With the three pallets above, for example, I just can’t bring myself to tear them apart. I feel like I can find a better use for them as they are.

Everything Else – Pallet Mining Is A Mixed Bag
We’ve covered the most common situations you’ll face while harvesting pallet wood. This post is far from exhaustive, but it will start you off on the right foot. Just make sure that foot doesn’t land on top of a rusty-spiked pallet board. Be creative; but be safe. Happy mining and may your harvest be ever bountiful!
Eizzy Bar Pro for $99.
Pallet Monster for $31-$35. You supply your own pipe.
Dremel Saw-Max for $79.
3/8″ diameter screw extractor for $16.99
very interesting, do you know where in hampshire can one find dismantled machinery crates ? 5ft or + long…….regards mike