

Got a sporty new fridge, with a water dispenser or ice maker? Need to hook up a water supply line to feed that sporty new fridge? You’re probably eager to test out your fridge’s capacity for cranking out ice for celebratory frozen daiquiris, and you may be tempted to take the fastest, easiest way to get that beast hydrated. Do yourself a favor, though; for just a minor increase in effort and expense, you can install an ice maker line that will still be up and running when it’s time for your NEXT sporty new fridge.
What is that fast, easy way of which you speak, you may be asking, and in this era of instant gratification why shouldn’t I use it?! Excellent questions, grasshopper! There are installation kits available that come with tubing and a shutoff valve called a self-piercing saddle valve. These valves are designed to straddle and clamp onto a water supply line. They have a sharp pointed needle that pierces the tubing they’re clamped to, which then allows water to enter the icemaker supply tubing. The needle is sharp enough to pierce even copper supply lines.

The problem? As most people who own one can tell you, after a few years, many of them leak or corrode. And if you need to disconnect the supply line down the road, almost none of them will work to actually shut off the water supply. They don’t meet code in many states, so if you plan to put your house on the market any time in the future, be prepared for possible negative and unkind remarks from the home inspector.
The better solution when it’s time to install an ice maker line is to cut the water line, install a T fitting and a ball shutoff valve, and add your supply line. It may sound intimidating, but with readily-available fittings, it’s really pretty simple to install an ice maker line when you have copper, CPVC or Pex water supply lines.

The Cool Stuff You Need To Install An Ice Maker Line
Most refrigerators with ice makers or water dispensers come with at least some of the connectors you need to install an ice maker line. In most cases, though, you’ll need to provide the ¼” line to connect the fridge to your home’s water supply.
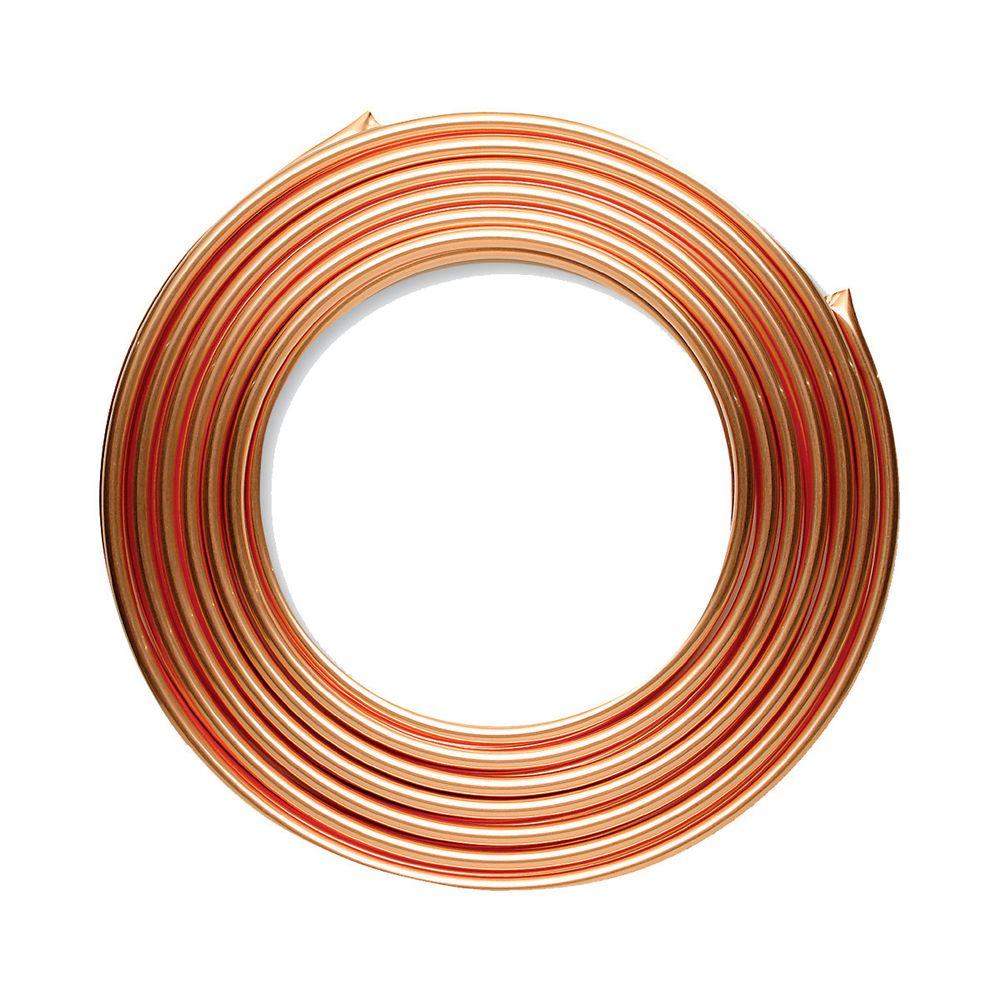
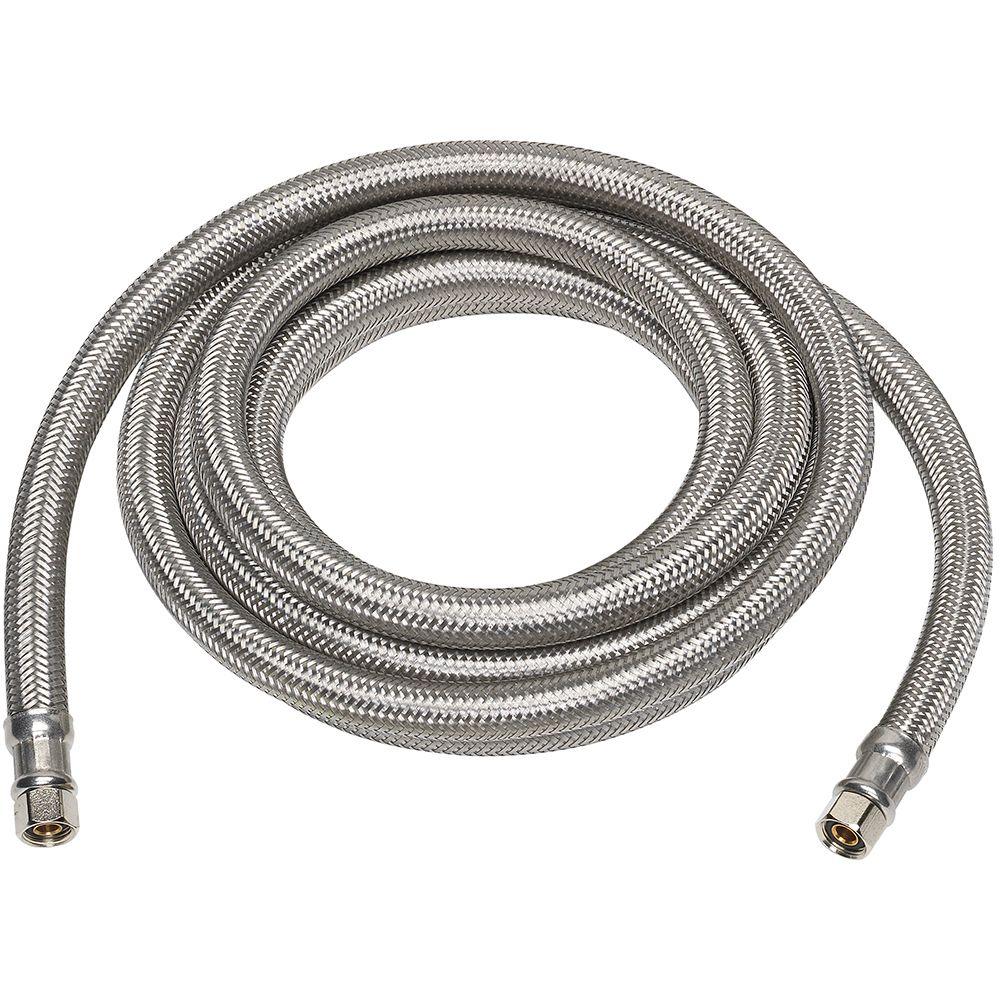
The most common choices for supply line include copper, plastic (poly) and braided stainless supply lines. They work equally well to deliver the agua, and each has drawbacks. Plastic line is obviously not as rugged as copper, and can be cut or crimped if it’s subjected to abuse. Copper can develop leaks if it gets crimped, and braided stainless can be tough to find if you need a supply line longer than 10-12’. Stainless line may also be a bit tougher to find.
Other items to add to your shopping list will vary, depending on what type of plumbing you have: Copper, CPVC, or Pex. In each case, your goal is the same – to tap into that water supply, and send some up to make cubes for your Margaritas. Here’s a list of what you’ll need for most installations:
How To Install An Ice Maker Line – Shopping List
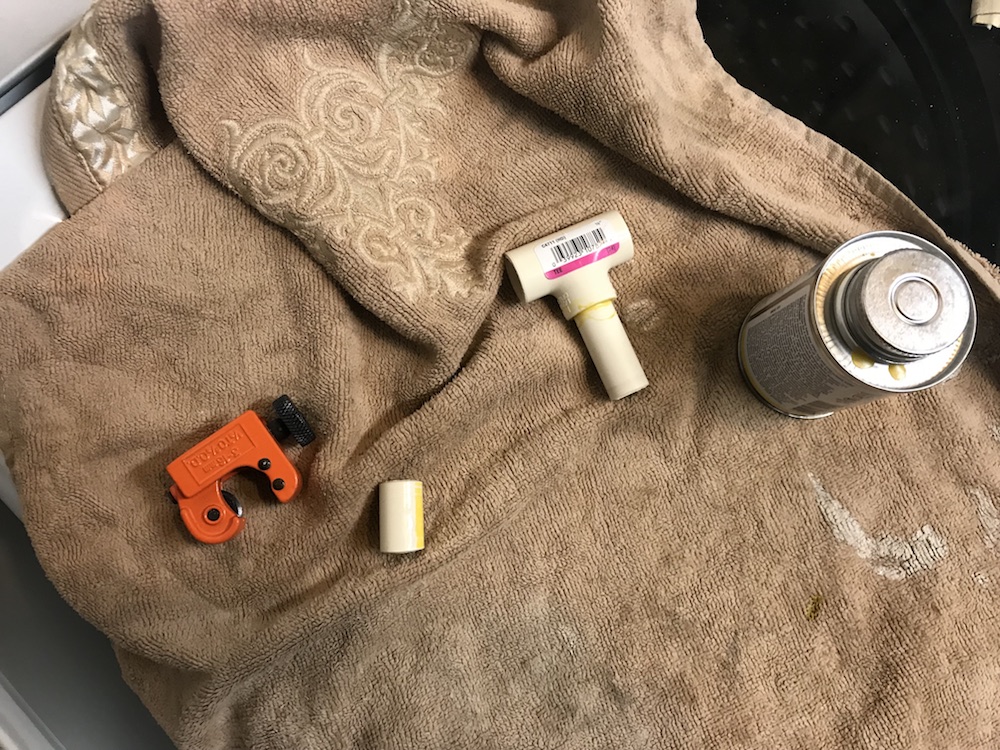
• A tubing cutter, sized to cut your water pipe. A close quarters tubing cutter is best, as it will fit into pretty tight spots, but if you already have a full-size cutter, and good access to your pipes, that will work fine.
• A T fitting for your supply type. An excellent option, if you have ½” copper, CPVC, Pex or PE-RT tubing, is the SharkBite ½ x ½ x ¼ compression fitting. It’s also available in a ¾” version, and is by far the fastest way to get you hooked up.
• Cleaner and glue if using PVC pipe
• A drill and bit, if your ice maker tubing will need to run through a wall or floor
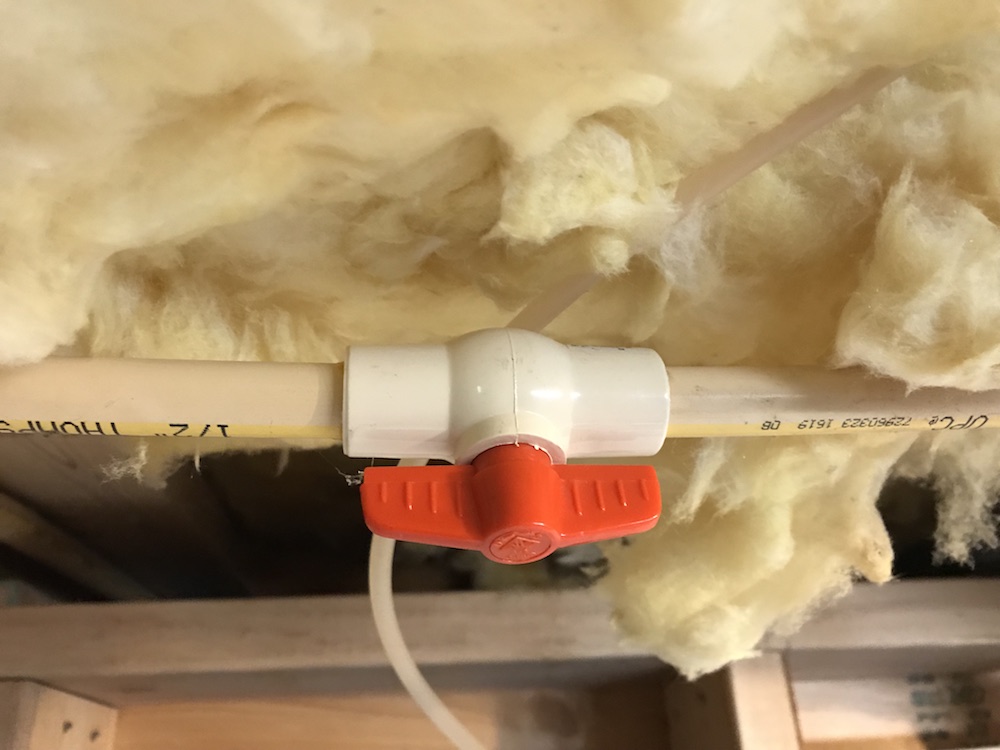
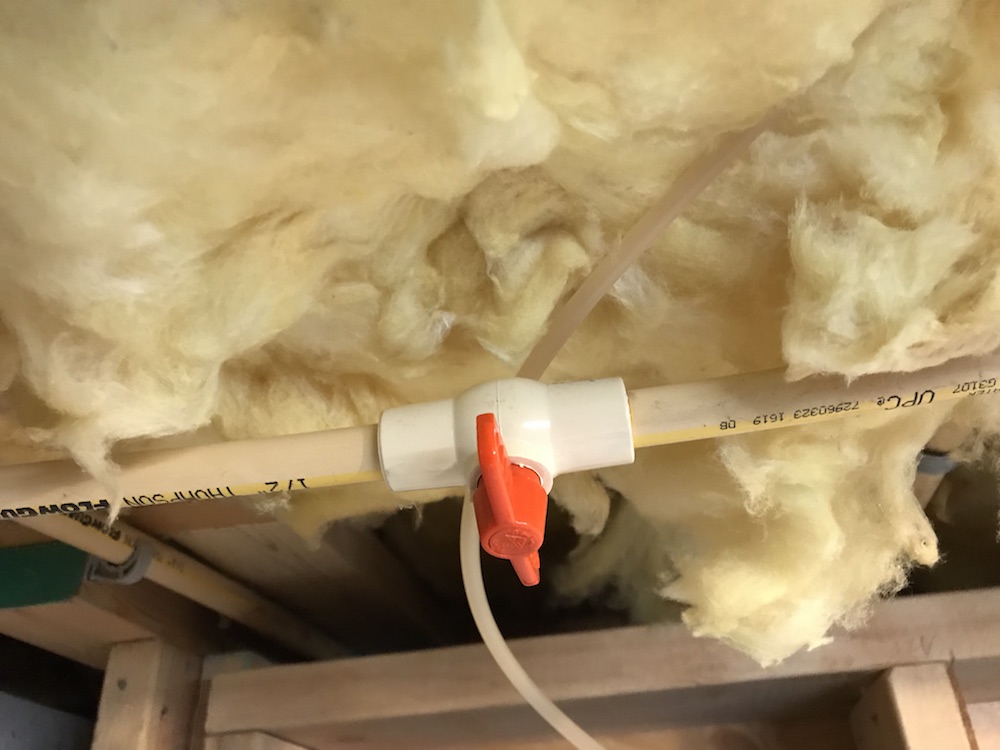
• A shutoff valve to be installed close to where you tap into the water line. You don’t need this if you get the T shown above with the built-in valve.
• A second in-line shutoff valve for the tubing as it gets close to the fridge. This is required by code in some areas.

Plan Your Route To Install An Ice Maker Line
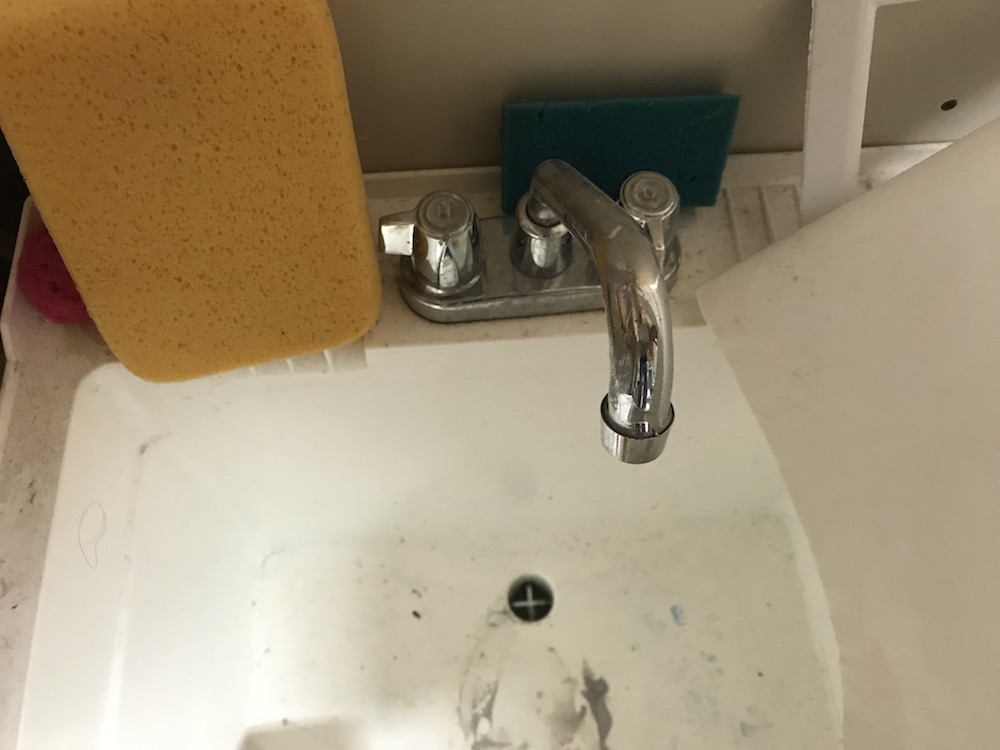
Obviously, you’ll need a source to tap into for water when you install an ice maker line. Most refrigerators are in the kitchen, and most kitchens have a sink, so there should be a cold water pipe not too far away. If your house has a basement, check the area under the kitchen floor. Try to find one as close to the fridge as possible, preferably with no walls or other obstacles to contend with. If the fridge backs up to a wall with a water heater or utility sink, that might be another possible source to tap into.
The tubing you’re using is generally sold in lengths of 20’, so you’ve got some room to play with. Look for the path of least resistance, where you’ll be able to run the tubing with no tight bends. It’s also best to keep it up and out of the way, to avoid anyone banging into it and dislodging or damaging it.
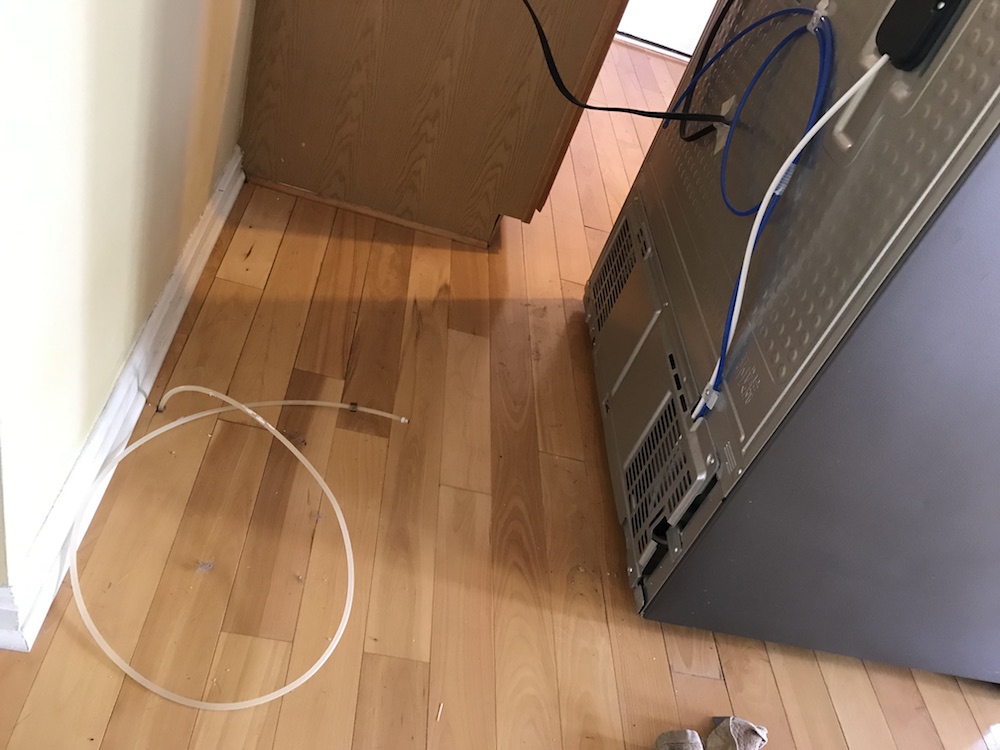
Once you’ve located a good source, drill a hole large enough to fit the tubing through. Make sure you know what’s on the other side of the floor or wall you’re drilling through, unless you want another project to add to your DIY list! Feed the tubing through, being sure to leave plenty of tubing behind the fridge to make your connection, and allow for the fridge to be pulled out several feet from the wall.
Making The Cut To Install An Ice Maker Line
Have you located a water source, and got all the parts you need to install an ice maker line? Let’s do some water line surgery! Step one, though, unless you’re fond of an unscheduled shower and a bit of water damage, is to shut off the water supply to the line you’ll be cutting into. You also want to double check that the pipe you’re using is a cold water pipe; making ice from hot water isn’t quite as efficient. If you’re not sure, trace the pipe back to make sure its source is a cold-water supply pipe. Along the way, hopefully you’ll encounter a shutoff; if not, you may have to shut off the water where it comes into the house.
As you prepare to make the cut, be aware that, being water pipes, they contain water, and some quantity of it is going to escape. Have a bucket or other container ready, along with a towel or rag, to catch the outflow. If there are any finished surfaces close by, protect them with some plastic sheeting. Or an old shower curtain (you need a new one anyhow, right?).
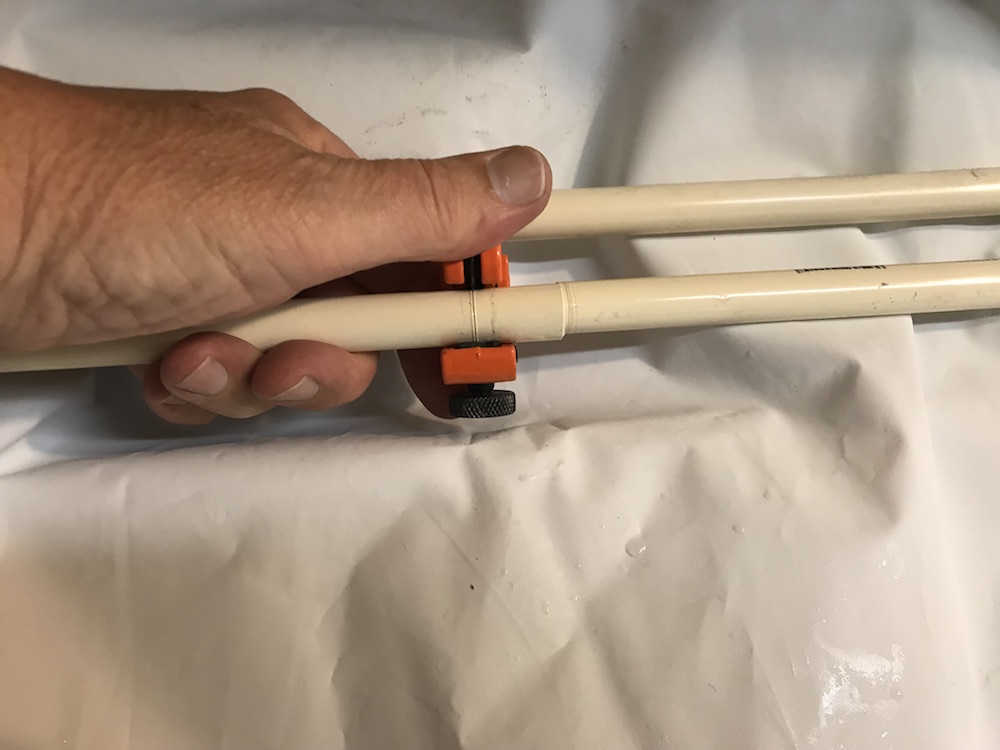
Mark the pipe, and use your pipe cutter to make a nice, clean cut. Don’t rush it; snug up the cutting wheel, make a rotation or two, and tighten the knob just a little before making the next couple of rotations, until the pipe separates. To help the water drain completely, open a cold water faucet at a higher level to break the vacuum (don’t forget to turn it off after the water is drained).
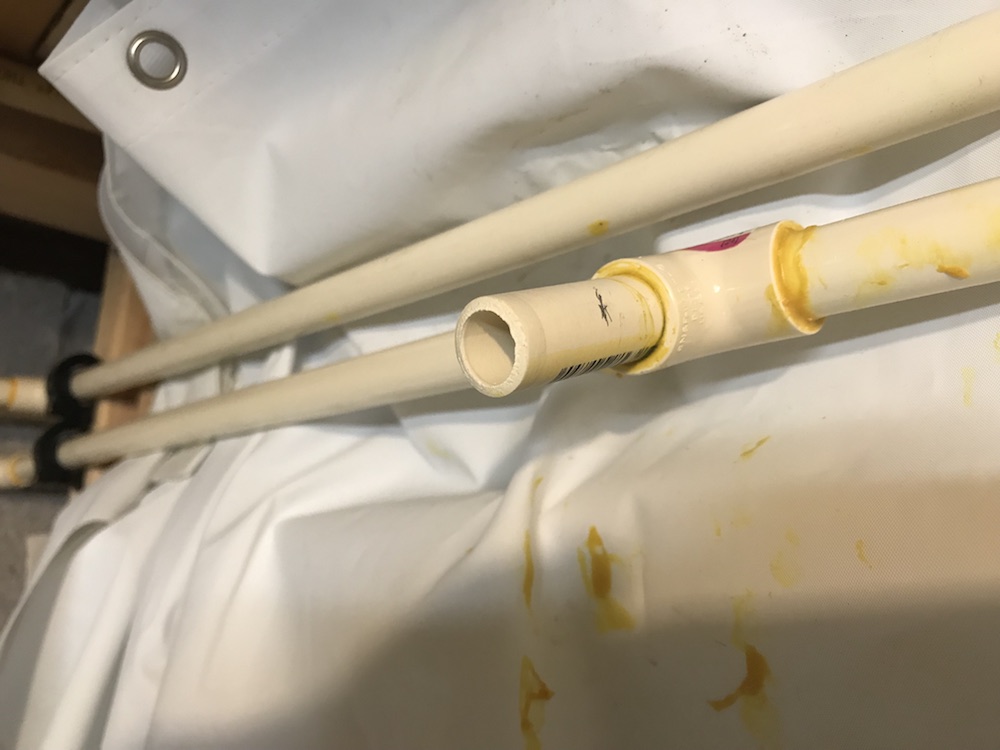
Once the water is drained, make a second cut to fit your T fitting into place. Determine how far the pipes extend into the T fitting, then hold the T fitting up against the pipe, and mark where the second cut needs to be to allow the pipe to extend in the correct amount on both sides.
If you’re using a CPVC fitting to install an ice maker line, you can determine the right depth by looking into the fitting and seeing where the “shoulder” is that the pipes will butt up against. For SharkBite fittings, you can either buy a spacer tool, or just measure the amount shown in the chart for your size of pipe.

Get Teed Up To install An Ice Maker Line
Once the pipe has been cut, you’re ready to zoom right along! Now it’s time to install the T fitting. Make sure the ends of all the pipes you’ll be using are clean and smooth, with no burrs. You can use a piece of emery cloth or a little piece of sandpaper if needed.
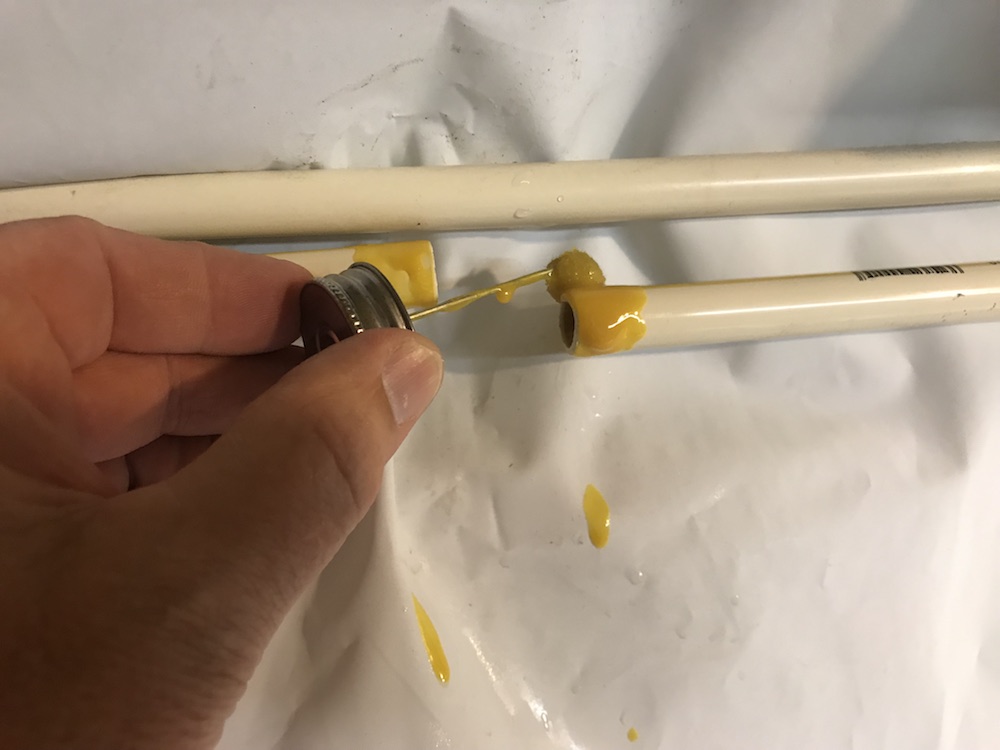
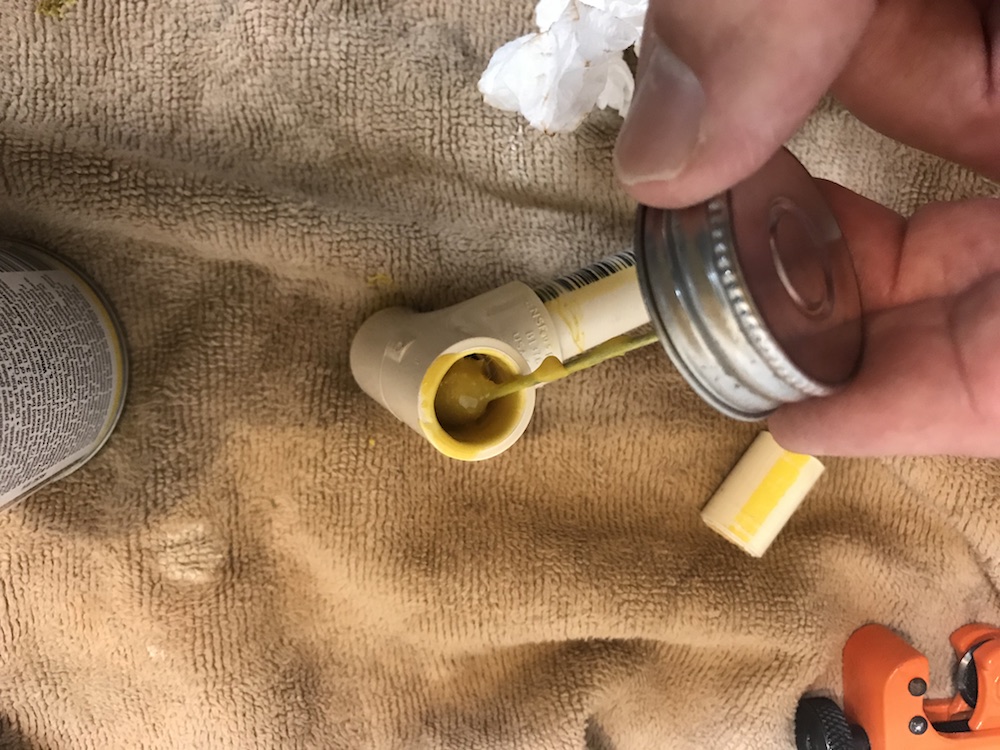
If you’re using CPVC, dry fit the pieces to make sure everything fits properly. Take it back apart, and clean the ends of the pipe and inside the T fitting with the CPVC cleaner. Make sure no water is still dripping from the pipe, so the glue will set properly.
Now follow the instructions on the glue container. Normally, you coat the ends of the pipes liberally, put a lighter but thorough coating inside the T fitting, then re-coat the pipes. Insert both pipes into the fitting, and give it about a ¼ turn to twist it into its final position. Note: The glue sets up FAST, so you have to work quickly. Once it’s all together, hold the parts in place for about thirty seconds.


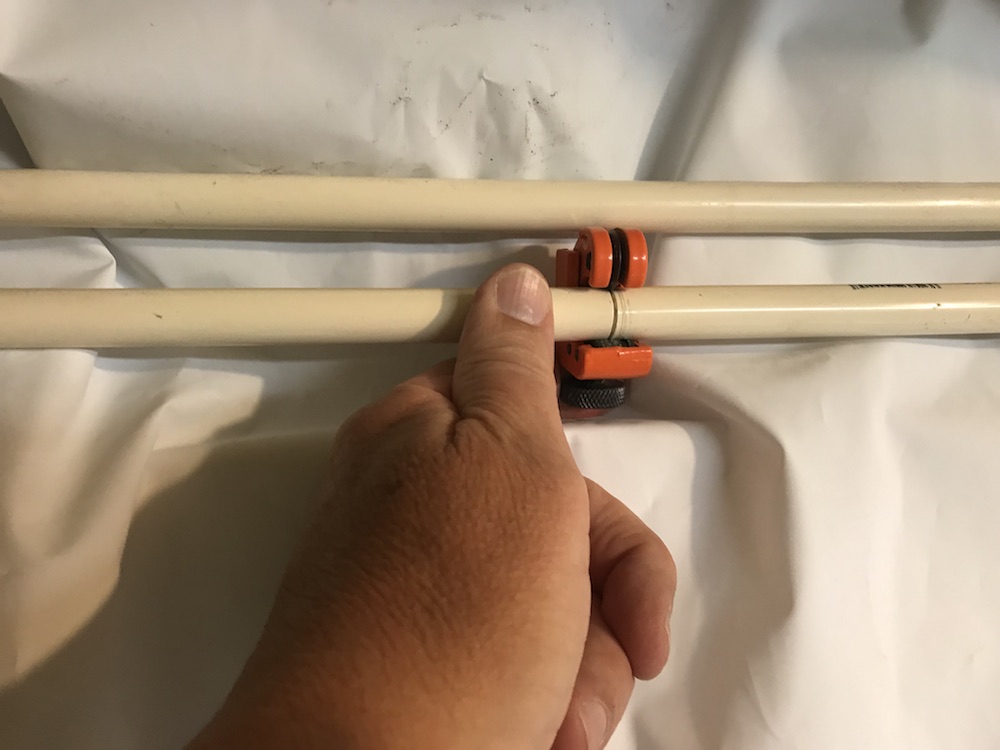
You can be a bit of a slacker if you’re using SharkBite connectors to install an ice maker line. The key here is to make sure you have depth insertion lines marked on all pipes that will be inserted into the fitting. This ensures all the parts you put together will stay together, without spraying water everywhere, which is generally the preferred outcome. Insert one end up to the mark, then the other end; the fitting can be rotated after everything is together with no negative consequences.
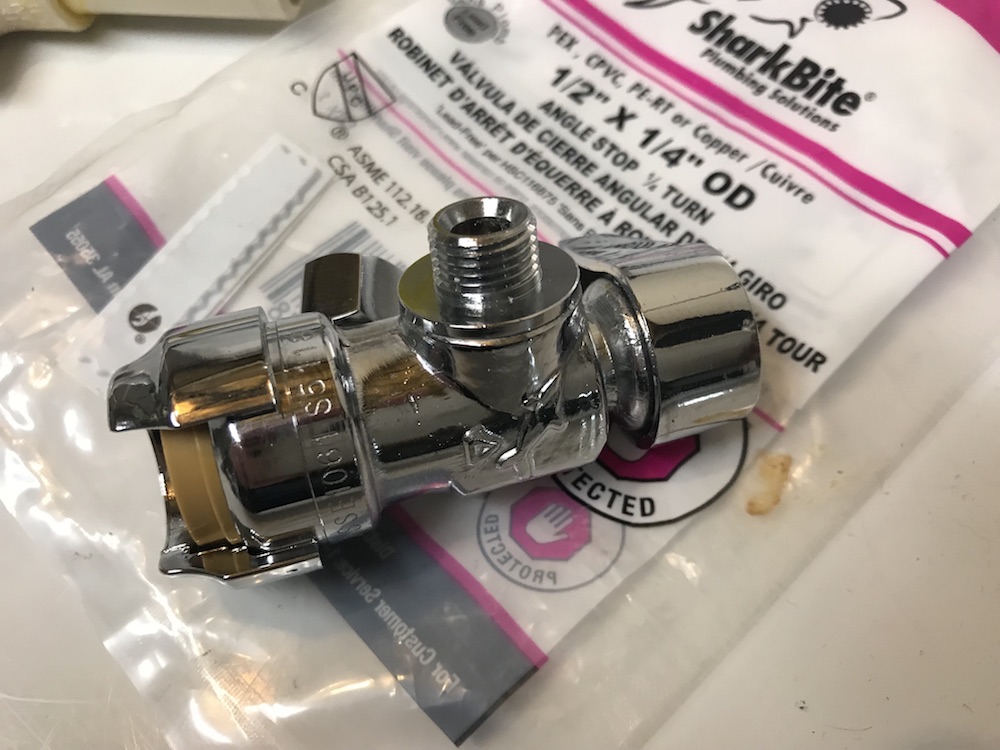
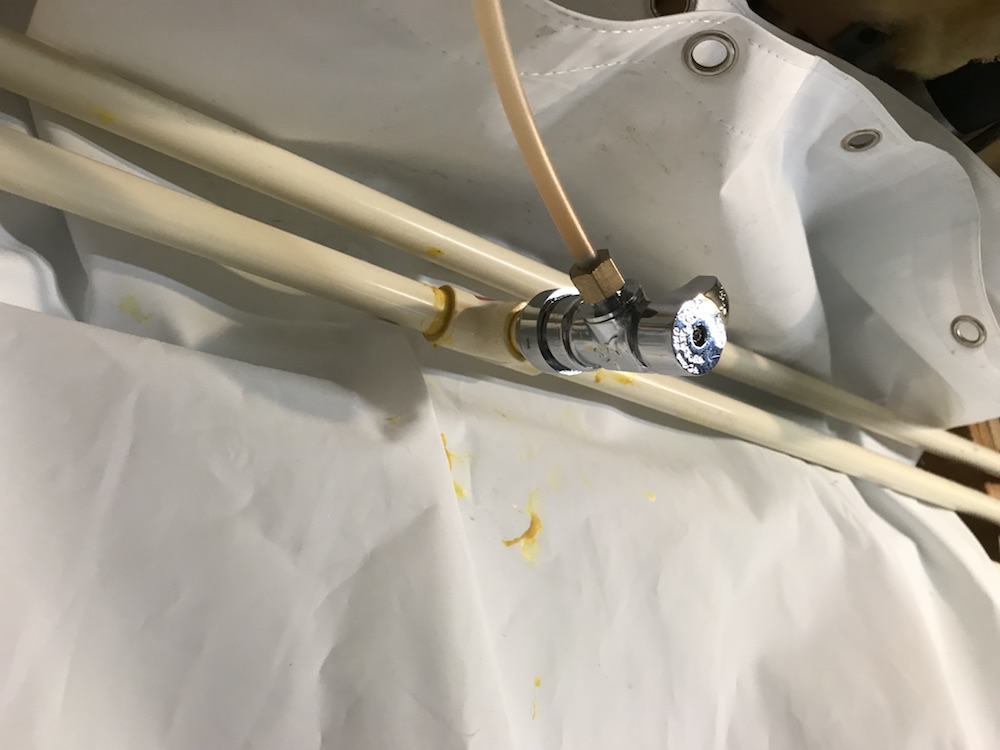
At this point, if you were fortunate enough to score the SharkBite T fitting with the shutoff valve and ¼” compression outlet, you’re ready to connect your ice maker line! You have permission to skip the next section, although you’d be missing some fascinating and insightful information. Unfortunately, the home center we went to didn’t have one in stock, so we used a CPVC T fitting, and a 1/2″ x 1/4″ SharkBite shutoff valve. No biggie, just one more minor step.
Add A Shutoff Valve When You Install An Ice Maker Line
With the T fitting installed, your quest to install an ice maker line is in the home stretch. It’s a good idea to install a shutoff before you add the ice maker tubing. This will make it much easier to do repairs in the future, in case the tubing gets damaged and springs a leak, or requires other servicing.
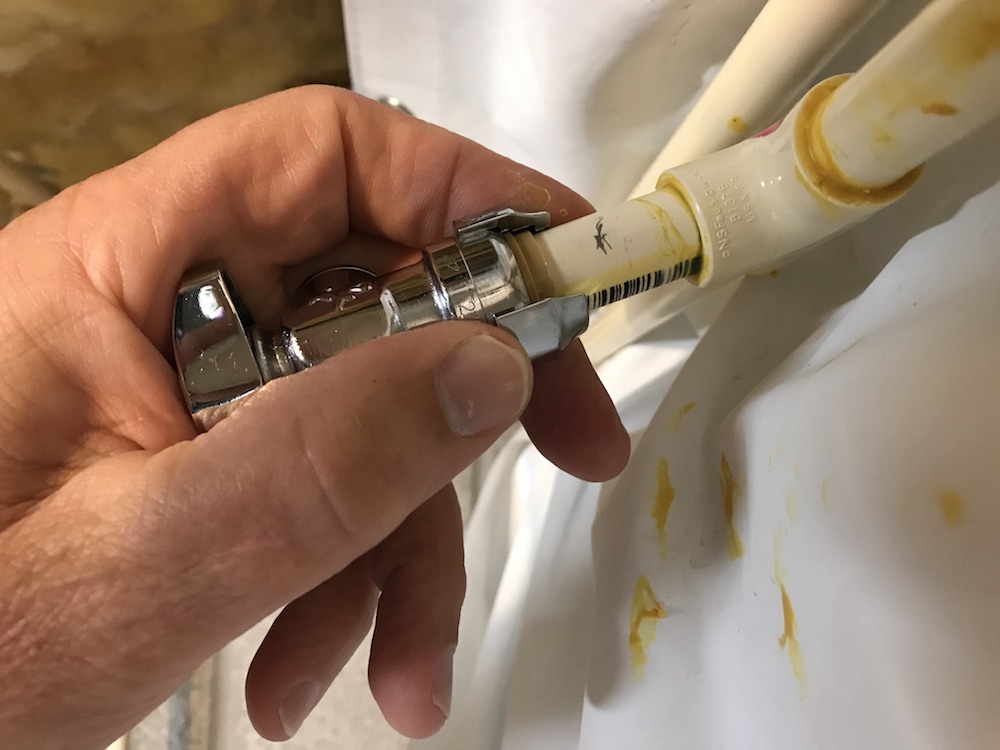
To get started, just install a short length of pipe into your T fitting; three or four inches long is plenty. If you’re using CPVC, follow the same process to get the pipe installed. For SharkBite, again make sure you mark the depth settings on the pipe, and just push it into place.
The fastest and easiest way to install the shutoff valve is to use a SharkBite valve. They’re available in a size that will slide right onto your stub, with a straight or right-angle output end that will accept the compression fitting from the ice maker tubing. Again, make sure to mark the correct insertion depth, then just push the valve body onto the pipe until you hit the mark, and boom – you’re ready to connect your tubing!

Go Tubular – The Final Steps for How To Install An Ice Maker Line
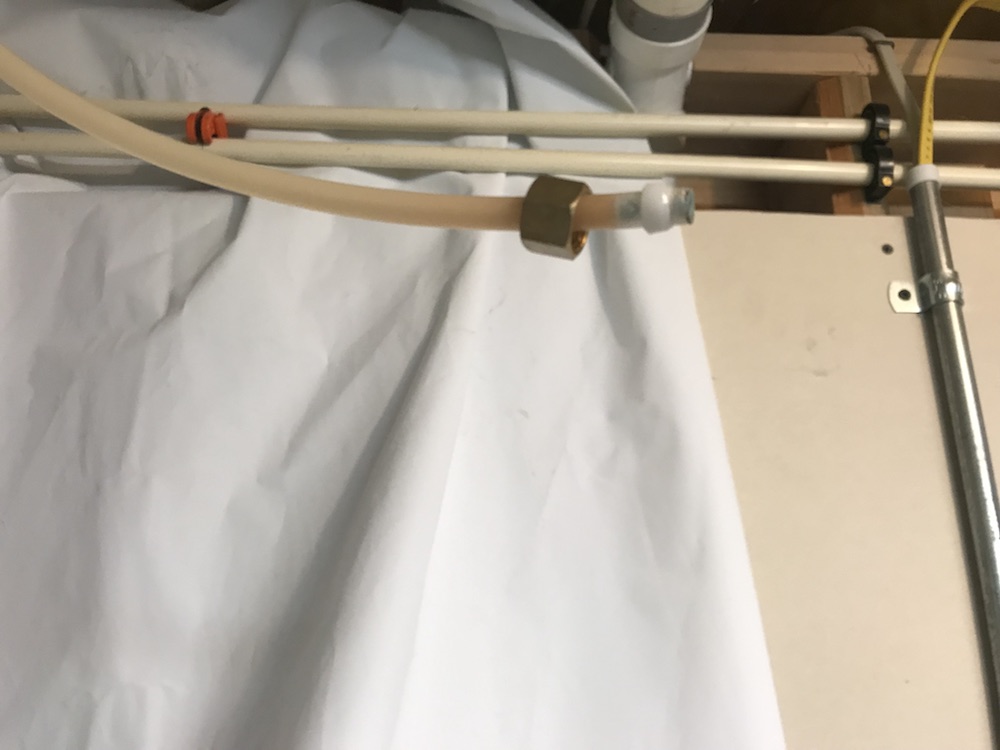
You’re almost ready to start cranking out some ice! The only thing left to do is to connect the compression fitting on the end of the ice maker tubing to the shutoff valve, and connect the other end to your fridge. It’s pretty straightforward; make sure the compression ring is in place around the tubing, and snug up the nut around it onto the threads on the shutoff valve, and onto your refrigerator’s connection point. Don’t go all Hulk on it, just make sure it’s good and snug.
One thing to consider before you turn the water on: Most modern refrigerators with water dispensers or ice makers have a water filter. If yours doesn’t, consider installing an in-line filter. It will have similar ¼” compression fittings, and can be installed quickly at any point in the tubing running to your fridge. An online search for “in line ice maker filter” will provide you with about four billion choices, and your local home center should have plenty in stock.

And that’s it – you’ve made it to the ice age! Turn the water on slowly, and check for leaks. There should be instructions with your fridge, but in general run a few pitchers of water through the dispenser, or let the ice maker fill the bin at least a couple of times and dump the cubes, to make sure you have nice clean ice, ice baby. Let me know when the daiquiris are ready!
So here’s the deal: I cannot stand those crappy plastic 1/4 tubing lines to run water to the fridge. Are you kidding me? All of the rules and regulations on plumbing out there and this is how the majority of households run water to their fridge? Oh my God, plumbing is horrible. (Why can’t they invent a kitchen sink with the drain/strainer built in already!? without the drain/strainer assembly to put in with HA! Putty?!! OMG!) I swear, plumbing is the worst of the trades–how many thousands of years old is the concept of running water through a tube and it never has changed since the greeks! We can put a man on the moon 50 years ago but I cannot for the life of me, figure find a connector that connects a braided ice maker line from the fridge to a 1/4 OD plastic tube coming from my reverse osmosis water system. Tried every combination of fittings from Home Depot, Menards, Lowes–even stumped the professionals at Auburn Supply here in Chicago. No one makes the right fitting. And don’t even get me started on saddle valves or those Shi$%Y brass 1/4 compression fittings–seriously, what are these even used for? If you put a plastic 1/4 tube on them–even with epoxy, they blow off. Can anyone point me to a fitting ( which should be extremely common given the number of Refrigerators that have ice makers on them) that goes to the braided line (which has the fine compression fitting threads and NOT the coarser regular threads common on most fittings)and mates to a quick lock 1/4 OD plastic tubing connector? The brass ones are COMPLETELY useless. Sorry, been trying to get this hooked up for over a week now and really frustrated as usual…
I thought I just landed on a forien planet! I couldn’t find the same fridge line to 1/4 plastic line. I also went everywhere to no avail. So I started writing a new “standard” that could be new international standard.
This is a good step by step guide. Will there be a video showing the procedure?
Thanks, David. Sorry, no plans for a video at present. Give YouTube a try; there’s an incredible amount of useful (and not-so-useful) stuff on there. Good luck!
I used the shark bit connector for mine. Much less work and a lot less likely to burn my hoise down soldering copper pipe! Good article!
Thanks, Matt! The SharkBite connectors are definitely a lot faster and easier to install. I used to be skeptical about how leak-resistant they’d be, but I’ve used them a few times, and had no problems at all. I think the time and labor savings are well worth the additional cost.