

Band saw boxes have a distinct aesthetic that’s hard to duplicate by other means. The possible shapes, styles and drawer arrangements – including hidden drawers, lids and lift-out trays – are limited only by your imagination. They are usually made from a single, solid chunk of wood. A band saw box can present a baffling mystery to many woodworkers and laypeople alike. But they’re actually deceptively simple to make. To demystify the process, we’re going to break it down for you step by step, with plenty of pictures. There’s a lot of ground to cover, so let’s get right to it!
Grab Your Wood – Let’s Make A Band Saw Box
Band saws are some of the most used stationary tools in my shop; they are amazingly versatile. And band saw boxes are an exploitation of the things band saws do (resawing and cutting curves) – and don’t do (make inside cuts) – really well. They can be made from just about any piece of solid or laminated wood. If it’s large enough, it will probably work.
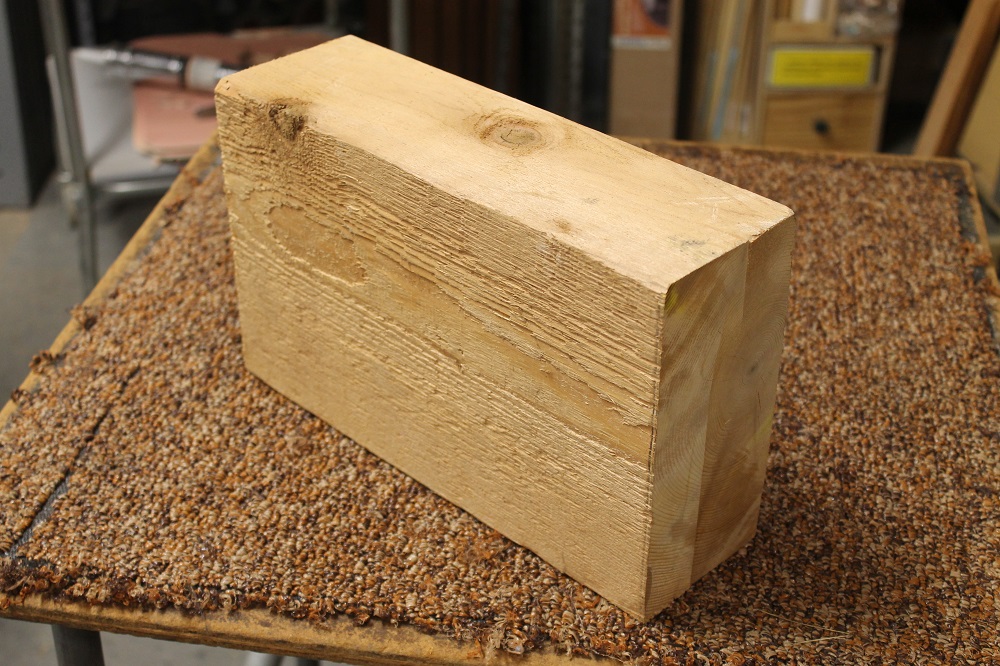
In this case, I’m using a cedar offcut from the construction of a balcony. I didn’t build the balcony, but I did lay claim to the scraps, many of which became band saw boxes and other projects over the years.

With most projects, I start with wood having flat, smooth faces. Since this is cedar, which sands easily, I’m going to ignore the rough surfaces and jump right into the project. Everything will be sanded smooth later on.
A Little Preparatory Clean-up
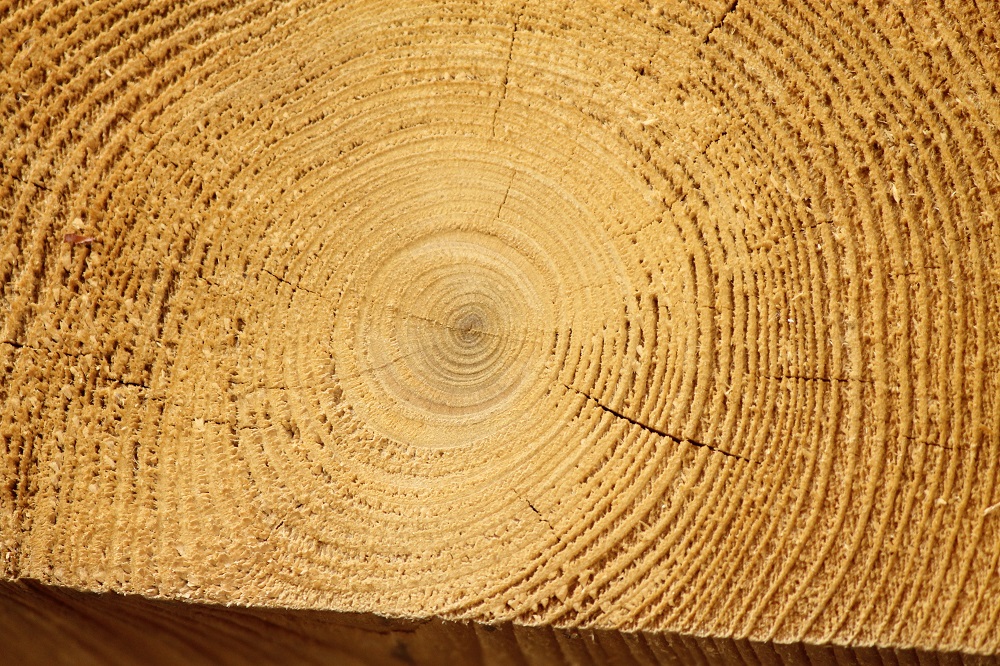
To determine how much wood you have to work with, inspect your blank and note any splits or other obstacles that you might want to avoid. Blemishes can often be incorporated into the final project, becoming attractive features. But split end grain can be a problem and should be removed before proceeding.

Lay Out Your Band Saw Box Design
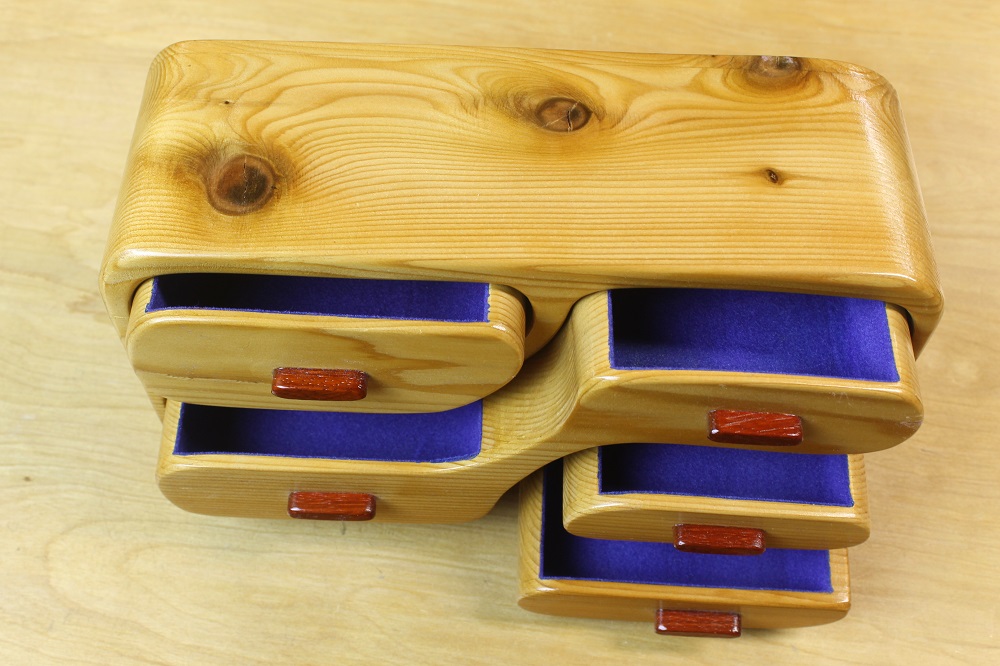
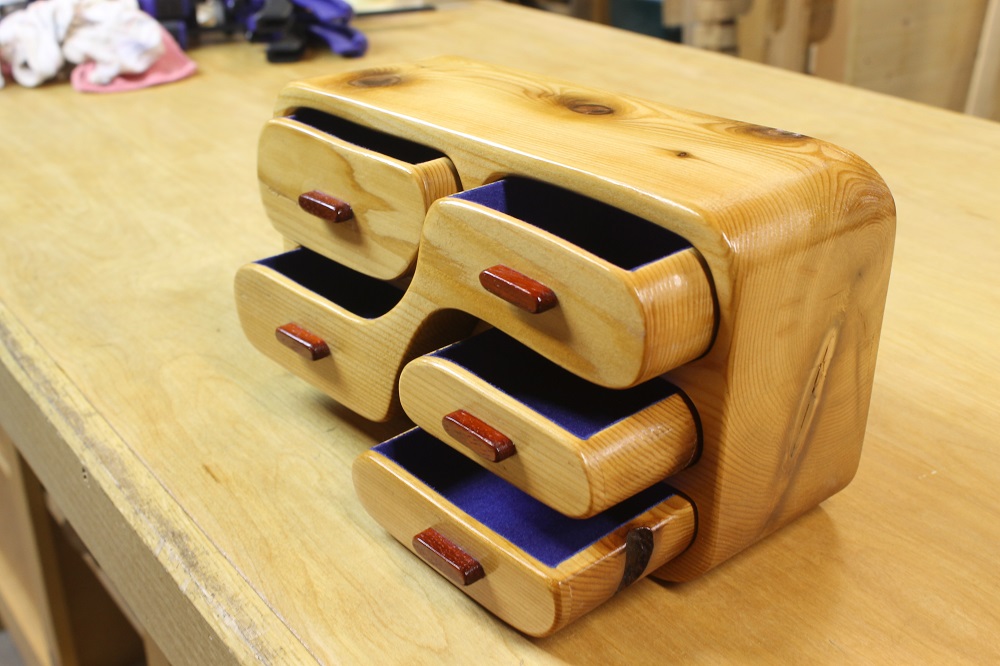
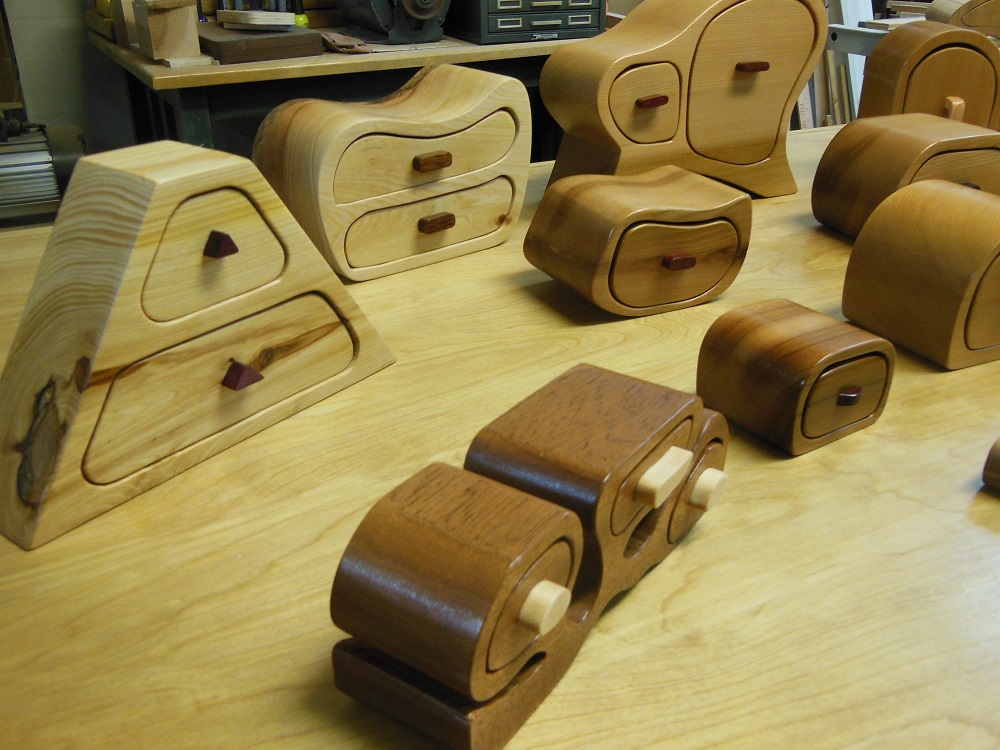
A band saw box can be as simple as a single drawer or as complicated as you can dream up. You can find plenty of design ideas and patterns online. This one is inspired by one of my old designs having a multi-level ganged drawer. The process outlined here can be applied to countless designs, whether like mine or completely different. Simple or complex.
In general, the drawers should have rounded corners because of the way they’re cut. It’s possible to make square cornered drawers using a technique I came up with several years back, but doing so drastically alters the build process. In other words, it’s a project for another time.

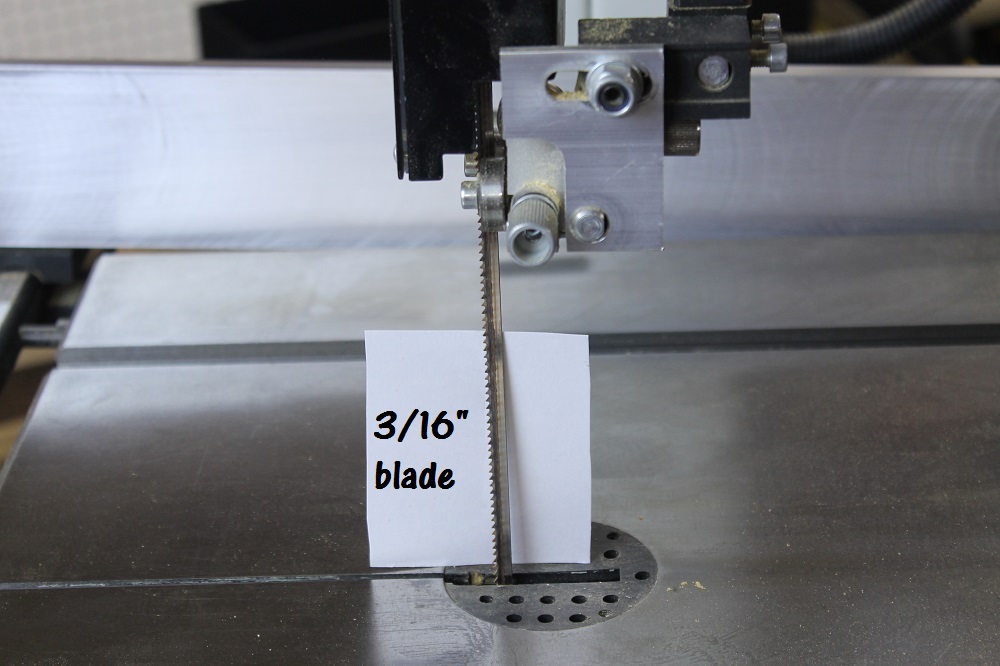
The size blades you have at your disposal may – to some degree – affect your design. Wider blades are great for cutting straight lines and resawing, but they limit the minimum radius of your curves. The smaller the blade (measured from front to back) the tighter curves you can cut.
An Overview Of The Band Saw Box Making Process
The most important aspect of making band saw boxes is to maintain the proper order of operations. Here’s a brief summary before we dive deeper:
1) Cut out overall shape.
2) Cut off the back.
3) Cut out the drawers.
4) Glue the kerfs closed.
5) Cut the fronts and backs off of the drawers.
6) Mark and cut out the interiors of the drawers.
7) Sand only the insides of the drawer cutouts and carcass (but don’t sand the fronts of backs of either).
8) Glue the fronts and backs back onto the drawers and carcass.
9) Make and glue on drawer pulls.
10) Sand.
11) Keep sanding.
12) Sand some more.
13) Apply finish.
14) Finish the drawer interiors with your method of choice.
During the entire process, avoid sanding any cut surface that will be glued later on. If you leave the cuts rough, they will glue back together virtually seamlessly, with very little disruption to the grain pattern.
Baby Got Back – Let’s Cut It Off!
SAFETY NOTE: Band saws and other power tools are dangerous. Be sure you understand how your tools work and how to operate them safely!
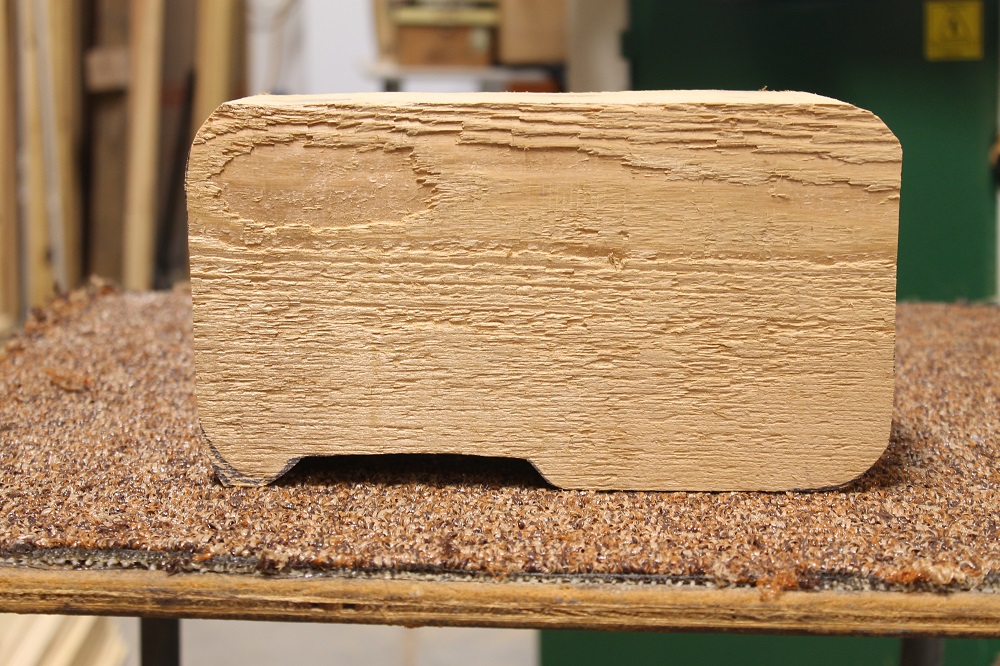
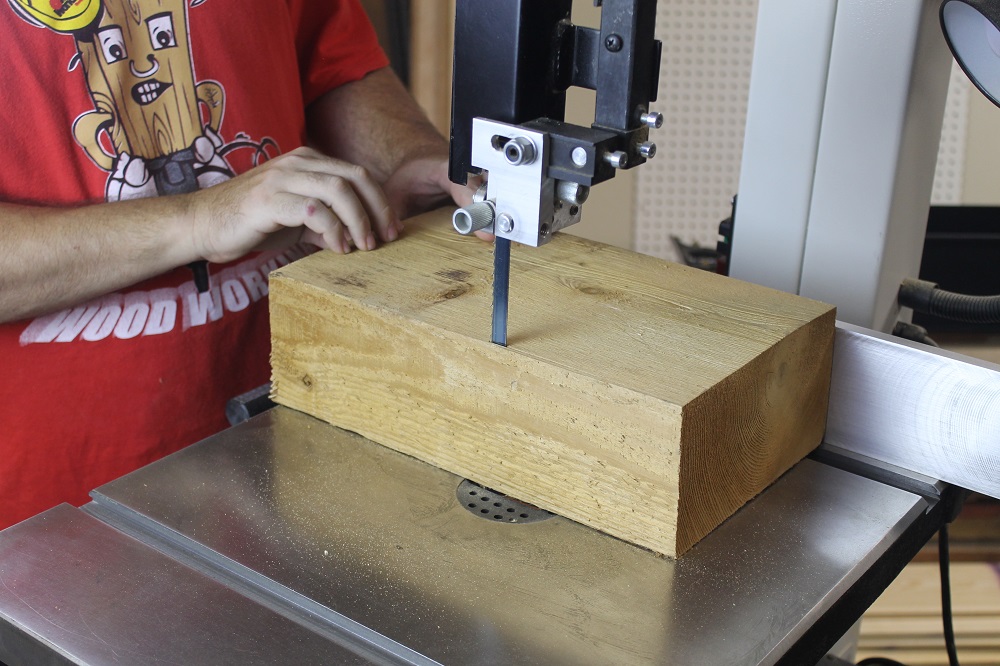
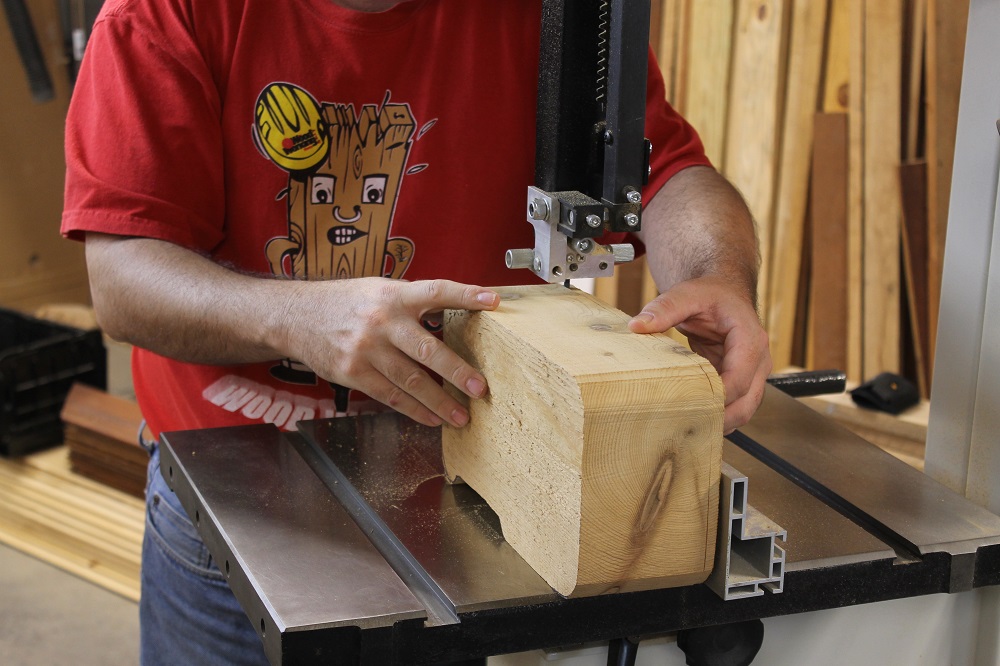
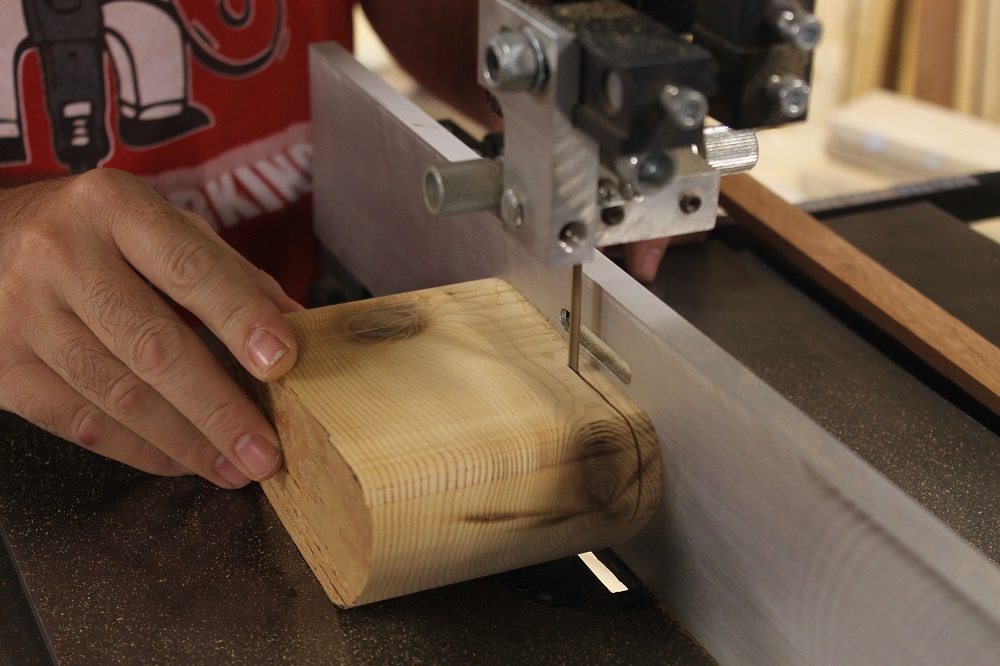
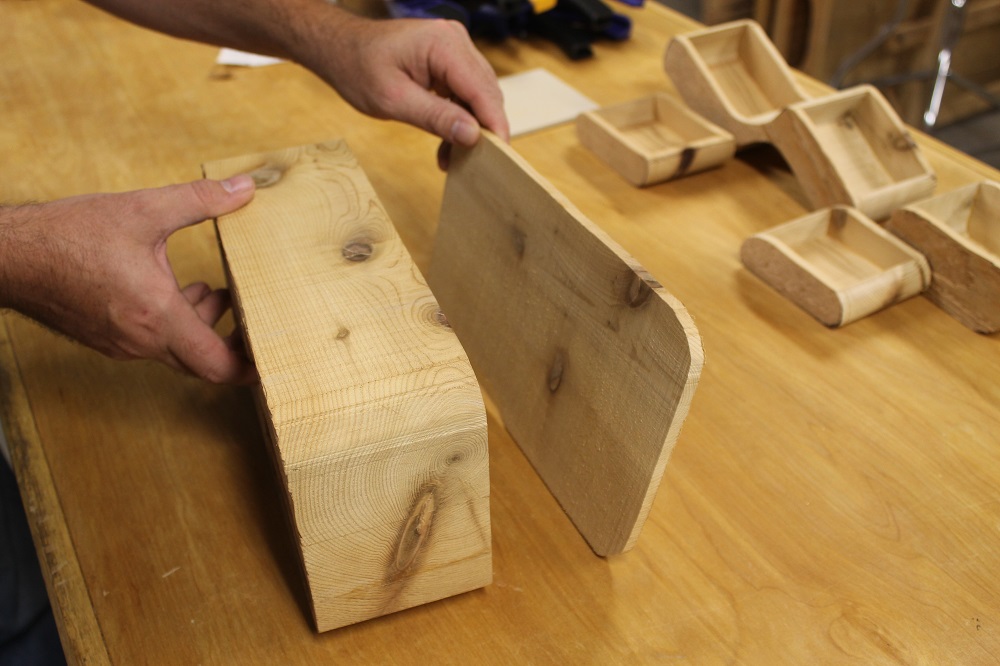
The first step is to cut out the overall shape you want.
Next, slice off the back and set it aside for later. I usually cut the back about 1/8 – 3/16” thick. The larger the box, the thicker the back. In this case, I’m leaving enough meat (1/4”) so that I can sand away the rough outside surface without it becoming too thin.

You’ve Got Some Nice Curves In Those Drawers – We Should Hang Out Sometime
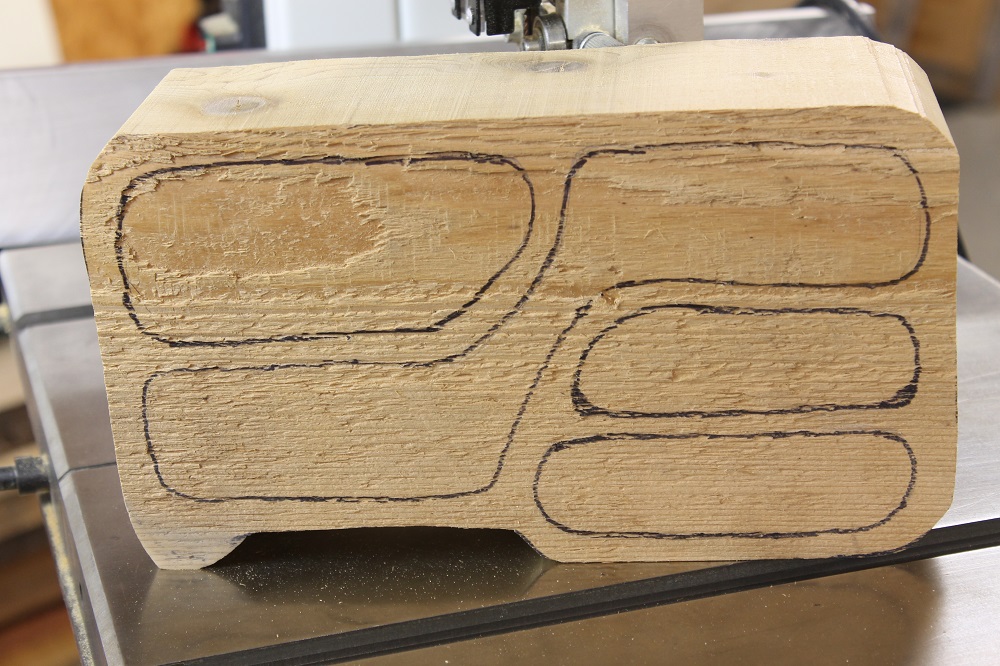
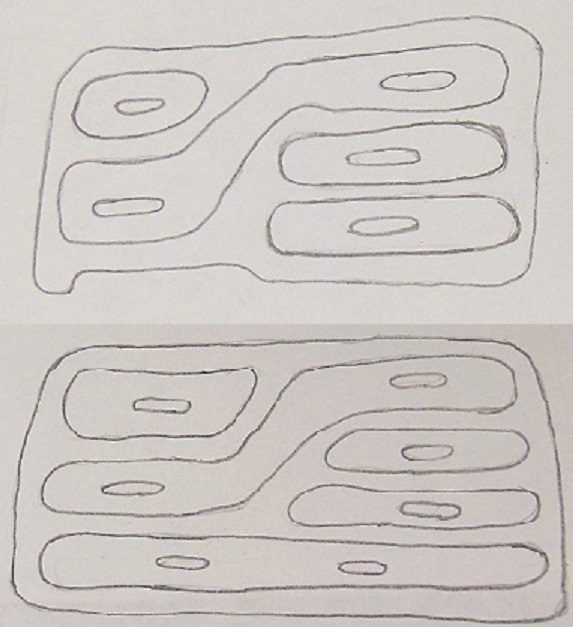
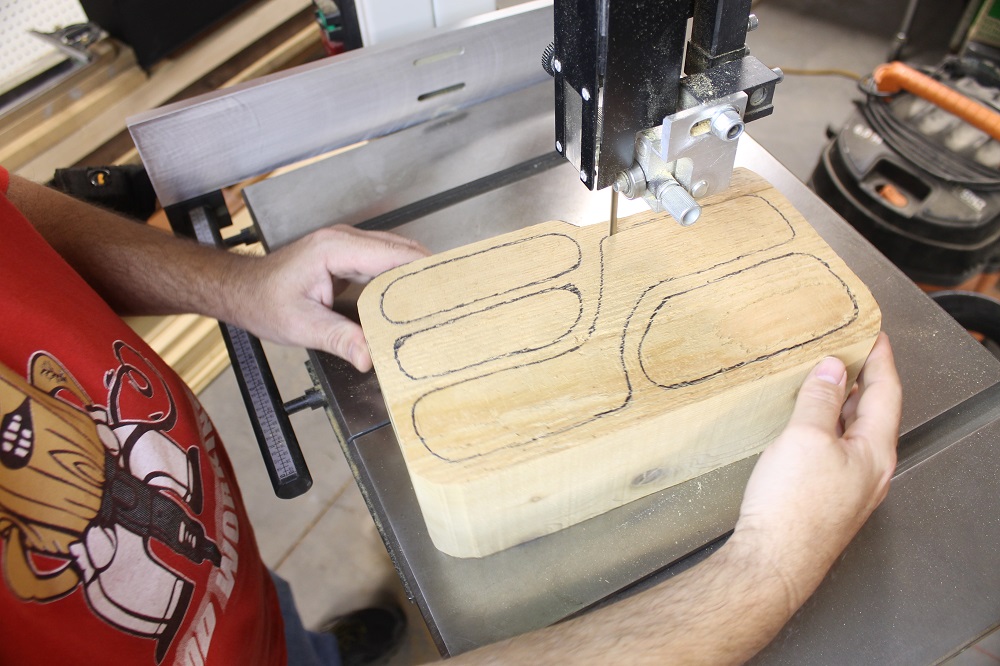
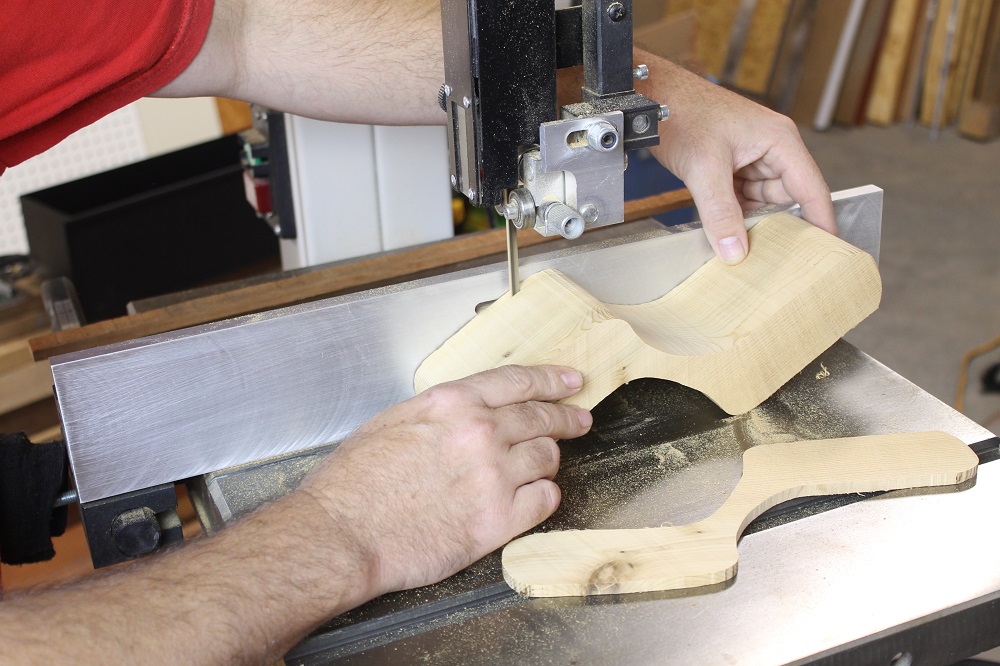
Now that you’ve established the overall shape and size, go ahead and lay out the drawer arrangement on the front of the box. Yours doesn’t have to be fancy, like mine; use your imagination and make it your own. To cut out the drawers, install a blade small enough the make the desired curves. You can always make wider curves with a narrow blade, but you can’t make tighter curves with a blade that’s too large.
Cut Out The Band Saw Box Drawers
Cutting out the drawers is just a matter of following the lines, much like you do when using a scroll saw. In fact, if you’re making a small enough box, you can actually do the entire project with a scroll saw.
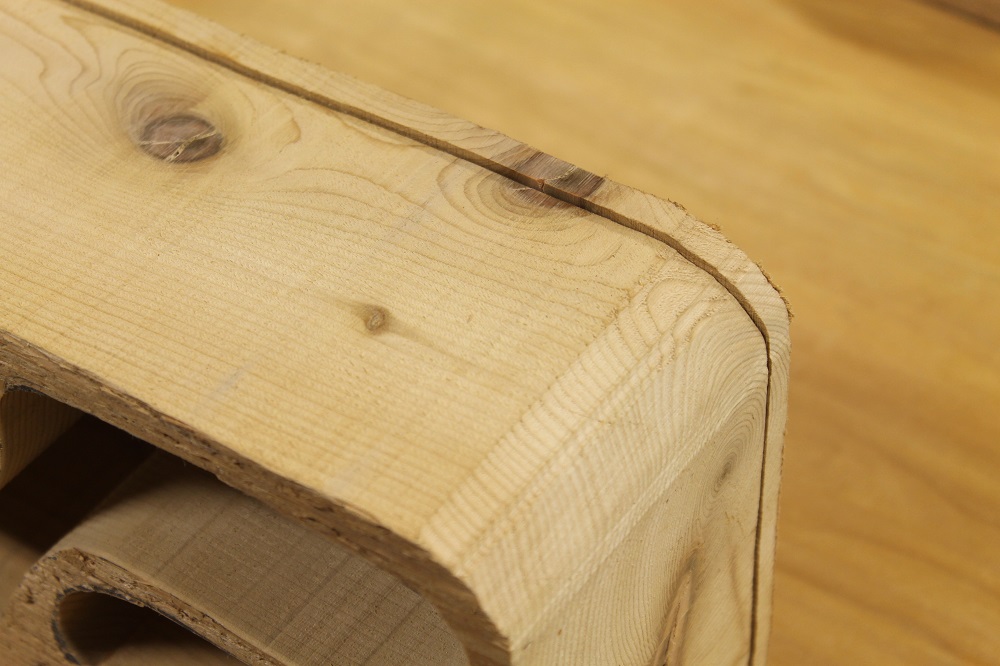
The problem is, how in the world do you get a band saw blade in there to cut the drawers out? Easy; you cut right through the carcass then glue the kerf (the gap created by the blade) closed afterwards. A well cut, well glued kerf will be nearly invisible.
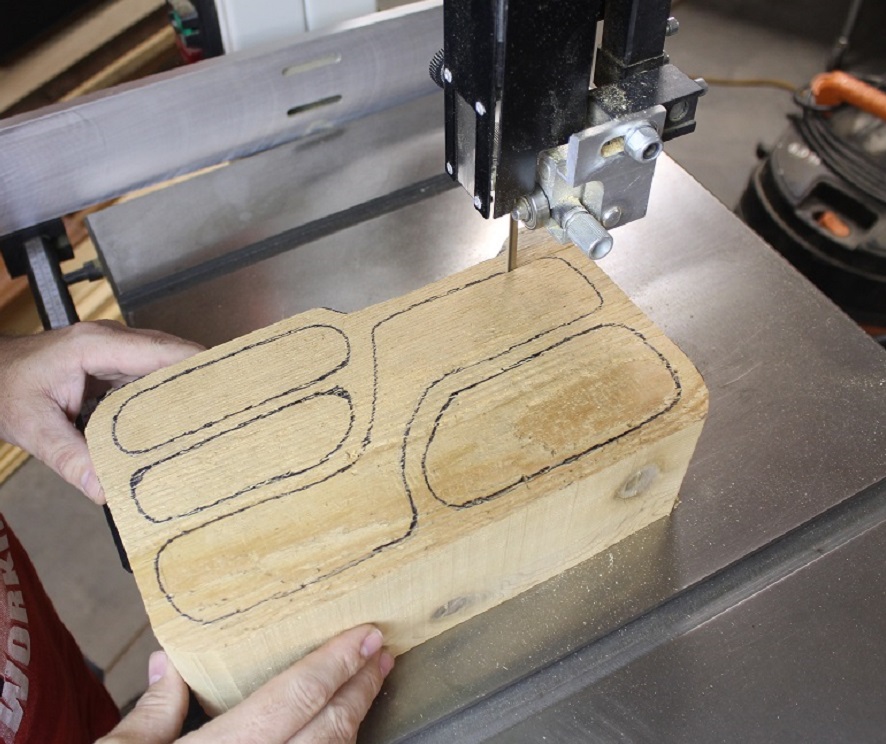
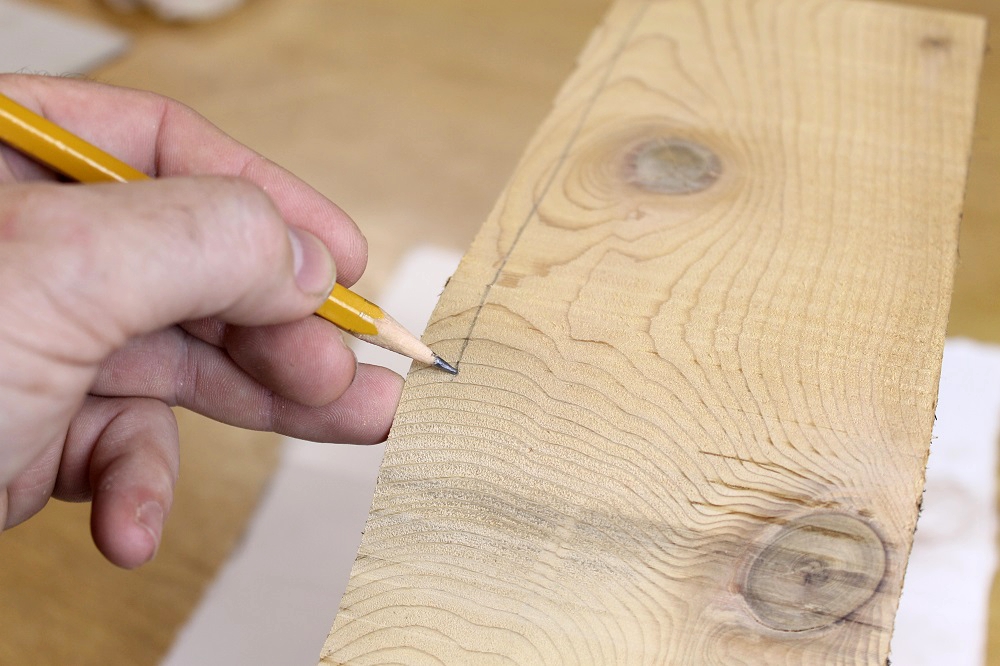
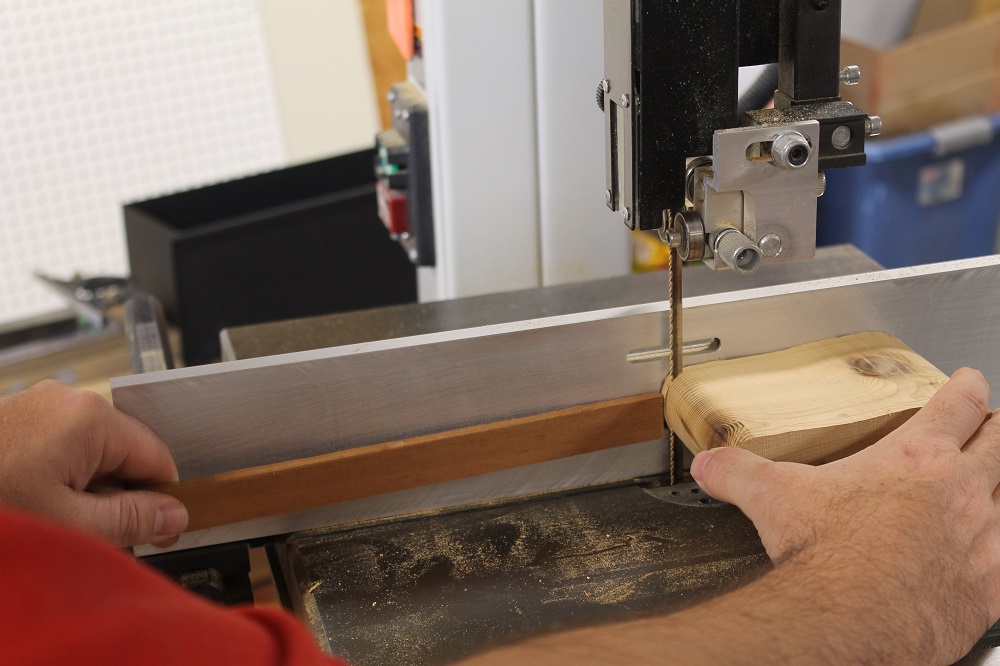
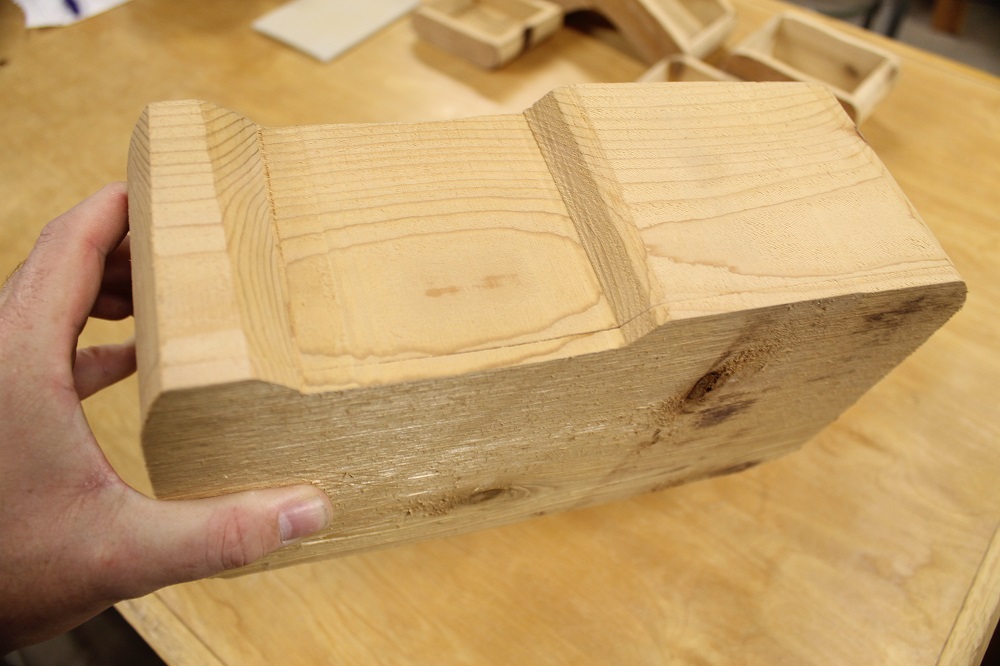
To cut out the drawers, identify a line that follows the grain – the bottom of a drawer, in this case – and approach it straight on, from the side of the box. It’s important to only cut through the carcass in the same direction as the grain.
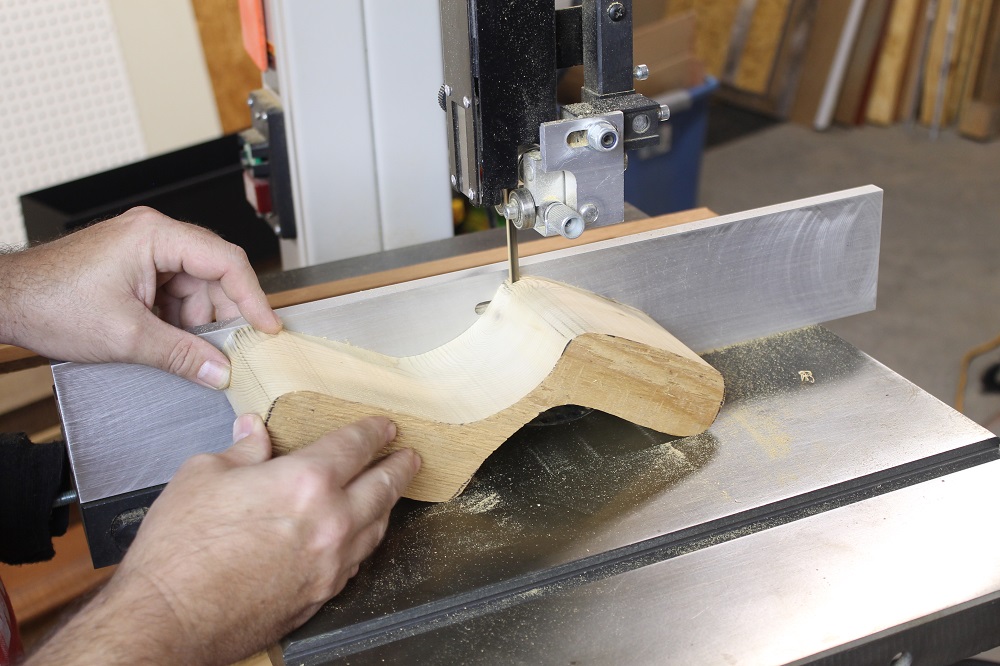
When you approach a curve, take your time. And remember that the blade must be cutting to turn. You can’t spin the wood in place like you can with a scroll saw. So anticipate your turns.
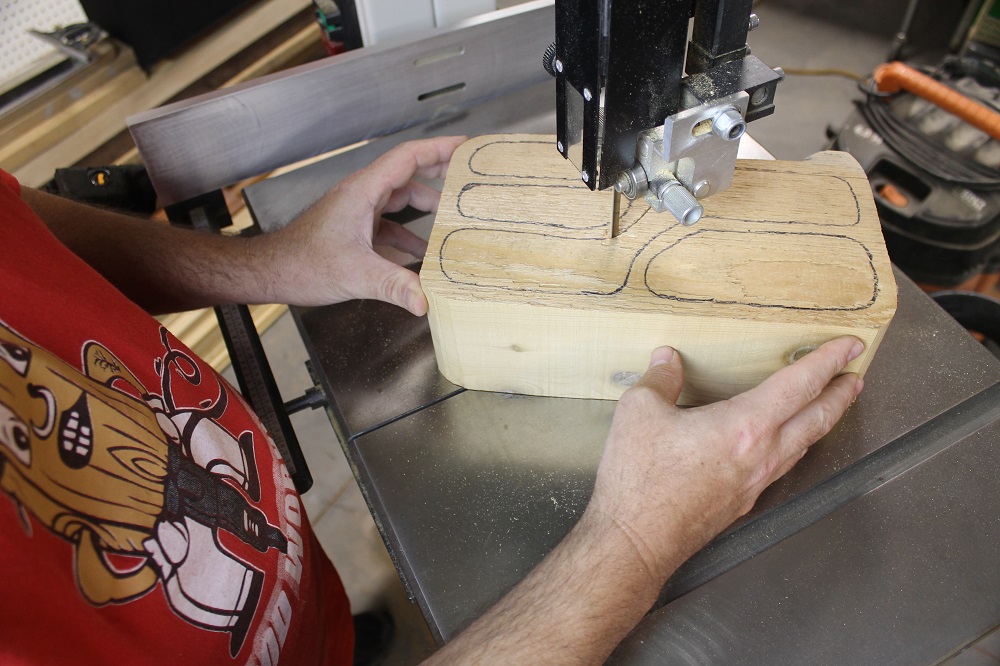


As soon as you break through the end of the cut, stop feeding the wood. Hold the workpiece in place with one hand and turn off the saw with the other. Once the blade has stopped, gently spread the kerf (if needed) and work the blade out of the wood.
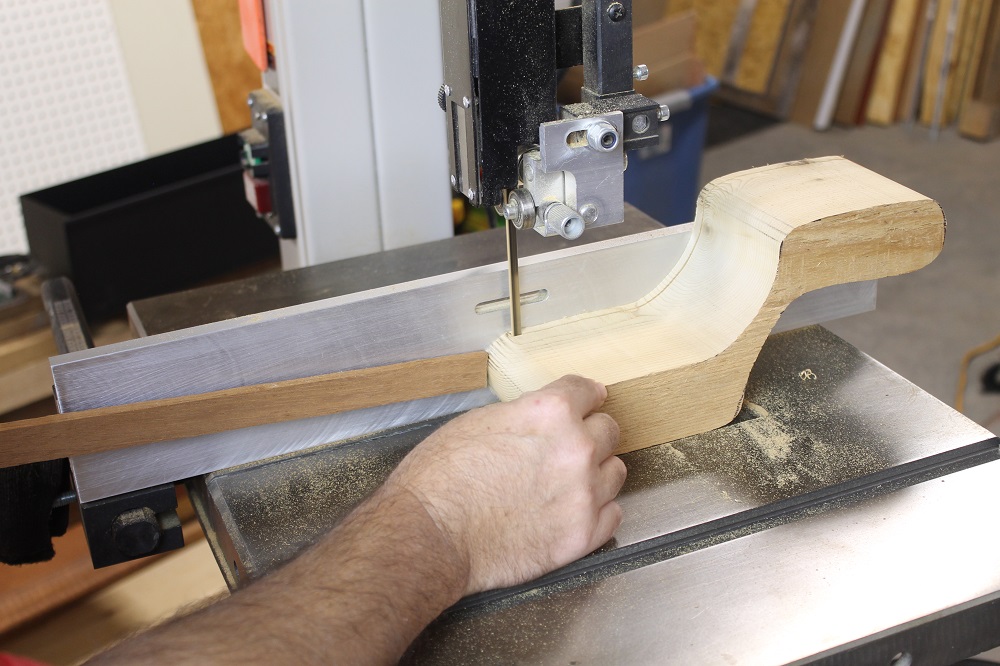
One Drawer Down, Three To Go

If your band saw box has more than one drawer, go ahead and cut out the rest of them now.
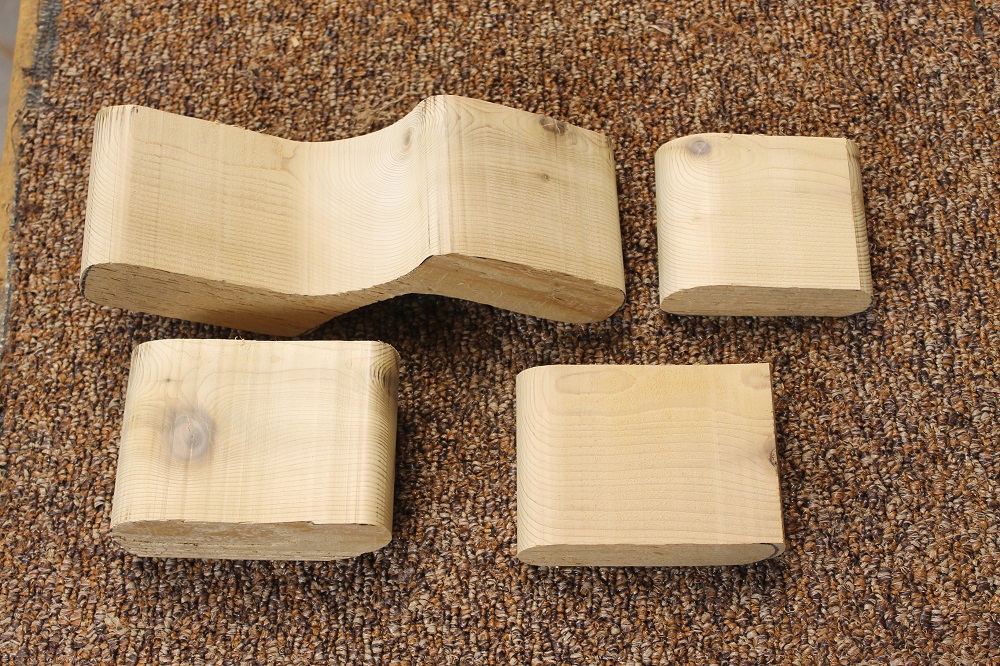
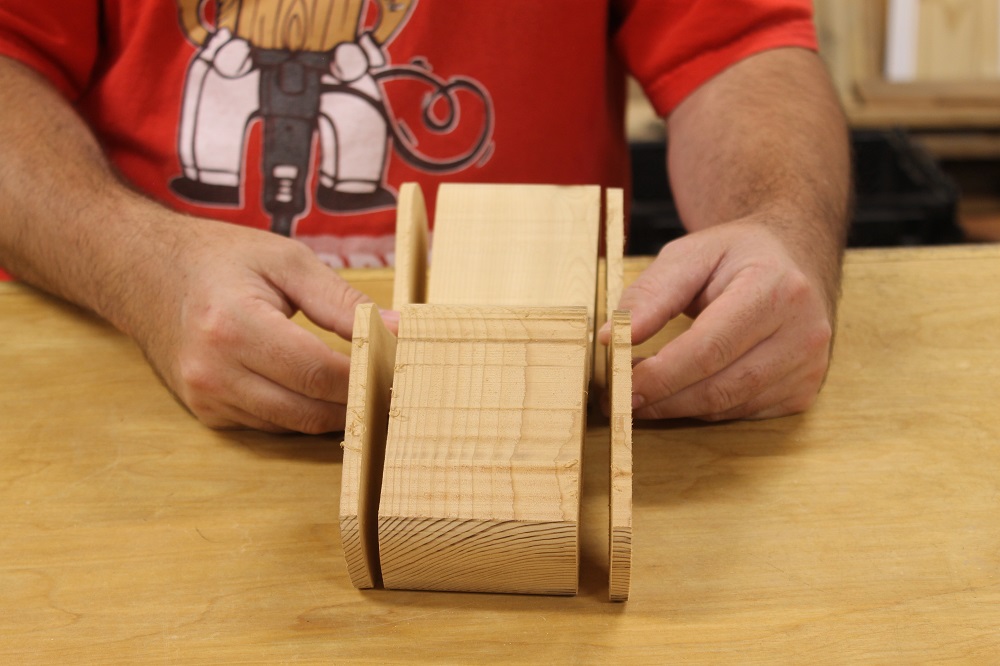
Separation Anxiety – An Optional Step To Relieve Tension
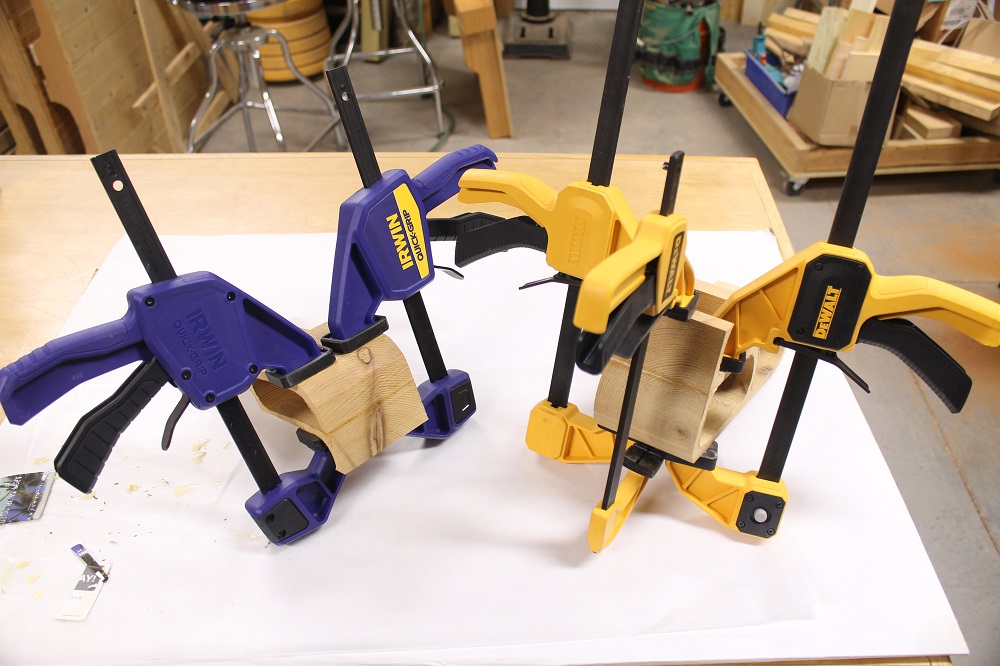
To close the kerfs, inject glue and clamp them together. Closing the kerfs causes a small amount of flex in the wood. Sometimes, when you have multiple kerfs on the same side of a band saw box, you may want to relive some of the tension by separating the carcass somewhere in the middle.

Whether or not to do this is a judgment call based on the amount of force required to hold all of the kerfs closed, the thickness of the walls and the stiffness of the wood you’re using. You don’t want to crack your carcass trying to close a whole row of kerfs.

Remember that this separation is an optional step that isn’t required in many/most cases, especially if your box has only one or two drawers. But it’s a good tool to keep in mind. In the case of two drawers, locate your kerfs on opposite sides of the box, if possible.
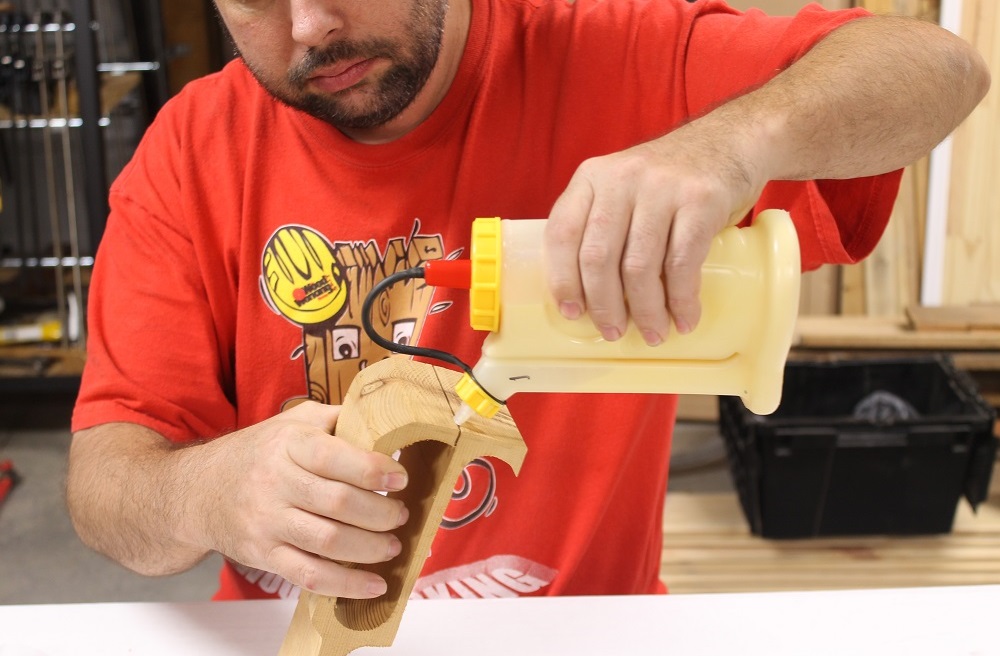
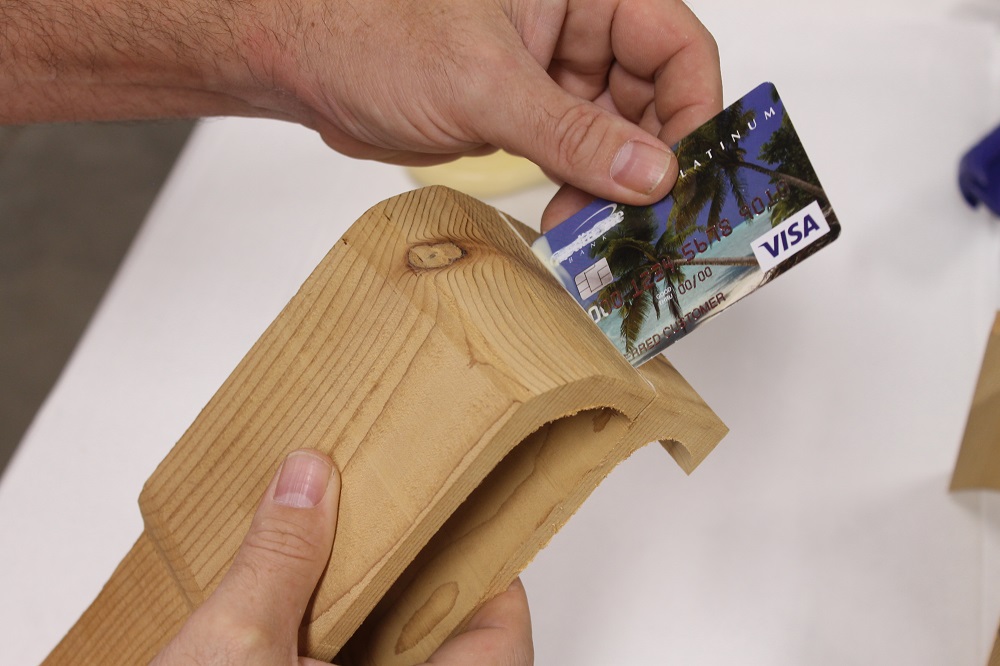
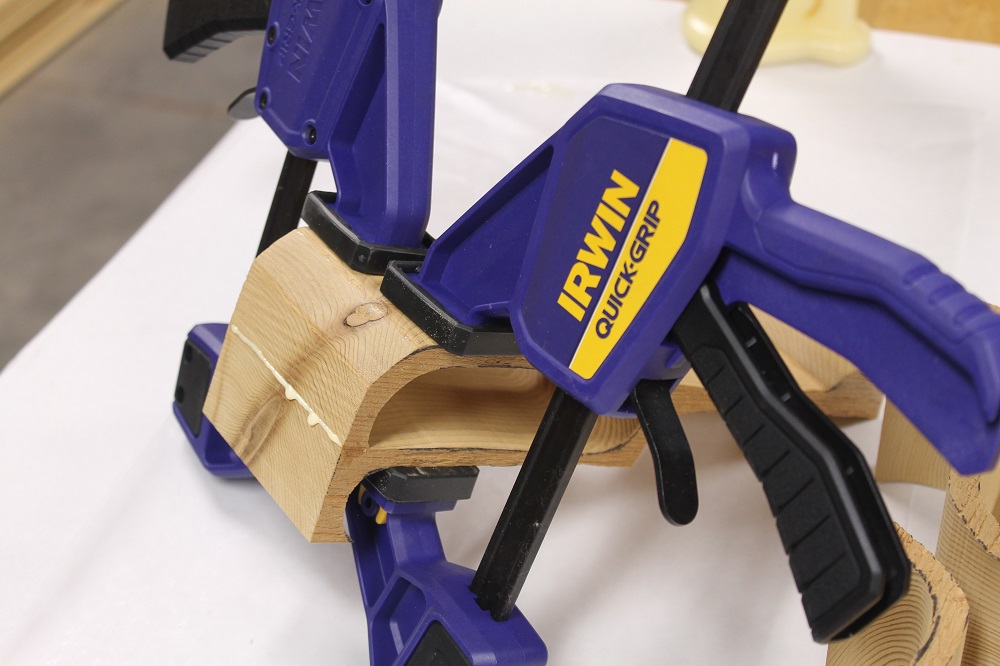
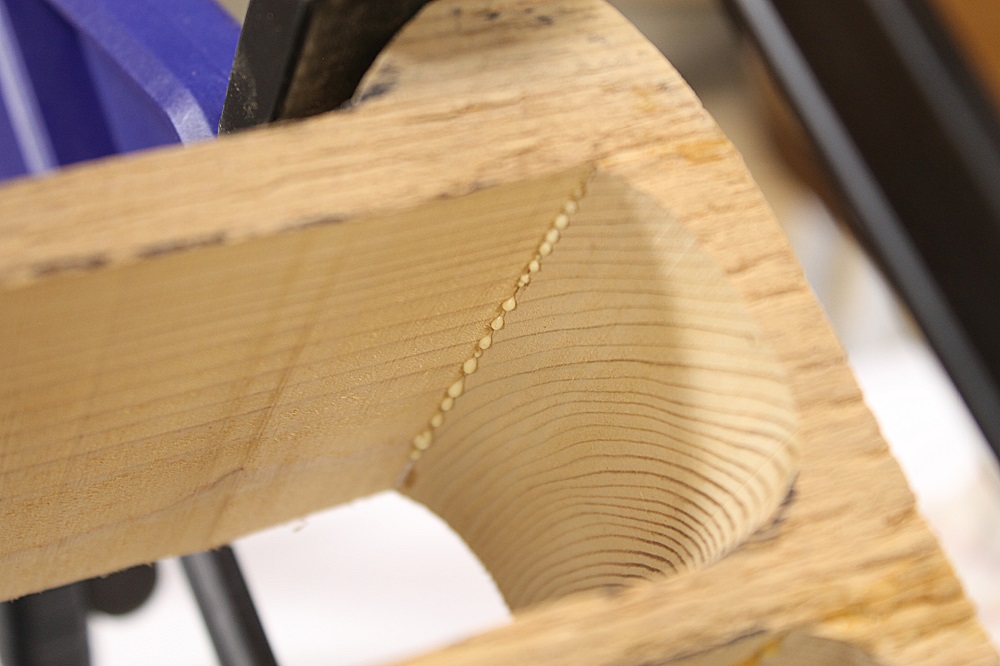
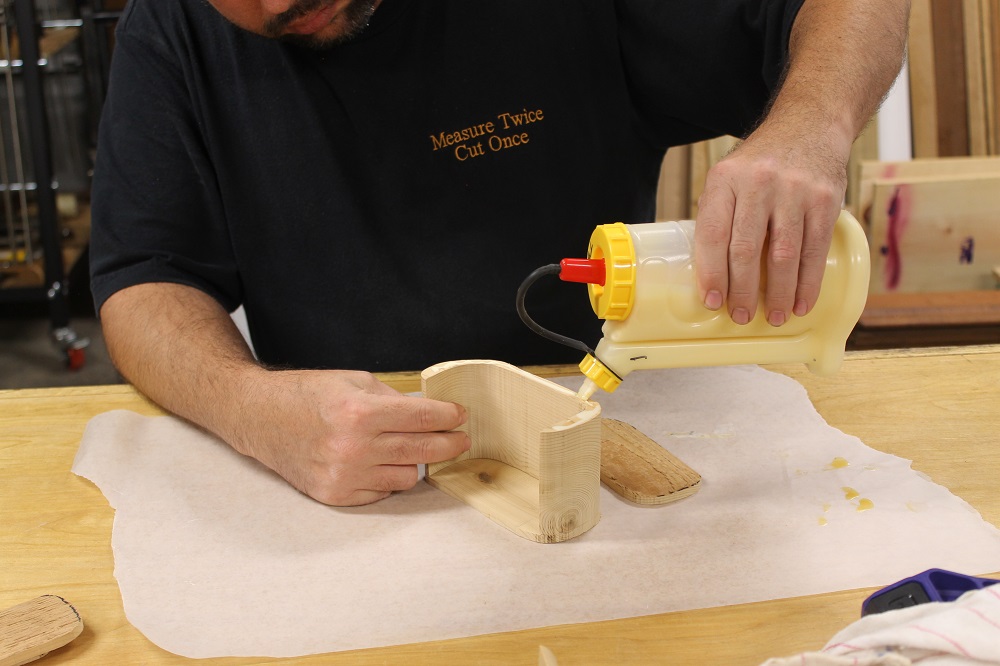
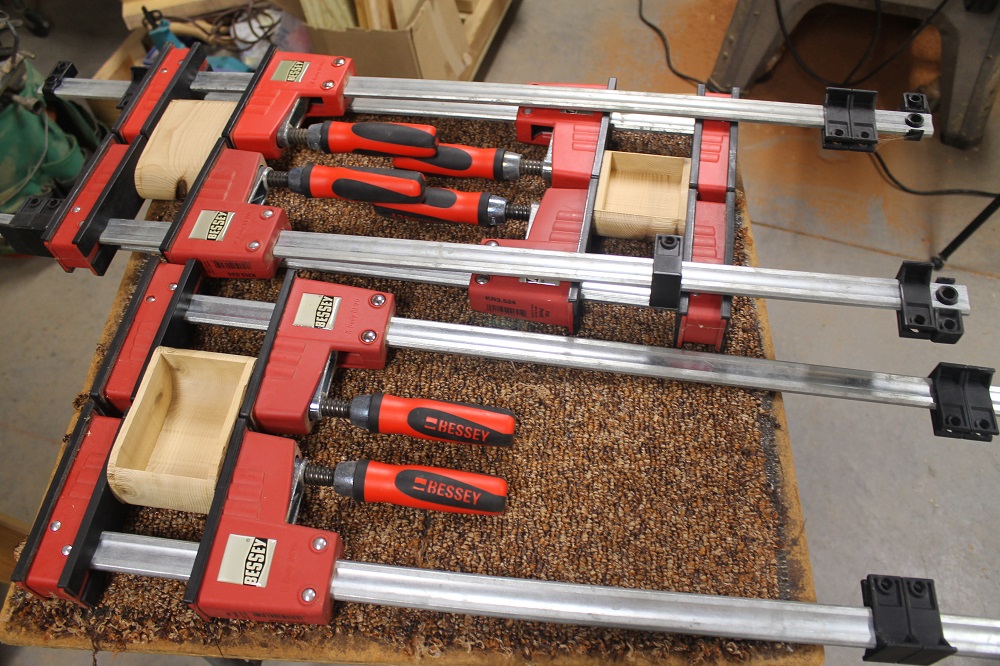
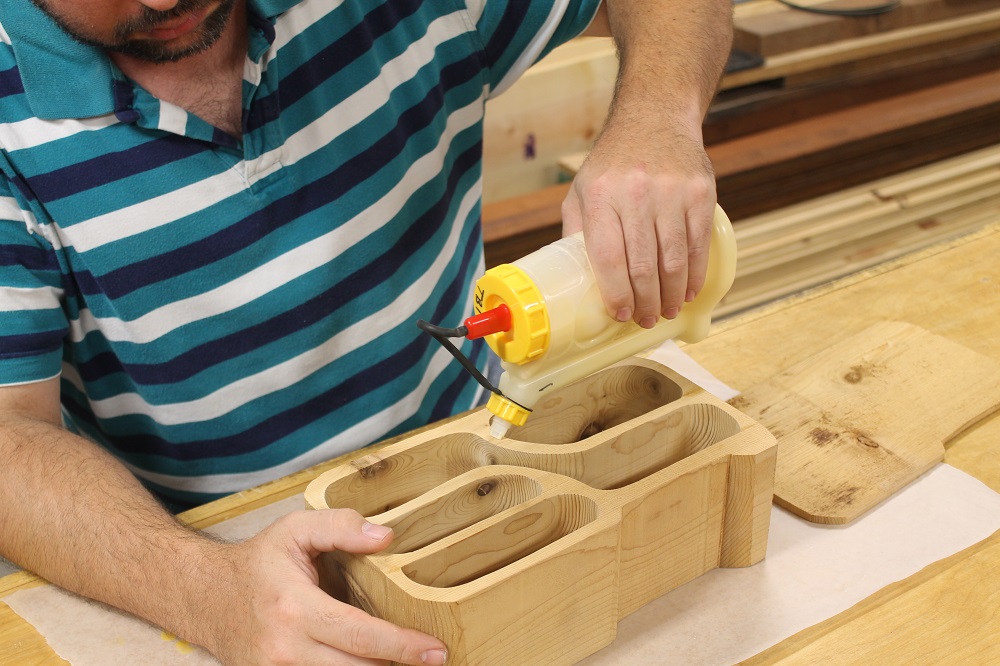
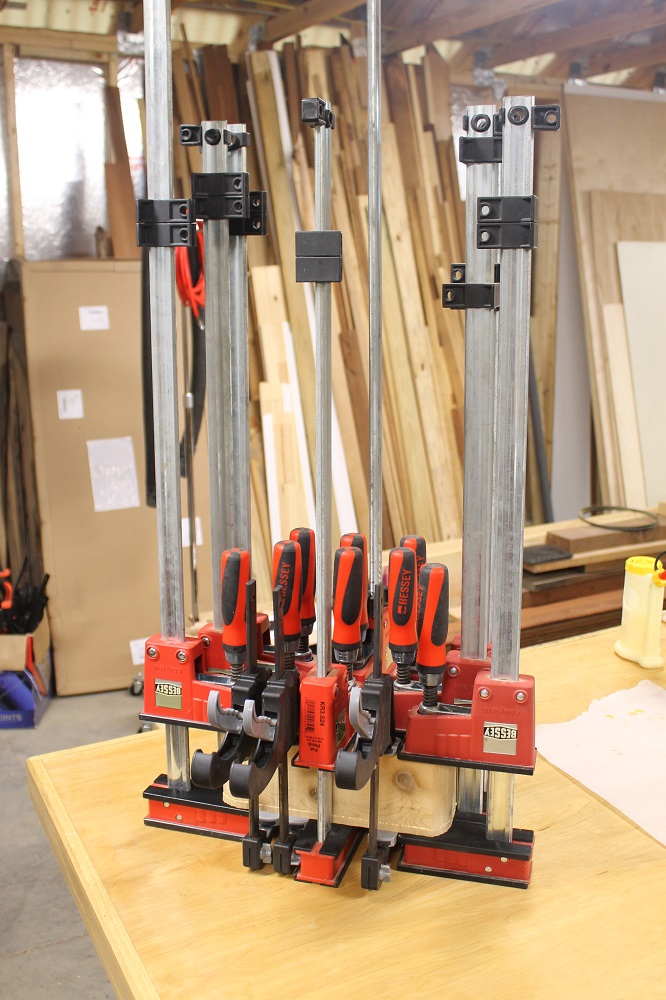
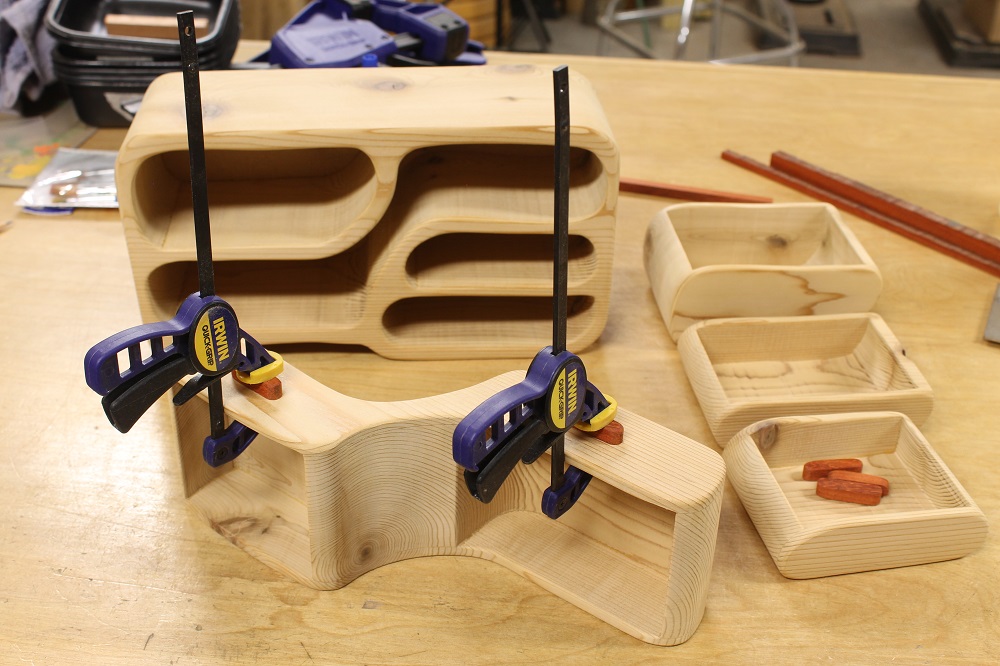
Closing The Kerfs In Your Band Saw Box Carcass
Now we can close the kerfs. Do not sand the kerfs! Leave them rough. Apply glue sparingly; it’s stronger than you think. Aim for full coverage with as little excess as possible. You want a small amount of glue to squeeze out – ensuring the seams are completely filled – but if it runs or drips it can cause more work later on. Glue runs can be wiped up with a damp rag. Just try not to smear it around.
Back To The Band Saw Box Drawers
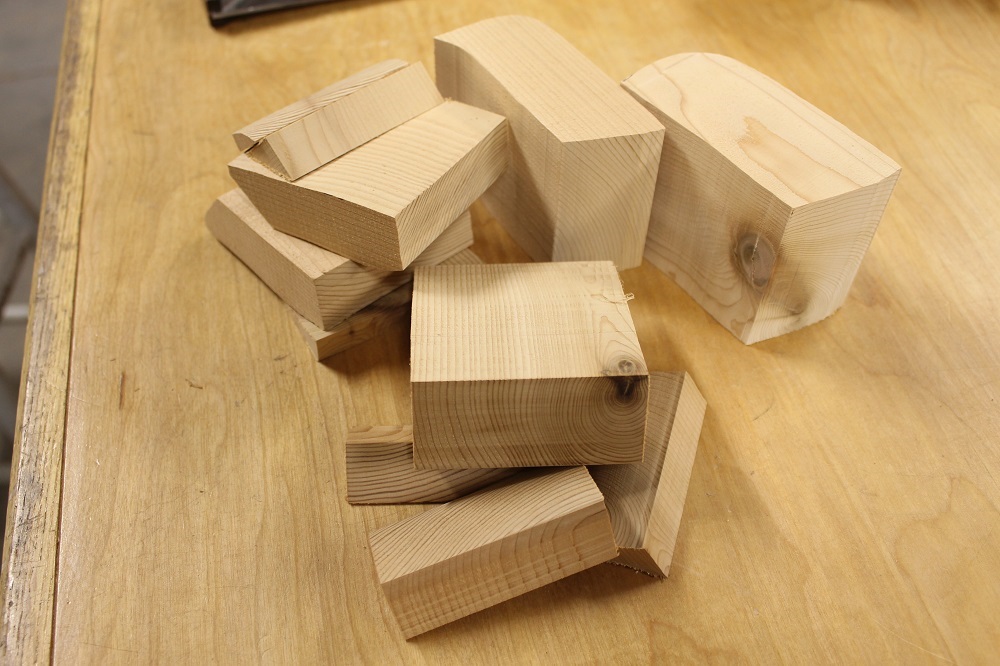
Now to transform these slugs into drawers. Slice off the front and back of each drawer, the same way we cut the back off of the box earlier. Generally speaking, these don’t have to be quite as thick as the box’s back. An 1/8th inch should be fine in most cases.
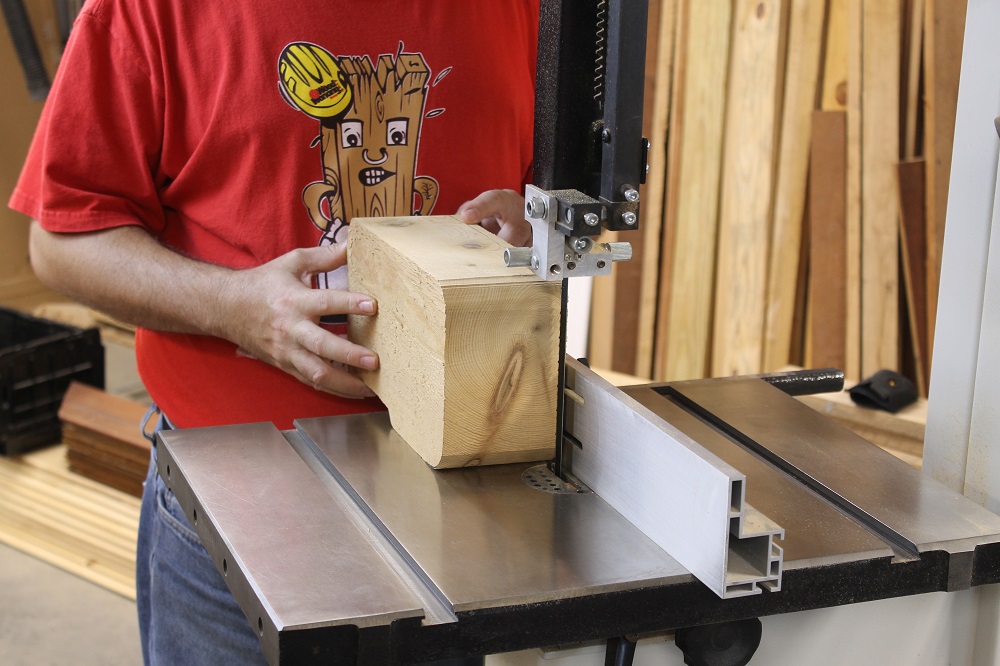
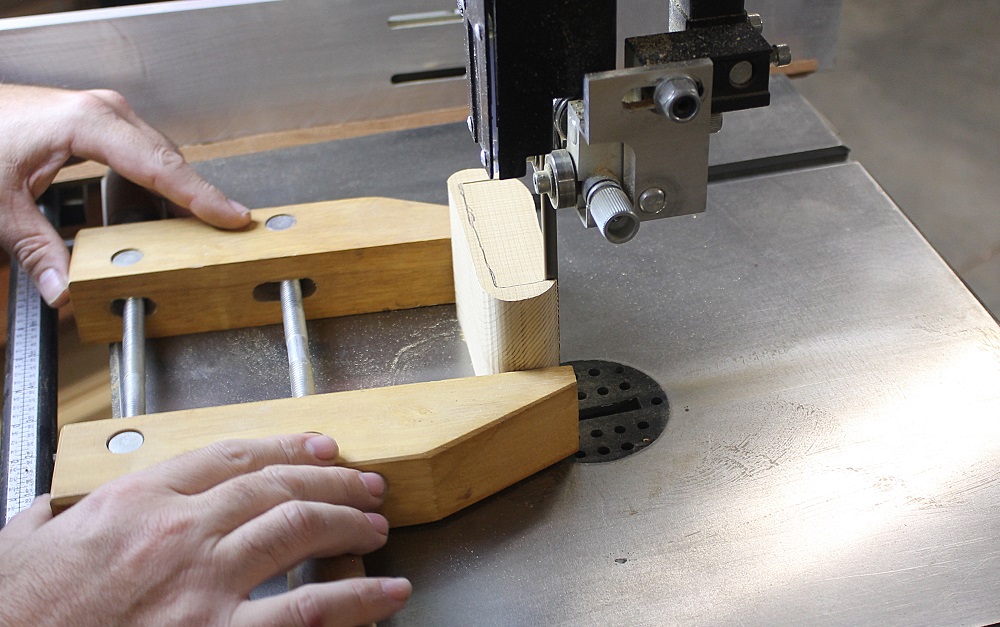
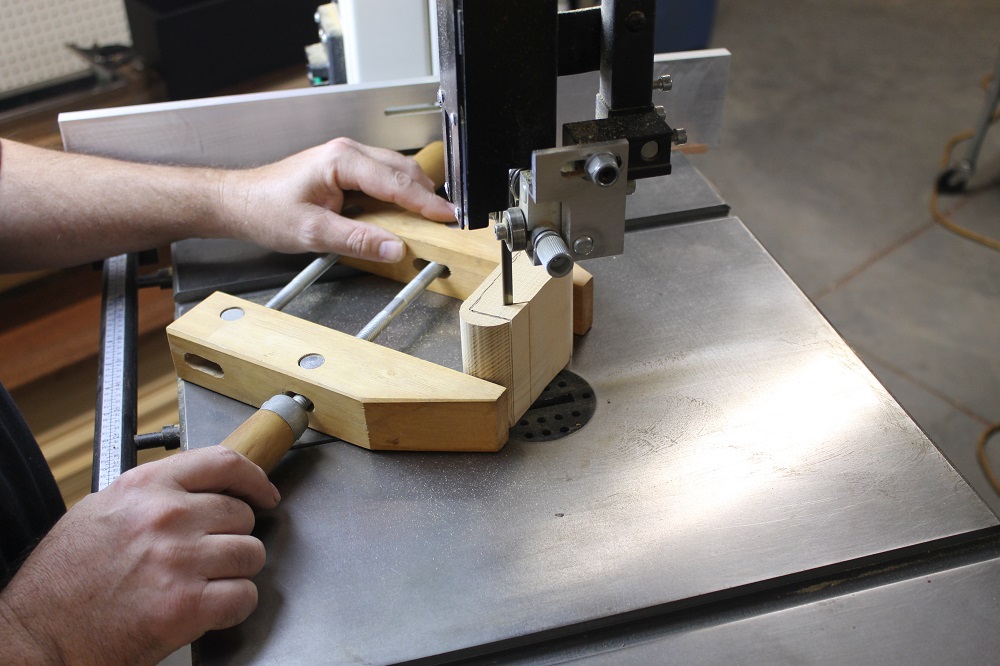
Cutting The Front And Back Off Of An Odd-Shaped Drawer.
Oddly shaped drawers may seem be tricky to slice the fronts and backs off of. Pass them through the blade in such a way that the section being cut is always supported by the table of the band saw, even if you have to prop it up with a piece of scrap wood. Otherwise, the blade can slam the workpiece down and break it. Keep your wits about you and be safe. These pictures should illustrate the point.


Reviving The Carcass
After the glue has set for a while – and before the buzzards start circling the carcass – glue the halves back together. Earlier, we split the chassis to reduce the flexing tension on the weak cross-grain sections of the box. Whether that step applies to your band saw box depends on the requirements of your particular design, the wood you’re working with and your personal preference.
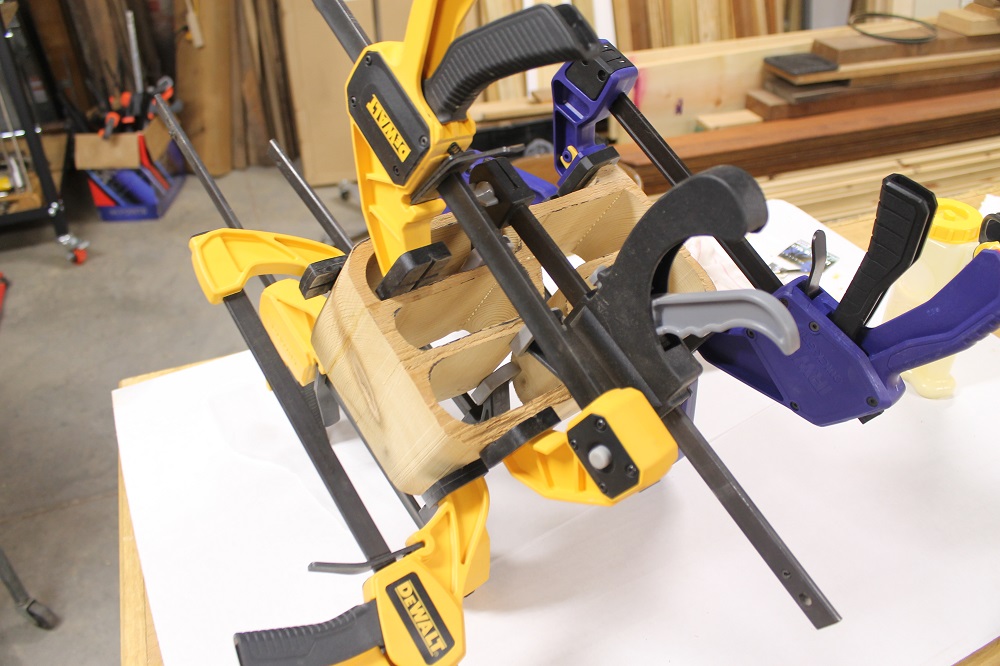
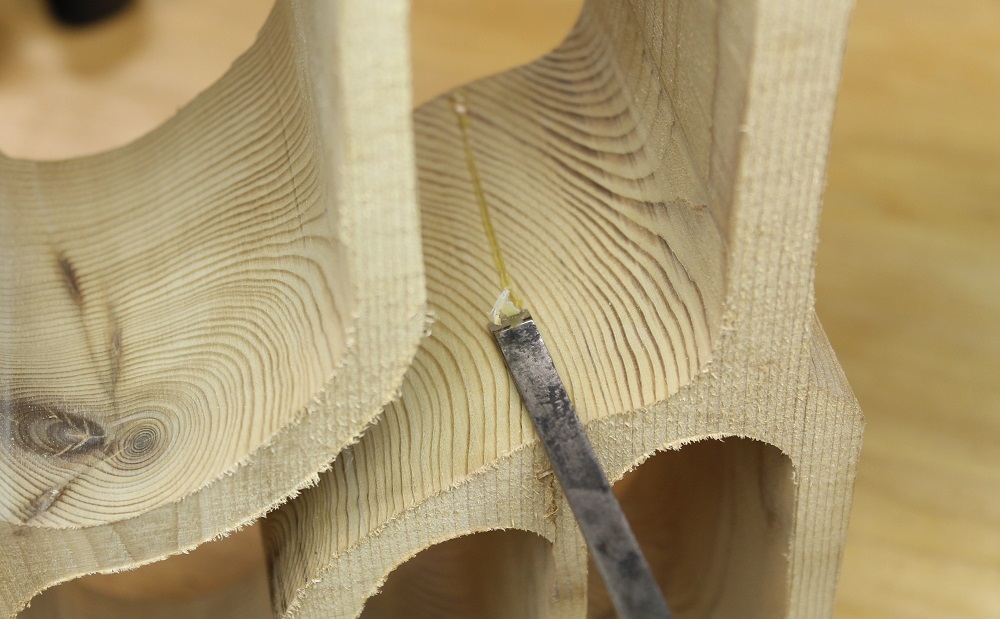
Cleaning Up The Squeeze-Out In The Band Saw Box Carcass
After the glue has dried, the excess can be pared off with a chisel. When I have only a tiny amount of squeeze-out, I try to resist the temptation to wipe it off when wet, for fear of smearing it around. As is, it will clean up easily.

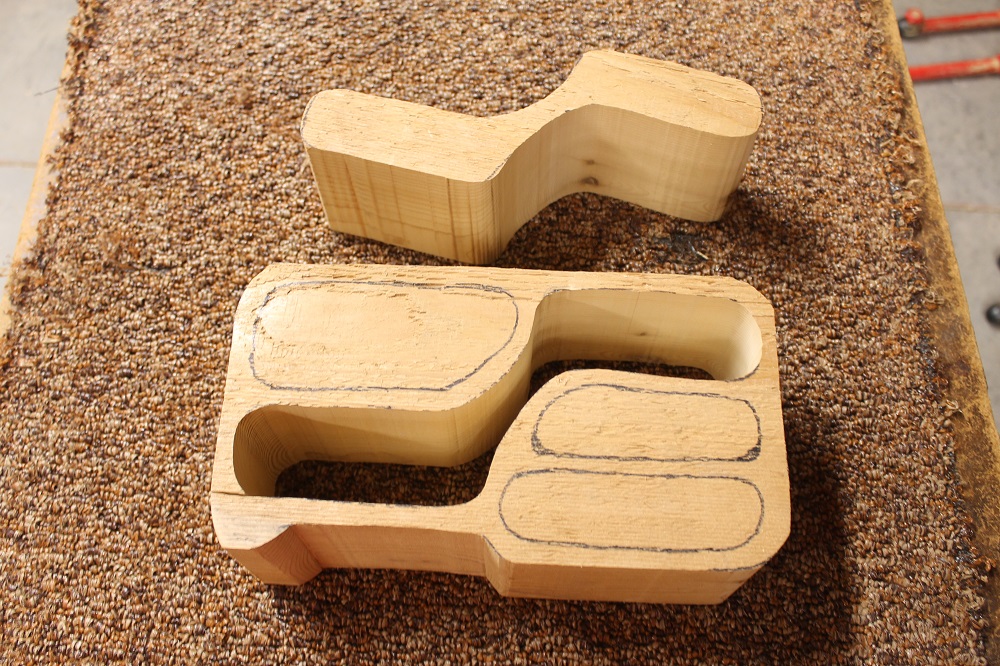
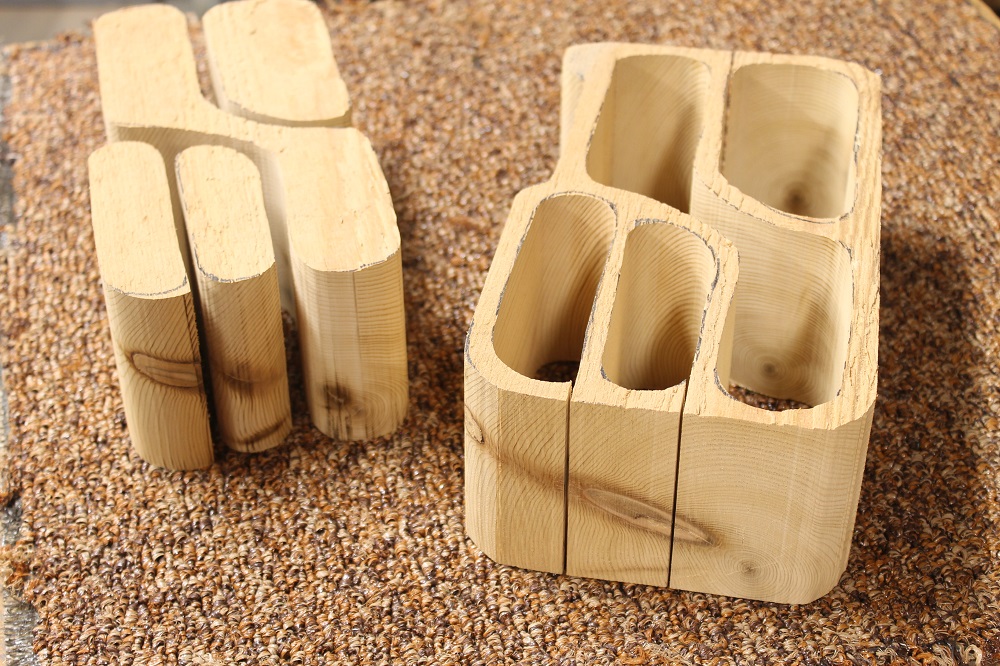
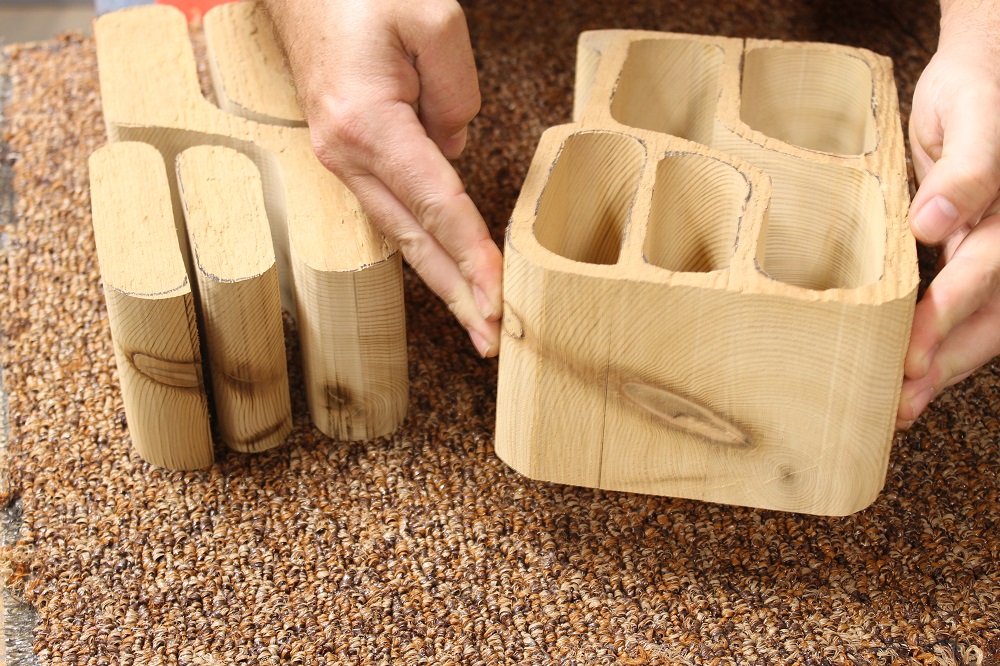
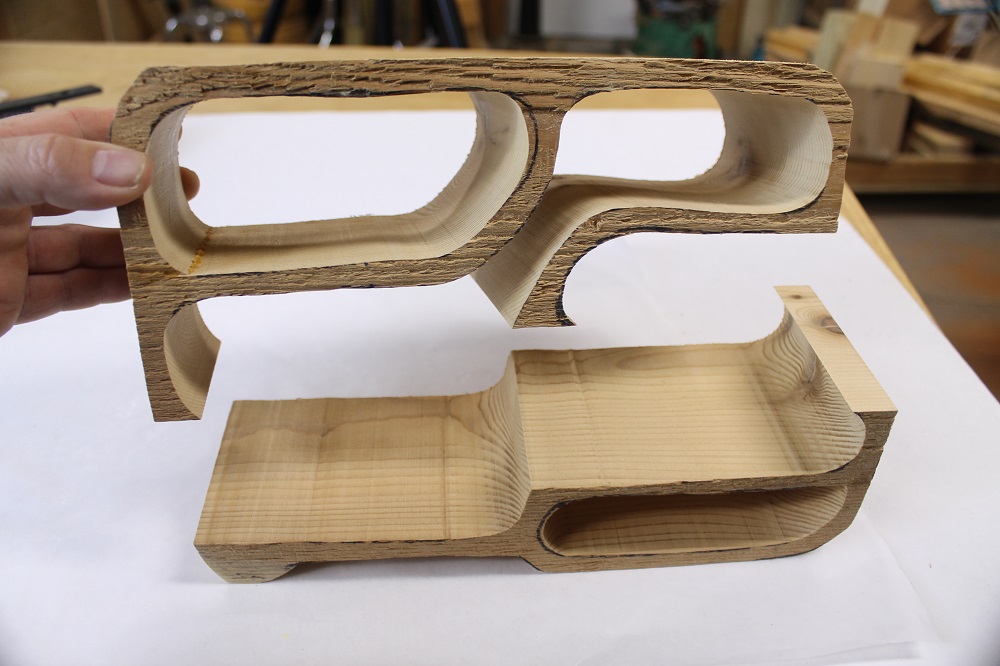
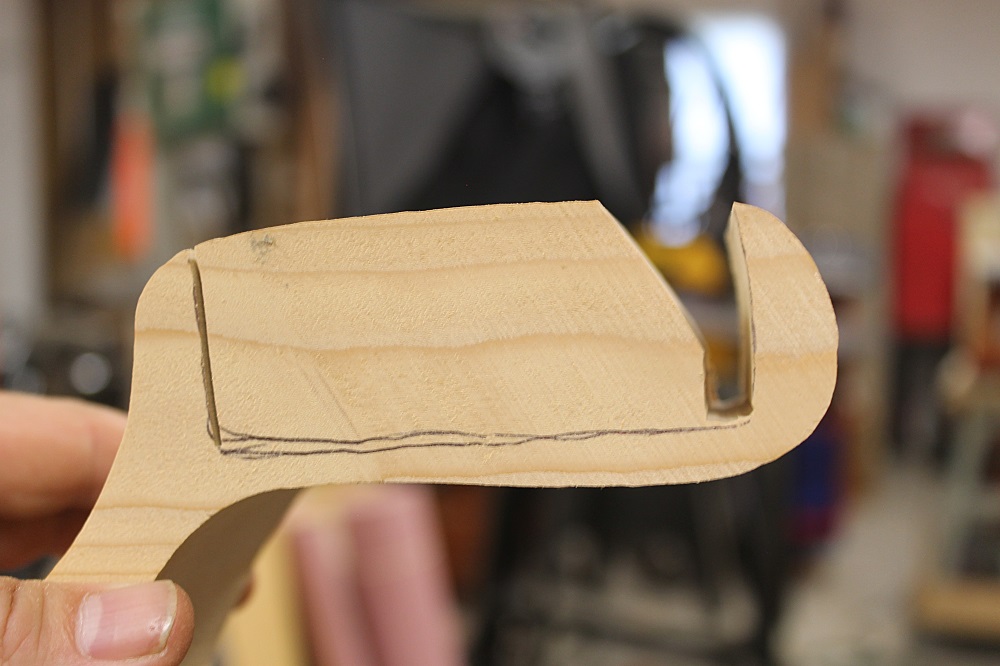
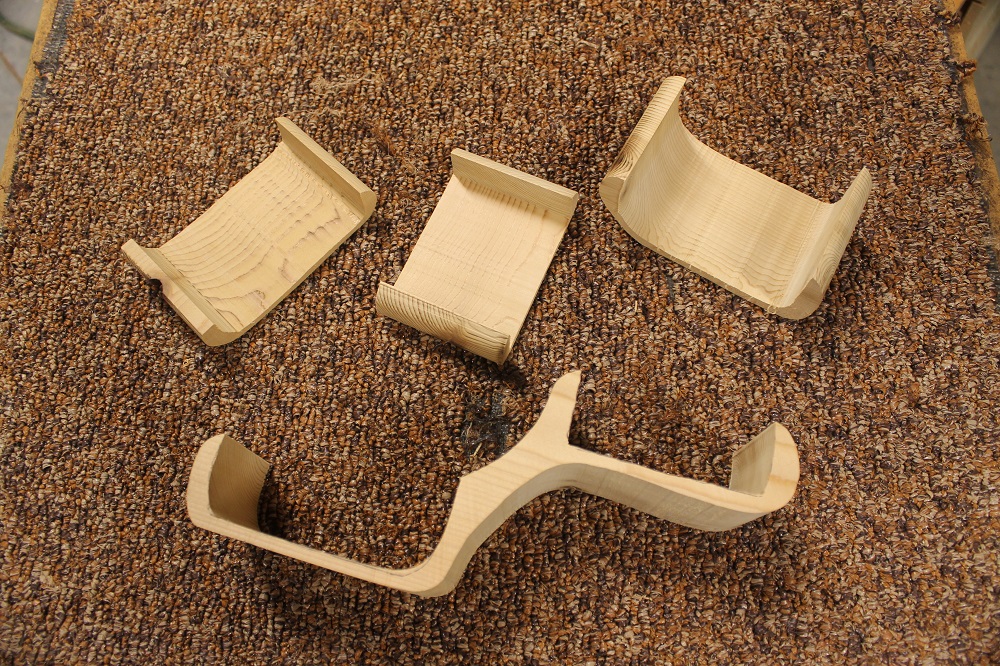
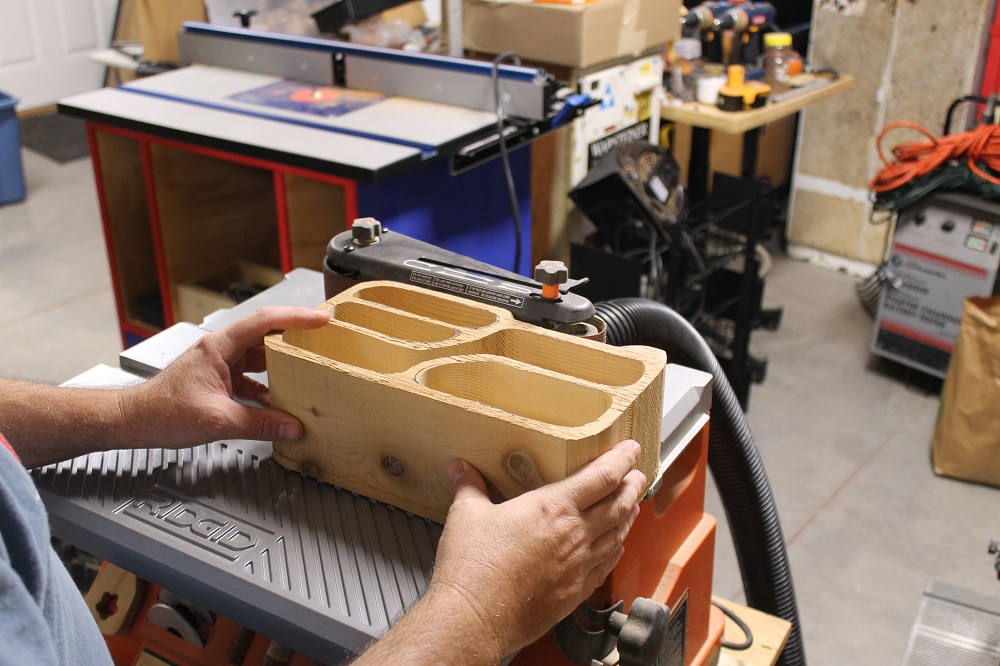
The Biting Reality Of Band Saw Box Drawer Cavities
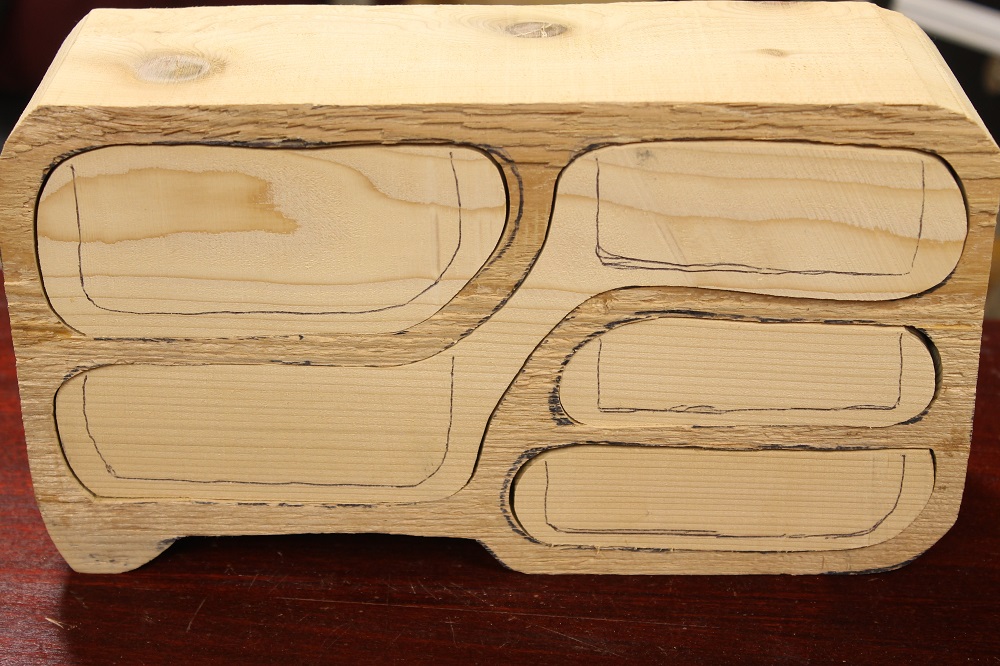
The next step is to create the cavities that make the drawers, drawers. Always put the drawer bodies into their respective cubbies before laying out the openings. The last thing you want is to accidentally cut a drawer upside-down. You would no longer be a happy camper; and there’s nothing your dentist can do about it.
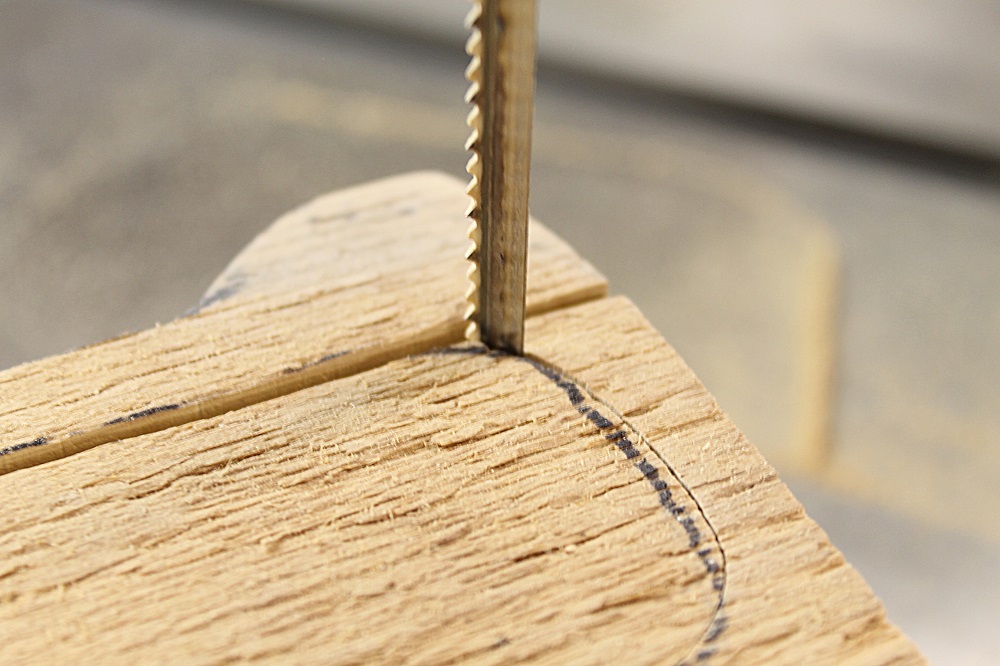
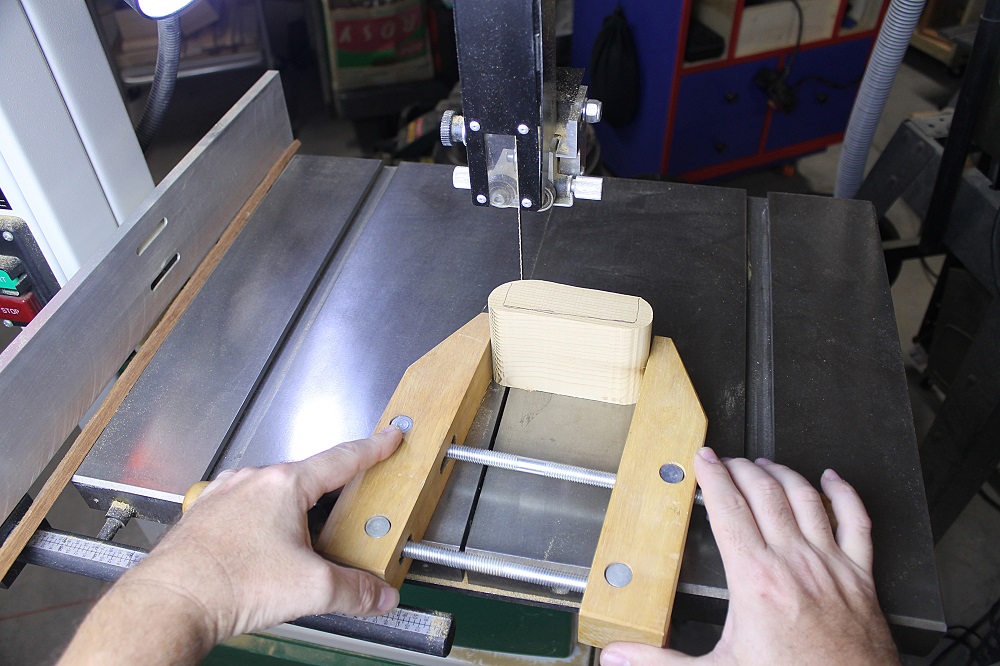
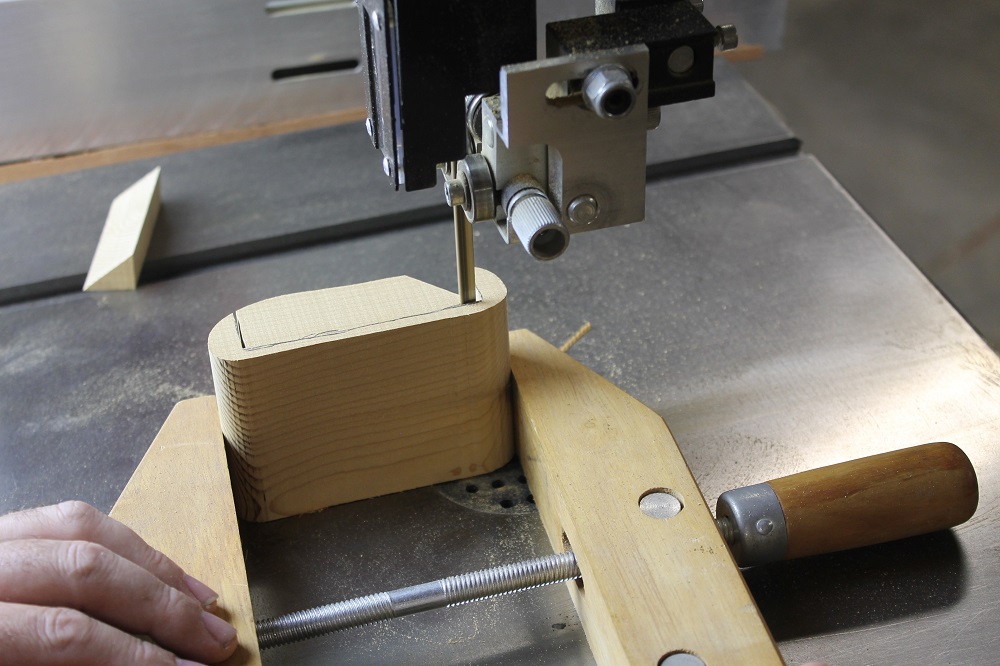
Cutting Your Band Saw Box Drawer Cavities
For safety, a hand screw clamp can be used to hold smaller drawers while cutting them. Clamp securely, but not too tight. If you can’t get a firm grasp, try putting double stick tape on the clamp jaws. If your drawer cavities have curved inside corners, you can cut them out in one motion. But if they have squared inside corners – like some of the ones in this box – the procedure shown here will get the job done.
Assembling The Band Saw Box Drawers
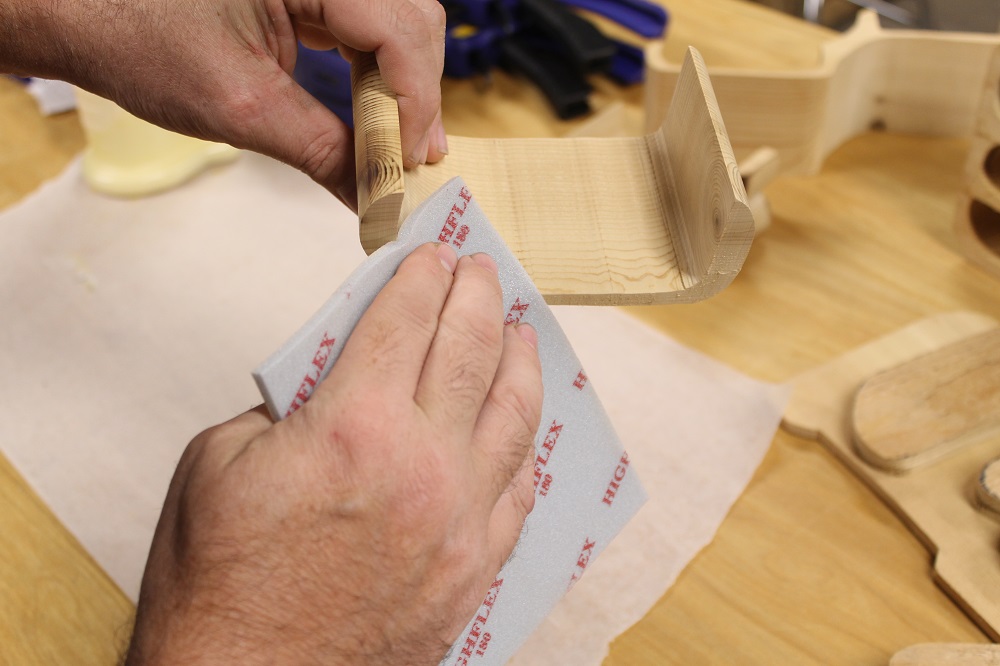
If you want to sand the drawer cavities, now is the time to do so. But only sand the interior of the drawer body, not the edges or the front/back pieces.
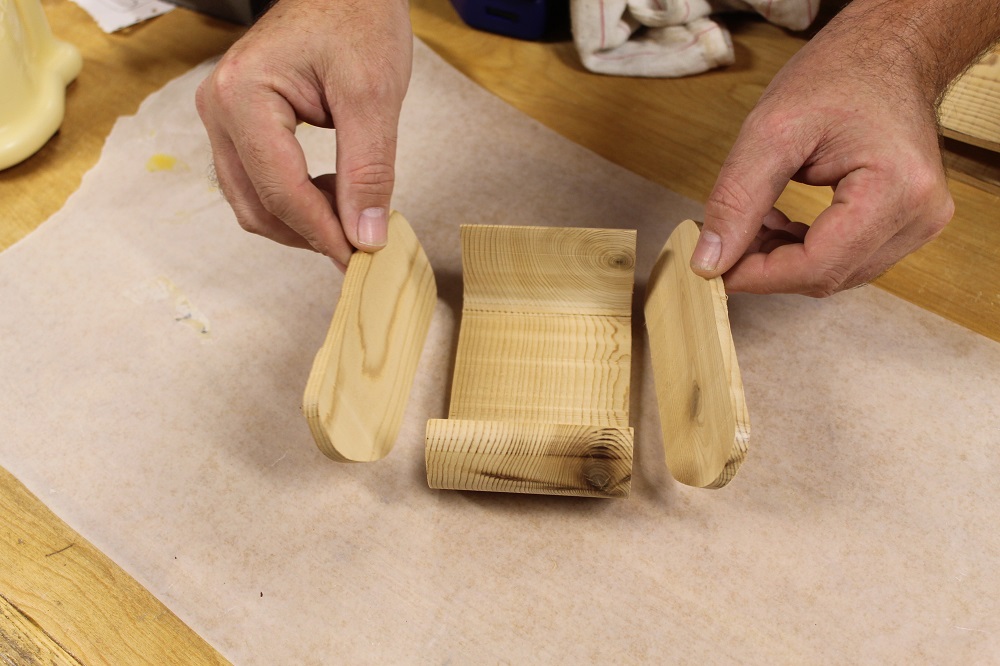
Use 180-220 grit sandpaper or a fine sanding sponge to knock off any fuzzies around the edges then glue the fronts and backs on. It doesn’t take much sanding (or glue) at all; don’t overdo it.
Band Saw… Ugh, I Mean, Sand Paper Boxes
Did I mention that some people teasingly refer to band saw boxes as “sand paper boxes”? Of course I didn’t; I wouldn’t want to scare you away! There’s a good reason though; they can require a lot of sanding. So when making your cuts, keep your feed rate smooth and steady. Every little start and stop leaves a forensic trace, many of which will have to be dealt with by sanding.
Until now, the carcass has been somewhat delicate. But a lot of the strength will return once the rear panel is glued back on. But before doing so, take the chance to do some sanding on the inside of the carcass. The inside doesn’t have to be nearly as smooth as the exterior. Just knock down any random peaks and rough spots.
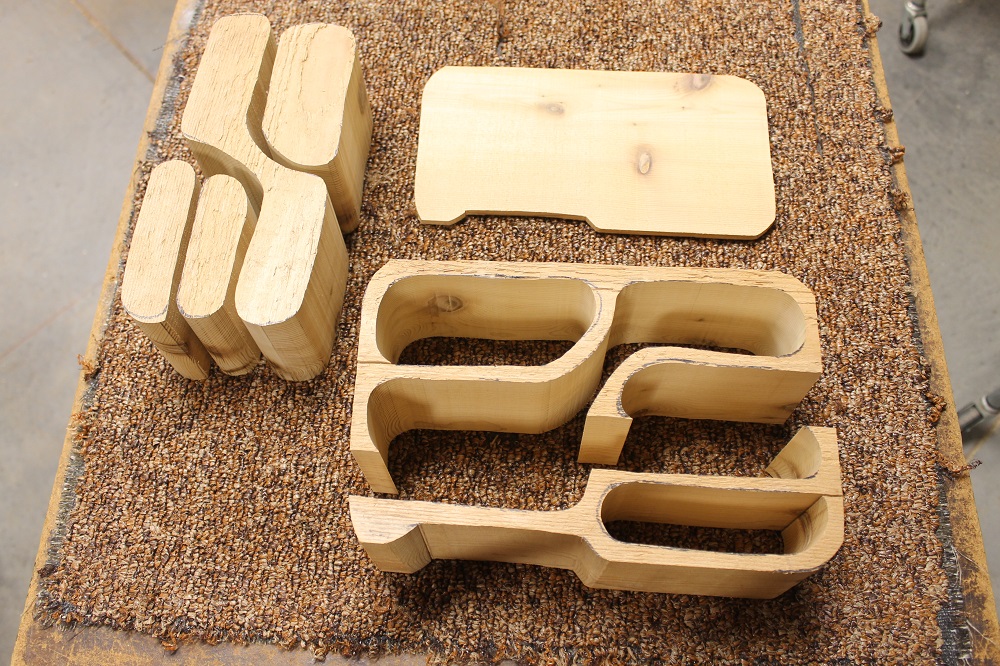
Give The Carcass Its Back Back

Now to reattach the back of the box. You’ll notice that part or all of the carcass is now slightly shorter (or narrower, if your grain runs vertically) than the back. The missing height was lost to blade kerf. Determine which edge – top or bottom – you want to align, then glue the back in place.
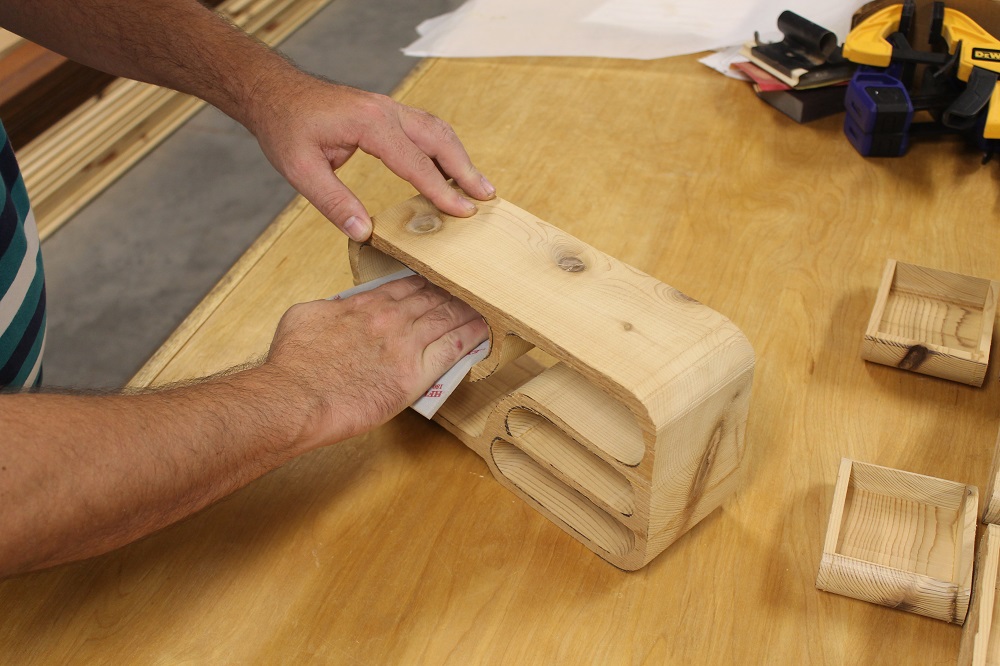
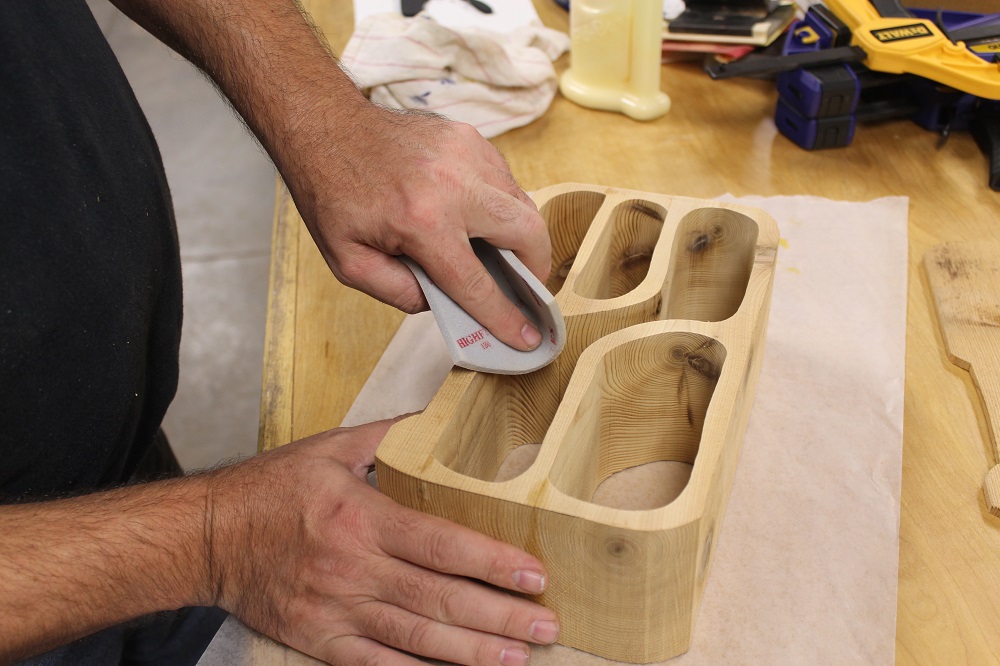
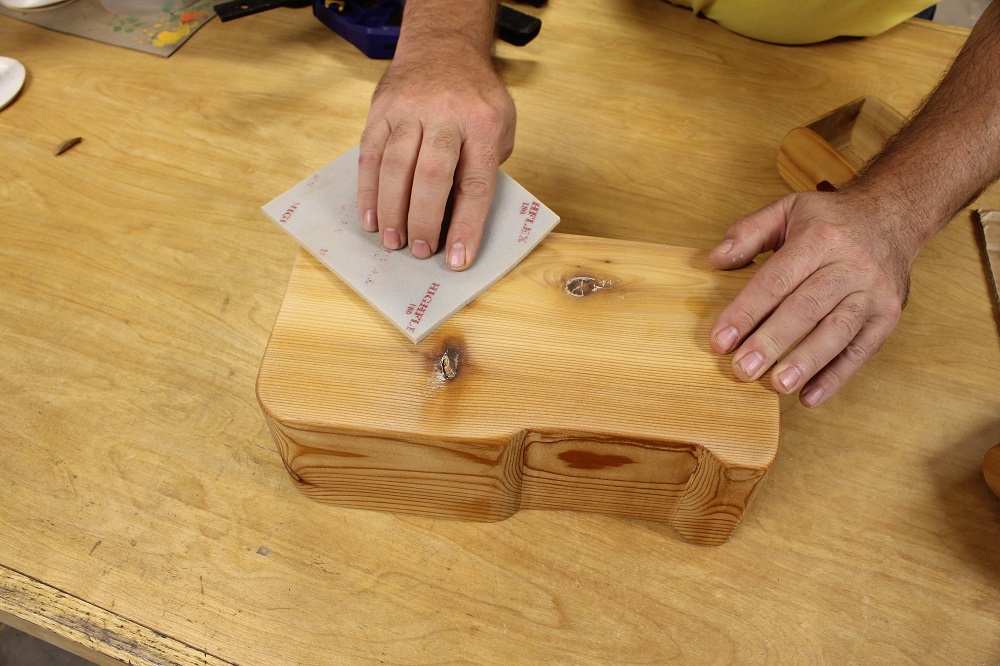
More Sanding
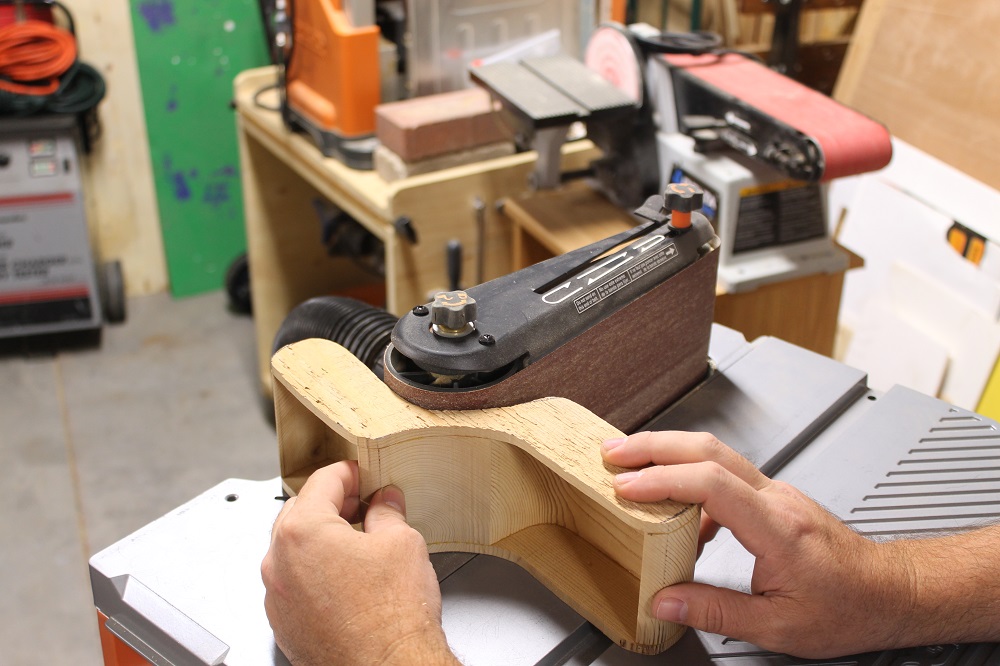
Are you still with me? Hey, wake up over there; we’re in the home stretch now! I know, there’s a lot of waiting around while glue dries. Going by the number of different shirts I’m wearing, you can see this was a multi-day build. But there’s usually another part of the project that you can be working on while things are clamped up. Right now, however, it’s off to the power sanders. Let’s sand the outsides of the drawers and carcass.


Custom Pulls For Your Band Saw Box Drawers
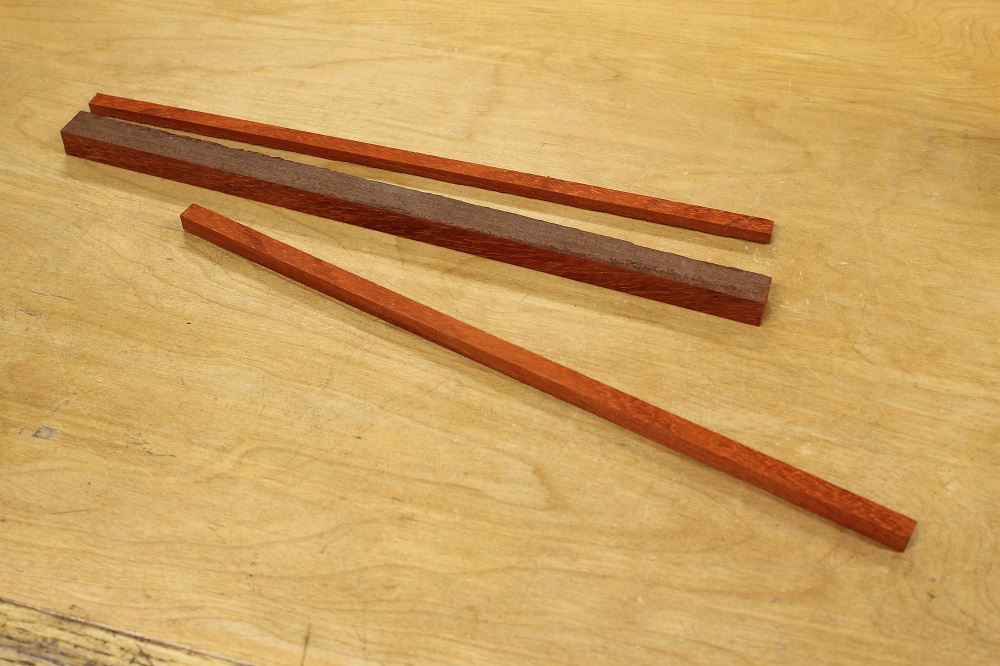
You can buy little drawer pulls if you want. But after all this work, shop made pulls – even simple ones – add a satisfying, personal touch. This is the basic pull design I use on the majority of my band saw boxes. But sometimes, shapes like hearts or butterflies might be more appropriate. Be creative.
The measurements given are for reference only, alter them as needed.
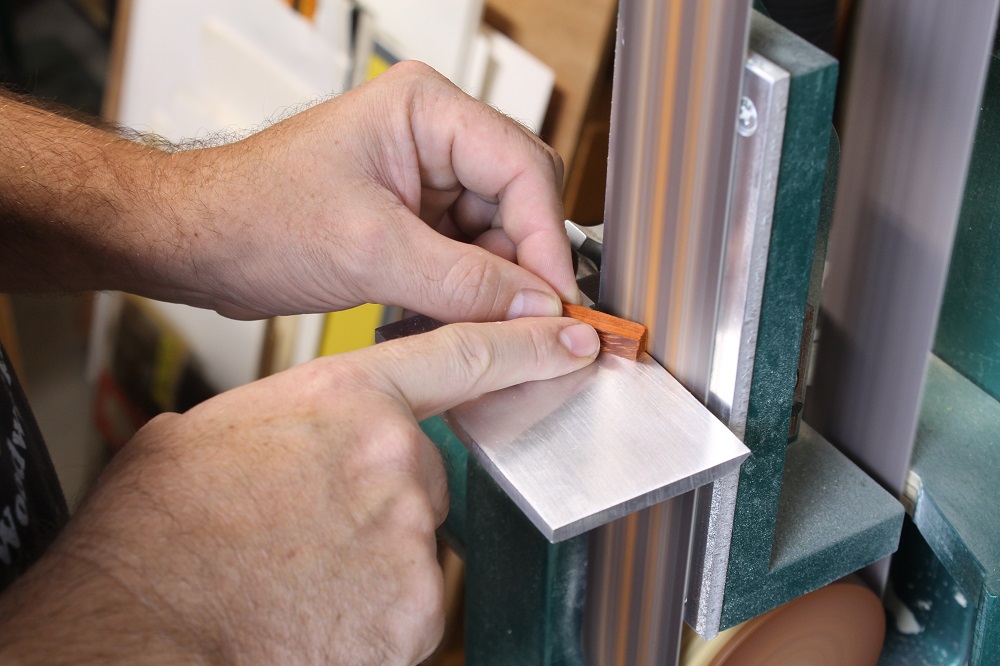
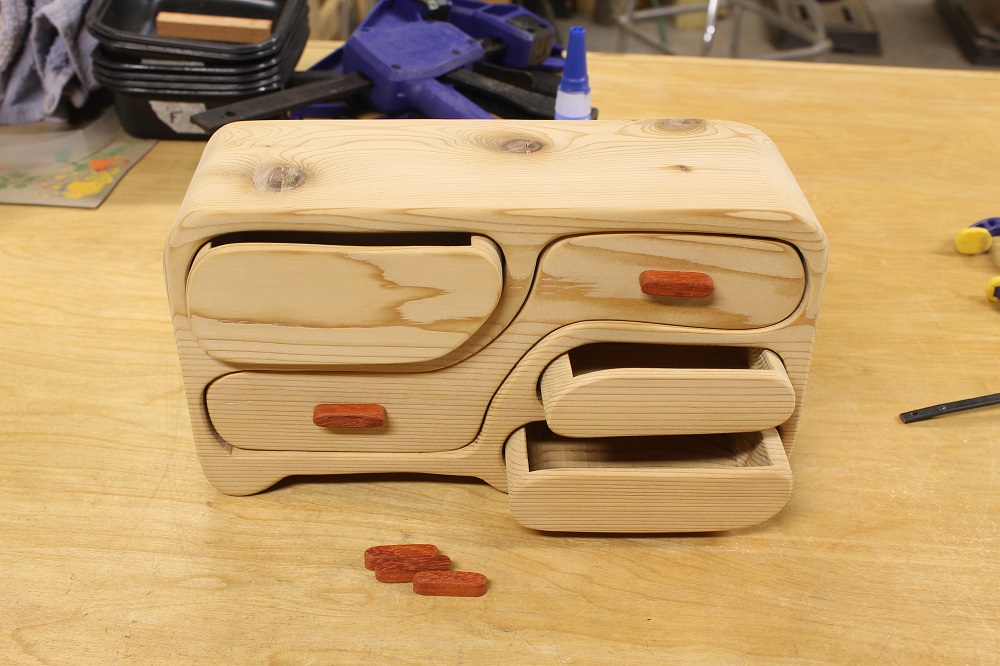
Attaching Pulls To The Band Saw Box Drawers
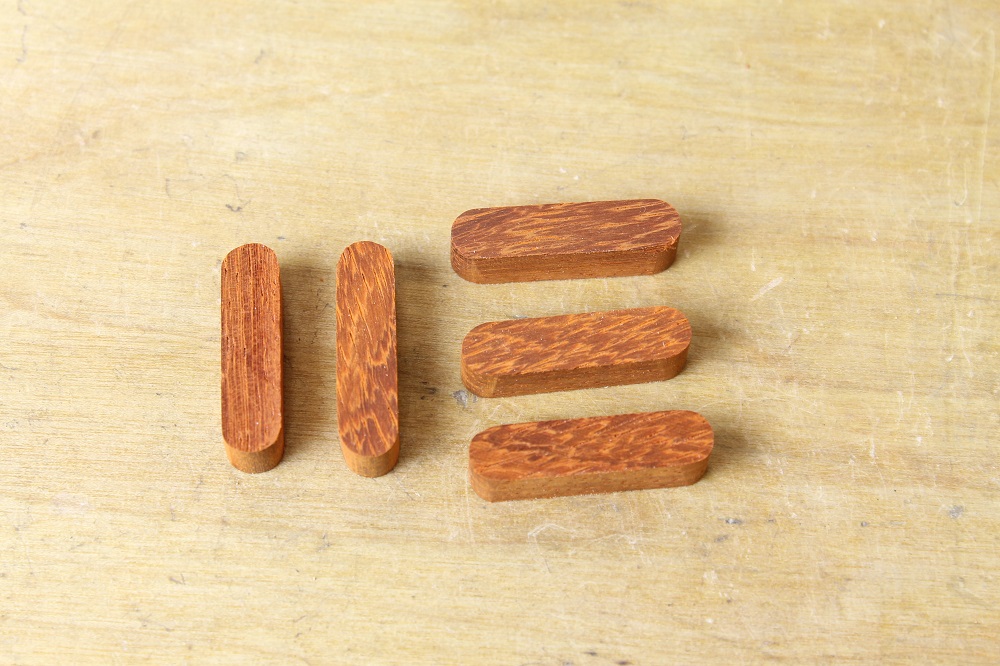
Select the best looking face on each pull and round over its edge, leaving the bottom side with a nice, crisp edge. Finally, glue the pulls in place.
Because I wanted the pulls to be more or less vertically aligned, I started with the double drawer. Then used those pulls as reference when positioning the others. Be sure to put the drawers into their respective places – especially with oddly-shaped drawers – to make sure you get the pulls level. Parallel to the bottom of a drawer isn’t necessarily level when the drawer is in place.

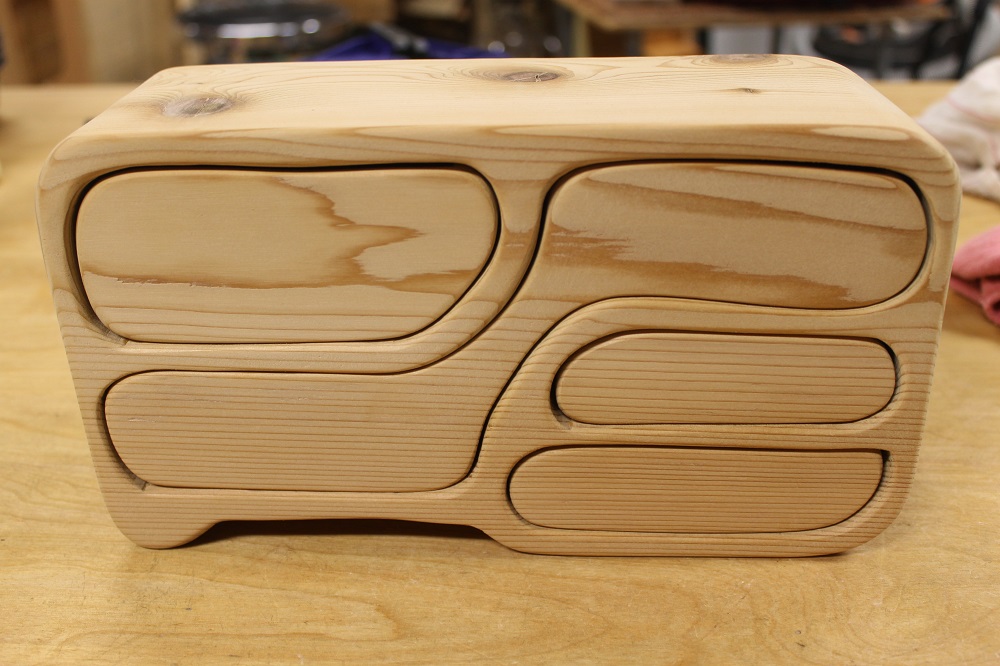
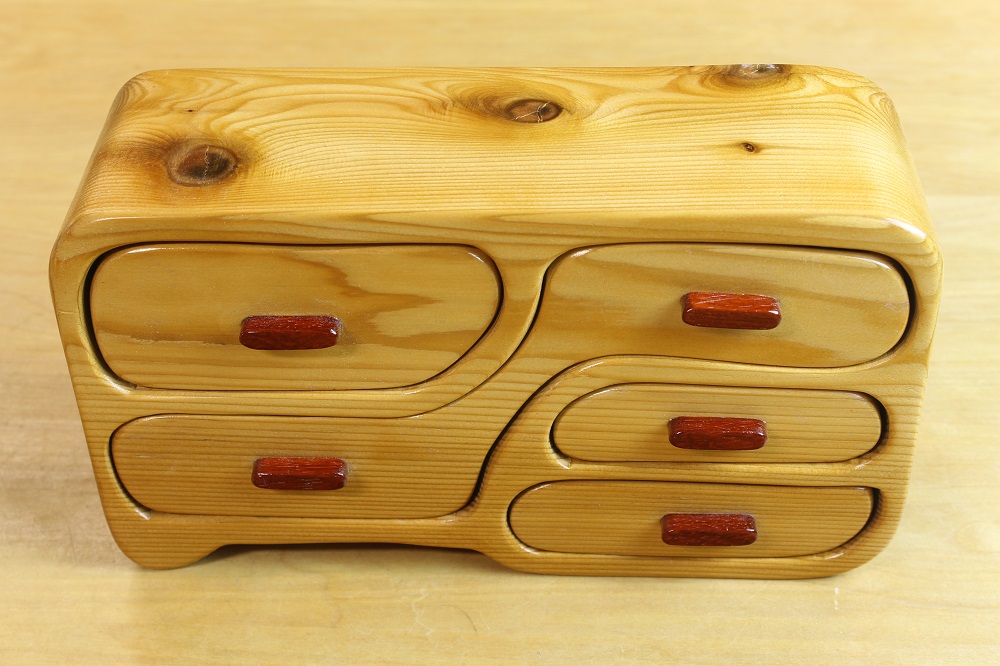
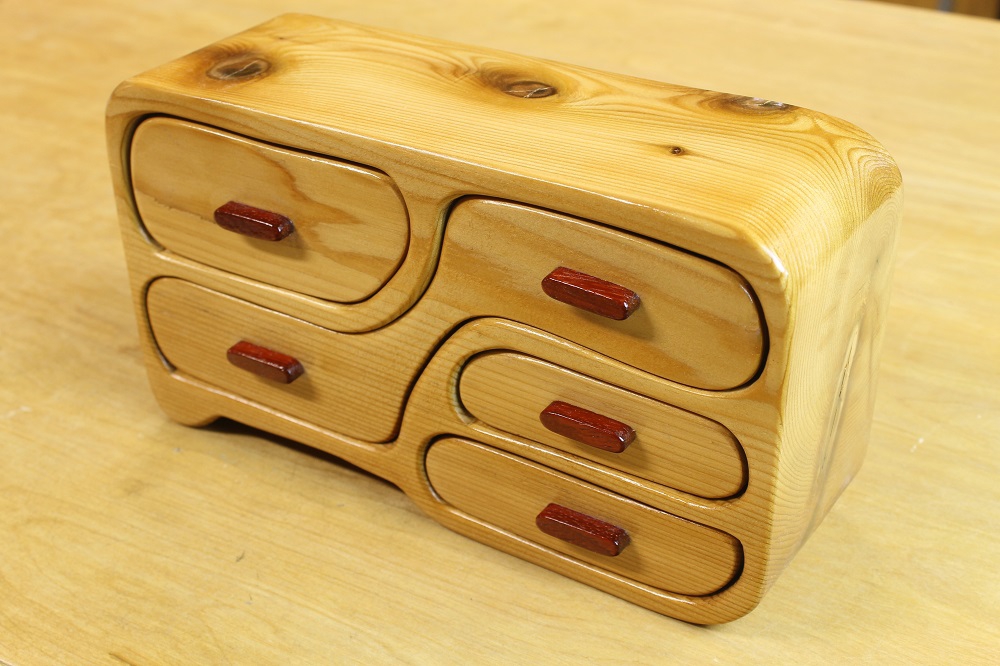
Finishing Touches – The Beginning Of The End
We have now made a band saw box. From solid chunk of wood to functional item in just under 400 discrete steps! Go us! But you really didn’t think we were done so soon, did you? Functional is great, sure. But there’s a lot of hidden beauty in there. What this project needs is more steps!
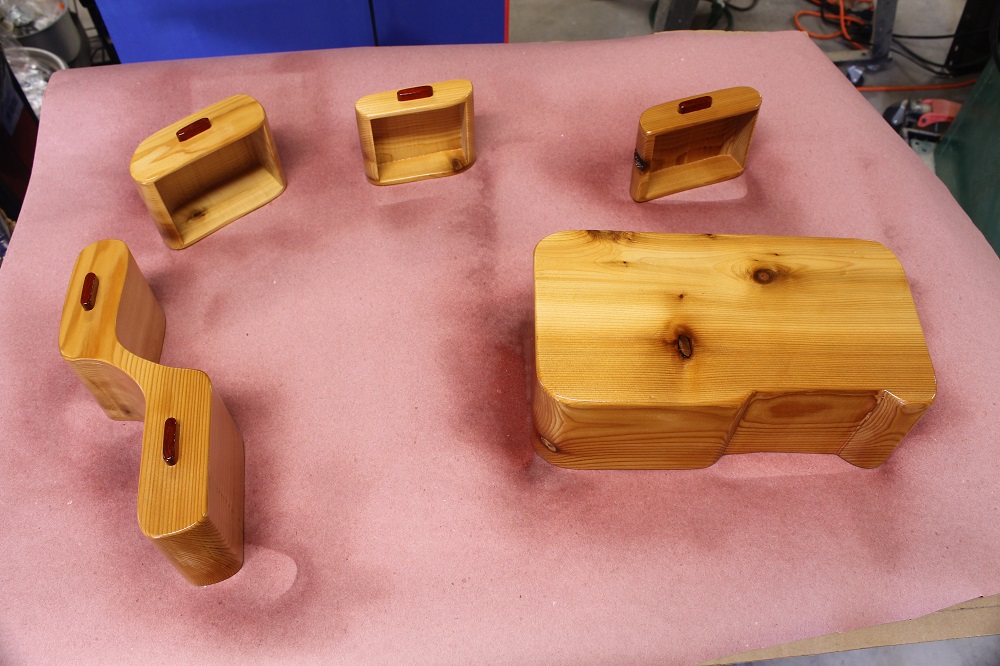
Before applying a finish, remove any sanding dust by wiping lightly with a tack cloth. Use your finish of choice. My standard finish for band saw boxes is RUST-OLEUM clear lacquer.
After the first thin coat or two of lacquer, give the box and drawers a very light sanding with a fine or extra fine grit sanding sponge to soften things up again. Then wipe away the dust again and spray more coats of lacquer, for a total of 5-7 coats. You should only need to sand the one time during the finishing process, not between every coat.
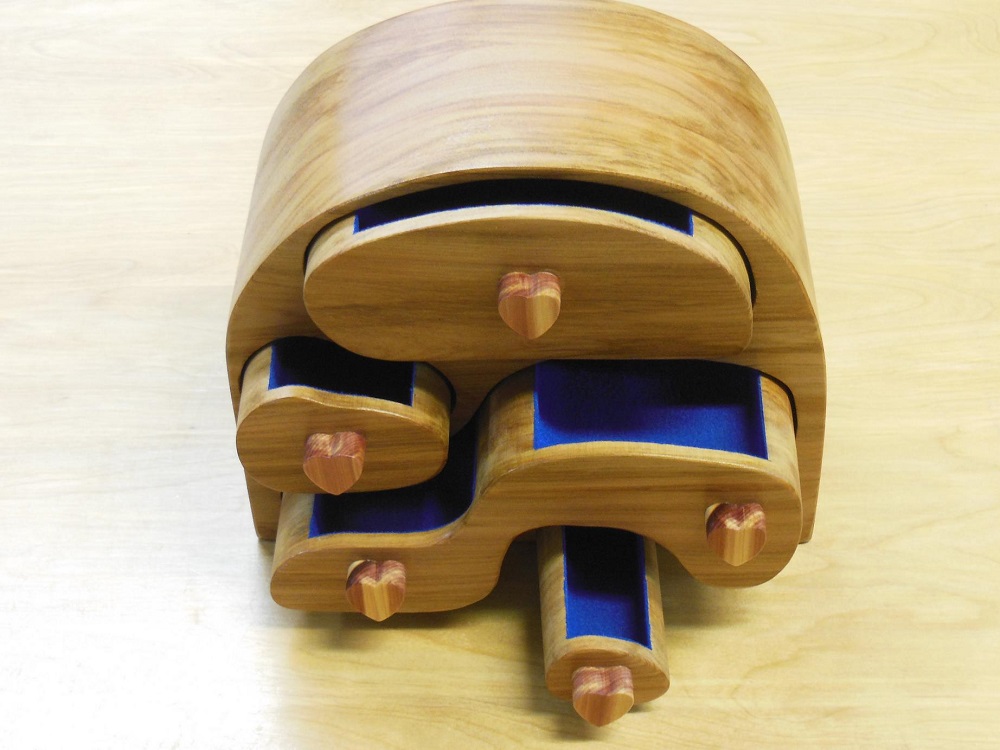
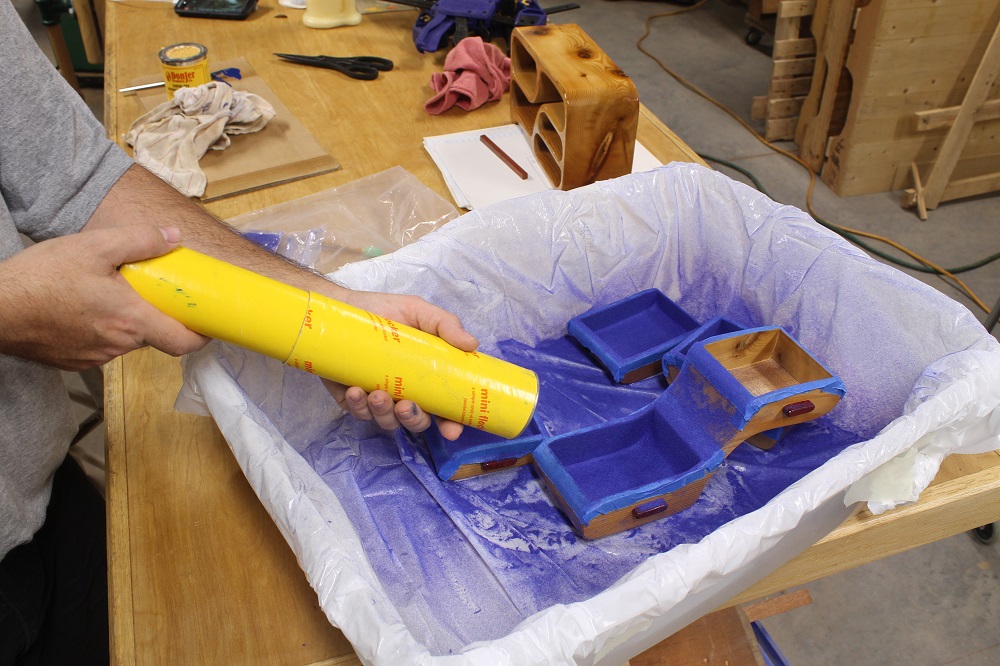
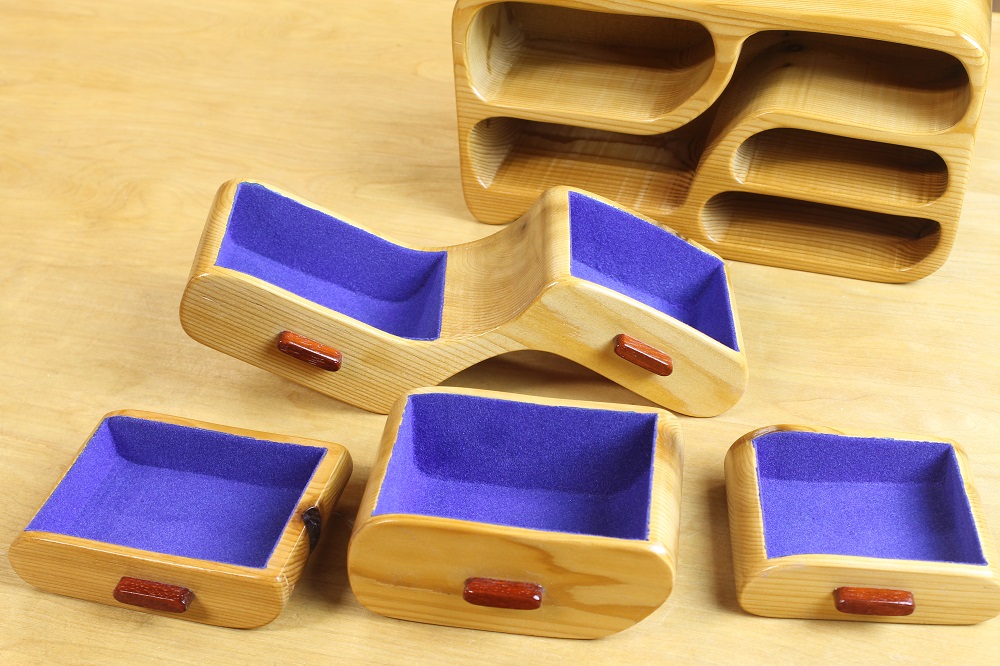
Finally, the drawer cavities were flocked to give them a soft, velvety interior. What’s flocking? We’ve got you covered with this how to apply flocking HomeFixated article from last year.

Outside Of The Box

We hope we’ve helped you to better understand the process of making band saw boxes. And maybe even inspired you to make your own. It may seem complicated at first, but you’ll find that you can cut one out in no time. Then it’s just a matter of sanding, gluing, rinsing and repeating.

If you’d like to see the process of building the box that inspired this one, check out my video here:
Let us know in the comments if you’ve ever made a band saw box and any tips or tricks you might have come up with to make the process easier. Now get out to your shop and make something cool!
Very generous in giving of your skills and talents. Thank you.
I’ve made a few boxes, some good and some fast. The extra information you have provided has inspired me to make another (well, several) and do it extra good.
Thanks
Norm
Thanks Norm, glad you found the article helpful!
Oh man, the most detailed description on bandsaw boxes, thank you.
Thanks for this great tutorial. I can’t wait to try and make one. Quick question: Does it have to be a solid piece of wood or can you use a glue up maybe with different species of wood? Thanks again.
Getting ready to try my first bandsaw box. You tutorial was very informative and useful. Good job.
Hi Steve! I have been doing Bandsaw Boxes for a few years now. I agree with the others that say this is one of the very best Tutorials!!! I use a lot of logs 🙂 I am now going to look to see if I can follow you somewhere! Thanks for your time 🙂
This is, without a doubt, the best woodworking tutorial I have yet to see on the web. I have made several bandsaw boxes but still learned and picked up ideas from your instruction. Thanks. Great job.
I’ve got to wonder what Alan of July 31st is doing up at 6:40 in the morning
Thanks Alan and Jon. So glad you found the article so helpful – the author is a woodworking (and article writing) rockstar!
God blessed me with a father who was a true wood wizard ! He owned and ran his own custom cabinet and special millwork shop for years . He had 12-14 custom home builders that he did all of their work . From the kitchen, laundry , bath , bedroom ,and den credenzas with bookcases and mantles to scroll top exterior front door headers and fluted pilasters and transom light entries . The homes were anywhere from $300 K to well over a million dollars . He never advertised in the yellow pages as he was too busy by word of mouth . Damn , I sure loved and admired that man . I worked for him from 12 – 29 years of age . I’m now retired from the N.C. Air National Guard and the Charlotte Fire Department and find myself in my own workshop doing our thing again on a much smaller scale of course . It’s truly gratifying !
Hi Van, thank you for sharing your story! Sounds like your father was quite a craftsman, and that he inspired you to carry on some of that tradition. Thanks for being a part of our community here at Home Fixated!
It’s really amazing,have any Platform to buy this product pls,you guys are just rock
I used your design as an inspiration to build a band saw box. I used a vaneer of 4 different woods. Being hardwoods, it was a chalenge to cut everything . I went through two bandsaws, before they bent and eventually, broke. I was using 3/16″ 4 tooth blade. This made for a lot of sanding. But I finished and donated to local Rod & Gun club for a silent auction. Not great, but the woman who won it loved it. Thanks for your idea..
Bandsaw blades, not bandsaws
real nice job on this one!!!
Those are beautiful boxes and I was REALLY excited about the projec5 until you told me I had to “sand” it.
I feel your pain, James. I suppose you don’t HAVE to sand it. But it you want it smooth and beautiful, it sure helps! Thank you for visiting HomeFixated. We appreciate the support.
Marla White, thank you for the feedback. There’s a lot more cool projects to come.