

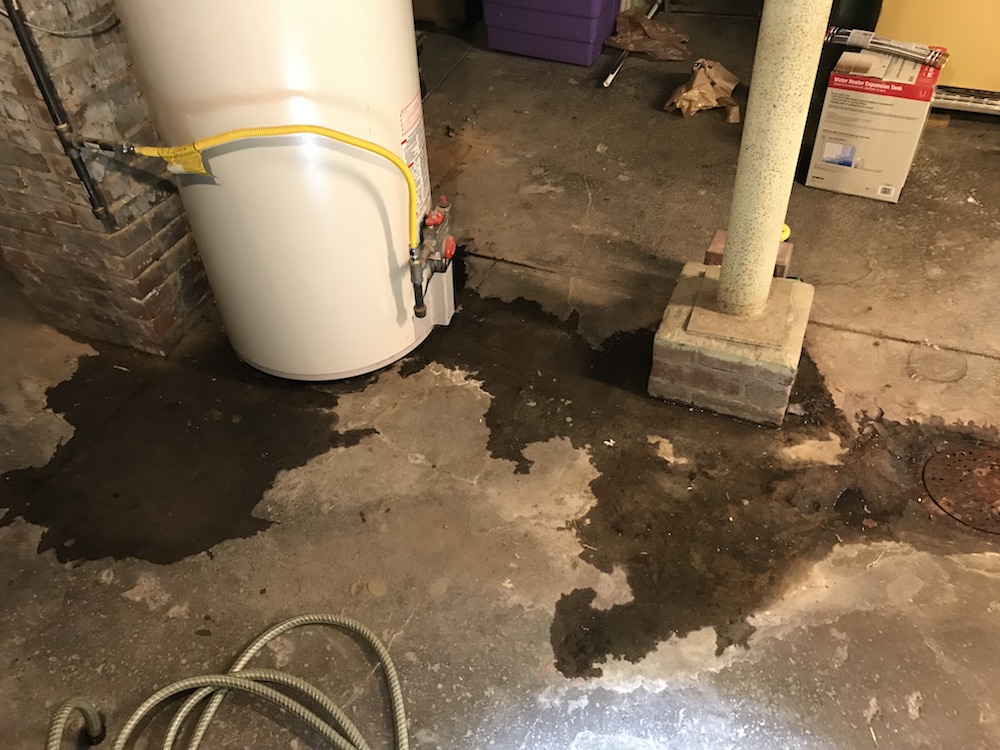
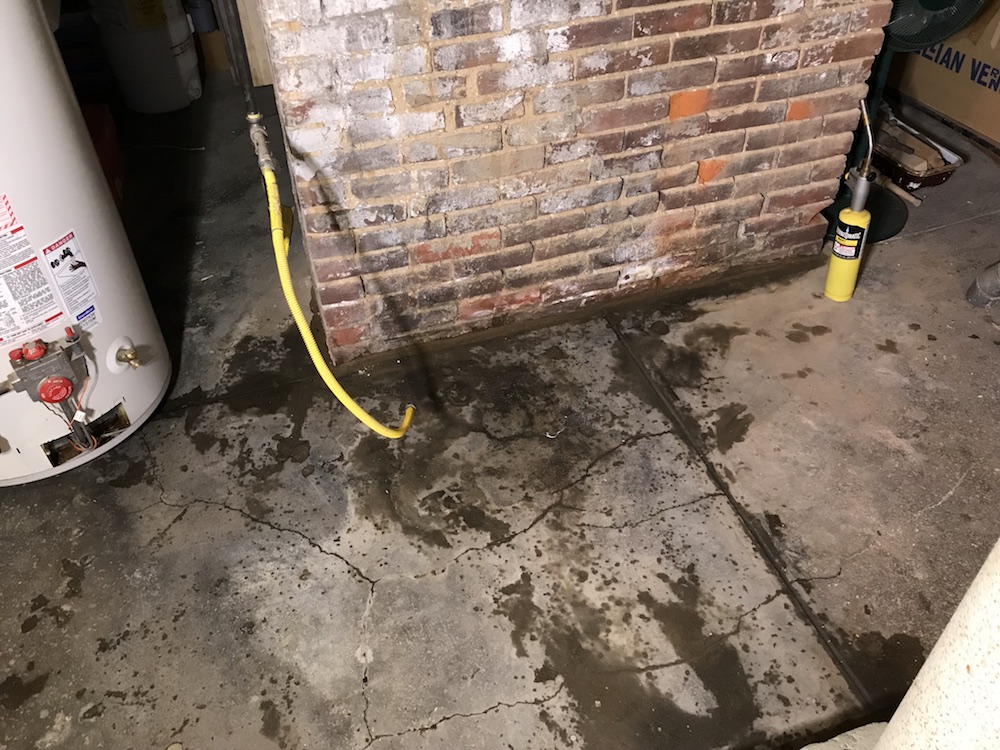
Recently, my wife and I spent several days out of town, working on a project. When we got back home on Saturday night, I was ready for a long, hot shower. I unloaded the truck, and schlepped the contractor bag full of dirty laundry into the basement. Having been blessed with keen powers of observation, I immediately noticed the largish puddle that had formed under our water heater. I muttered a string of special phrases common to homeowners and DIYers, ending with something along the lines of “Just what I wanted to do tomorrow – replace a water heater.” There may have been an adjective or two in there, which I have omitted to maintain our PG-13 rating…
When you’re getting ready to replace a water heater, the first thing to do is to take a look at your old water heater, and make some notes of dimensions and parts you’re likely to need. Just be aware, there’s an unwritten rule (until now) that you will NEVER get every part you need on the first trip. Make a note of the height and width of the old water heater. If you can match the dimensions fairly closely, you can save yourself some re-plumbing. Also be aware that if your water heater is in a tight space, such as a closet or recessed area, you need to make sure the new unit will fit in the same space.
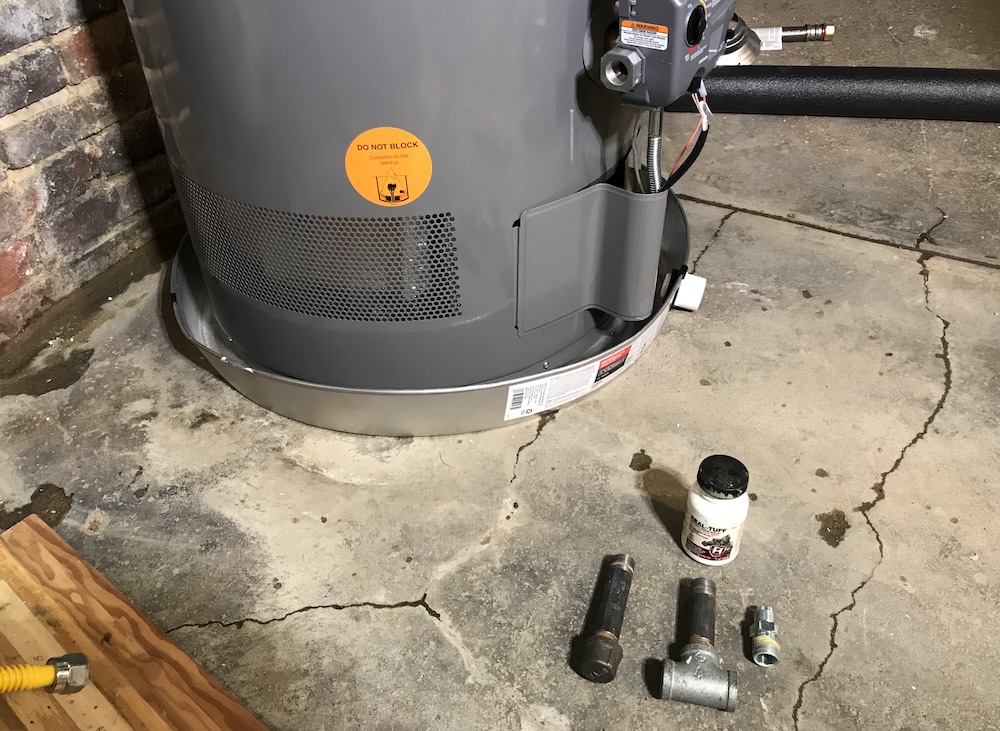
When you go go shopping to replace a water heater, some other items you’re likely to need include:
– Two water heater connection hoses (they come in various lengths)
– Teflon tape
– Pipe dope, aka pipe joint compound
– A small brass wire brush
– A water heater pan, if you don’t already have one
– A discharge pipe to connect to the pressure relief valve
The tools required to replace a water heater are pretty basic: A pipe wrench, an adjustable wrench, and a screwdriver or two to connect the flue cap on a gas water heater, or access the wiring on an electric model.
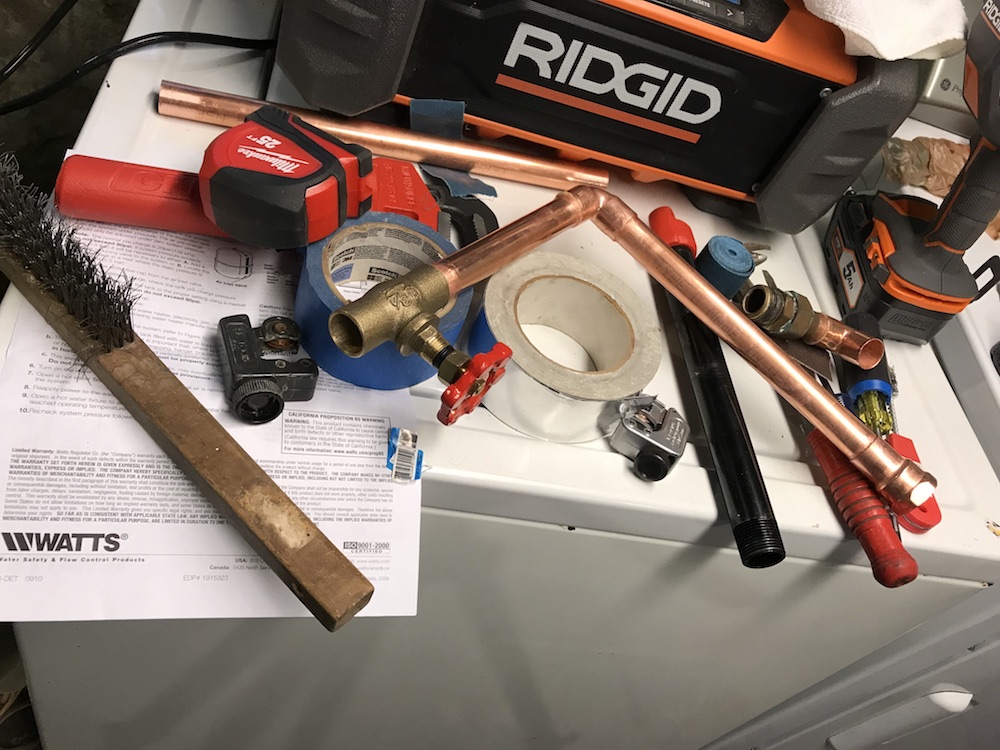
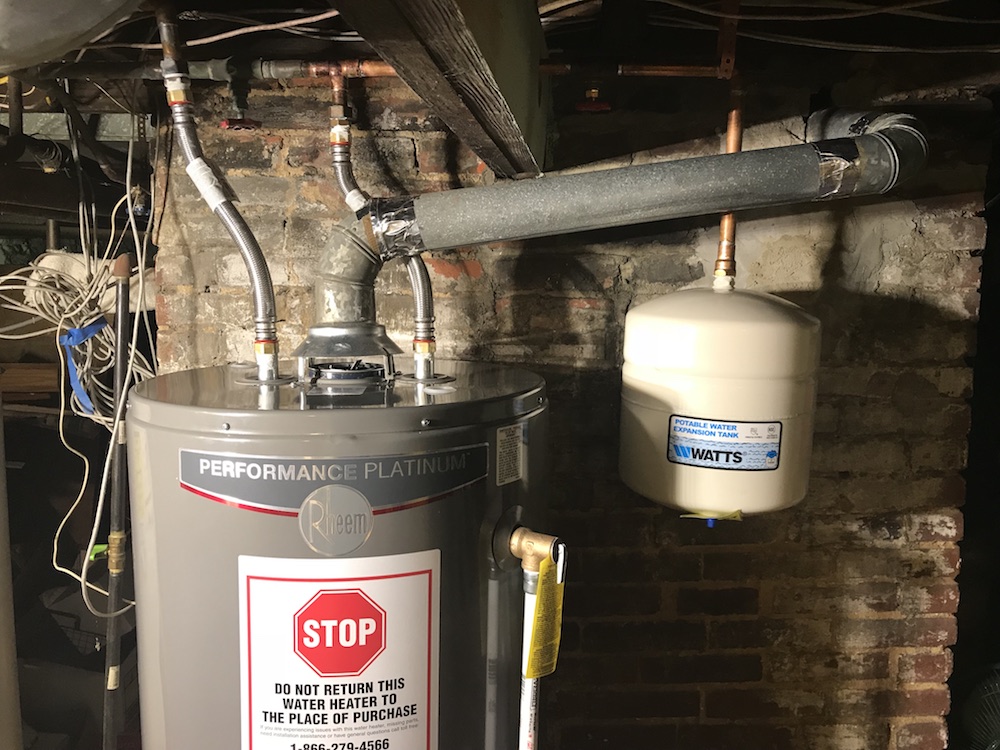
If you’re adding an expansion tank, you’ll need to decide where it will be located, then figure out what fittings you’ll need to plumb it in. I recommend including a shutoff valve, so you can isolate the tank for repairs if needed. If you’ll be sweating any pipes together, make sure you have enough solder, flux and emery cloth, a pipe cutter, and small round wire brushes for cleaning fittings. And, of course, a torch and fuel.
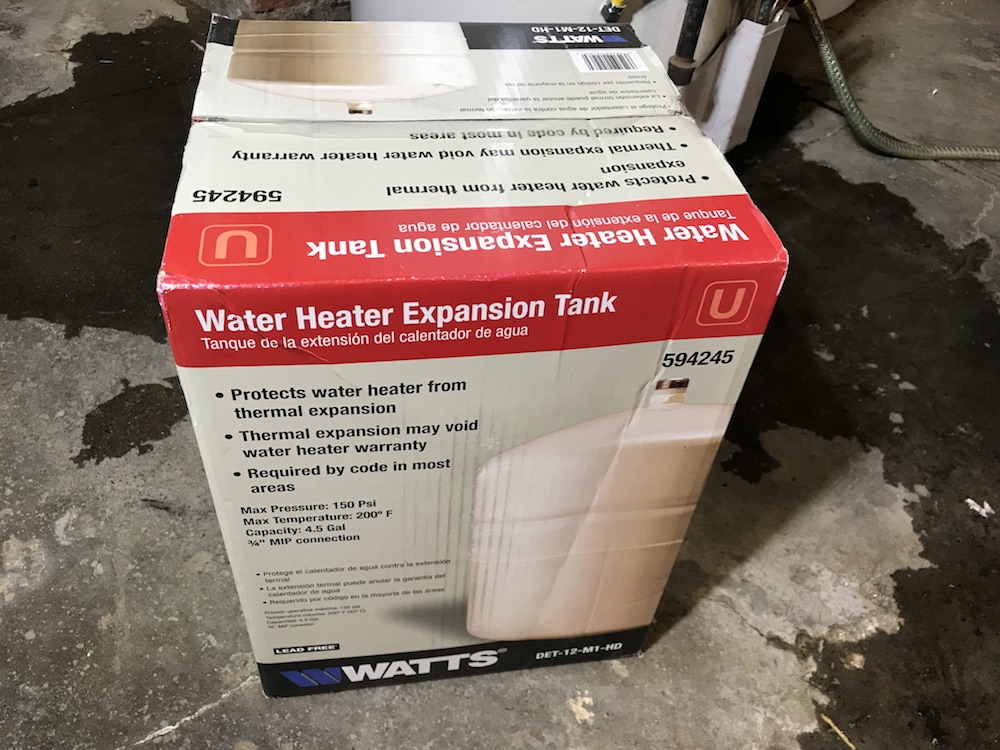
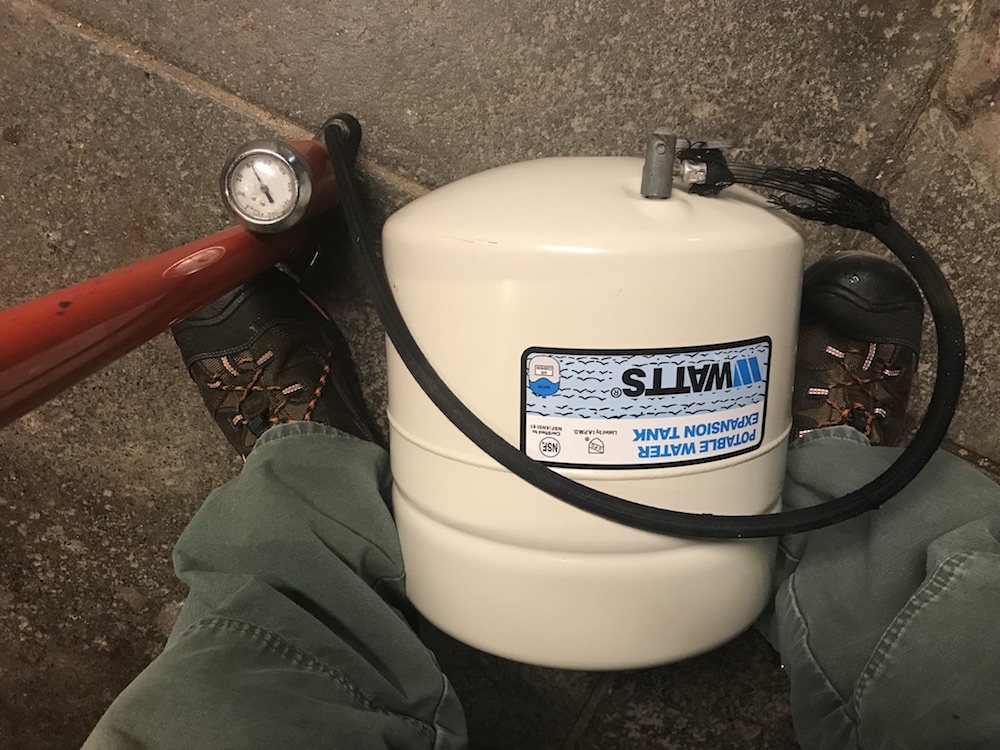
There are different sizes and brands of expansion tanks available; the specs are available online, to help you decide what size to get. Getting an oversized tank is OK; getting an undersized tank is not OK. For our 50-gallon water heater, I got a 4.5 gallon tank. The tank I got can be installed right side up, upside down, or horizontally; make sure the tank you choose can be installed the way you want it. The expansion tank weighs several pounds, and if water expands into it, will be even heavier. Get some strapping, preferably copper, to support the weight. Some tanks also have mounting bracket kits available, in case you want to go all upscale…
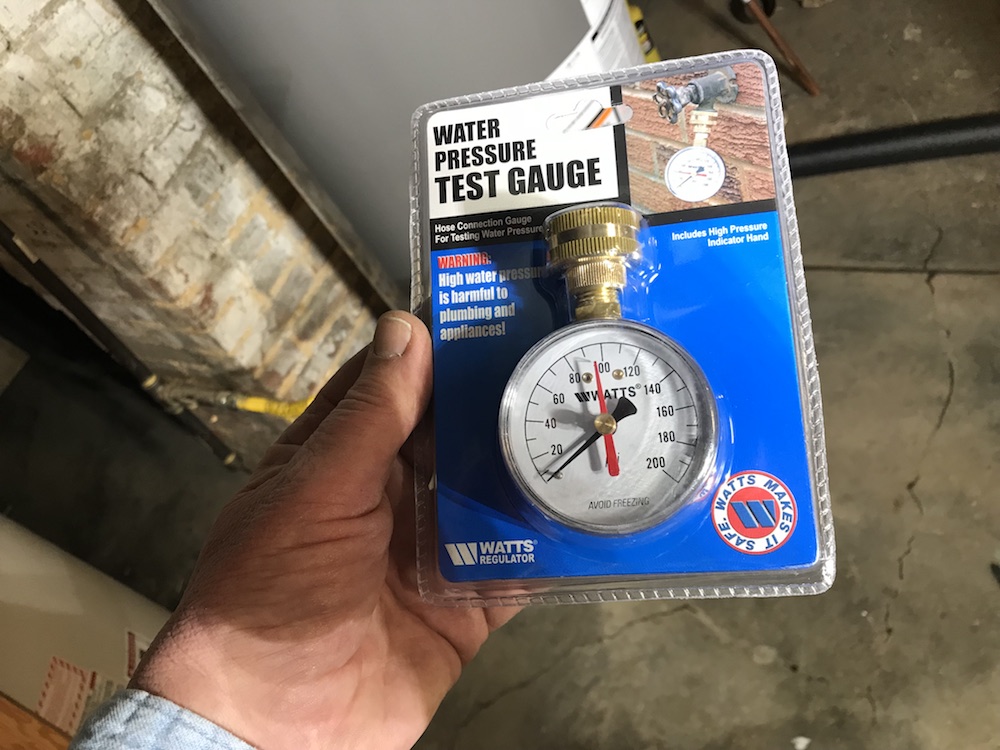
The other thing you’ll need if you’re adding an expansion tank is a water pressure gauge. When you install the tank, you need to match the air pressure in the tank to the water pressure in the pipes. You can pick up a cheap but accurate gauge at the home improvement store for about ten bucks.
A final consideration as you get ready to replace a water heater: They’re HEAVY. The model I got weighs 165 pounds. Most places that sell water heaters will help you get loaded up, but make sure you have a strong friend waiting when you get home. Most water heaters can be transported lying down; check with the seller. If you do lay it flat, make sure the control panel isn’t on the bottom.

Replace A Water Heater – Out With The Old
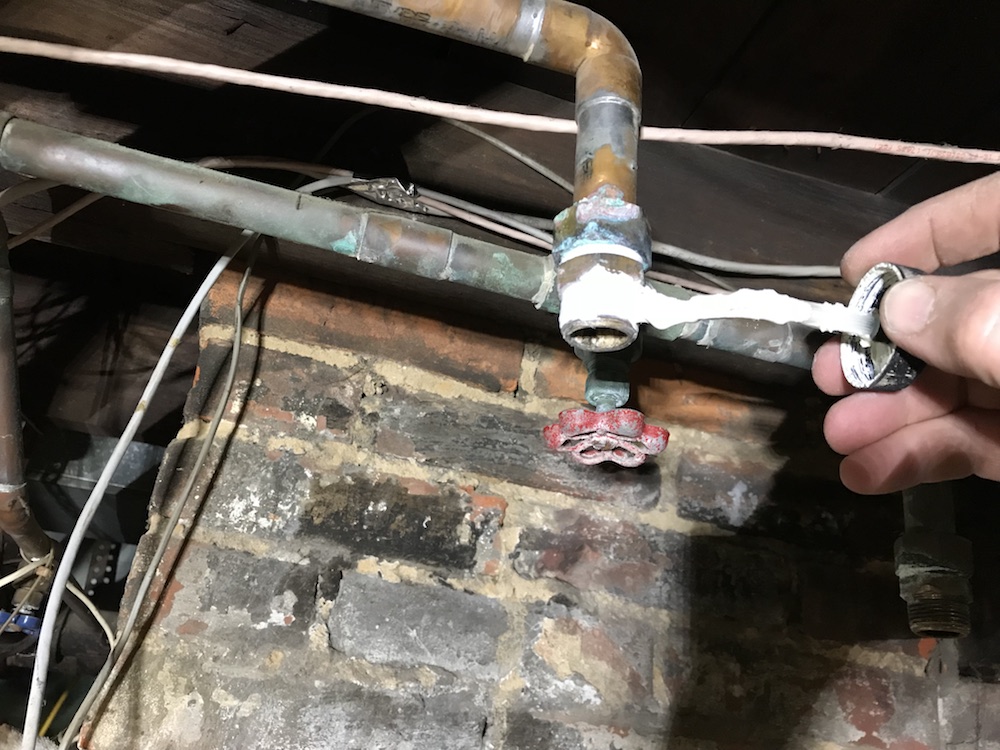
Disconnecting your dead water heater is usually pretty straightforward. Step one is to take away its fuel source. If it’s an electric water heater, turn the breaker off, and double-check with a voltage tester. Open up the panel where the wiring goes in, and disconnect everything. For gas heaters, shut off the gas supply, then disconnect the flexible supply line from the old water heater. Note: Save the black pipes used to attach the flexible supply line to the water heater; you can clean up the threads and re-use them, assuming they’re not badly corroded.
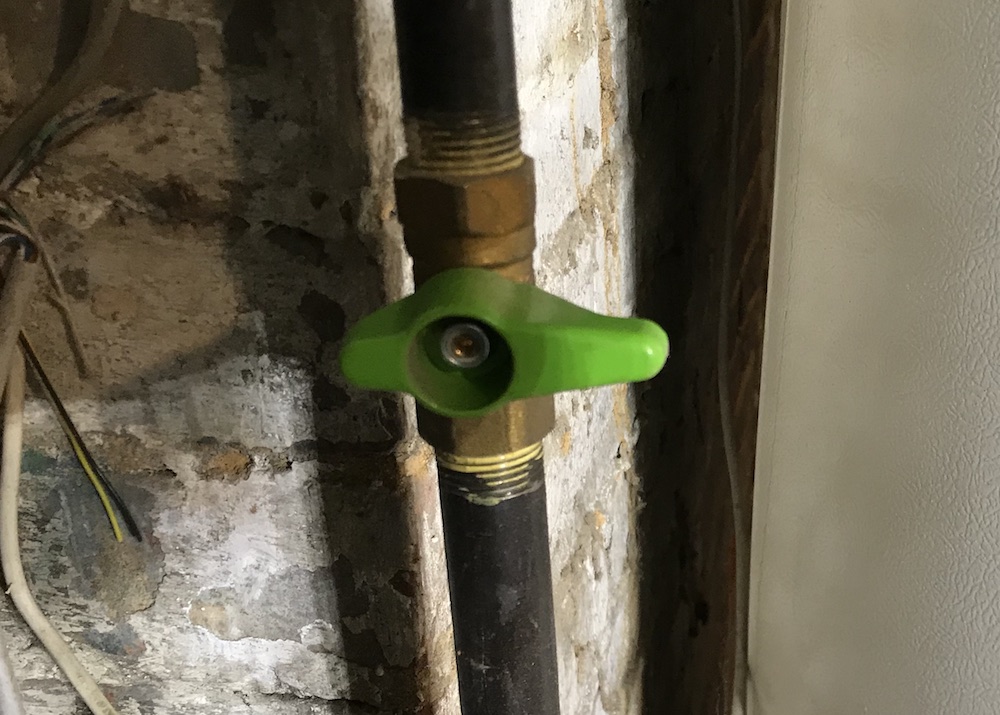

Now you have to drain that thing. Shut off the cold water supply valve. If there isn’t a separate shutoff for the water heater, trace the cold water line back and see if there’s a shutoff upstream. If not, you’ll have to shut off the water at the main shutoff.
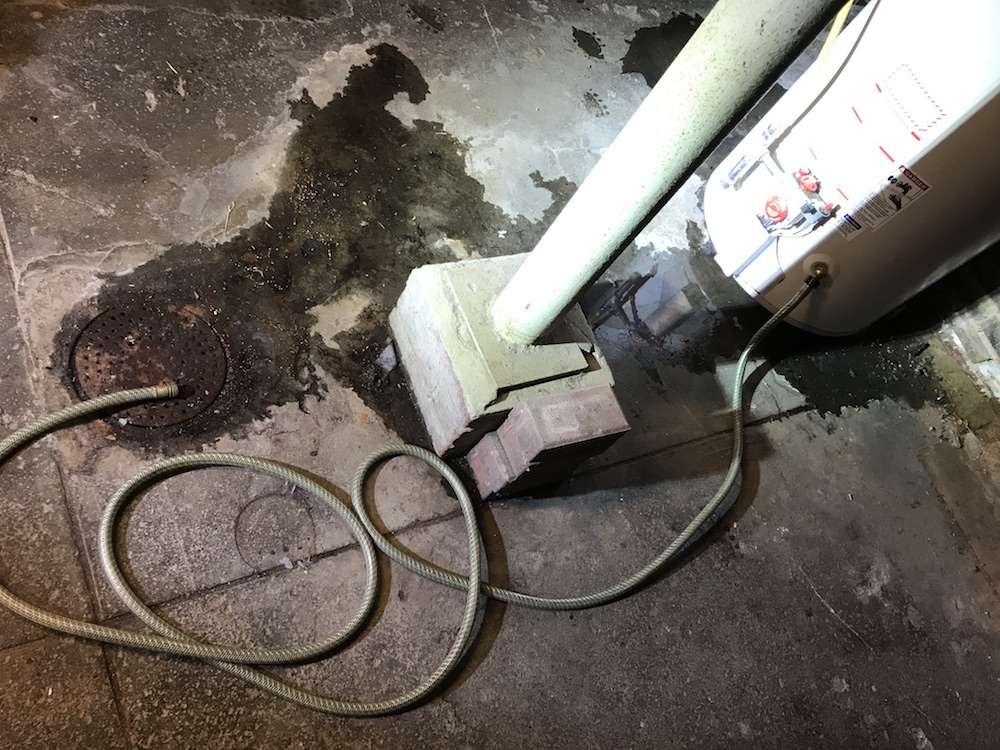
Connect a short length of hose to the drain valve at the bottom of the water heater, and run it over to a floor drain. If there is no floor drain, you may have to use a small pump to pump the water into a utility sink or outside. To break the airlock and help the water drain, open the hot water faucet furthest from the water heater (don’t forget to turn that off later).
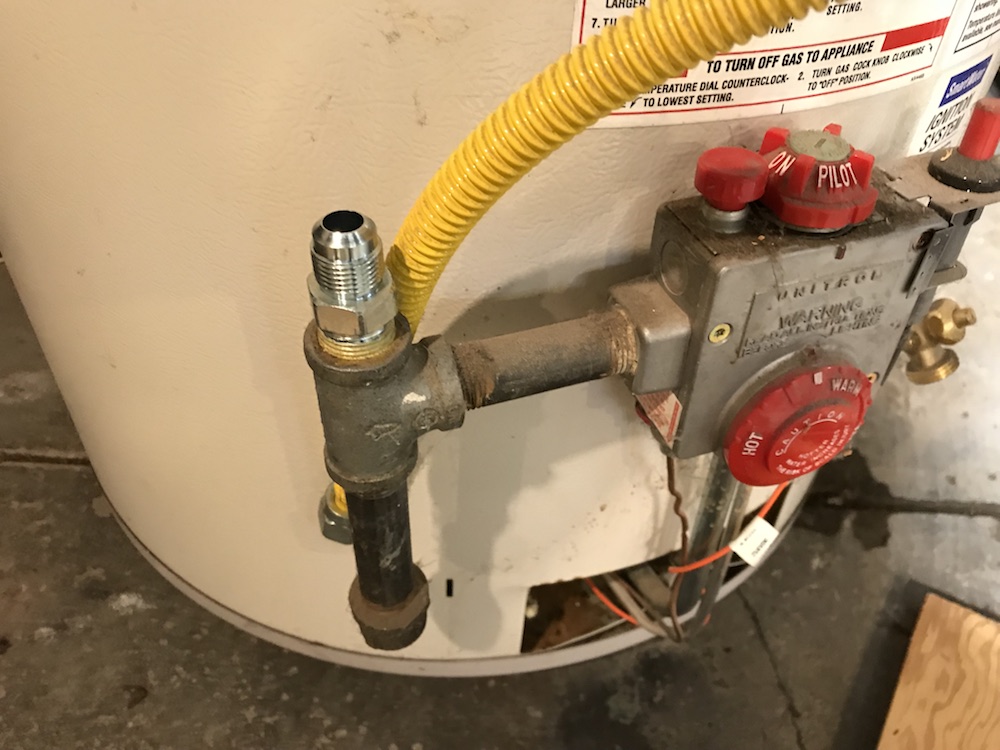
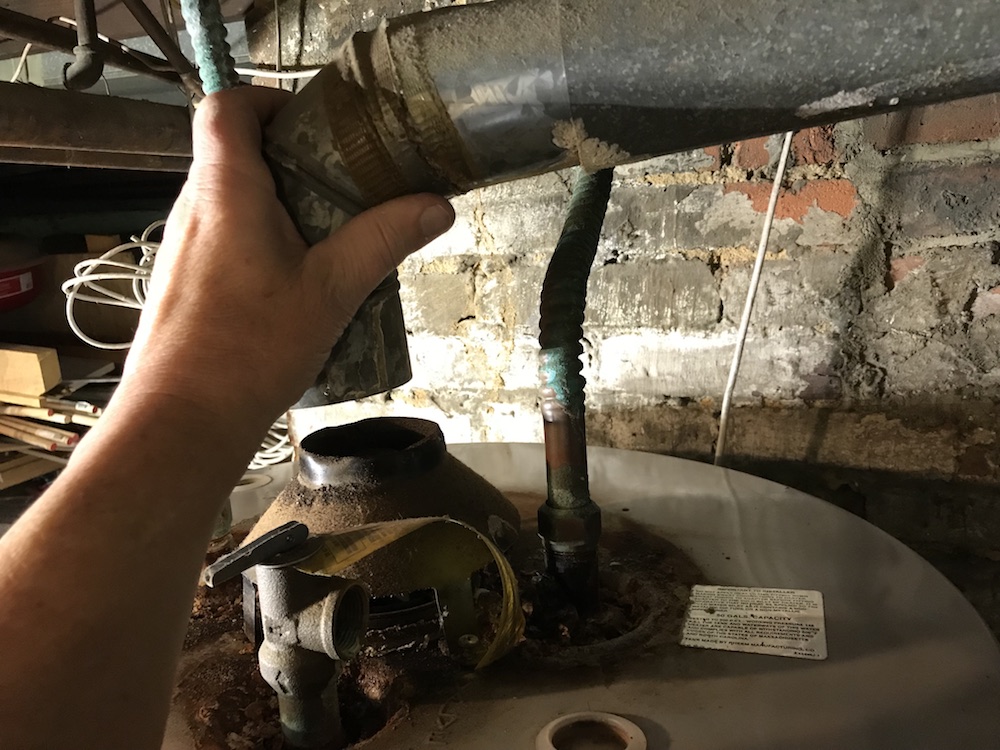
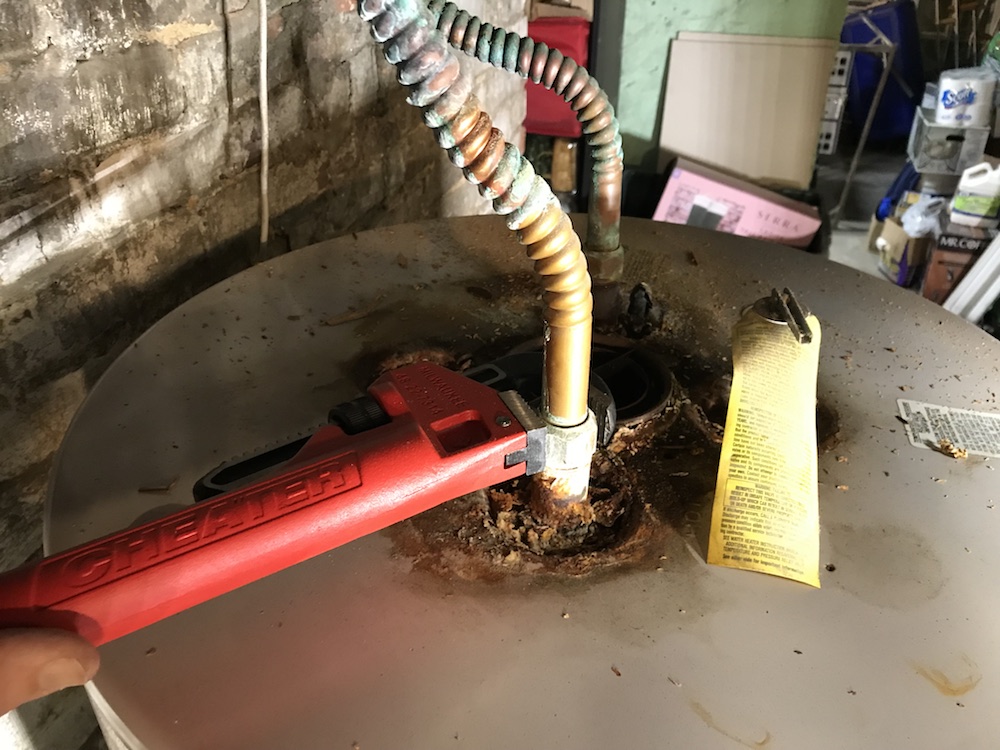
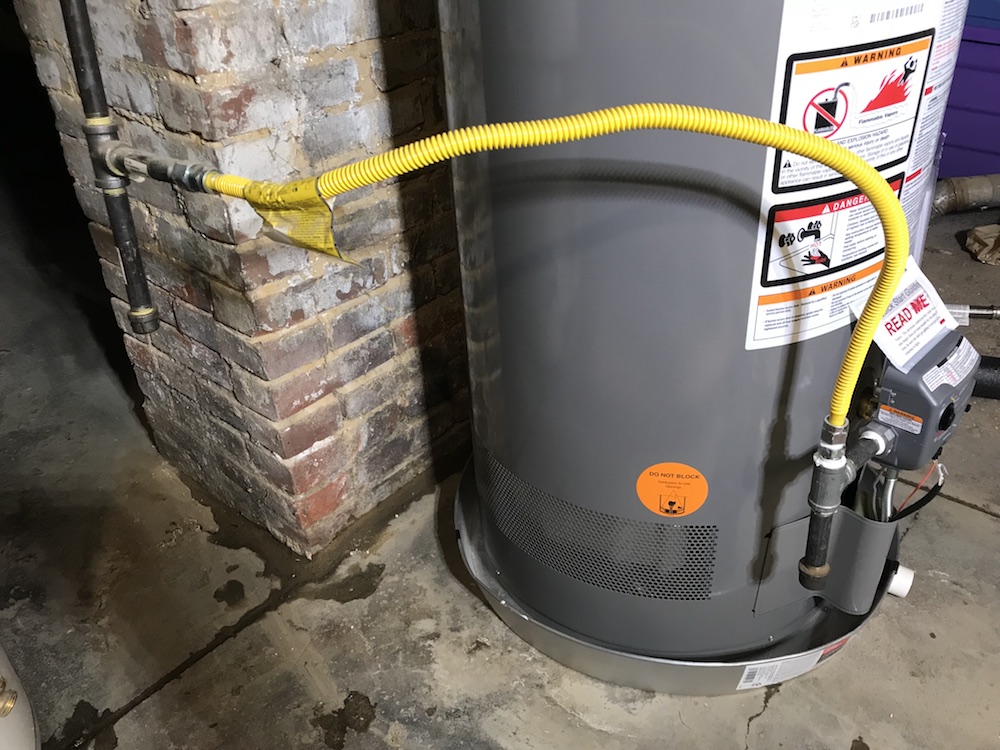
If you have a gas water heater, remove the flue pipe while the water is draining. Be careful; flue gases can make these pipes VERY hot. Once the H2O is gone, it’s time to disconnect the water heater from the hot and cold pipes. Usually, there is a short flexible connector between the pipes and the water heater. Disconnect the connectors from the water heater first, then from the pipes. Use two wrenches to avoid twisting the pipes. Your best bet for a leak-free result when you replace a water heater is to chuck the old connectors and replace them. Most retailers that sell water heaters have a good assortment of new connectors available.
All disconnected? Tip it back, and roll it out of the way. If the floor is wet, like ours was (sigh), get it as dry as possible before putting your new water heater in position.
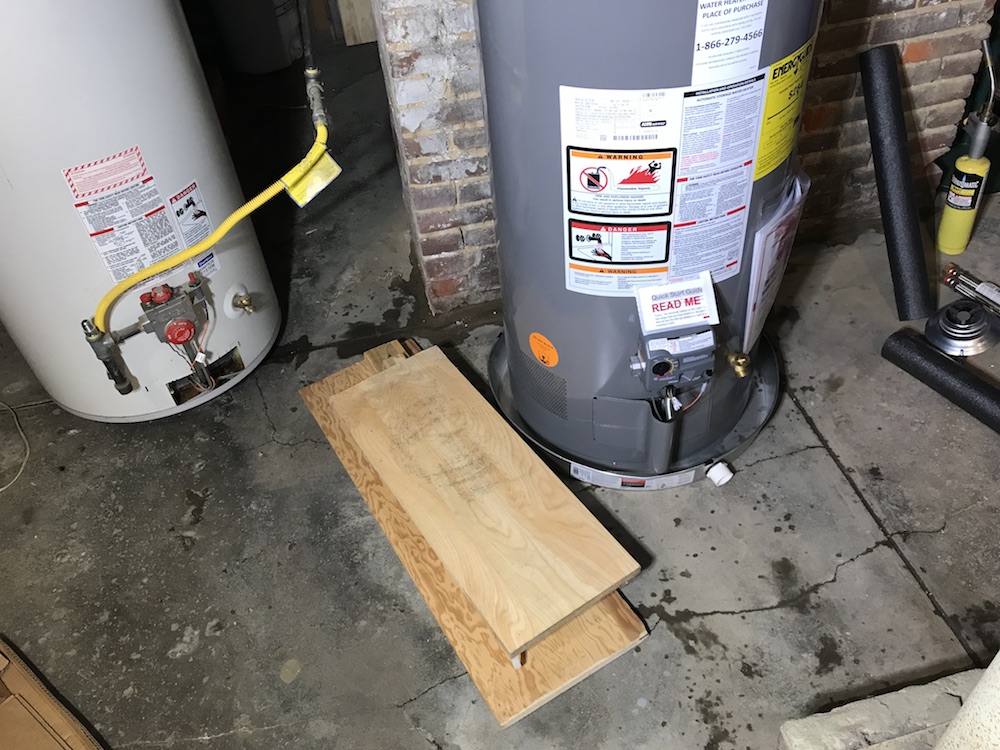
Most times, when you replace a water heater, it’s a great idea to add a water heater pan. This is especially true if your water heater lives in finished space, such as in a closet or up on a main floor of your house. The pans have a drain outlet built in, which can be connected to a floor drain. Given our recent history, I grabbed a pan when we picked up the water heater.
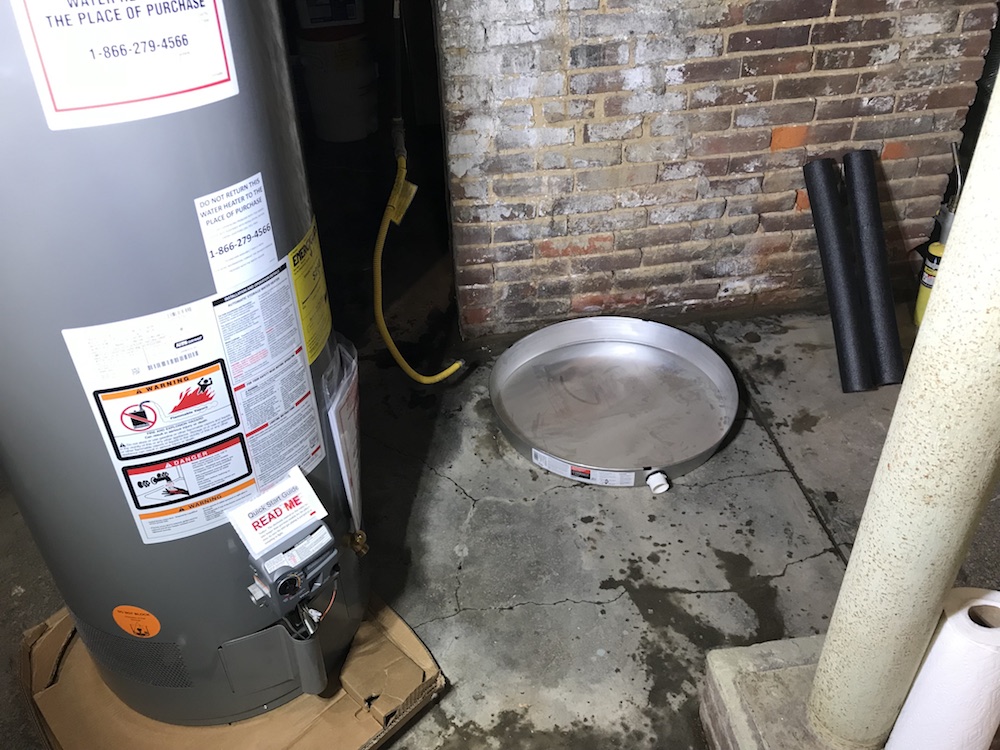
Handy HomeFixated tip: As I mentioned, water heaters are HEAVY. I did the installation by myself, and trying to lift the water heater up over the lip of the pan wasn’t working out too well. Ever resourceful, I grabbed a couple of scrap boards, and piled them next to the drain pan, just above the height of the rim. I rolled the water heater onto the boards, and over the edge into the pan. Water heater in, sides not crushed – all good!
Replace A Water Heater – And Add An Expansion Tank
This section only applies if you’re adding an expansion tank to your “replace a water heater” project. It’s incredibly interesting and informative, but if it doesn’t apply, feel free to skip the fun, and head down to the “Hookup” section.
Expansion tanks are required by code in many areas now – with good reason. When the water in your water heater gets hot, it expands. When it expands, it has to go somewhere. In the past, the most common avenue for that extra agua to escape was back into the water supply. However, many municipalities require back flow preventers or check valves, which trap the water in the house pipes, making it a “closed system.” If the pressure builds up too much, and the expanded volume of water has nowhere to go, very bad things can happen.
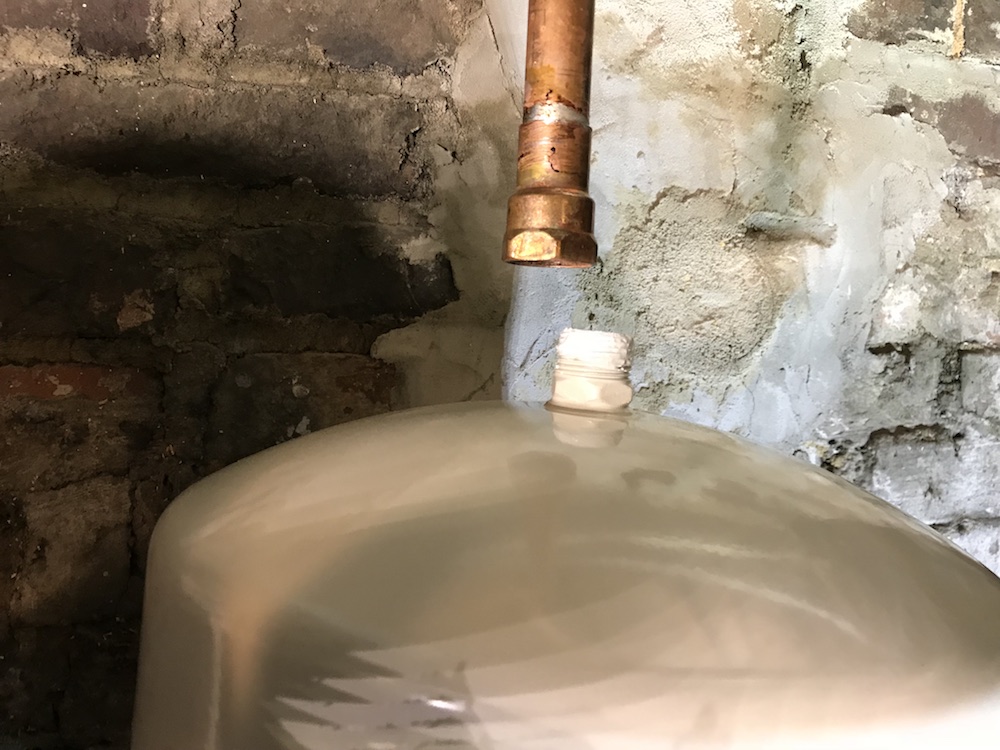
The expansion tank generally gets connected to the cold water inlet of the hot water tank. (Check the instructions that come with your tank). The tank I bought had to be located at least 18” away from the water heater’s inlet. It can be placed further away, but they recommend installing it within a few feet of the water heater.
Find a nearby location to install the tank. Keep in mind that you’ll have to run the cold water supply to it, so look for a spot with few or no obstructions. Also remember to leave clearance for your water heater’s vent pipe, if it’s a gas water heater.
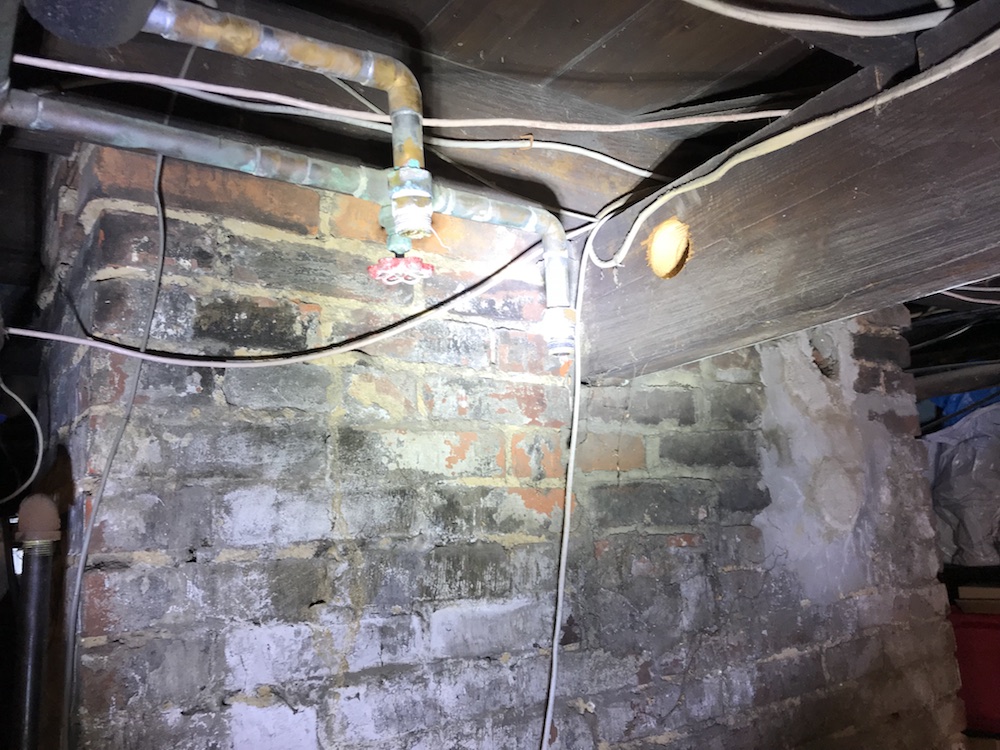
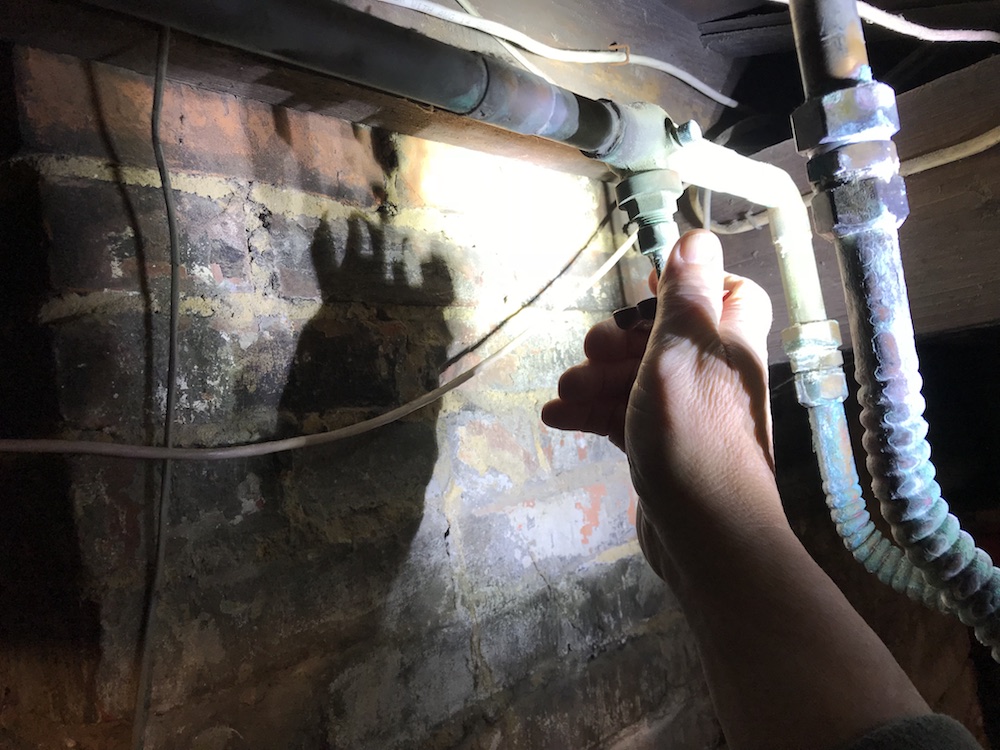
Unfortunately, my water heater was right next to a support beam on one side, and a walkway I didn’t want to block on the other. The original setup for the cold water supply was a horizontal 3/4” copper pipe, with a 90 degree elbow to bring it down toward the water heater. I decided to take out the elbow and replace it with a T fitting. The pipe would then continue straight through the support beam (after I took a little chunk out of it with a hole saw), with the base of the T heading down toward the water heater.
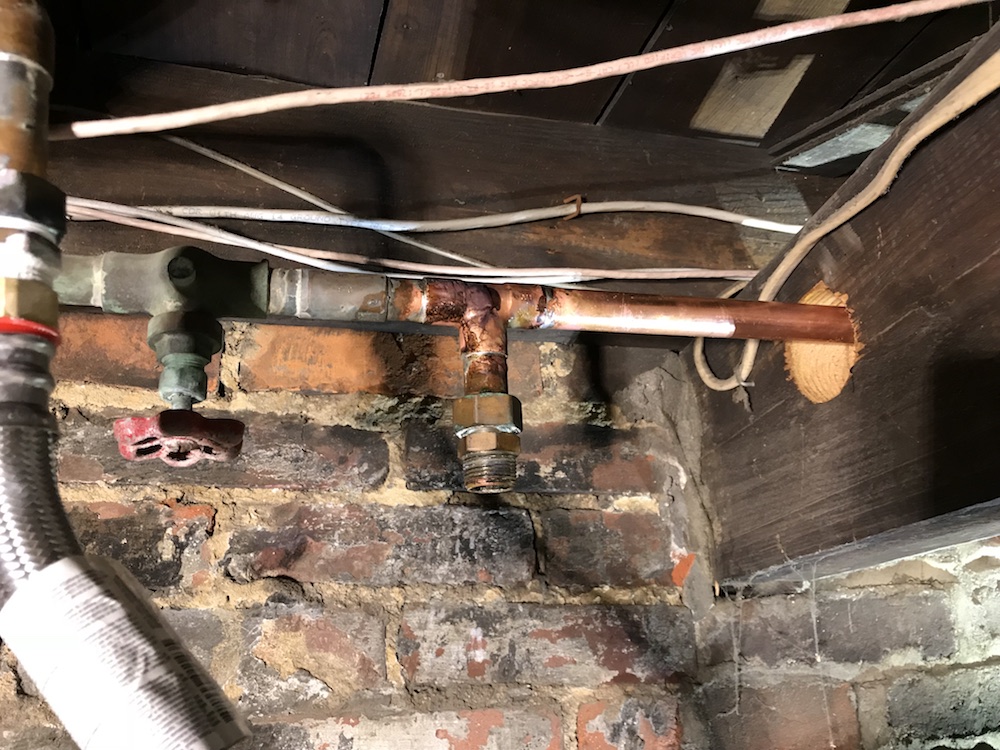
I added a shutoff valve in the line right after it came through the hole in the support beam. A shutoff valve only costs a few bucks, and will make any future servicing a lot easier. I added a 90 degree elbow after the shutoff, and inserted a short length of copper pipe pointing downward, with a 3/4” female fitting sweated onto the end to accept the male threads on the expansion tank.

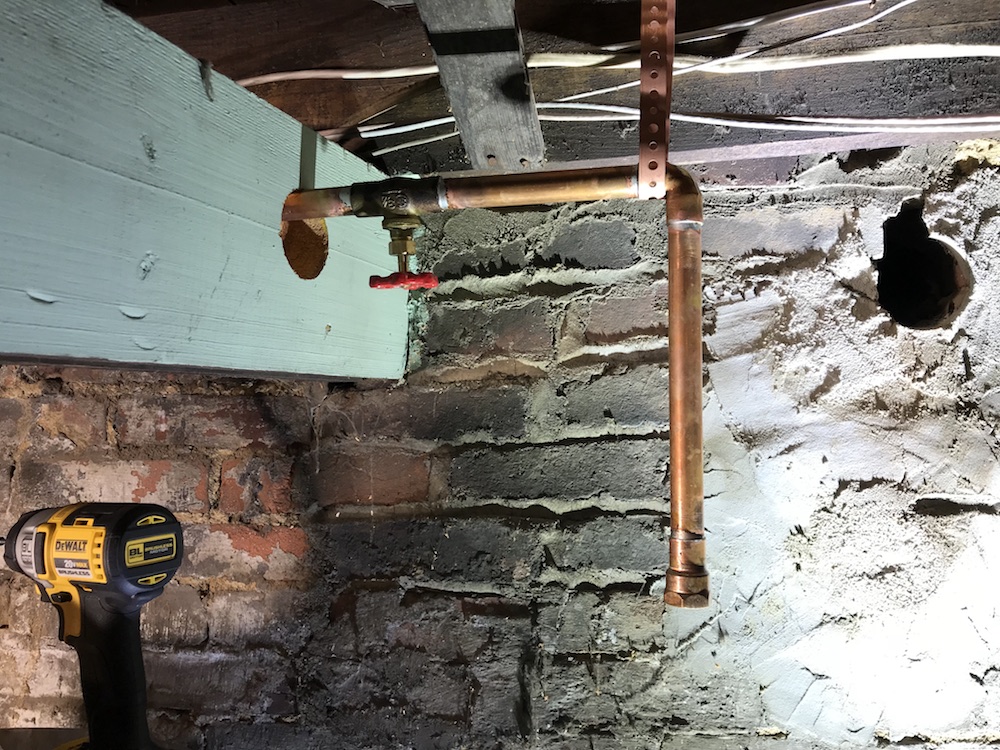
I used some copper strapping attached to the ceiling for added support, made sure the new valve for the expansion tank was in the OFF position, and got ready to put everything back together, as told in “The Hookup” section.
The Pressure Is On
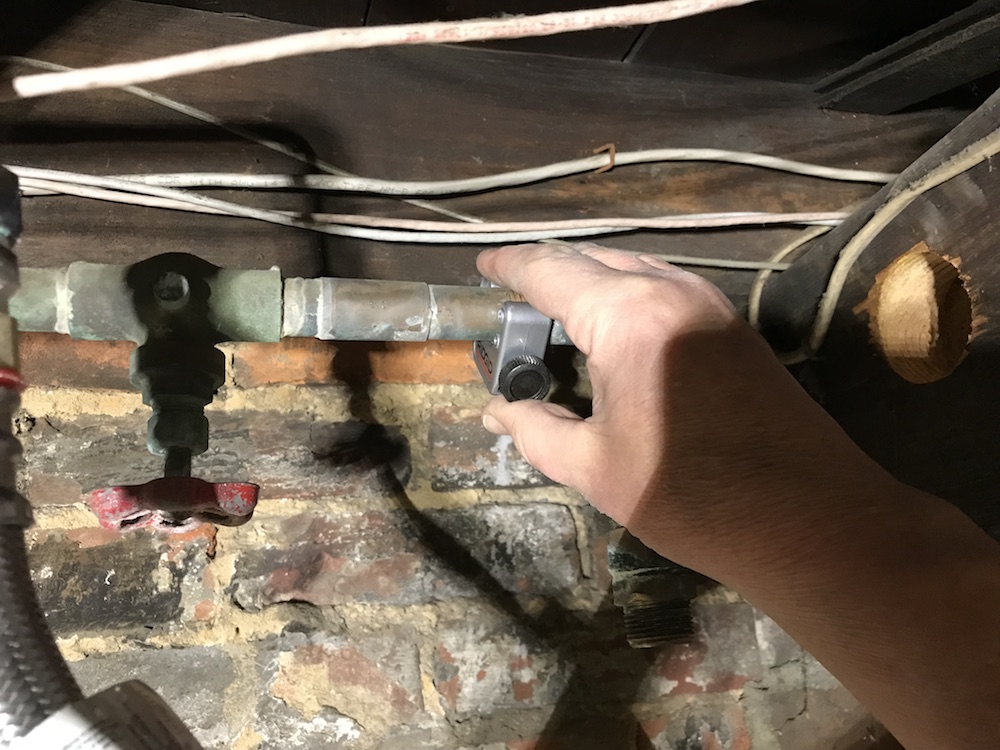
As part of the expansion tank installation process, you have to match the air pressure inside the expansion tank to the water pressure in the pipes. Normal residential water pressure is between 40 and 60 p.s.i. When I attached my newly-purchased water pressure gauge, the reading spiked to over 140 p.s.i. – and stayed there.
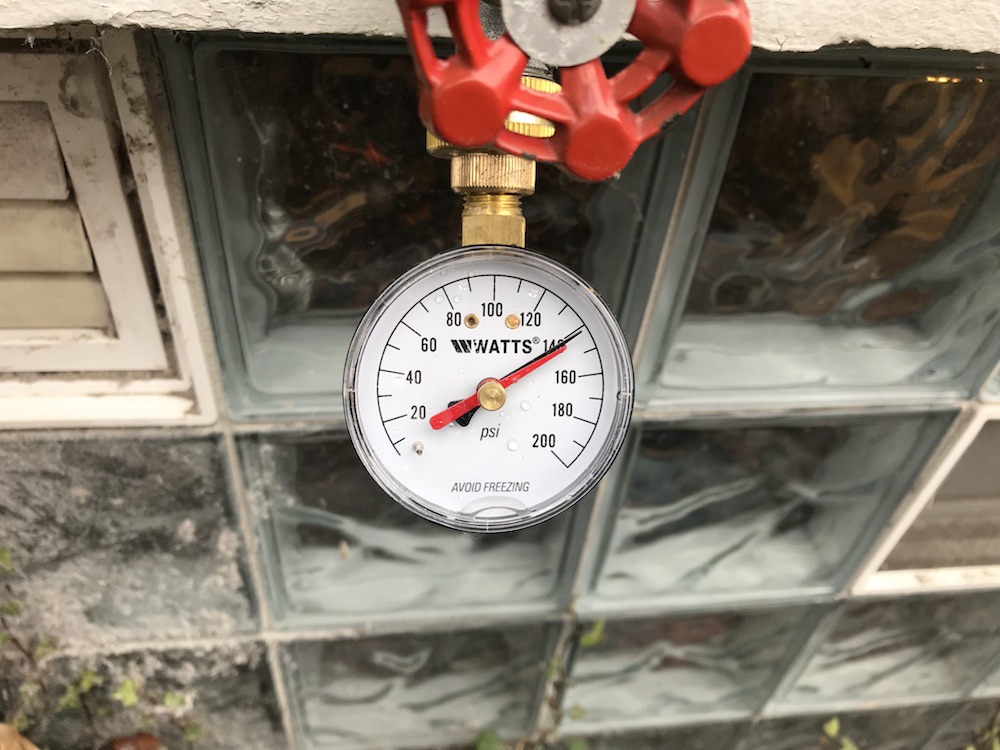
Thinking “No WAY that’s right,” I tried it on another faucet. Same thing. I still figured I must have a faulty gauge, but I called our water company, to see what the normal pressure is in our ‘hood. They said the pressure on our street averages 162 p.s.i. Damn! At least I knew my $10 gauge was probably good.
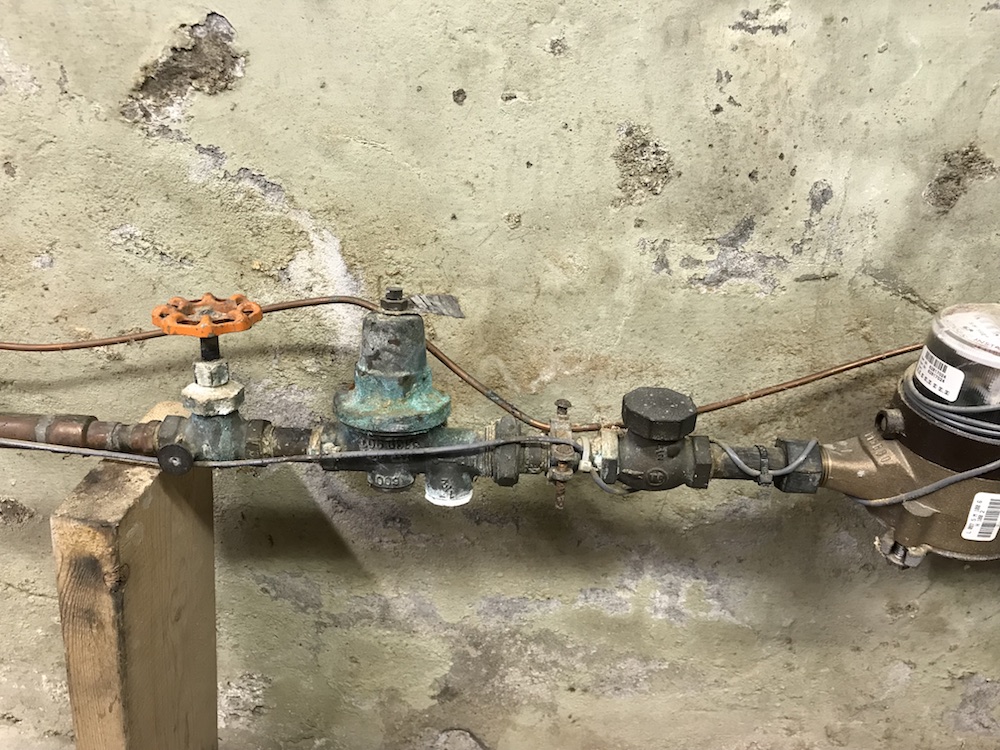
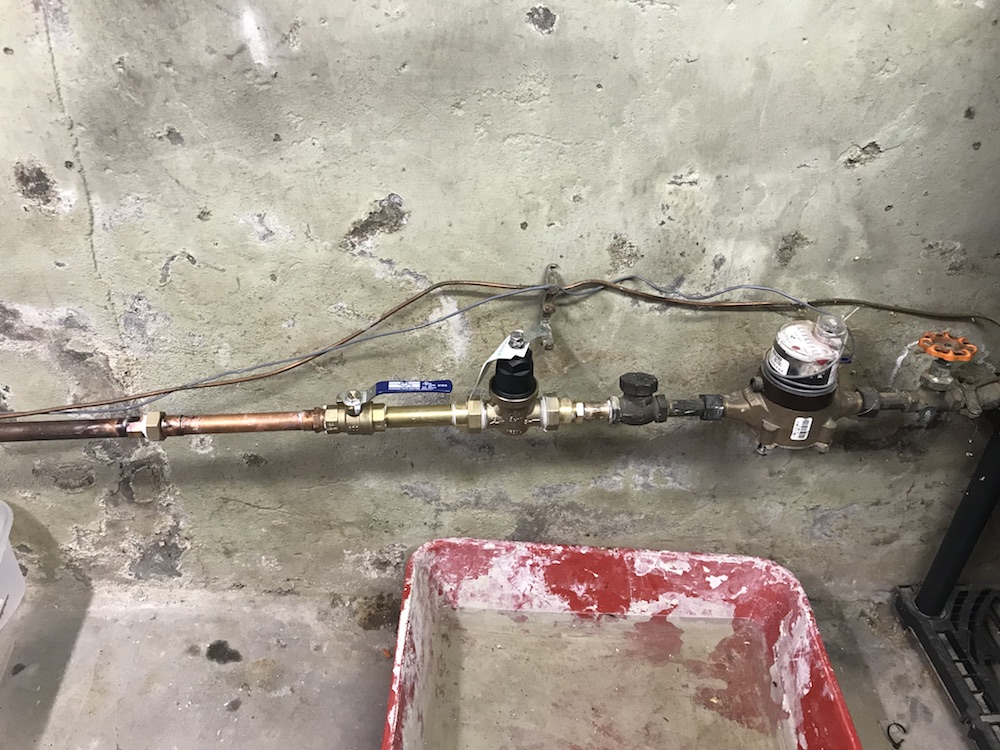
Since the expansion tank I bought isn’t designed to work at pressures over 80 p.s.i., this added another task to the “while we’re at it” list – replacing the pressure reducing valve. The new valve would take two days to arrive, and I wanted to get the water heater installed and cranking the hot water NOW. Fortunately, having the shutoff valve for the expansion tank allowed me to finish my “replace a water heater” project without waiting for the pressure reducing valve to arrive.
Replace A Water Heater – The Hookup
When you replace a water heater, once the new water heater is in position, the hard part is pretty much over. With the exception of schlepping the old tank out of there; hopefully you’re still on good terms with whoever helped you lug the new one in…
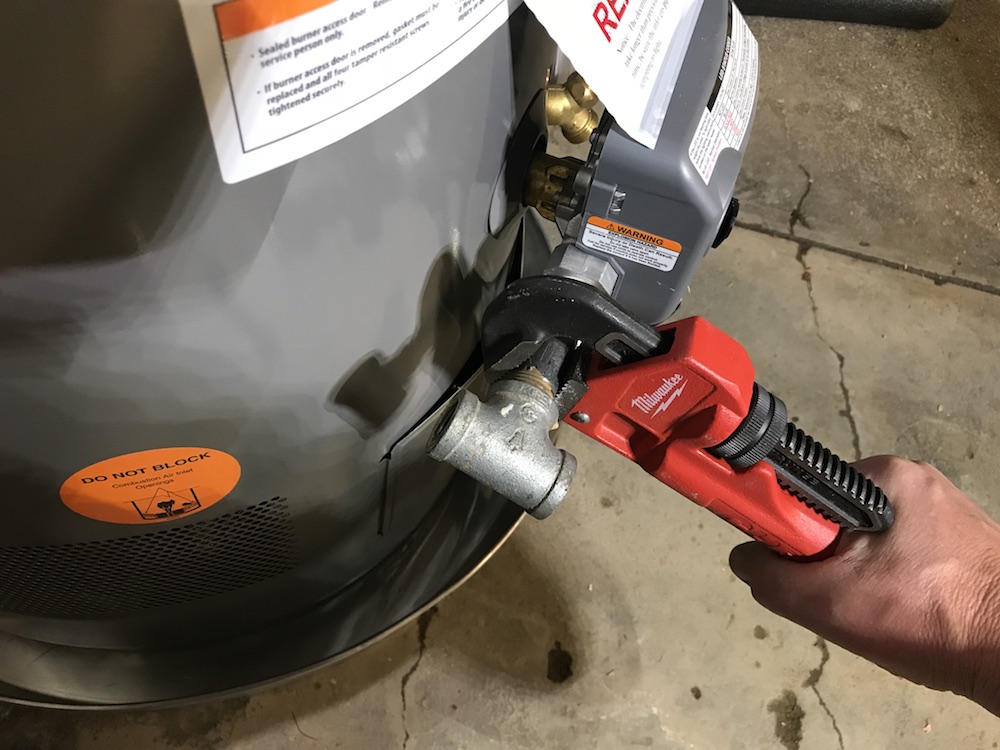
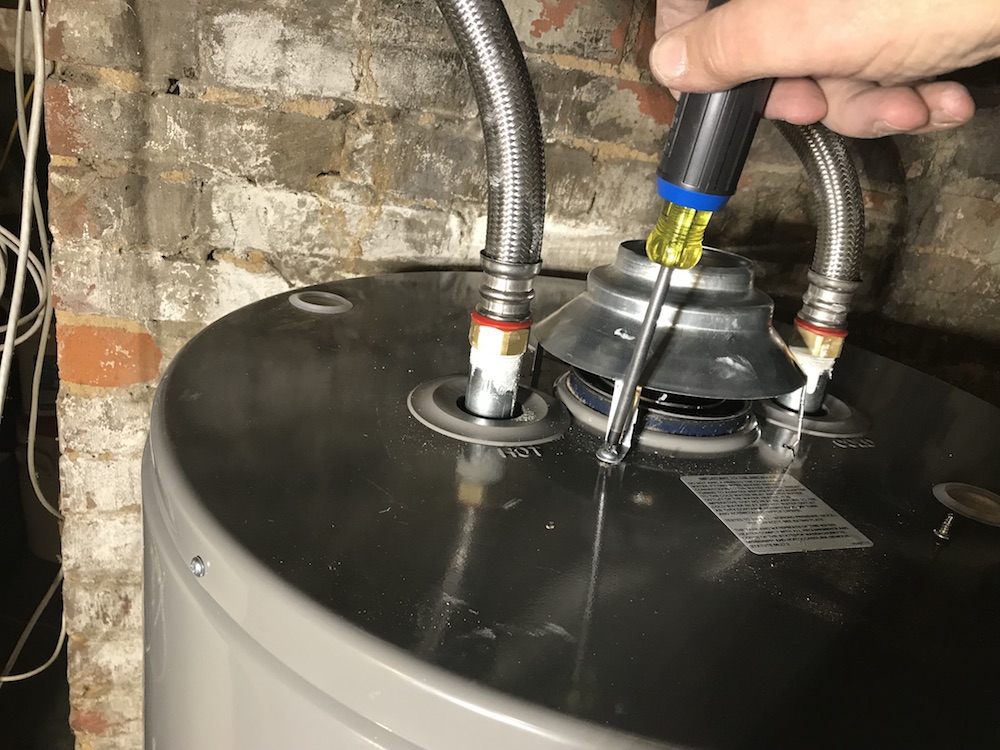
Now it’s time to get the new water heater connected to the house’s water system. Make sure you clean the threads on the connectors coming off the hot and cold water pipes, using an inexpensive brass or steel wire brush. They’re likely to have a little corrosion, and some chunks of old teflon tape and/or pipe joint compound. Do a test fit, to make sure the connectors you got are long enough. If they’re close but not quite there, sometimes you can save the day by simply rotating the water heater a bit. If not, get a good measurement, and it’s time for a bonus trip to the plumbing supply store.
Wrap some teflon tape around the male fittings on the water heater and the house pipes. When I replace a water heater, I like to also use a bit of pipe dope on the connections – just don’t go crazy.
Snug up all the fittings and slowly turn the water valve back on. Make sure your hot water faucet is still open, to allow air to escape from the system. Check to make sure none of your connections are leaking; if they are, snug ‘em up. Keep the water cranked until the tank is full, and water is running from your hot water faucet without spitting air, then close the hot water faucet.

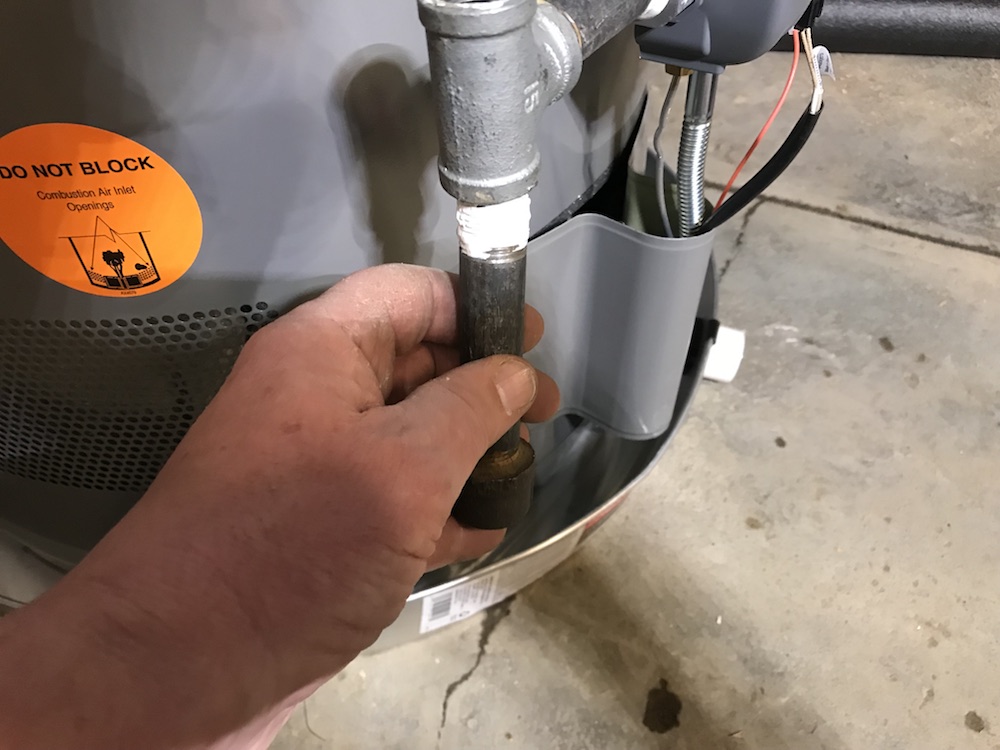
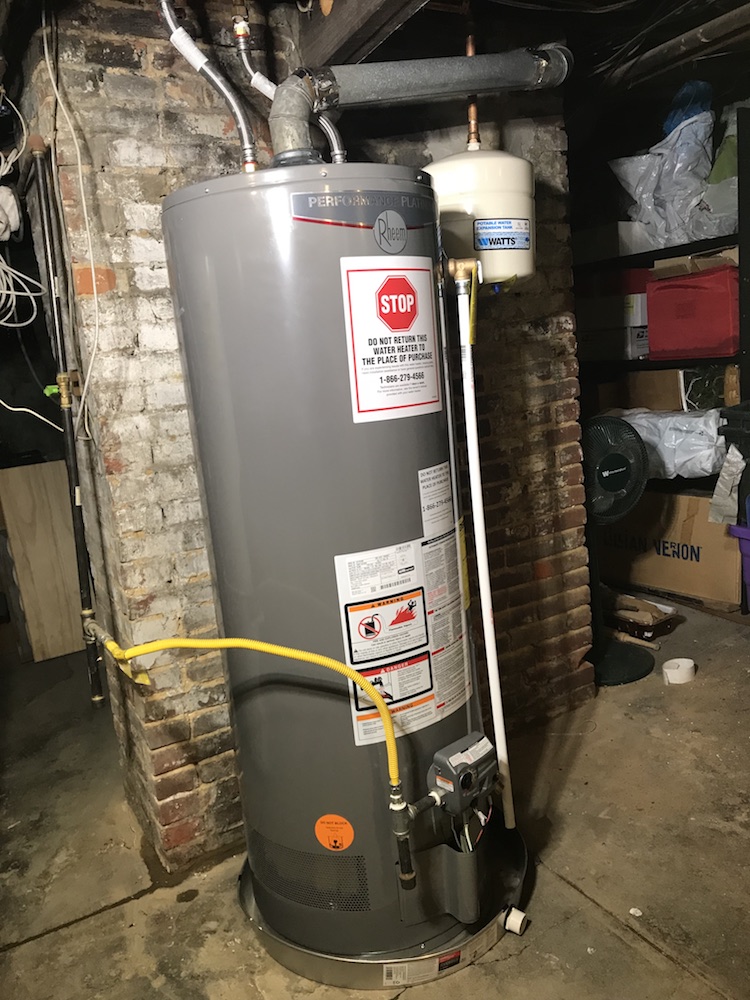
While the tank is filling, connect your power source. If it’s an electric heater, make the electrical connections shown in the directions that come with the water heater. If it’s gas, hook up the gas line. When you replace a water heater, you should be able to re-use all the black galvanized pipe you took from the old heater. Just make sure to clean all the threads well, and use pipe dope (sealant) on all the threaded connections. And don’t forget to test for leaks!
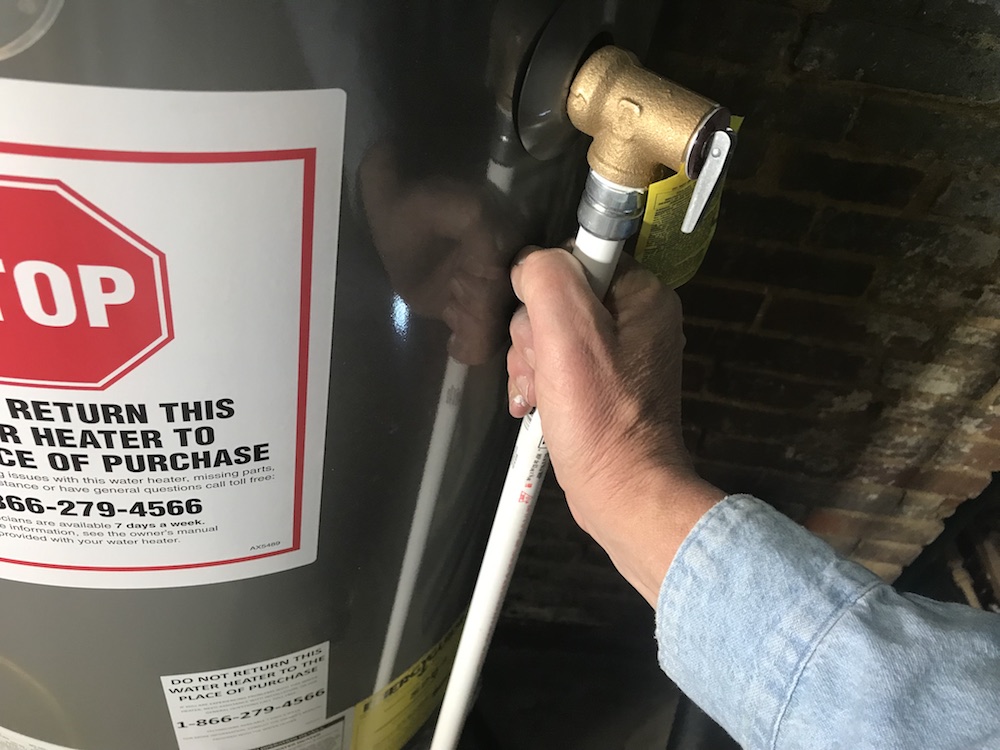
Once that’s done, connect the discharge pipe to the water heater’s temperature/pressure relief valve. Some water heaters have the valve on top, most have it on the side. The valve is threaded, and the store where you bought the water heater is likely to carry a very inexpensive discharge pipe that threads right into the valve. The pipe I bought was less than four bucks. Spread a little pipe dope on the threads before installing it. You’ll probably have to trim the pipe to length; make sure it ends above the top of the water heater pan.
When you replace a water heater, there’s one other important item for gas water heaters: Make sure you connect the flue vent pipe. It should be angled upward all the way out, and there should be no gaps or holes in it. Small openings can be sealed with foil tape (not duct tape); if the pipe is badly corroded, replace it. Also make sure the pipe and flue outlet aren’t blocked. You don’t want to die from carbon monoxide poisoning right after you get your sporty new water heater installed! Our chimney had quite a bit of blockage I had to remove, from chunks of mortar that had tumbled down inside the chimney.

Once the water tank is full, and your electrical or gas connections are all set, follow the instructions that came with it to get the water heater heating! You’ll probably have to adjust the temperature a day or so after making the initial setting; I set ours at the med-hot setting, and it was HOT. A lower temp setting will help save energy, and help avoid accidental burns, especially if there are kids or oldsters on the premises. If you’re installing an expansion tank, read on; if not, you have special dispensation to skip to the final paragraph.
Installing An Expansion Tank? Get Pumped!
Once the new water heater is all set, it’s time to add the expansion tank. It’s pretty simple once you’ve got all the plumbing done for it, and only takes a few minutes. Assuming you don’t have to add or replace your water pressure reducing valve along the way…
The pressure in the expansion tank has to match the pressure in your home’s water lines. When I put the new reducing valve in, I adjusted it to set a pressure just over 60 p.s.i. This meant the expansion tank had to be pumped up to the same pressure. The expansion tank has an inflation valve on it, similar to those on a car or bike tire. Using a bicycle pump, I pumped (and pumped and pumped) until the pressure on the expansion tank also read just over 60 p.s.i.

After that, all I had to do was spread some pipe dope on the tank’s threads, screw the expansion tank into the threads on the hanging connector, and open the shutoff valve. Woohoo – fully protected and code compliant!
And that’s it – your quest to replace a water heater is complete! Hot water has been restored, and the universe is once again in balance. And so is your water pressure, if you installed an expansion tank. The job wasn’t all that hard (after getting the water heaters up and down the stairs), and you’ve saved several hundred dollars, and earned the respect and admiration of all. Now you can hit the showers!
Good tutorial
Thanks, Liz!
If you end up with air pockets in the tank, you should be able to fix the problem as follows:
First, shut off the hot water tank. For an electric tank, switch the breaker off. For gas, turn the control on the water heater to the “OFF” position. Then let the tank cool for about an hour.
Hook up a hose to the drain faucet at the bottom of the water heater. Snug it up well, and run it to a floor drain, utility sink, or outdoors. Open the valve on the faucet, and allow fresh cold water to run through the tank. Be careful – the water coming from the hose may still be very hot. If you hear hissing or sputtering, this indicates you did indeed have air in the tank. Keep running the water for several minutes, until there are no further noises, and the water comes out the hose clean and cold.
Now just close the drain faucet on the water heater, remove the hose, and get the water heater fired back up again. Any air should now be gone from the system, and hopefully now you’ll have good, hot water. Over time, air may re-enter the water heater (this can happen with both gas and electric heaters); if it does, just repeat the purging process.
Maybe i missed something but you say all you have to do is fill the tank with water. I had a problem with water not getting hot and found out the tank had to be “Burped”. Evidently with all the lines connected this causes a void inside the tank and will not let water completely fill up the tank which causes problems. How is an electric water heater “burped” to get the proper amount of water to properly heat the water?