

The Internet is filled with advice on how to replace sprinkler heads. Why? Because sprinkler heads get broken ALL THE TIME. What if when you replace your next broken sprinkler head, you could dramatically reduce the likelihood of another break in the future? I know it sounds like sorcery, but it is actually very easy to do with the creation of a simple swing joint. Whether you are installing a new sprinkler / drip system and want to avoid breaks, or you are replacing a single broken sprinkler head, this article and video will walk you through how to replace sprinkler heads to make them very resistant to breakage. The technique shown here is also great if you need to slightly relocate a sprinkler head.
How to Replace Sprinkler Heads – Basic Steps
Before we get into our sneaky technique for avoiding future breaks in your sprinkler system, let’s walk through the basic steps in a typical repair. A lot of the information later in this article also applies if you’re installing a brand new sprinkler or drip line. If you are installing a new system, you may want to skip this quick list:
- Identify the broken sprinkler by briefly running that circuit and flag it if the head will disappear in your grass.
- Turn off the sprinklers and the water supply to sprinklers.
- Carefully dig a small hole surrounding the broken head until you reach the PVC pipe feeding the head.
- Remove the broken sprinkler head.
- If the nipple (the small grey pipe threaded into the PVC and sprinkler head) is broken, you may need a sprinkler repair tool like this to extract the broken piece.
- If the PVC T or pipe itself is broken, you may need to lengthen your hole to expose enough of the PVC pipe so you can cut out the broken section and repair it with a new fitting and length of PVC.
- Follow the tips below for a break-resistant irrigation pipe repair.
The “Normal” Way Sprinklers and Drip Emitters are Set Up
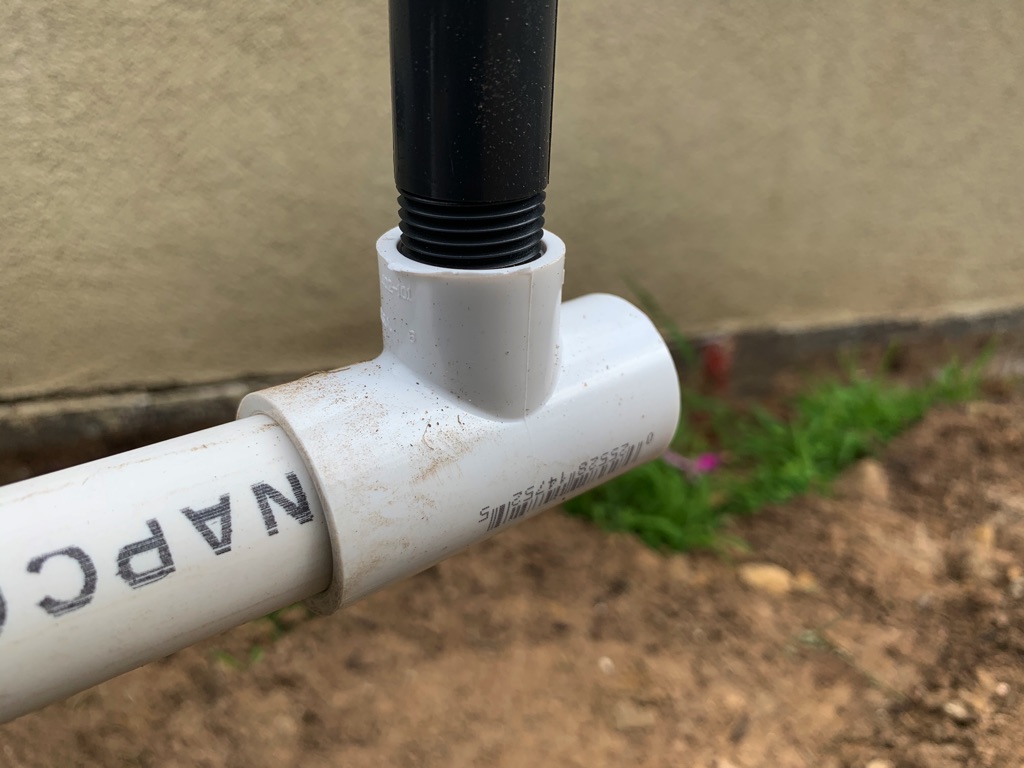
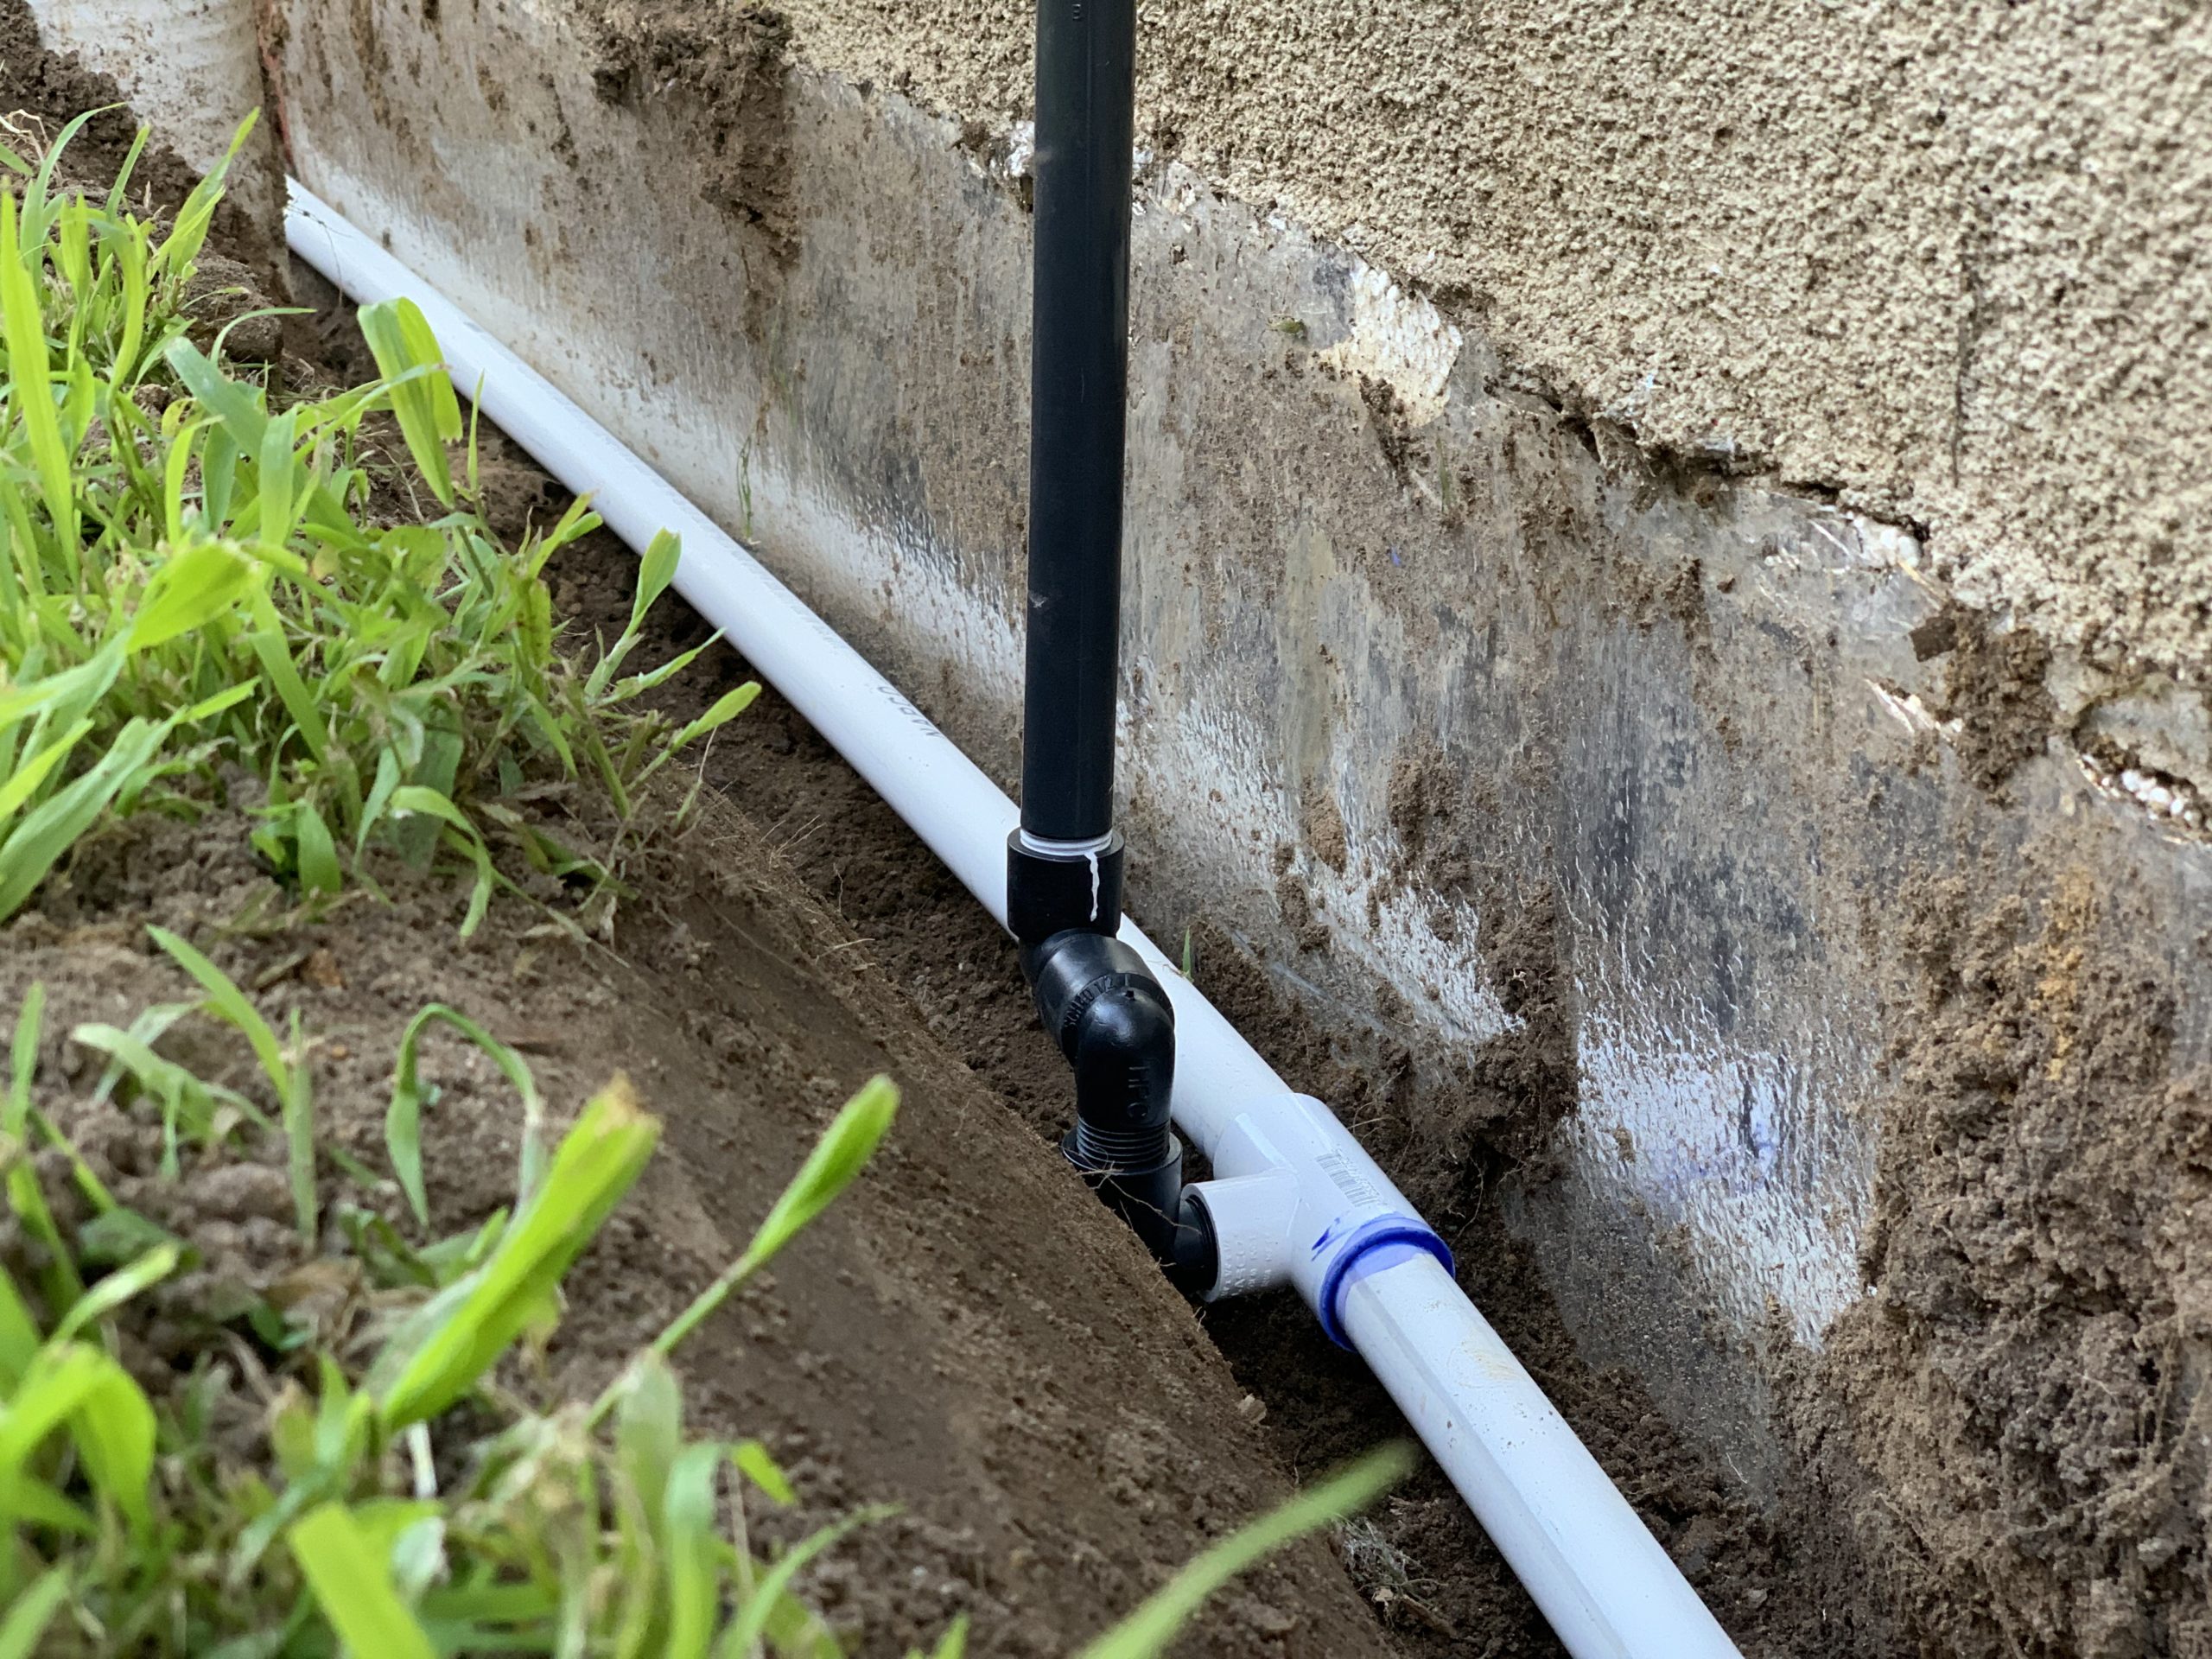
Now that we have covered the basics of how to replace sprinkler heads, let’s dive into how we got here in the first place. The typical setup for most lawn sprinklers consists of a threaded PVC T that is connected to the the sprinkler pipe, a plastic nipple, and the sprinkler head itself. The PVC T is typically SST (Slip, Slip Threaded – meaning the two sides are smooth pvc for gluing to more PVC pipe and one opening is threaded for a nipple). The nipple is threaded into both the PVC pipe and the sprinkler head. The nipple is also typically the weakest link and will snap easily if someone trips on the top of the sprinkler head, or rams it with the lawnmower.
Because everything is installed straight up from the PVC line, it’s almost as if it is designed to be broken. In landscape applications, (where the sprinkler head isn’t mostly below soil level, exposed sprinkler risers are even more likely to be broken by homeowners, gardeners, kids playing, vehicles or simply someone walking through the yard. But, this is an article on how to replace sprinkler heads, not how NOT to do it! There is a better way, and it involves a simple and inexpensive to build swing joint.
How to Install or Replace Sprinkler Heads to Avoid Breakage – Video Summary
The Not-So-Secret Ingredient to Making a Break-Resistant Swing Joint – The Marlex Street Ell
Depending on what type of sprinkler head, riser or drip emitter you’ll be installing, we will be recommending the creation of a swing joint (or two). Although you can purchase pre-made swing joints, also known as funny pipe, we like creating flexible, break-resistant connections using Marlex Street Ells.

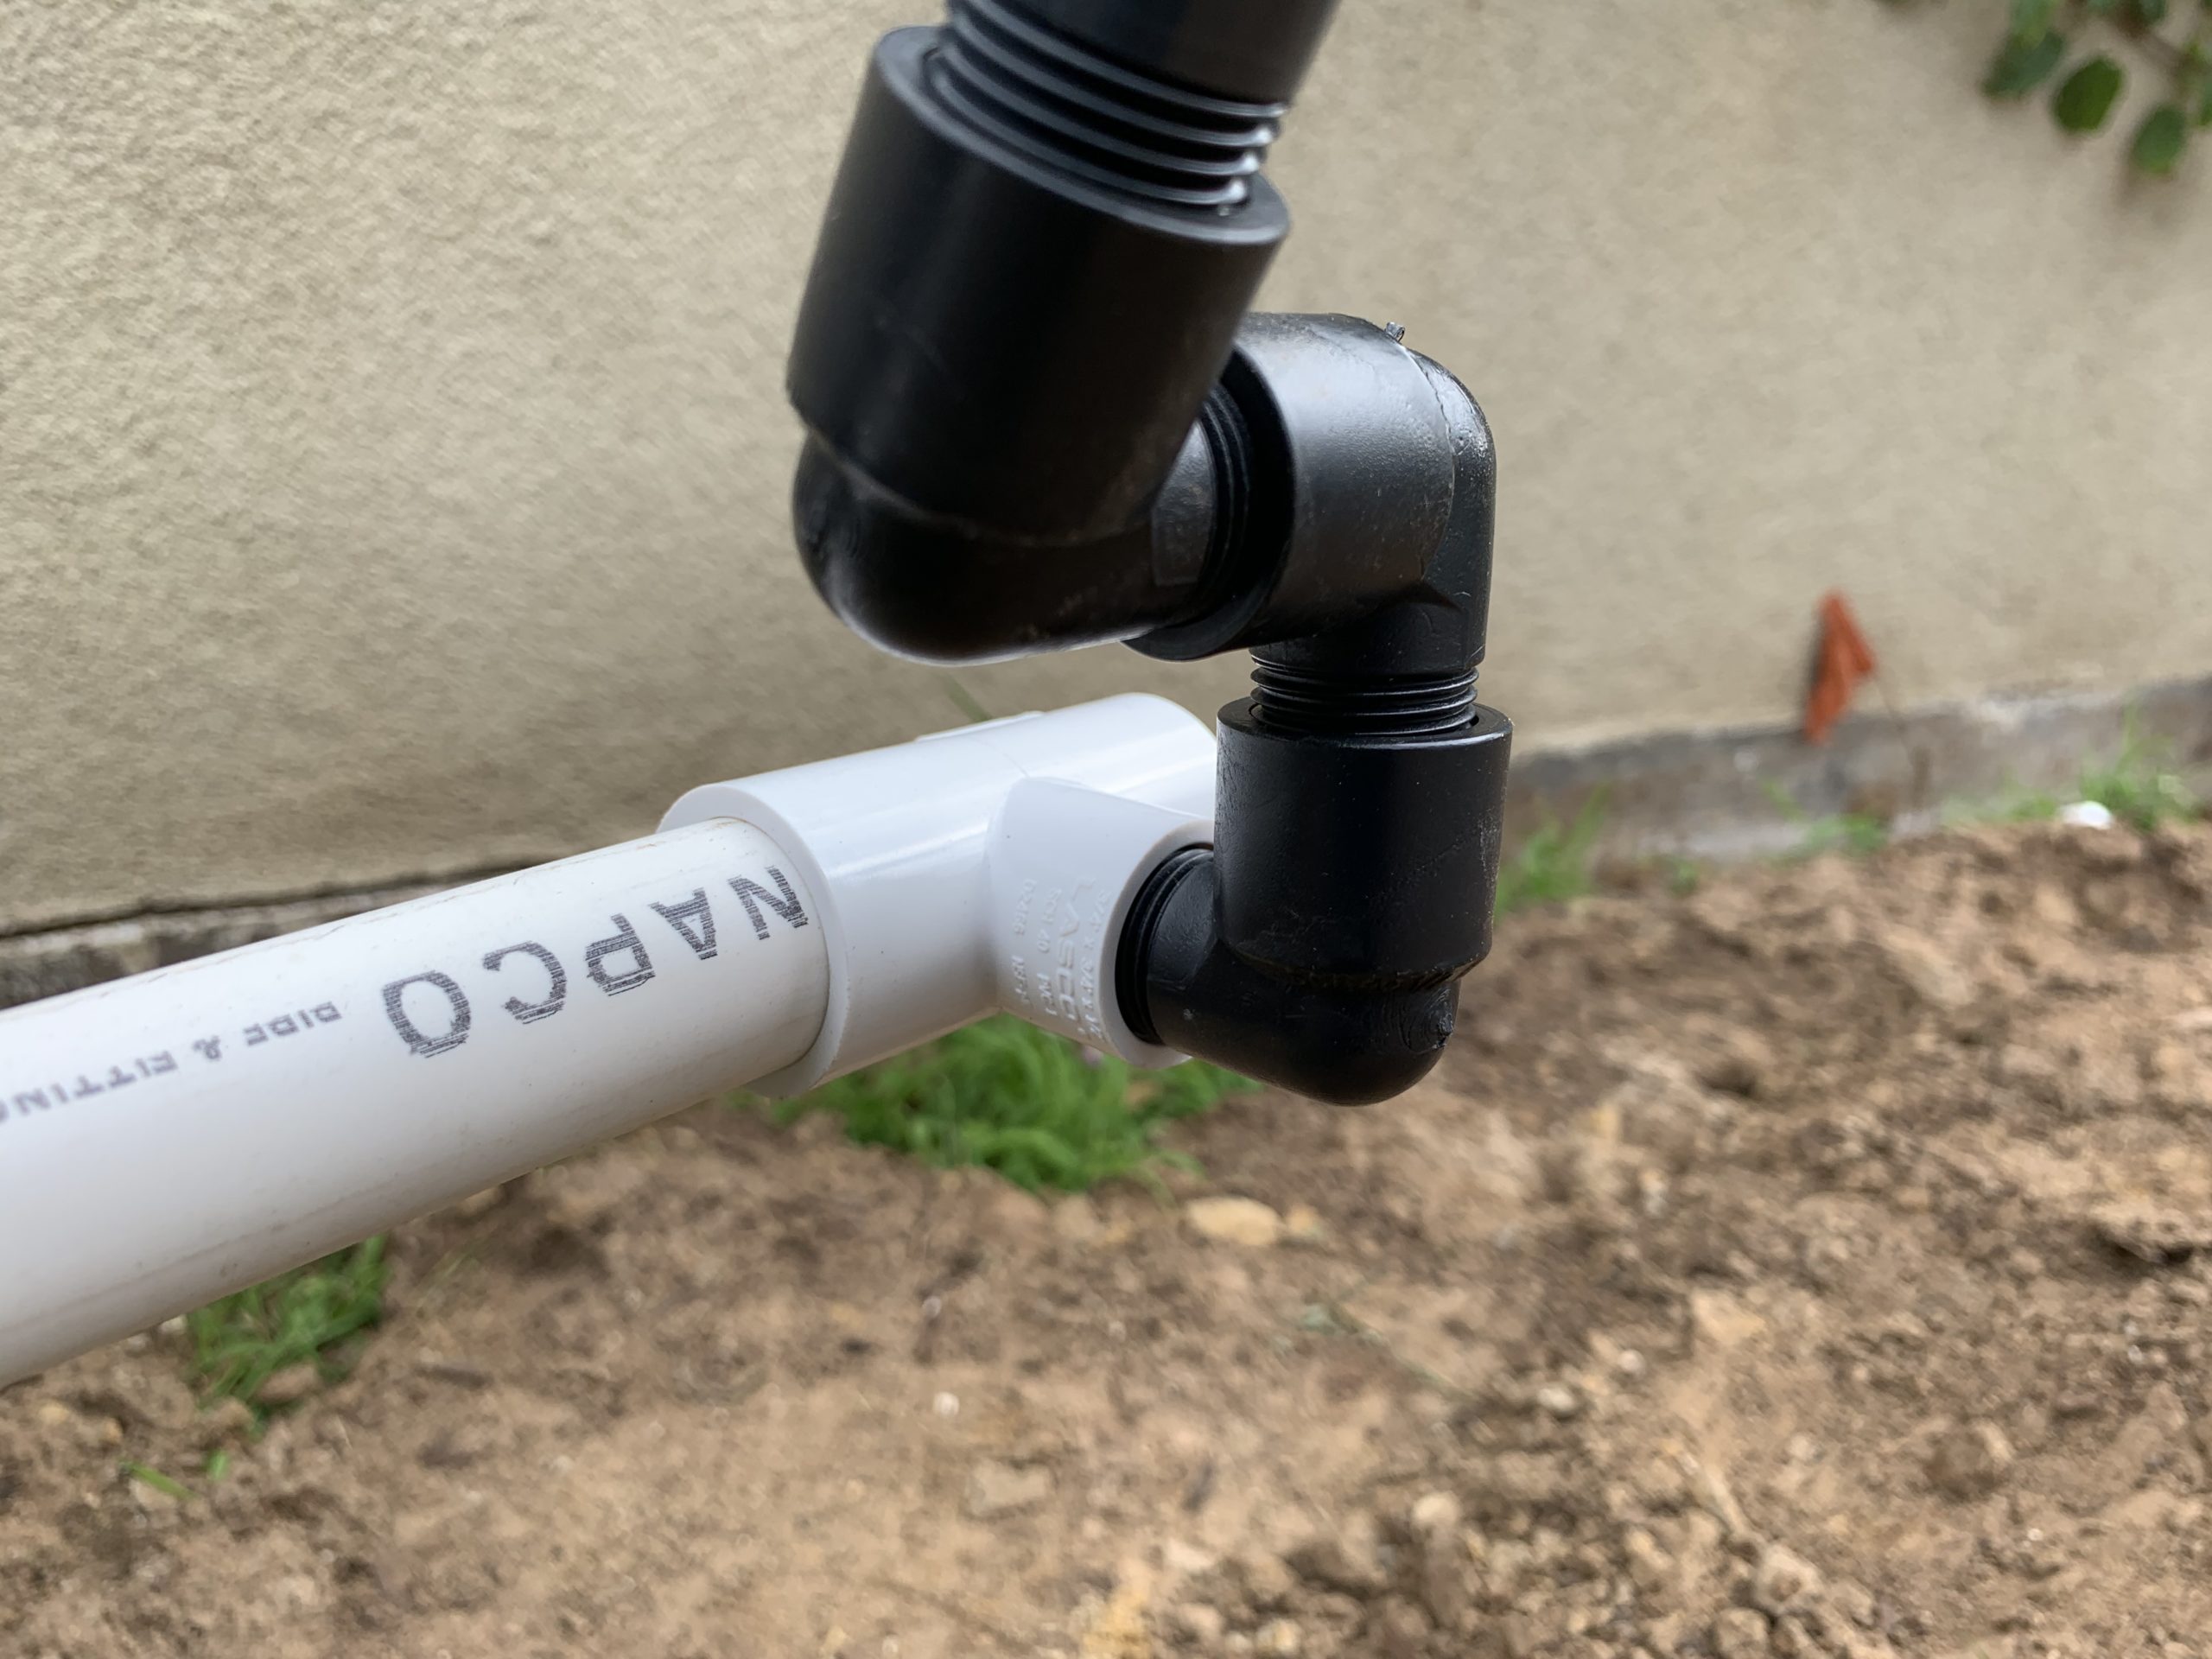
The Marlex Street Ell is simply a 90 degree fitting with a male and female threaded side. By connecting three of these fittings together, you create a flexible joint. Attaching this flexible joint to a nipple and your drip line (or another Marlex joint connected to a sprinkler head), creates a far more break-resistant sprinkler system.
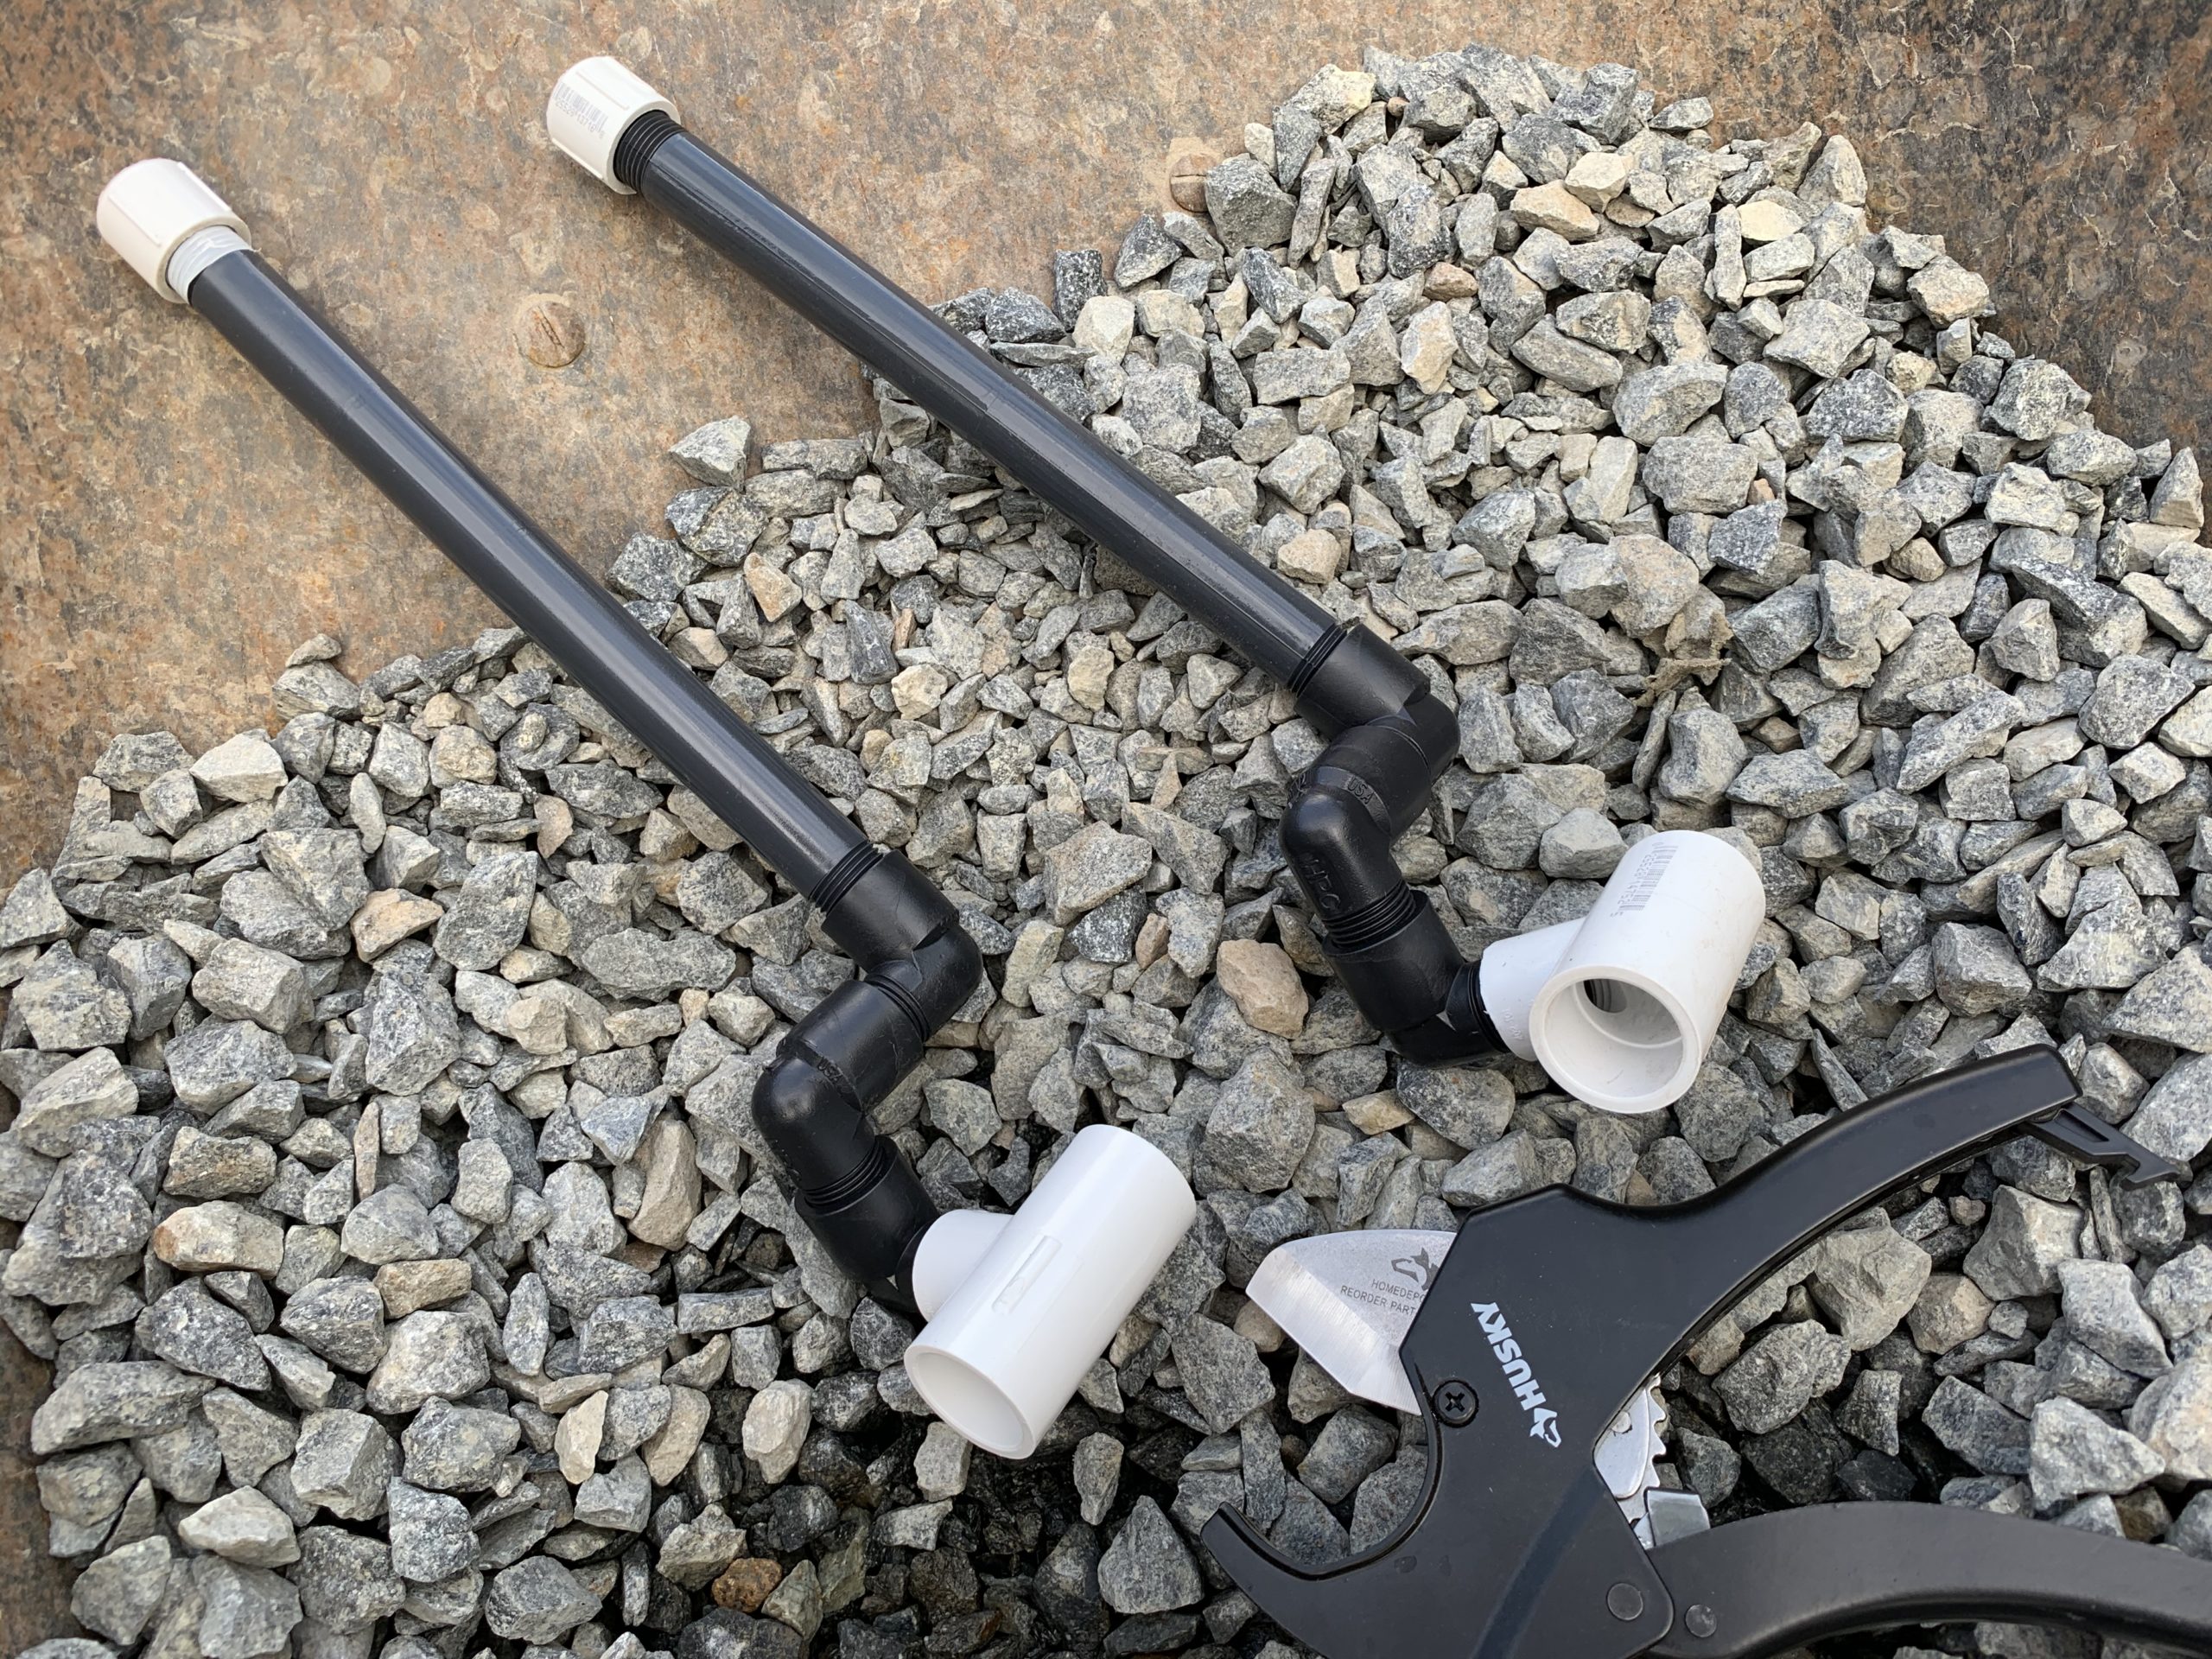
It is much easier to build these in bulk from a comfortable table if you are installing a new irrigation circuit as I was. I set up a little station with all the parts, including the all-important Marlex joints. Once you have the joints pre-assembled, take them to where you plan to conduct your repair or installation.
When Things Going Sideways is a Good Thing
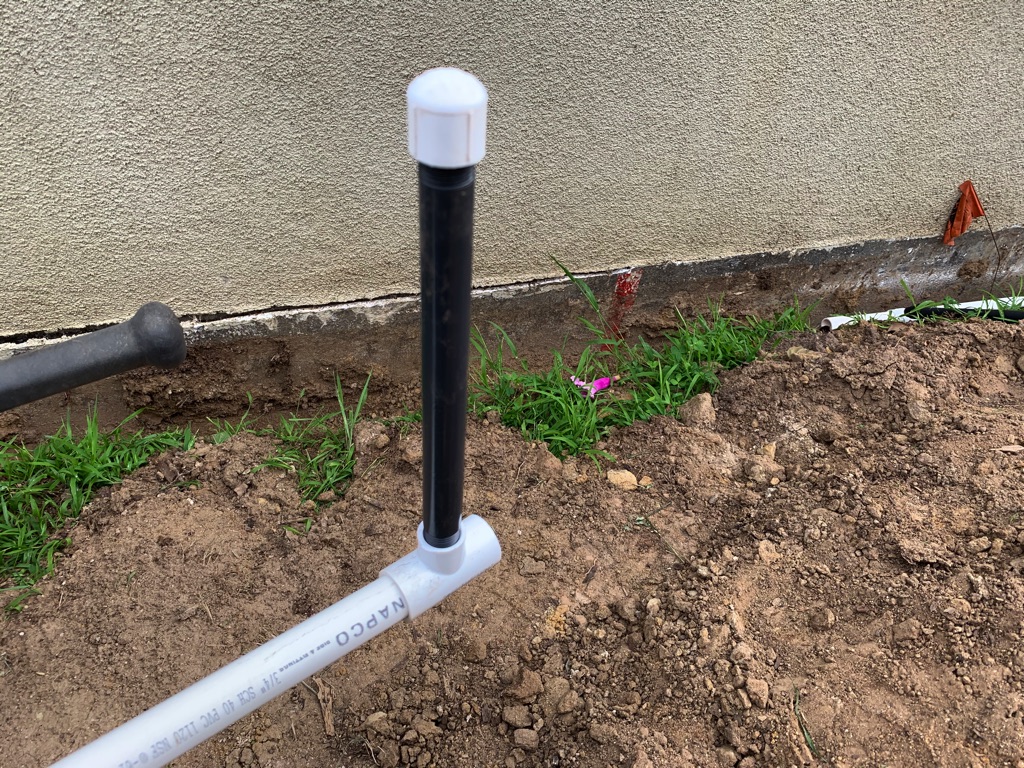
As we saw in the video and in the images here, the typical approach to adding a T or 90 for a sprinkler head has the threaded PVC fitting aimed straight up. With the more flexible approach here, we actually recommend turning the PVC T or 90 on its side so the threaded portion is aiming to the side of the pipe, not straight up. Should anyone be digging in the area in the future, this approach makes it less likely for them to damage the PVC fitting.
To Teflon Tape – Or Not to Tape, That is the Question
For the connections that are Marlex to Marlex, don’t worry about teflon tape. However, when connecting a nipple or riser, adding some teflon tape is recommended to minimize leaks and keep that joint lubricated in case you need to remove a piece in the future. Thanks to your newfound skill here, hopefully removal won’t be needed anytime soon!
I would like to relay a special thanks to my former neighbor Michael who happened to be a landscape pro. I consulted with him about the new drip irrigation system I planned to install on an epic re-landscaping project featured in a “Yard Wars” contest with Family Handyman. Michael taught me how to replace sprinkler heads (or in our case install new ones) with the techniques to create a swing joint shown here. Despite having an assortment of people and kids traipsing through our yard regularly since then, not a single sprinkler head has been broken.

As someone who felt like I was repairing a broken sprinkler head bimonthly, this new approach to avoiding broken sprinkler heads has been a winner. And since some of our landscape is on a slope and still evolving, the ability to pivot and rotate our connections for sprinkler and drip lines has come in very handy multiple time.