

Ok, so I should start off by saying that I did not invent this jewelry making process. When my series of photos was posted online, several folks were kind enough to point that out for me. I have heard stories of soldiers in WWII, with ample time, tapping away on coins with a spoon for weeks to make a ring for their significant others/women of the night. When I was younger, after my uncle had passed away, I found a ring he had made in my grandmother’s attic. She told me he had made it himself, pounding away on it for hours. I somewhat forgot about it until I was getting ready to be married, and thought it would be nice to make our bands the way my uncle had made his ring. I found a video online that gave a rough process, and I refined it a little, and here we are. Read on, and I’ll share how to make unique, hand-crafted DIY rings from specific US silver coins.
DIY Rings – The Tools You’ll Need
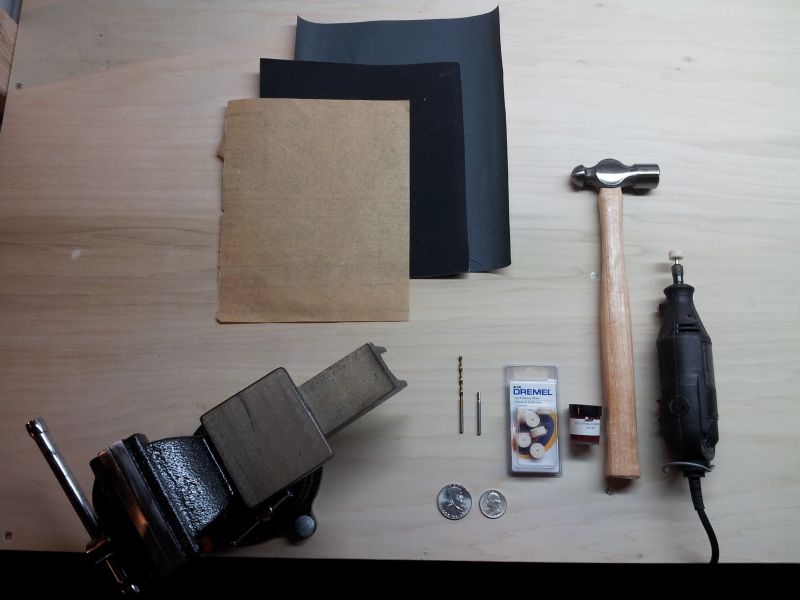
- Vise
- Light hammer
- Handheld rotary tool
- Felt polishing tips with polishing compound, and a carbide cutting bit
- Drill and a small bit, say 1/8” or 3/16” diameter
- 220 and 600 grit sandpaper
- Ring sizing mandrel and calipers
Silver Coin Spec’s
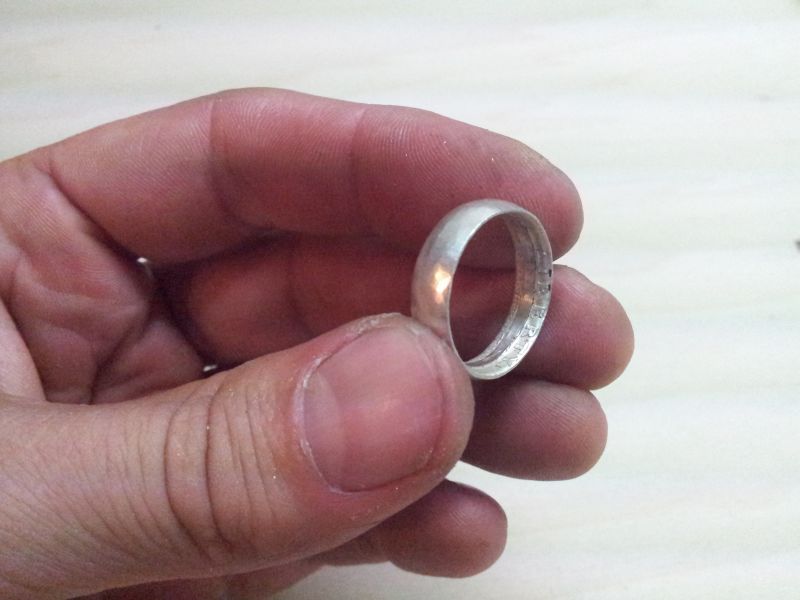
First of all, we need a coin with a high silver content. I use 1932-1965 US quarters and any silver US half dollar. You can look up which ones are 90% silver with a quick search online, there are many. Newer coins are made of nickel and copper, and will most likely stain your finger and not look as nice. Stick with the good stuff.
Getting Started with DIY Rings- Let the Tapping Begin
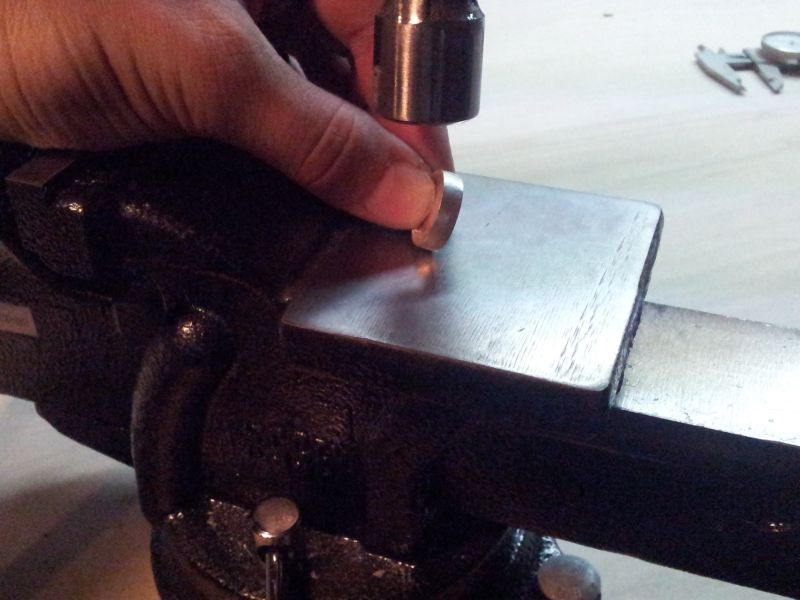
Now that we have all the stuff necessary, we can start tapping. Using the flat (anvil) surface of the vise, the flat end of the ball peen hammer, and holding the coin on edge, start lightly tapping the coin, like so:
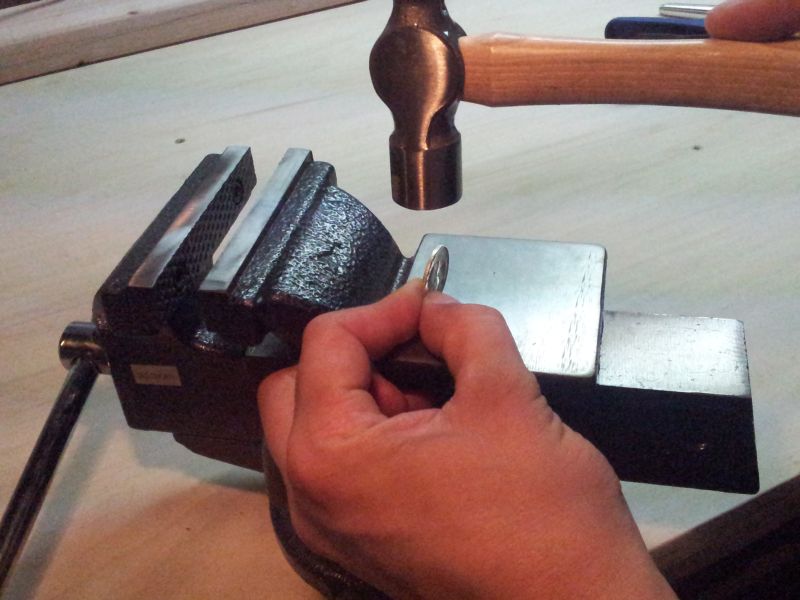
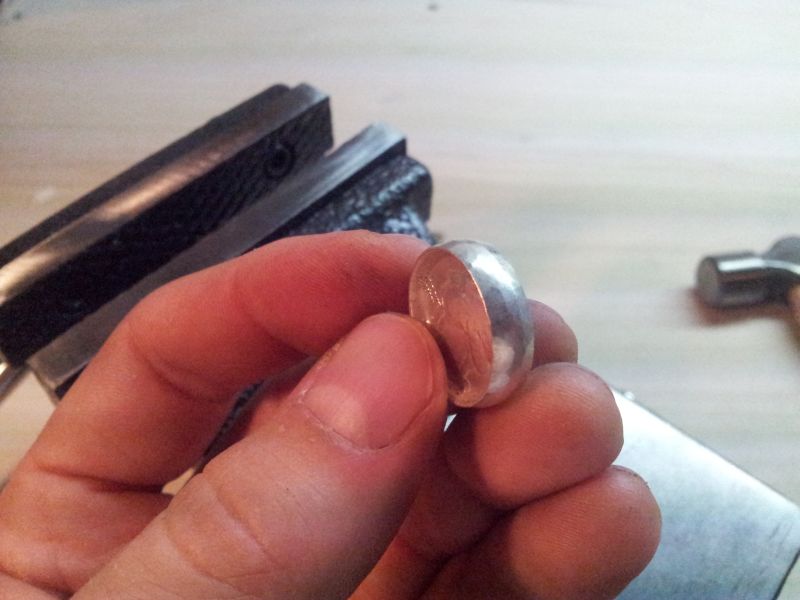
Tapping lightly is important. It is easy to warp the coin by tapping too hard, and not easy to bring the coin back flat. It’s also very important to rotate the coin as you tap. This is imperative to keeping the ring round. Always keep the coin rotating as you tap. I find a good way to do this is, holding the coin as pictured above, to reach to the far side of the coin and roll it towards me, tapping as I go. Try not to hit the coin in the same spot consecutively. After 10 minutes or so, you will notice that the lines on the edge, or the reeded edge (just looked that up) will start to flatten, and eventually disappear. Tap on brothers and sisters. Soon, the edge of the coin will start to flatten such that the faces of the coin (along with the text) will start to wrap around to what will be the inside of the ring:
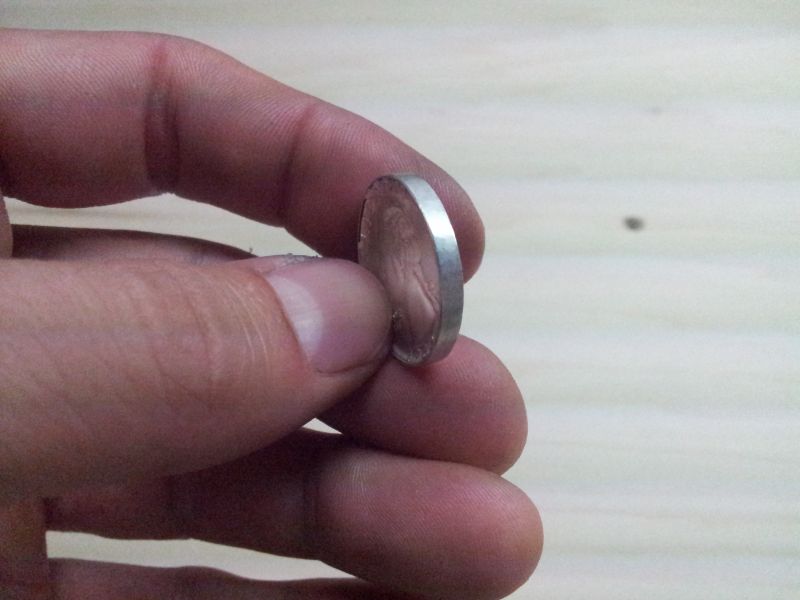
Now it’s just a matter of time. For me, I set up my computer in the background and binge-watched/listened to Cheers online, but you could listen to music or your favorite talk show. I grew up in Massachusetts, so I like Cheers. A little background entertainment helps tame the boredom. The coin will continue to get smaller in diameter, while the band of the ring gets wider.
It’s possible, even though you’ve been careful to tap lightly, that the coin starts to warp a little, or the edge flattens unevenly. You will be able to see this by laying the coin on a flat surface and looking for where you can see space between the coin and the surface. Little spaces will be sanded out later, but if it is getting all caddywompus, you may need to take corrective action. I find that for smaller warps, I can hold the ring on the vice such that the warp goes away from me, and tap on the closer side. This seems to pull the warp back towards me, but I may just be imagining that. Give it a shot if it happens to you. Then let me know.

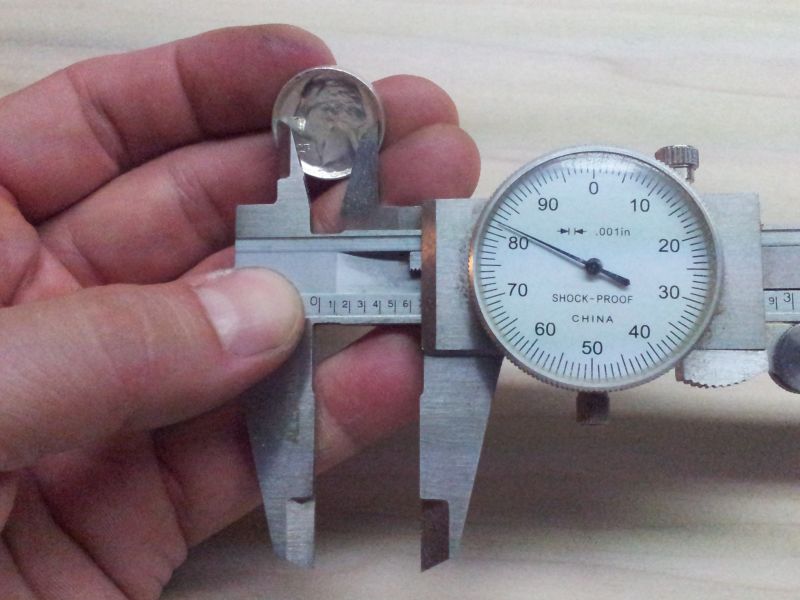
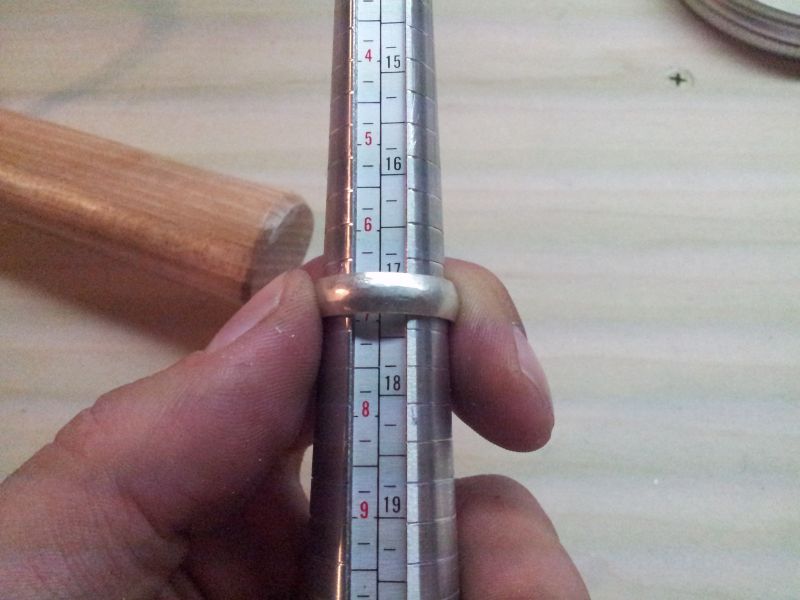
At this point, I should mention something about sizing. You can look up ring size inside diameters online, and determine what your target is. I have a set of calipers on hand to measure when I start to get close. The other thing to consider, is, if you have a larger ring size, you may want to use the half dollar instead of a quarter. The ring here is going to be a size 7, so you can see what that looks like with a quarter. Should you desire a thicker band, a half-dollar will work nicely, but the tapping time increases significantly as there is quite a bit more material to move around. Make sure you have a lot of entertainment lined up!
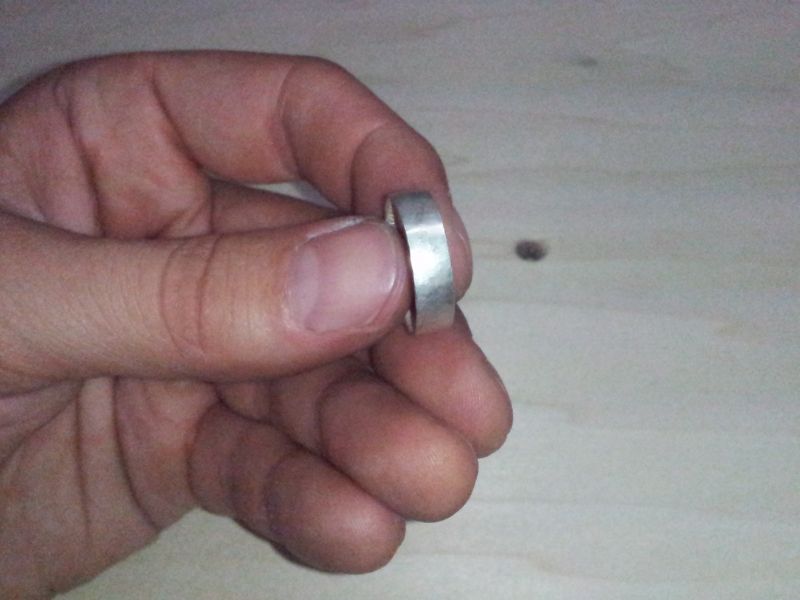
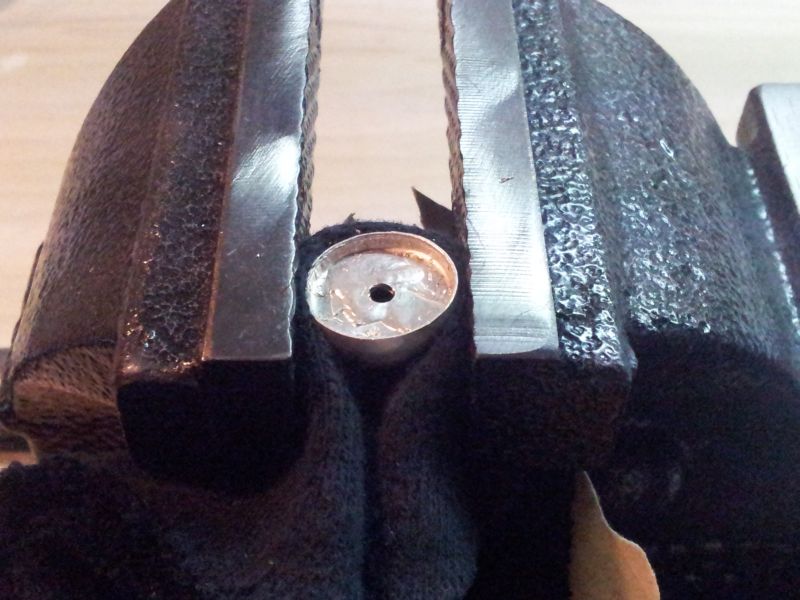
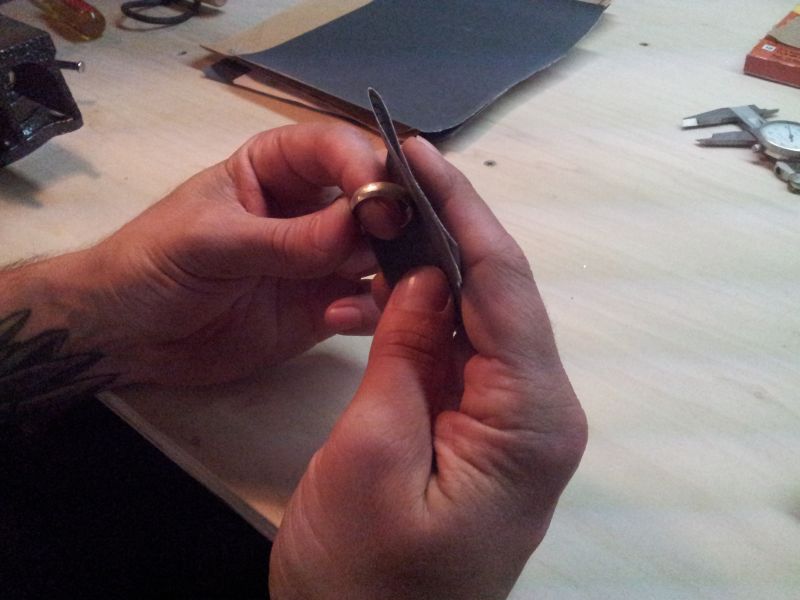
Now, measuring the inside of the ring, we are about ready to cut the middle out. Before we do that, however, there are a couple things to take care of first. If you like to have a little curve to the band, or “half round” (also just looked that up) then we need to add that now. Once the middle of the ring is cut out, there is no going smaller or modifying the ring. Any tapping then will just squish the ring into something other than round.
To add the half round, hold the coin as shown below, at an angle of maybe 75 degrees to the vice surface. Tap as before, rotating as you go, but such that the tapping bends the edge of the coin towards the center.
To make sure the half round is uniform, hold the coin so you can look directly at the edge, and rotate it, paying attention to the curvature. You should be able to get it so that, as you rotate, the curvature is uniform around the entire ring.
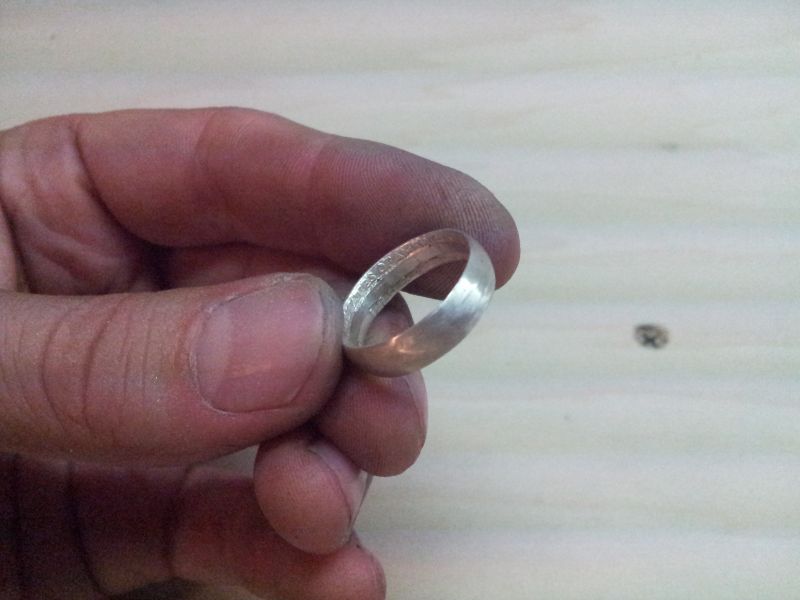
The other thing we want to do at this point is to smooth the edges of the ring. Over the tapping time, it is inevitable that some waviness will develop on the sides of the ring. We can get rid of this by sanding the edge of the ring on a piece of 220 grit sandpaper. I like to put the sandpaper on a flat surface and, holding the ring flat, move the ring in a circular motion on the paper. Be careful not to take too much off here, though, as you can start to eat into the text on the inside of the ring.

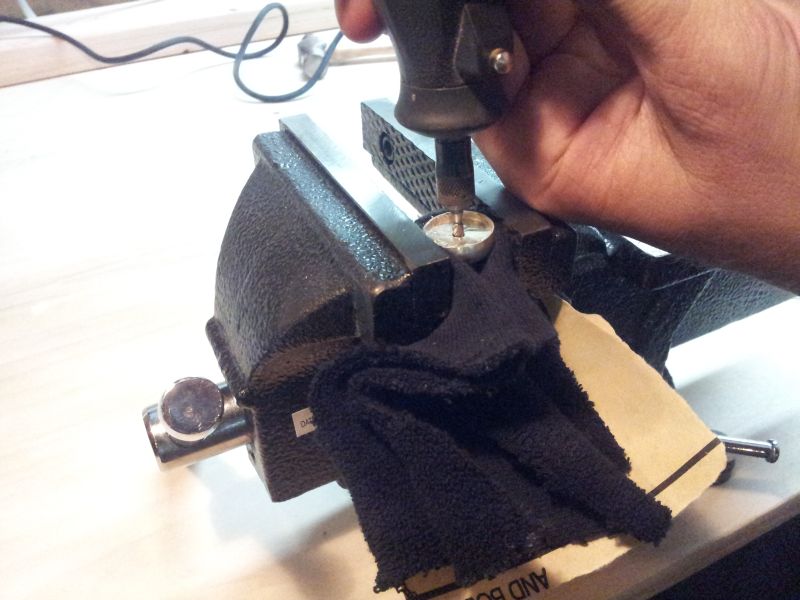
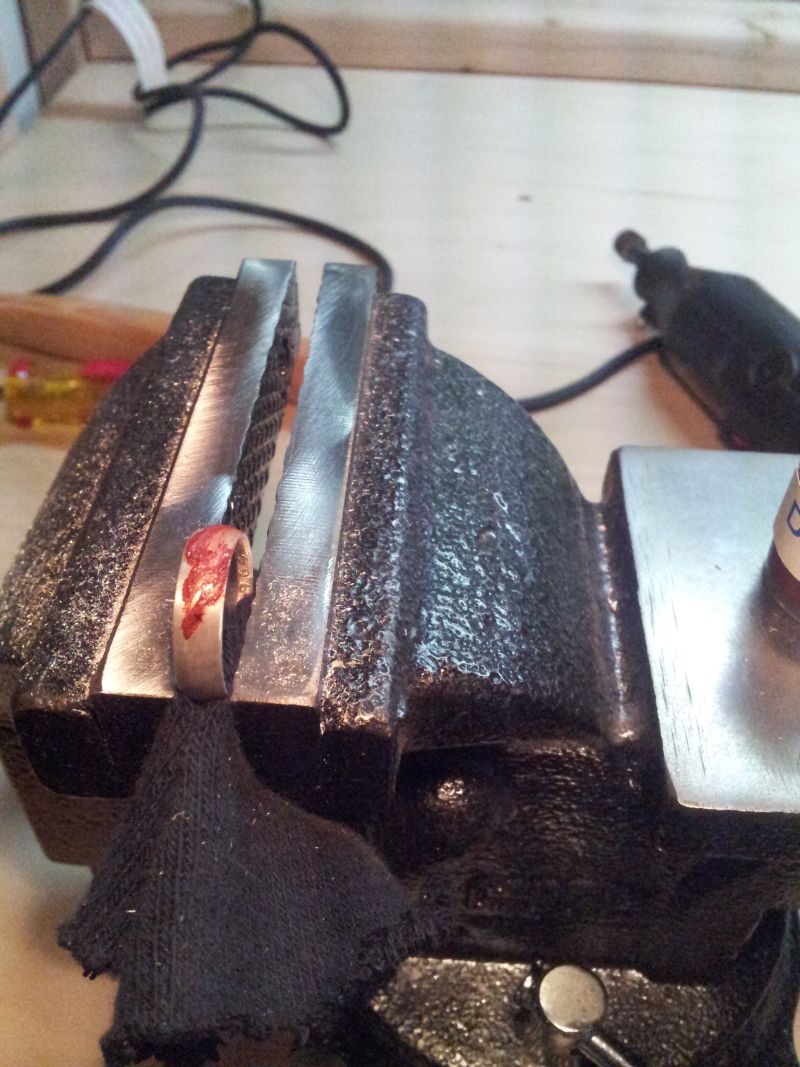
We are now ready to cut the middle out. There are multiple ways to do this, but I use a drill and a rotary tool. The first thing to do is put the ring in the vice with something to protect it, like a rag wrapped around the edge. Also, don’t get carried away with vise tension. You want it tight enough to hold the ring/coin, but not so tight as to warp it as you remove material. Using the drill and a bit big enough to drill a hole that the rotary tool carbide cutting bit will fit comfortably into, drill a hole in the center of the ring.
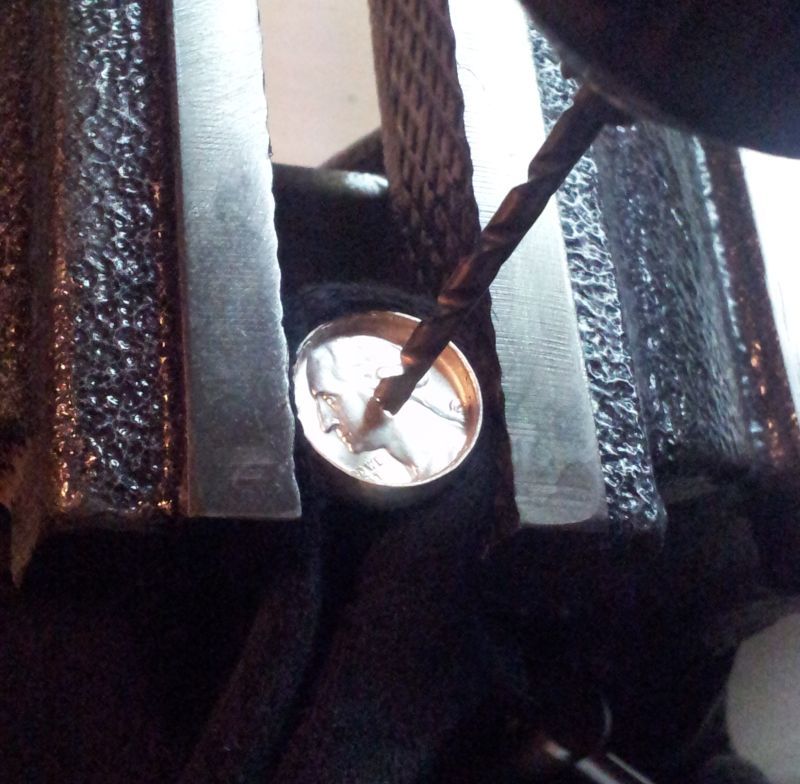
Now, using the carbide cutting bit, and the rotary tool at high speed, carefully cut the middle out. This process takes a little time, and much attention. The bit will slip out of the hole easily, and will damage the inside of the ring where the coin text is. I have learned this the hard way, and still have to make new bands for me and my wife, as only some of the text remains in ours.
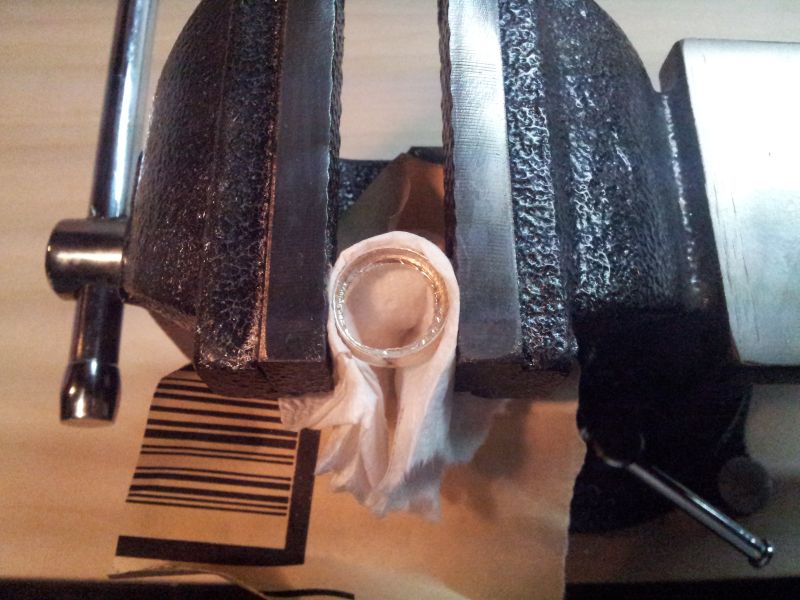
When I start getting close to the edge, I take it a little slower, and frequently rotate the ring in the vice. I also frequently take it out and try it on the ring sizing mandrel. As I mentioned before, there is no going smaller with the ring without cutting it and soldering it, so let’s not do that. If you do not have a ring sizer, just keep trying it on after cutting out small amounts, always being very careful to not damage the text inside the ring. The sizing can be a trial and error process, our rings are the second iterations of my attempts as the first ones were too big.
We are almost finished now. At this point I like to go through a couple grits of sandpaper, starting with 220 and ending with 600 or so. Something nice and fine. The finer you go here, the less polishing there is to be done with the rotary tool. Where we sanded the edge of the ring before there will be a sharp edge at the transition from the edge to the half round, and it’s nice to take that down a little. Don’t sand the inside, though, we will just polish that a bit at the end.

Finished Jewelry Making Product – Your New Silver DIY Rings
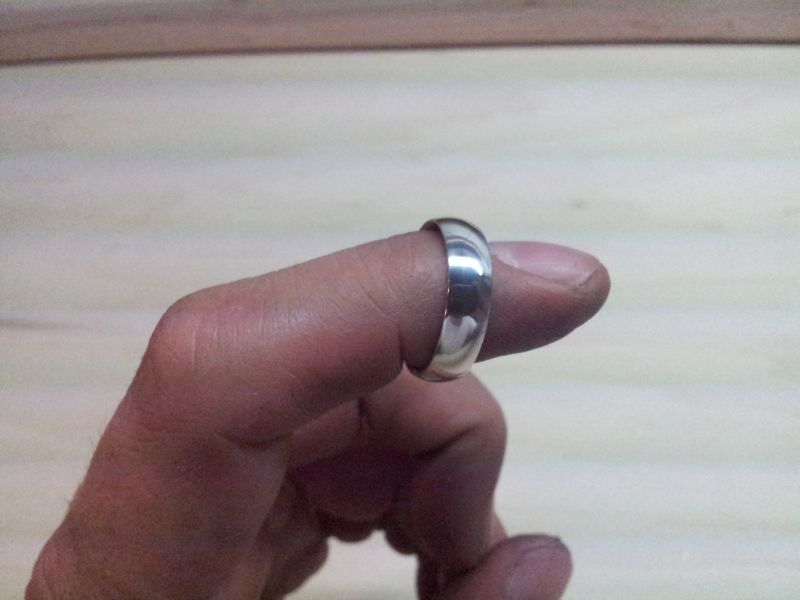
That’s about it. I find that my DIY rings get a little scratched up from normal everyday stuff. Once every couple of months I go through the polishing steps again, and the rings look as good as new. Good luck!
Guest Bio
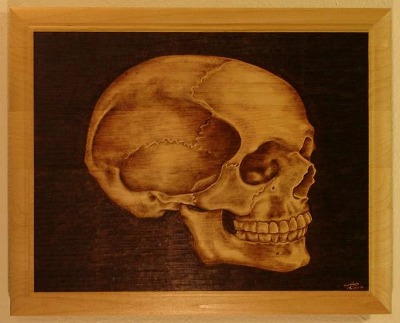 Marshall Stokes lives in Portland, Oregon with his wife Merri – they both have tattoos of a bird. When he is not working on his Masters Degree in Structural Engineering, Marshall sometimes makes DIY rings, burns pictures into wood (one of his works is seen to the right), and stains the occasional concrete floor. His rings can be ordered on Etsy, and his work can be seen on his website.


I think I’ll give this a go. I lost my ring awhile back and the wife would like me to have one. Thanks for the detailed writeup.
Cool Jeff. . . send us a pic if you tackle one!
wow, what a fun and special item to be able to make! I can;t wait to try it!
Cool Rich, let us know how your DIY ring project turns out. It’s definitely a fun one with a finished product that should last a long time if it works out. Have fun!