

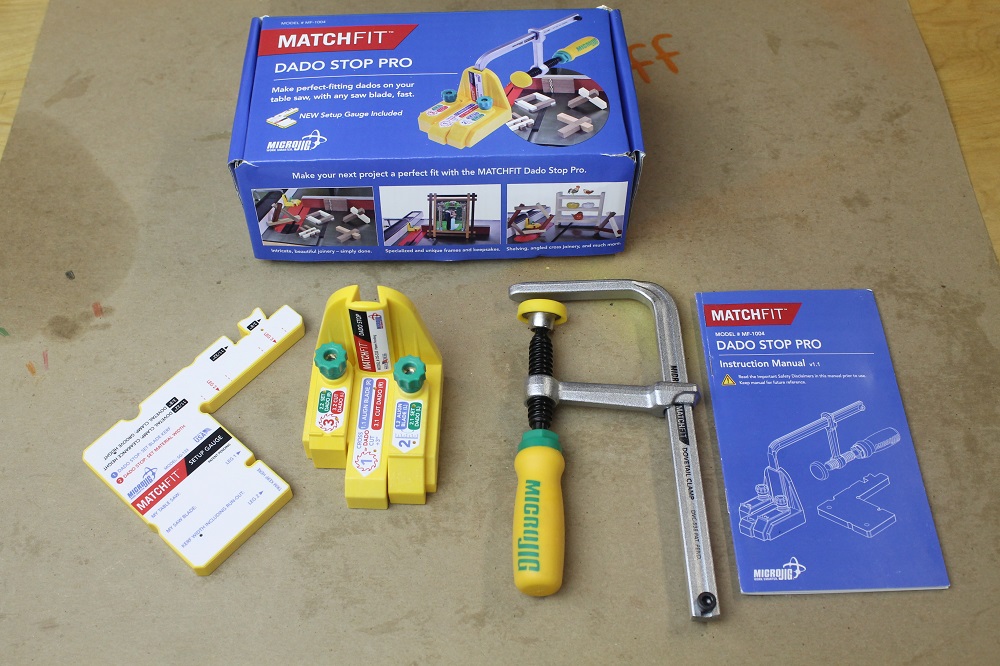
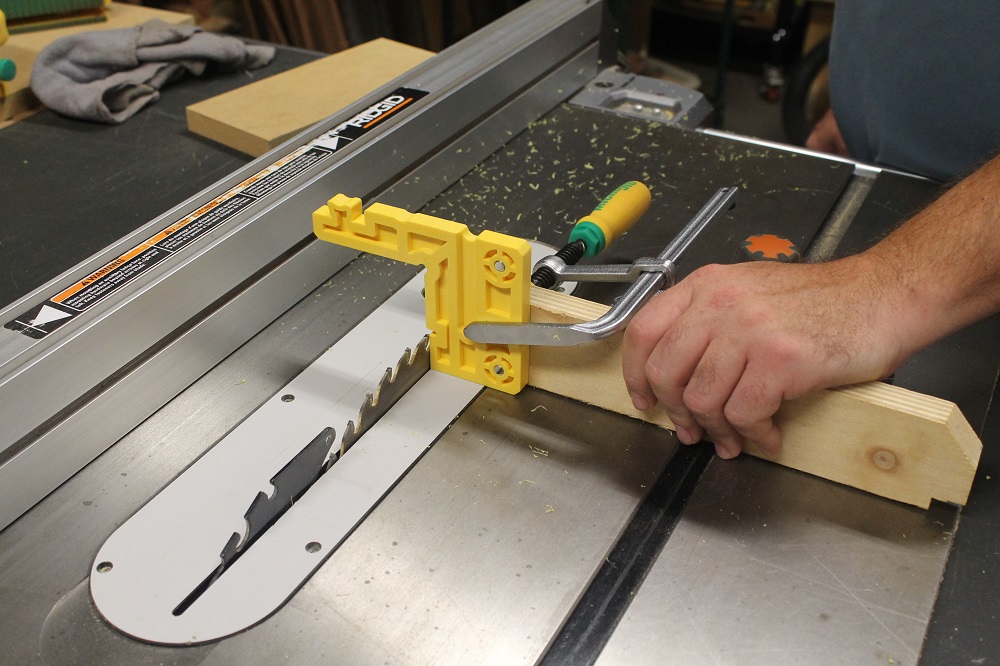
Just as there are many ways to make a picture frame, there are many ways to cut a dado. Dadoing large parts at the table saw is quick and easy with a specialty dado blade stack. But for smaller items, by the time you actually install said stack, you may have already spent more time and effort than it’s worth. Luckily, the yellow and green-clad folks at Micro Jig were kind enough to send a Matchfit Dado Stop Pro our way. This table saw accessory sets up in no time, letting you cut repeatable, perfectly sized dadoes with no blade changes! So while you’re busy figuring out which chippers and shims to use, I’ll be exploring one of the many things this clever jig can do: make a picture frame.
Micro Jig Matchfit Dado Stop Pro – A 3-Legged Dado Doodad

For some reason, many woodworkers (myself included) hate having to change tablesaw blades, especially for small projects. It’s not nearly the hassle we make it out to be, yet we dread and ham it up nonetheless. In our defense, setting up a dado stack does require a little more time and thought than a mere blade change.
The Dado Stop Pro takes pretty much all of the effort (and error) out of the process.
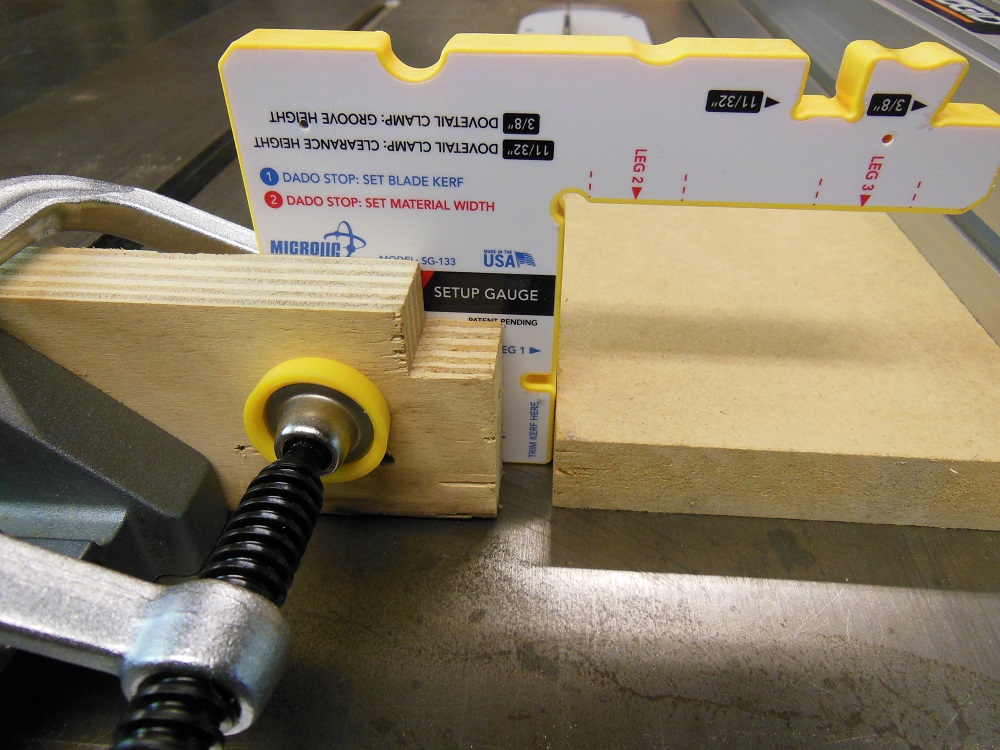
Use the setup gauge – along with your workpiece – to do a super simple adjustment and you’re ready to cut perfectly sized dadoes within seconds. You also get to use the blade that’s already on your saw, which is a huge bonus.
https://www.instagram.com/p/Buwk631g_9P/
One-Time Calibration
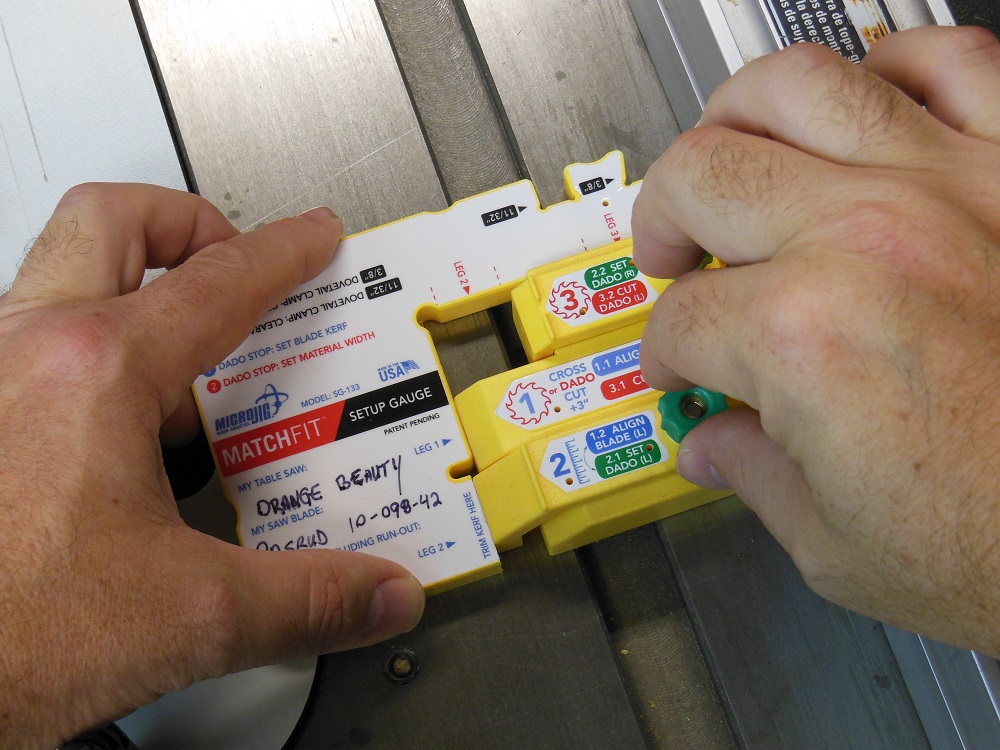
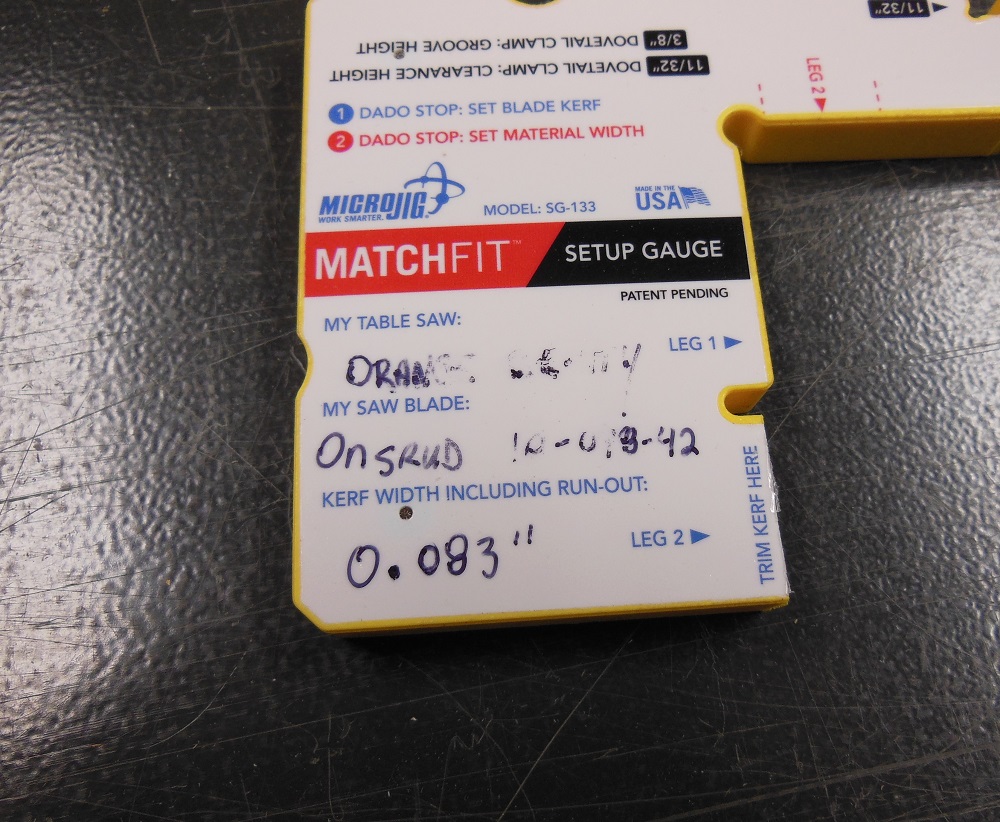
Before using your Dado Stop Pro for the first time, you have to calibrate the setup gauge. It’s a quick procedure and you only have to do it once. But if you flub during calibration, you will probably need to buy a new setup gauge. So make sure you read and understand the instructions before proceeding.
You’ll need an extra setup gauge anyway if you ever want to use the Dado Stop Pro with a different saw/blade combination.

Even without a Dado Stop Pro, your saw’s blade should be parallel to the miter slots. And your fence should be parallel to both. I went through the initial alignment process years ago, when I first unboxed the saw. But the instructions urge you to verify that your fence is parallel to the blade. I checked and found the fence to be splayed a tad bit at the far end. I realigned my fence then trimmed the setup gauge as instructed.
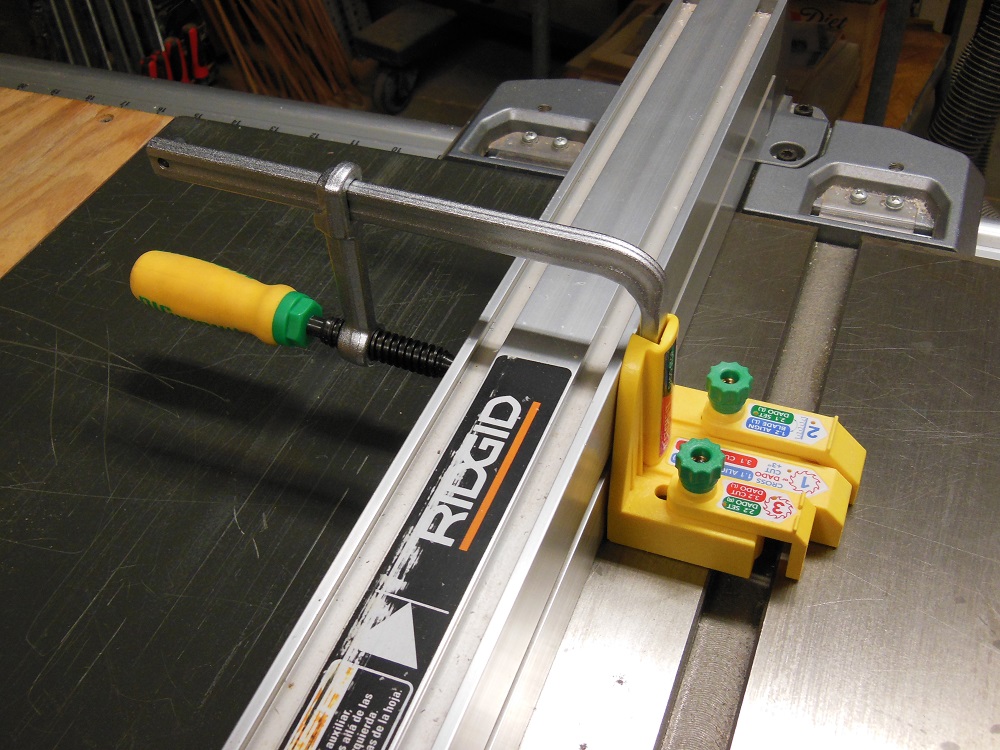
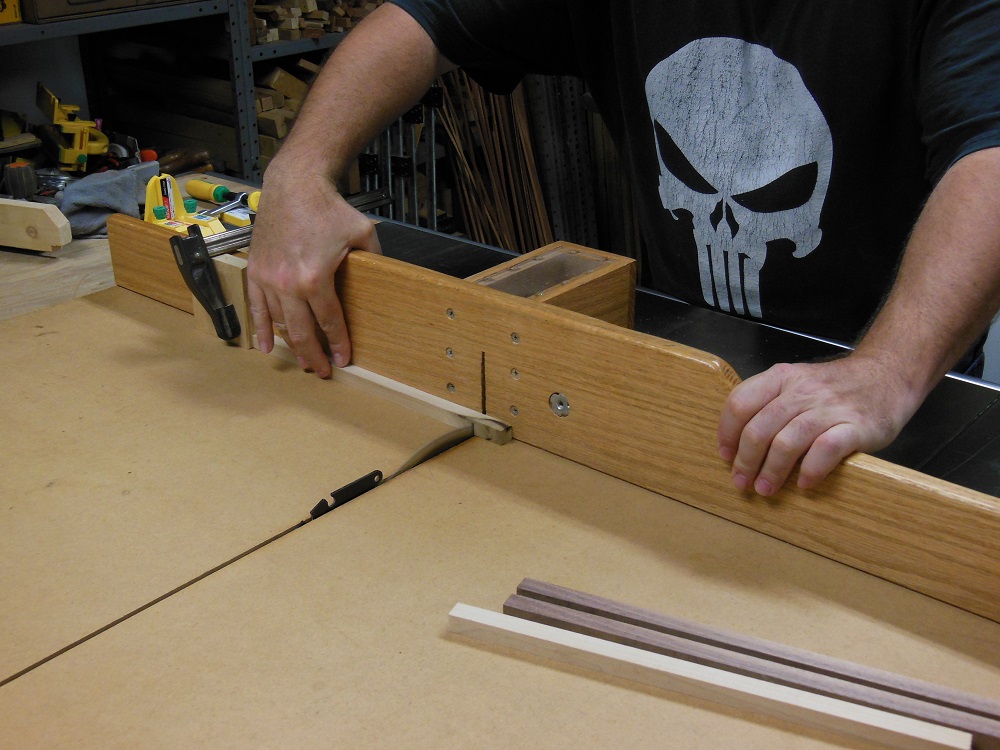
Quick To Set Up And Easy To Use – Matchfit Dado Stop Pro
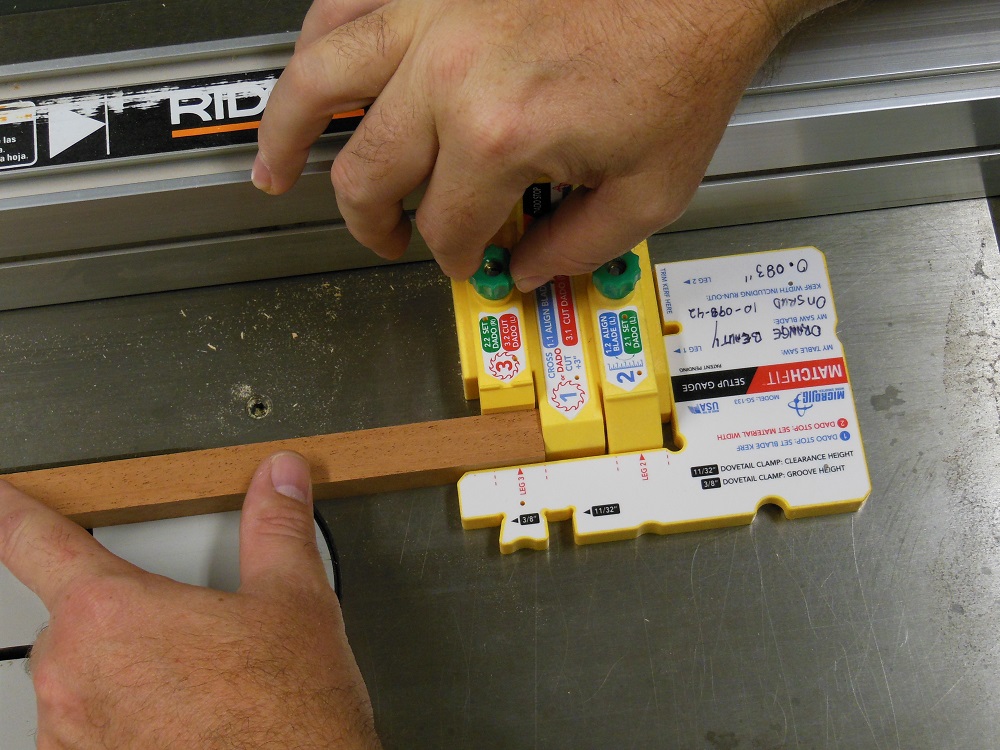
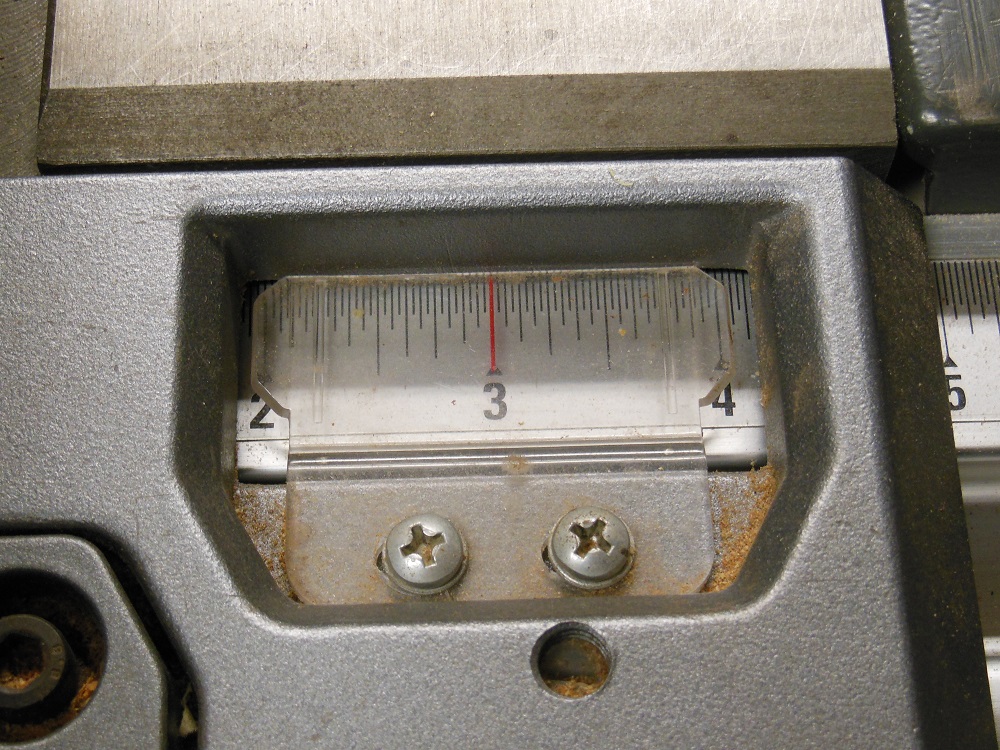
Use the setup gauge to set the legs on the jig. Then position the rip fence to locate the dadoes where you want them. Leg #2 measures exactly 3”. So if you want a dado, say, 4” from the end of your workpiece, add 3” and set your rip fence 7” from the blade.
It might seem confusing at first, but it’s surprisingly easy to use. Before we get into our project, here’s a quick demo video to help you understand what’s going on:
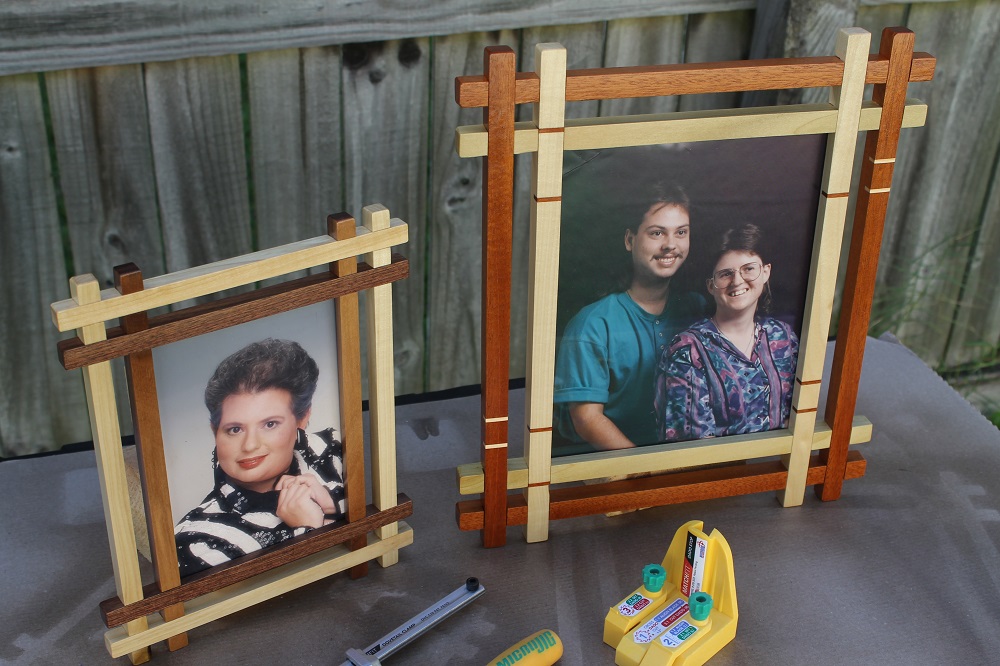
Picture Perfect For Frames And Other Small Projects

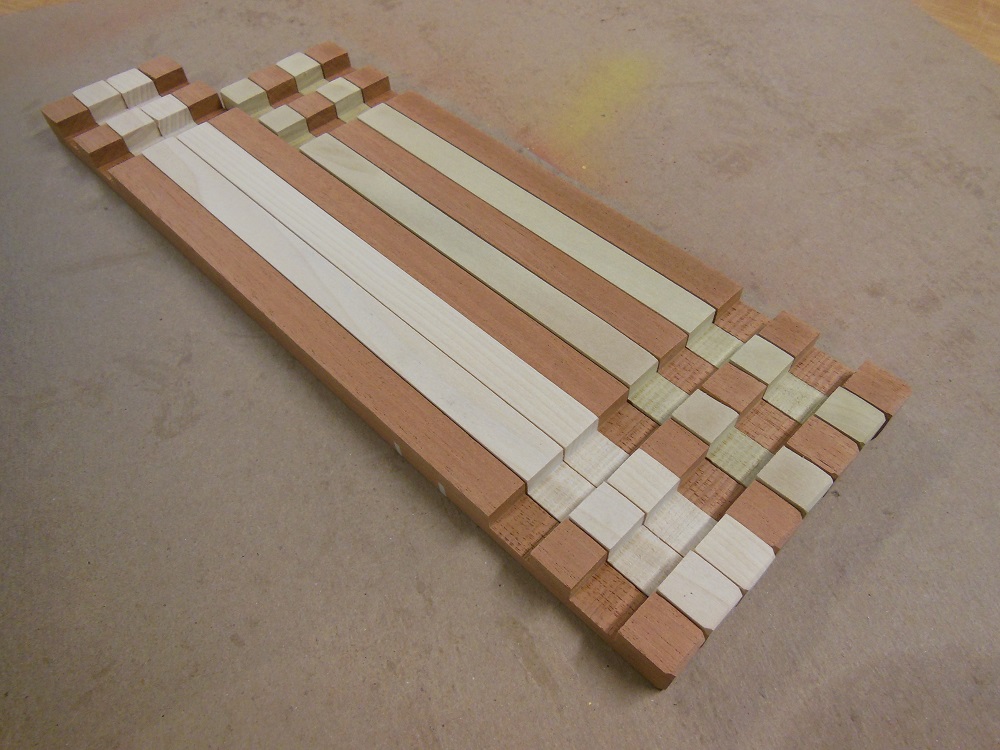
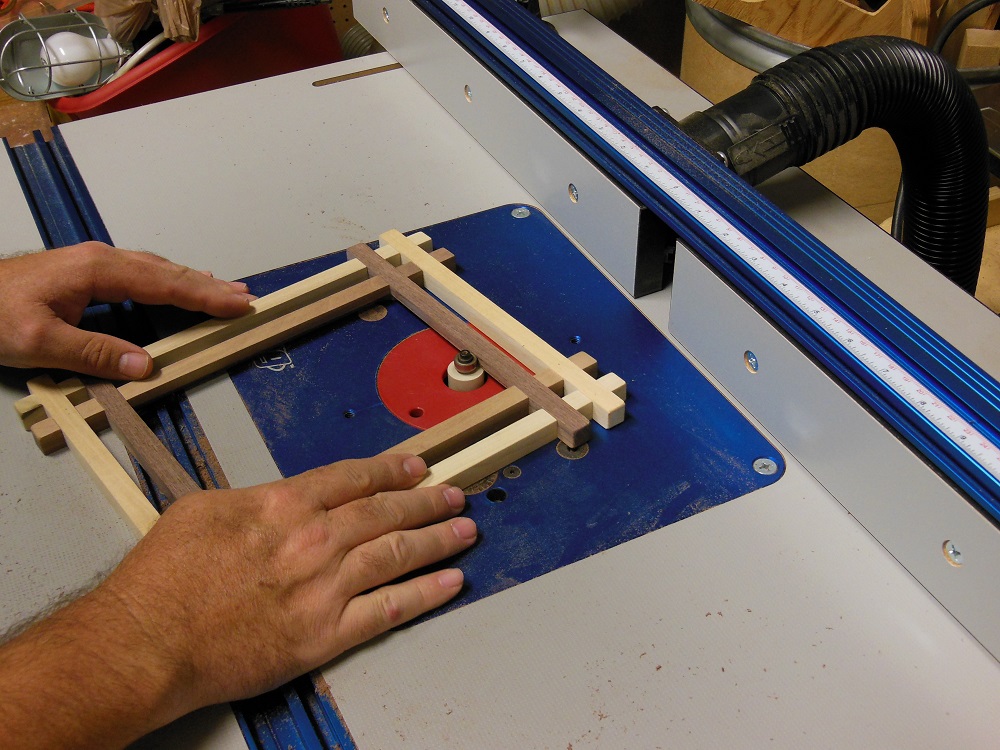
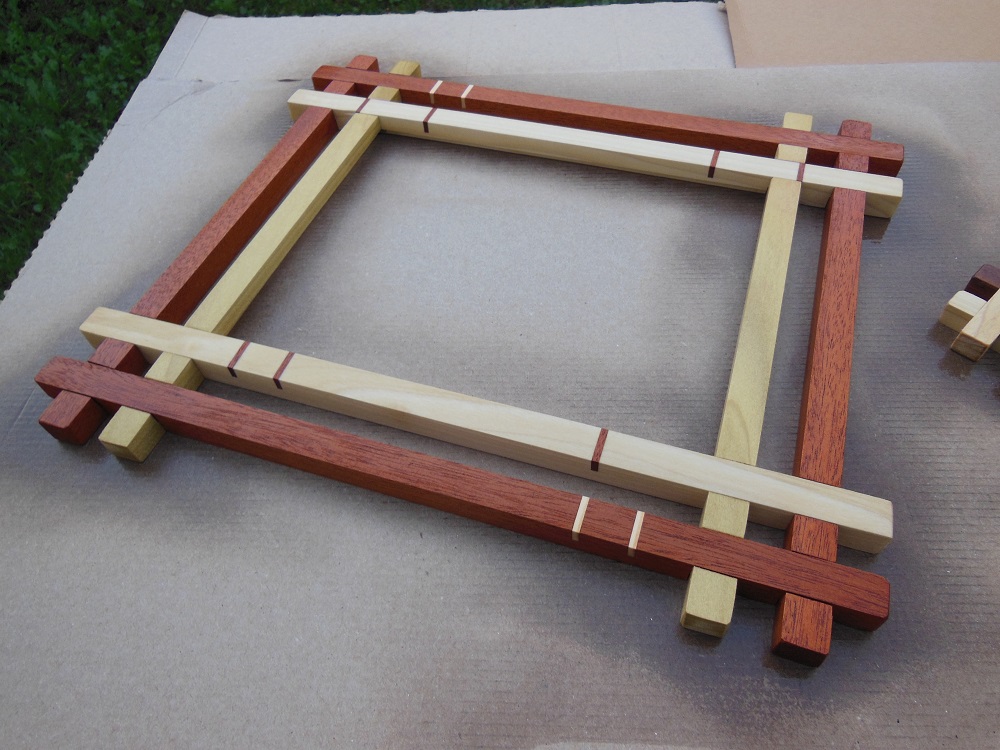
Now that everything is set up, let’s see how well it works. One of the demo videos I watched features a cool “no miter picture frame” that I really liked, so I thought I’d give it a try. And boy did the Dado Stop Pro make it easy! If you need help figuring out dimensions, you can download the plans from the Matchfit page of Micro Jig’s website.
To determine how long my pieces should be, I just multiplied the width of one piece by 8 then subtracted 1/4”. Then I added that number to the dimensions of the picture I wanted to frame. This gives you a viewing window that’s 1/4” smaller than the photo (hiding a 1/8” border on all four sides for a clean presentation). If you want the window the exact same size as your photo, still multiply by 8 but don’t subtract the 1/4”.
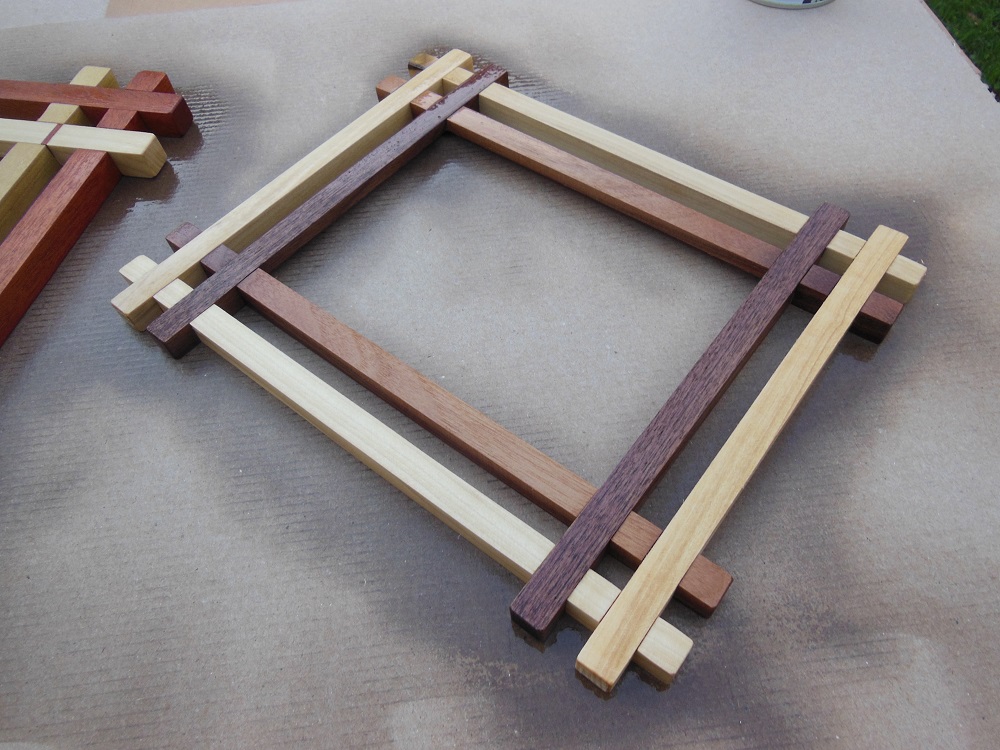
For example: My smaller frame is made of 1/2″ square rods. I multiplied 1/2″ x 8 to get 4″. Subtracting 1/4″ from that leaves 3-3/4″. The photo I’m framing measures 5″ x 7″, so I added 3-3/4″ to both 5″ and 7″ to find that I need four rods measuring 8-3/4 in length; and four at 10-3/4″.
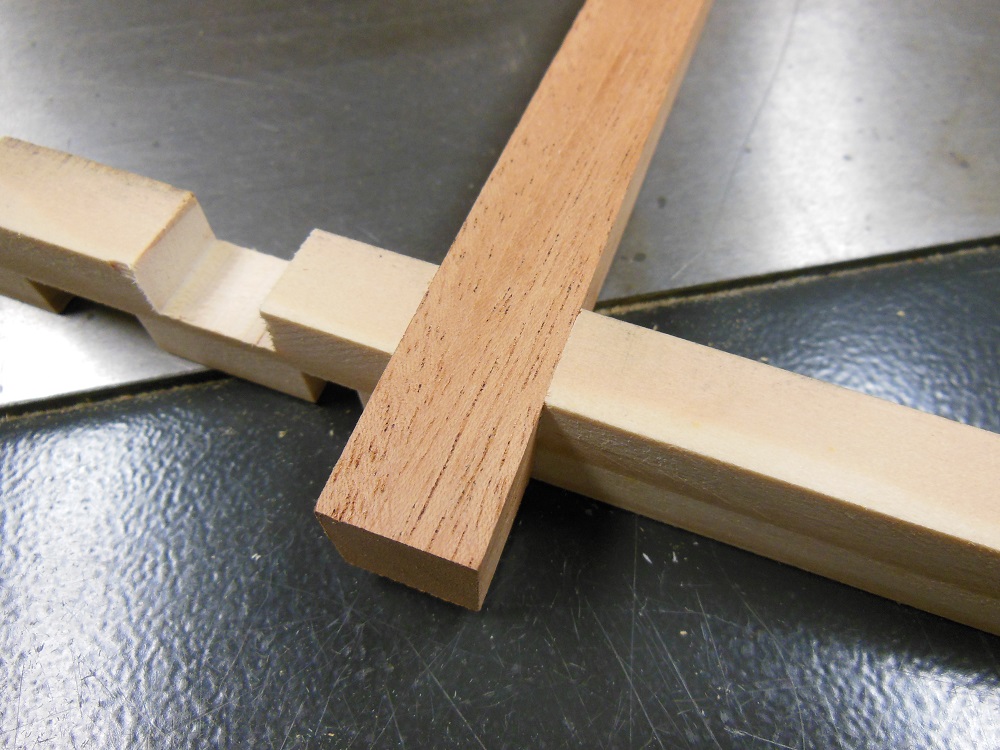
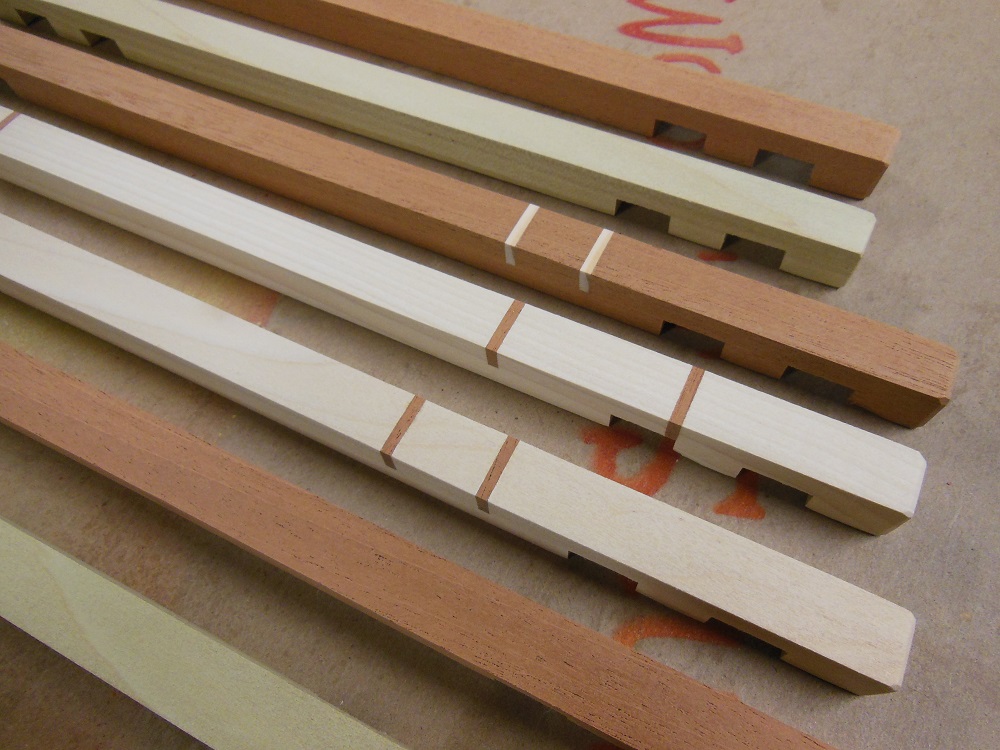
When you actually cut the dadoes – leave the width of one piece at each end, and again between the rod pairs.
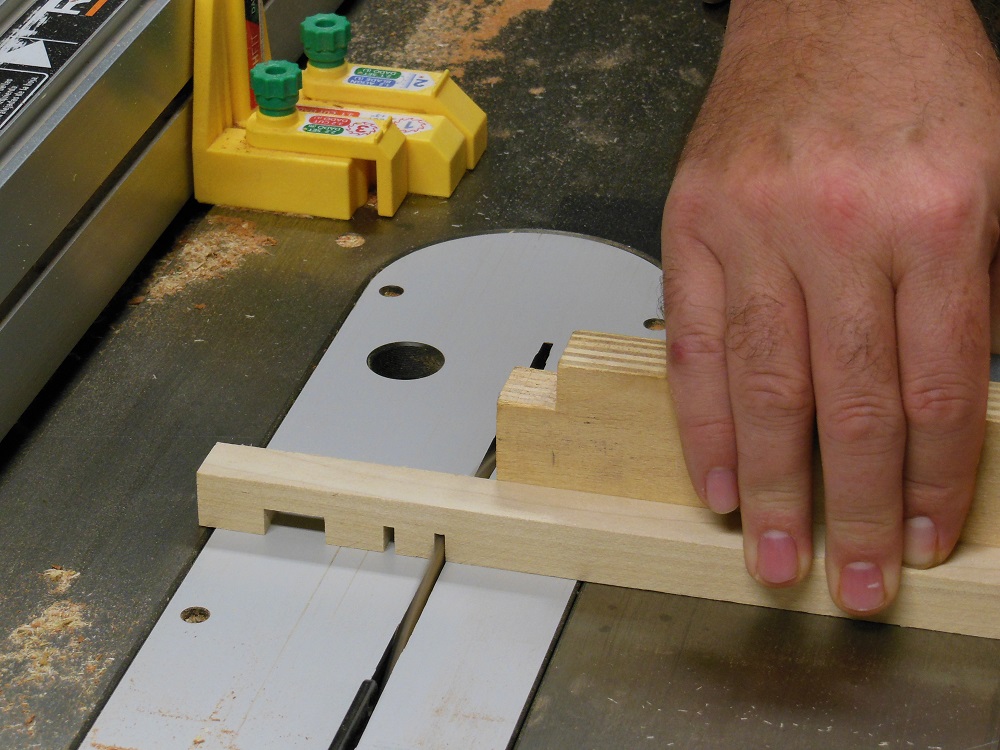
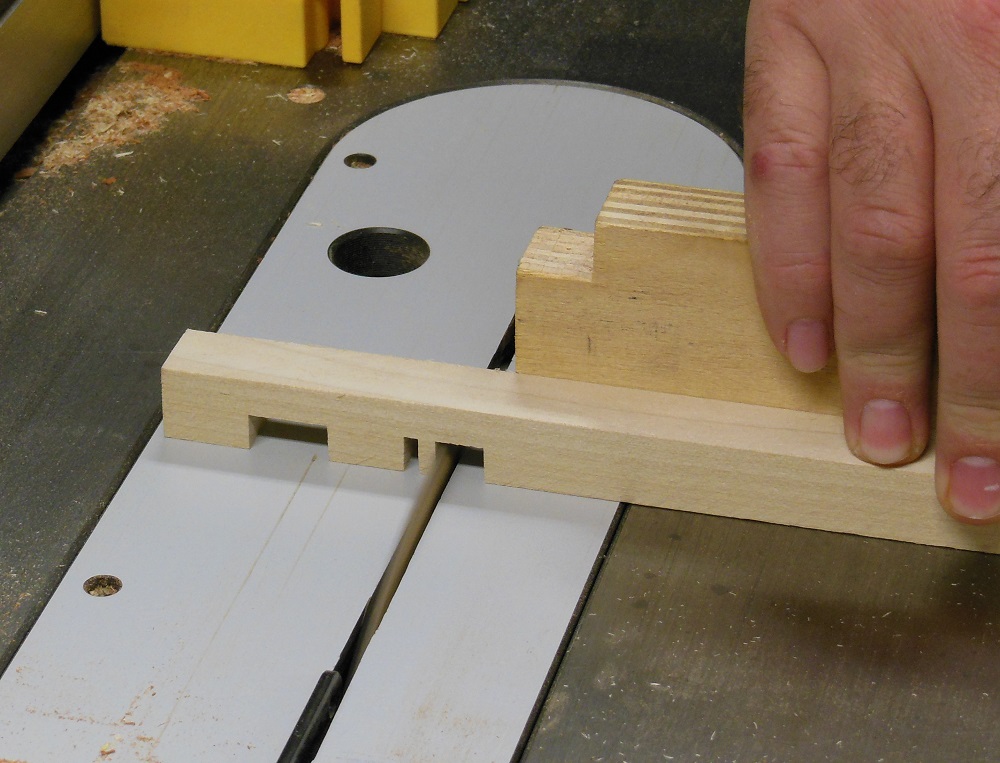
A Perfectly Sized Dado Every Time

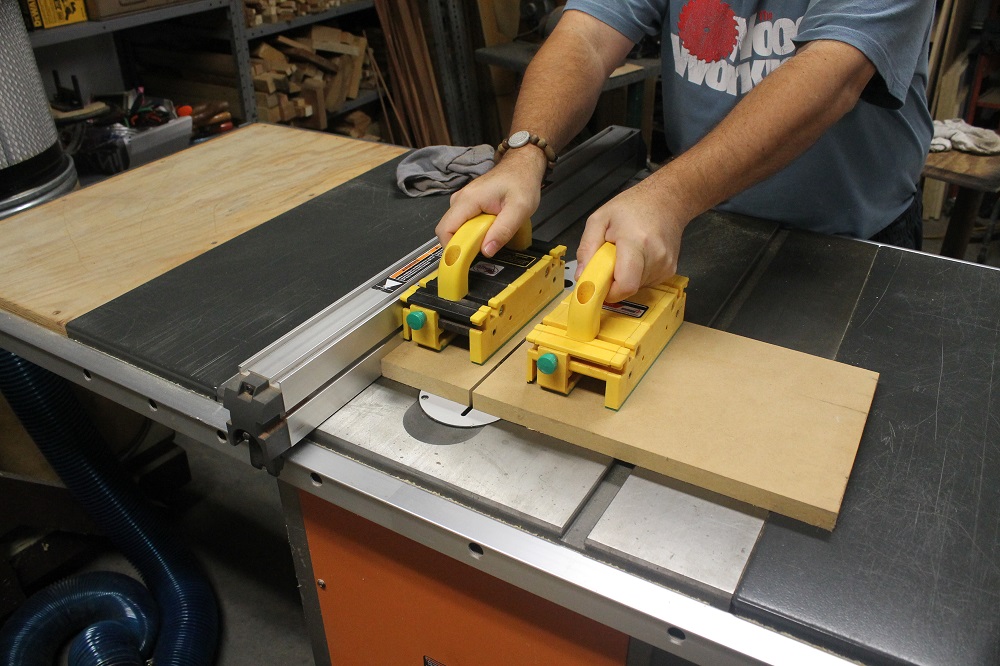
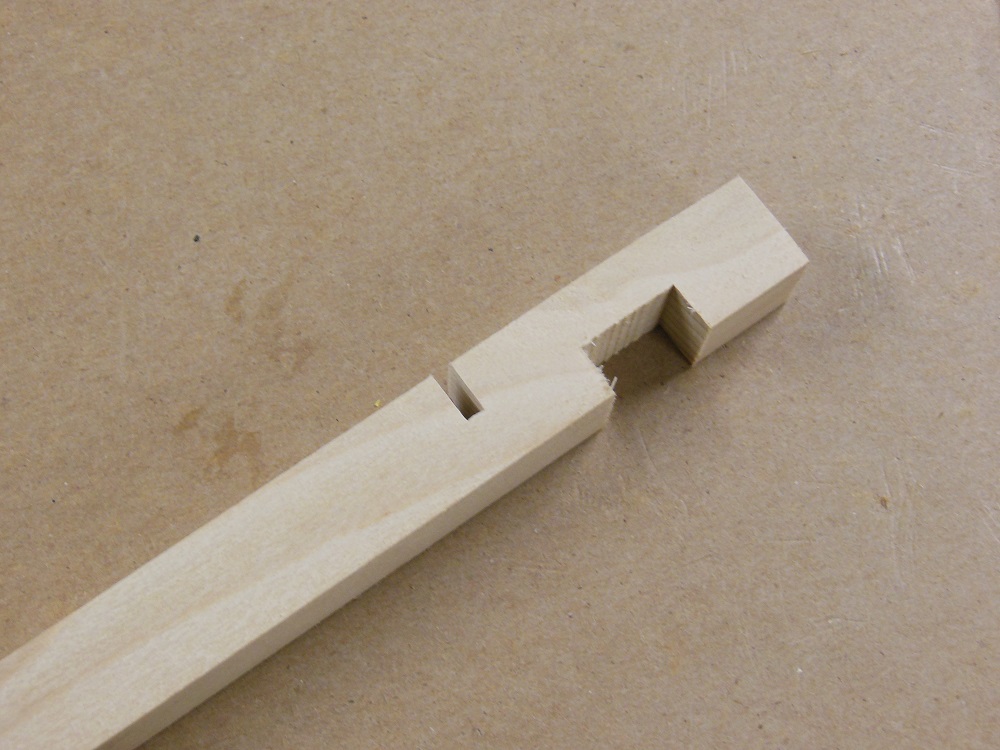
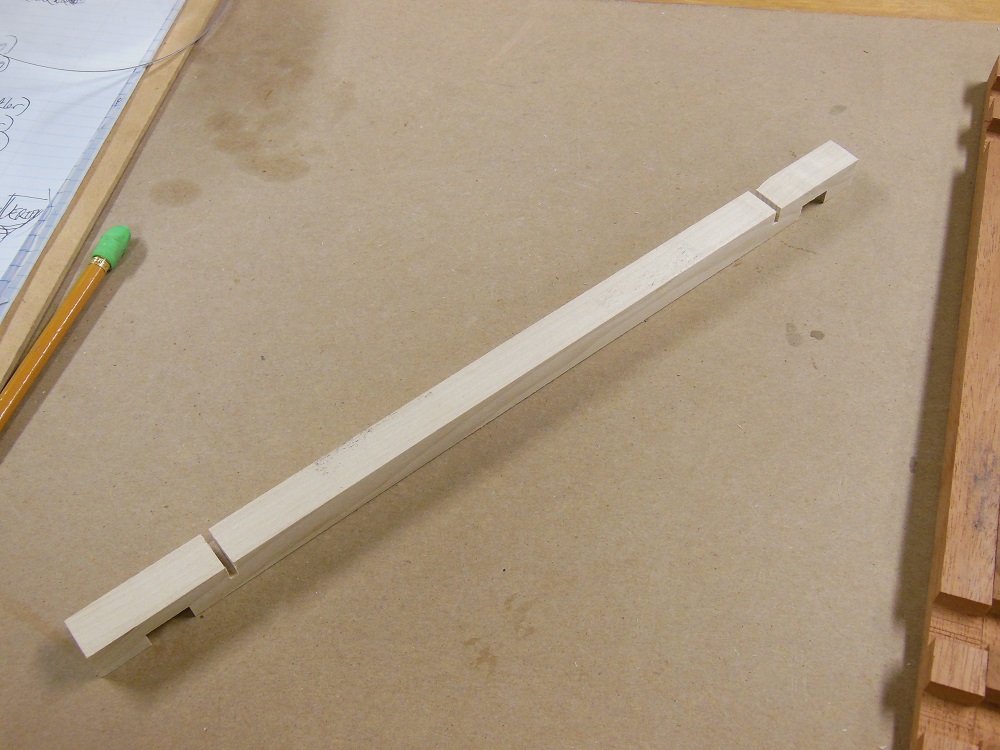
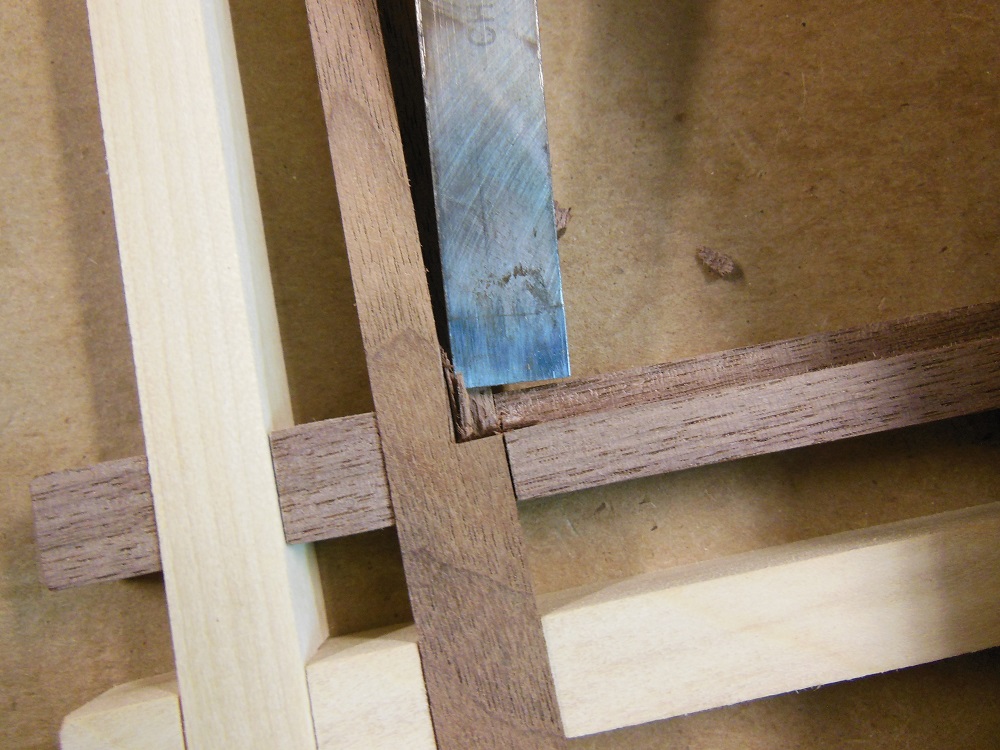
Reference off of legs #1 and 3 to cut the sides of the dado. Then hog away the middle with a handful of quick passes over the blade. Cut the outer dado on both ends of all eight pieces. Then reset your rip fence for the inner dadoes.

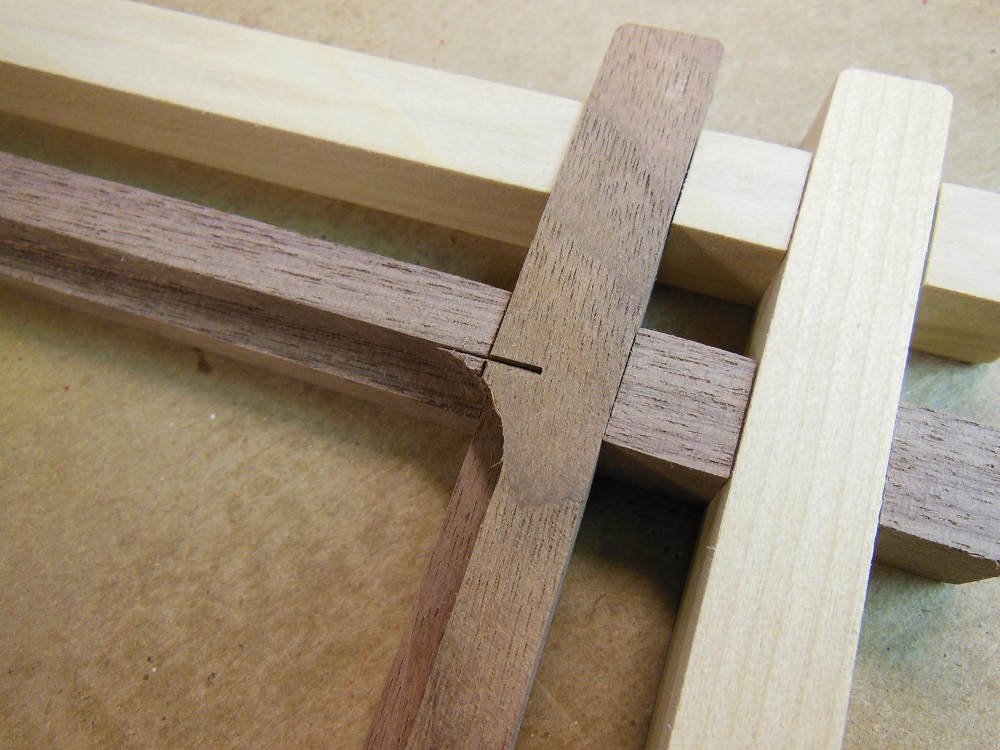
Not A Mistake – A Design Opportunity
If even expert woodworkers make mistakes, what hope do I have? It only takes a moment of inattention to mess something up. But a mistake can be a blessing in disguise, a surprise opportunity to add a creative touch to your project. Some of my coolest little project details are actually just camouflaged repairs.
To mask the stench of my brain fart, I cut a matching kerf on the other end. And I artistically placed kerfs on some other pieces as well.

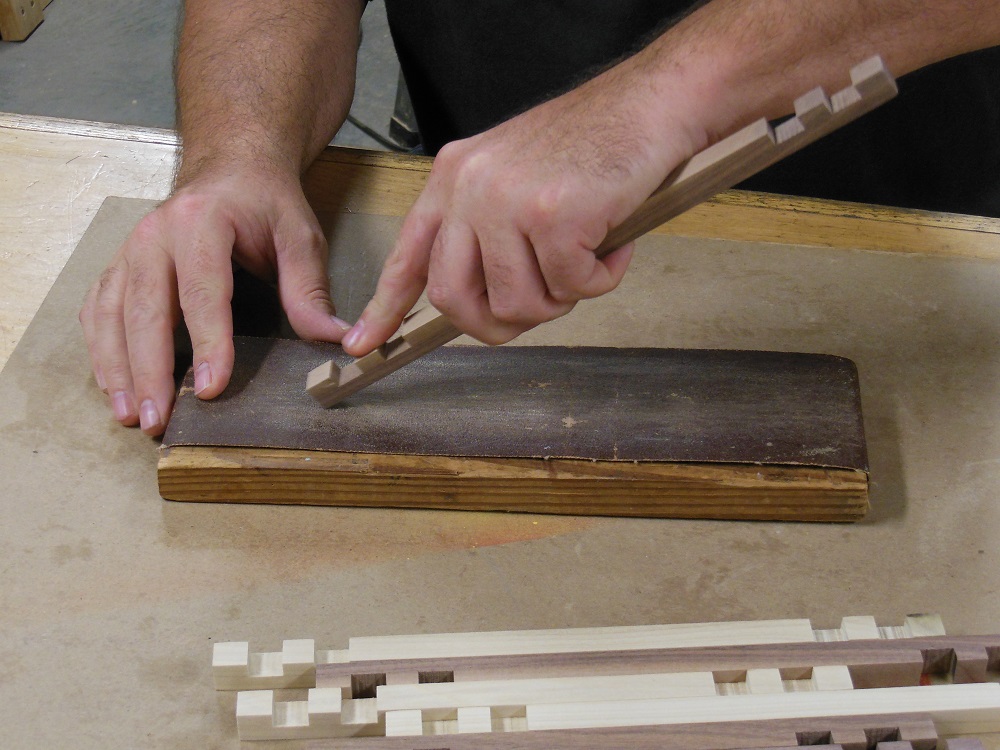
Rods – Trimmed And Smoothed
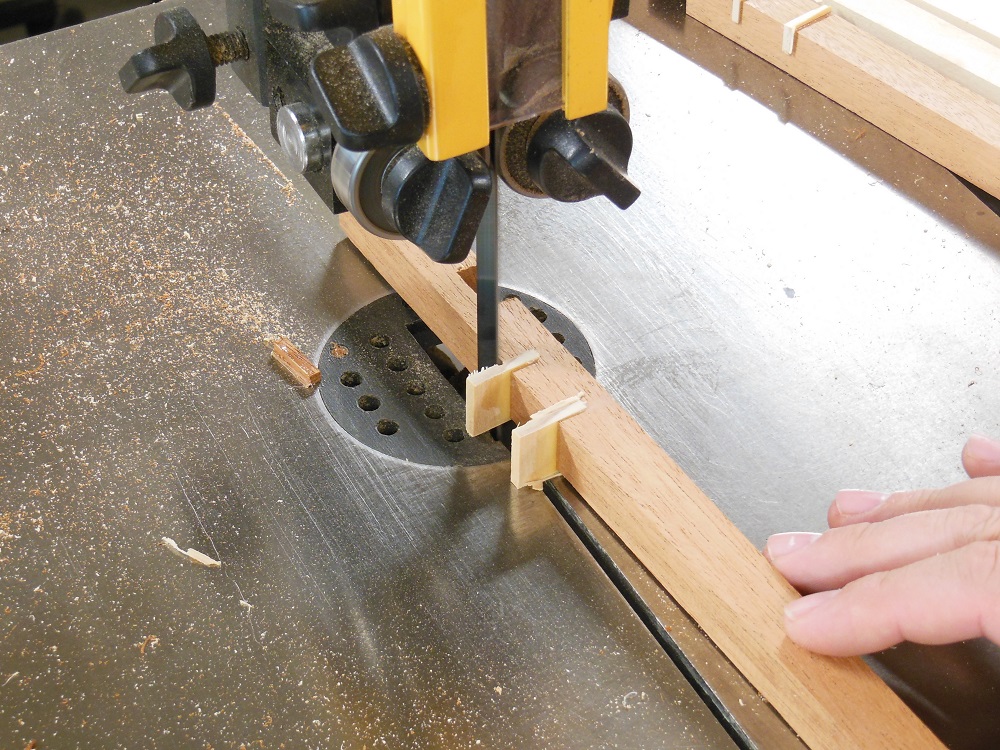
After the glue dried, I trimmed the fat at the band saw. I wanted to keep the saw teeth from gouging the frame parts. So I gently contacted the back of the blade, then pivoted the workpiece towards the teeth enough to make my cuts without actually touching the rod.
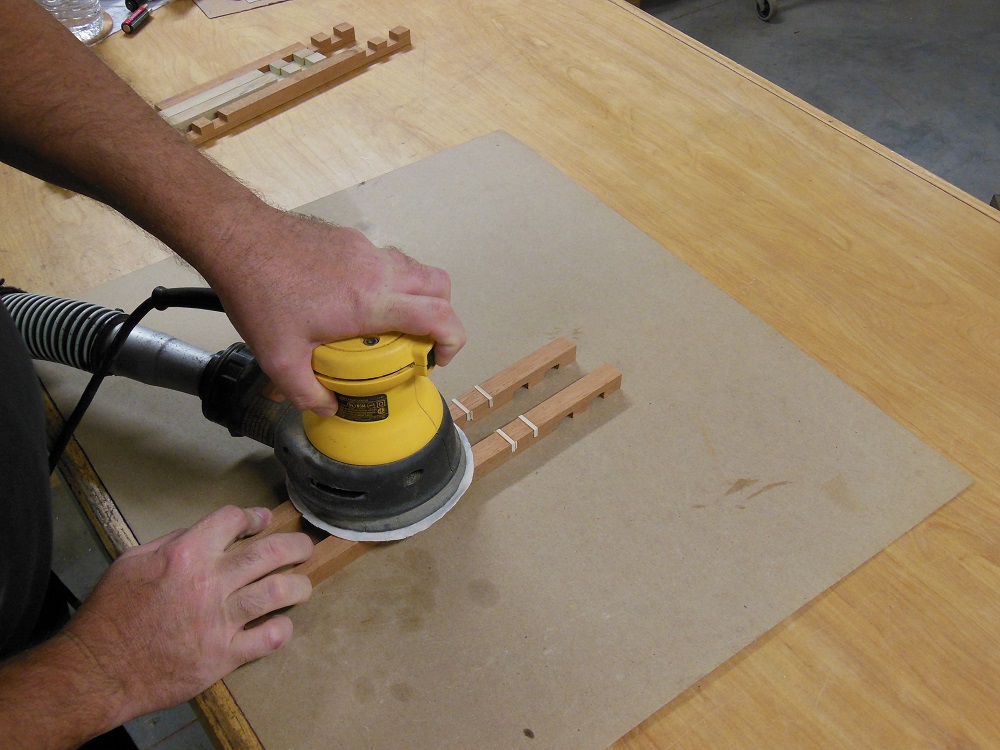
Unfortunately, I failed to consider the fact that the dadoes were already perfectly sized and sanded some of the rods bit aggressively. For those keeping score at home, that’s two blunders; both my fault. I looked around sheepishly to make sure no one saw the egg on my face, tucked my tail between my legs, then proceeded more carefully with the smaller frame. No sugar coating. No design opportunity. Just a few loosened dadoes, which I’ve made peace with.
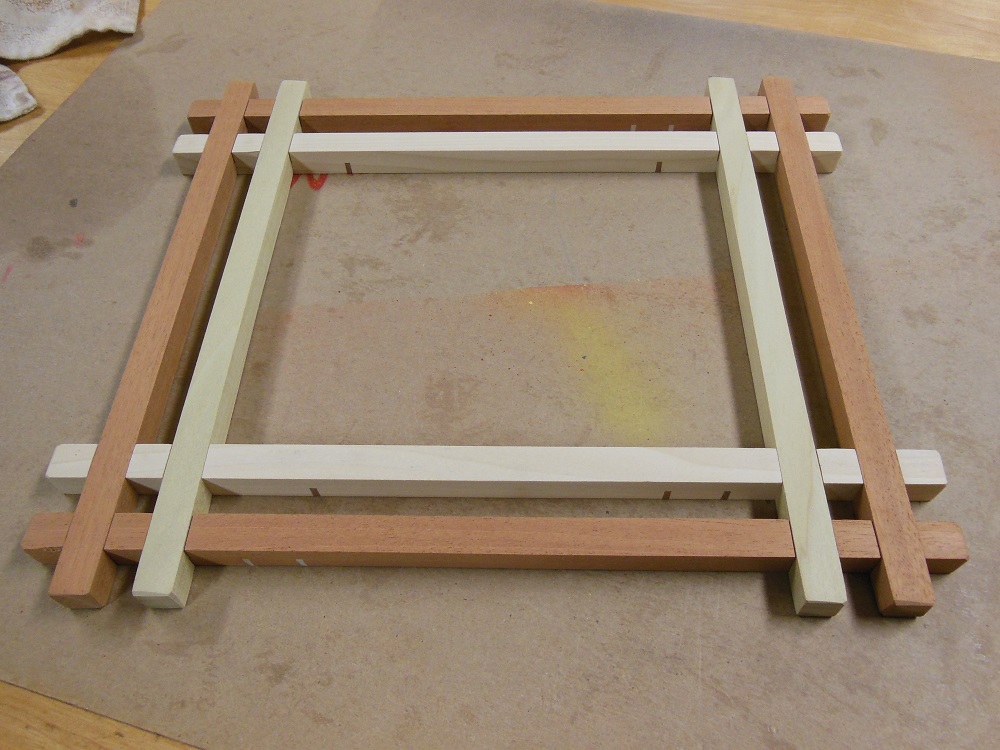
Glue Up – Easy Assembly

If you’ve ever played with Lincoln Logs, you already know how this frame goes together. One set of parts (either the horizontal or the vertical) is laid out, dado up. Then the remaining pieces are fitted in place with their dadoes facing downward. Seat all the joints with a few gentle mallet taps and leave the frame overnight to dry; no clamps needed.
Routing Rascally Rabbets – Matchfit Dado Stop Pro
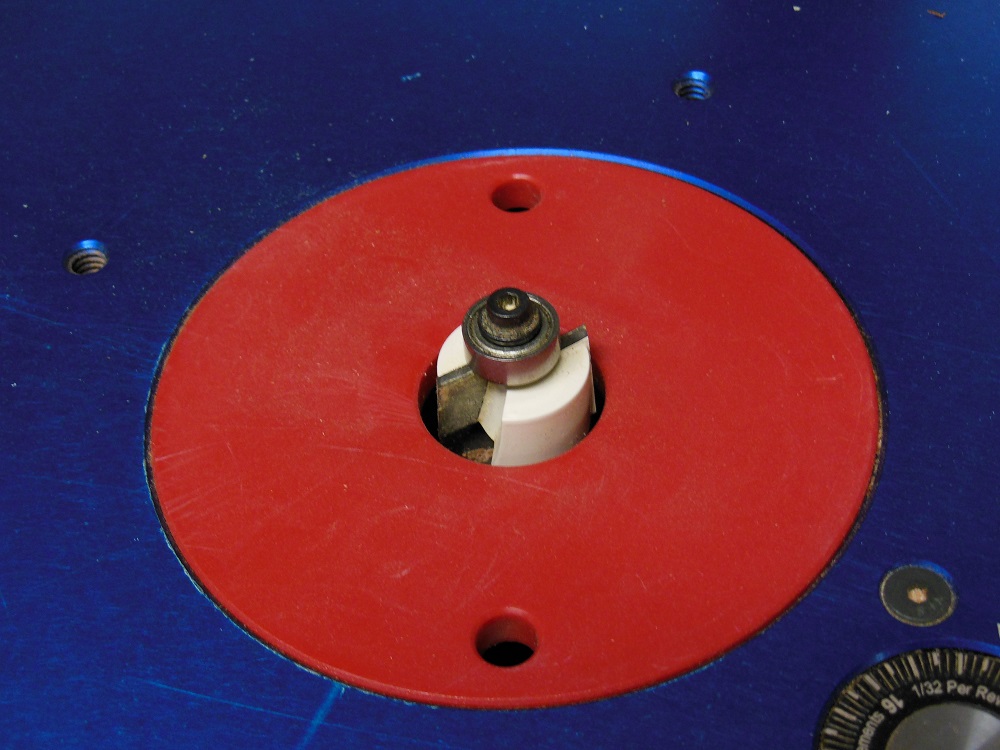
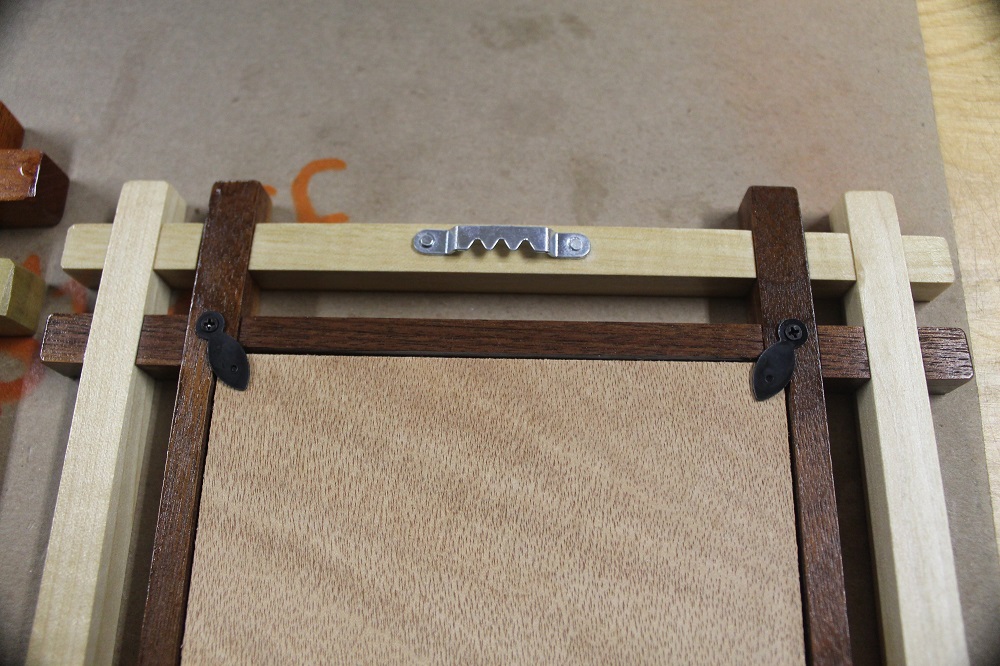
Before the assembly can be called a picture frame, we need to rout a rabbet (or, a “rebate”, as some parts of the world like to call it) to hold the glass, photo and backer. This is most easily done at the router table.

Putting the Finishing Touches On Our No-Miter Picture Frames
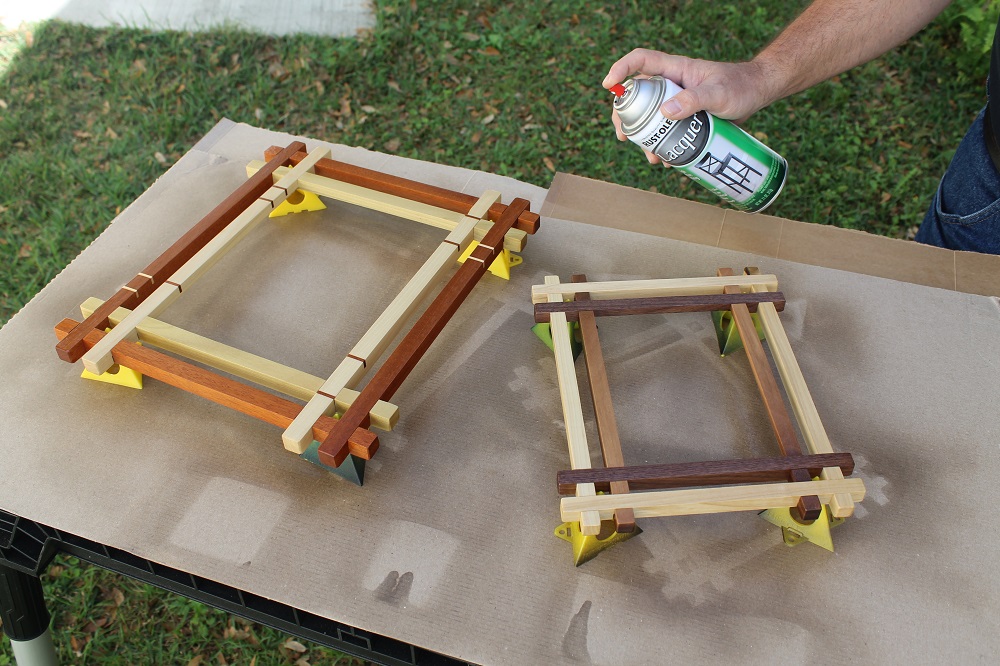
The next step is to finish the frame with your method of choice. Then cut your glass and backer and move on to final assembly. I used clear Lexan for the window and thin wooden paneling for the back.


Matchfit Dado Stop pro – Way More Than A Frame Maker, But Not A Panacea
We focused here on making these cool picture frames. But the world of projects that can be built using the Matchfit Dado Stop Pro are limited only by your creativity. Given how easy it is to set up and use (and how well it works), it is a product I’d recommend without hesitation. Plus, both the setup gauge and Matchfit Dovetail Clamps have other great uses, which we’ll explore in a future review.
However, there are a couple limitations worth noting. For one, the maximum dado width is somewhere around 7/8”. That’s actually not bad at all (many dado stacks also max out at 7/8”).
Also, the longest dado you can cut with the Dado Stop pro is determined by the distance between the jig and the leading edge of your blade. So the Dado Stop Pro is perfect for smaller projects, but it isn’t going to replace your standard dado stack for all applications. Finally, beware of sanding too much after cutting the dadoes.
Purchase the Matchfit Dado Stop Pro for just under $60:
Get an extra setup gauge for under $13: