

You know how some people cringe at the sound of fingernails across a chalkboard? I do the same thing when I see someone painting a steel door with a paintbrush. A steel door needs extra special care when it’s painted because the wet paint can easily be manipulated by the tool that’s applying it. When it’s on slick steel, paint doesn’t absorb into the material and “laydown” and you’re going to have a rough looking texture in your paint finish. Use these tips for painting a metal door and get a great finished product, all without putting a paintbrush in your hand!
I could make this article easy and finish it in just a few sentences. Painting a metal door? Simple. Just take it down and use a paint spray rig to coat it a few times, and then reinstall it. Problem solved, article over.
It’s true that a nice sprayed-on finish from a basic paint spray rig is the best way to paint any door, but it’s not always possible. In most cases, you don’t have hours and hours to leave the door frame wide open to the elements while you’re spraying paint from you $800 sprayer all over your backyard and the neighbor’s fence. Spray rigs are messy and taking the door out of the frame for long periods of time just causes problems all the way around.
Preparation “H”
So what do you do? You simply paint the door in place and when you’re done you close the door. Sounds too easy right? Well that’s because it is.
I’ve messed up enough metal door paint jobs to have a pretty good idea of how to do it without making it into a disaster, which it can easily turn into if you’re not careful. Over the years, I’ve developed a plan for the preparation of painting a steel door. Plans A-G were failures, but the final plan for steel door preparation, Preparation H, is a success and on the whole, feels good.
To start, you need a good exterior steel paint. The glossier it is, the harder it is to paint without a sprayer, so keep in mind a flatter paint sheen is going to produce a flatter finish on a metal door.
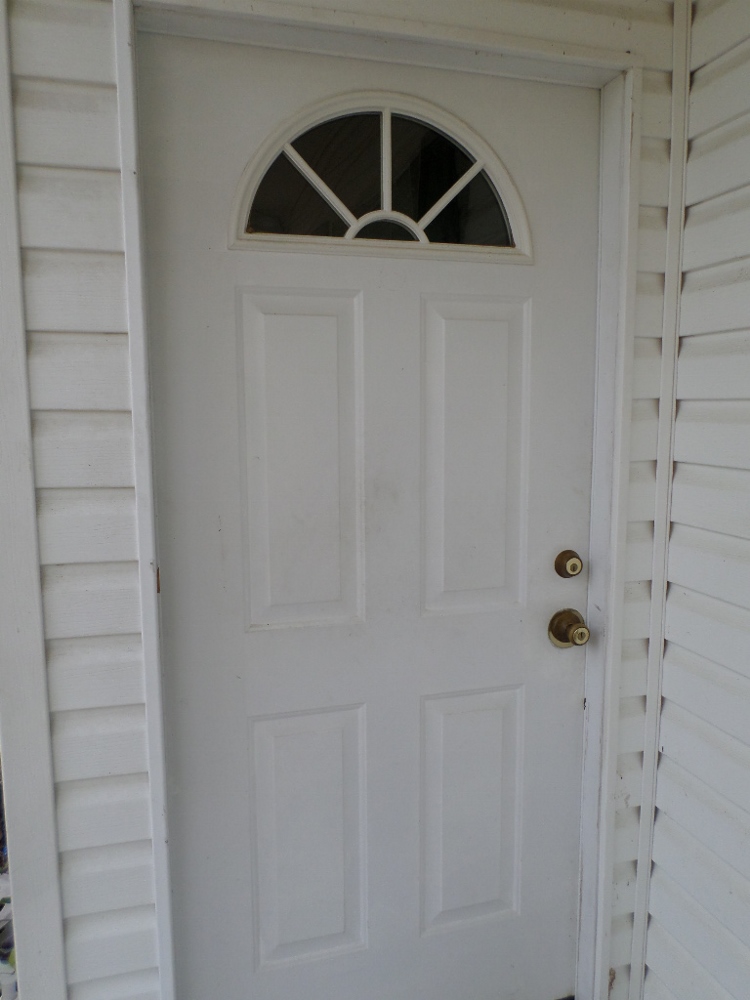
You’ll also want to make sure that you don’t have any issues with the old door paint. If you’re painting over an oil-based paint with a water-based paint, the water-based paint is going to peel and bubble. If you’re unsure, cover the door with a good exterior metal/wood primer first. Don’t take any chances if you don’t know, or you could end up like this guy! With my door, I had painted it last time so I knew it had a water-based coat and it was ok to paint over with another water-based exterior enamel.
Second, a good three-inch roller and roller cover are needed. Why such a small roller? It’s because the smaller roller helps to knock down any lines and it fits better in between the lines and edges of a paneled door. If you steel door is flat, by all means, use a larger four or six-inch roller.
Don’t use a roller cover with a nap bigger than 3/8-inch or else you’ll leave one nasty texture in the paint. The lighter/shorter the nap, the softer the texture and the smoother the door will look. Foam rollers work well, especially for heavier paints like glossy enamels.
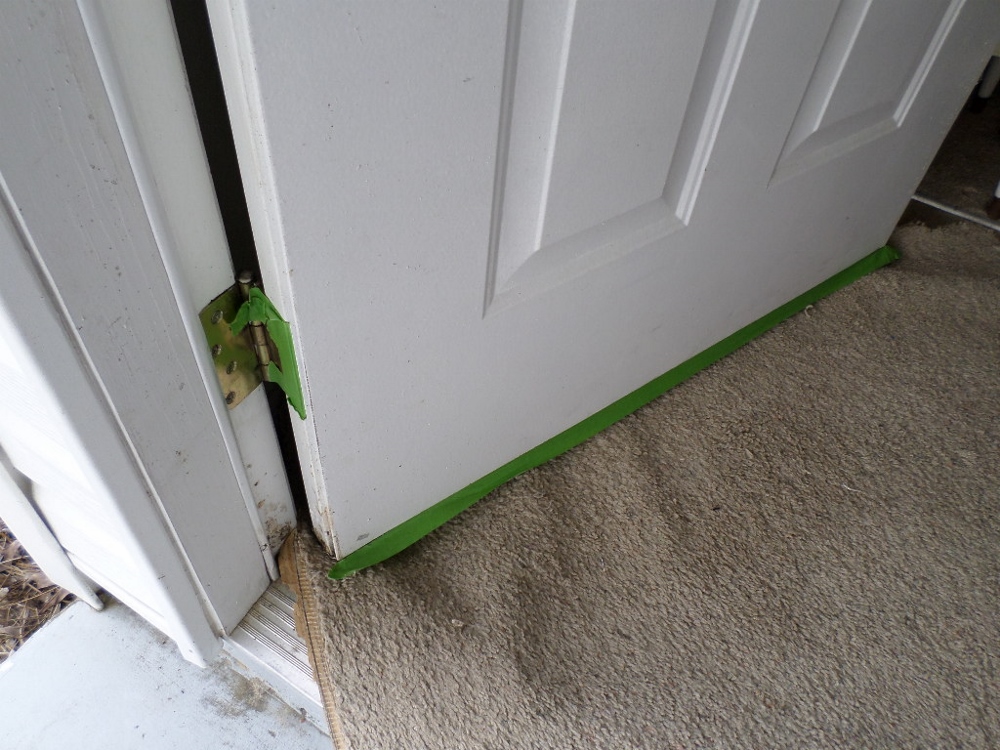
I like to tape off the door parts like the hinges and door sweep to keep paint away, but I remove any other hardware with a simple screwdriver. Never use a power tool to remove any door hardware or you could end up with another project on your hands, installing a new door handle.

My project involved removing a window insert. This is easy enough if you can get a small nail or thumbtack behind the screw hole covers to access the screws. Don’t worry about the window falling out; it’s stuck on the door frame pretty good. In fact, don’t break the window or frame trying to pry it loose from the steel door!
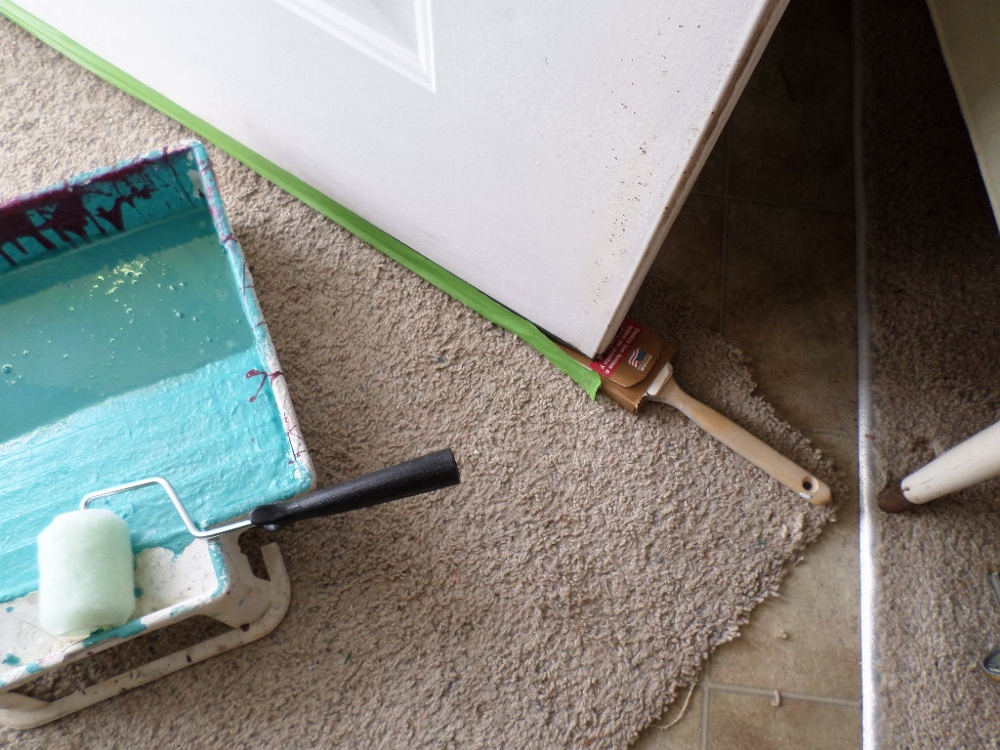
After all that, I used an old piece of carpet for a drop cloth and made the door stationary using a covered paintbrush. This is the only time you should ever use a paintbrush on a metal door!

Last but not least, I prepped my steel doors old paint job by cleaning it with a natural degreaser/cleaner and lightly sanding the finish/removing any blemishes. Sanding the door is NOT something you want to do if your door has some age to it and might have lead paint. When in doubt, test the paint and always follow lead-safe practices.
To clean, I used a bit of oxy-something or another – it’s basically just hydrogen peroxide. It kills any bacteria, fungus and other paint eating organisms, plus it cleans the grease away while making the door nice and bright. I also used a 220-grit sandpaper to scuff the old paint up and knock down any paint bubbles or rust pockmarks. Be sure to wipe it all off with a clean damp cloth before painting.
You’ve got to Keep that Steel Door Wet
Once you’re ready to paint, just remember one thing, you’ve got to keep it wet. If you don’t keep a wet edge on a metal door when it’s being painted, the drying paint will stick to the roller and peel off. Keeping a wet edge is simple. Paint from the top to bottom of the door, going left to right and continuing the process without skipping down the door more than 4-6 inches at a time. Always keep a wet edge when painting and you’ll be successful in the final finish.

Be sure to quickly knock down any lines or paint drips that come from the corners of any impressions in the panels. If you find you’re too late, you’ll end up with a rougher texture in that area than the rest of the door. You’ve got to be fast to keep it wet!
Ideally, paint in the morning and avoid the afternoon. Early evening can work too, but not if you plan to let the door dry before closing it for the night. If the door is in direct sunlight, avoid painting until it’s in the shade. Hot steel doors are nearly impossible to paint as the paint dries almost instantly and you won’t have a wet edge to keep up with.
After your final coat goes smoothly (fingers crossed) it’s a good idea to hit it with a little more 220-grit sandpaper once it’s dry. Any rough spots that look out of place should be knocked down with some sandpaper. Be careful as you sand as you can easily tear the paint loose from the door.
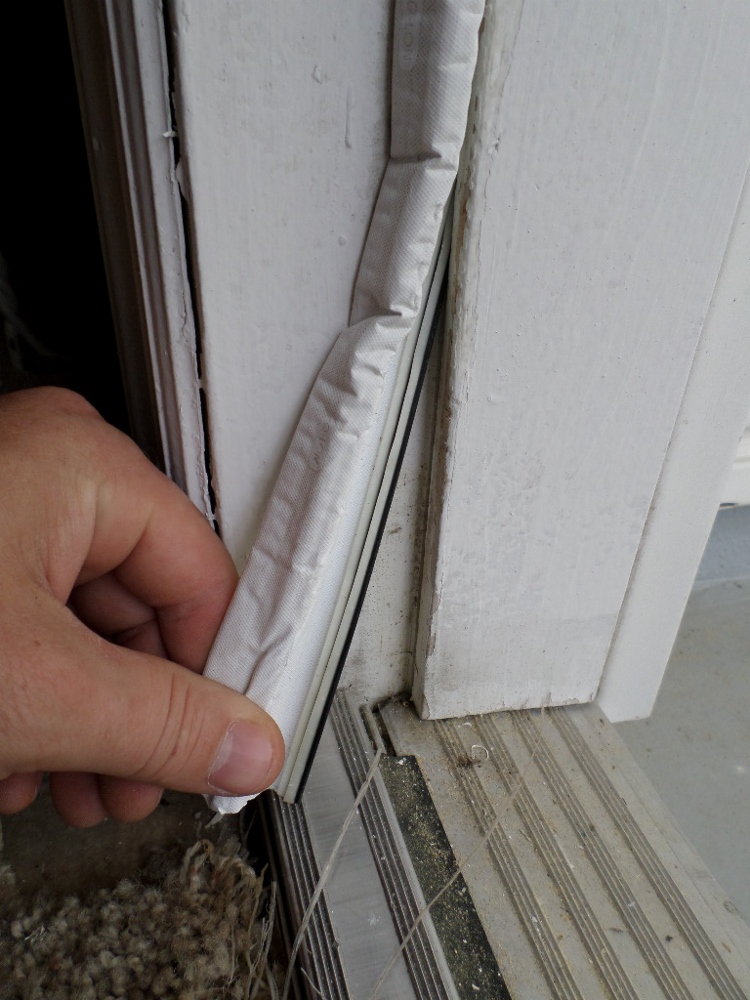
You’ll also want to remove the weather-stripping around the door frame before you close the door for the first time. It can stick to a freshly painted door (even when it appears dry) and ruin your paint when you close the door for the night, so be sure to remove the weather-stripping and leave it out for the next 24-36 hours after painting an exterior door. You’ll have to deal with a little gap for a day or two, but at least you won’t have to deal with repainting your peeled door and replacing your freshly-painted weather-stripping.
Three coats should do the trick nicely, but sometimes you’ll need to do more if you make mistakes and you have to sand out your mistakes. Keep in mind; the smoother the roll is on the door, the less sanding you need to do between coats and the better the final product will look when finished. Happy painting!
Anyone have any good recommendations for a paint for the metal doors?
Wished I too had read this artilcle …Tried painting a new metal exterior door from Menards with the standard primer it comes with. In the past I would use Behr Alkyd enamel (waterborne) semi-gloss brush/rolled horizontally and got flawless results–oh but that was fiberglass. Couldn’t find that paint(?) so I went with Behr Urethane Alkyd Enamel (waterborne) and got terrible results. Prominent brush strokes, a total mess. Tried sanding after 8- hours and attempted a second coat. Same, terrible. 3rd try, after moving door to heated garage (1st 2 coats were outside and it was cold but with … sun, door surface temp was 70). Dried rapidly. Paint can states no thinning but I tried Floetrol on 3rd coat anyway. Same lousy result. At that point I thought the paint was flawed (painter too). So, on to the door’s other side. I went to Sherwin Williams. Their Urethane Alkyd Waterborne is $100/ gallon! Used synthetic, quality brush. 3/8 nap roller. Tried Kilz primer. I believe this Kilz is good for all paint types but not sure. In heated garage, applied 1st coat. Much better but not flawless. Waited a day, wet-sanded with fine sponge-type block, applied 2nd coat. Decent, but not flawless. What gives? Should I switch to oil base? Different brand? Spray? Dunno.
Thank you
Sorry to hear about the painting woes Norman, I feel your pain(t). Paints can be finicky, and painting on an unforgiving surface like a steel door can make that more challenging. I have found local, mom and pop paint supply stores can be really great for getting specialized advice on what paint will work best on particular applications. I’m far from an expert on paints, so I’d recommend you start there and see if they have any insights. An HVLP sprayer is another option to avoid brush strokes with. The coldness may have been part of your challenge – it can make the paint more viscous, which is the opposite of what you want on a steel door application. Glad our article helped a bit. . . keep us posted on how things work out!
I have painted my steel door according to paint adviser from THE HOME DEPOT. He suggested to use oil base primer after drying I used water base white satin. The adviser did not mention about sanding in between. Now my door are rough and bumpy, a real disaster. I think I have to sand it , cleaned and use a can of semi-glass paint, rather than a roller.
I have a steel door that had a vinyl cover under the paint. The vinyl cracked and peeled , removed all vinyl -bare steel door. what do i use as undercoat? DOOR FACES EAST, HOT SUN! Door gets hot bare steel Needs coating
How do I know whether the original paint was oil based or water based? It’s a mobile home metal door.
Well…I have a full length triple pane steel door that I salvaged from a demolition. It’s a beautiful door and I can’t believe that nobody saved it. That said, I brought it home to repurpose on our bunkie. It had dark brown colour on it already, and since our windows are going to be black, we opted to paint the door black, as well.
We picked up a quart of black Behr exterior semi gloss from Home Depot. My wife loves Behr! Me? Not so much. Dries too quickly, as far as I’m concerned. Nevertheless, I gave the door a light scuffing with a high grit sandpaper and wiped it down well. Then I applied the first coat using a good brush to get all the trim around the glass and on the frame. According to the can, 1 hour to dry, 2 hours to recoat. Did that!
For the second coat, I used a 4″ foam roller and applied the paint quickly knowing how fast it starts to cure. When it dried, you could see overlaps from the sides and top and bottom sections. So I applied a third coat. It, too, showed signs of roller marks where paint went on thin or thick, but since I ran the roller up and down the frame several times, I’m not sure how this came to be? So on to round four! Again, expedited the process to alleviate streaks or overlaps. Right now, you can see some excellent areas, and then in the corners you can see where the roller left overlap. Not happy!!!
So now my wife thinks that she has the knack to painting and that I don’t know what the hell I’m doing, so she’s applying a fifth coat to it. What a waste of time!! I might be better off just to spray paint the thing.
Your thoughts on this?
I wish I had read this before I attempted as made a right mess of my door
OMG! I need help! Doing a side job I painted 2 metal doors, customer God rest oleum oil based paint for metal doors. When do I had put kill on, The other I did not. The door with the kills I started rolling first and used a new regular roller, LINT has stuck to the paint, it looks horrible nor did it dry after 14 hours and I had to lock it up before I left so I know I will go in there tomorrow and it’s stuck shut. The door I did not primer dried and of course it was after I had used a roller so there was no lint. 1st question how do I get rid of the lint, 2nd Is it not drying because I put kilz on it? With metal sanding paper work and I could start over with a sponge roller?
Ok, I give up. What’s the deal with the Prep H. Just because painting metal doors is a pain? Inside joke kind of thing? Or is there a real use?
Call me gullible…..
If you read what he said it was that he tried 7 different preparations. First was preparation A, then preparation B, etc a total of seven times which ends with G. The next one was his success and that would be #8 that correlates with the letter H as it is the 8th letter in the alphabet. So, Preparation #8 translates to preparation H. Hope that answers your question.
Thanks! Didn’t catch that. Makes sense.
I also was thinking the same exact thing about Prep H! I read the article and was still waiting for when I should buy/use it.
I messed up… didn’t do any research and just cleaned the door and started slapping the paint on with a brush…. definitely left streaks… I did half the door and called it a day AND THEN thought I should look up how to paint the door. Now it’s a mess… how do I fix it? Ugh!
Thank you your article was very informative and so far I think I can do this. You don’t mention a primer , yes or no. Also the metal strip on the bottom of the door is old can I remove it safely. My son says Mom, it could mean a disaster. What do you recommend.
Hi Donna. If your paint is in good shape and you’re painting with a similar paint (eg. water based paint on top of water based paint), then just cleaning what is there and painting over it should be fine. If the paint is in poor condition or you are switching from oil-based to water-based paint (or vice versa), then I’d probably use a primer. It sounds like the strip you are referring to is a weather strip. If so, it should be replaced with a new one. That might be a good quick task for a handyman if you’re not comfortable doing it.
What is that prep H used for in painting?
My steel door has a large oval window I see the screw holes you mention in the trim around the glass. When I pop those out and take the screws out will the glass stay in? If so, can I then just cover the glass and paint the door and then paint the trim (ring) around the glass separately and screw back in? Thank you!
I think I will try Preparation H. I hope it feels good, on the whole.
I have metal doors at my house and they were initially painted crap brown. So last year I spent a ton of time and effort stripping off the paint [the builders paint job was a major mess] got everything sanded cleaned, applied two coats of klutz primer followed by 3 smooth coats over several days of Valspar exterior door and trim paint [DO NOT USE] Went to pull of painters tape when it was time and ended up takind off some of te paint. I smoothed that out and touched up the pant and thought everything was fine. Unfortunately even weeks later if you hit the door or painted wood trim with your finger nail or got the door with your keys, the paint just scratched right off. Months later the paint started scratching or running odd with the slightest touch and even the wood shutters I painted to match the door and the door itself had paint starting to bubble up. So I am currently in the process of attempt number 2 with sherwin williams exterior paint, thanks to the weather lately though I was.only able to apply the two coats of primer and two very thin coats of actual paint. So far however the paint seems to be staying relatively well. I’m using a mini foam paint roller. My advice NEVER buy a darn metal door in the first place get a fiberglass door with the paint cured into the material so you never have to worry about it. The amount of time and effort spent dealing with these doors is unbelievable. [The windows had to be taken out and re-caulked since they were leaking water into the frame]. If I would have known how much of a pain these doors would be I would have just bought new fiberglass doors and be done with it, because at this point between the supplies and time spent on fixing them the cost wood have been the same if not cheaper. Don’t even get me started on the very very crappy plastic window framing that doesn’t seem to want to hold paint no matter. What you do to prepare it or if the builders mess up the crappy frame how expensive those plastic pieces are to replace [100-160] depending on your window size.
So my advice after all this fun, is to ditch the metal door entirely and buy a fiberglass one, they last forever and you don’t have to worry about them rusting like a metal door, rotting like a wood door or shrinking and swelling like metal or wood. I live in louisiana so I have no clue why anyone would have installed a metal door in the first place, we get to much rain and humidity for those to last very long. I’m just hoping my final coats of paint this time actually work and last longer than the last type of paint.
My daughters friend painted her metal blue front door with chalkboard paint the landlord is not happy. How can we remove without destroying blue main paint. I know there was no prep done before hand . would just a steamer work or possibly nail polish remover
A Savior ! of a commentator :)…..I finally found my color (yellow) and started to paint using my skills from painting jobs in the past.
A few brush strokes with a good horse hair fine bristle and I knew something was not right 🙁 .
I will use Prep H combined with a couple other factors that I learned from calling up the painter I had paint my house “Body”. He said to mix in some latex “Extender” for a slower drying paint and a bit thinner for a smoother nap (surface)…. If anyone reading has any warnings for me please comment after..Okay ?
Hi, Eric! I’m so glad that I came across your post because I’ve been thinking about how to go about painting my steel door. I recently purchased it from a hardware store, and I’m really wanting to paint it green, just like in the picture on your article. I think you’re absolutely right: you need to make sure you’re doing your best to make sure you’re preparing the door to be painted. I’ll be sure to follow your suggestion by making sure all my edges are taped so I don’t get it on my floor. Thanks for sharing this post with us — hopefully mine turns out as good as yours!
Painted my steel door several years ago. Apparently when cleaning around the door handle months later where dirty finger prints are, I used a cleaner that softened the paint. Now it’s tacky/sticky in that area and the paint is coming off. It’s been like that for a year now. Any suggestions for correcting this problem?
Preparation H… on the whole.. feels good. I’m dying.
Can you paint the trim around the window as well instead of taking it off?
I removed several coats of latex paint from my metal door. White, brown,blue, terracotta, pink, red, and( beige, two coats.) OK. I am an artist. The door is on the west side of my home and it gets hot enough to fry an egg. ( Never tried this). Most of the paint, when hot, peeled off in large hunks, except on the top panels. I then bought some spray-on paint remover. Big mistake. It was $8 and it only removed the top 2 beige coats. Messy, Messy. Then I tried to clean this big mess with paint thinner. It ran down the door and made a worse mess, over my nice metal I had just uncovered. It gobbed down the door. So sticky! The red in the layers of paint ran all over the place, under the newspaper I had placed on my vinyl entryway. I tried to clean it with the mineral spirits, but it bonded with the vinyl and turned HOT orange. lol ( Now I have another job) No big deal, I had to replace this anyway. Eyesore for a while. Then I let it all dry, then painstakingly chipped the rest of the paint one eighth of an inch at a time, and my arthritis flared in my hand and my neck ached from pounding overhead. Next, I sanded the door with cheap sandpaper, not wanting to spend any more money. Big mistake. I should have got the sandpaper for metal .Now i have a shiny metal door.–with two rust holes. I went to the store- 8 miles away -and bought a repair kit for metal. It really scares me. Now the whole door does. It is so-o-o shiny. It petrifies me. i went to the store 20 miles away and got spray paint– gray primer for cars. Going to try to spray vertically. Going to spray the brass doorknocker oil-rubbed bronze along with the deadbolt thingy and the doorknob. And I got paint chips at the store because I do not know what color to paint the door. I am also painting my metal table and chairs on the deck. Also 2 decks and railings and the lattice work underneath. ( I already trimmed the bushes.) I have a home refi, and the banker will take photos. I am 63 and that door still frightens me, all shiny in the sun. I have pinnned this article on my pinterest board, and—Thank you very much. I wish you could visit and do the rest of the door and maybe the chairs. Sorry this is so long but I was almost at my wit’s end. Where there is a will there is a way?
Great ideas on exterior door painting?% to you !!
I did not keep it wet enough on the first two coats. Looked very uneven. I will lightly sand and add a coat based on your great advise.
Thank you so much never had metal door before gonna give it a try!
Thanks for the great advice, wish I’d read this before I painted my steel door yesterday!
When painting a exterior steel door, do you paint the edges on both sides as well as the face ?
up to you… I often paint the edge that faces out when the door opens (the hinge side) the same as the exterior and leave the latch edge the same color as the interior side of the door. Or you can just paint the exterior surface of the door and leave the edge sides white (or the same color as the interior).
Wow looked everywhere for repainting our metal front door and all say we have to strip old paint off – until we found Prep H! Our door is in good shape (not peeling, no rust or bubbling), just faded. This was exactly what we wetter looking for! Thanks a million!
What do I do with the Prep H and can I paint now (November)?
Thanks this sounds like just what I needed. Done messed up once,(used a brush) and you are right on Don’t use a brush. Preparation H is my plan.
Thanks so much
Pop