
 Building fences is sweet. It is a relatively simple way to really dress up your yard, and if built high enough insulates you from neighbors, sweeping mountain vistas, and the awkward explanations as you stumble out less than dressed on a Saturday morning to let the dog out. In some regards it makes an outdoor room for your other home improvement plans. Decks, gazebos, grilling areas, outdoor fireplaces, catapults, all of these improvements can be enhanced–and sometimes included with a nice fence.
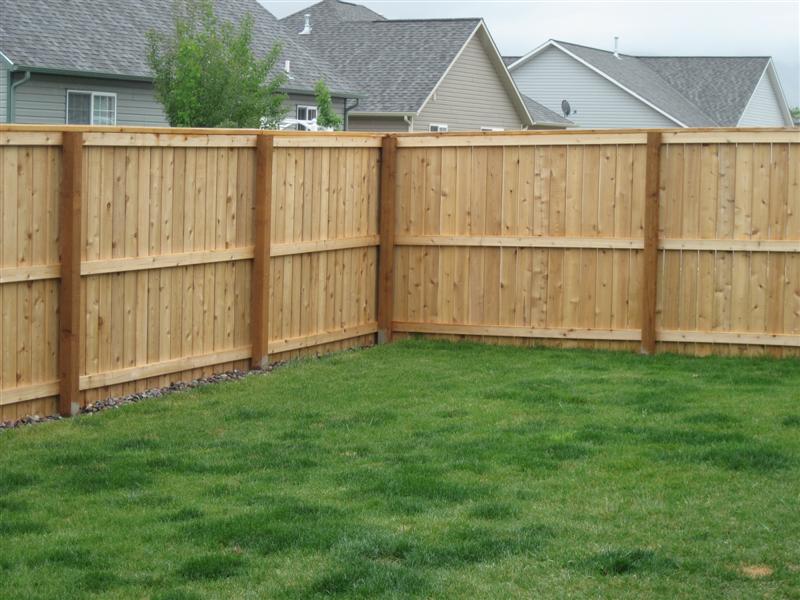
Also–it doesn’t take a ton of tools or planning to make a really nice fence. The idea for our fence was one of utility. The garage faces the alley–as do the other houses in our development so there is quite a bit of neighborhood traffic back there. The fence gives us a bit of a barrier against alley noise, and makes a nice yard for the dog to lie about soaking up sun. Plus, we don’t have to worry about her wandering off, or going Cujo on any of our neighbors.
In my deck planning article, I mentioned pounding in some stakes and using string to get a feel for the size and lay-out of the deck. Same principle here for your fence. I do need to mention that as we are setting posts in the ground–you are going to want to have either the utility company, or a underground service locating company do this. Gas leaks, water geysers, and electrocution are not cool. Do yourself a favor and get things all located before doing any digging. It just makes fence sense.
For us–we used the driveway, alley and one edge of the house as a guide. It really didn’t matter how square everything was (or wasn’t) as they were fixed anyway. I couldn’t really geek out with my neurotic need to make sure all the fence posts were square. Considering my assistant…some things are just best left alone.
Some quick measurements–and we had the corner posts all laid out, and could see where the fence would go. Pretty easy stuff. A bit of spray paint on the grass, and boom–we were off and running.
It is hard for me to admit disliking a tool–but a post hole digger would have to be one of them. Most of the time they involve: Blisters, sweat, and swearing. They are what ol’ Gramps would refer to as a “character builder”. If you would like your children to grow up learning how to curse like they just finished up a tour in the Navy–by all means–let them use a post hole digger. Apparently that is the “character” these types of tools teach.
I decided to dig about 24” into the ground to get deep enough for some good concrete–and simply so I didn’t have to cut any 4”x4” posts. I was able to set a roughly 6′ finished fence height by keeping my holes a consistent depth. Also–this depth will prevent (I hope) any frost heaving from the winter freeze/thaw cycles.
A few sacks of Quik-crete and I was ready to mix and pour. A quick note about mixing the pre-made bags of concrete…start with less water than you think you’ll need. Trust me. It is much easier to add water than it is to wait about 6 months for your extremely thin (soupy, wet) concrete to set up. Plus, it will be brittle as heck and one good tennis ball rampaging Labrador can crack it–making your post pretty well useless. Also–do me a favor: Wear gloves. Don’t do something silly like use your hands to make concrete castles. The chemical reaction that is under way in concrete will literally burn your skin. Don’t say I didn’t tell you so.
The consistency in which I mixed my concrete allowed me to get most of the posts in, plumbed (or “leveled” if you are my wife. The girl has multiple degrees from a (accredited!) University…and I cannot teach her the difference between level and plumb <sigh>), and set before the concrete set up.
The posts are in–now you can begin to focus on the stringers, or boards that will make up the frame of your fence. Stay tuned. I’ll cover how to go about installing your stringers, fence boards, and finish it off in grand style.
Thanks for those concrete tips! I would have definitely added too much water like you said. I am planning out where I want to put up the fence on our land, and I was wondering exactly how some put up theirs. I’ll make sure to make the posts the right way.