

Cutting boards are always a fun and practical project for woodworking newbies and experts alike. Whether they are simple or complex, they serve a purpose; cutting food! Here is one I recently made that is borderline newbie to intermediate. I call it the ‘Herringbone Cutting Board’. It’s a little different than most cutting boards but it looks great and would also be a great gift. I gave one to my mom this past Christmas.
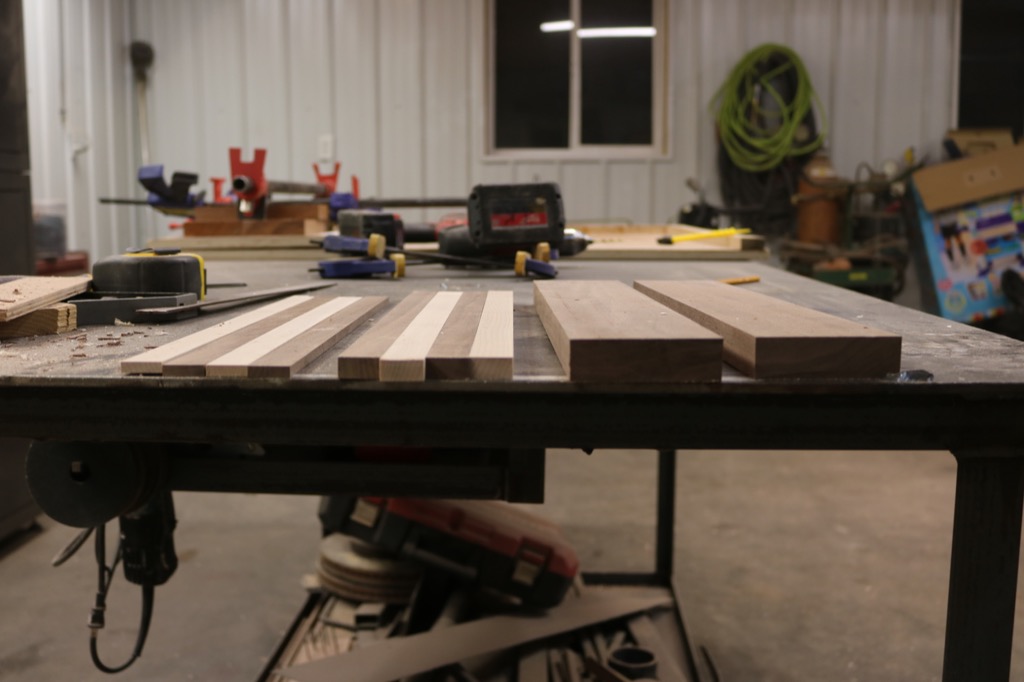
For some nice contrast, I decided to go with Maple and Walnut. I set my fence to 3/4″ and ripped down a few strips that were approximately 3′ long. I ripped 6 strips in all, 4 will be used for the herringbone and the other 2 will be used later
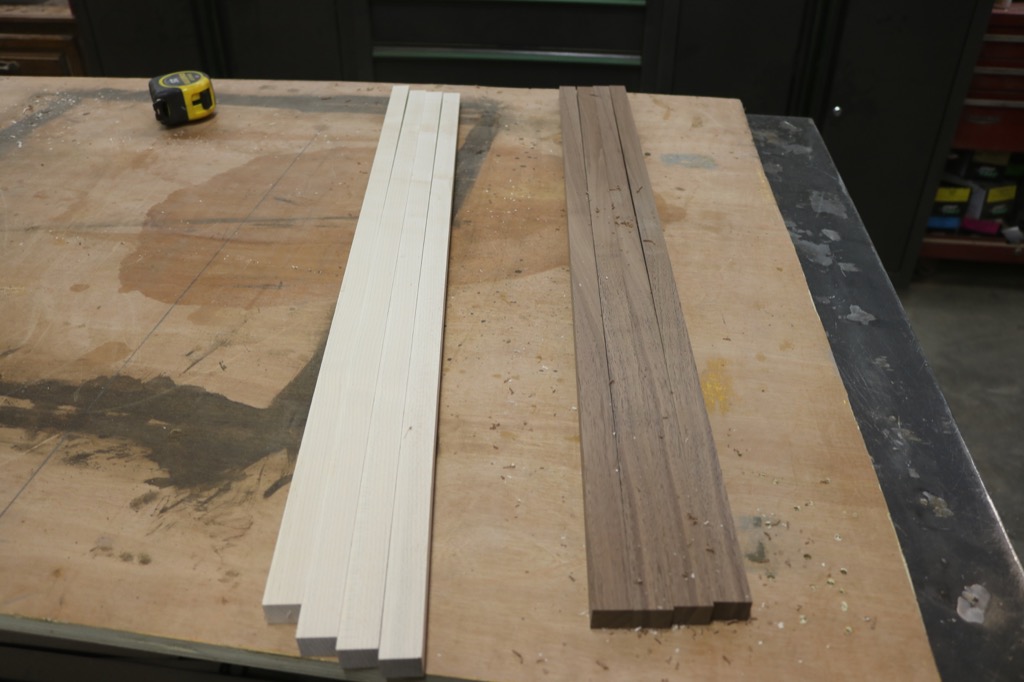
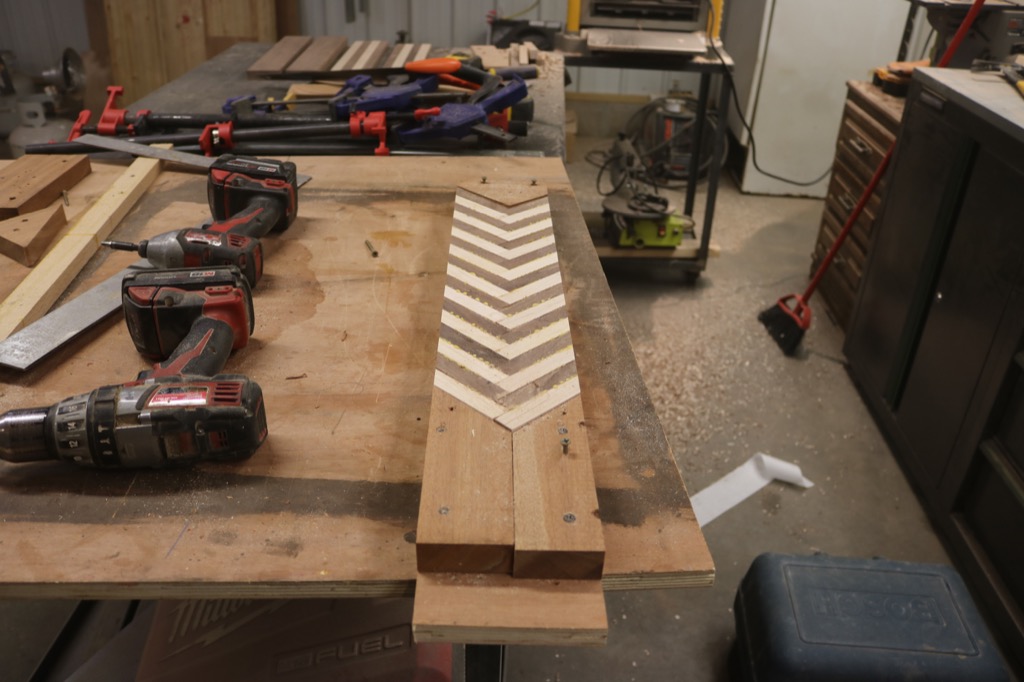
After the strips were ripped down I placed a backstop on my miter saw at 4″ and proceeded to cut approximately 22 pieces of each. After I cut all the 4″ pieces I made a clamping jig.

The jig is something for the herringbone to sit into. I took a piece of flat stock and cut a 45 degree angle into it. Then with the leftover, I used that on the end of the herringbone. This was cut out with my bandsaw. But can also be cut out with a jigsaw, miter saw or scroll saw.
Now for the toughest part. Make sure that you have plenty of glue on these pieces and go quickly here because the glue will set up fast.
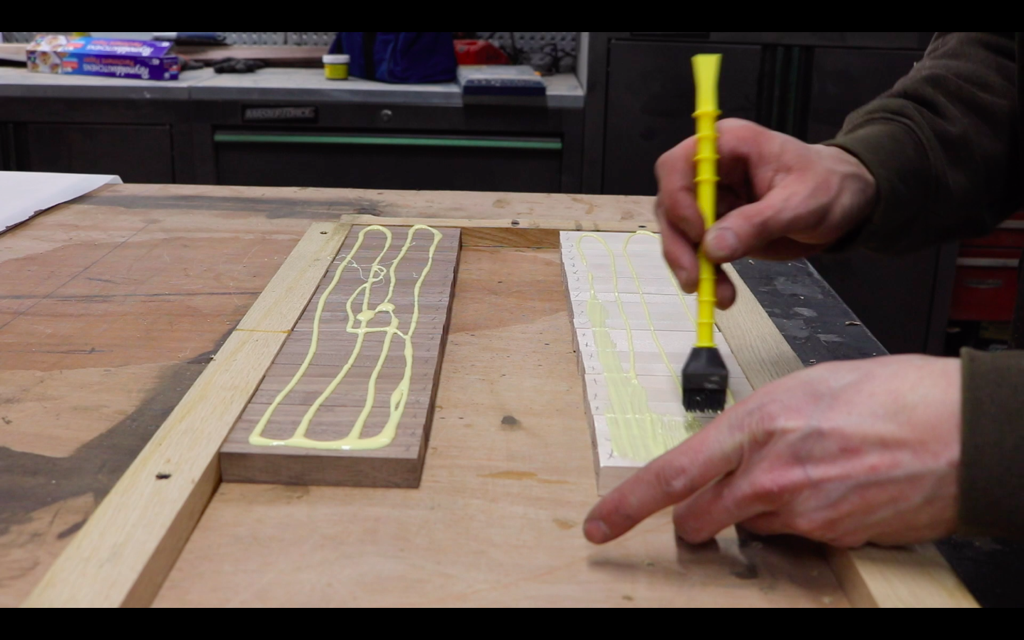
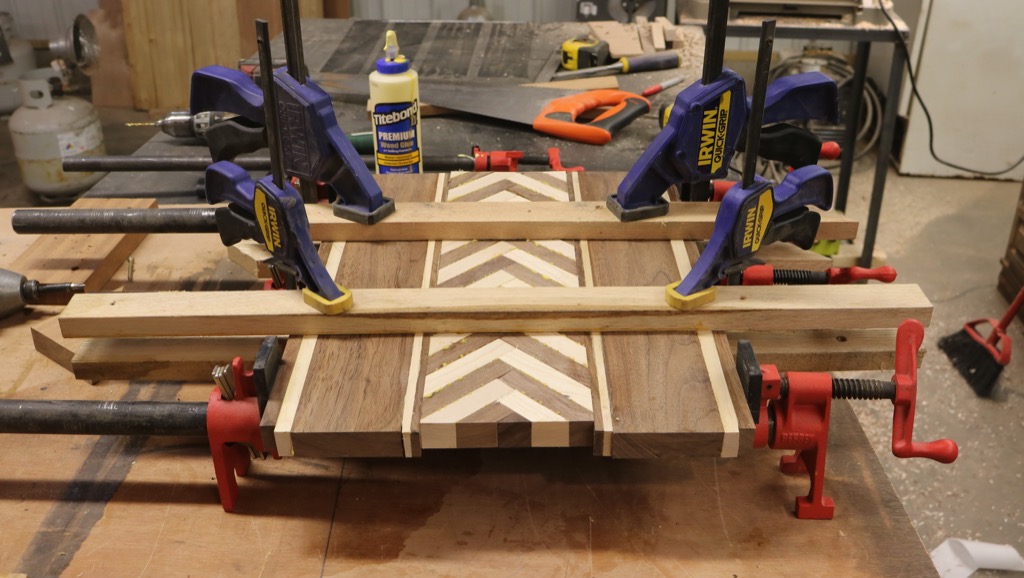
I used a liberal amount of glue and used a brush to spread the glue. Then it was time to stagger the pieces. I used a piece of parchment paper so that the glue would not stick to the scrap plywood underneath.
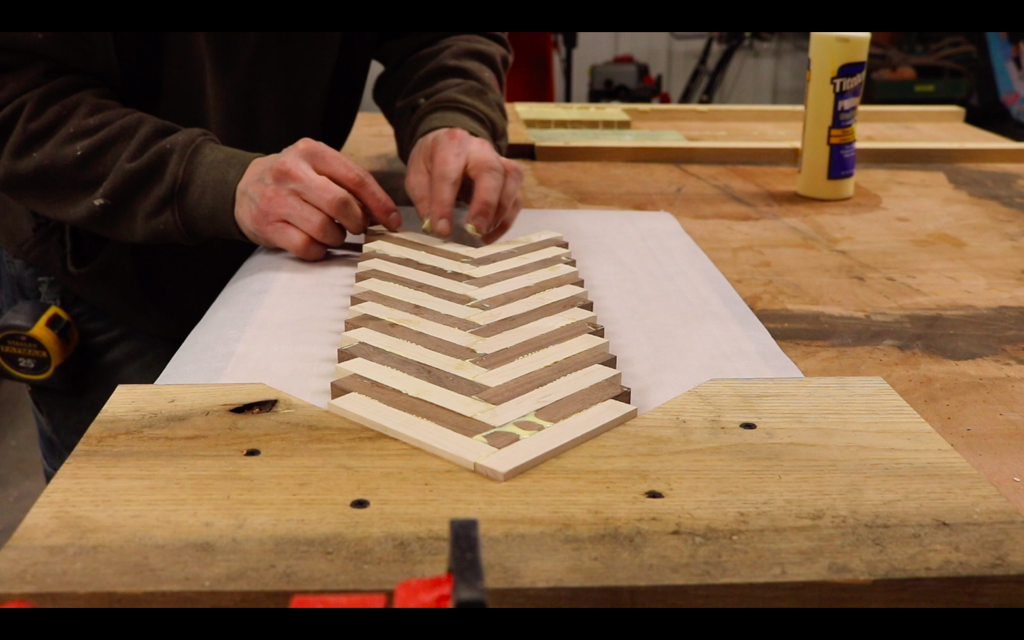
For clamping; I clamped runners on the side and one pipe clamp across the front.

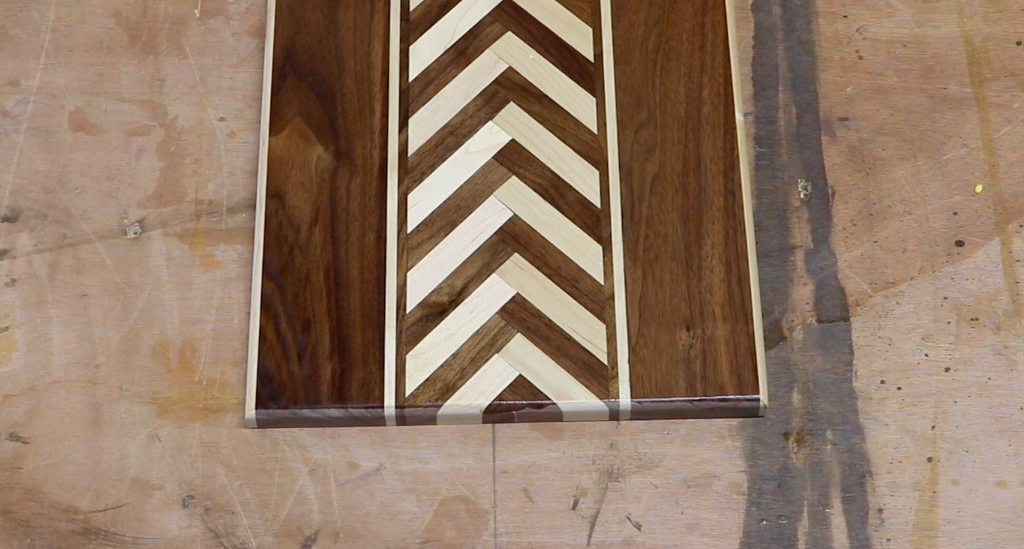
While the herringbone section was drying, I cut and ripped the outside edges. I wanted the pattern to go, herringbone, maple, walnut, and maple so I started working on the outer strips. I cut down the strips of 3/4″ stock that I previously ripped down to 17″ lengths.
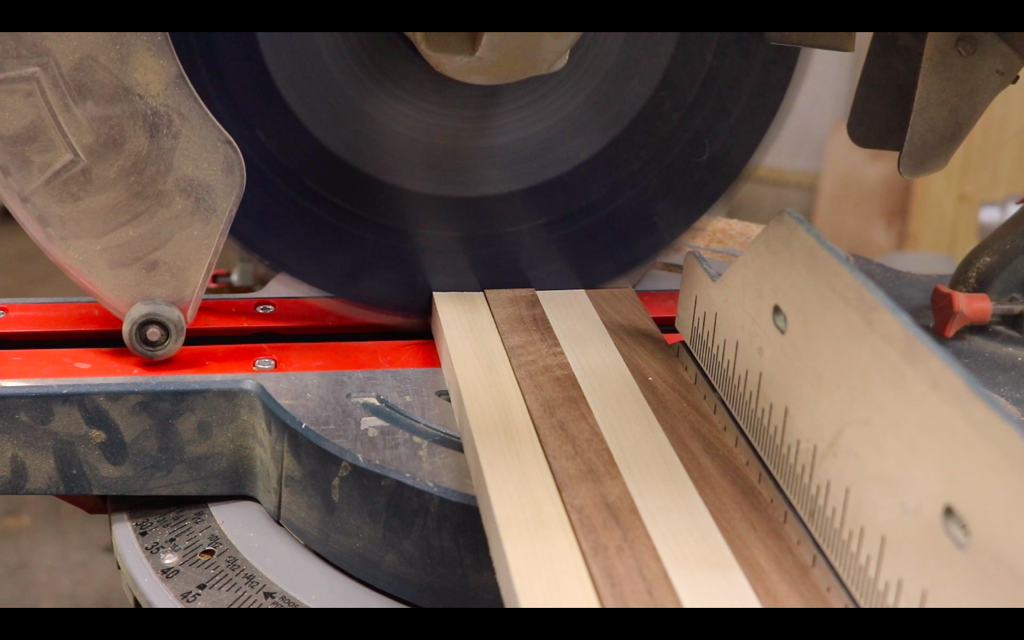
The strips were planed to 3/16″ and 3/8″ and then the wider walnut strips were ripped to 3″ and also cut to the length of 17″.
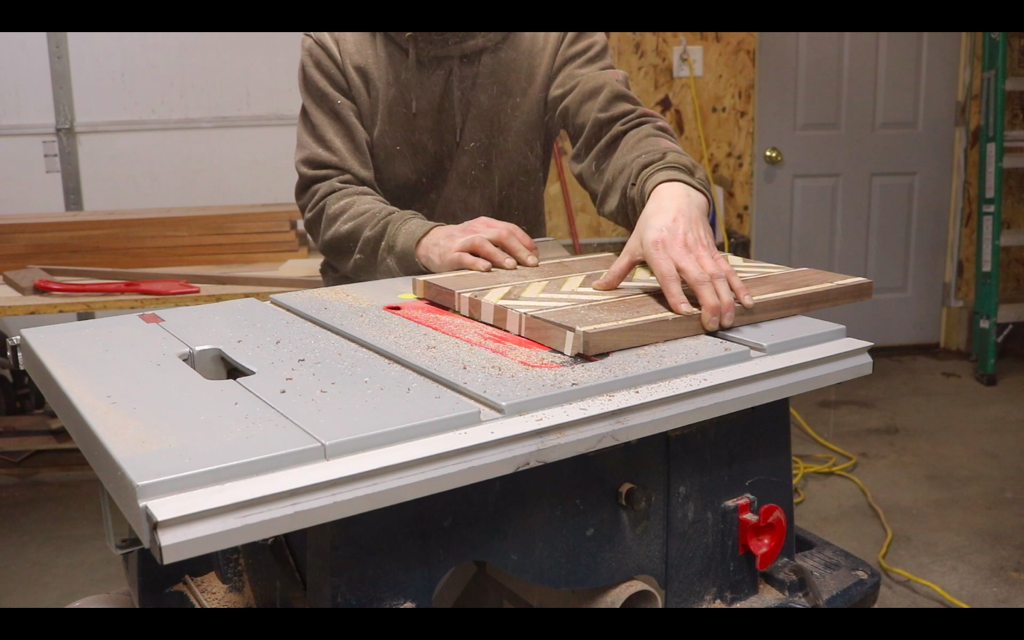
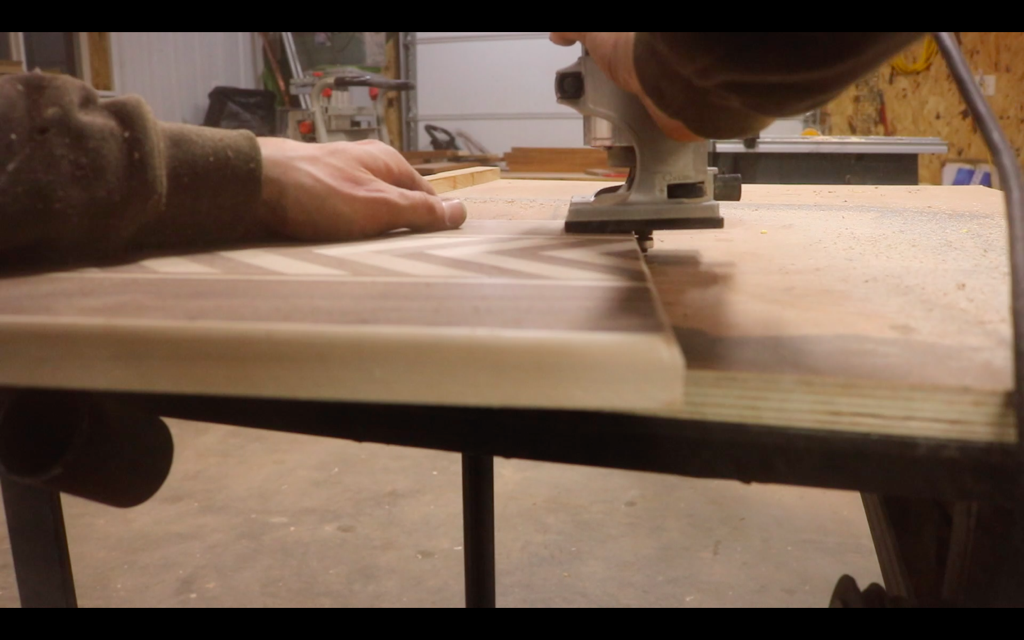
Once the herringbone was dry I had to square that up. For this I used a combination of my miter saw and table saw.
Now it was time to clamp the rest of the board together. I should mention that I’m using a wood glue that is water resistant. Follow your preferred glue’s recommendations on dry time.
Once the entire assembled herringbone cutting board dried, I squared everything up again.
Then I put it through the thickness planer, only going about 1/64 at a time.

I noticed a couple small gaps, (we like to call that “character” – SHHHHH, don’t tell anyone!), so I made a mixture of walnut dust and wood glue to fill them. I let that sit for about 30 minutes to dry.

No one wants a wood piece with sharp edges, so I took my palm router with a quarter round bit in it and used it just to round over the top.
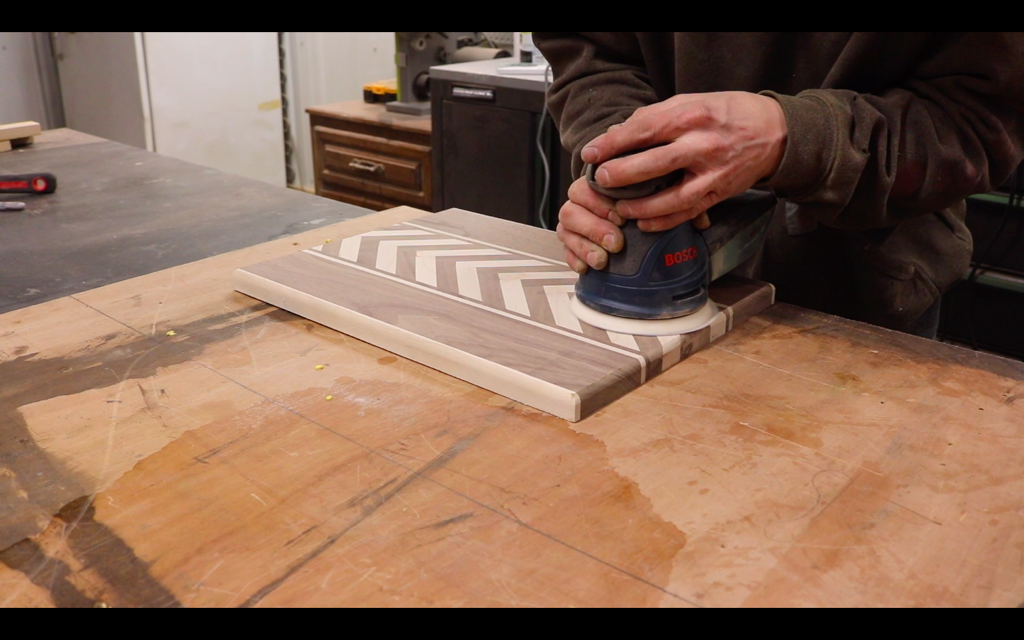
After that I used an orbital sander to get everything smooth. I started with 80 grit, followed by 120 and finished with 220 grit.
Lastly, I applied some walnut oil to all sides of the cutting board. I used a soft cloth to apply the oil. Then removed the excess with a dry rag.

Voilà and “Bon” Appetit – the finished product! We hope you enjoyed this little tutorial and hope it inspires you to make a herringbone cutting board of your own!
That’s a great looking board! Well done.
Excellent descriptive project article. Thanks so much!