Getting nervous because the lights dim and flicker every time the fridge kicks on? Finally got that new table saw, but the breaker trips every time you fire it up? Sounds like it might be time to add a circuit. With a few simple tools and supplies, a bit of electrical knowledge, and a LOT of caution, it’s a fairly simple project. We’ll show you how to add a circuit to your existing circuit breaker.

Note: Be aware that it can be dangerous to add a circuit. It involves removing the cover from your breaker box, and working near live wiring. If you’re not REALLY careful, it can kill you, which would likely put a damper on your whole project. If you’re uncomfortable doing this type of work, or you’re fairly accident-prone – or you really do have lights that dim and flicker – call in an electrician.
Tools And Supplies You Need To Add A Circuit
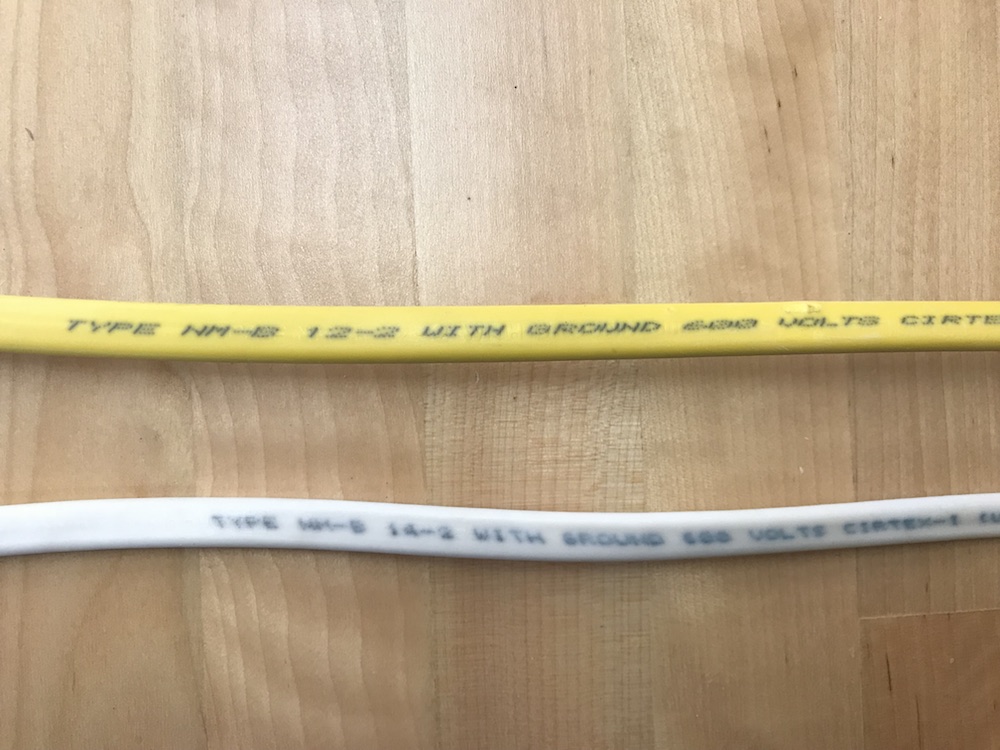
There are two types of cable, commonly known as Romex, most frequently used in household wiring. Lighting or other relatively light-duty circuits generally use 14-gauge wire. For appliances and other circuits where there will be higher current draw, 12-gauge wiring is typically used. Both are readily available at home centers and hardware stores, as are these other tools and materials.
• Wire strippers
• A hammer
• A drywall saw (for old work)
• Regular and Phillips head screwdrivers
• Outlet boxes, either old work or new work
• Outlets and switches for new circuit, either 15-amp or 20-amp
• Romex cable: 14-2 for lighting circuits, 12-2 for tools or appliances
• Wire staples
• A cable clamp, one for each circuit being added
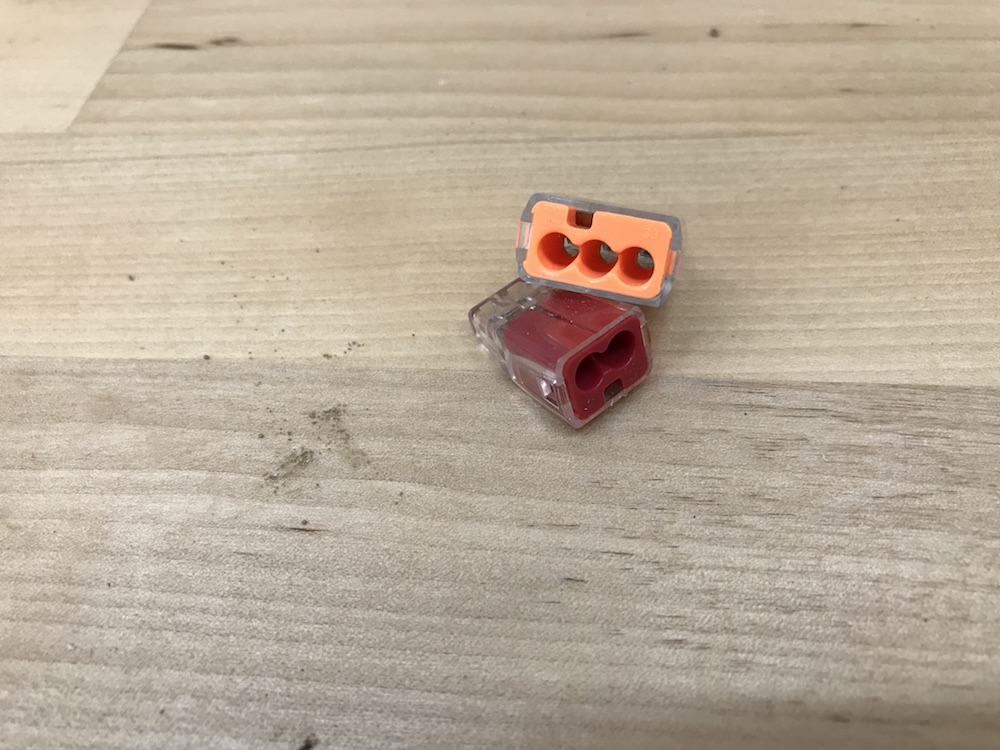
• Wire nuts or push-in connectors
• A circuit breaker compatible with your breaker box. Get a 15-amp breaker for 14-ga. wire, a 20-amp breaker for 12-ga. For outdoor or damp locations, GFCI breakers are available, and may be used in place of GFCI outlets.
I’m Not Yanking Your Chain – It’s Easy To Add A Circuit!
On a recent project, I added 25 four-foot LED shop lights in my new shop building (stay tuned, that article is up next). Even though LED lights are very energy efficient, if I’d added them all onto an existing circuit, my new nickname would probably be “Sparky.”
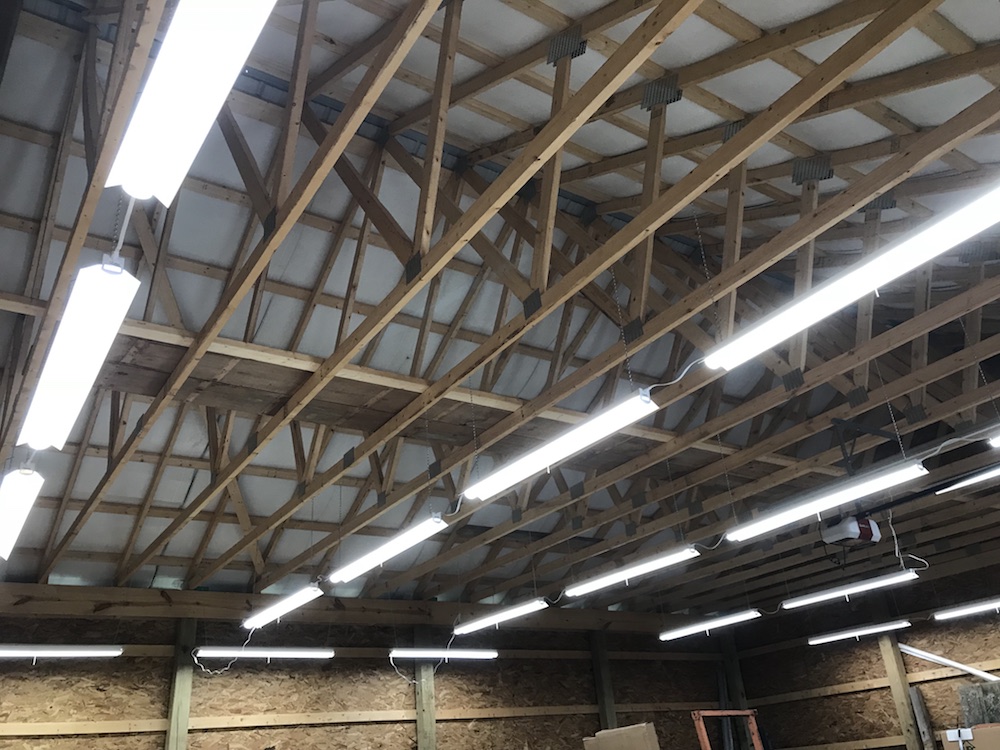
I had plenty of space in my breaker box, so I added two new circuits. Because I’m inherently lazy efficient, I also decided to connect all the lights onto switched outlets, so I wouldn’t have to pull 25 chains every time I wanted to turn the lights on or off.
When you add a circuit, start by installing your device (switch or outlet) boxes. Run your cable between all the boxes, installing outlets and switches as you go. Route the wiring along studs, joists, or other framing, to get it from box to box. Staple it frequently for support, and drill holes where necessary to keep it from being pinched or otherwise in the way. Your local codes will likely have requirements for all this.
Providing An Outlet For Your New-Found Power
The primary focus of this post is to instruct you on the finer points of how to safely add a circuit to the main breaker box. Since most new circuits are used to add outlets, we’ll include a quick primer on outlet installation.
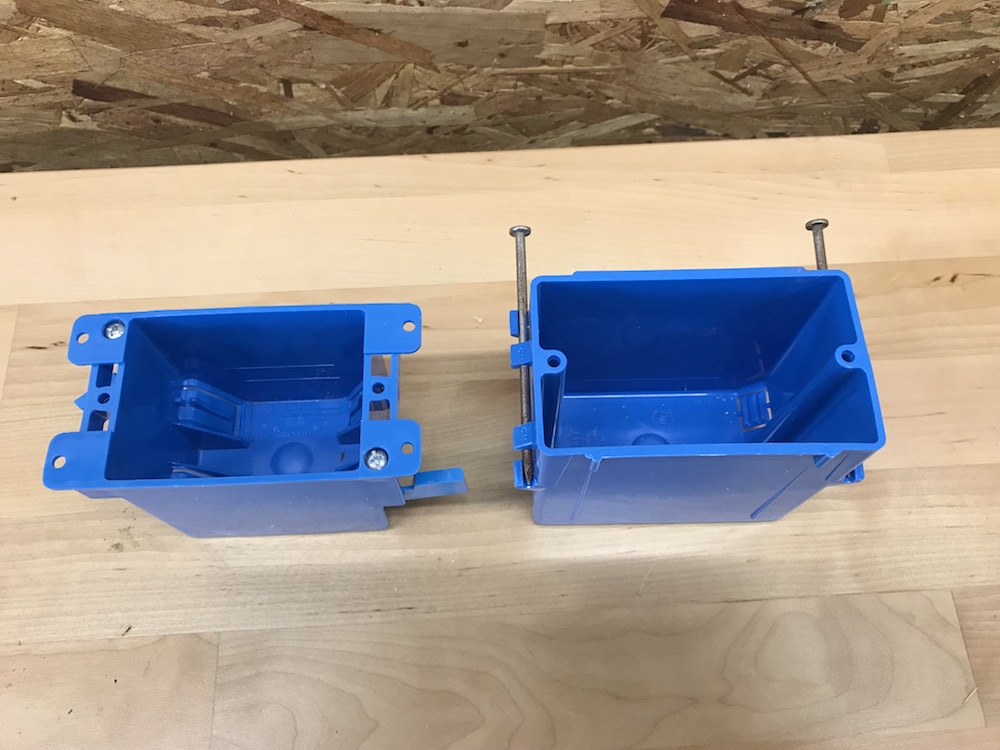
Step One is to give those outlets a home. Electrical device boxes come in many shapes and sizes; a standard box for an electrical outlet or switch measures roughly 2-1/4” x 3-3/4”, and comes in plastic and metal versions. They’re available in various depths; if wall depth isn’t an issue, a deeper box makes it much easier to tuck in your wires.
Boxes also come in two types: old work and new work. If you have access to the framing, you’ll want a new work box. It attaches to a stud or joist with nails or screws. If you’re adding a box to a finished wall, you need an old work box. After cutting a hole in the drywall, you fish the wiring through the wall, and into the back of the old work box. Then you insert the box into the cutout, and a couple of little “wings” expand out to hold it in place.
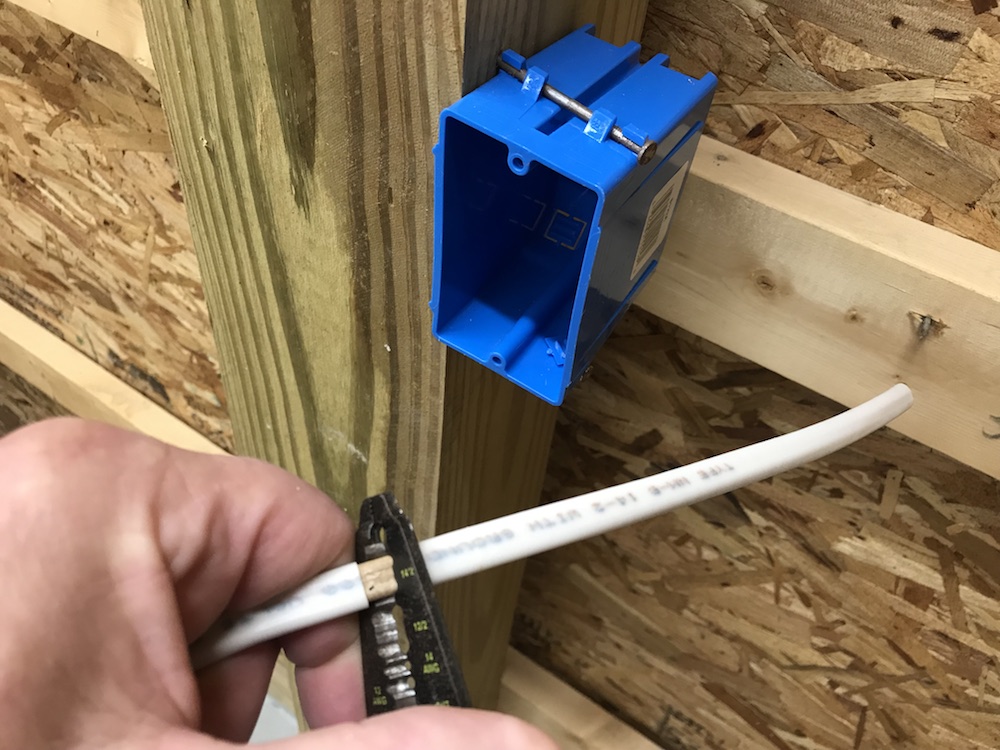
If you’re using new work boxes, attach them all to the wall, then run the wiring through the holes in the back of the boxes. If you’re working with old work boxes, make your cutouts in the drywall, and fish the cable through the drywall where the boxes will go. Leave enough cable to have about 6-8” of wiring protruding from the box, to make attachment to your receptacles easier.
Pro Tip: It’s easier to start stripping the sheathing from the cable before pulling it into the boxes. Make the cut and pull the sheathing back about half an inch, but leave it on until the cable is pulled through, then yank the sheathing off. Leave about ½” of the sheathing inside the box.
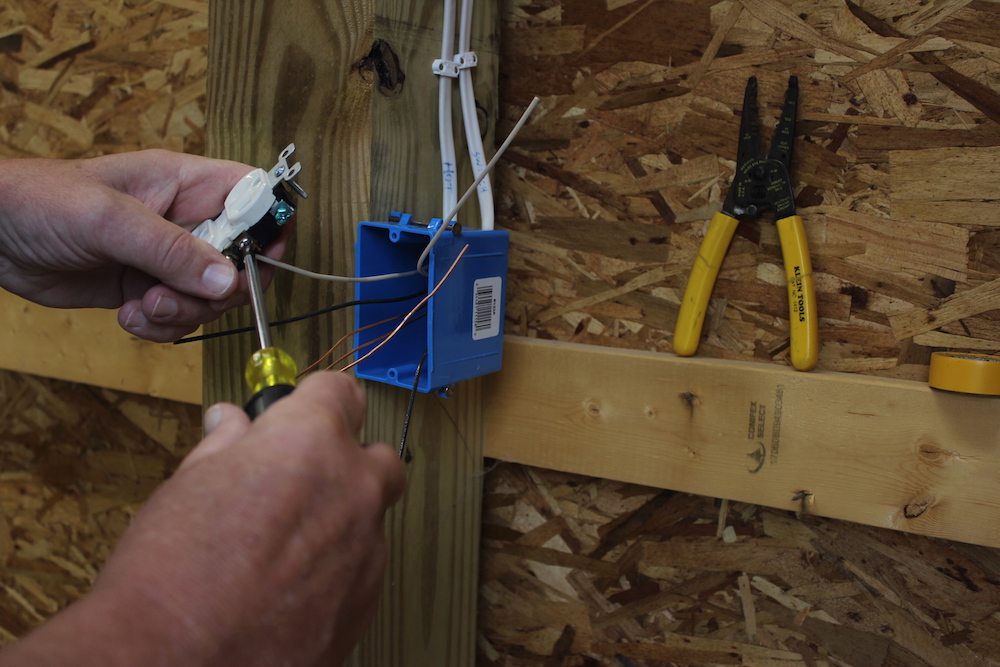
If you have only one outlet on your circuit, for a high-demand appliance like a refrigerator or table saw, your job is simple. Attach the ground (bare or green) wire to the grounding terminal. Strip about ¾” of insulation from the end of the white and black wires, and make a U-shaped bend at the end of each one.
Next, take the white (neutral) wire from the “hot” inbound cable, and connect it to one of the two silver screws on the outlet. This will be the side with the larger of the two prong openings. Make sure your screwed connections are good and snug. Many outlets also have holes in the back for “push-in” connections, but most electricians use the screw terminals, as they’re less likely to come loose.
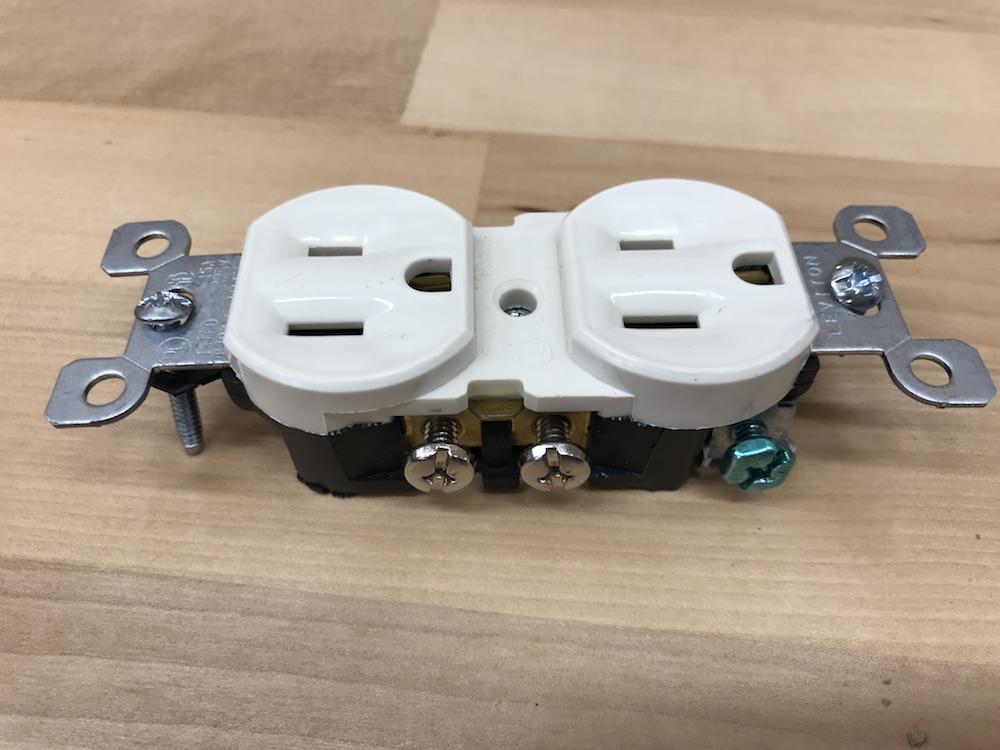
Now attach the black wire to the copper-colored screw, on the side with the shorter prong opening. Tuck the wiring carefully into the box, attach the outlet to the box, and install the cover plate. All done!
If you’ve got more than one outlet, you’ve got a little more work to do. Pull the “hot” wire, which will be providing the power, in to the box through one opening in the rear, and the “power out” to the next outlet through another.
Pro Tip: To make sure your power is continuous, even if an outlet goes bad, make “pigtails” for all three conductors. Cut a piece about 6” long of black, white and bare wire. Connect your incoming, outgoing and pigtail wires of each color together with the same-colored wires. Either twist them together and use a wire nut, or use a push-in connector if your codes allow.
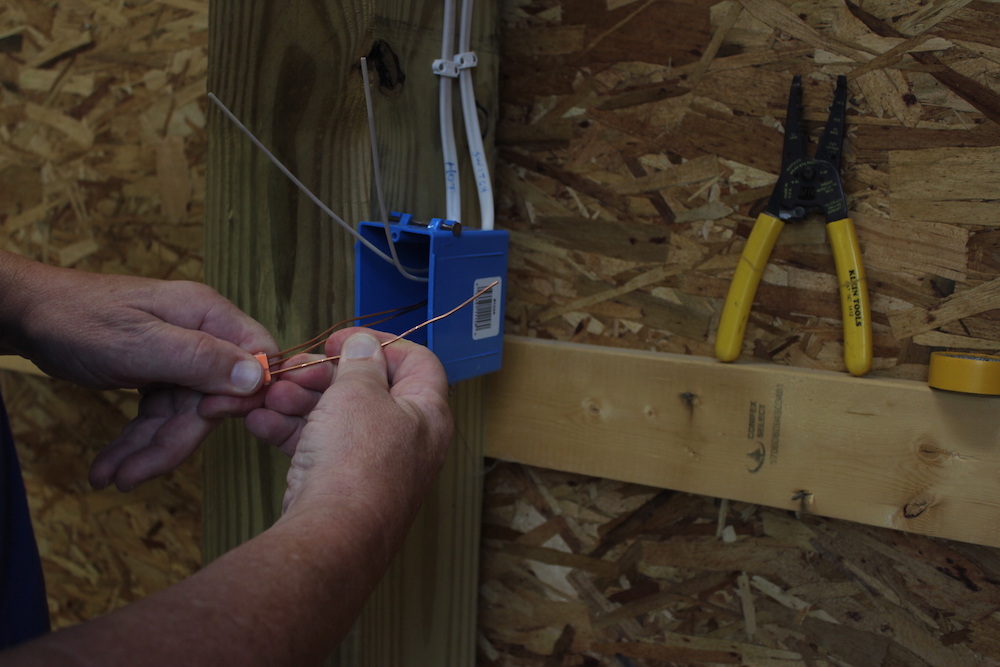
Now make a U-shaped bend in the end of each pigtail. Secure the ground wire to the green screw on the outlet. Attach the neutral (white) wire to one of the white terminals on the outlet (on the same side as the ground screw). Attach the black pigtail to one of the copper-colored screws on the outlet. Carefully tuck the wires into the box, push the outlet into the box, and secure it with the attached screws. The outlet at the end of the run is wired as if it were a solo outlet. Once all the outlets are wired, it’s time to attach your string of outlets to the breaker box!
How to Add a Circuit – Time To Focus!
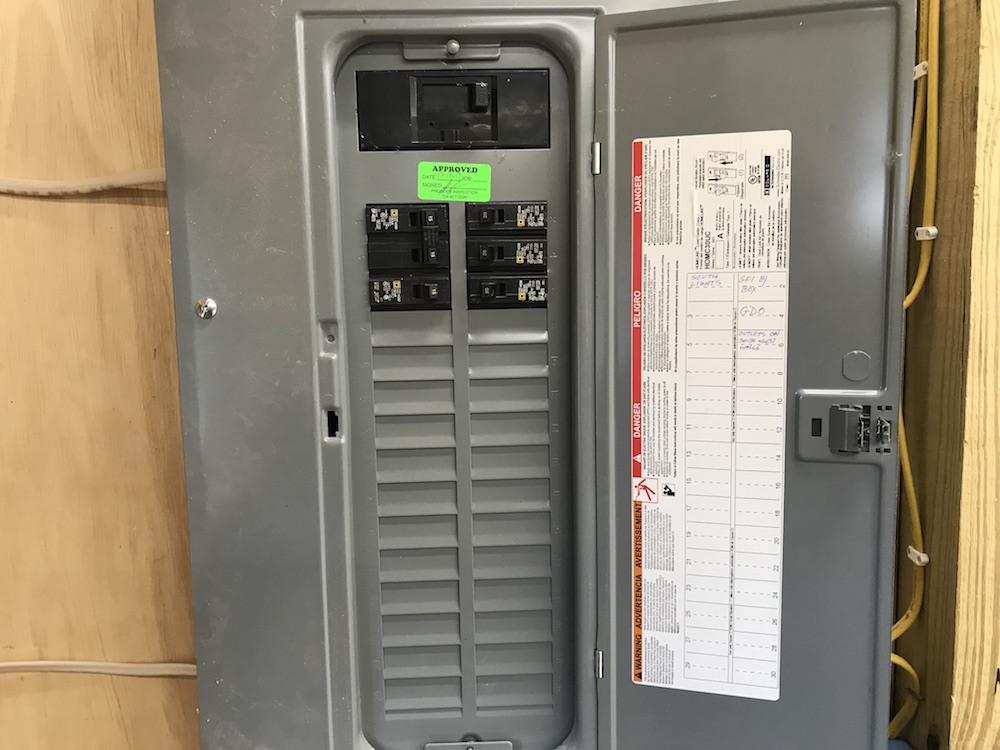
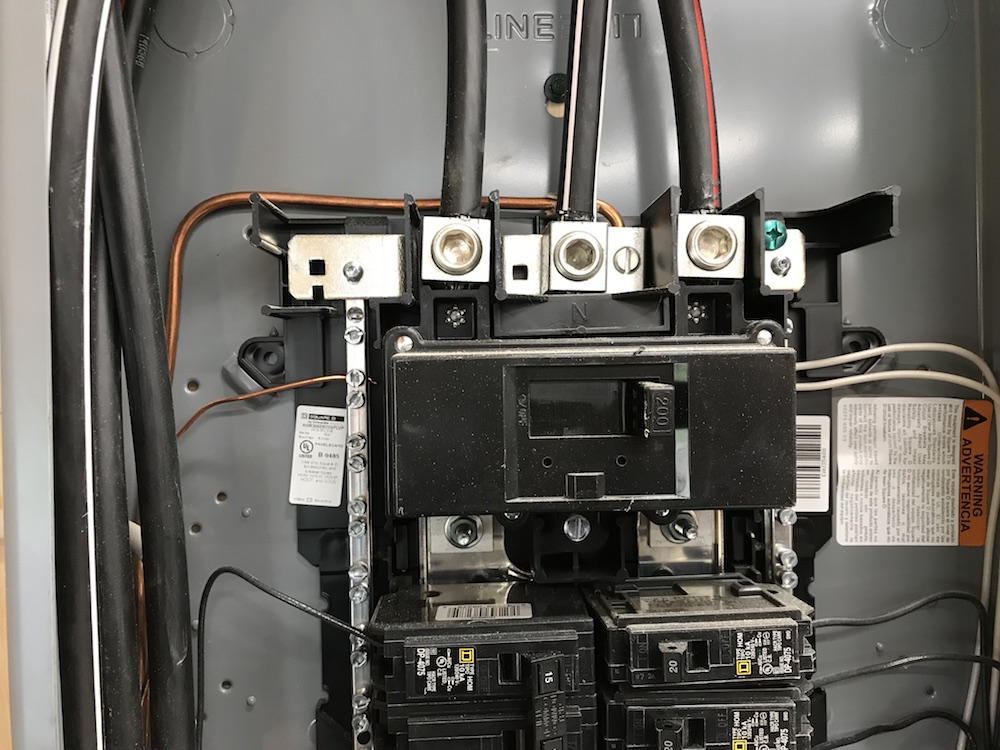
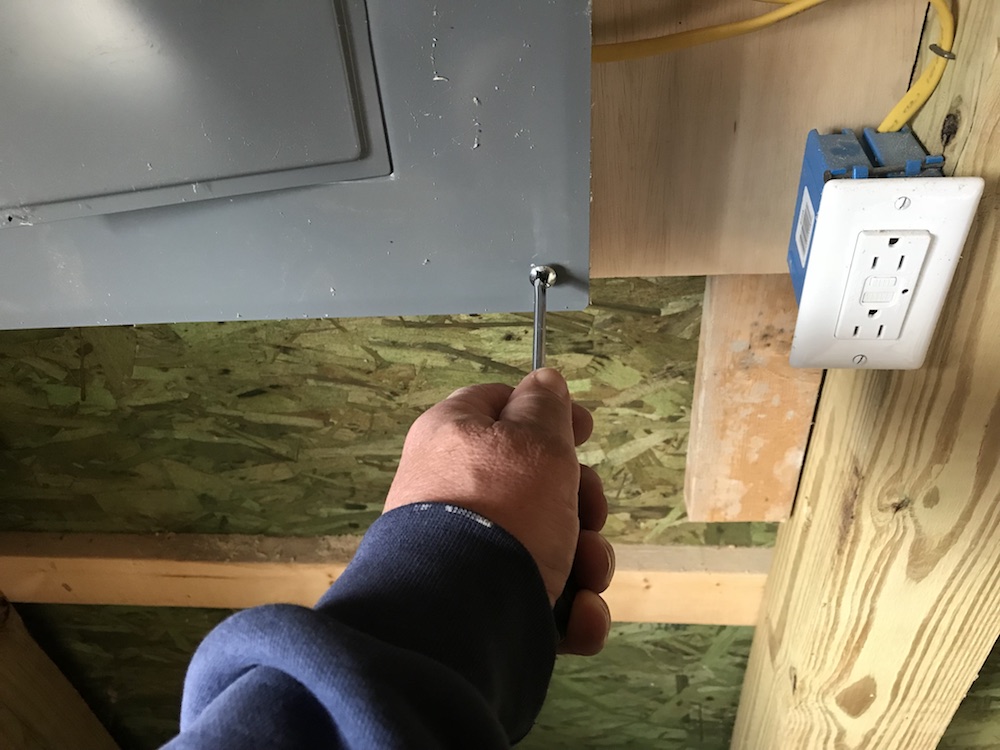
When you’ve got everything installed, run the cable over to the breaker box. Now it’s time to start being extra cautious. For maximum safety, flip the service disconnect (main breaker) to the “OFF” position. Caution: Although most of the panel is now safe, the large service cables coming into the service disconnect are still live – and they pack a LOT of juice!
Lose A Knockout, Add A Circuit
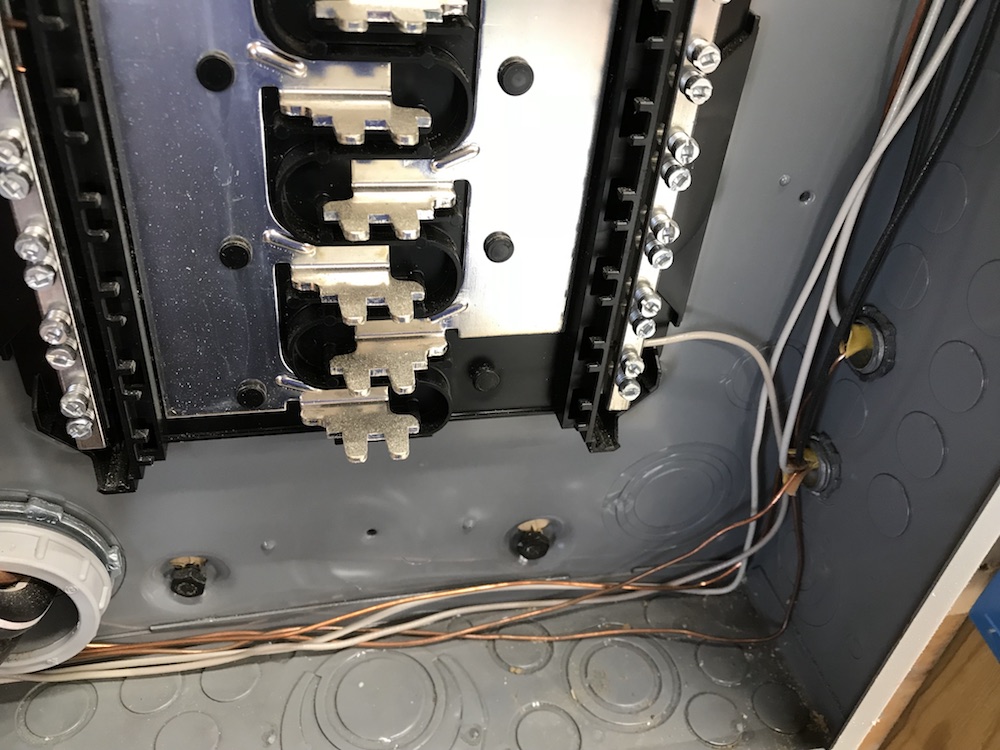
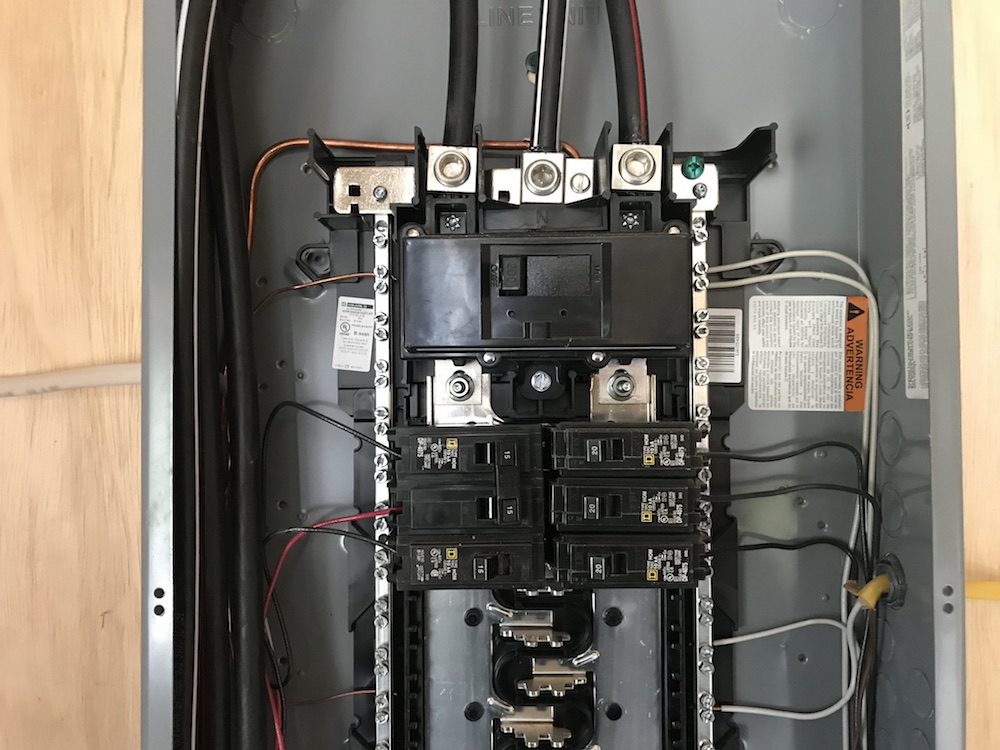
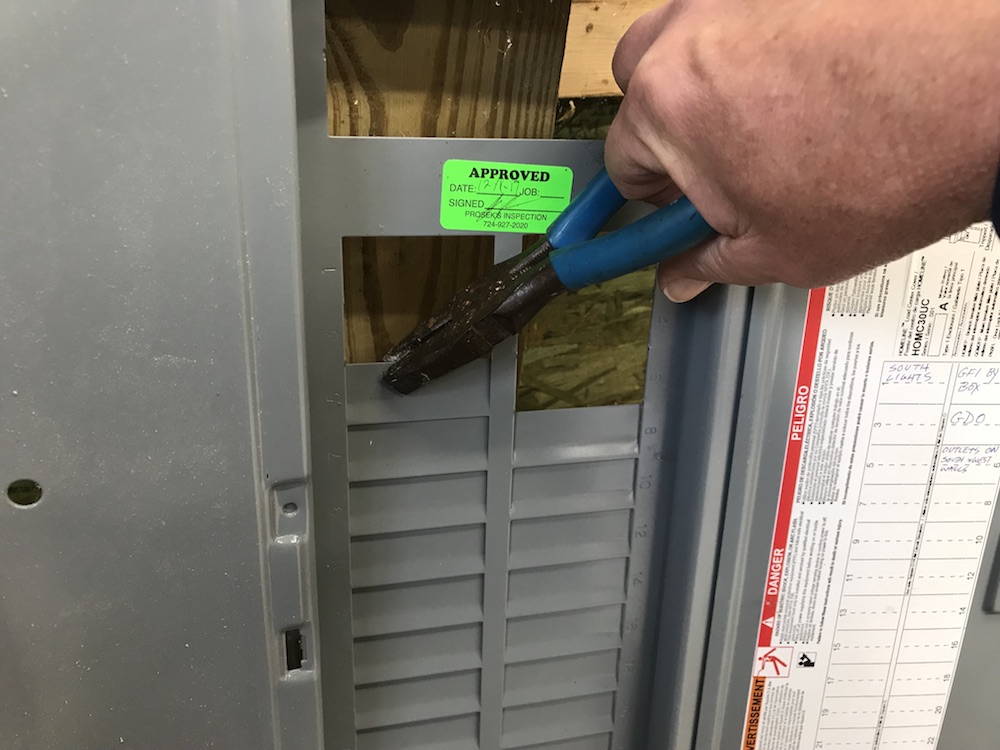
Remove the screws holding the front panel cover on. Find an unused knockout to bring the cable in. Most boxes have knockouts on the top, bottom, and both sides; pick one that will give you easy access inside the box.
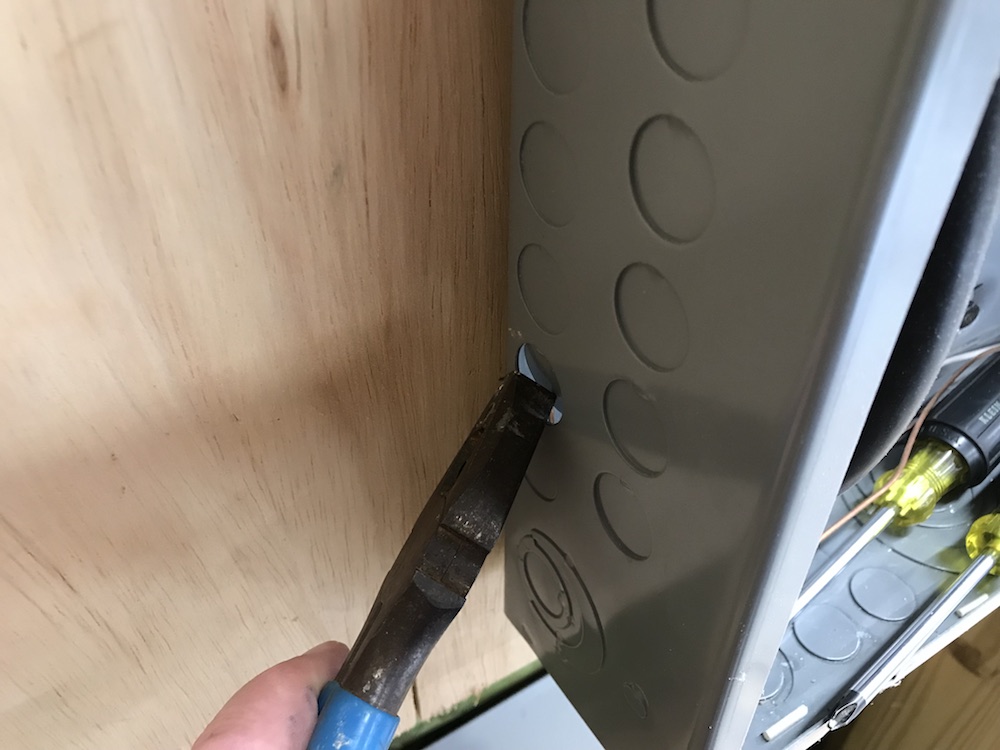
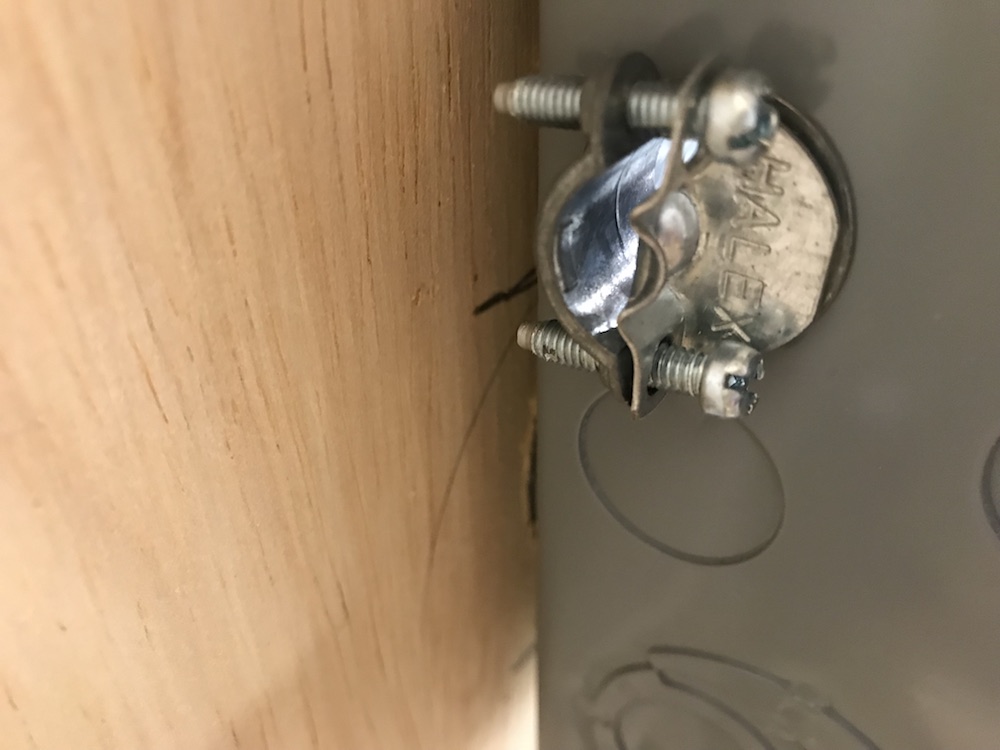
Tap on it with your pliers to swing it out a bit, then twist it off. To protect the cable as it enters the box, securely install a cable clamp into the knockout.
Find an open spot in the box where you can install your new breaker. You can add a circuit in any open slot. Get a rough idea how much cable you’ll need to reach the new breaker, keeping in mind you’ll have to route it around the box’s inner edges to connect to the new breaker, as well as the ground bar and neutral bar. Add about an extra 2-3 feet to that for insurance, and cut your cable free from the roll.
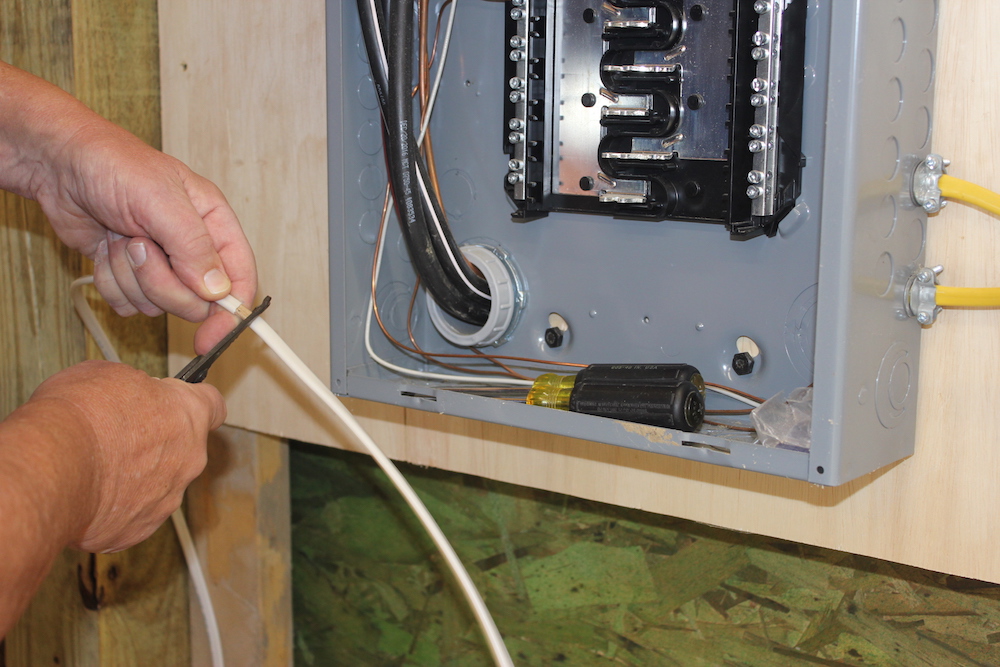
After gauging where your cable will enter the box, use your wire strippers to cut through the cable’s sheathing, making sure there’s enough sheathing left to extend about ½” into the box. Don’t pull the sheathing off yet; pull the cable all the way through the cable clamp, being careful to keep it away from the exposed innards of the breaker box.
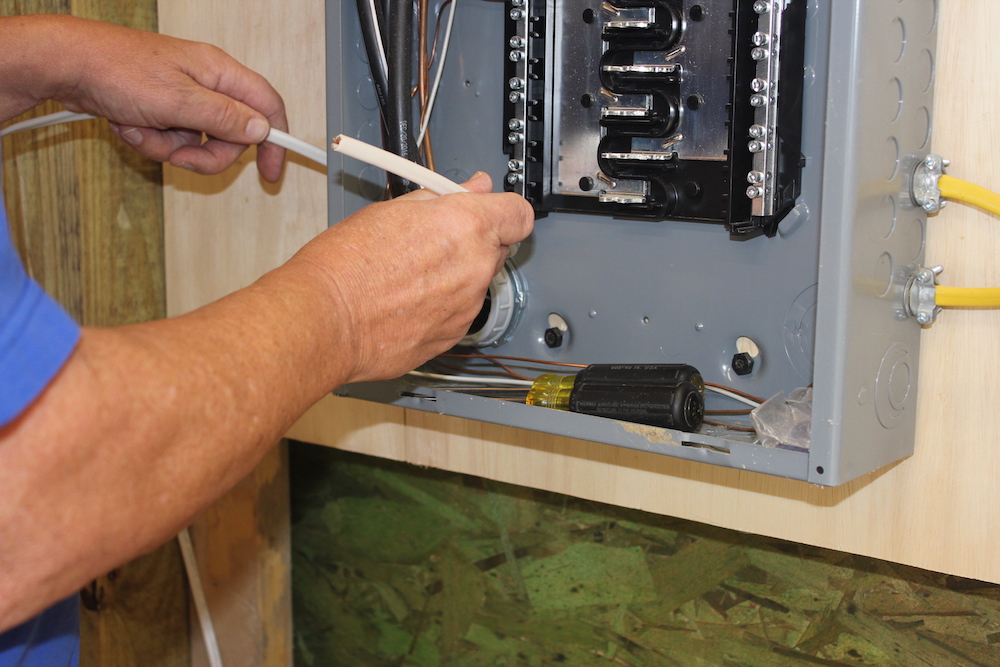
Tighten the cable clamp, and pull the sheathing off the cable, along with any inner paper wrapping.

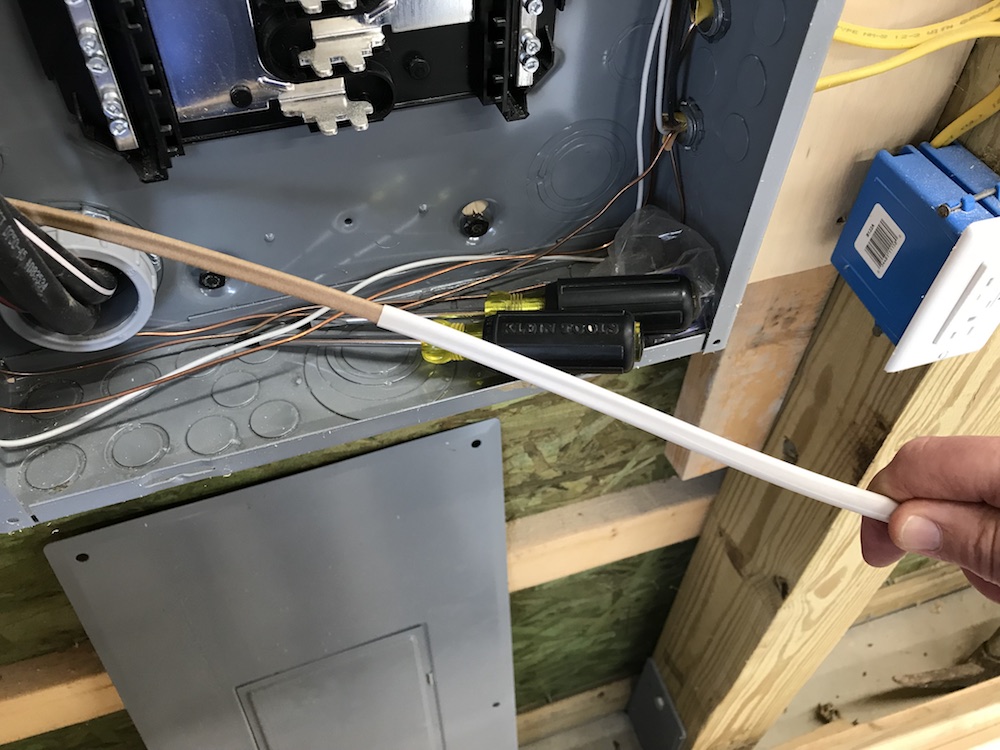
Keeping the white and black wires bent out of the way, find an open spot on the grounding bus bar (which will have all the bare ground wires attached to it). Bend the ground wire carefully around the inner edges of the box, routing it so it’s tucked back out of the way.
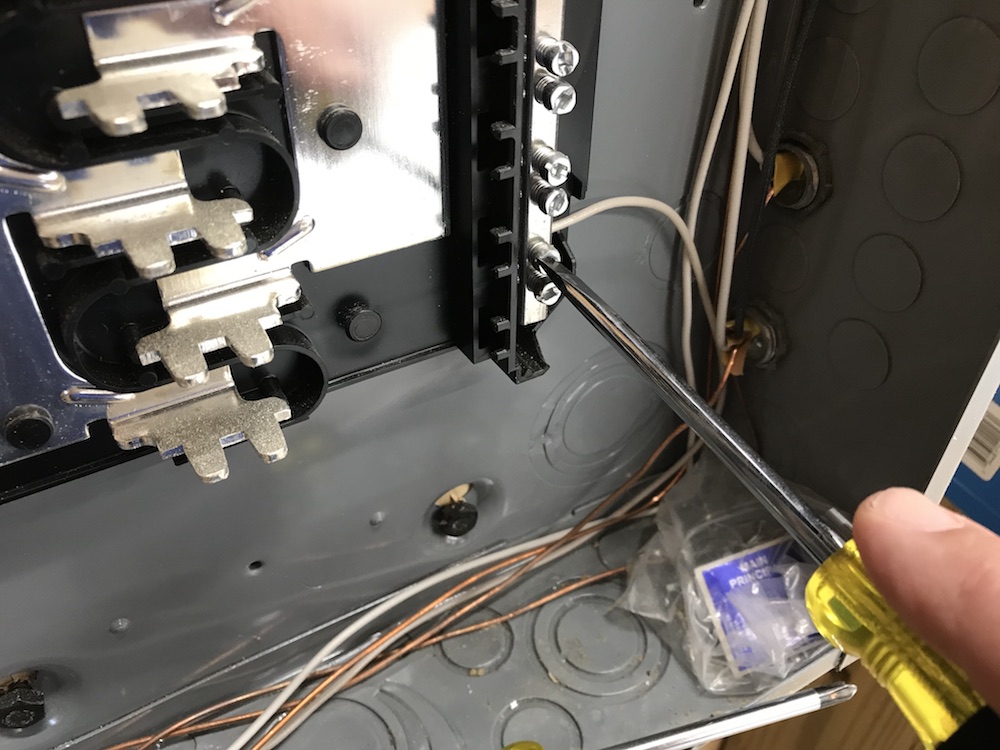
When you get to the open spot on the ground bus bar, bend the ground wire toward it, and cut it to length, leaving enough to insert into the bar. Loosen the screw, tuck the ground wire into the bar, and tighten the screw, making sure the ground wire is secure.

Now follow the same procedure for the white (neutral) wire. Strip about ¾” of insulation from the end before connecting it to the neutral bus bar (with all the other white wires attached).
How to Add A Circuit . . . Breaker
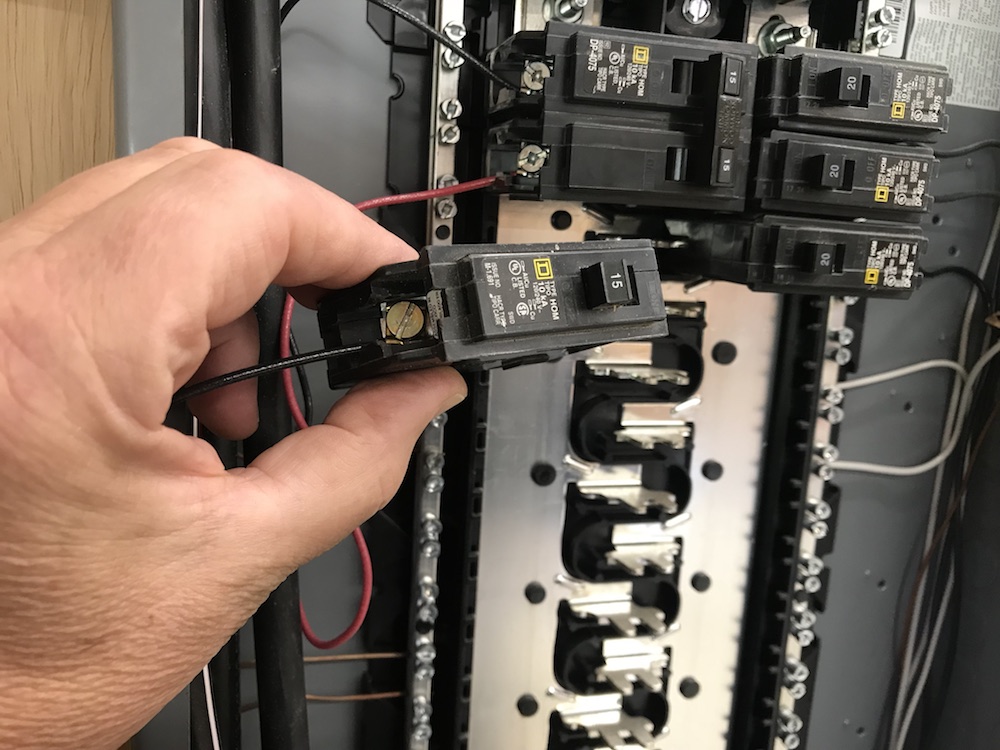
Now for the breaker. It’s dangerous to use an oversized breaker; for 14-gauge wire, use a 15-amp breaker, and a 20-amp breaker for 12-gauge. Follow the same process to route the black wire to the vicinity of the open breaker slot, but don’t install the breaker yet. Strip about ½” of insulation from the end of the wire. Loosen the clamping screw on the breaker, slide the wire in, and tighten the screw securely.
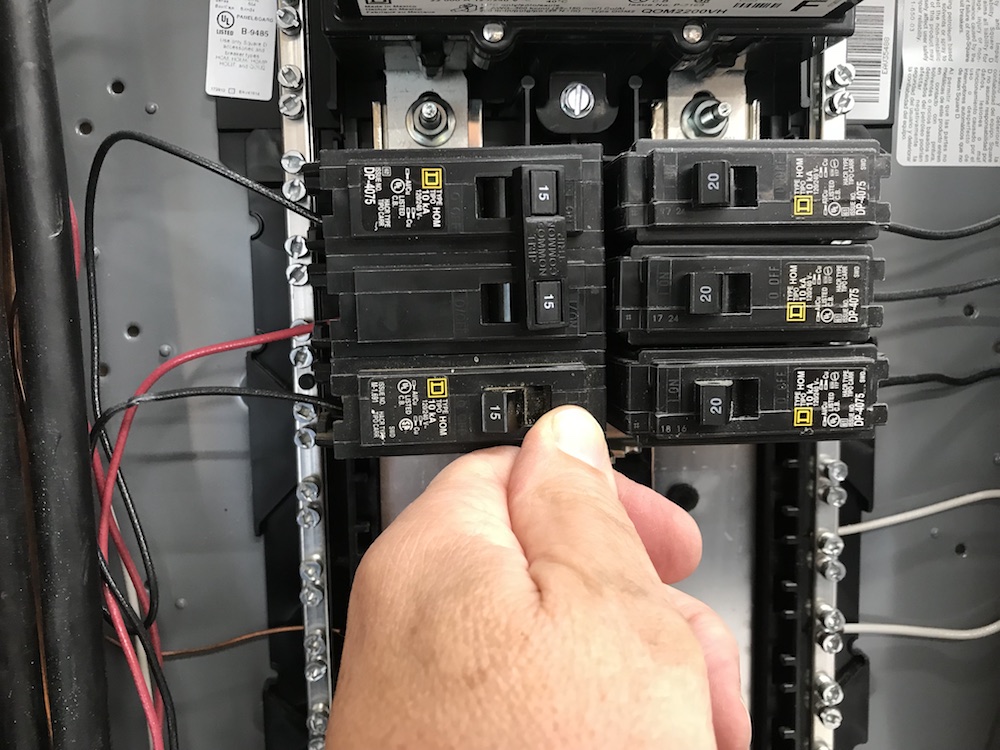
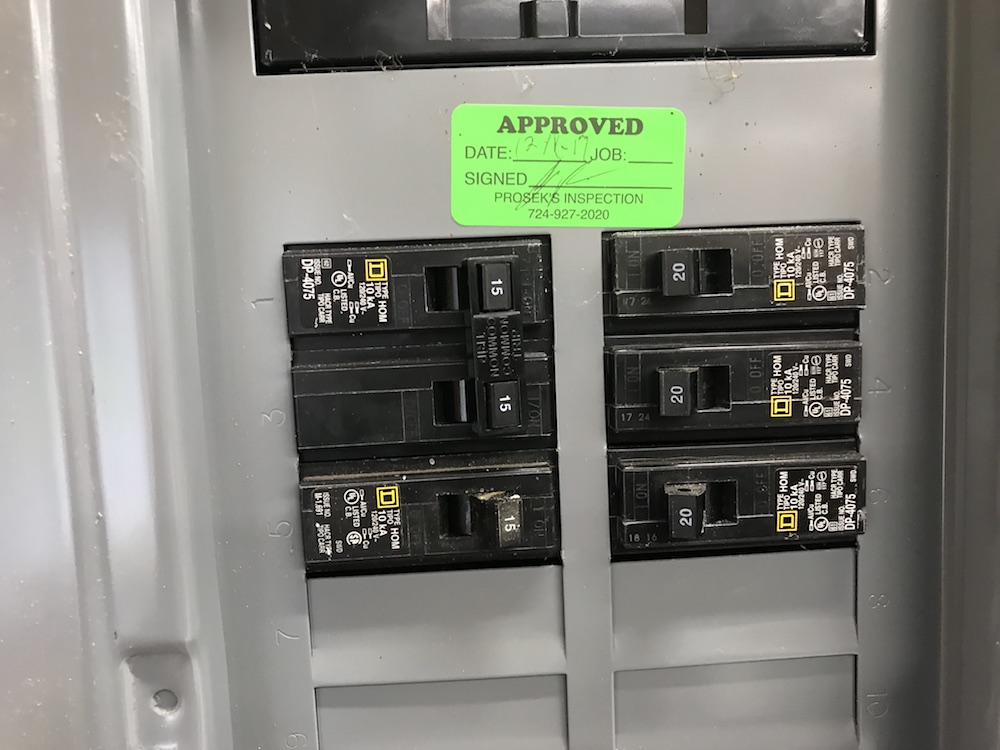
With the breaker’s switch in the “OFF” position, install it on the main bus. Many breakers have a hooked outer edge; slide it into the hot bus bar until it engages, then firmly push the other end down over the protrusion on the bus.
Reinstall the front cover on the breaker box, after knocking out the tab that corresponds with the slot where your new breaker is. Flip the service disconnect to the “ON” position, and switch the breaker ON if all your wiring is finished.
Now, how to add a circuit is no longer a mystery! It’s time to relax, and breathe a heavy sigh of satisfaction and relief – your quest to add a circuit is complete. Plug in, power up, and enjoy watching as the lights DON’T dim and flicker!