

The band saw is an incredibly versatile tool. It can convert logs into boards, those boards into thinner boards, cut straight lines or curves, compound cut cabriole legs and bandsaw boxes and much more. The more you use one the more uses you find for it. However, you need the right blade for the job; wider blades are best for straight cuts – narrower blades for tighter curves. But blade changes seem to be a black box for many woodworkers. Whether you’re a beginner or could just use a refresher, we’re going to walk you through the process for a perfect bandsaw blade adjustment setup every time, no matter what blade you install.
Many Different Bandsaws – One Simple Procedure
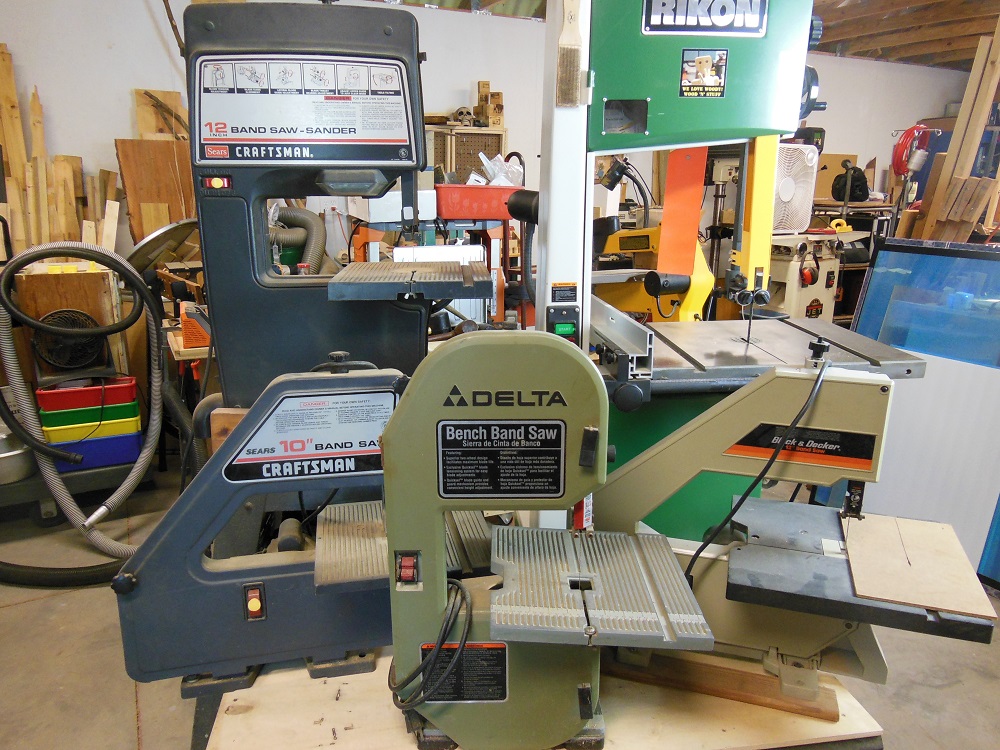
There are a plethora of different bandsaws out there. Some have guide bearings, some use rigid guide blocks. Some cheaper saws use a pair of machine screws instead. A lot of tabletop band saws increase their throat depth by using three wheels instead of two. But don’t let any of this distract you. For our purposes, the specific style of blade guide and number of wheels are irrelevant.
There is a whole quality spectrum when it comes to bandsaw blade guides. Even a “good” bandsaw can come with only so-so blade guides. Spending another hundred dollars or two for an aftermarket upgrade is often a good way to instantly improve your saw’s performance. Even though the ones on your saw may look different than mine, it’s OK. If you follow the right sequence of steps you’ll be able to properly align them with no problem.

The tool featured in this post is a 14” Rikon Bandsaw, model 10-325. Several of the original bearings kept seizing up on me. After replacing individual parts a few times, I upgraded to the retrofit system, which is essentially what comes stock on the upgraded model, the 10-326. It made life much easier (and the saw quieter), with its tool-less adjustment for faster setup and beefier sealed bearings that spin at lower RPM for longer life. However, it comes at a loss of about one inch of resaw capacity. Well worth the trade off, in my opinion.
A Quick Overview Before We Jump On The Band(saw) Wagon
Since we’re trying to lump all bandsaws into one how-to, it may seem complicated. But you’ll see that it’s actually a rather straightforward procedure. The main bandsaw blade adjustment are as follows:
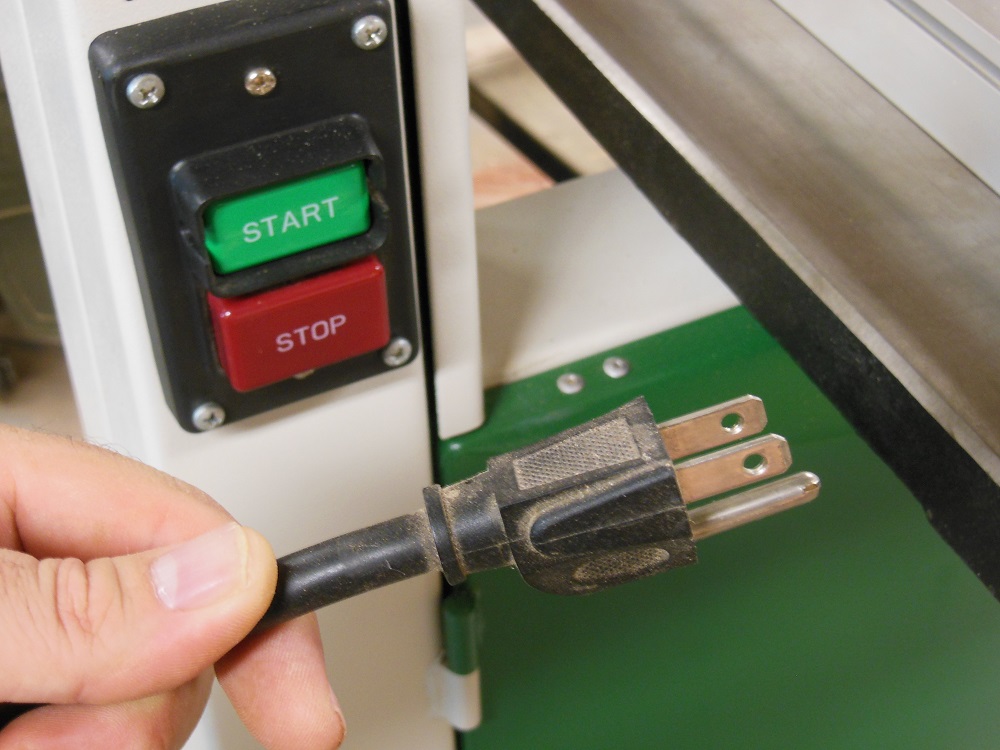
- Unplug the saw from the wall.
- Loosen blade tension.
- Remove/disconnect table leveling bar/pin.
- Remove blade.
- Retract all guides and thrust bearings.
- Install new blade.
- Check tracking.
- Position upper and lower guide bearings.
- Adjust upper and lower thrust bearings.
- Adjust upper and lower guide bearings.
- Set blade tension.
- Bring me a beer. You’ll be the one using your saw, not me. And, you know, I’m thirsty.
Why So Tense, Bro? – It’s Easy To Change Your Bandsaw Blade!
It’s good practice to relieve the blade tension if the saw is going to sit idle for any length of time. Don’t bother doing so between every cut; but at the end of the day, go ahead and loosen the blade to reduce fatigue and prevent flat spots on the tires.
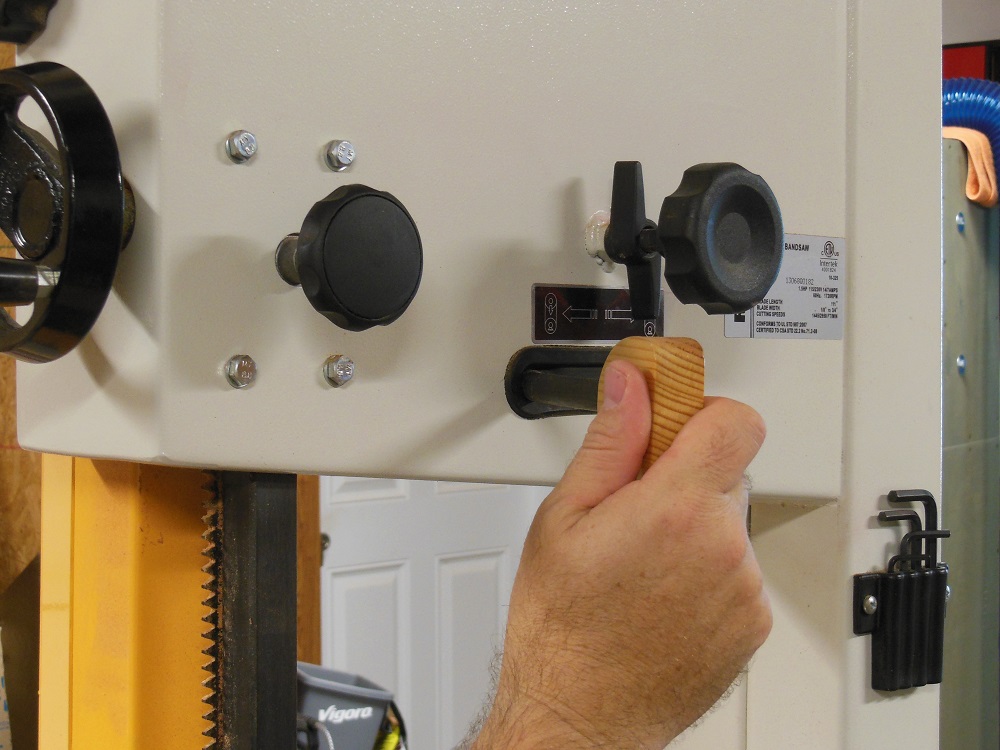
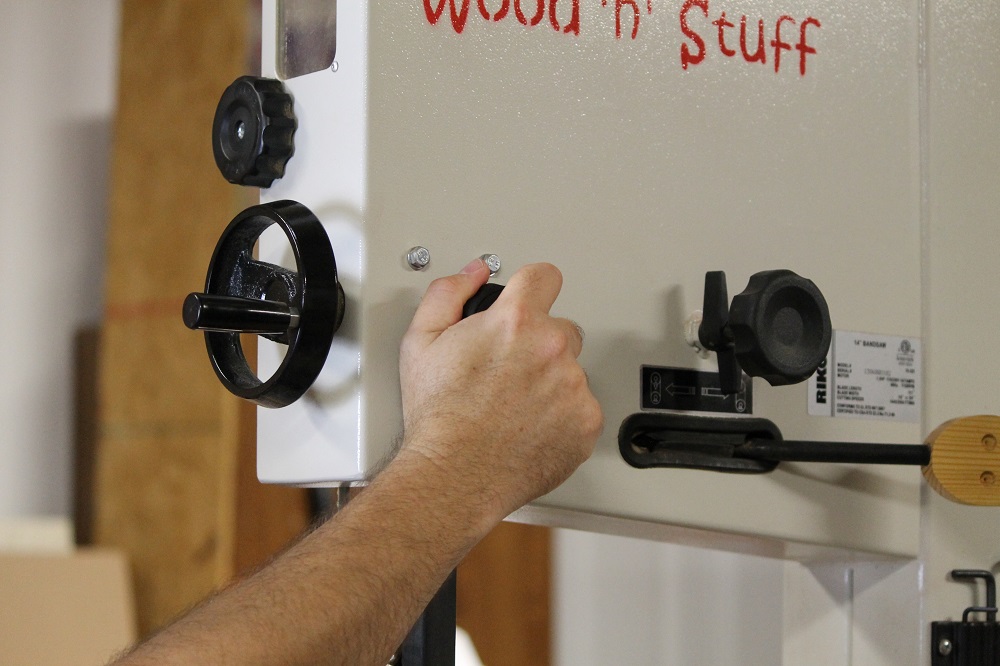
To remove your old blade, first relieve the tension. Most bandsaws require that you turn a tension adjustment knob, which protrudes from the top of the saw. But many have a quick release lever (in addition to the tension adjustment) that drops the top wheel in one fell swoop.
Just keep in mind that if you use the quick release lever and switch to a thinner blade, you’re going to want to also loosen the main tension adjustment before returning the lever to the tensioned position. Or that brand new 1/4” blade just might go “boing!”.
You’ll usually also have to lower the guidepost – the vertical part that houses the blade guard and upper blade guides – all the way to the table.
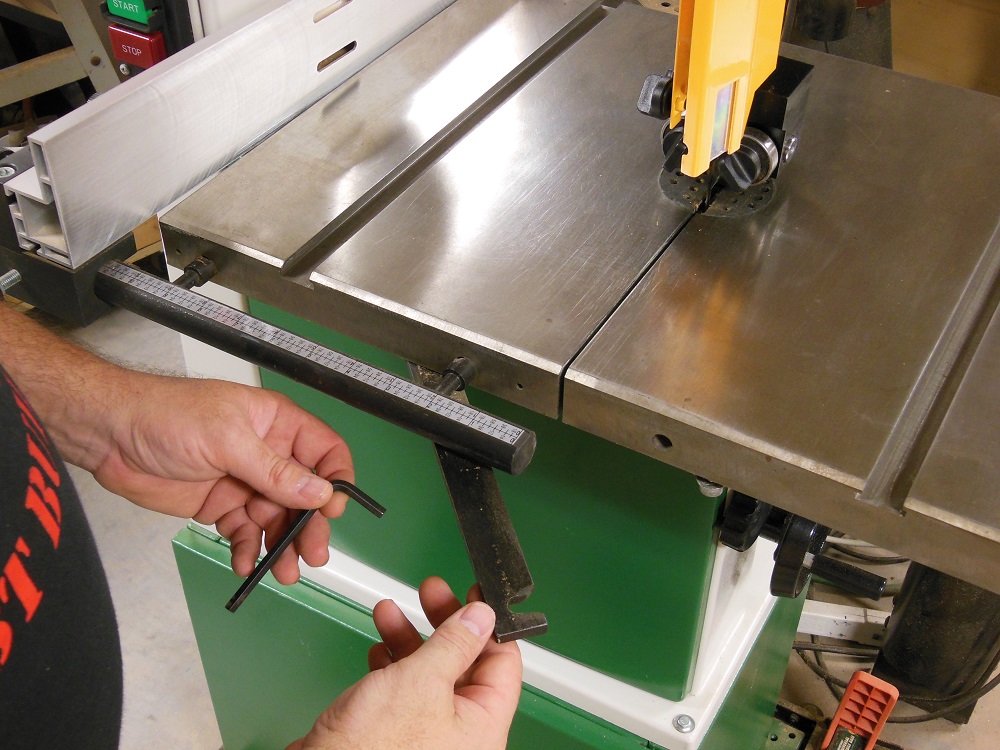
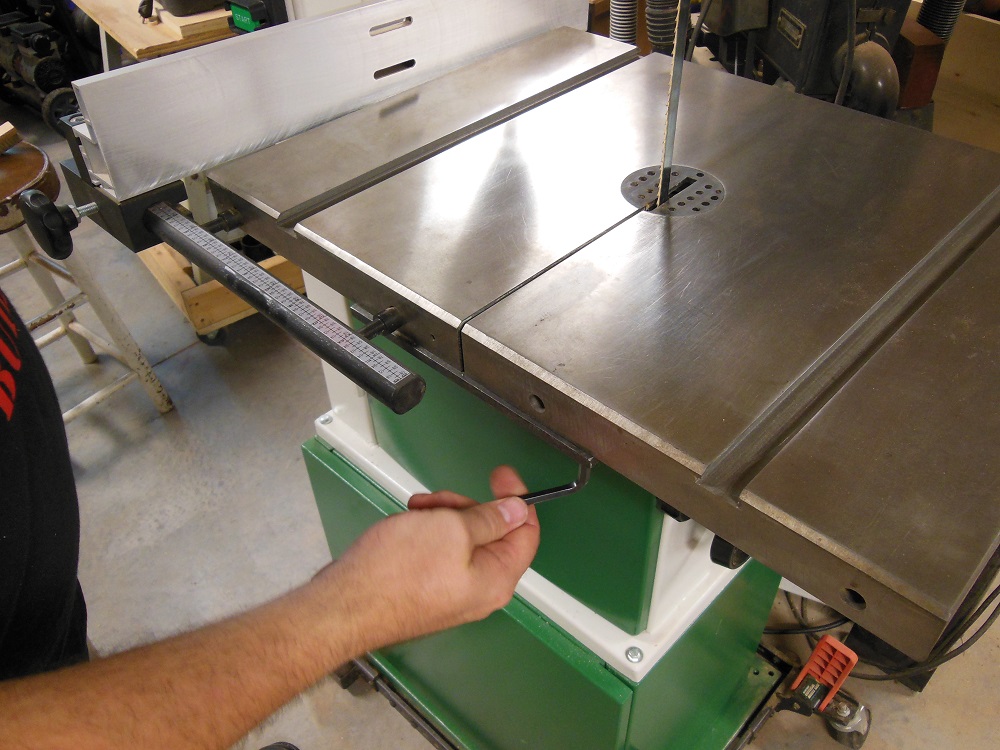
Every bandsaw table has a split that you snake the blade through during removal and installation. There is usually a leveling bar or pin that spans the front edge of the gap, keeping the two sides rigid and aligned. Move that bar or pin out of the way for now.
Lower the upper blade guide, open the wheel housing(s) and blade guard and carefully remove the blade. Wearing a pair of gloves and eye protection is advisable.
When You Change A Bandsaw Blade – Realign The Guides
Any time you change blades, you should realign the guides: upper and lower. If you’re swapping to a different blade of the same width – perhaps to a higher tooth count (more teeth makes a smoother cut, but cuts slower) – or putting the same blade back on, you may be able to get away without readjusting the guides. But the blade is unlikely to end up in the exact same position on the wheels, so it’s often best to go ahead and run through the procedure.
Don’t Miss The Forest For The Trees
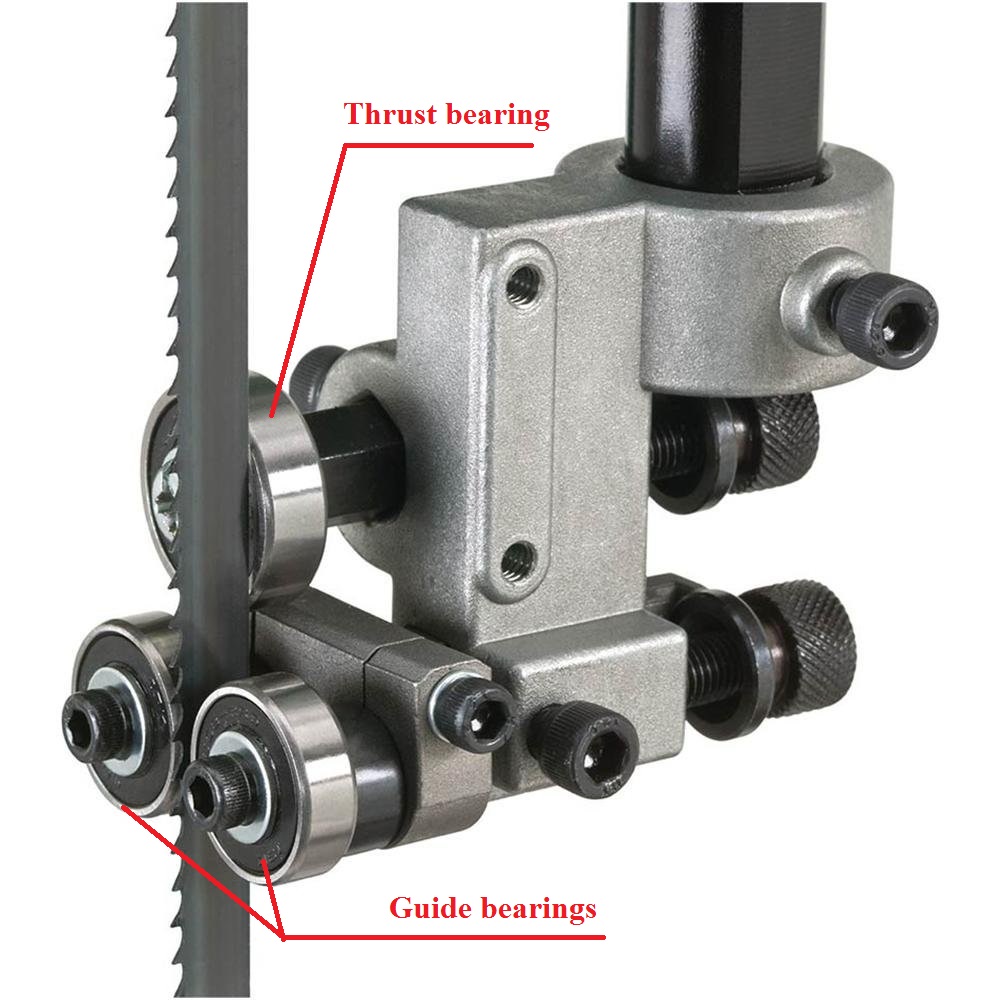
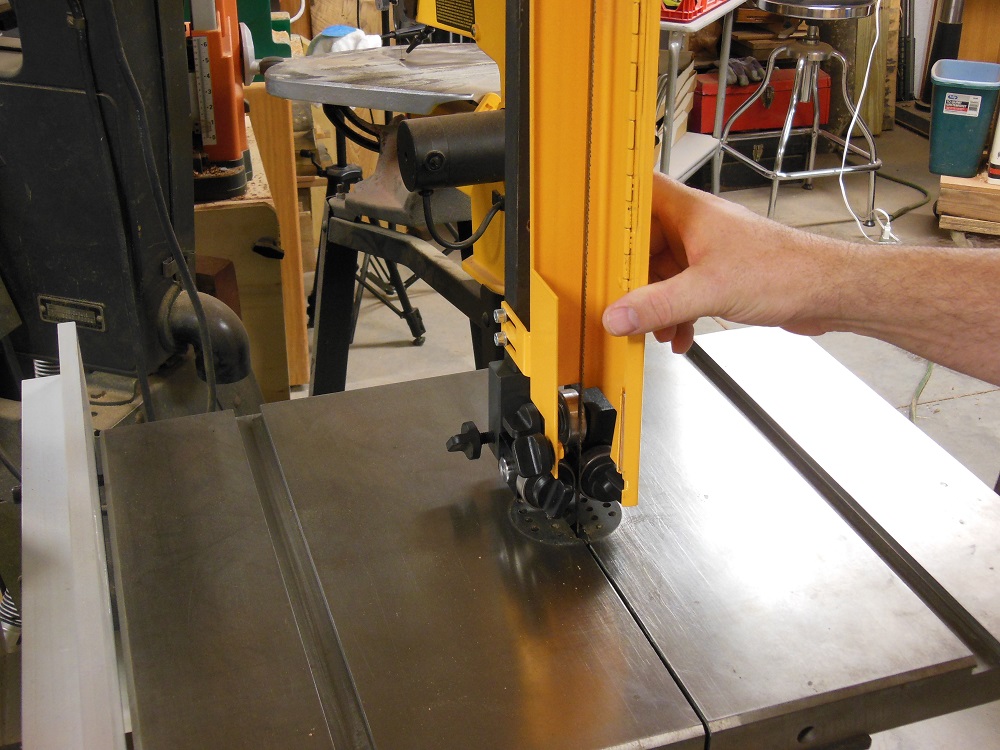
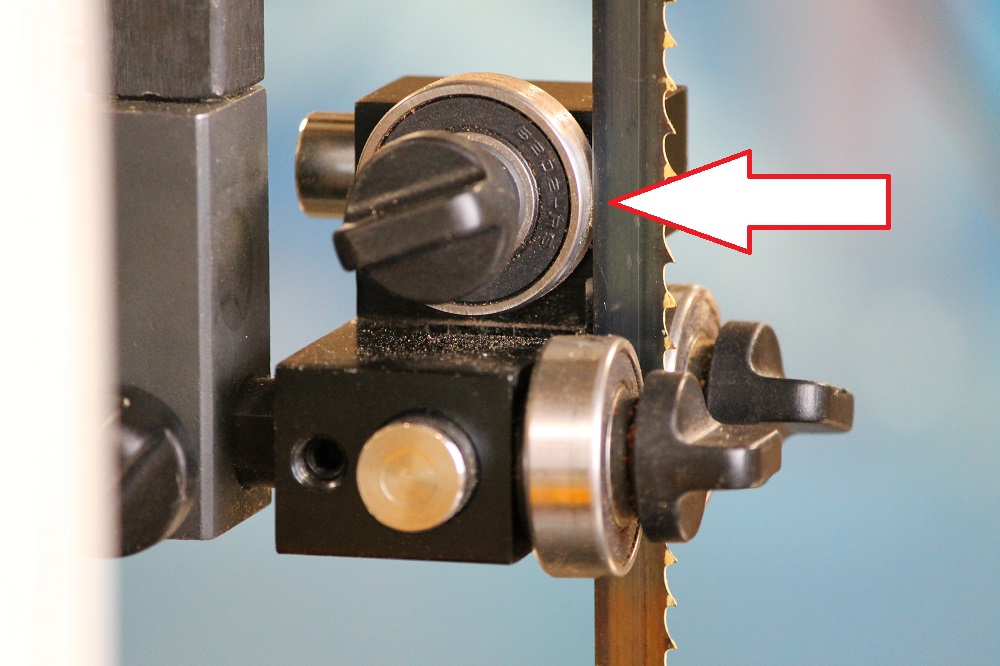
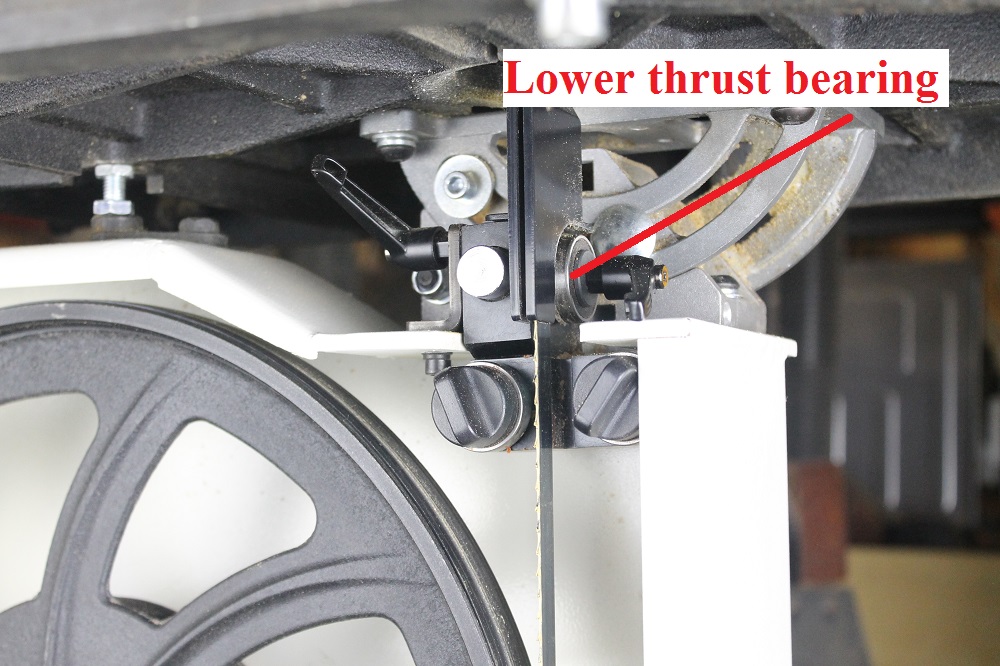
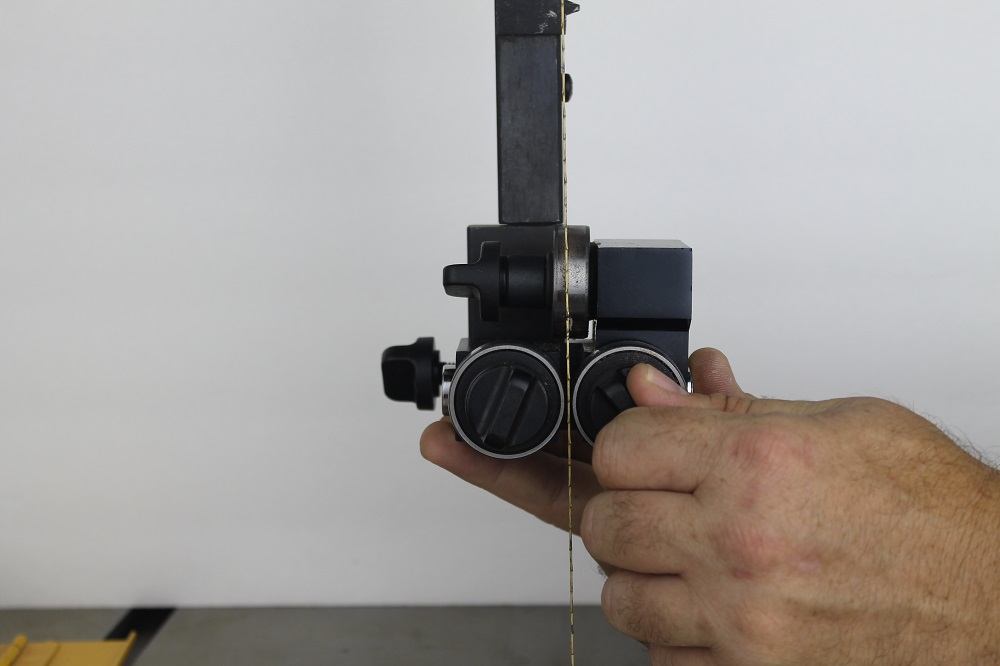
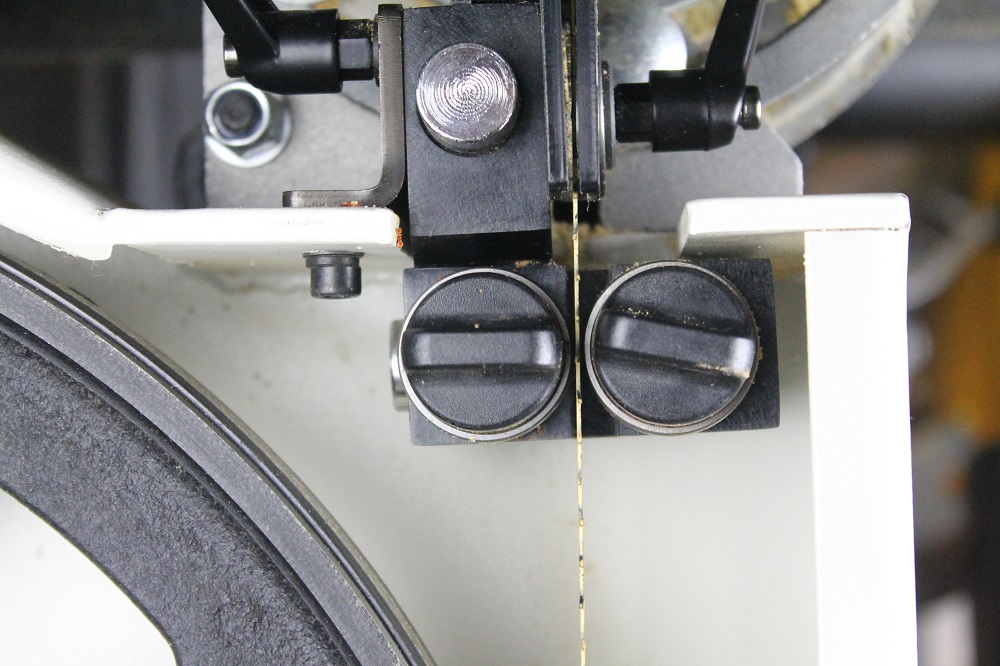
The biggest challenge to writing a one-size-fits-all tutorial is that blade guides can vary a lot from saw to saw. I labeled these two pictures to distinguish the “thrust” bearing from the “guide” bearings.

Your bandsaw may look completely different, but there are always analogous parts serving the same functions. And the same setup requirements apply to pretty much all woodworking bandsaws.
Your Guide To Setting Up Your Guides – First, Clear The Path
Now that the blade is removed – or even before you remove the blade – retract your upper and lower guides to their outermost positions. That is, adjust them completely clear so that when you install the new blade, it will not contact any of the guides.
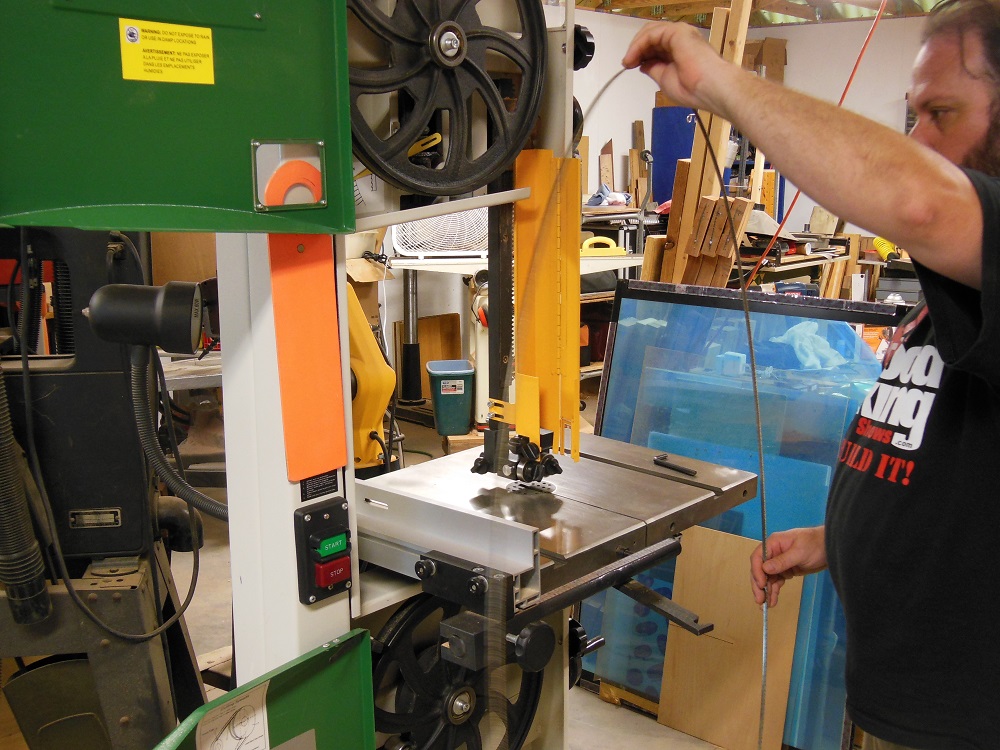
Installing A Bandsaw Blade
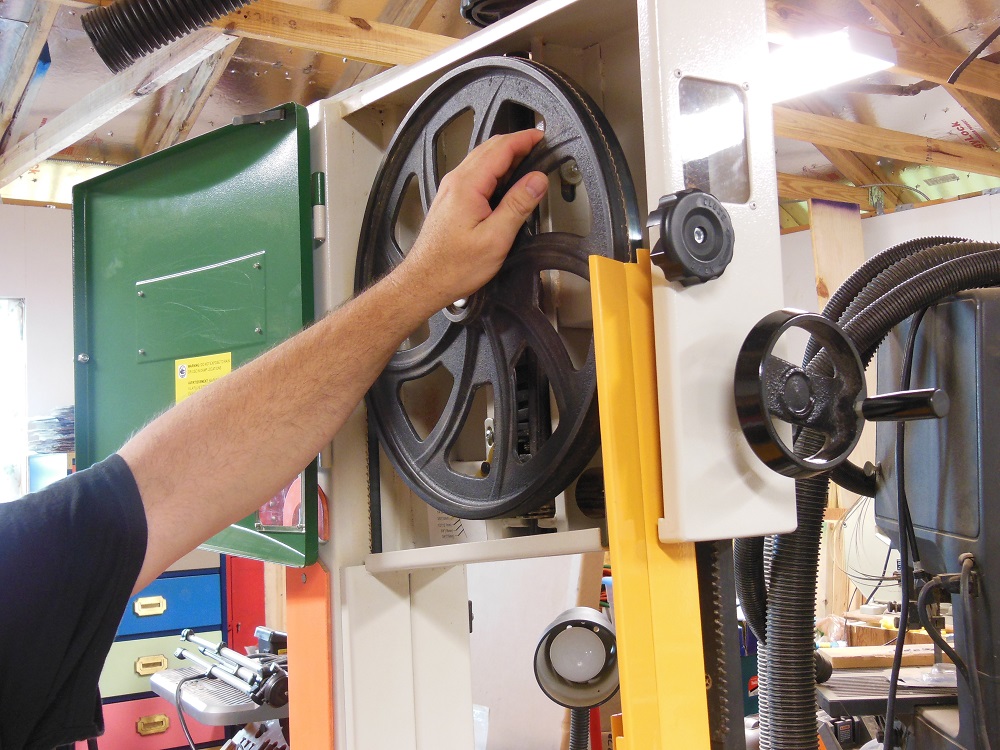
Start by draping the blade over the top wheel. Then move on to the rear (on 3-wheeled models) and lower wheel.
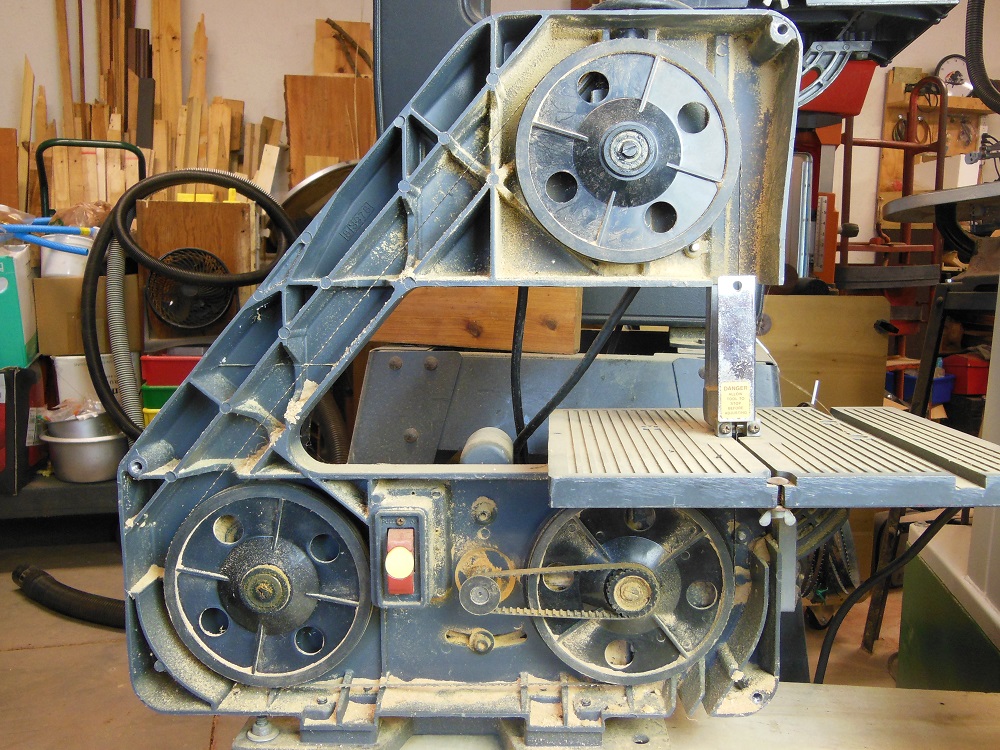
Jack Fell Down And Crowned His Bandsaw Wheels

Anyone who knows jack about bandsaws is probably aware that the wheels are crowned, meaning the cross section of the wheel or tire has a convex arc at the outside edge. That’s how the blade manages to stay where you put it rather than drifting fore and aft.
In the woodworking world, there are certain topics which seem to spark perpetual controversy amongst its inhabitants. We have the “biscuits: alignment only vs. strength-adding (vs. eating, I suppose)” discussion; the “hand tool vs. power tools” camps; the slowly-waning “is CNC real woodworking” rivalry; and even an “is it crime against humanity to paint your projects?” thing that inexplicably ruffles feathers from time to time.
So it should be no real shocker that you’ll encounter conflicting schools of thought regarding blade placement on the wheels and how it affects blade “drift” (side to side blade wander while cutting). There’s even reason to think the whole “drift” issue doesn’t even exist in the way people think it does.
And Jill Came Tracking After – Getting Back On Track

After years of reading and attending woodworking shows and presentations by experts, I’ll sum up consensus the best I can. Basically, the blade should positioned so that the teeth ride slightly forward of the crown. This does two things: prevents excessive tire wear and preserves tooth set. For larger blades (say, 3/4” or larger), you may want the crown a little farther back, closer to the middle of the blade.
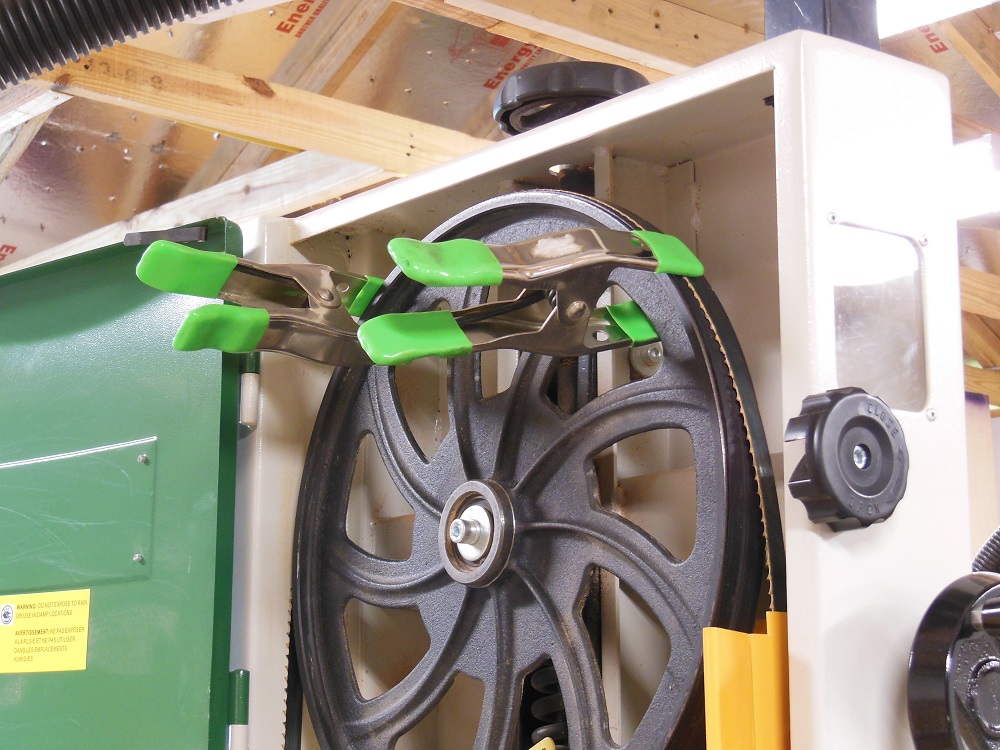
Tension the blade enough to keep it in place on the wheels. Maybe slightly tighter, but not full tension. Rotate the wheels slowly by hand, taking care not to pinch a finger or catch your clothing or hair between the blade and a wheel. Also be wary of those gnashing teeth. Even though you’re turning the wheel slowly, the momentum is enough to cause a nasty cut if you get grazed. Especially with heavy cast iron wheels.

Tracking is generally a “set it and forget it” alignment. Tweak it only if the blade keeps wandering forward or backwards from where you want it to be. If the blade stays in position as you turn the wheels, leave it alone.
Set The Forward Position Of The Guide Assemblies
Blade placement is the only “controversial” facet of this. And now that I’ve set the record straight once and for all (if only it were that easy), we can move on. The rest of the process is basically rote checklist procedure, but it’s critical for saw performance and blade longevity.
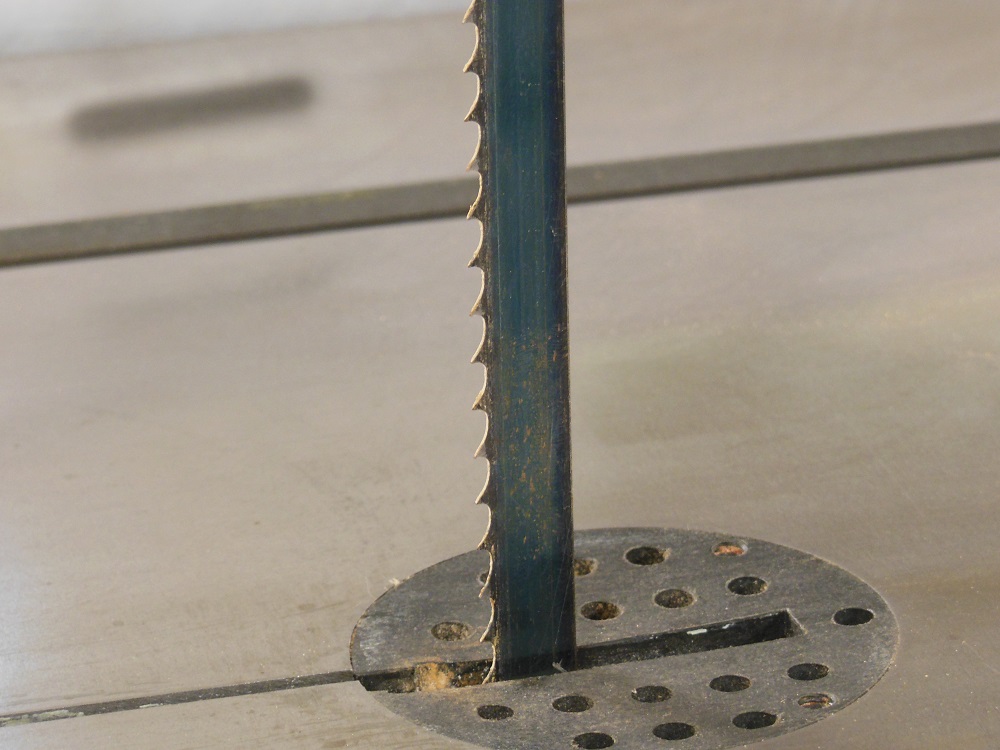
Starting with the upper guide assembly, shift it forward until the two guide bearings (or guide blocks or guide screws, on some saws) sit just behind the gullets. If the teeth were allowed to ride against the guides they would lose their set – a little at a time – until the blade no longer clears its own kerf. So proper guide placement does matter. Next, do the same to the lower guide assembly.

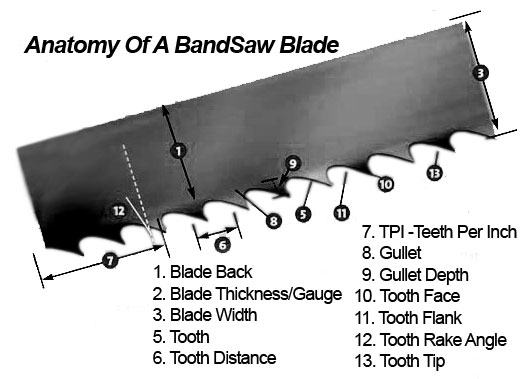
For clarity, “gullets” are the hollow spaces between the blade’s teeth. “Kerf” is the void left behind in your material as you make a cut. And “set” refers to the fact the blade’s teeth are angled slightly left and right – usually alternating (one left, one right, one left, etc…) – rather than being flat, in line with the body of the blade. This gives the blade enough room to maneuver so it doesn’t drag or bind in its own wake.
It’s A Matter Of Thrust – Setting Bandsaw Thrust Bearings
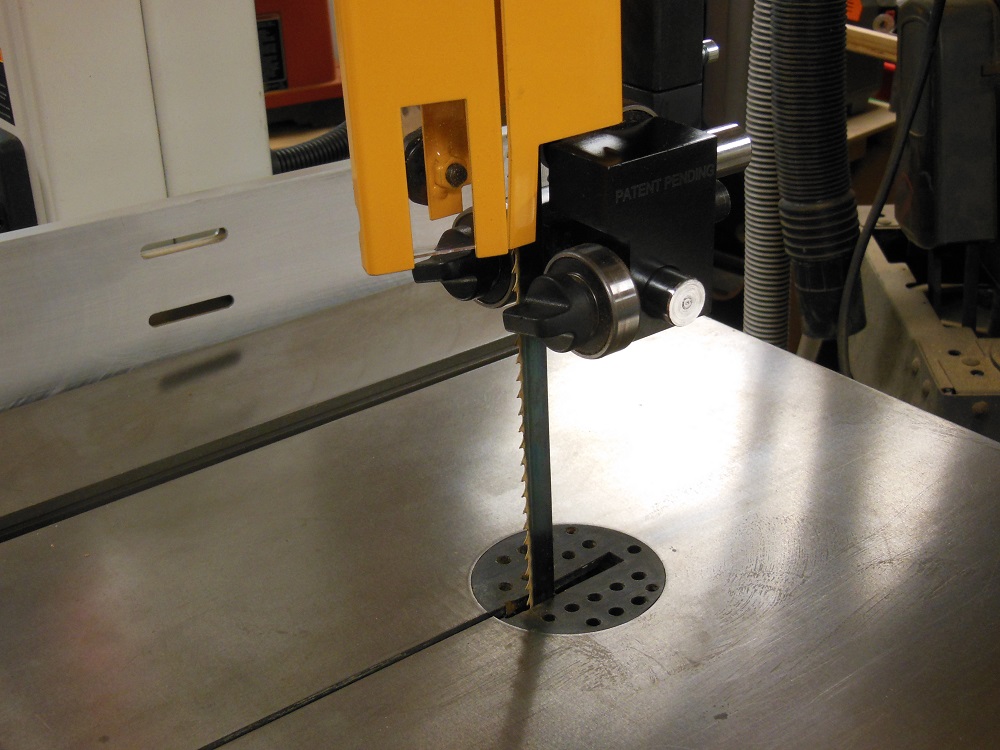
For the rest of the setup, I’ve removed the blade guard so you can see what’s going on. Never operate your saw with the guard removed.
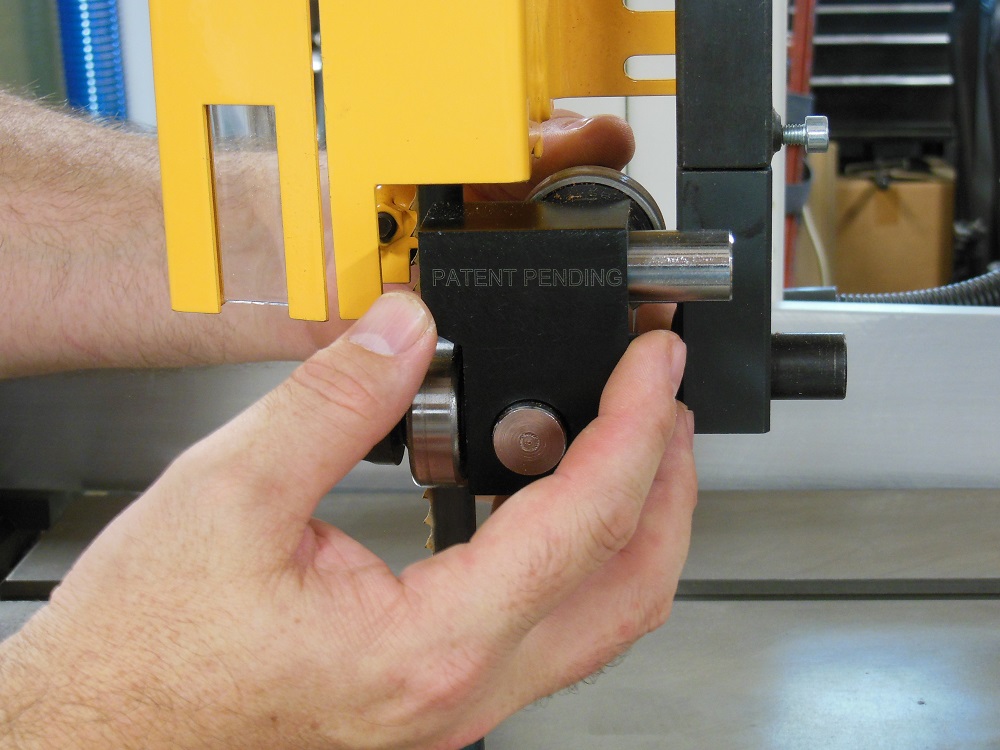
After positioning the upper and lower guide assemblies, it’s time to fine tune the individual components. First up are the thrust bearings. Again, start with the top one, then move on to the lower. The thrust bearing sits directly behind the blade and prevents it from being pushed off of the wheels as you use the saw.
Keeping with the theme that bandsaws are a diverse animal, some thrust bearings are situated edge on, in line with the blade (as in the example above). Others are set at 90°, so that the blade rides on the edge of the bearing. Yet, on others, the thrust bearing is a “thrust block” instead. Either way, it serves the same function: supporting the blade as you feed material and preventing the blade from bowing and twisting as you exceed its beam strength.
Mind The Gap
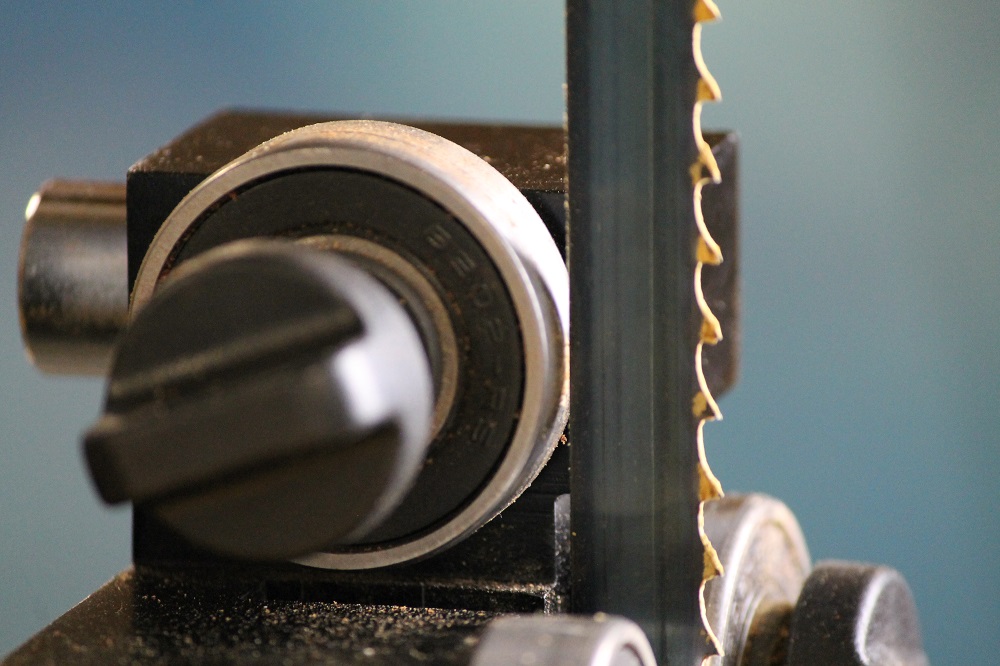
As you cut, the blade will be pushed back slightly, against the thrust bearing/block. But you don’t want constant contact while the saw idles. Leave a small gap (about the thickness of a playing card) between the thrust bearing and the blade.
Will The Real Bandsaw Blade Guides Please Stand Up?
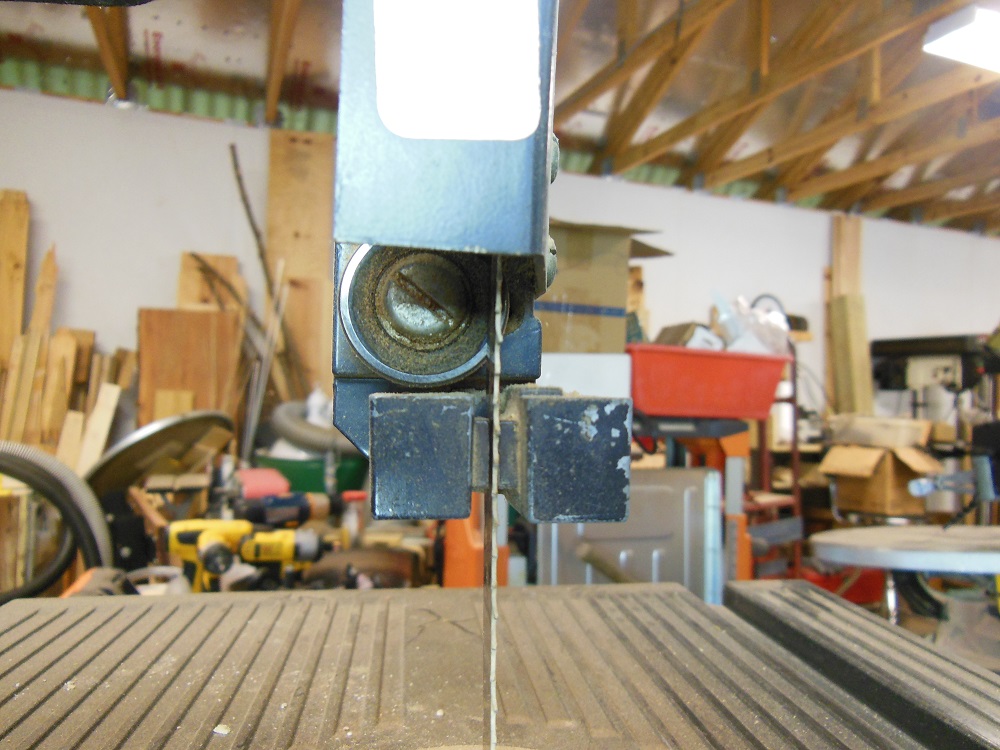
While the guide assemblies can be generically referred to as “the blade guides”, the actual blade guides are the parts that sit to the left and right of the blade and restrict side to side movement and twisting.
Blade guides are often roller bearings, but they may be blocks of steel, ceramic, Bakelite, graphite impregnated phenolic, or even steel machine screws.
No matter the material, align them in the same manner: so they they almost touch the blade. The blade will rub the guides in use, but it should not make contact when the saw is merely idling.
Setting Bandsaw Blade Tension – Snug, But Not Too Tight
All that’s left to do is set the final blade tension. The most important thing to keep in mind is to not overdo it. Some blades are sold as “low tension”, but even standard blades can stress and break (often during use, scaring you half to death) if you over-tighten. The increased pressure will also wear your tires and wheel bearings more quickly.
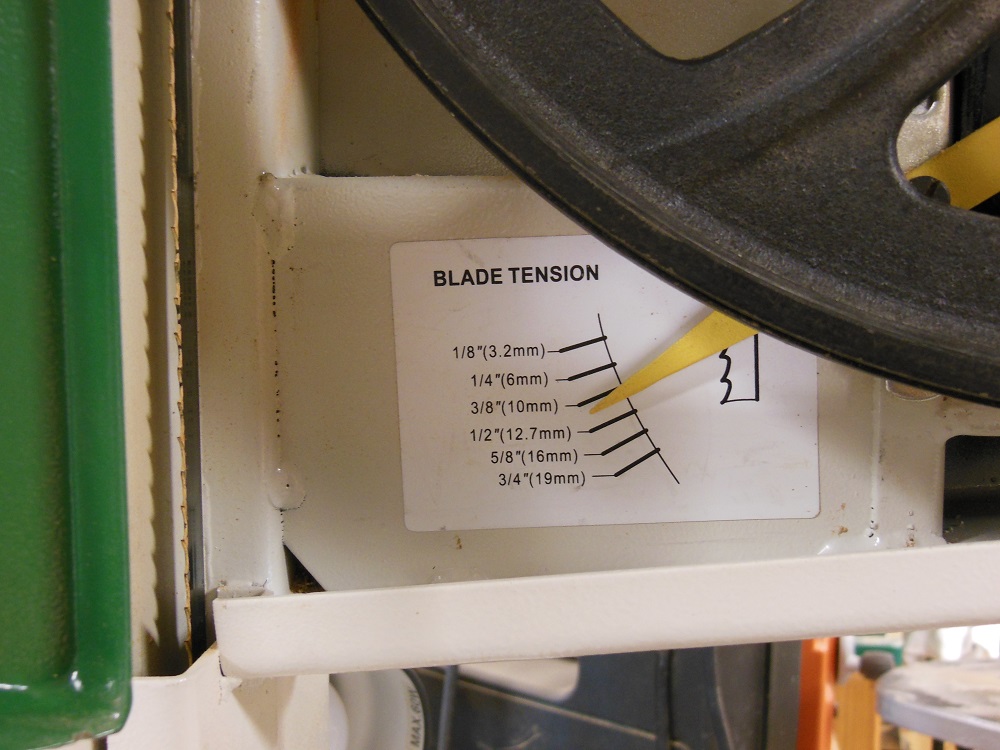
Unfortunately, built-in tension gauges often seem to be more suggestive than precision instruments and can lead to over-tightening by a substantial margin. Many, including myself, recommend tensioning the blade by feel and not relying on the gauge.

Raise the blade guard/guide post all the way to the top. Now tighten the blade until it deflects 1/4” or so with moderate sideways pressure. No, this isn’t an exact science, but it will get you in the sweet spot. You have a range to work with; it doesn’t have to be exact. Just avoid the temptation to keep tightening, thinking tighter is always better. It isn’t.
See? That Wasn’t So Bad
That’s all there is to it; now you’re set up and ready to go! Once you’ve done the bandsaw blade adjustment steps a couple of times you’ll have it down and it won’t take very long at all. It’s nothing to dread or be afraid of. Easy peasy.
Hi Marc,
Great site !!!
I have an 80″ 1/4″ blade Craftsman band saw I’ve been using for a lot of years.
Done a little modification and it’s been great !
If I readjust the guides, etc. I’m wondering if I can start using 80″ x 1/2″ blades?
THANKS in advance.
Bill
Wow, what a very good instruction lesson! Many thanks!
Vividly instructive ,glittering with humor , a gift to floundering readers . Made my day,thanks a million.
Very easy to follow in basic details so clear and precise it’s a shame all people don’t describe things like this then it would take a week to read the instructions thank you very much
Hi Colin. Thanks for the feedback and we’re glad you found the bandsaw blade installation article helpful!
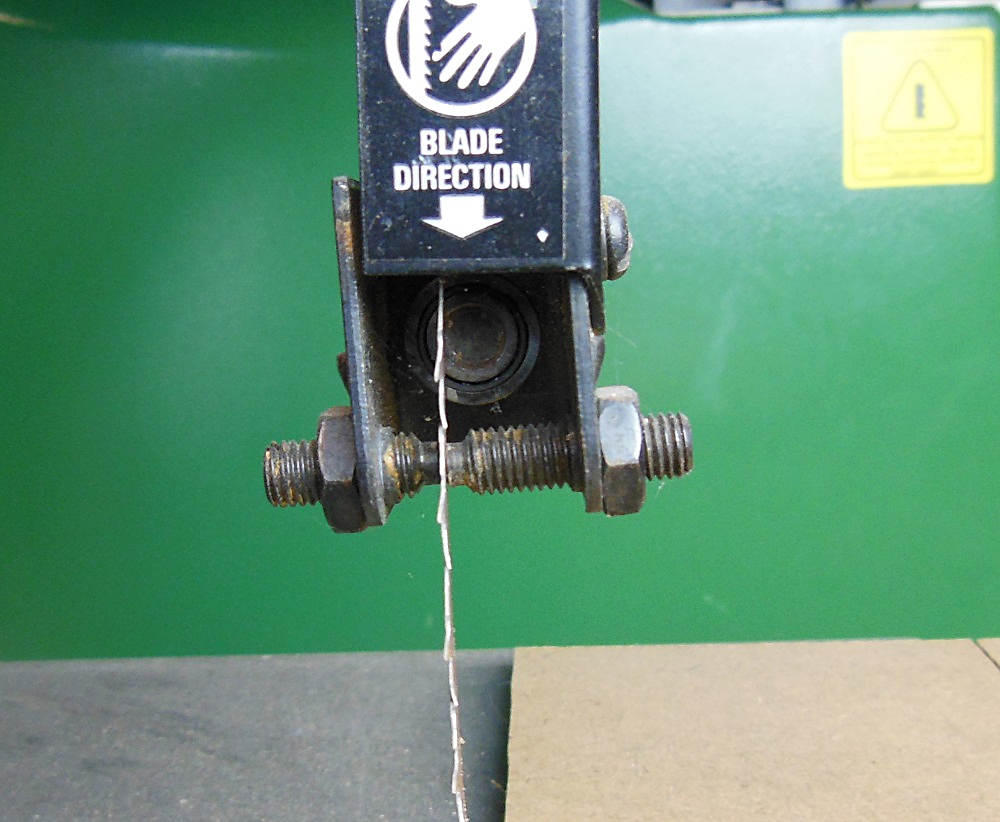
I’ve only started using this tool this summer and I finally had to face my fears: change the blade and adjust/tune the bearings. I thought I bought the wrong blade when i went to install it, the teeth were pointing up! didn’t know that can happen from simply uncoiling the blade the wrong way, thank you for pointing that out (maybe you should emphasize that notice/instruction for newbies like me). The rest was a breeze (sort of) thanks to your detailed and clear instructions supported by great pictures. without the pictures it just wouldn’t be the same, so thank you for a great article and look forward to reading your others.
Thank you Michael, glad you found it so helpful!
totally agree with the above comments! A great article means it’s constructed so as to be clear, very clear, in it’s suggestions/instructions.. and this certainlly ‘fills the bill’ .. Congrats!
I wrote a piece about how to care of band saw blade 2 years ago but, Steve, I am honestly saying your content totally made my idea changed. It is great explanation with fine visual detailing. I got that a content should be like this one from that people can be benefited. Thanks a lot Steve.
I am new to the wood tool world but understood most of this article. Cool
Excellent article… a lot of great information.