

Just as there are many ways to skin the proverbial cat, the methods for building workbenches, too, are rather numerous (and produce far fewer hair balls). This no-frills, bare bones, built-in workbench is an easy and inexpensive way to add a sturdy work surface along a garage or workshop wall. I made mine tall enough that things can be stowed under it and out of the way when not in use. But there’s no reason you can’t make it shorter or more complex. Once you have the framework, add all the doodads, glob sockets, shelves and drawers you want: if you want. A couple hours (or less) is all it takes to make this built-in workbench. So let’s get going!
On The Surface – A Simple Built-In Workbench

First, decide how large you want the top of your bench to be and cut a sheet of 3/4” plywood to size. In my case, I used a 22 x 65 inch piece that was given to me by a fellow woodworker. He’d already banded the front edge and finished the top and bottom with a whitewash pickling of some sort.
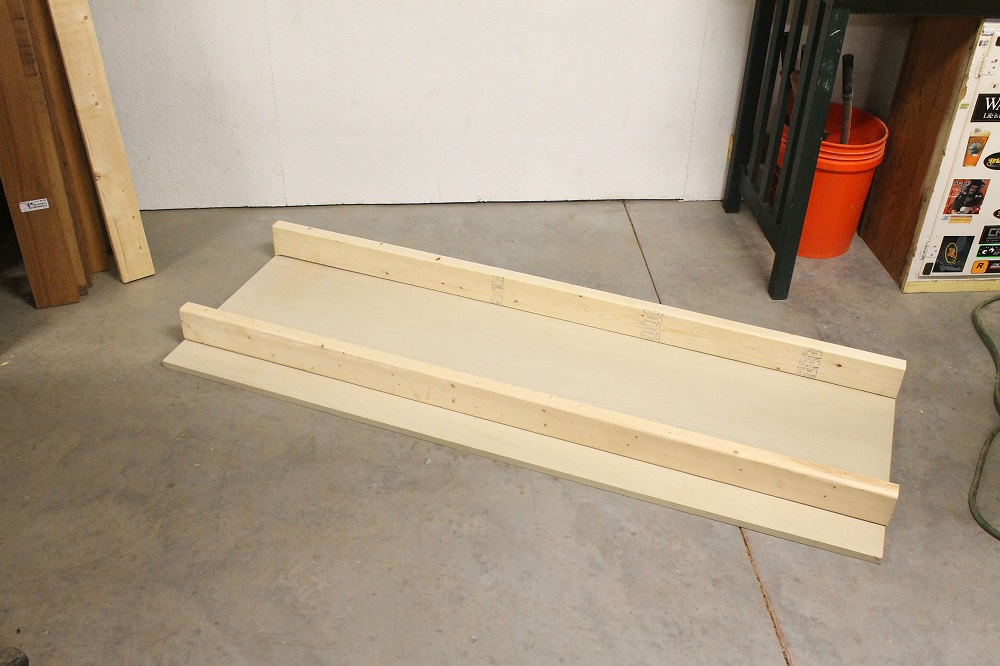
This piece was already what felt like a good size for this project so I just went with it. Sometimes you make decisions – other times they’re made for you. I got to use up some material that’s been in the way and save myself a little work in the process. A win-win.
So, if you have a woodworking friend, just have them to give you a finished, suitably-sized piece of plywood. They absolutely won’t mind gifting you all the material you need and doing at least some of the work for you. After all, woodworkers are the coolest, most generous people out there! I tease; but it is great to have awesome friends who share my passions: beer, bacon, tools and woodworking (not necessarily in that order).
Alternatively, you can just buy and cut your own damn piece of wood and stop groveling for handouts all the time! Wood doesn’t grow on trees, you know. Well, actually, it grows IN trees. Or rather, it IS trees. Sigh… Never mind. Look, all I’m trying to say is if you have any nice wood you’re willing to give up, I’ll be glad to take it off your hands. Pretty please!
Your 15 Minutes Of Frame
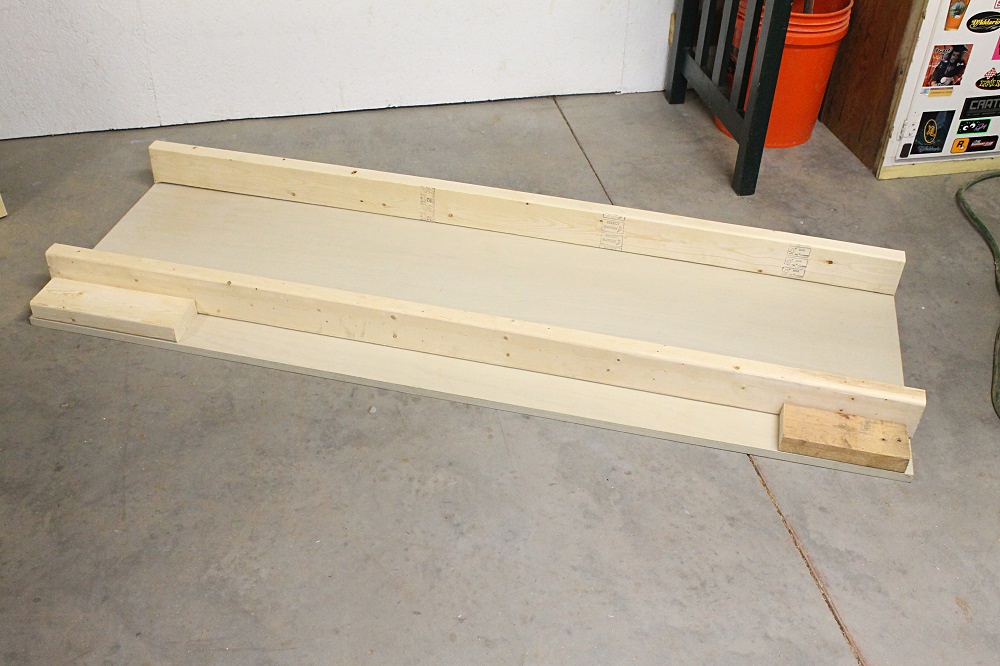
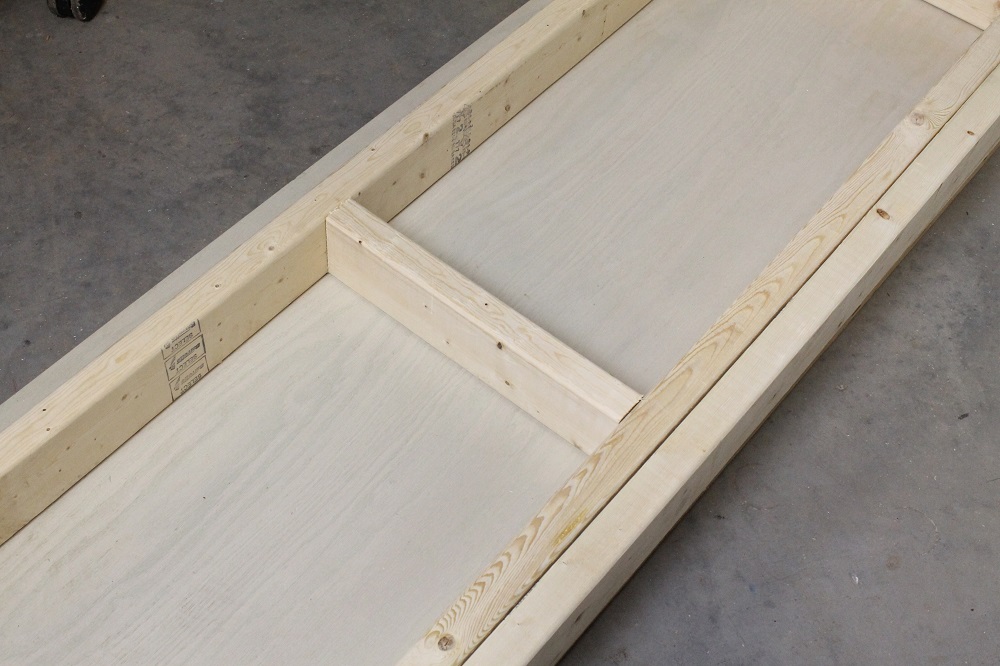
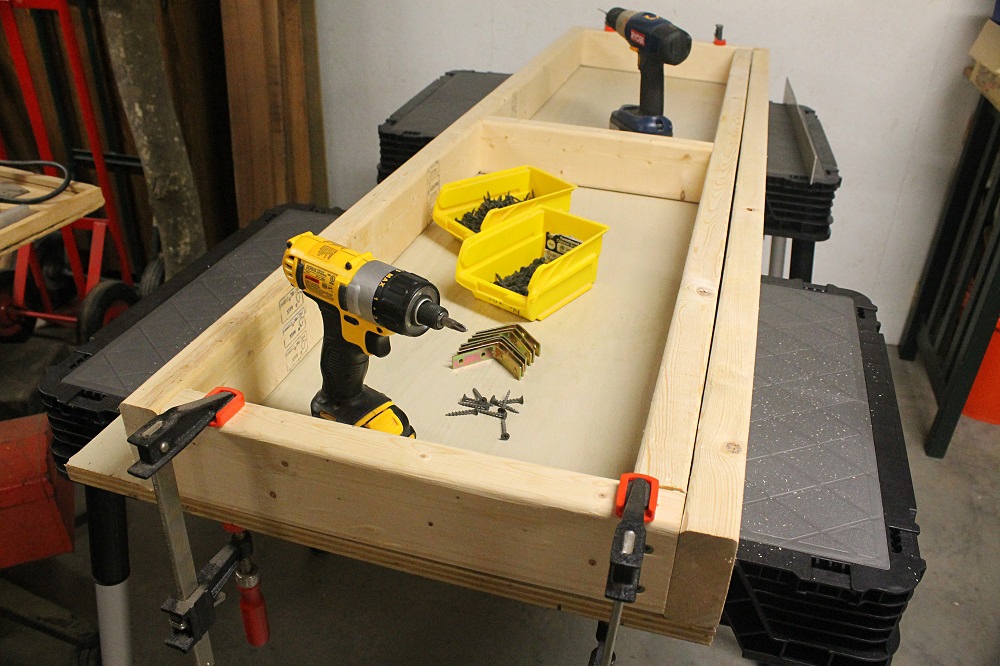
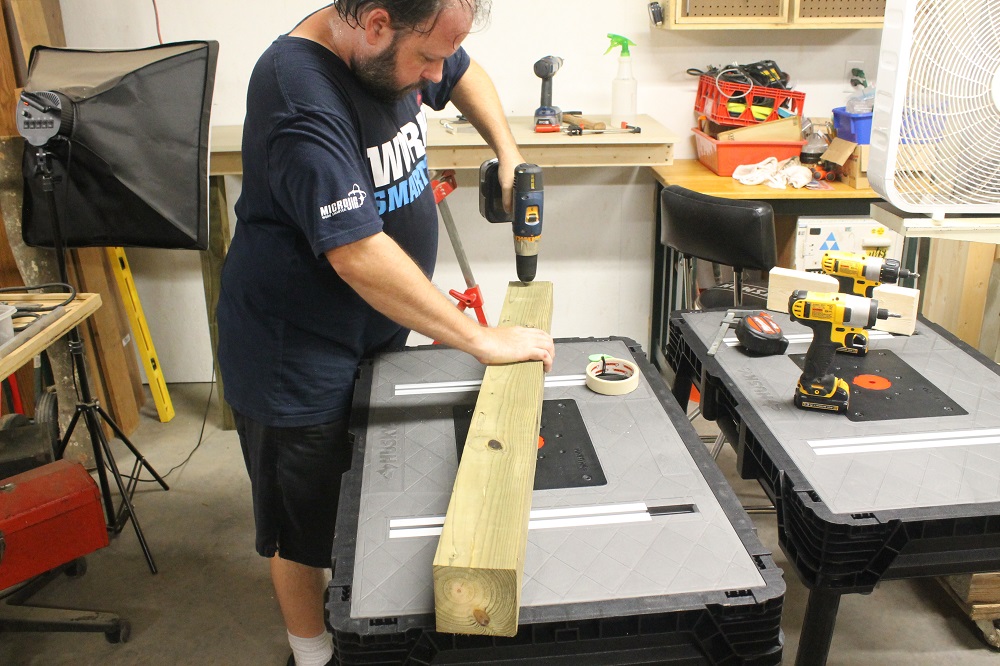
The next step is to make a simple frame that supports the top. In most cases, 2×4 construction lumber works just fine. Cutting the frame parts shouldn’t take very long at all. If I weren’t photographing, I could easily have cut them in 10 – 15 minutes. They say the camera adds 10 pounds; but they never mention that it also doubles (or triples) working time.

You’ll likely want at least one support rib in the middle of the frame. Depending on the size of the bench top, however, you may decide to add even more (dividing the length evenly). In this case, one in the center should be plenty. If the bench were going to be longer or deeper – or if I planned to table dance on it (a mistake I vowed to never repeat) – I’d add a second cross member, dividing the length into thirds.
The Right To Assemble (Your Built-in Workbench)
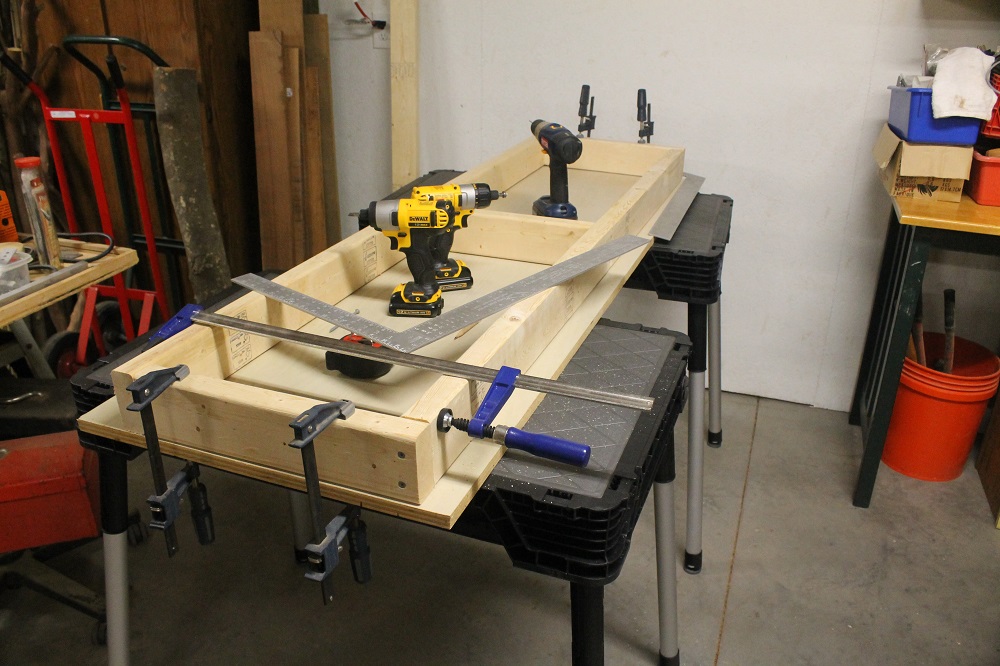
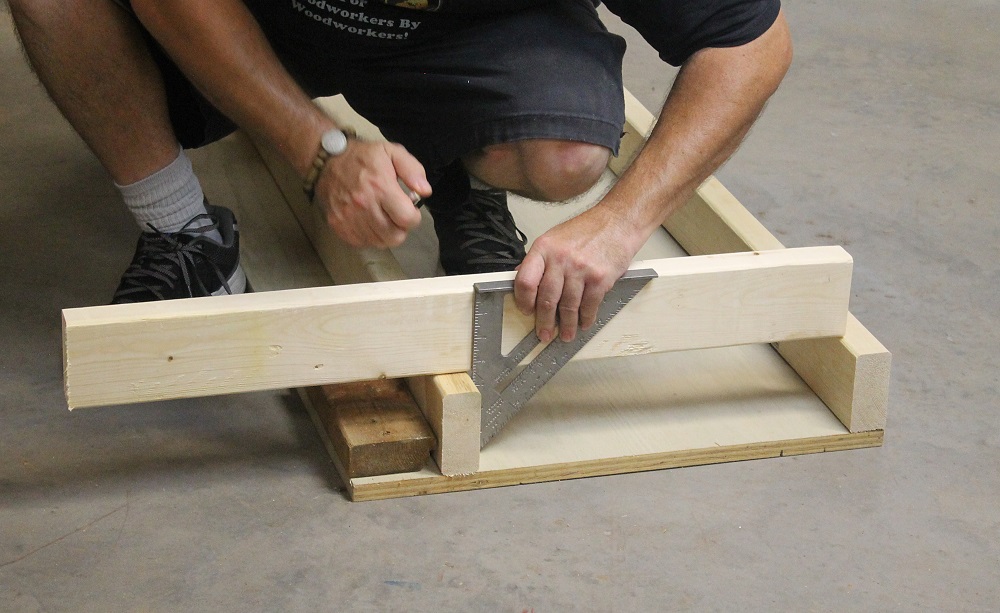
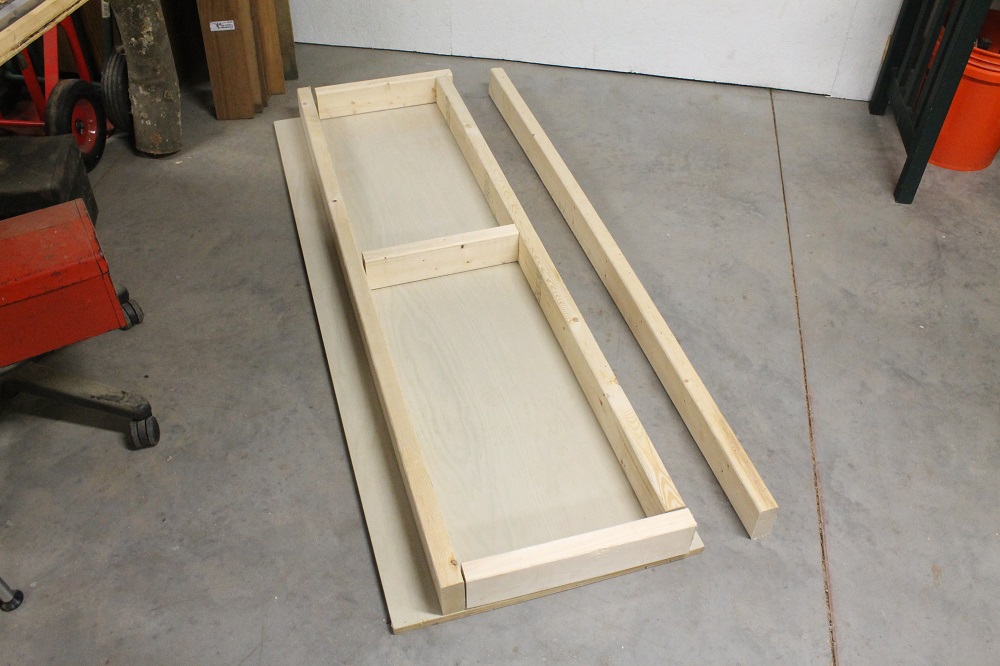
Lay the frame parts “upside-down” (if you have a preferred “up”) on a flat surface and screw them together. I clamped everything in place so nothing shifts while drilling and screwing. If you want to up the “duty game” of this medium-duty workbench, we offer some suggestions near the end of this article.
Attachment Therapy – Built-in Workbench
There are various ways to attach the top to the frame, with chewing gum and duct tape ranking among the absolute worst. It turns out all those wads of gum underneath restaurant tables are non-OEM, aftermarket parts and don’t add nearly as much structural integrity as we’ve been led to believe. I know, right? Mind blown!

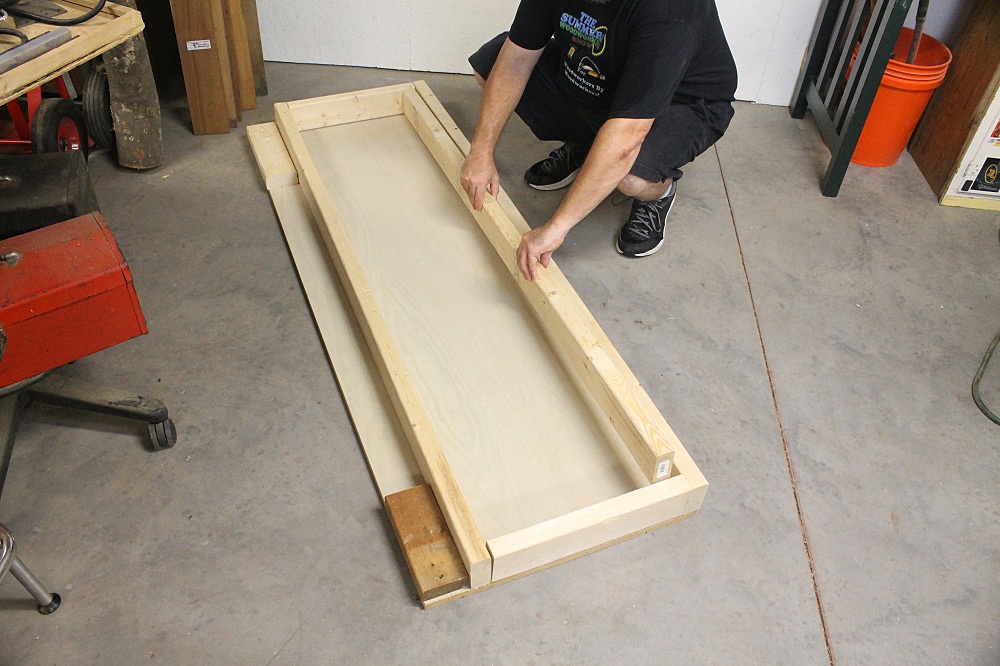
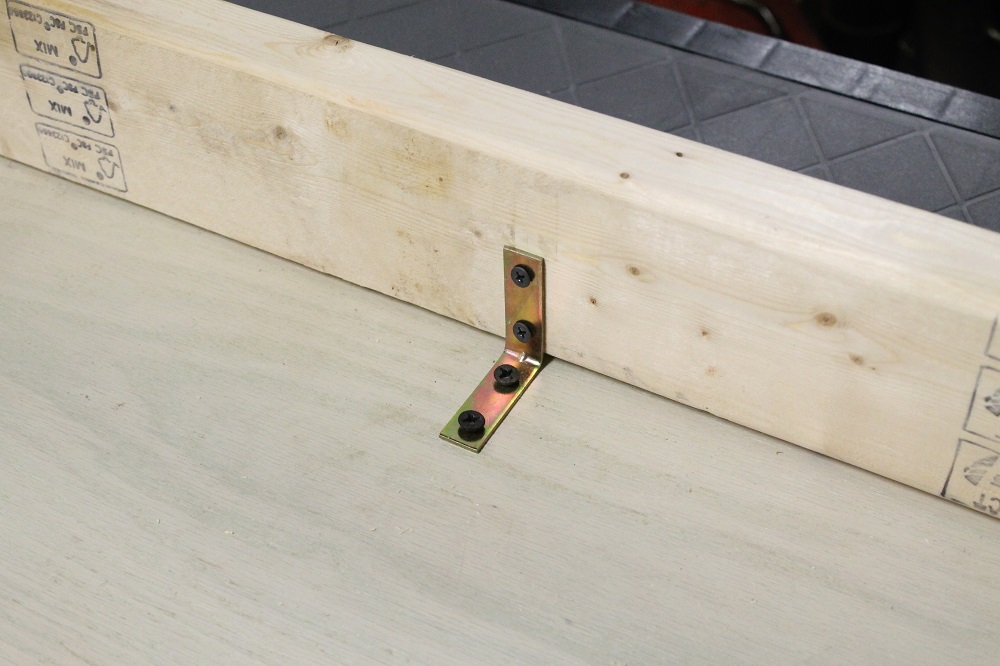
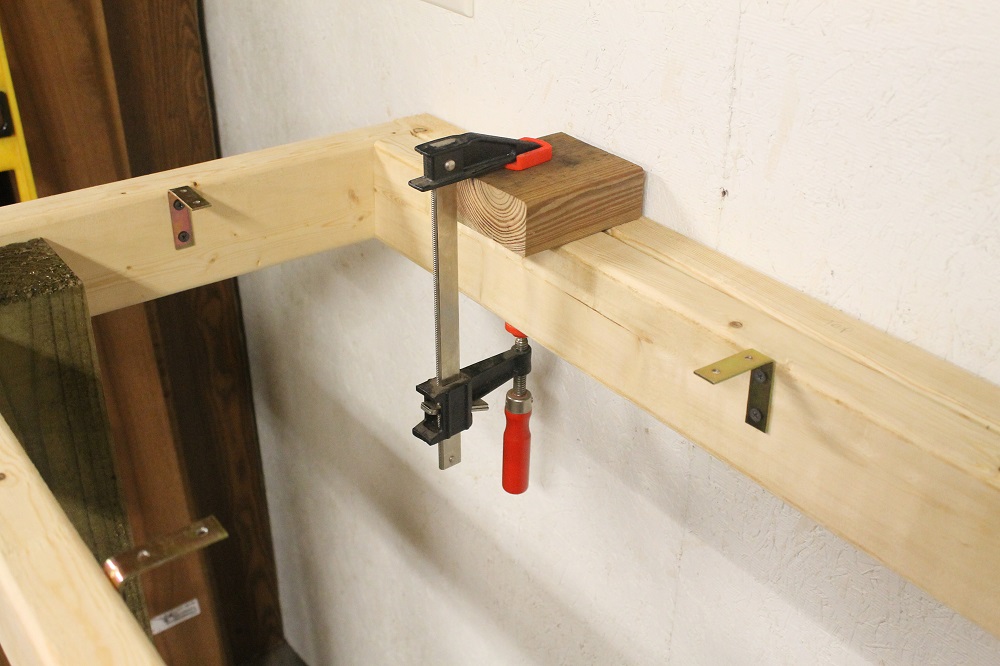
Simply screwing through the top and into the framework works just fine (and I’ve done that before). However, I didn’t want a bunch of visible screws breaking up the smooth surface, so I opted for “L” brackets instead. Though – when all was said and done – I did end up running a screw down through each corner to close some small gaps (though I could have eliminated the flex with more L-brackets). So, what’cha gonna do?
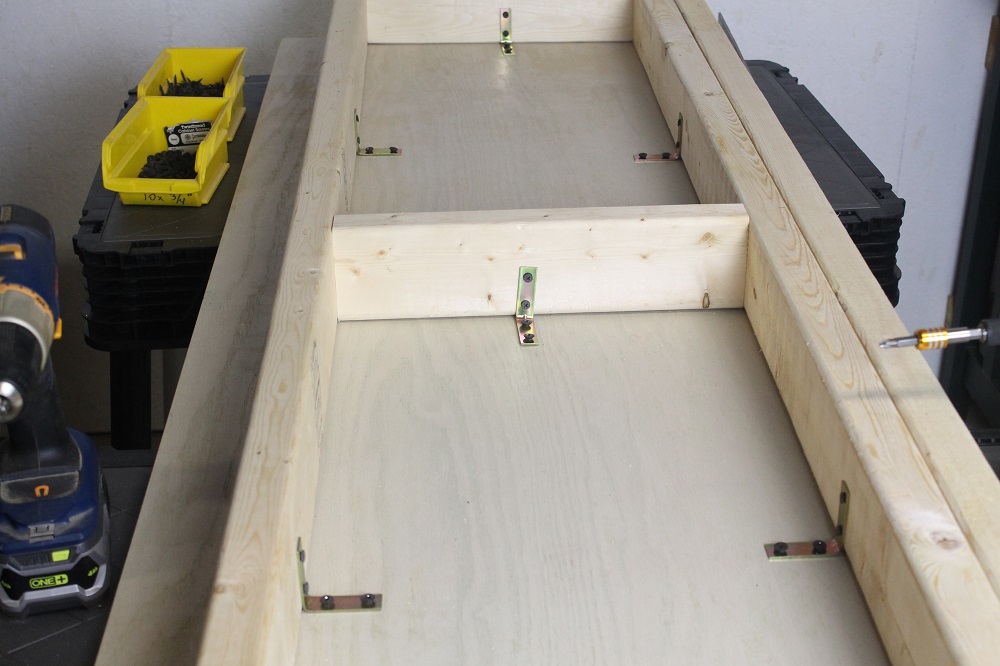
Lay the top upside-down and position the assembled frame. The ledger is sitting in place to space the frame out from the back, but remains detached. Make sure the ledger is flush with – or ever so slightly proud of (overhanging) – the rear edge of the bench top.
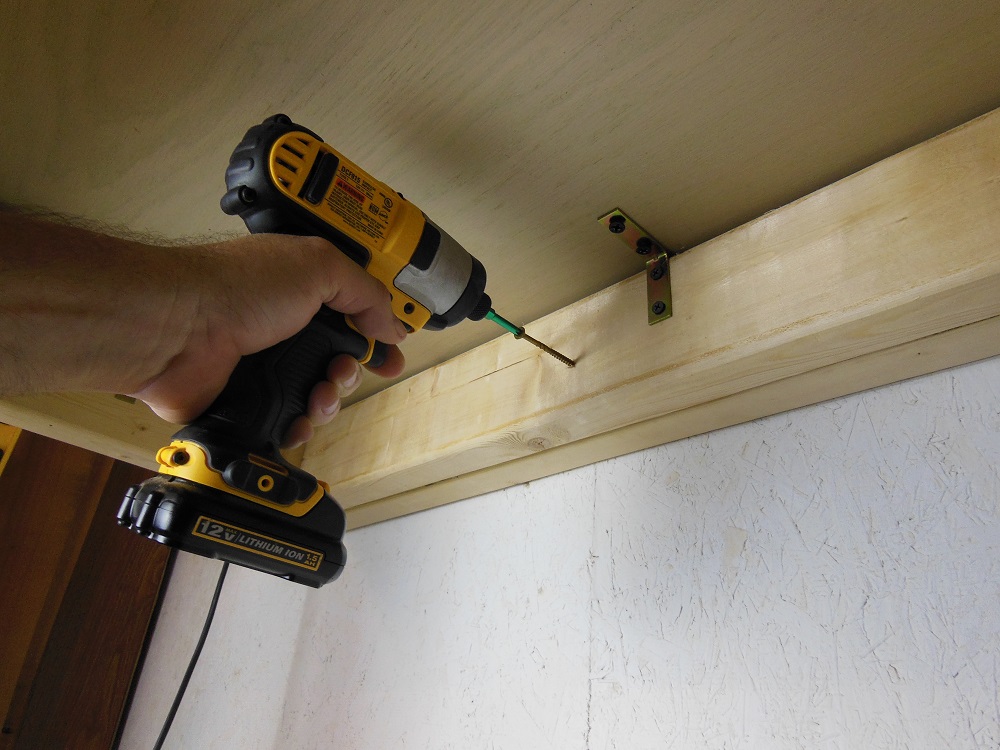
Screw It To It – Attaching The Ledger To The Wall
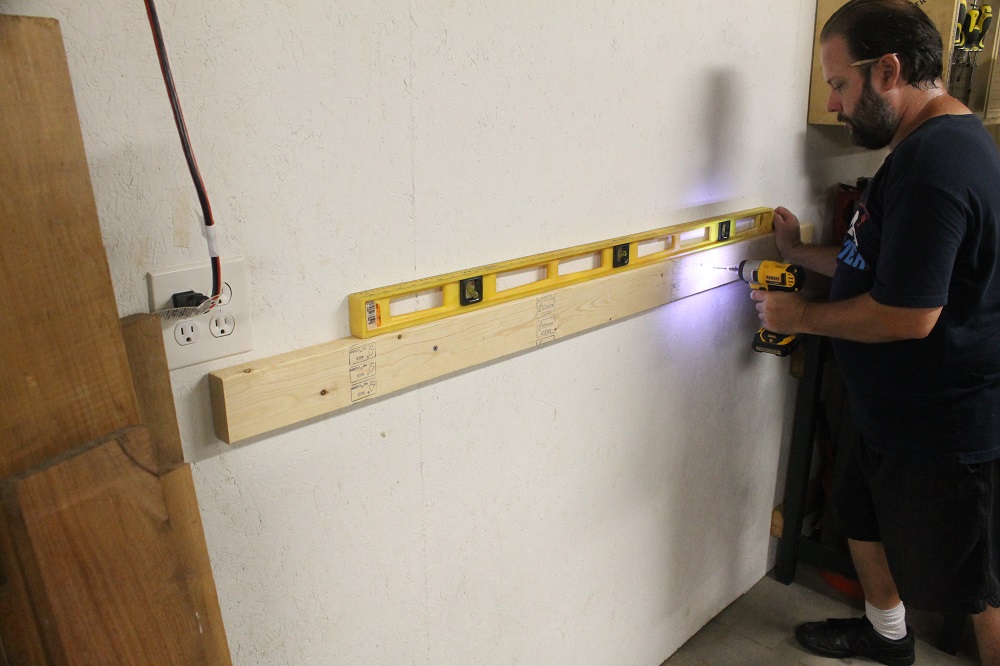
This built-in, bipedal workbench utilizes wall studs (vertical 2×4’s inside the wall, not your teenager’s heartthrob posters) for rear support and is secured to the wall with a ledger board. Make sure your ledger is level.
As mentioned earlier, there are a number of ways to go about building a workbench. The same goes for how it’s attached to the wall. Some people just screw the frame straight to the wall, but I feel that a separate ledger better supports the weight when you don’t have rear legs.

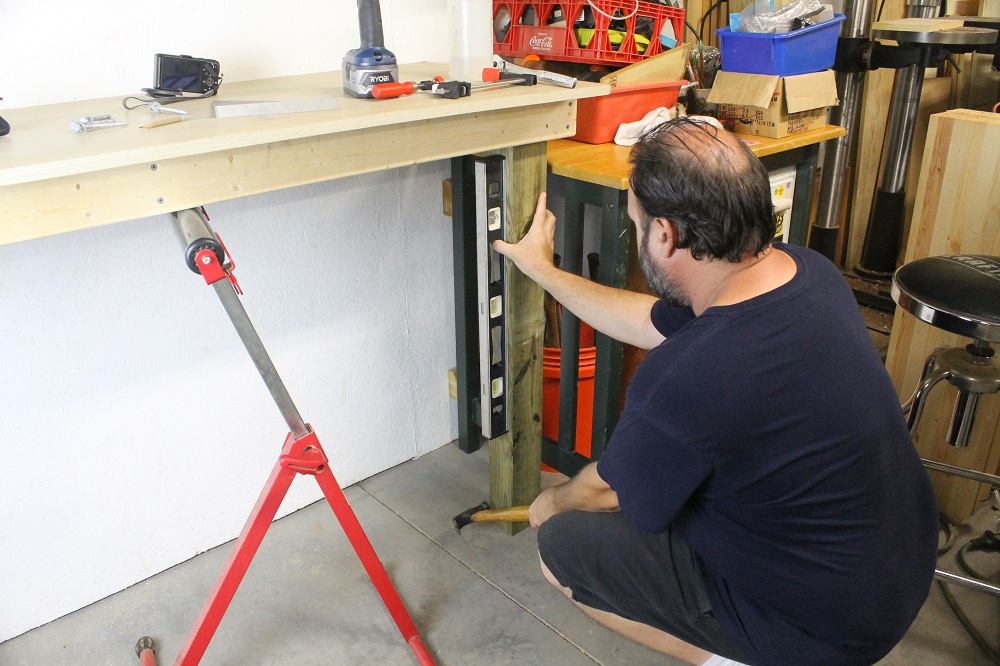
Look At Those Sexy Legs. No, Not My Chicken Legs – The Workbench Legs, Silly!
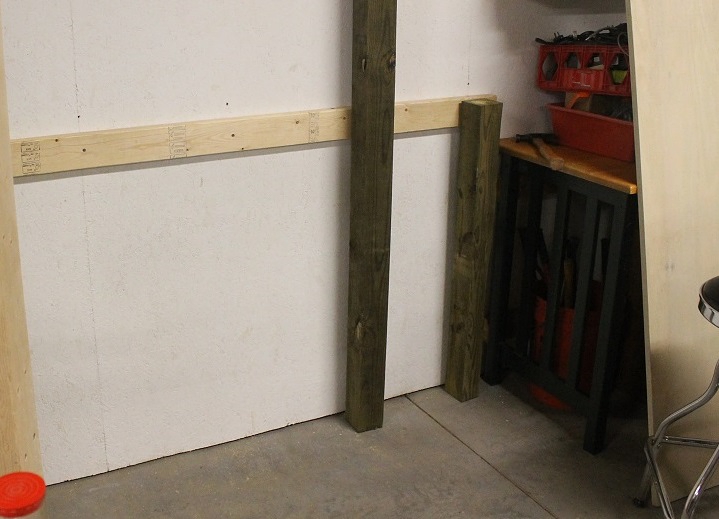
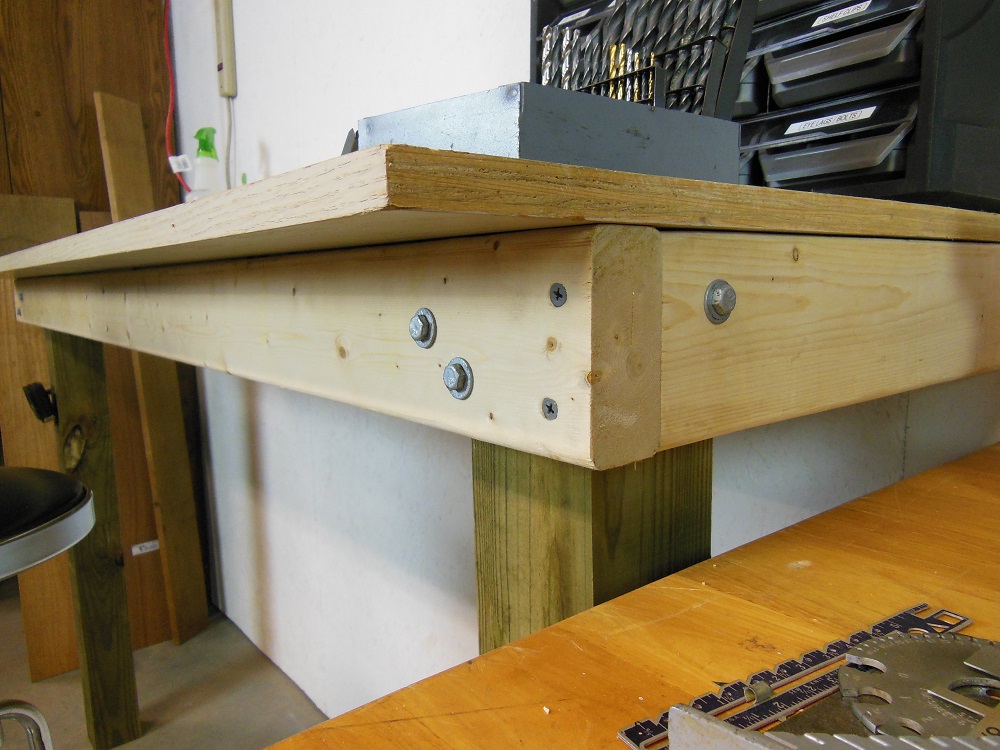
“Sexy” is in the eye of the beholder, I know. But the real beauty of these legs is their simplicity. They’re just lengths of 4×4 and some lag screws.
I chopped my legs a tad shy of the cut line, giving me some wiggle room when I level the bench top (in case the floor isn’t perfectly level… and it isn’t). How tall should you make it? Well, how tall do you want it to be? The top of mine is 41” from the floor. This works great for standing or using a tall shop stool. If you’d rather use a desk chair or short stool, you may find 28” or 32-34” – respectively – to be more comfortable.
On The Level – Leveling the Built-in Workbench
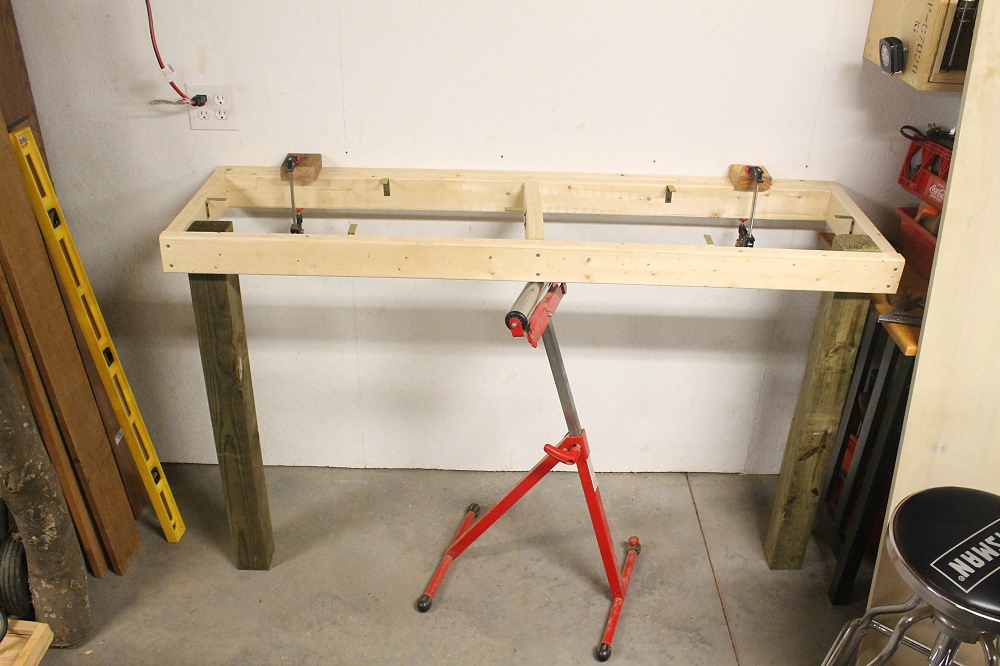
Rest the back of the bench top on the ledger and temporarily prop up the front. An adjustable roller stand works great for this. Lay a carpenter’s level on the frame and adjust the front edge until it’s level with the back.

Final Assembly Of Your Built-in Workbench
Now you can go ahead and anchor the frame to the ledger and shore up the legs.
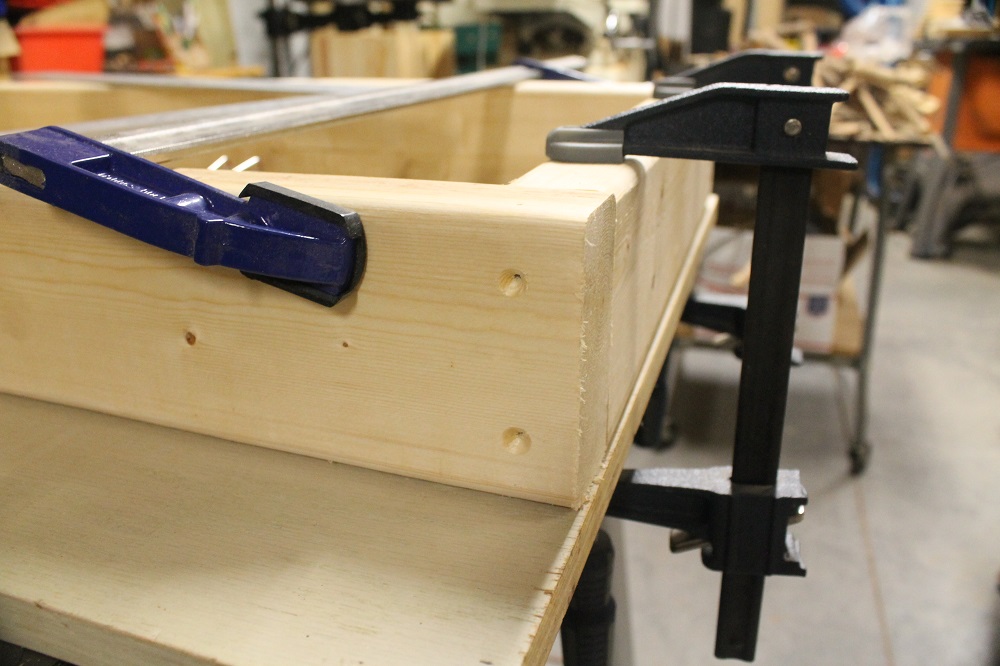
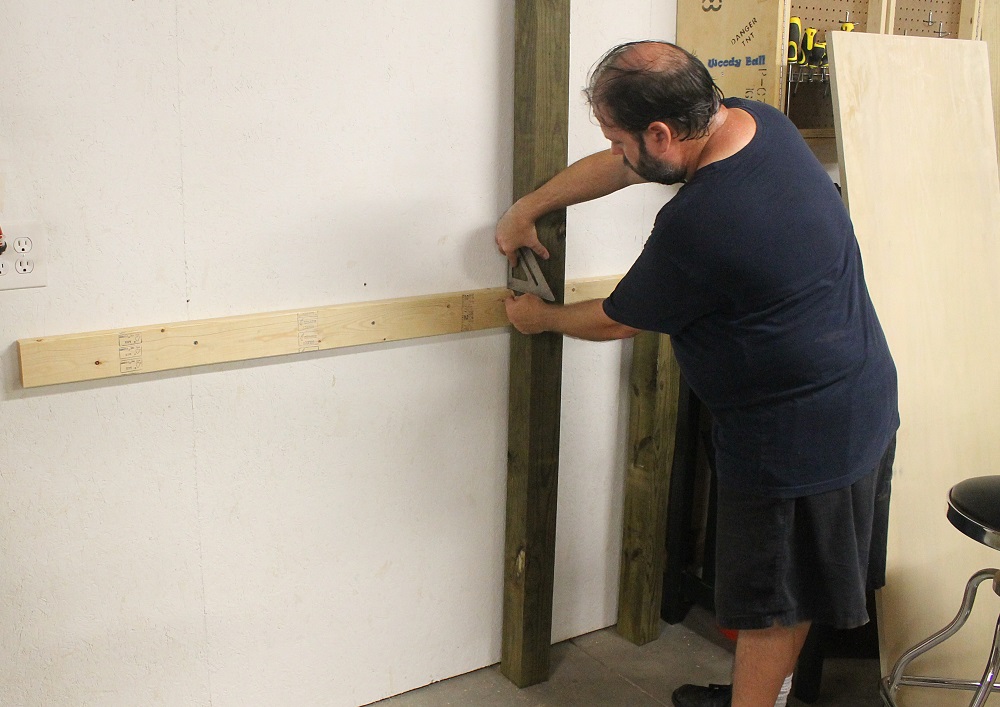
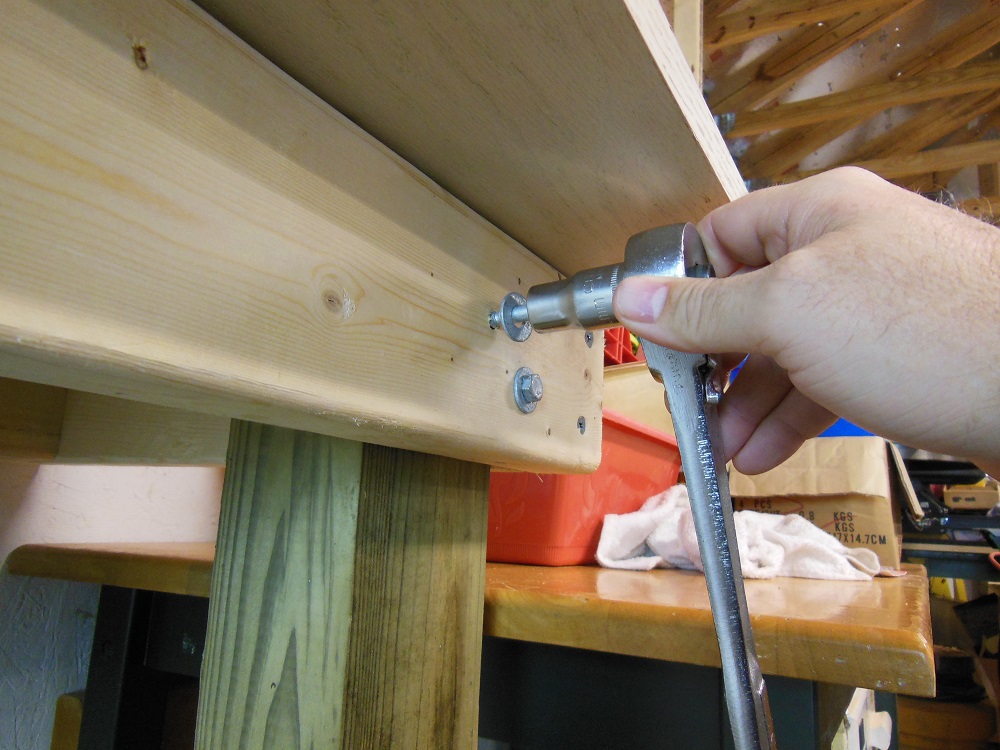
Clamp the leg tightly to the frame and drill for lag screws.
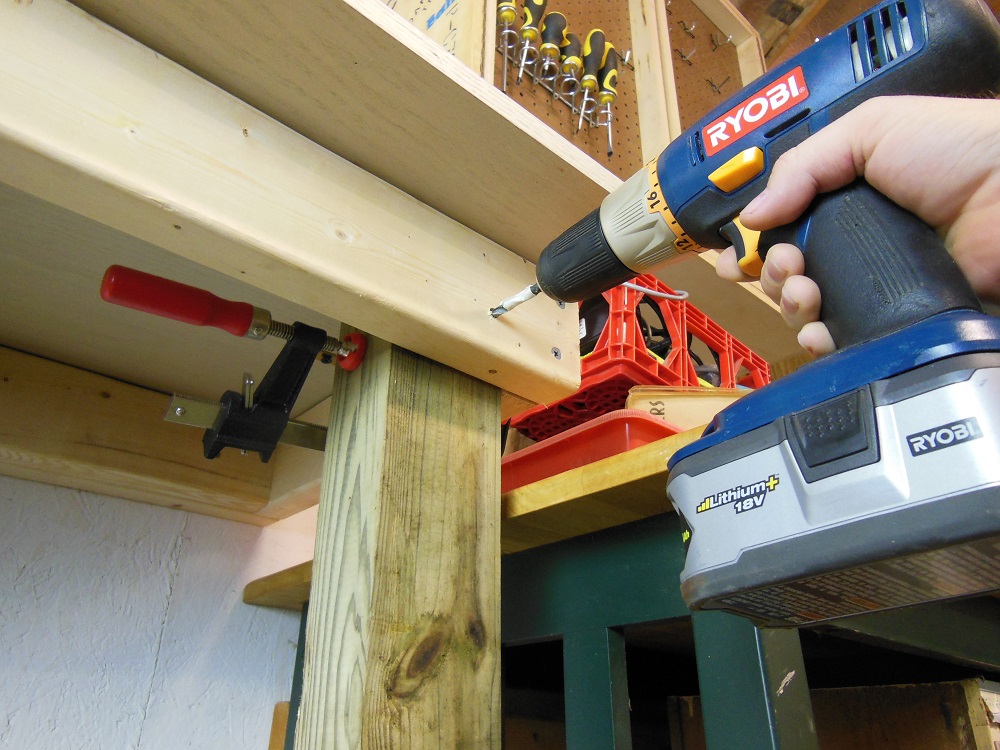
Finally, fasten the legs. For each leg, I used two 3 inch 3/8” lag screws from the front and one from the side. On others, I’ve used a single 1/2” lag in both the front and sides.
Calling In Reinforcements – When You Need An Even Stronger Workbench
If you need to upgrade the load bearing capacity, you may choose to build a bench having four legs and then anchor the back to the wall (or just position it up against the wall). Or you may opt to add reinforcement blocks to the rear inside corners of the frame and the ends of the cross members. Another common solution is to make the frame flush with the back of the bench top and rest it on top of the ledger (just be sure to fasten the frame to the ledger to keep it in place).
You can also strengthen the frame by gluing the joints (in addition to the screws). There’s no need to glue where the legs bolt to the frame (or the frame-to-ledger or ledger-to-wall connections). These are all great ways to beef up construction, if needed. But – in most cases – the build method described above will work more than sufficiently for my needs (and probably for yours as well).
Permission To Approach The Bench
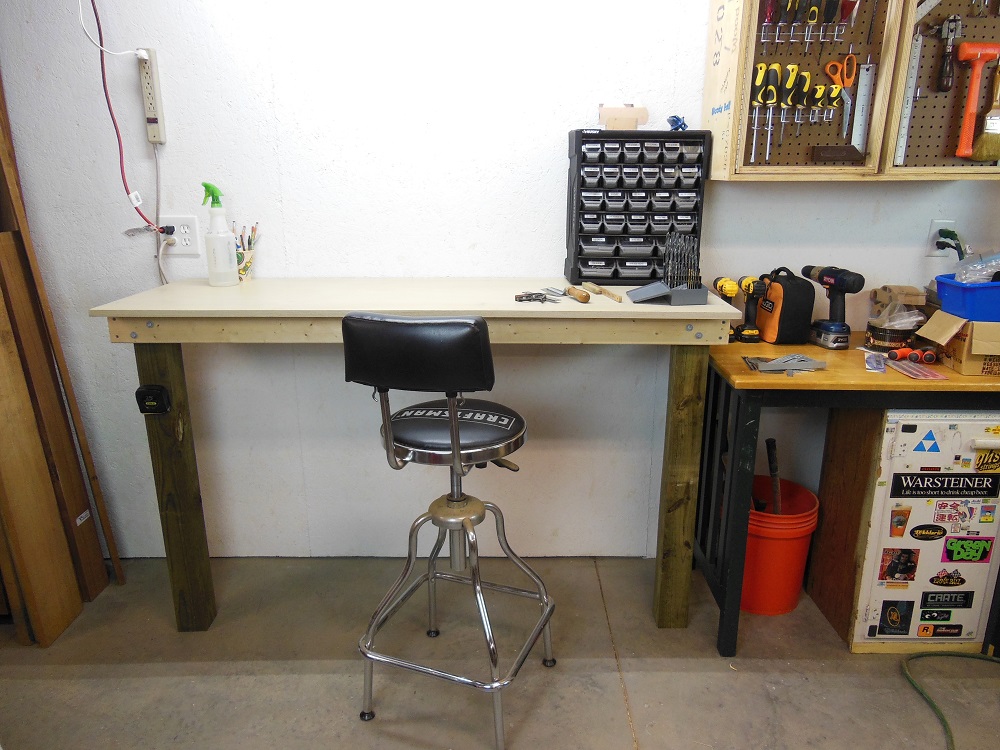
Basic utilitarian projects like this tend to be some of the most useful. And I think you’ll find this one to be very approachable for DIY’ers of all skill levels. After I use it for a while and decide what additional features I’d like, I may add a few things. But floor space is at a premium, so I like that I can roll various pieces of equipment underneath the bench and out of the way when not in use. However, I will definitely be mounting some sort of storage on the wall above it.
Now if you’ll excuse me: I’ve been asked to sort all these used table top fasteners, by flavor.