

There’s not much of a demand for stairs in Florida. I guess the ground is too flat and the people are too old to make a big fuss about stairs. But occasionally I do get the pleasure of creating a staircase for my clients (or myself). This year, it was for my parent’s cabin in North Carolina. With not much time on our hands for work (or money for materials) we scrounged up what little wood we had and made a basic set of stairs for the porch in a little more than five minutes. Read on to learn more on how to build stairs in just a few simple steps. Get it, steps?!
The Old Stairs
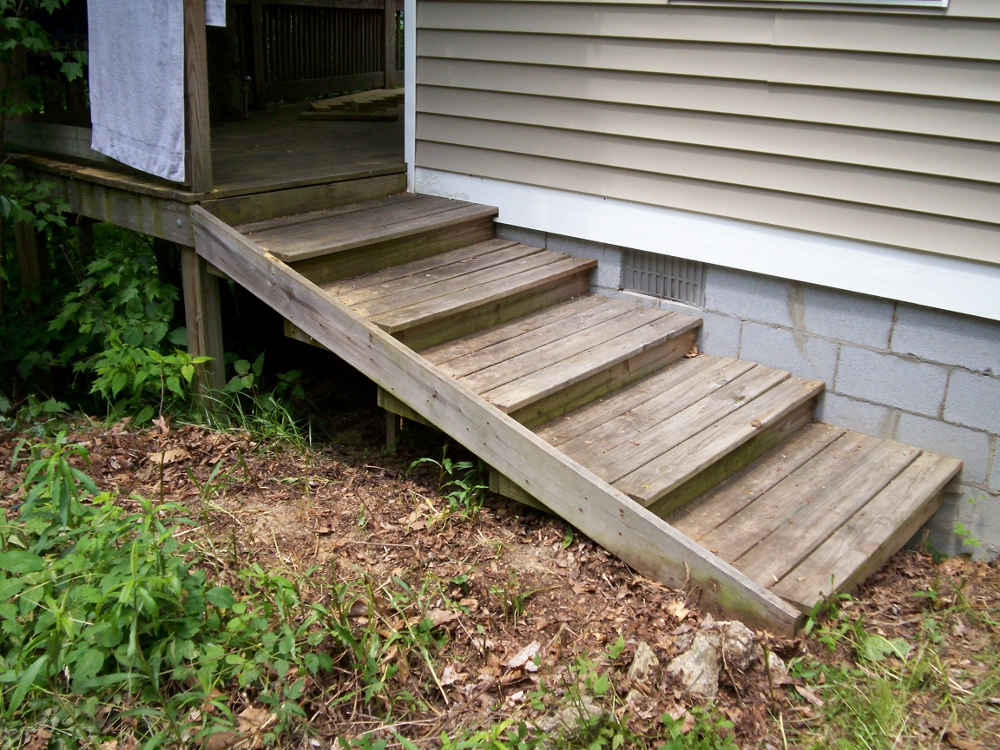 The old stairs were a bit cumbersome. Years earlier, my mom had the notion that they would be too old to use a regular set of stairs, so they decided to build some elongated ones that you could use with a walker. What ended up happening was that it made walking up the stairs really weird so you had to take two steps with one leg, then one step with the other to get up the stairs. You kind of looked like a zombie trying to navigate an escalator.
So we ripped the old stairs out of the way and tried to level out the rocky, uneven mountain ground around the stair landing. I ended up sticking a few concrete blocks against the foundation and backfilling it with a couple of rocks just to make up some solid ground.
Three Stringers
 We needed three stringers for the stairs but we only set one 2×12 out for a layout at first. To find the length of the stringers, just measure the height from the top of the landing to the bottom, take said measurement and divide by seven (the typical rise per step) to get the number of steps you need. For instance, a 50 inch rise would be divided by seven to get an answer of 7.14. Round down and you get seven, the number of steps you’ll be cutting out of the stringer.
In our case, because the ground was so uneven, we put a long 2×12 on top of the landing and extended it out to the guesstimated landing zone, then took our measurement from the bottom of the board.
You can take it one step further and divide the number of steps by the rise of the landing and get the actual length of each step. For instance, take the 50 inch rise of our imaginary stair landing and divide it by the number of steps—7 to get an answer of 7.14 again. This time, you won’t need to round up or down, just convert the decimal to a standard fraction. 7.14 = 7 9/64 inches but we can call that 9/64 a quarter of an inch since our stairs are so short. Therefore our steps rise are going to be 7 ¼” each.
Since the optimal step is no less than 10 inches, we can multiply the steps by 10 to get an answer of 70 inches—and find the length of each stringer.
Stair Layout
 Before you get carried away with the layout, you’ll need to know if you’re going to attach the stringer so the first step is even with the deck or if it’s going to begin one step down from the landing height. To make it simple, just go with the first step being level with the landing height. It’s easy enough to attach everything right to the face of the landing rather than worry about attaching it to the joists below and adding a bunch of deadwood.
Layout the first stringer with your square so that one outside edge of the square reads your rise and the other side reads the run measurements you calculated in the first step. Stair gauges really help hold the square in place, but if you’re in a hurry, just mark the square with a pencil for your stair guide.
Mark the stringer on each side of the square (the run and the rise), then move the square down to the opposite side of the first mark and make another two marks. Work your way down the 2×12 until you’ve got the right number of steps. (In our case it was seven).
For the bottom step, you’ll need to trim off the excess amount so the steps are remaining the same height up the stringer. For instance, if you’re using 2×6’s, you’ll need to trim off 1 ½” from the bottom of the stringer where it sits on the ground.
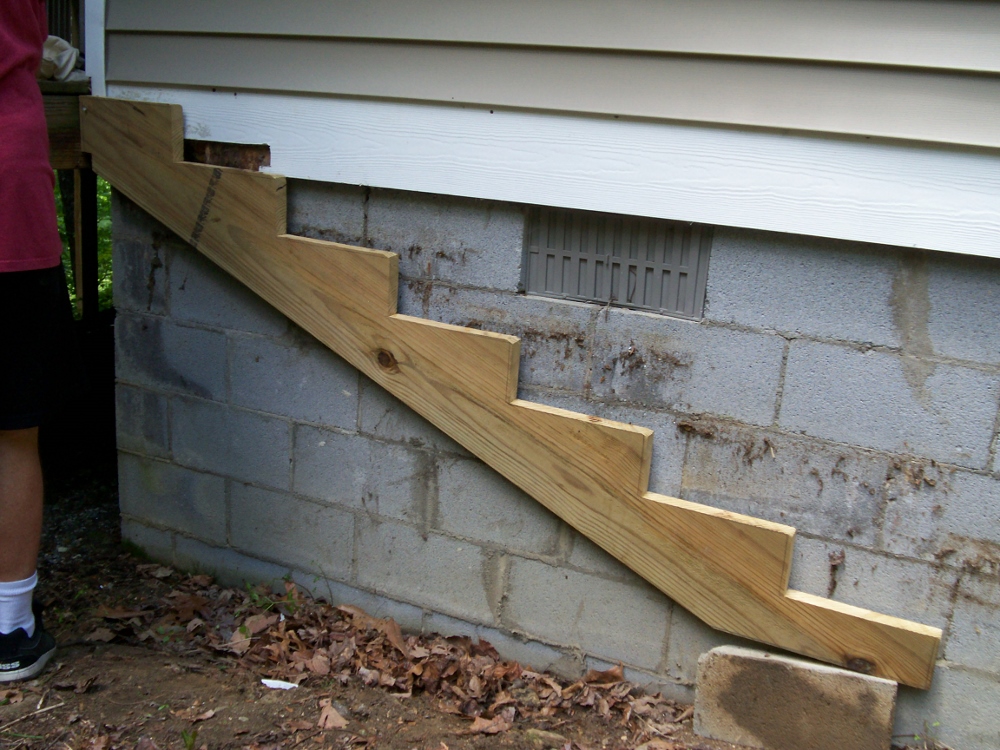
Last but not least, make a notch on the top of the stringer where it will sit on a ledger board. You really don’t need to so this, but I find without it, the staircase is only held in place by a few nails or screws and that makes for a dangerous set of stairs indeed.
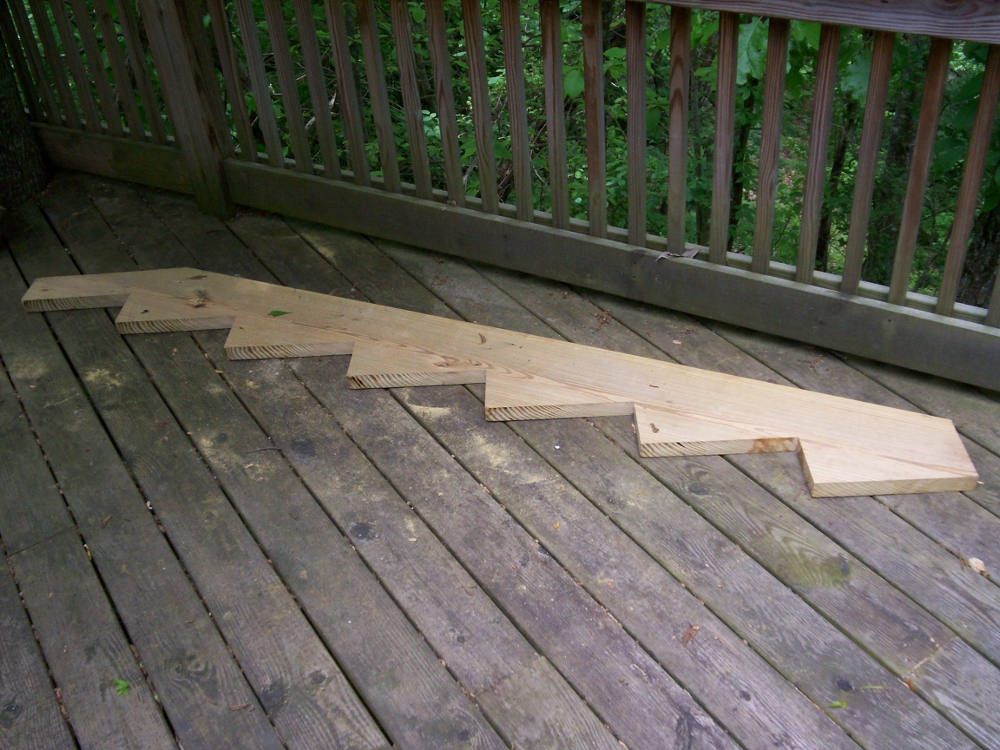
Cut out the stringers with a circular saw and finish the corners with a hand saw or jigsaw. This way, you won’t cut into the 2×12 anymore than you need to and weaken the structural stability of the stairs. Copy and paste is all you need to do once you’ve cut out the first stringer. Just lay the cut out stringer on top of the other 2×12 and start scribing away.
Step it Up
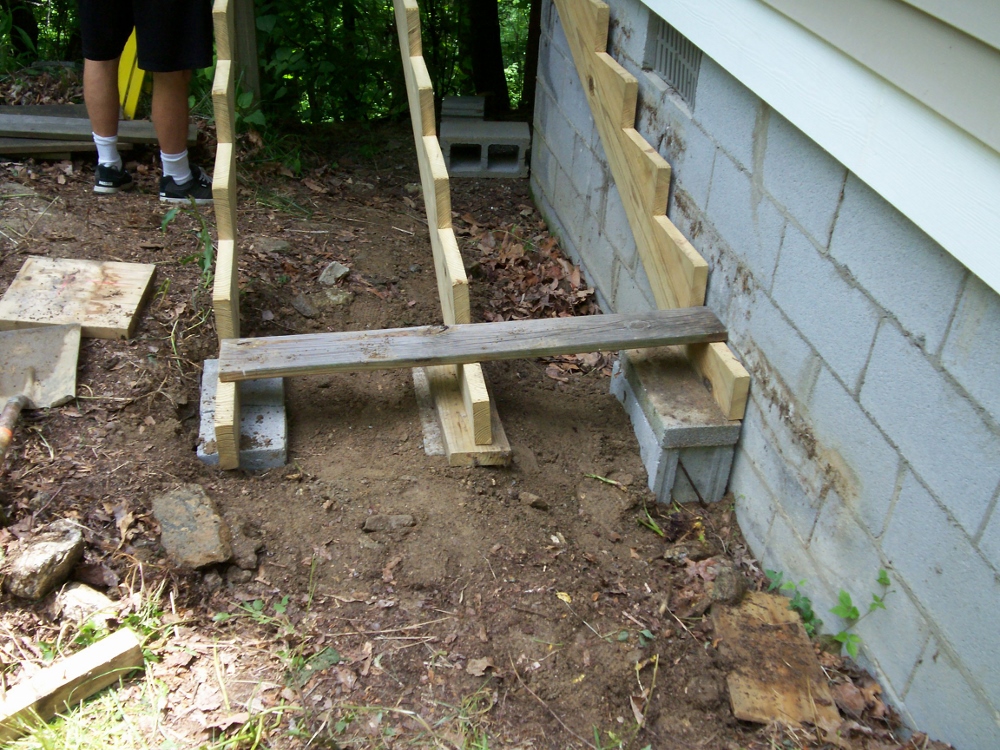 All that’s left for our simple staircase was to install the stringers and put the treads in place. We placed the first stringer against the wall and made the rest line up with the first. We installed the stringers onto the ledger board and made sure they were level across the treads. Finally we attached the treads to the stringer. We used two treads per step—except at the top we needed a small piece so the deck met the first step without a gap. After a few nails, they were all ready to go and it didn’t take us but a steps to get the job done!
Are you a stair building pro? Or, have you tackled a DIY stair project yourself? If so, share any tips you might have in the comments below!
I do prefer to include riser boards on each step. Not sure how this works with the ready stair brackets. Riser boards make the stair case look finished and you can’t see between the treads. Also, there should always be a handrail. You can use 5 1/2 or 6 inch carriage bolts to attach a 2×4 edgewise to the stringer. cut an angle on the tops to match the pitch of the stairs and attach another 2×4 along the tops. The handrail should be 34 to 26 inches above the nose of the tread.
Also, I like to leave the tread wider than the stringer so the overhang matches the nosing on the tread. The tread nosing is the part of the tread that sticks out beyond the riser. it should be 1-inch.
I think that’s a good idea, the right tread nosing is essential for the look of the staircase. When I build stairs i get my designs from http://www.eestairs.com, they seem to get it right most of the time. 🙂
I like to use my knife for laying out my rise and run , I find that it makes the layout more accurate then with a pencil.
Thanks for sharing Bill. A blade can definitely make for more accurate cut lines!
When I need to build stairs I go to Lowes or Home Depot grab a pre made stringer, then go to the 2x12s lay it down and trace the stringer onto it as many times as needed. I then buy the 2×12(s) with my traced lines. The rest is self explanatory.
The precut stringers do not always fit the rise and run that you need and they may not even meet your local code requirements. It is silly to put in stairs that are not tailored to your needs just so you can avoid some simple math.
Some locale may accept notching your stringers on a ledger, some may require a FHA strap or similar hardware at each stringer.
If you like the challenge you can mortise stair treads into stringers with a router- stringers without notches are much stronger.
For strong un-notched stringers, Stair Tread Brackets can make the job easy, Simpson makes them and a company called EZ Stairs:
http://www.ez-stairs.com/ makes some great brackets we have used quite a bit to make solid, onsite stair building go faster.
Thanks for feedback Kimber, good input!
EZ Stairs looks like a remarkable product and simplifies the process. Of course it helps if you know what you need beforehand so you could take them with you. I have built my last notched stringers.
There is another advantage to building stairs without notched stringers: headroom below.
With notched stringers, you will always need a substantial amount of 2x material left intact below the tread- usually 3-5″. With routed or bracketed treads and risers we have built solid stairs with only 3/4″ of stringer below the lowest-back corner of the tread. It is also possible to do this on wider stairs without an intermediate stringer(s) by using the risers as cross beams. You do need to secure attach them to the back of each tread. We have done this with solid lumber and also used 1 1/8″ plywood for treads and risers when they will be faced with finished material or carpeted.
We have been able to solve some tricky design problems this way
Thanks for the comments James and Kimber!
Personally, I think Jeffrey had a great idea for the novice who may not even own a framing square! I’m going to pass that along to others in similar situations.
billw