

What you do in the privacy of your own bedroom should be your business. But it’s hard to maintain that cone of silence when your bed broadcasts your every move. Even if the neighbors “see no evil”, a squeaky, creaky box spring can embellish the simple, innocent act of sitting down or rolling over into scandalous fodder for the gossip fence. Rest assured you won’t have to replace that noisy box spring. We’re about to show you how to silence the sleep sack with nothing more than a half hour and a bottle of glue. If your box spring has been dishing the dirt, we have the fix for you!
Sleeping In A Cardboard Box(spring)
If you have this atrocious noise in your life, you’ve come to the right place:
https://www.instagram.com/p/B5URtC8ABfs/
Annoying creaks and squeaks are common with cheap to mid-grade box springs; and even some expensive ones. In reality, most modern “box springs” contain exactly zero springs. But if yours actually does have a network of metal springs and wires – and they’re squeaking – you’ll want to find the offending contact points and wax liberally. But if the video above is what you’re dealing with (and it probably is), we’re going to take care of that right now.

Even the “box” part of the name is, in my opinion, a misnomer. But maybe it’s not as far off as I think. Most box springs are just a cheap – and I do mean cheap – wooden frame topped with cardboard (basically a flattened box) and wrapped in fabric. Believe it or not, that loud, creaky commotion is usually caused by said cardboard rubbing against the wood.
Remove The Dust Cover – Putting A Noisy Box Spring To Bed
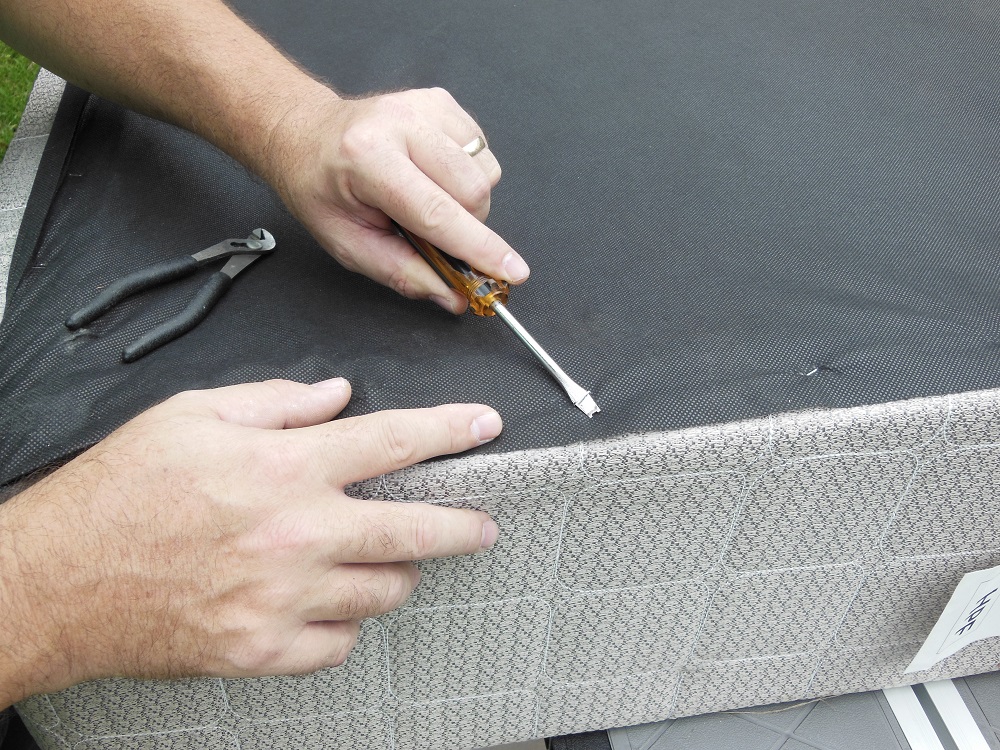
Either stand the box spring on end or lay it upside-down. Pull the staples and corner protectors from one end and both sides. Then you can peel the liner (dust cover) back and out of the way to access the inside.
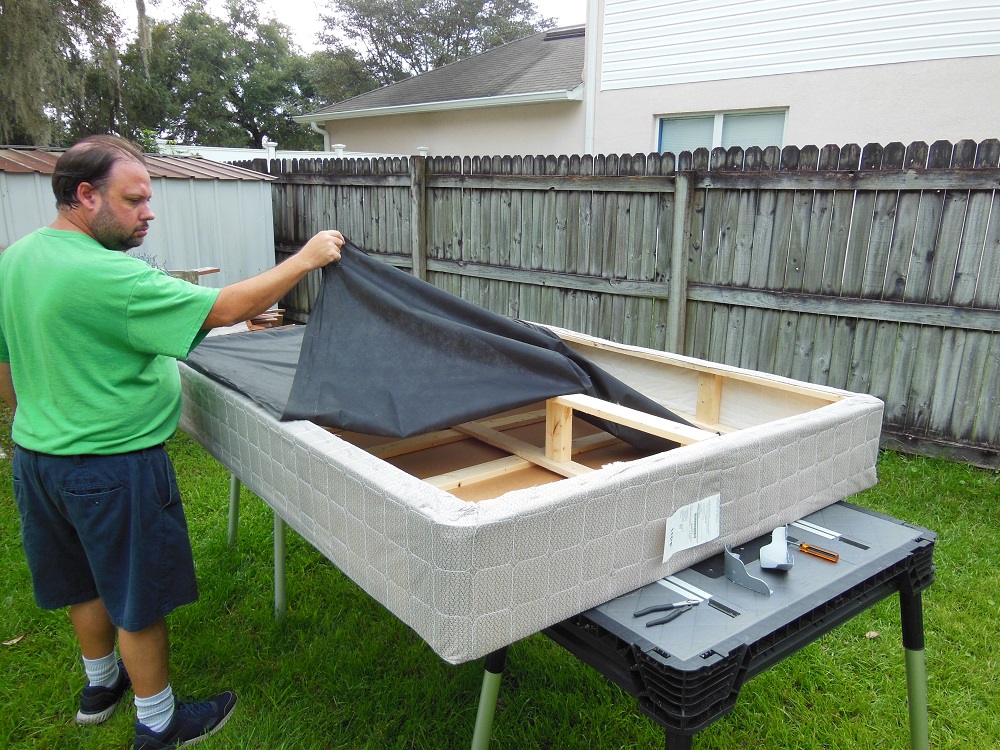
The cloth on the bottom is actually there to keep dust out. But my cynical side insists its true function is hiding how cheaply these things are built. Same with most couches.
Finding The Source Of The Problem – Hush Little Box Spring: Don’t Say A Word
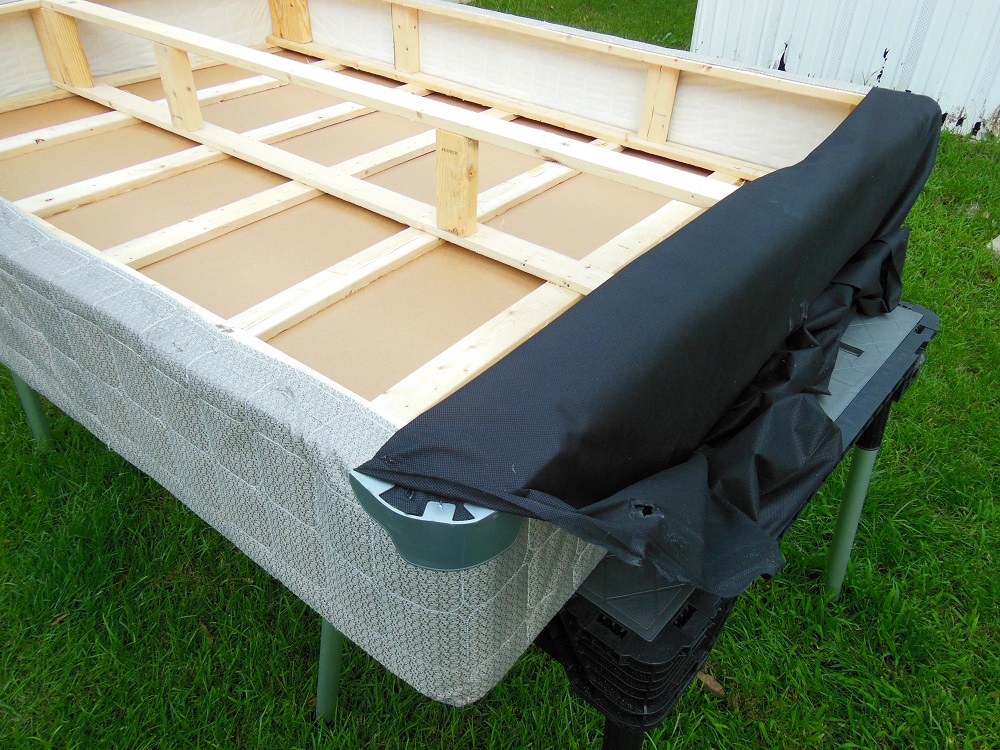
In some rare cases a noisy box spring may have a broken board. We’ll cover an easy way to repair that in a bit. Most of the time, however, you will find that what you’re hearing is the friction-creaking sound of cardboard rubbing against the wooden frame. The two become burnished over time. And when they do, they feel compelled to announce it to the world.
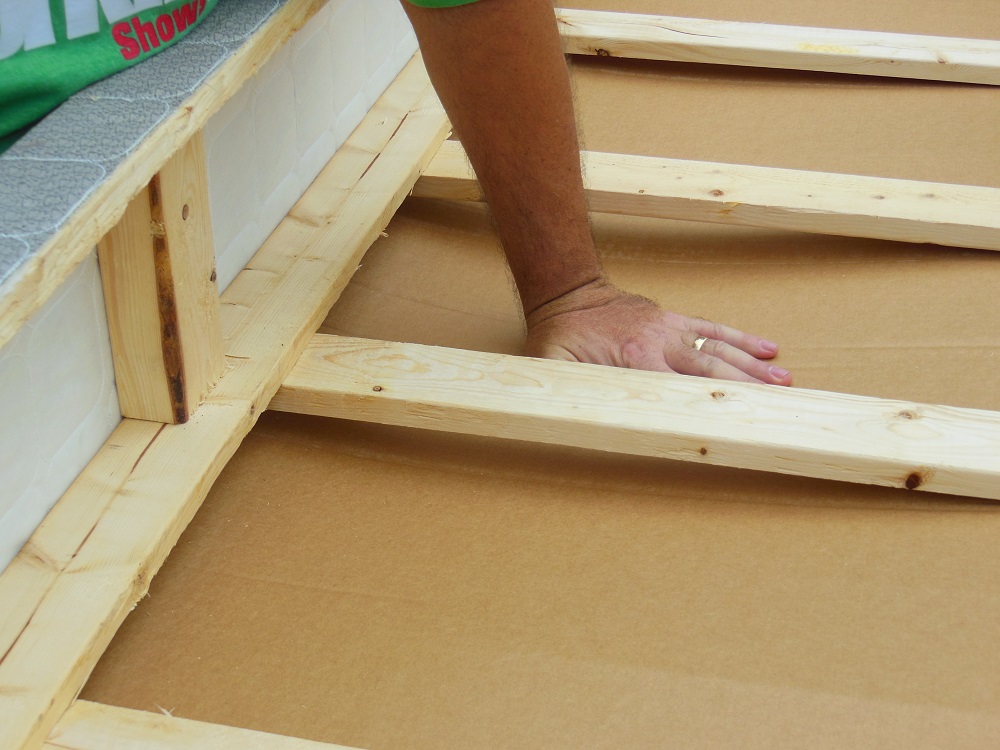
In better wooden box springs, the cardboard will be glued to the slats. But many manufacturers skip that step. So your bed eventually starts to sound like a herd of elephants in a room of loose floor boards.
As I suspected, the cardboard in this one isn’t glued to the slats. It does seem to be stapled or glued at the middle of each slat. But beyond that it’s just sitting there, retained only by the fabric cover.
Rest In Peace – It’s Easy; You’ll See!

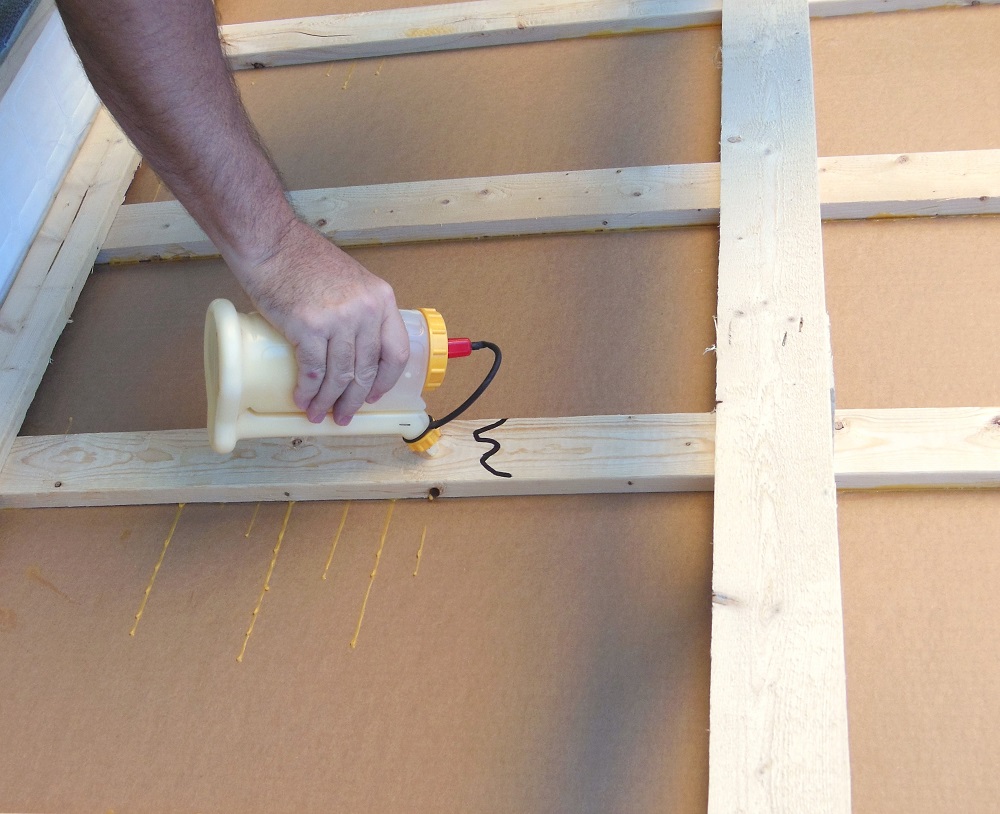
It was easy to find the problem. And the solution is just as easy: wood glue! You might want to just staple the cardboard to every slat and call it a night. But you can only muzzle a noisy bedfellow for so long. Staples will eventually tear elongated slots in the cardboard and you’ll be right back to where we are now, with the cardboard sliding and creaking against the wood every time you put weight on the bed. Or look in its general direction.

There are some who advocate removing the cardboard altogether; we do not. It’s there to disperse weight and support the mattress between slats. Removing it can significantly reduce the life of your mattress. If the cardboard is torn, install new cardboard.
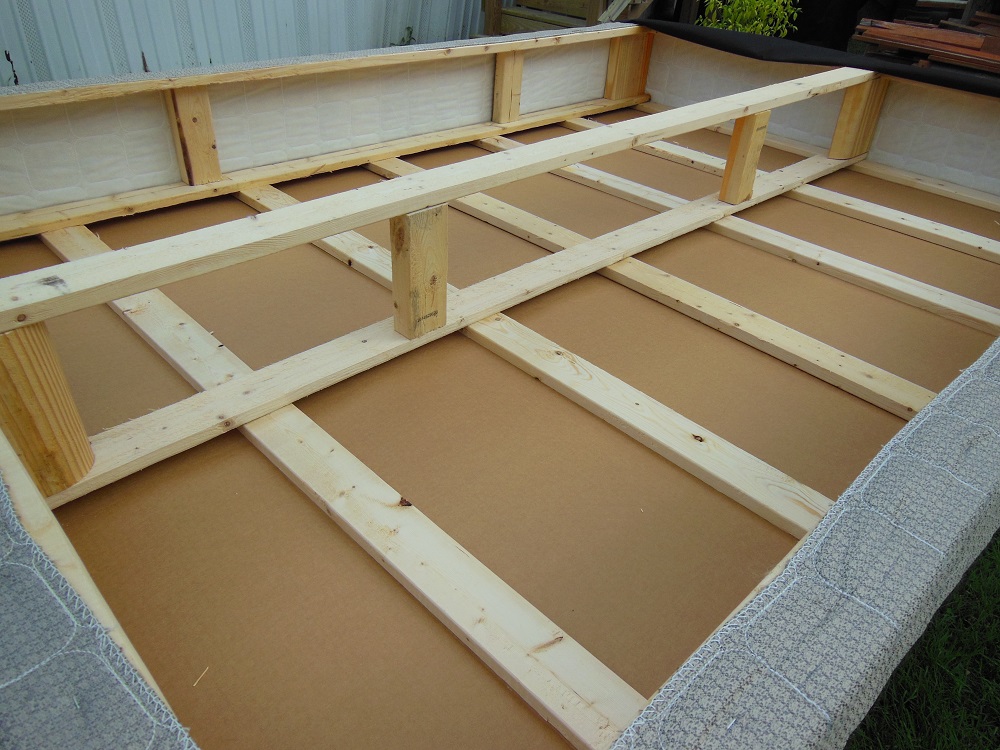
Glue the entire length of every wooden slat that contacts the cardboard. A lot of the noise occurs at the edges of the box spring (ends of the slats), so be sure to slather glue all the way to the ends of each slat then give it time to dry before flipping the box spring and gluing from the other direction.
You probably got decent coverage along the “top” edges of the slats, but the “bottom” edges – and the slat at the top end of the box spring – likely still have areas where the cardboard isn’t glued very well. So after the glue has set, flip the box spring onto the opposite end and glue any missed areas where the cardboard pulls away from the wood. And with that, your box spring should be fixed!
Repairing Broken Boards (So You Can Saw Some Logs)
If by chance you find broken wood, that’s also an easy fix. Despite the thin boards used in a box spring (to make it springy), it’s actually pretty rare that one will snap. And if one does, it’s usually the result of abuse, such as kids honing their trampoline skills. Or, you know, an overzealous “boom-chicka-wah-wah!” turned “boom-chicka-crack-crap!” Again, your bedroom – your business.
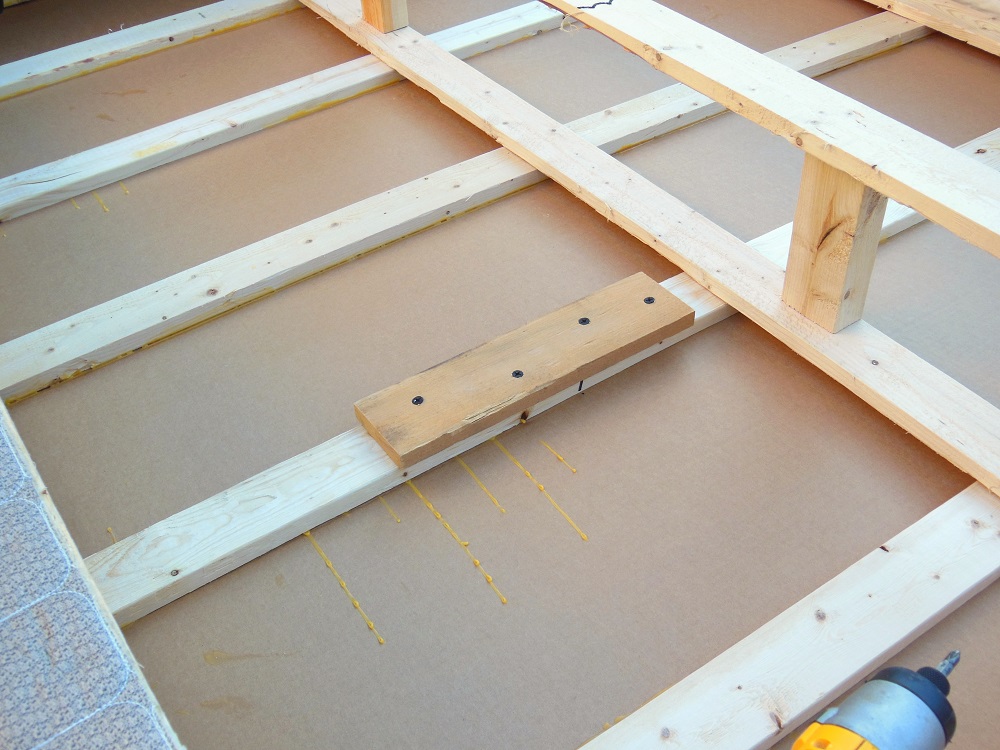
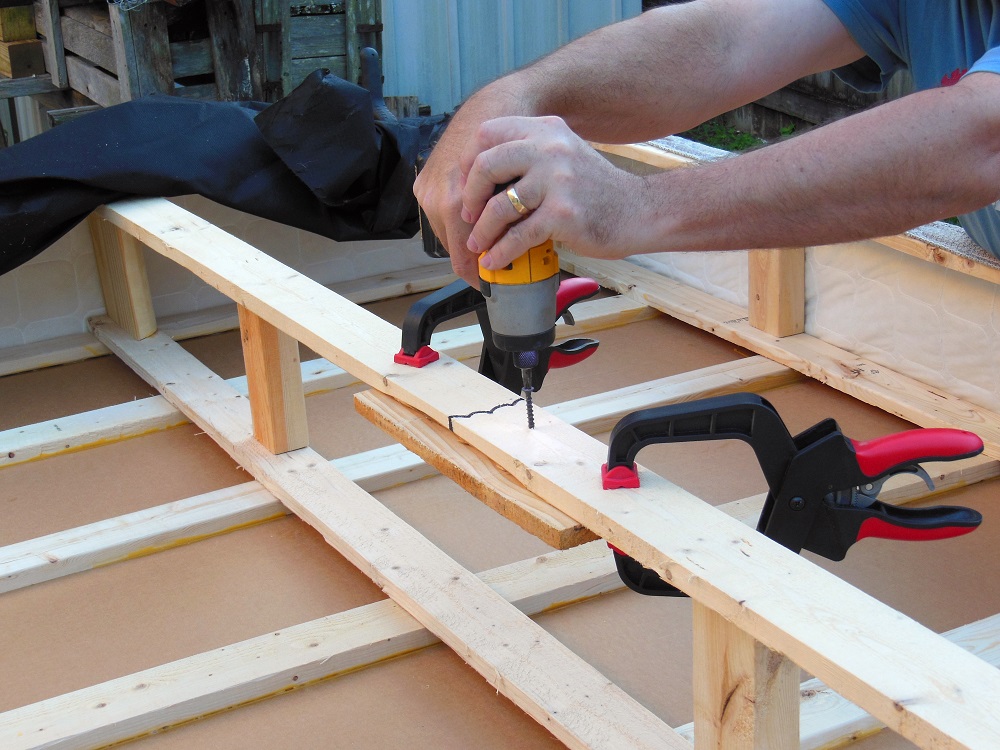
Repairing a broken board is as simple as spanning the crack with a brace cut from another board. Spread plenty of glue on both sides of the break. Then attach your brace with a couple screws on each side.
Two things to keep in mind when reinforcing a broken board are:
1) Use screws that are long enough to sink 3/4 or more into the “bottom” board, but too short to poke through the back side.
2) Locate the reinforcement brace on the “inside” of the part you’re repairing (so that it’s contained completely within the original dimensions of the box spring).
If a break is located too close to another part (so that you can’t span across it), simply glue and screw a filler piece to match the height of the neighboring member. Then span a brace across both pieces. Worst case: pull and replace the broken board. No big deal.
Next Stop: La La Land – Shush That Noisy Box Spring

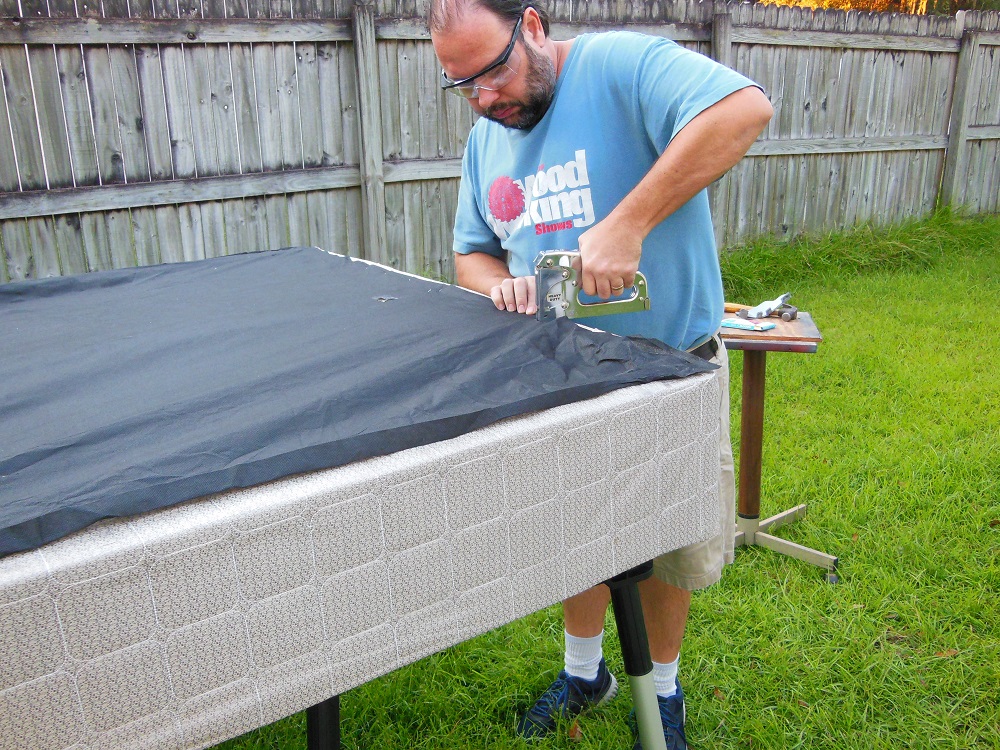
All that’s left to do is staple the dust cover back in place. A staple gun with 5/16” (or 3/8”) staples works great. With shorter staples (say, 1/4”) you run a greater risk of some not seating well and falling out over time. You don’t want stray staples in your bedroom carpet!

You Sing Like A Canary – You Sleep With The Fishes
We don’t mean to threaten you. But come on; some of us are trying to sleep over here!
The noisy box spring repaired in this article is our son’s old full-size (he’s since been upgraded to a queen). It’s otherwise in great condition and perfectly fine to pass on to someone else, but I took care of this first because nobody wants a loud, obnoxious, creaky box spring. Nobody. And now, if there’s a noisy box spring in your home, you can politely tell it to shut its filthy pie hole. And those under your roof can sleep soundly once again. Or rather, sound-less-ly. If only my snoring was so easily muted.
Found this while searching for new box spring options, or how to fix. Thanks to your site and tutorial on this, I found we have the exact “box spring”. I did as you showed with the glue and all, and it hasn’t made a peep since. Thank you so very much for this. We’d had a warranty replacement, thinking just bad box spring. Then it happened again, but now fixed thanks to your tutorial. 🙂
Where can I get cardboard in the right size to replace the torn one?
Im gonna try this too. For years had never unwrapped my two box springs, still had the plastic around it. And had squeaky noise for 12 years. I was debating on wether to buy new ones. Bc i unwrapped them today lol and the noise was still there and came to find out that a board is broken on one of my box springs.
Thank you for this video. I hope it works for me as it did for Claire.
Thank You! I’m going to try this tomorrow morning. I hope it works too because I don’t want to by new box springs for a king size bed. Fingers crossed it works.
Ok. So I did this today, and it worked like a flipping charm!!!! I followed the directions, used a big bottle of carpenters glue and was able to eliminate the squeezing and box spring groaning. I didn’t staple the dust cover back in place…I opted to glue it instead. No one will ever see it anyway! Instead of buying a new set of box springs (king size means two), you saved me a bundle for only my time and $13 worth of glue. Thank you so so so much.
So glad this article helped! Thanks for the feedback!