

If you’re still driving a gas or diesel-guzzling car or truck, you might be inclined to click past this article. Don’t you dare! Electric Vehicles, (EV’s if you’re in the know), are hitting the mainstream, and if you haven’t already contemplated one as you gaze at the dollars rolling by at the gas pump, you might very well in the near future. Even if your daily driver or work vehicle is a pickup, those are not destined to stay gas or diesel forever. I dipped my toes into the EV market with a small electric vehicle and spent many months using the basic, Level 1 “Occasional Use” charger that accompanied it. A Level 1 EV charger might work fine if you do minimal driving, but if you put on some miles, a Level 2 charger can make a huge difference in your electric vehicle experience. ClipperCreek recently sent us one of their Level 2 chargers so we could share some background on Level 1 vs Level 2 charger differences, why you might want to consider installing a Level 2 charger for your electric vehicle, and what’s involved in a charger installation.
Level 1 Chargers – When a Trickle Will Do
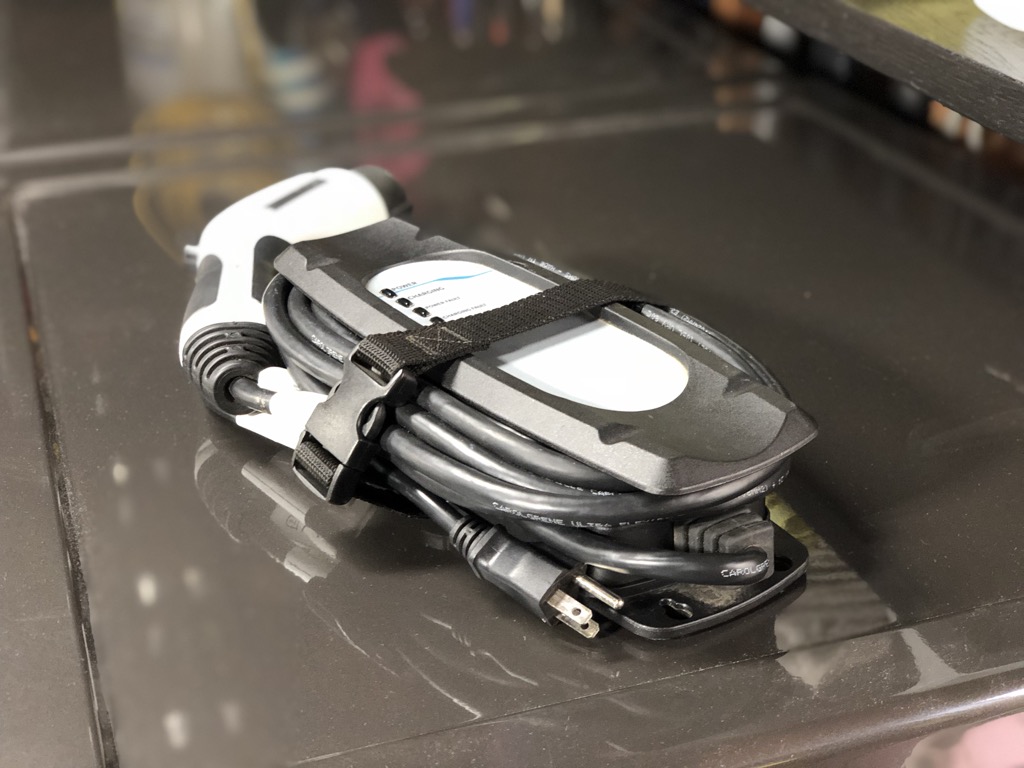
When I first got my EV, it came with a Level 1 charger. The beauty of Level 1 chargers, is that you can plug most of them into a standard wall outlet. My Level 1 charger, like many others, is small enough I can carry it in the vehicle in case I need to do an emergency charge somewhere without a car charger. In fact, that’s really their intended purpose. They will work fine on a typical 15 or 20 amp circuit, and plug into a standard 110 3-prong outlet.
Sounds great, right?! Unfortunately the downside to Level 1 EV Chargers is that they are SLOW. We’re talking watching paint dry slow. If I fully deplete my 100+ mile range battery, getting back up to full charge can take upwards of 24+ hours. Put in different terms, a Level 1 Charger adds about four miles per hour of charge to the range (ouch)! A Level 2 charger adds about 24 miles per hour (fully charging in four to five hours). That’s a huge difference. For an idea of relative charge times for Level 1 and Level 2 chargers for some of the more popular EV’s on the market right now check out page 1 and page 2 of this handy guide from ClipperCreek.
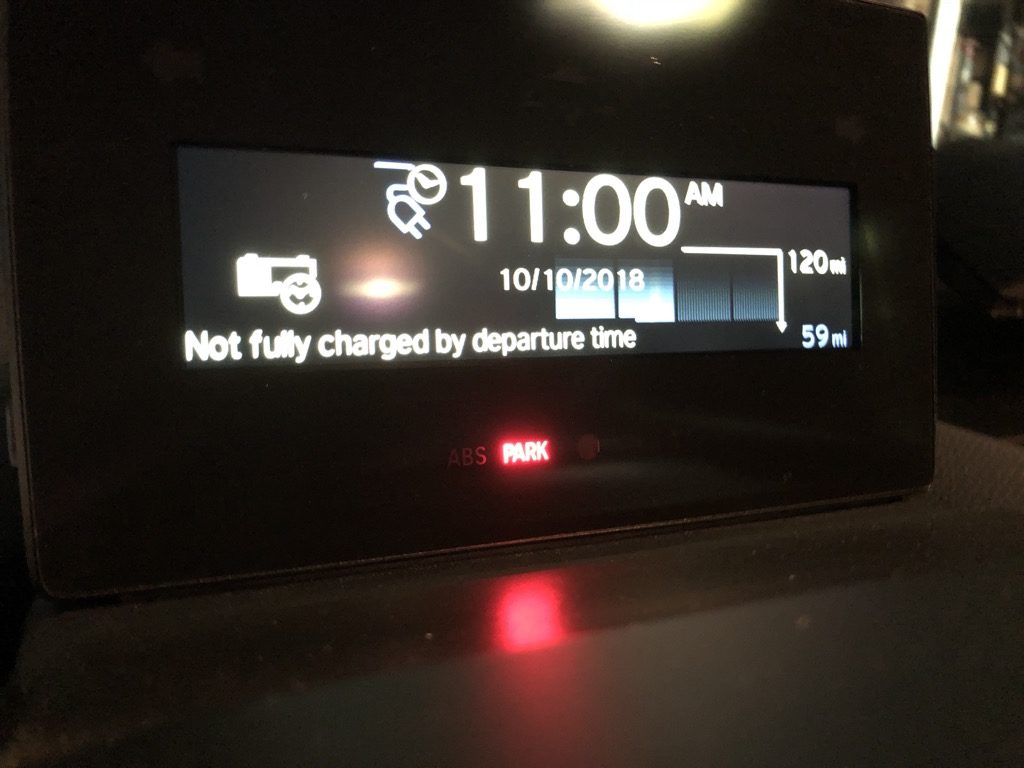
In my experience, if I was depleting less than half of my range, charging overnight with the Level 1 charger worked fine. However if I had a busy day and depleted most of the battery, getting back up to 100% could be a multi-day process, and even an overnight charging session wouldn’t cut it. Aside from the huge time savings it’s also important to think about WHEN your electric vehicle is charging. Many utility companies are now offering special rate plans and pricing for EV owners.
Electric Vehicle Rates – Charge When It’s Cheap!
I signed up for our local utility’s EV Rate Plan right when I received my EV. Here in San Diego, even on that special EV rate plan, November 1st through May 31st is virtually the same rates at all times of day. However, June through October, charging during the “Super Off Peak” hours of midnight through 6:00 am results in a rate less than half the “on-peak” hours of 4:00 pm to 9:00 pm (when everyone likes to crank their electricity usage up). Aside from the convenience of faster charging, programming your car to charge only during the “Super Off Peak” times with a Level 2 charger means you can get a full charge in when electricity is cheapest on your utility’s rate plan.
Level 2 Charger Options – Where Hi-Tech Meets High Voltage
If you’re shopping for for a Level 2 Charger, you will quickly find there are numerous options out there. I looked at EV chargers made by EV vehicle manufacturers, ChargePoint (they make a lot of the public chargers in San Diego), JuiceBox, and ClipperCreek (the company that provided the charger used in this article). From my research, I found that car brand-specific chargers were about two times the price of comparable chargers made by independent makers like ClipperCreek. For example, the charger for my particular make was around $1200. While that charger looked sexier, it’s hard to justify the 2X cost for a glorified battery charger that accomplishes the same task just as fast as a model half the price.
Several of the chargers from ChargePoint and JuiceBox feature WiFi connectivity, an app for your smartphone, and a myriad of high tech features. These features include sending you reminders to charge your EV if you forget to plug it in (been there, done that), and setting specific hours for charging, as we discussed in the section above about rate plans. Since my EV’s app and the onboard car computer give me most of those features and then some, I wanted to keep things simple in terms of the charger. In fact, most of the EV vehicles on the market let you schedule charging times from settings inputted directly in the car. If you program delayed charging in your car, you can still plug in the ClipperCreek charger and it won’t start charging until your car tells it to.
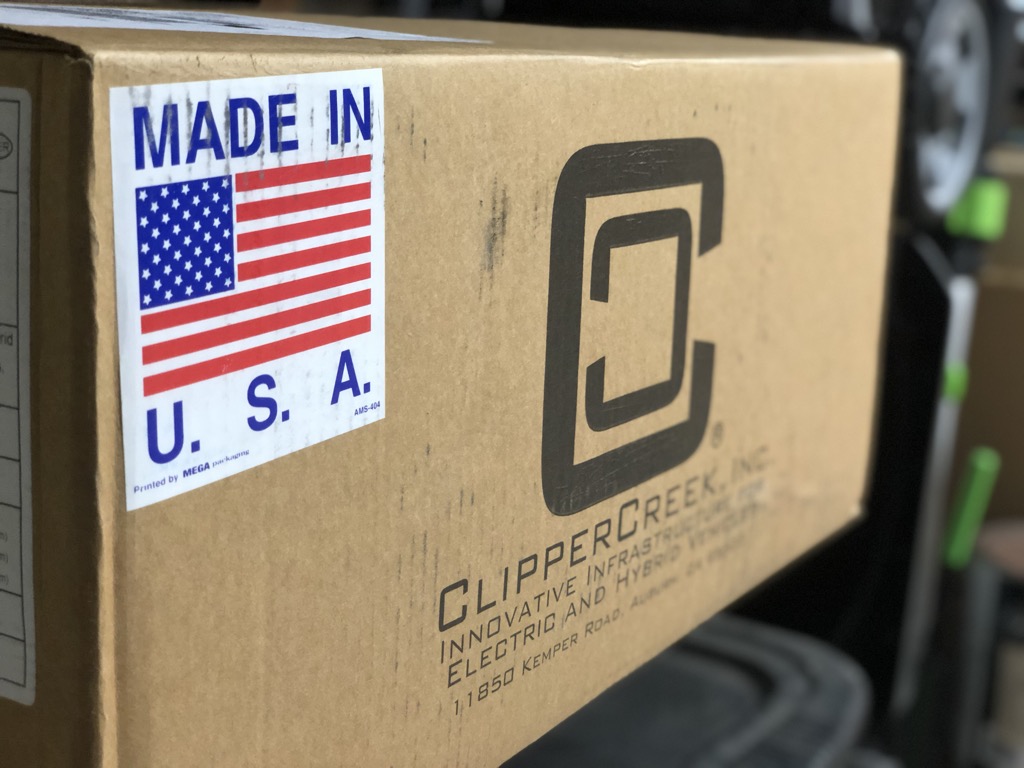
ClipperCreek had positive reviews and a solid reputation among Level 2 charger options I researched. They also have a very simple approach to the chargers (no wifi or app, just plug it in and charge). As an added bonus, ClipperCreek proudly manufactures their products in Auburn, California, which is currently still part of the USA. ClipperCreek Level 2 chargers are also very reasonably priced, with many falling in the $500-$600 range. ClipperCreek sent us their model HCS-40P, Plug-in 32A Level 2 EVSE, 240V, NEMA 14-50 plug, with 25 ft cable, which currently retails for around $589.
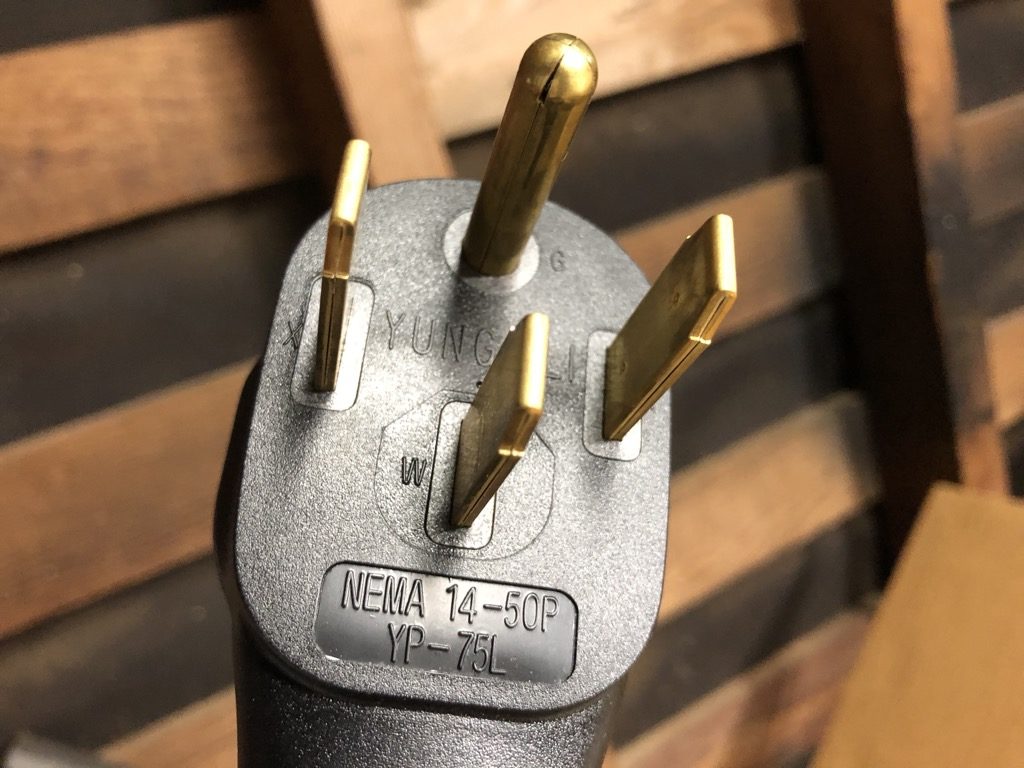
Aside from the exact charger to select, you’ll also need to determine whether you want to hardwire the charger, or get one that plugs in. We opted for a plug-in model, which can only be used inside. I liked the ability to simply unplug the charger if I needed to remove or relocate it, or in case I needed to plug in a higher voltage tool. If you’re opting for a plug-in model, you will need to determine what type of outlet / plug your charger will utilize. ClipperCreek can configure the charger with any of the most common plug options.
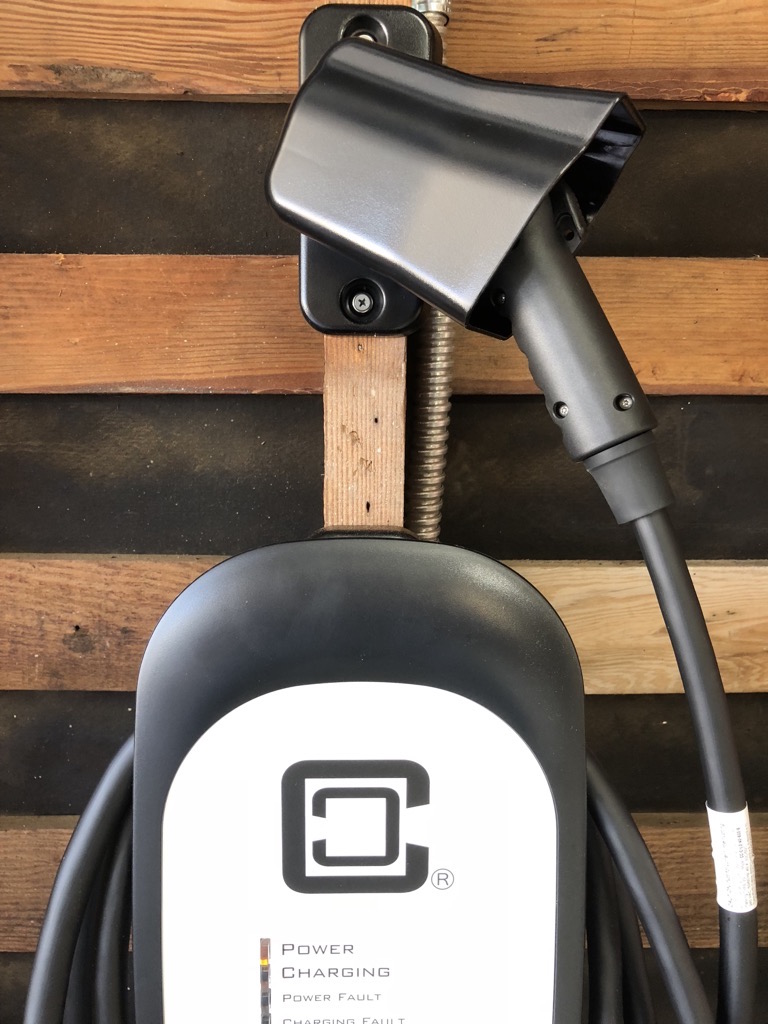
Mounting the ClipperCreek Level 2 Charger
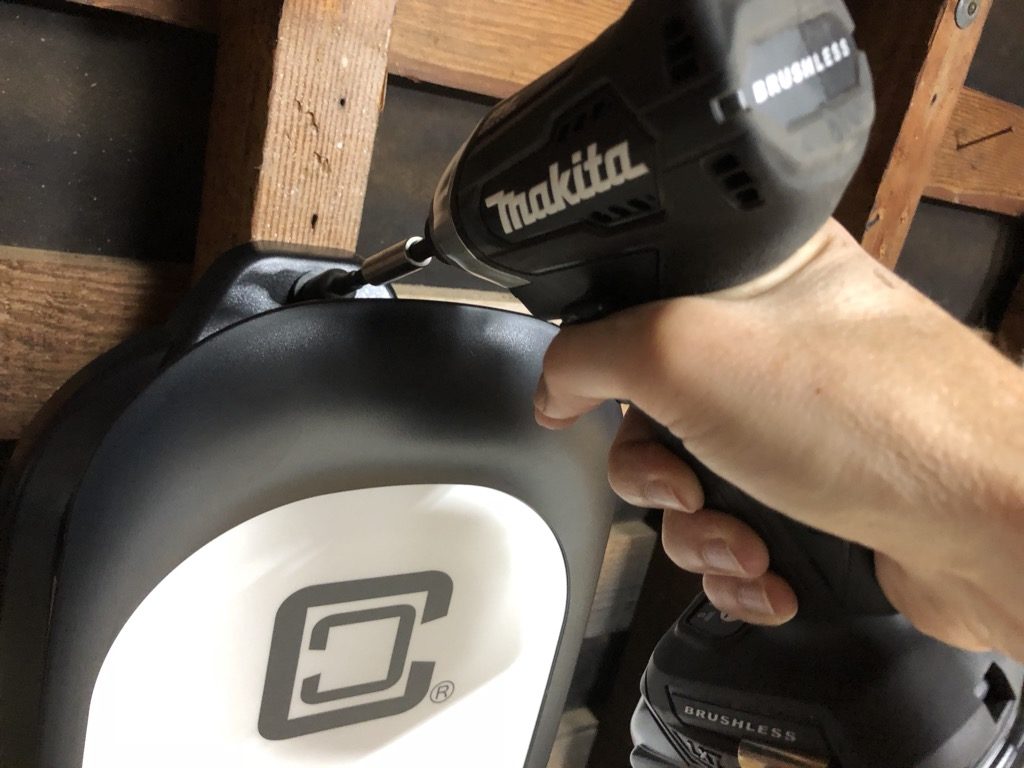
I mounted the ClipperCreek charger before bringing the electrician out to complete all the wiring to it (more on the wiring portion of this project in the next section). Mounting it before the electrical work let me ideally situate the charger and gave the electrician an exact end point to target. ClipperCreek thoughtfully engineered to the two mounting points so that the charger can be installed on a single stud. It’s a minor detail, but one that makes mounting of the charger remarkable easy. Assuming you can locate a stud, you’ll have the charger in place in no time. Thanks to the simple one-piece design, the charger also doubles as a storage hook for your charging cable.
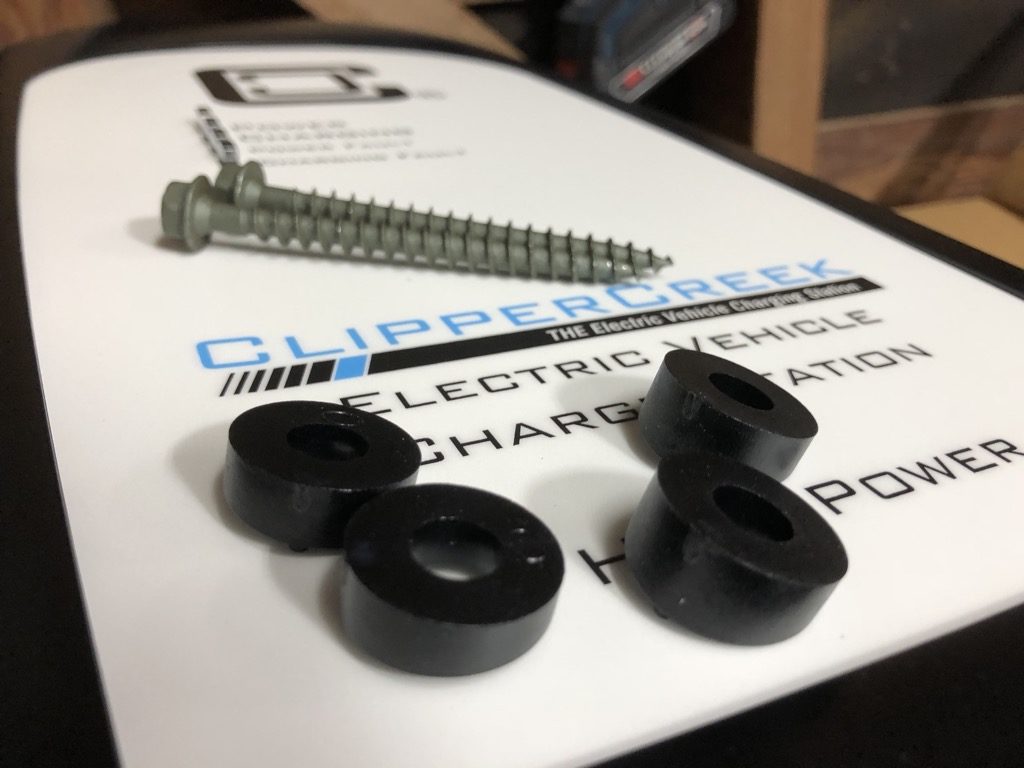
ClipperCreek includes two sets of washers depending on how the charger will be mounted. One set is designed for when the charger mounts to a solid wall, like a concrete block wall. Those washers create a 90 degree angle for the fastener. We used the other pair of washers that angle up or down since we were mounting directly to a stud. That angle is necessary because the shroud of the charger (the cable holder) prevents you from driving the included wood lag bolts straight in. Ideally, I would have preferred a design that you could screw in straight without an angle (and without the angled washers, which are a little finicky to work with), however that would have resulted in a more exposed view of the fasteners. Having a keyhole or cleat mount on the back would be another option for ClipperCreek to consider, but then the mount would not be as secure. The minor inconvenience of a little angled pre-drilling/driving and washer alignment aside, mounting the charger itself is quite easy.
Holster That Thing – Installing the SAE-J1772 Connector Holster
Many people wonder if every electric car uses the same connecter for the part that plugs into the car itself. In the gas world, it’s called a fuel pump nozzle. In the EV world, it’s a SAE-J1772 connector. That catchy name describes the nearly universal plug for just about all current electric vehicles. The only exception I am aware of to that is Tesla, which requires an adapter if you plan to use a non-Tesla charger like those from ClipperCreek.
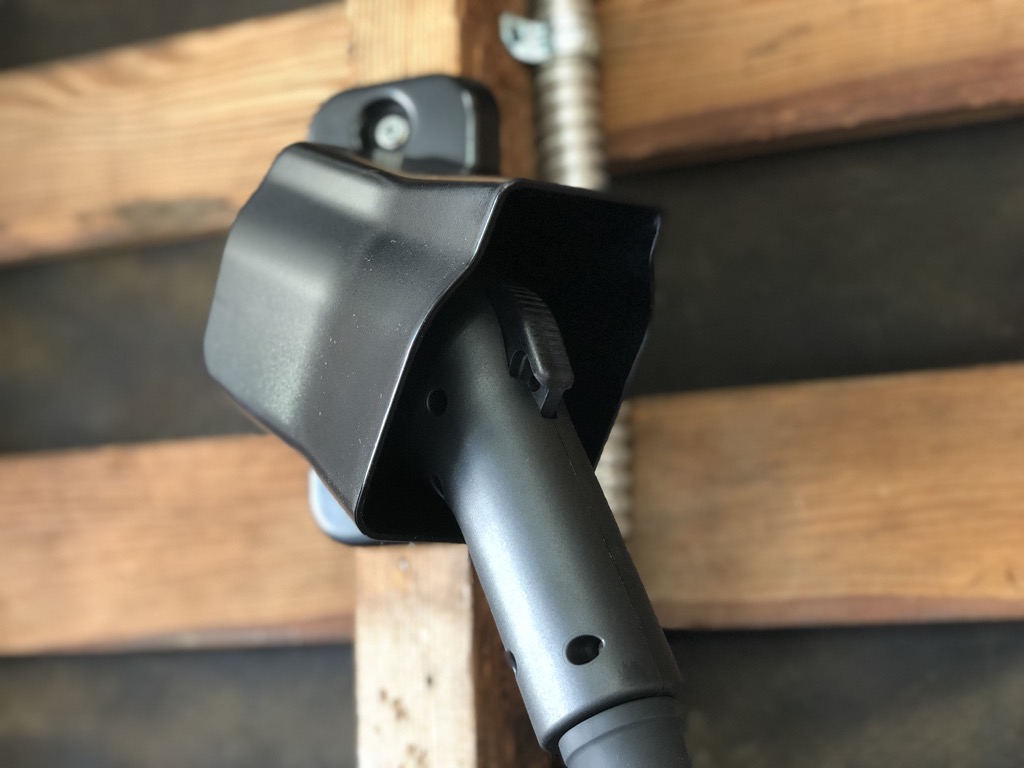
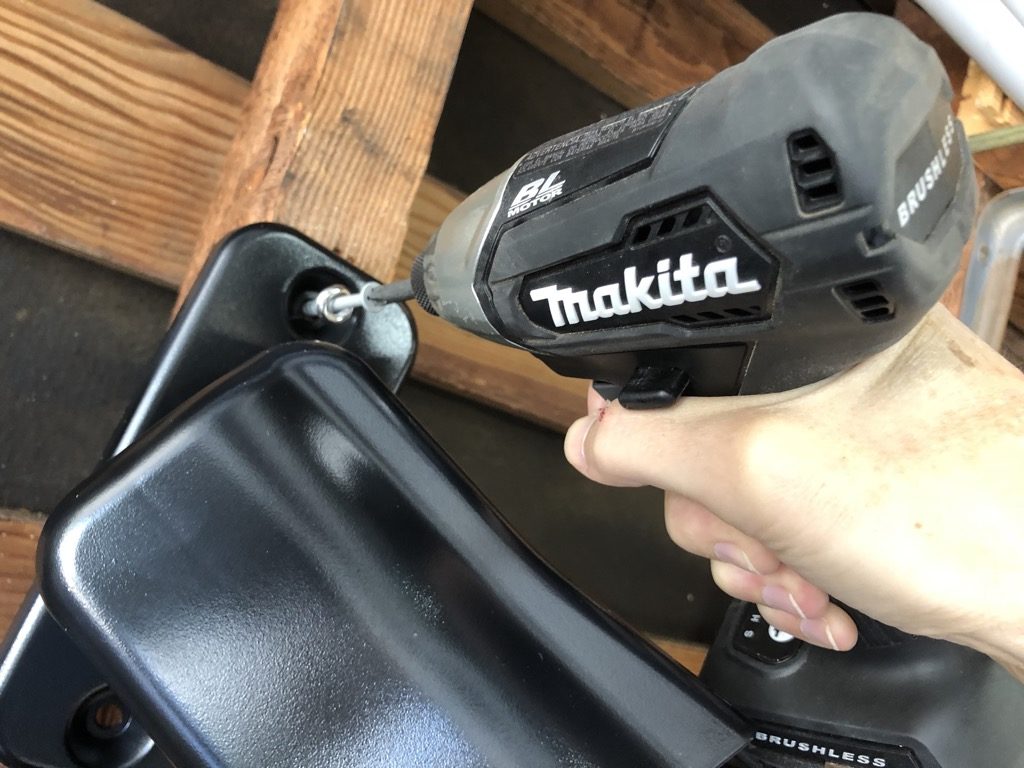
Our ClipperCreek charger included a SAE-J1772 connector holster. Although the ClipperCreek charger body doubles as the cable hook, the holster provides an easily accessible dock for your SAE-J1772. The holster, like the charger itself, is designed to install on a single stud. In fact, you can install both the charger and the holster on the very same vertical stud. The holster screws right in with two included screws. The holster not only shelters the plug from weather if mounted outside, but it also provides an affixed spot to store it rather than just laying it over the top of your coil of charger cable.
While I liked the holster overall, I would have liked to have seen the inside of the holster designed to guide the SAE-J1772 directly in, while keeping fingers out. There’s quite a bit of wiggle room inside the holster so it takes a little concentration to guide the plug into place. ClipperCreek clarified the reason for this additional space inside is, “so that it can accommodate J1772 connectors from as many manufacturers as possible. Some connectors have wider bodies than others.” We’d maybe like to see one version specifically for the ClipperCreek plug, and another “roomier” one for people that might be buying the holster for other plugs. Even with the wiggle room, it’s still easy to plug in, and even easier to unplug. While you definitely can get by just laying the plug on top of the coil (on an interior install), the holster keeps things neat and tidy, and I have yet to drop the charging plug.
EV Charger Installation Costs
The cost of the charger itself (usually in the $500-$800 range) is only part of the cost to consider if you’re contemplating adding a Level 2 chargers to your garage. Before we dive into the step-by-step of the electrical portion of the charger installation, let’s talk costs. Not unlike the car world where you often pay more for a faster car, you’ll also pay more for a faster charge. The additional cost is partly the charger itself, and partly the cost to install it. Installation costs for a Level 2 EV charger will vary depending on the availability of suitable voltage and wiring, and how easy or hard those are to access. Higher draw chargers will also typically have higher costs associated with them due to the thicker wire they require.
A professional installation could cost as little as a few hundred dollars on up to over $1000 if your electrician is having to run a new circuit a longer distance and/or through difficult to access areas. According to HomeAdvisor.com, a site that connects consumers and contractors, the cost to install a Level 2 charger has a national average of $676, and a typical range of $409 to $943. If the electrical service to your home is already maxed out, you could be looking at substantially more cost to upgrade the entire service panel. In our case, thanks to a 200 amp panel, and the close proximity of the panel to our charger installation location, our cost to install the level 2 charger was just under the national average.
How to Install a Level 2 Charger – Hint, This May Not Be a Good DIY
Unless you already have a 240v circuit with a NEMA 6-50 or NEMA 14-50 outlet with appropriately-sized circuit breaker ready to roll (LUCKY!), then you’ll most likely need some electrical work to support your new Level 2 Charger. The circuit breaker rating and wire gauge for your installation will depend largely on what model EV charger you get. Some of the less beefy chargers can operate on a typical 15A circuit breaker, while some of the higher-draw models need 50, 60 or even 80A circuits and breakers. Make sure you or your electrician knows the exact requirements for your particular charger, otherwise you might go from charging your car to calling the fire department – which leads me to the next point.
We would strongly encourage you to consider hiring an experienced, licensed electrician to install your charger for you. Many jurisdictions have permit and code requirements as well, which are something a licensed electrician and/or your friendly, local building department should be able to assist you with. Anytime I’m dealing with electrical work that involves opening up a service panel, my personal policy is to call in an electrician. Even though I am an avid DIY’er, I prefer to err on the side of personal safety / not being barbecued.
Getting Wired – Wiring Your Level 2 Electric Vehicle Charger
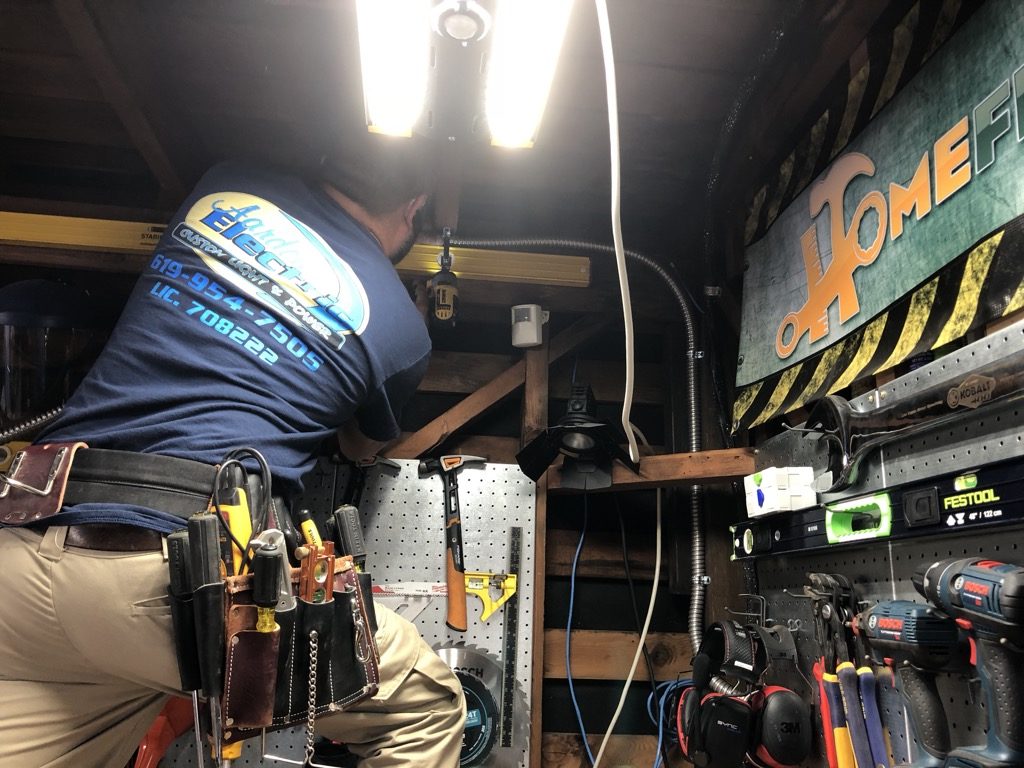
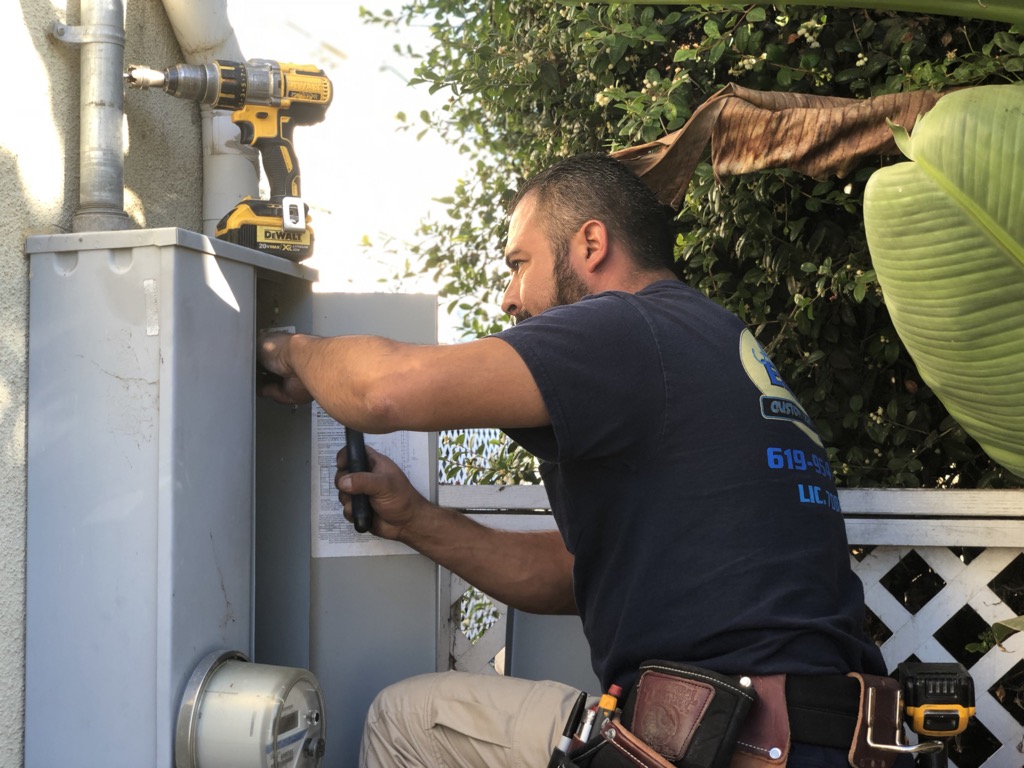
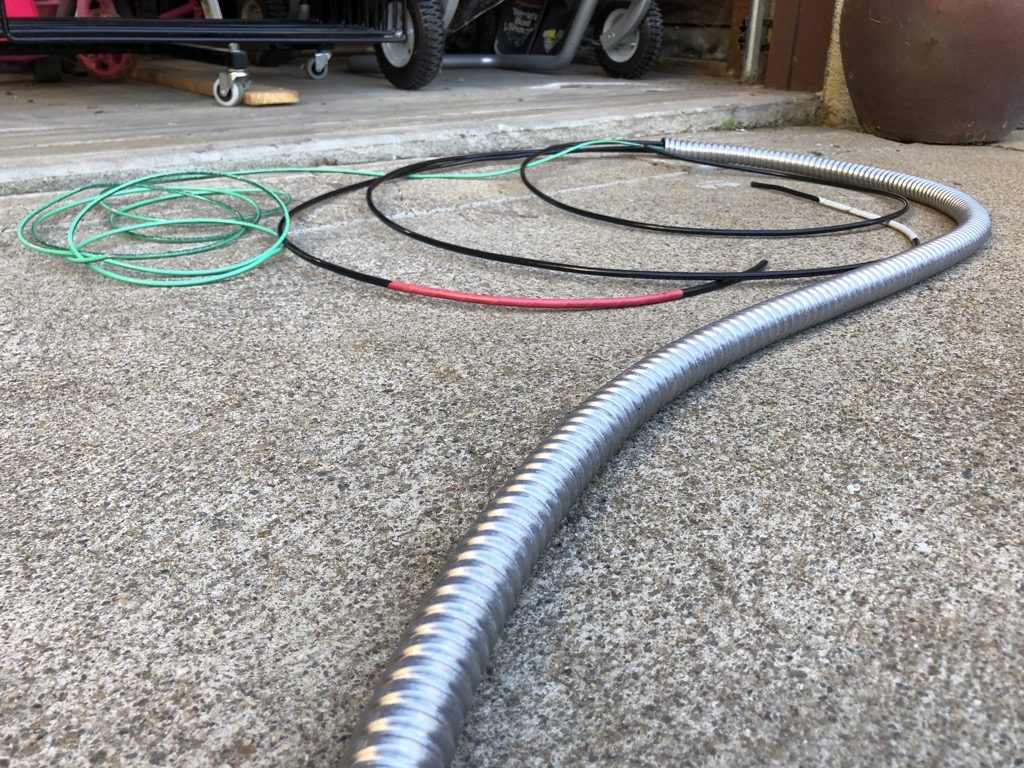
In our case, the service panel was conveniently located on the back wall of our garage. This meant our electrician, Moses with Aardema Electric, could drill directly into our service panel box and add the new car charging circuit. Moses first planned the path of the conduit, clearing our garage crammed full of obstructions in a manner similar to the parting of the Red Sea. This biblical-scale path-clearing would help not only in fishing the flex conduit, but also in securing the conduit in regular intervals with conduit clamps.
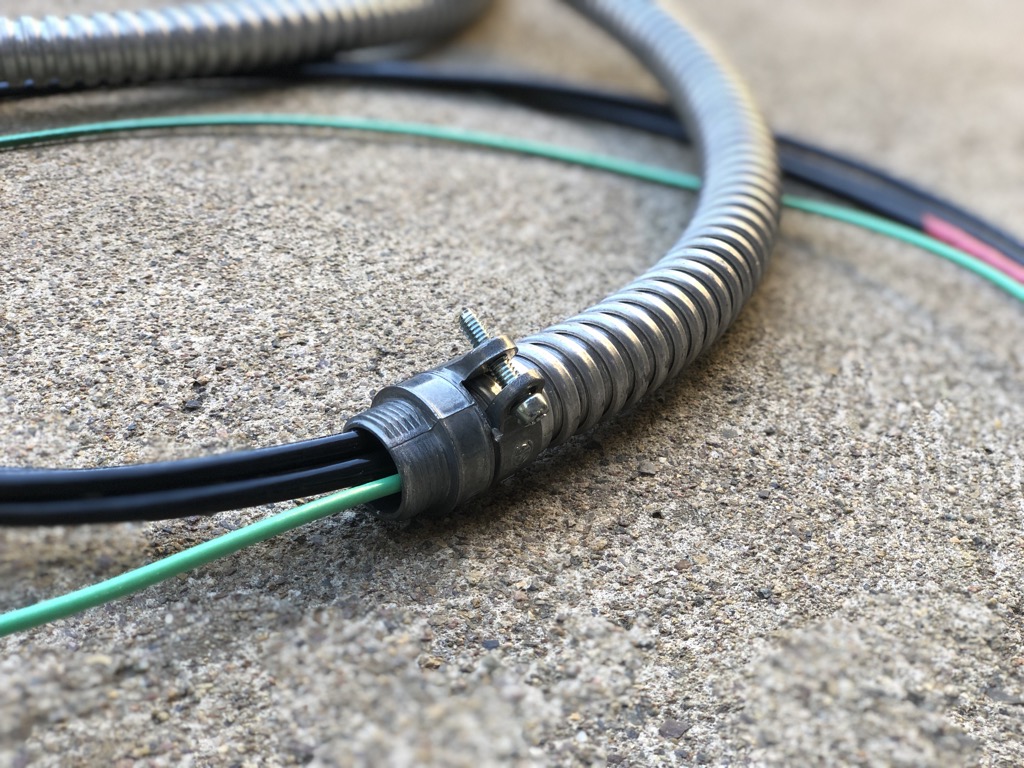
Moses carefully measured the length of conduit needed, and then cut the flex conduit to length after adding a little extra length just in case. It’s always possible to shorten wire runs, but lengthening them is a little trickier. Pro-tip: he then fished the beefy cables through the flex before the flex was installed. Fishing the wire while the conduit is straight is much easier than trying to do it after it’s installed with multiple twists and turns. Depending on the amperage you’re running, local codes, and how exposed or protected the wire will be, your installation may or may not require conduit. Talk with your electrician about code requirements and options.

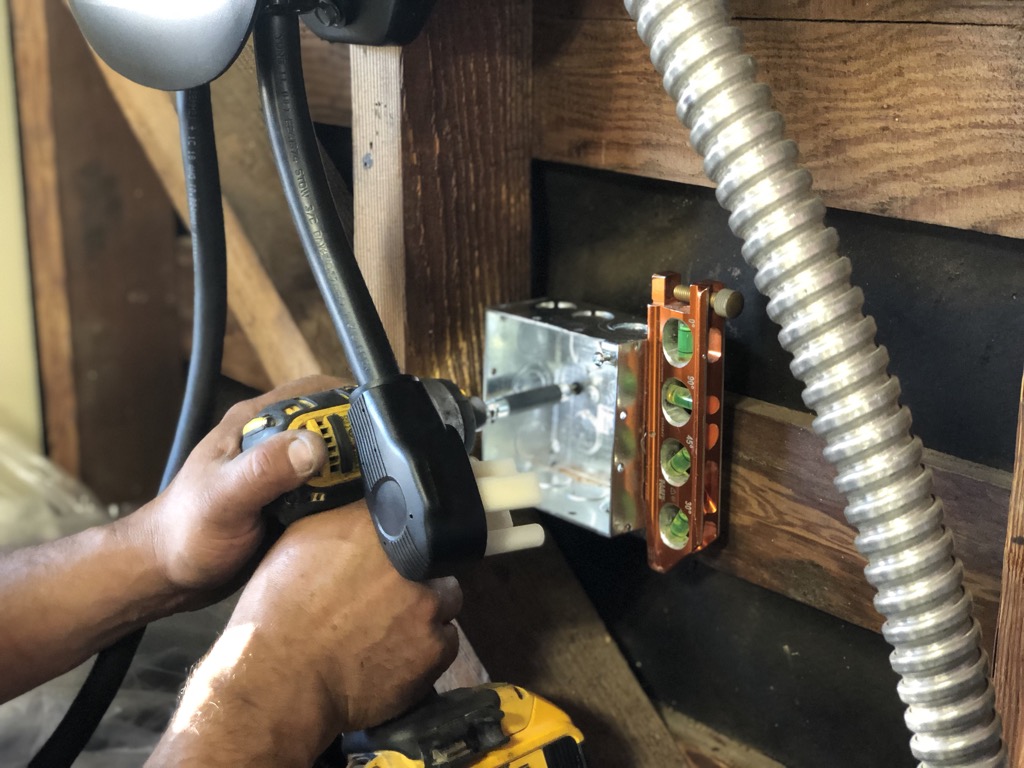
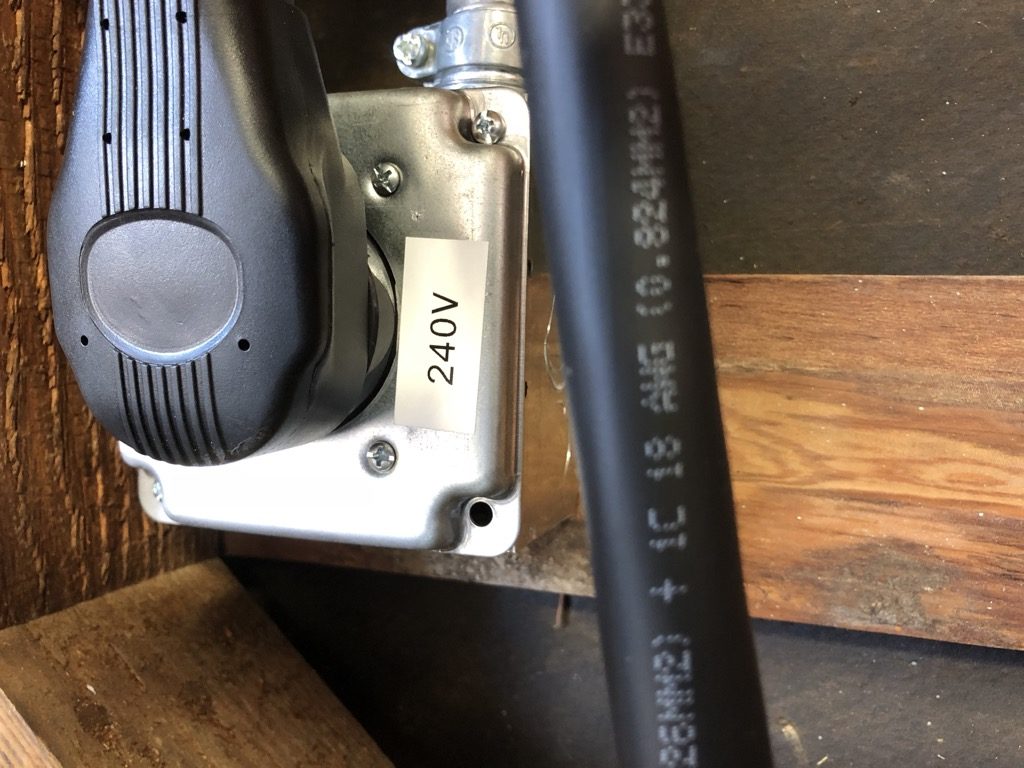
Once the conduit was put in place and secured in place at regular intervals, the box for the NEMA 14-50 receptacle was installed. If your installation is hard-wired, then the wiring termination between the charger and the circuit will happen inside the junction box. In our case, the box was getting a receptacle. Make sure you locate the box carefully, especially if you’re doing a plug-in installation like ours.
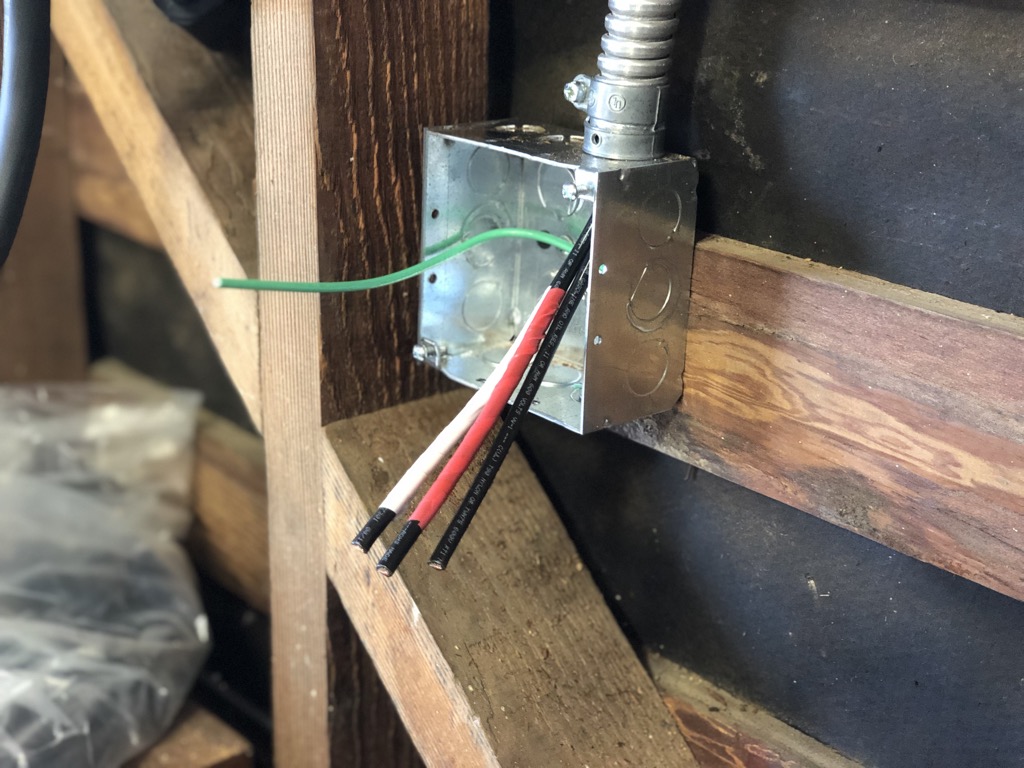
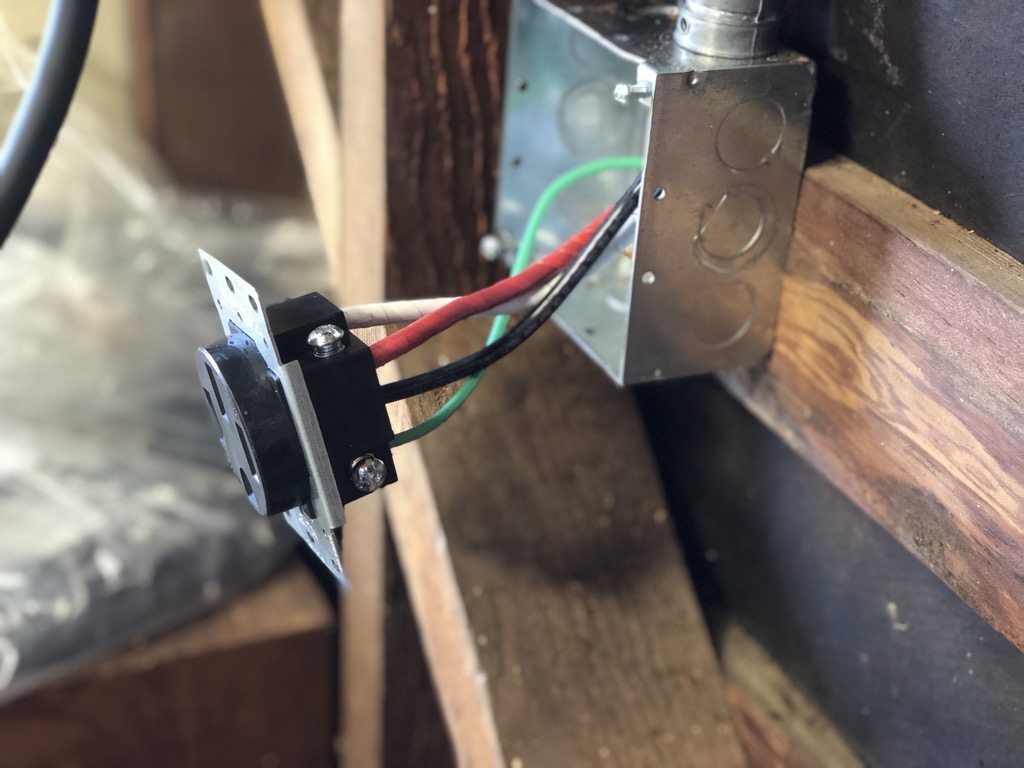
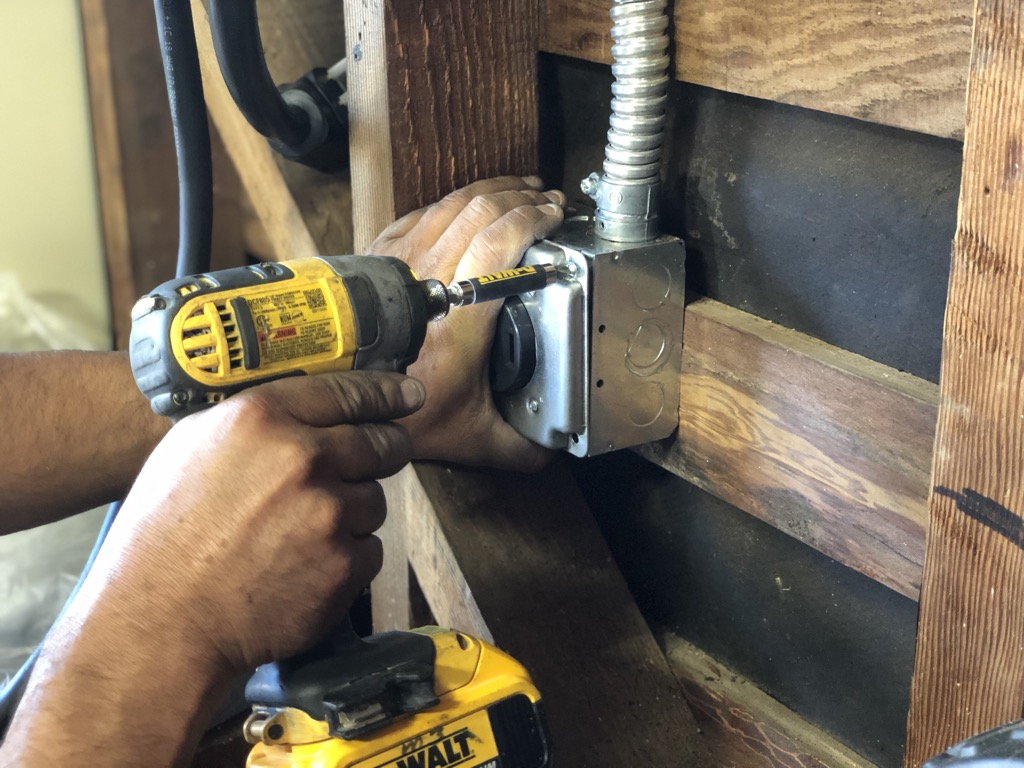
The cable from the charger to plug into the electrical outlet is VERY short. Not only is the cable short but it’s stiff. As a result, pay careful attention to the orientation of the grounding pin on your outlet – you can’t just twist around the plug like you would with a normal extension cord. Your outlet will likely be within 12″ of the charger, and orientation is critical or you’ll have an outlet you can’t safely plug into.
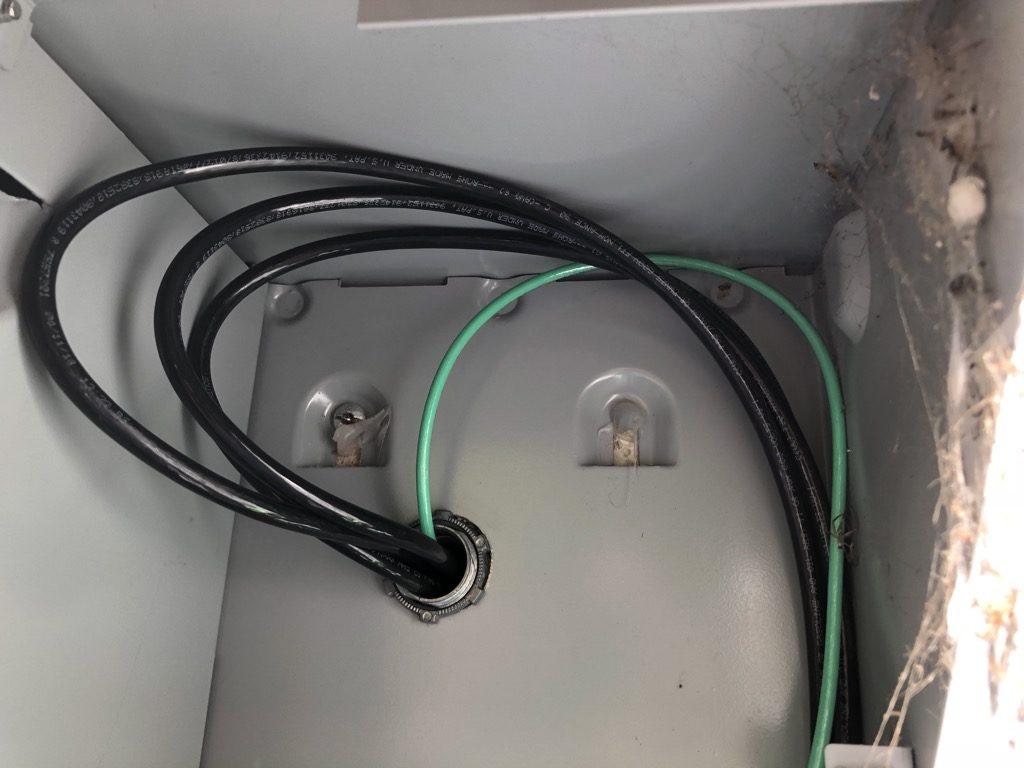
Once the outlet was wired up, attention was turned to the panel. As you may recall, that end of the cable was fished through a hole cut into the back of the panel and secured with a fitting to protect the wiring and keep the conduit attached solidly to the panel box. This left our electrician to carefully connect the wires to the appropriate spots in the panel.
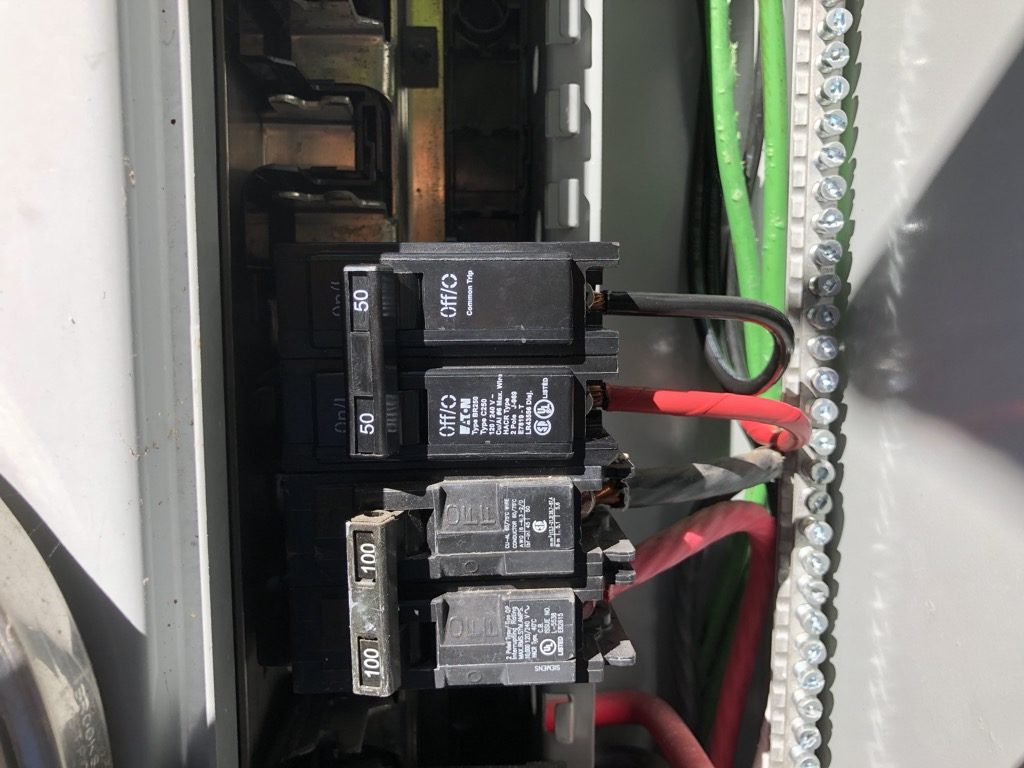
After the connections were made, all that was left was installing the new 50A breaker, and knocking out the spaces for the beaker in the panel cover that was removed earlier. A label was added next to the breaker so that the circuit is easily identified and compliant with code requirements. A brief public service announcement, if you’re ever working on your electrical system, please take the time to label circuits as accurately as possible. Many panels I see have no labels at all, or have every circuit labeled with something like “Lights & Stuff”, which isn’t particularly helpful to anyone doing future electrical work or trying to figure out what circuit to shut off.

Level 2 Charging – The Happily Ever After
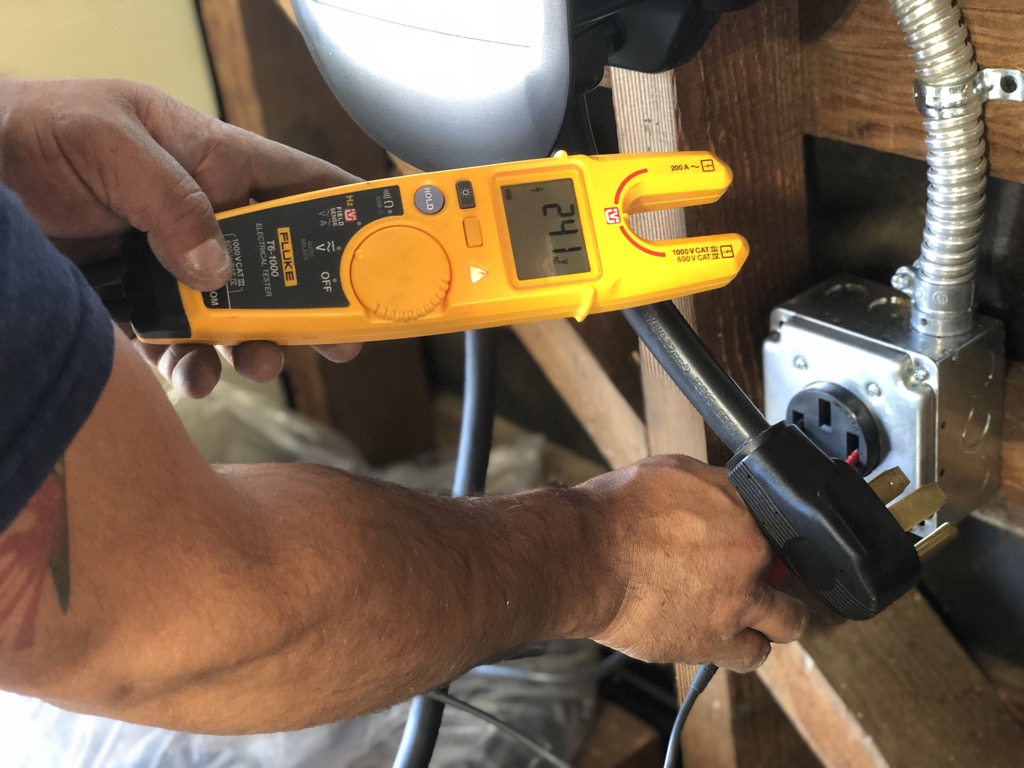
One of the great things about owning an electric car is never having to visit a gas station. What some people don’t tell you about is the anxiety of making sure you have enough charge to get to where you’re going. Even though I do a lot of driving, most of the time that EV anxiety is kept to a minimum with a little planning. However now that I have a Level 2 charger installed, it’s great to know that I can quickly “top off the tank” with a little extra juice when needed. It’s also nice to know that I can take advantage of lower electricity rates thanks to my now very speedy charging times. While it’s tempting to stick with the 110 “Occasional Use Charger” that comes with your car, my advice is to upgrade to a Level 2 charger if your garage location and budget allow for it.

Last but not least, our experience with the ClipperCreek charger has been very positive. While it’s not the sexiest charger on the market, its no-frills design brings a welcome simplicity to a market that can sometimes have too much complexity for its own good. Plus, since they’re made in America, you don’t need to worry about Trump shutting them down anytime soon. ClipperCreek also offers a no strings attached 3 year warranty for their HCS, LCS, PCS, ACS, and ECS series products. You can check out the full line of ClipperCreek Level 2 Chargers via the link below. Happy EV charging, and keep your eyes open for that Tesla pickup truck!