

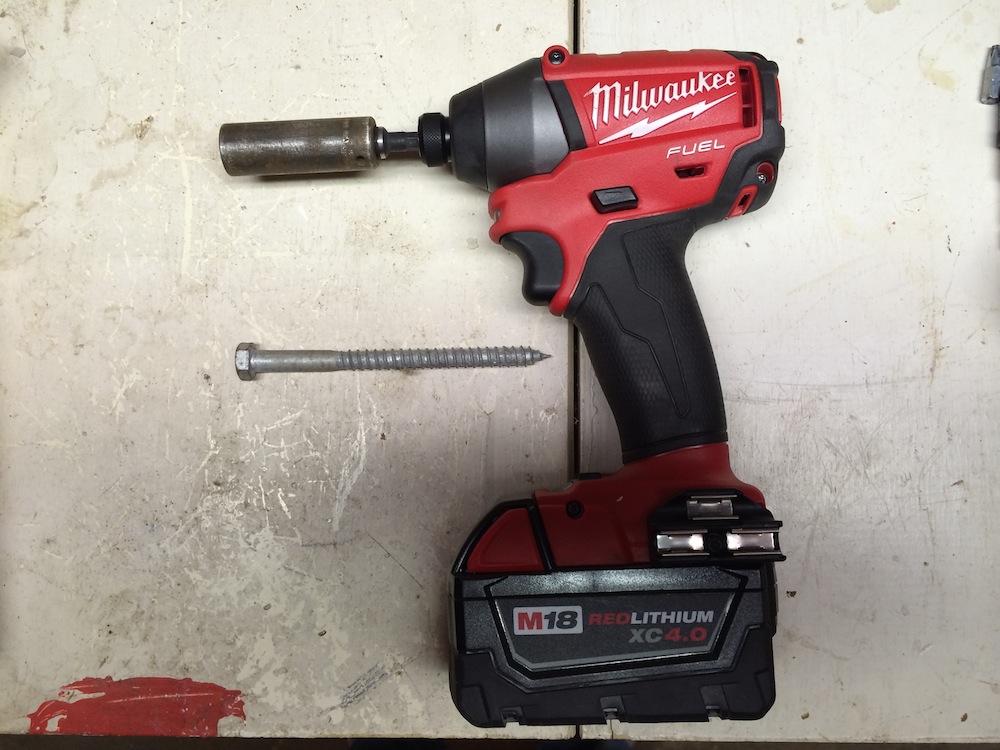
Since I first became enlightened about impact drivers roughly three years ago, mine has earned a permanent spot in my truck. For such small, lightweight tools, they offer amazing power. Need to drill a hole? No problem. Got a bunch of 8” Timberlok lag screws to drive? Swap in the right bit, put in your earplugs, and go for it! For smaller jobs, though, using an impact driver is a bit like using an 18-wheeler to deliver a six-pack. Milwaukee has a solution for the “too much power” problem. They provided us with one of their impact drivers to evaluate; join us as we take a look at the Milwaukee M18 Fuel Impact Driver, model 2653-22.
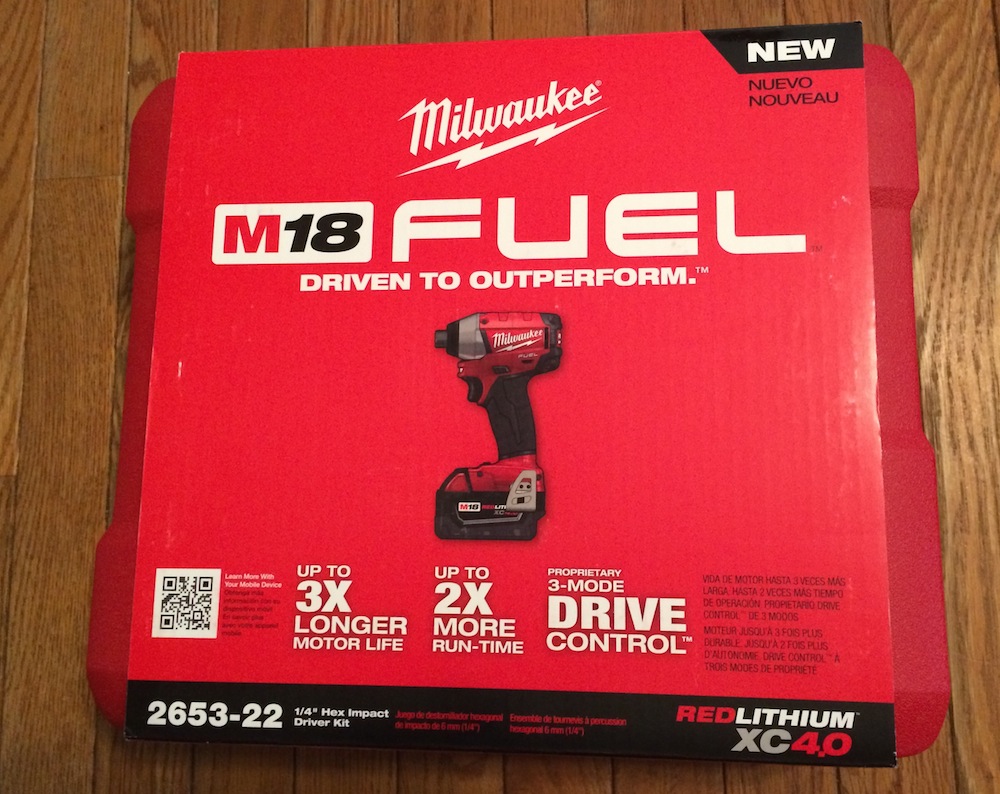
First, the gritty details: According to Milwaukee, the Milwaukee M18 Fuel Impact Driver is the most powerful tool in its class. Their proprietary 3-Mode Drive Control offers better control over the power and speed required for specific applications. The POWERSTATE Brushless Motor provides constant power output, yet runs cooler with no wearable components, and also provides up to 3X longer motor life. Milwaukee’s REDLINK PLUS intelligence monitors the tool and battery, and ensures optimized performance and protection from overload, overheating and over-discharge. The driver’s compact size and weight allow access to tighter areas, and help reduce user fatigue. It weighs about 3-½ pounds with the battery installed, and has an impressive peak torque of 1,600 in/lbs. Here’s a short promo video from Milwaukee:
Inside The Red Box
The Milwaukee M18 Fuel Impact Driver comes in the standard sturdy Milwaukee Red plastic case. Along with the driver, the 2653-22 kit includes two XC (extended capacity) batteries, a Multi-Voltage charger, capable of charging both 18V and 12V batteries, and a reversible belt clip.

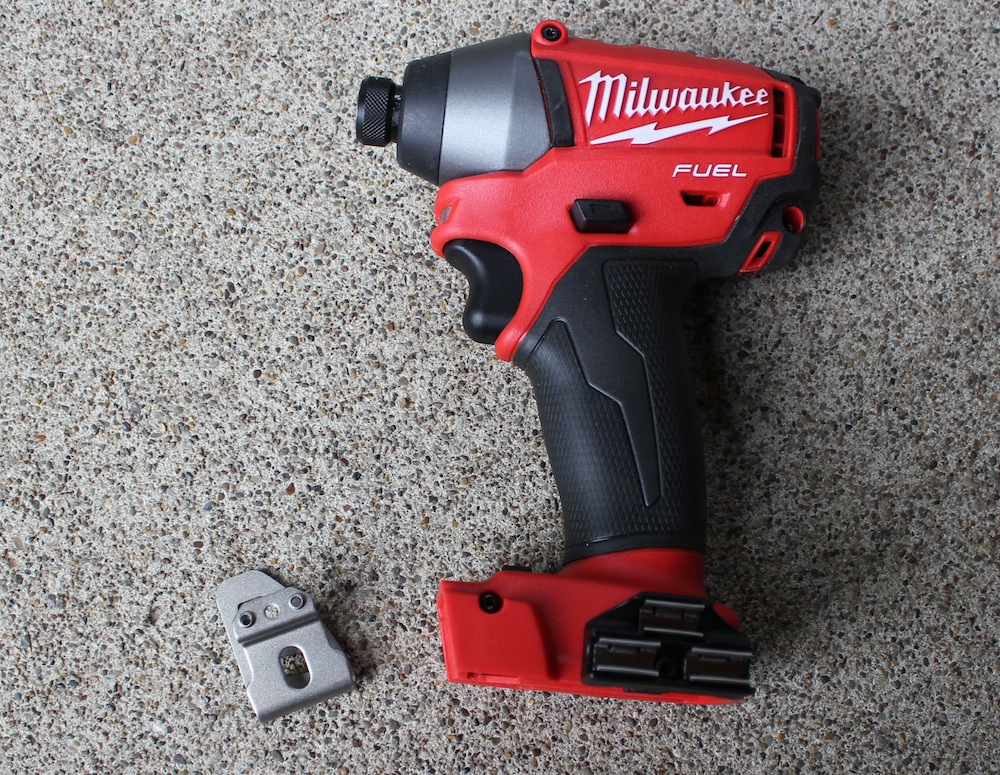
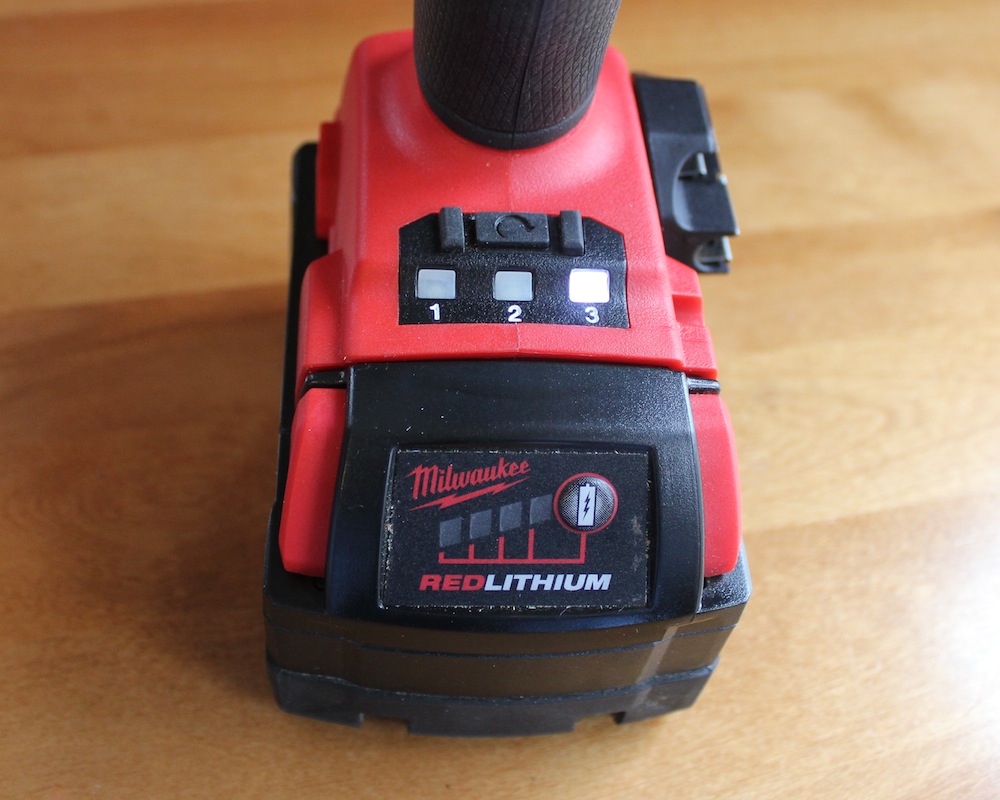
The tool has a comfortable rubber overmold, and fits nicely in the hand. Compared to most drill drivers it’s very lightweight, at around 3-½ pounds. The M18 battery is easy to install and remove, and features the four-bar “fuel gauge” to let you know how much juice remains. Inserting a bit is simple: just push it in. Removing bits is generally a two-handed process, as the collet has to be pulled forward to remove the bit. There is a bright LED light on the front; normally, I’m pretty ambivalent about the usefulness of these lights. Sometimes they do come in handy, though, as I’ll relate shortly.

Before we proceed, a brief rant: Why did pretty much all tool manufacturers stop including bit holders on their drills? Years ago, most drills came with them, but lately they’re a rarity. Many drills now come with belt clips, which are nice. I even use mine occasionally. My bit holders, though, ALWAYS got used. The Milwaukee M18 Fuel Impact Driver, like many drills, is threaded on both sides to allow repositioning the belt clip. I took advantage of this to go in search of an aftermarket bit holder. I found one that’s actually made by Milwaukee (or at least branded by them) for about $7 on Amazon. It fits perfectly into the extra threaded hole, and lets me keep my bits handy. Sure would be nice if the manufacturers would start including them from the factory, though. Okay – I’ll go back on my meds now.
A Day In The Life Of The Milwaukee M18 Fuel Impact Driver
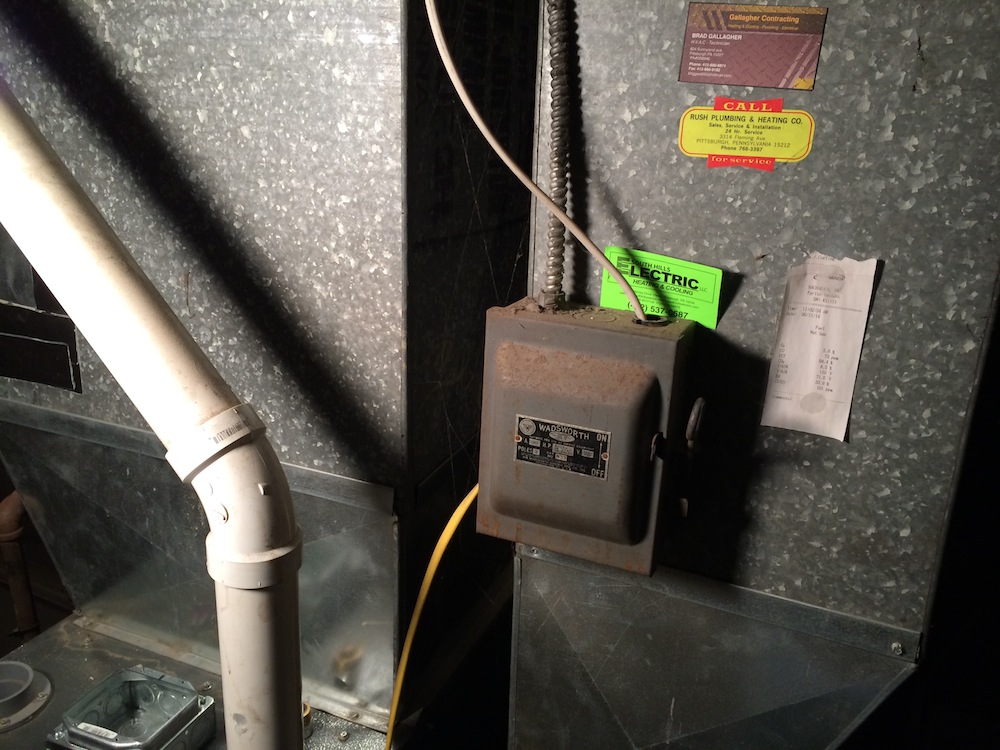
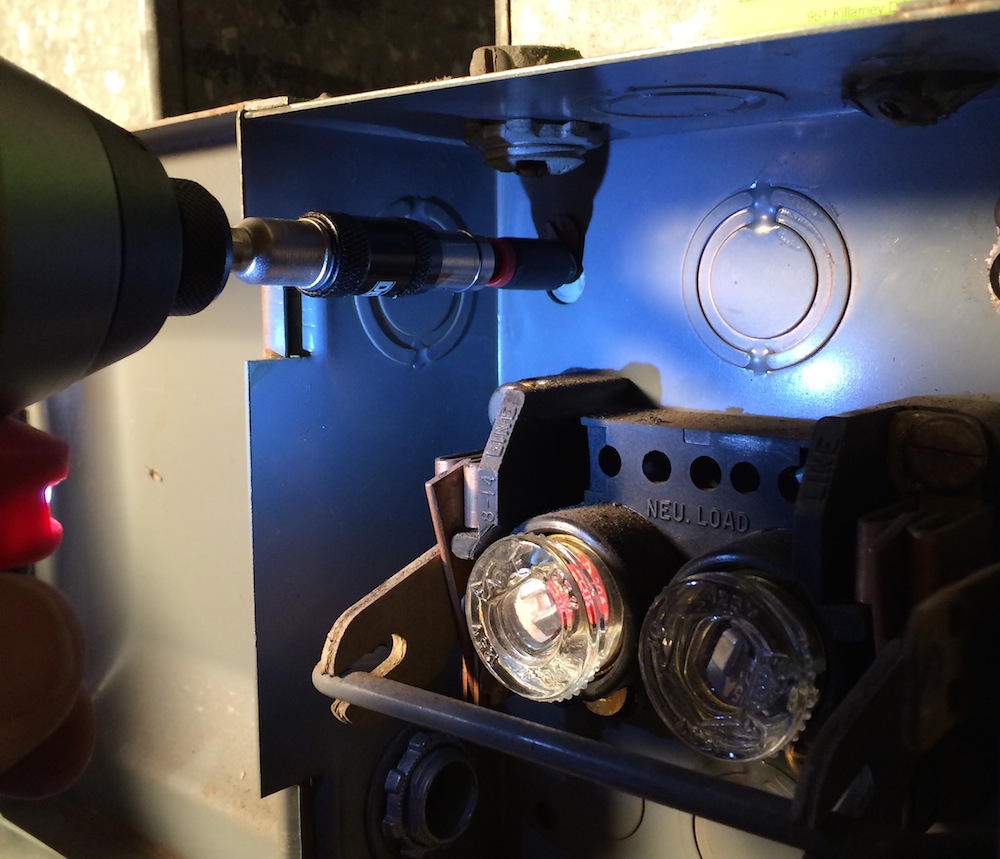
I wanted to try out the Milwaukee M18 Fuel Impact Driver in all three impact modes, to get a feel for how much control is possible. To test Mode 1, which is recommended for delicate fasteners, I used it while swapping out a furnace shutoff box. The old box, apparently installed before the advent of color TV, was not up to code, for many reasons. Power came in through a hole, with no clamp, to an old box with screw-in fuses. Using fuses is okay, but there was no GFCI protection, which is required in basements. Additionally, an old BX cable exited the box, and went on to provide power to a 2nd-floor kitchen. Both furnace and kitchen circuits are required to be on dedicated circuits. Other than that? Totally safe and code-compliant!
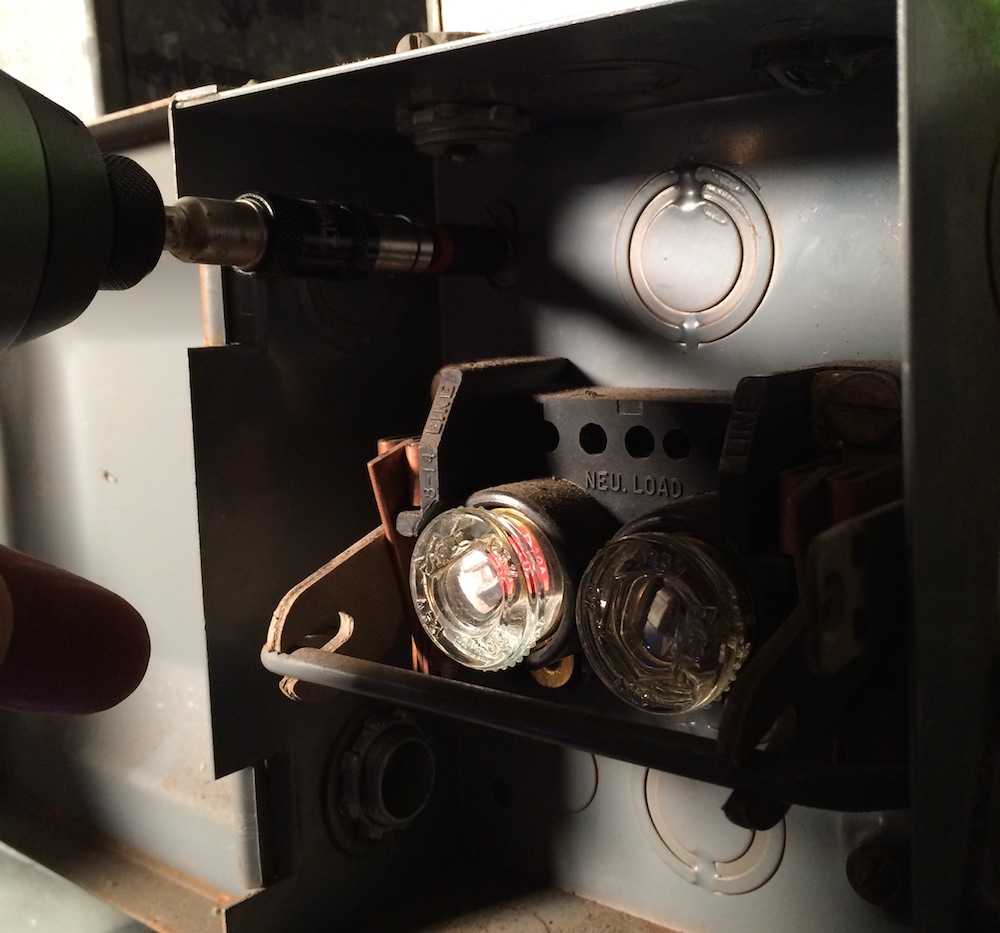
After shutting off the main breaker, I used the Milwaukee M18 Fuel Impact Driver, set on Mode 1, to remove the screws holding the fuse box to the furnace. Easy peasy. And about that LED light: the basement has pretty poor lighting, and I had a clamp light stuck on the wall behind me. Inside the box was shadowy and scary, though, and the built-in LED did a nice job lighting up my screw zone.
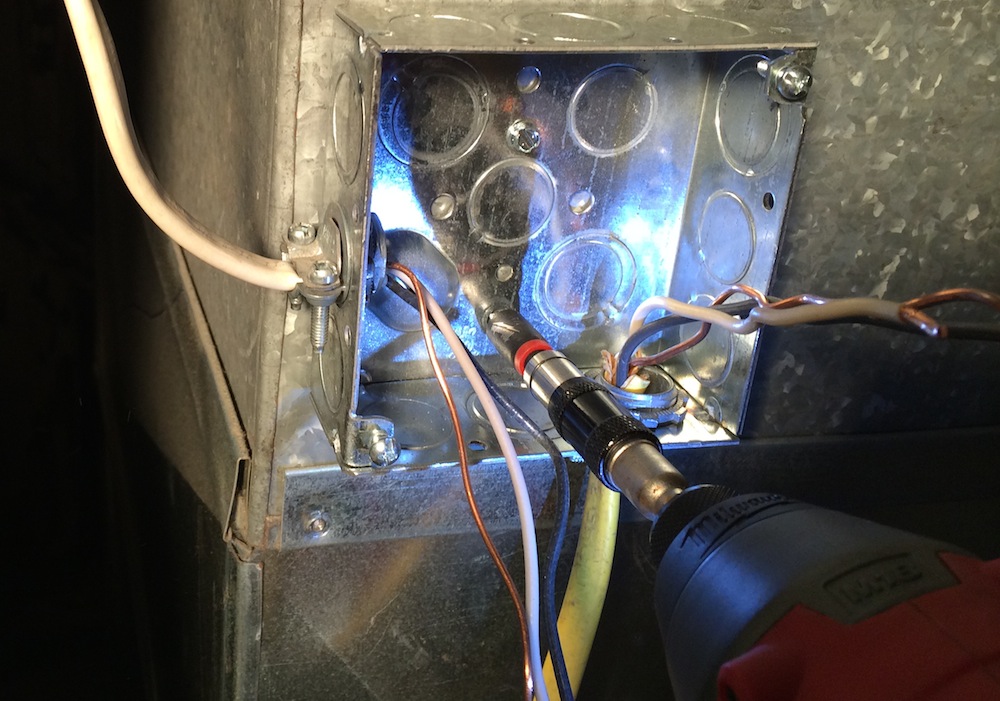
I then used the tool to attach a new workbox to the furnace, using sheet metal screws. Even without predrilling, the driver easily ran the screws in. The variable speed trigger provides excellent control over speed, and I was easily able to get the screws snugged up without overtightening. When the screws are tight, and the driver starts going into impact mode, just take your finger off the trigger. The electric brake stops the tool instantly.
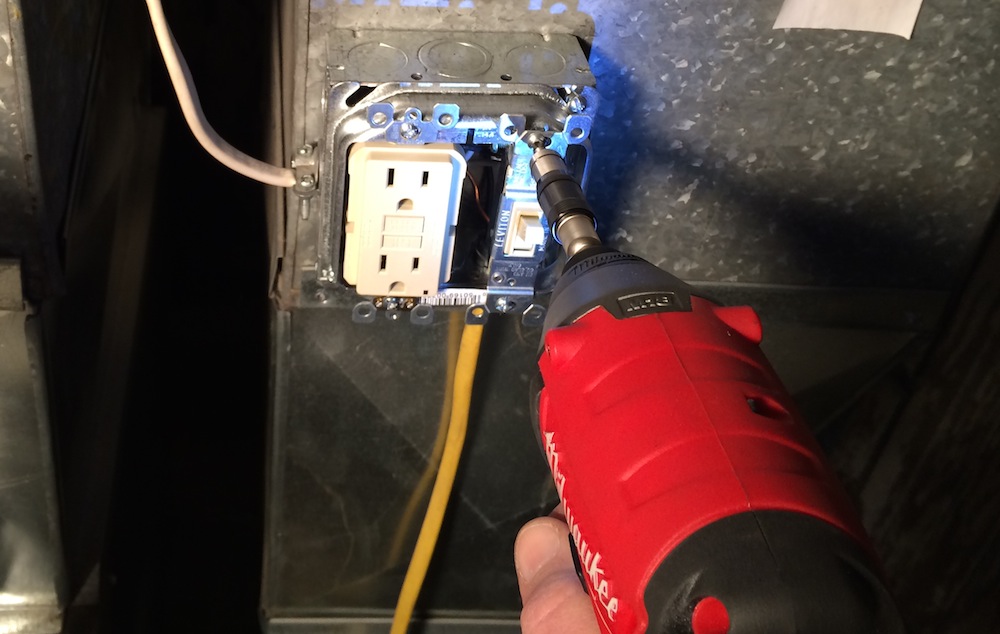
The new workbox contained a GFCI outlet, with an adjacent switch to serve as a cutoff for the power to the furnace. To further test the driver, I used it to run in the screws on both devices. Again, it ran the screws in easily, with no slipping, stripping, or overtightening. I also used the Milwaukee M18 Fuel Impact Driver, with a nut driver bit, to remove and replace the two large screws holding the front panel on the furnace, so I could replace a little 3-amp blade fuse inside. Again: quick, easy and precise.
More Power For The Star Drive, Scotty!
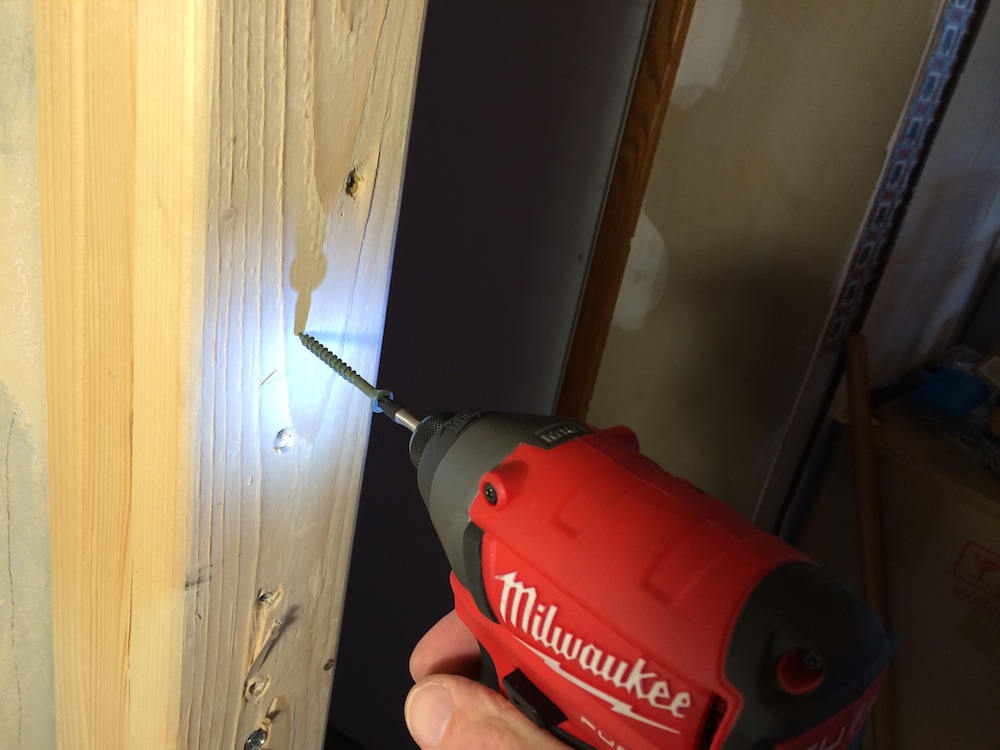
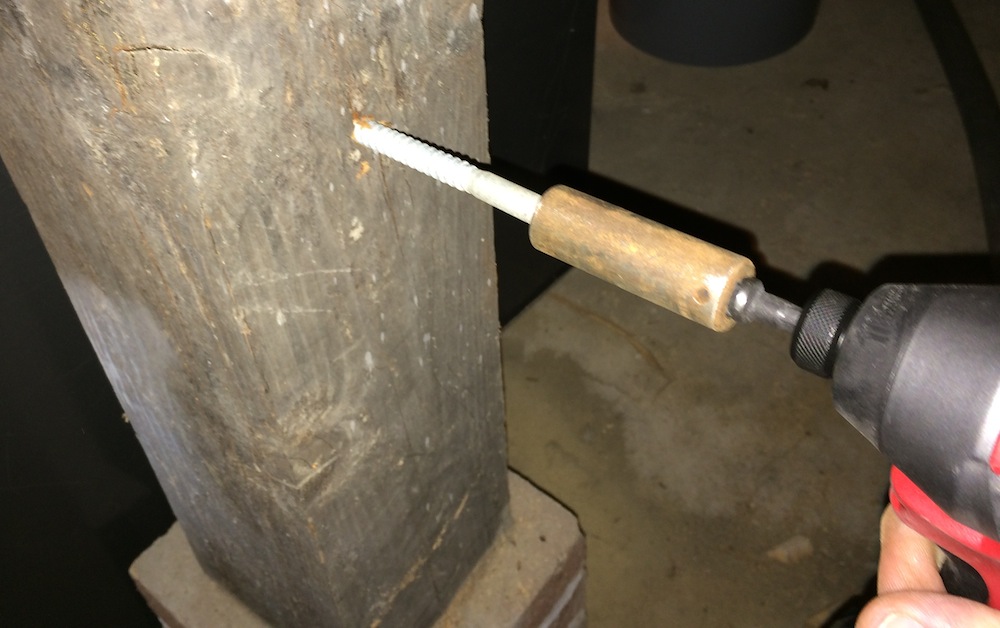
Stepping up to Mode 2, I grabbed some 2-½” and 3” star-drive screws. With no predrilling, I sank them into doubled studs. It sank them easily, burying a 3” screw in about 8 seconds. Next on the menu were some 4-½” X ¼” lag screws. Again without predrilling (I didn’t predrill for any of the testing), the Milwaukee M18 Fuel Impact Driver steadily buried the screws, in about 11 seconds. The driver showed no signs of strain or slowing, even after driving and removing about a dozen of the lag screws.

Finally, on to Mode 3. For comparison, I drove some of the 3” screws. Wow – in just over three seconds, they were buried! The 4-½” X ¼” lag screws were sunk in under five seconds. I took a hex drive to 3/8” socket adapter, slipped an impact socket onto it, and used it to sink a 3/8” X 5” lag screw. That took all of nine seconds. Once again, the Milwaukee M18 Fuel Impact Driver chugged happily along, with no signs of strain or slowing.
A Small Bit Of Advice – What you Should NEVER Do With An Impact Driver
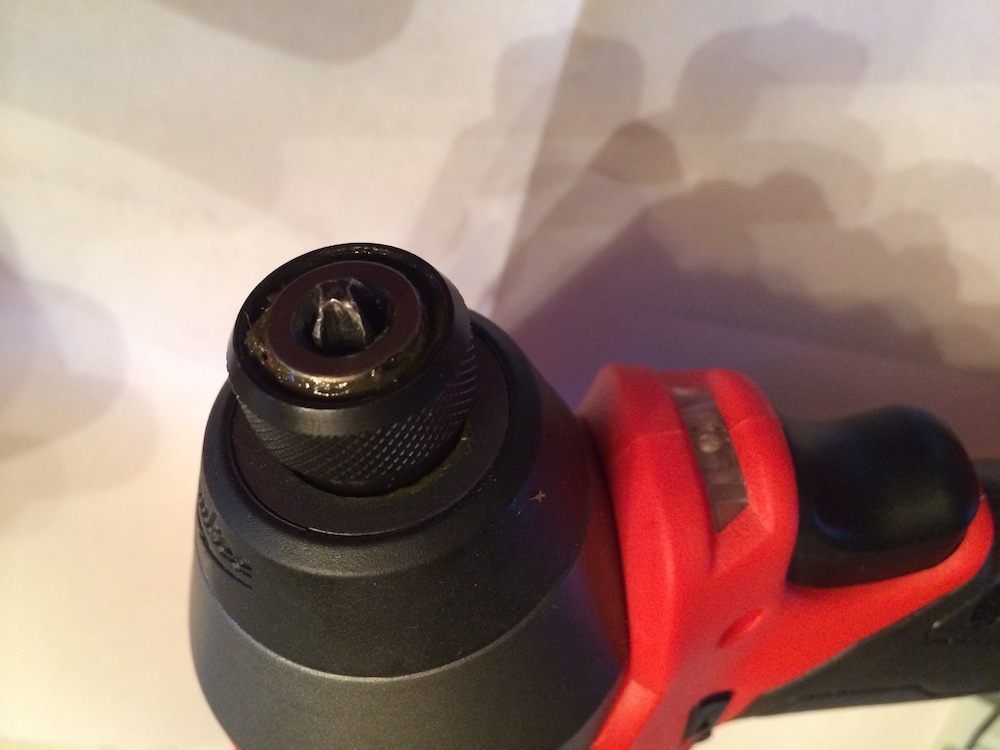
The Milwaukee Impact Driver has a very compact profile. This makes it easy to get into tight spaces, which is great. In your quest to get into one of these tight spaces, you may be tempted to just pop one of the common, 1”-long bits into the chuck. My advice? DON’T!! If you do, (cue annoying sing-song voice) you’ll be SOR-ry! There’s a good chance the bit will become jammed in the chuck, and you will have a very unenjoyable experience trying to get it dislodged. How do I know this? Funny you should ask…
One of the first things I did with the Milwaukee impact driver was to try to remove some Tapcon screws that held a breaker box to a basement wall. It wasn’t even a tight space, but the inch-long bits were all I had handy, so I threw one in the chuck and went at it. The bit didn’t protrude enough to fully seat in the screw head, so I wasn’t able to get the screw out. It did protrude enough to exert some torque on the bit, though, and wedge it firmly into the chuck.

Since the tip only protrudes from the chuck about 3/16”, and it tapers to a point, it’s pretty much impossible to get a grip on, even with needle nose pliers. The fact that you have to pull outward on the collet to release the bit makes it even more unlikely you’ll get a positive outcome. Searching online for advice on removing a stuck bit (from ANY impact driver) produced numerous recommendations, many of which I tried unsuccessfully. Among them: reversing the direction several times under load; spraying WD40 into the chuck; smacking the bit with a hammer; grabbing the tip with Vise-Grips; using a powerful magnet; grinding the end of the bit flat, drilling and using an EZ-Out to remove it; and welding or supergluing something onto the tip of the bit to gain leverage (that’s one I DIDN’T try, due to tight space and reluctance to end up with the bit welded to the chuck). One frustrated commenter recommended pitching the thing off a roof and buying a new one (tempting, but I decided the momentary satisfaction would be outweighed by the financial setback).
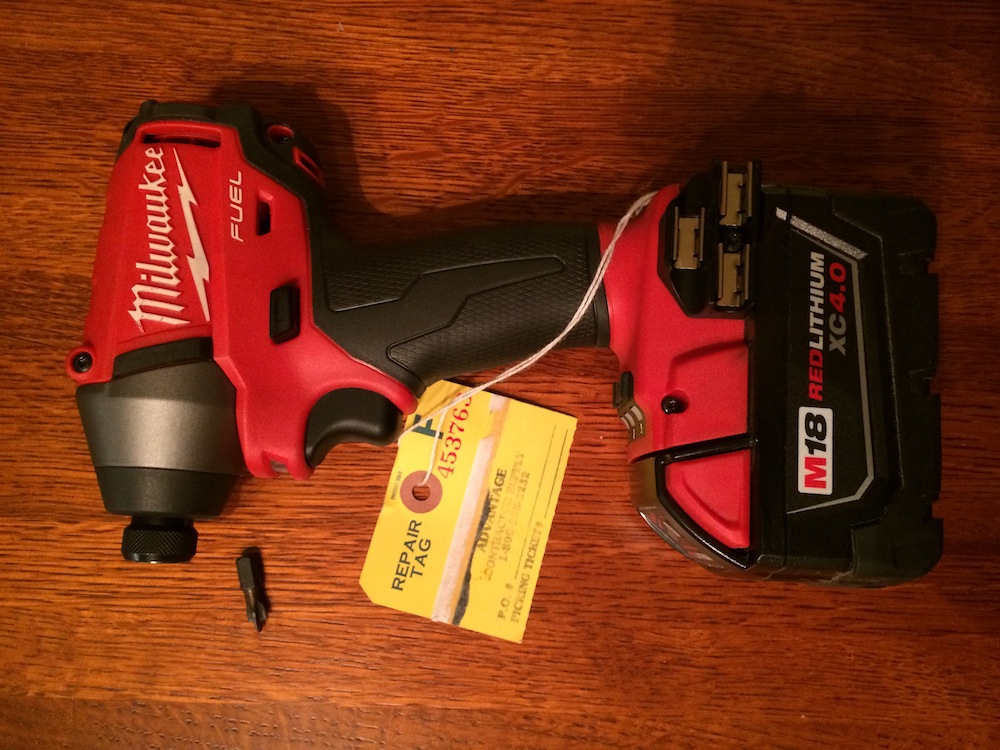
My eventual solution was to take the driver to the local Milwaukee repair center, where they performed a chuckectomy on it. One week and $35 later, I had my bit-free Milwaukee Impact Driver back, along with the advice to not use the short bits, which I am passing on to you for FREE! If you frequently need to use an impact driver in tight spaces, take a look at the Milwaukee right angle impact driver we recently reviewed.
Ready To Get Torqued?
So who is a candidate for an impact driver? If you’re an electrician, HVAC tech, plumber, garage door installer, carpenter, or serious DIYer (to name only a few), I guarantee you the Milwaukee M18 Fuel Impact Driver will become one of your favorite tools. The precise control you get lets you handle anything from installing cabinet hinges, pocket screws and conduit clamps to building decks, fences and wooden retaining walls.
I like the Milwaukee M18 Fuel Impact Driver a lot. Like other M18 Fuel tools I’ve used, it looks and feels like a sturdy, quality tool. It has amazing power for such a small driver, and it will drive a LOT of fasteners on a single charge, especially with the 4.0 Ah XC battery. The three-mode switch lets you really tailor the amount of torque and the speed to your current application. The tool is backed by a generous five-year warranty, along with a three-year warranty on the batteries. The kit we got, model 2653-22, comes with two XC batteries, and currently retails for $299 via our sponsor Ohio Power Tool. It’s also available in a kit with two compact batteries for $229, and as a bare tool for $129.

FYI….I also was impatient and stuck a 1″ bit in the chuck. Needed my drill right away so I took the chance on the only tip you didn’t try…glue. It worked like a charm. I used Loctite Professional Liquid Super Glue. I dipped a screw head in the glue, gave it a few seconds to start to cure then tilted my drill forward so no glue would drip inside then pulled. Came out easy peasy.
I’ll definitely try that in the (likely) event that I have a brain fart and use a short bit again! I didn’t think Super Glue would work well bonding metal to metal; see what happens when you think! The service center said they dismantled the chuck, but now I wonder…Thanks for the heads-up, Kasey!
just dremel two sides of the bit flat grab it with some vice grips and its out.
That might work. You’d need a pretty small pair of needle-nose pliers to get in there, because there isn’t much room, especially after you slide the collet forward. Certainly worth a try – thanks for the tip!
Thanks for the review Phil. I bought the Milwaukee drill/driver combo partly because of this review. It was time for a new set before my old impact driver imploded. Putting screws in cement board all day will give any tool a workout. So far this thing is awesome. I do find myself sometimes putting it in “neutral” if I choke up on the handle too much though.
And thanks for the tip about what not to do! That’ll probably save me sometime in the future, cause it’s something I’m sure I would have tried at some point!
Glad you enjoyed the review, Scott – it IS a sweet tool! I sometimes have the same problem with bumping it into neutral; not the end of the world, but it can get annoying. Seems like it could be fixed pretty simply by curving the casing out underneath the switch a bit. I’ve been running in lots of Tapcons lately; not as much fun as installing Hardibacker board, but we can’t all be that lucky…enjoy!
Very nice article for beginners with a Drill Driver, I am going to steal your expression serious DIYer to write a review and wish I could reference this but not where I write, so I’m giving you a Tweet. I’m serious about quite a few things. Well illustrated use of the driver, thank you.
Sorry meant Impact driver, still on my first cup of coffee! Thanks again
You’re welcome to reference the article. Please mention that you got the information from HomeFixated, and link back to the original article. Glad you enjoyed it!
Sounds like a tool I would like to have.
It’s one of those tools you didn’t realize you needed ’til you have it. You are hereby granted permission to get one!
Those DeWalt drivers are way better. It’s holding a Milwaukee nut driver atleast!
Nice Dewalt bit holder in the furnace shutoff pics! 😉
Oops – caught that, eh? Just think of it as a demonstration of what a harmonious world we could live in if only we could get along as well as our various tools…and quit zooming in!