

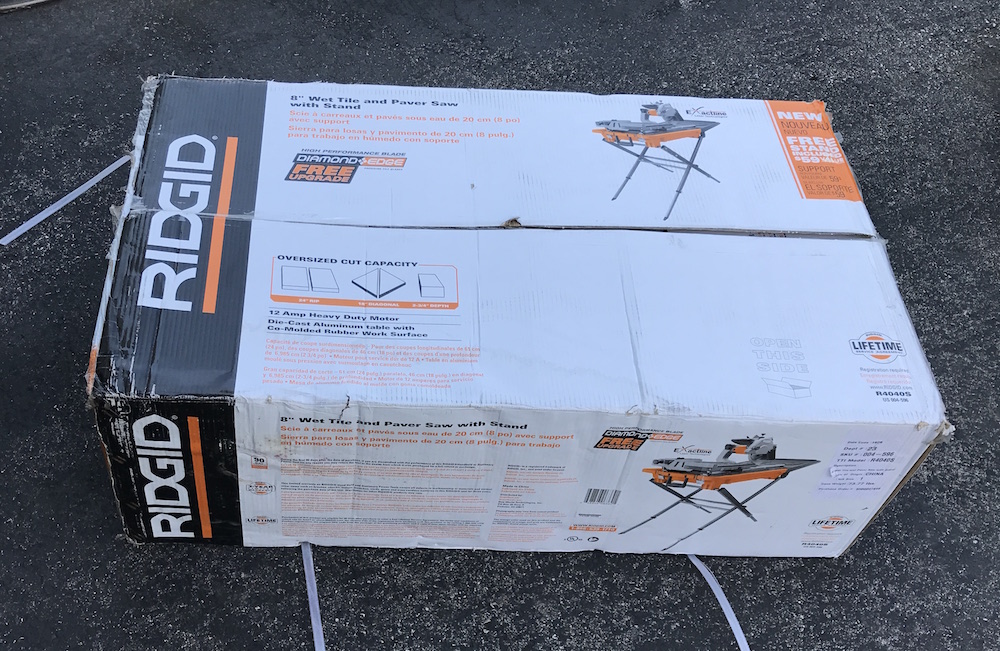
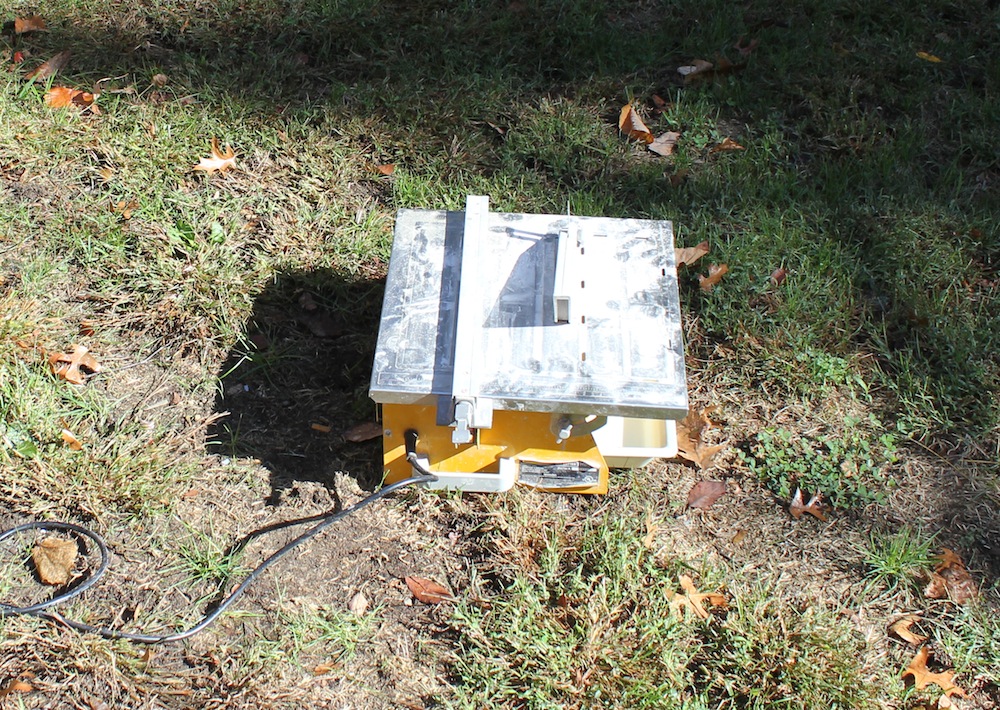
First, let’s get the disclaimer out of the way: I am not a pro tile installer, although I have many attributes in common with them. Crappy knees, a sore back, and an extensive vocabulary of colorful language, for instance. Despite that, I have installed a fair bit of tile over the years, bringing about glorious transformations to several bathrooms and kitchens. On many of these projects, I used a cheapo basic tile saw, aka the Community Tile Saw, borrowed from my buddy Steve. Recently, though, he moved, and selfishly insisted on taking “our” saw along. Since I had a bathroom floor to install, I was very happy when a large orange and white box, containing a Ridgid R4040S Tile Saw, showed up at my door for a review on HomeFixated.
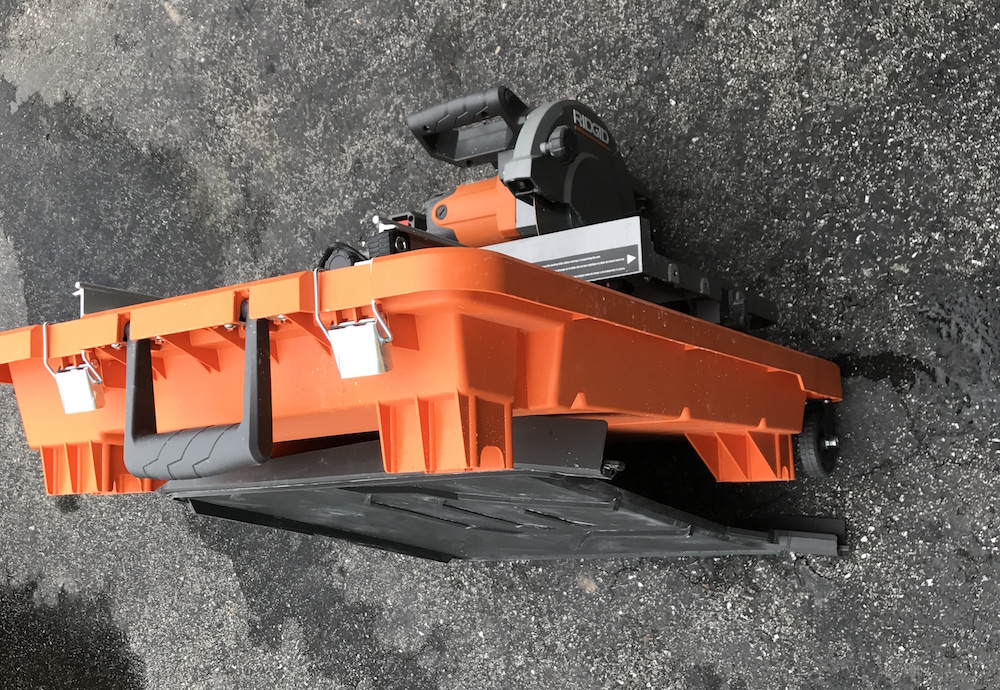
The Ridgid R4040S is a major step up from the little tabletop saw I’m used to using. The motor is quite a bit larger, and much more powerful. Instead of pushing the tile across a gritty, aluminum table, a rubber-covered tray glides smoothly through the cut.
One of the biggest differences is that I get to stay dry; the little saw tended to throw spray in the general direction of the operator, while the Ridgid sends it down and back. This is thanks to its sporty guard baffle system and wrap around rubber splash guard, along with a water tray extension at the rear of the unit. Here’s a list of features, followed by a short promo video from Ridgid:
• 12 Amp motor – 1.2 HP heavy duty motor powers through natural or man-made tile and pavers
• Oversized cut capacity – 24 in. rip, 18 in. diagonal, 2-3/4 in. deep, can cut up to 5 in. wide extra-long backsplash or threshold material
• Removable water tray – captures overspray and water from larger tiles to help keep work area dry and clean
• Aluminum miter guide – precision straight and miter cuts from 0 to 45 degrees left and right
• Heavy duty cast aluminum arm – prevents flexing while keeping the blade aligned
• Cast aluminum frame – heavy duty performance yet lightweight for easy transport, aluminum prevents rusting
• 5 Gal. water tray with wheeled system – allows for quick setup and easy transporting of saw
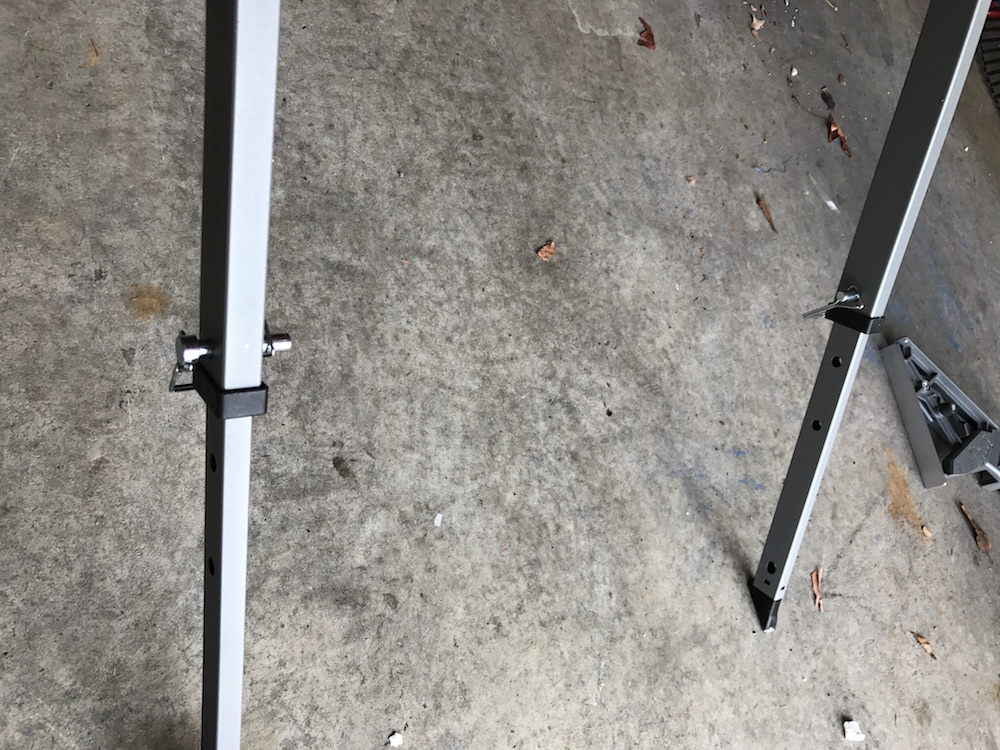
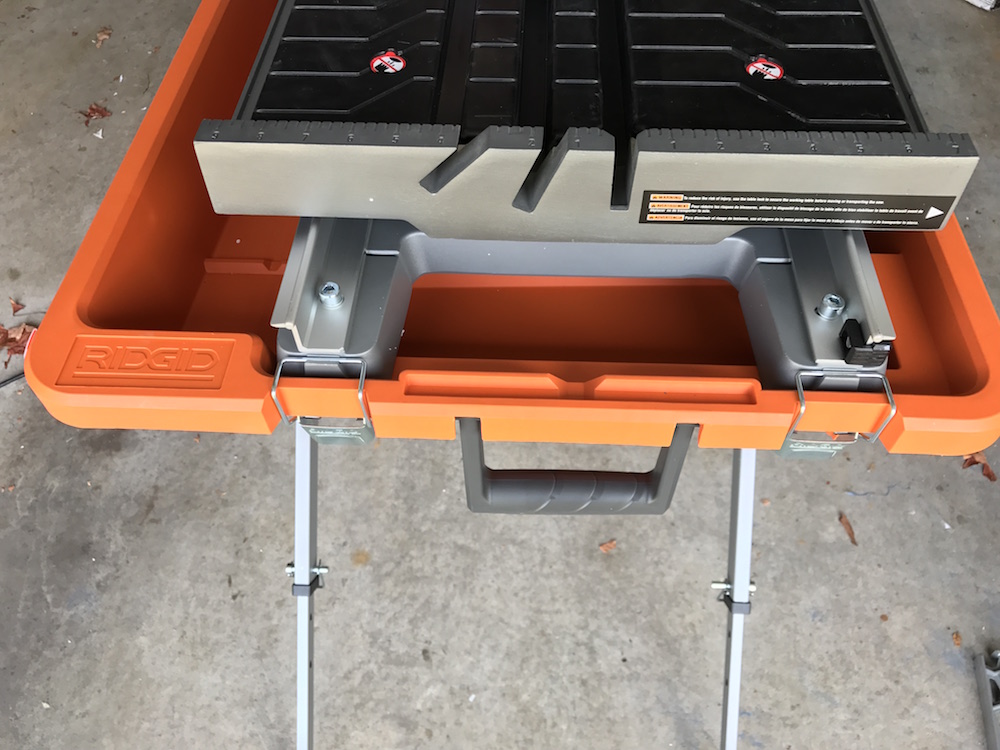
• Folding stand – tool-less height adjustment and scratch resistant feet to help protect flooring
Getting Ready To Slice And Dice…
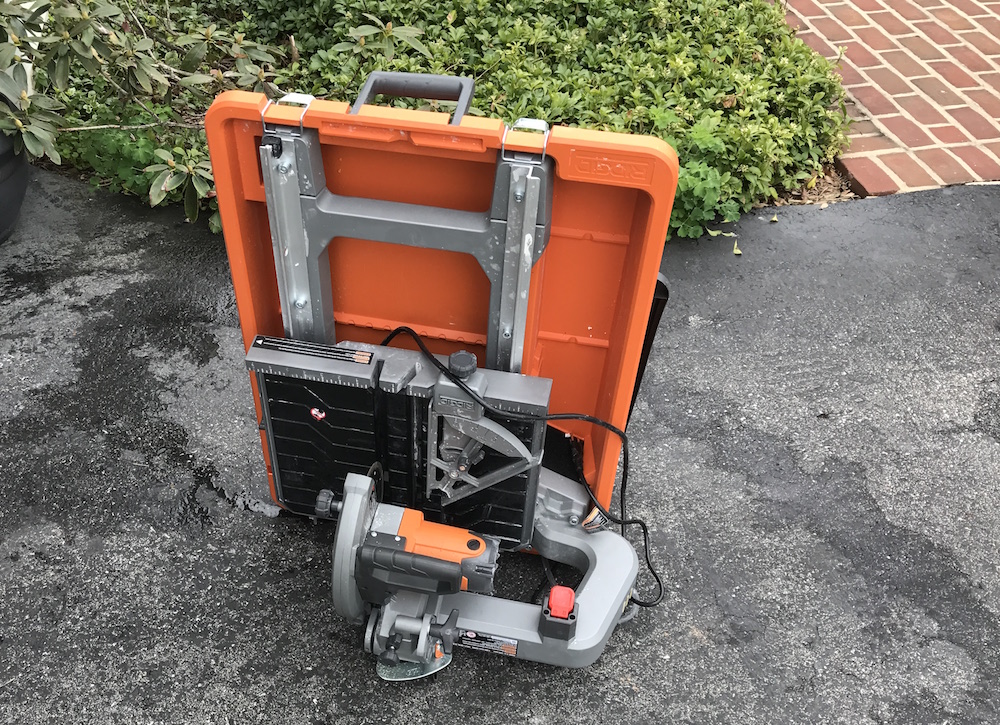
Getting the Ridgid R4040S Tile Saw set up was fast and easy. You’ll just need to bolt on the motor assembly, stick the pump in the reservoir, and install the blade. Doing so is simple. Turn the knob on the blade cover, and it swings open. The arbor wrench and Allen wrench work well, and the blade goes on easily. Just make sure when you put it on that it goes in between the two nozzles, so both sides of the blade get spray. Once the tray assembly is ready, it clamps to the top of the water tray, and you’re ready to cut some tile.
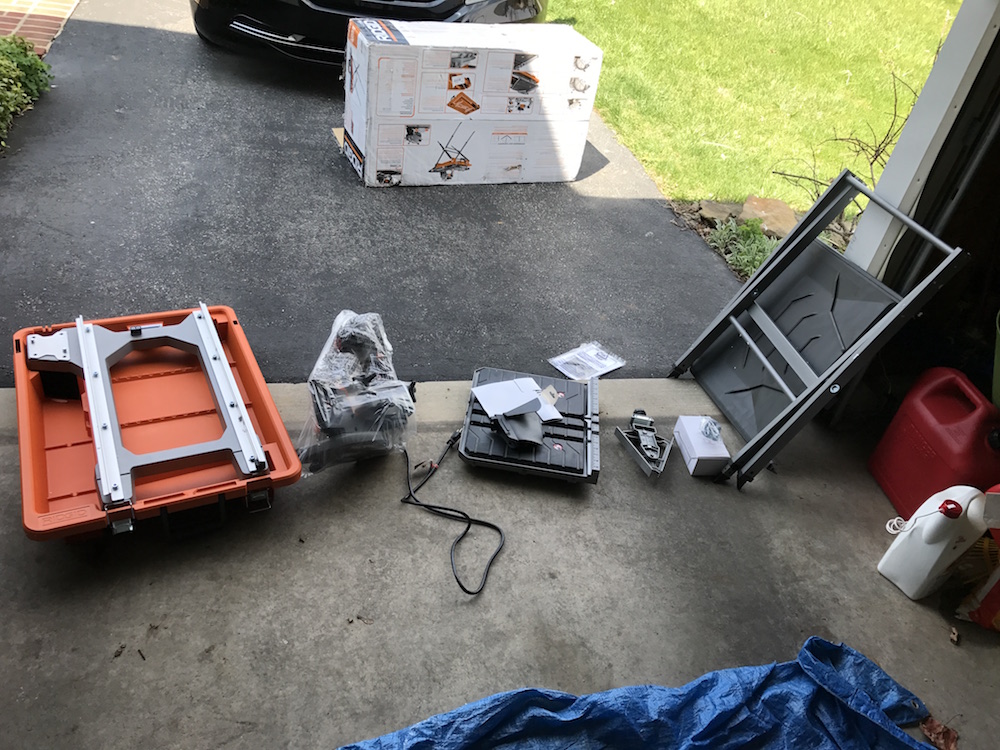

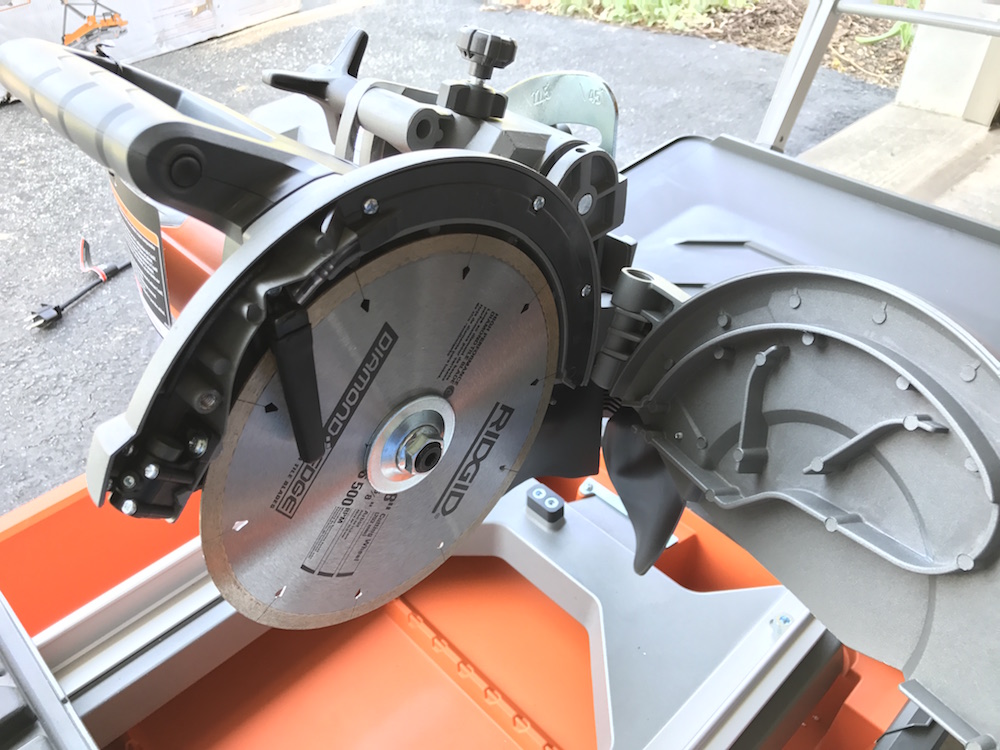
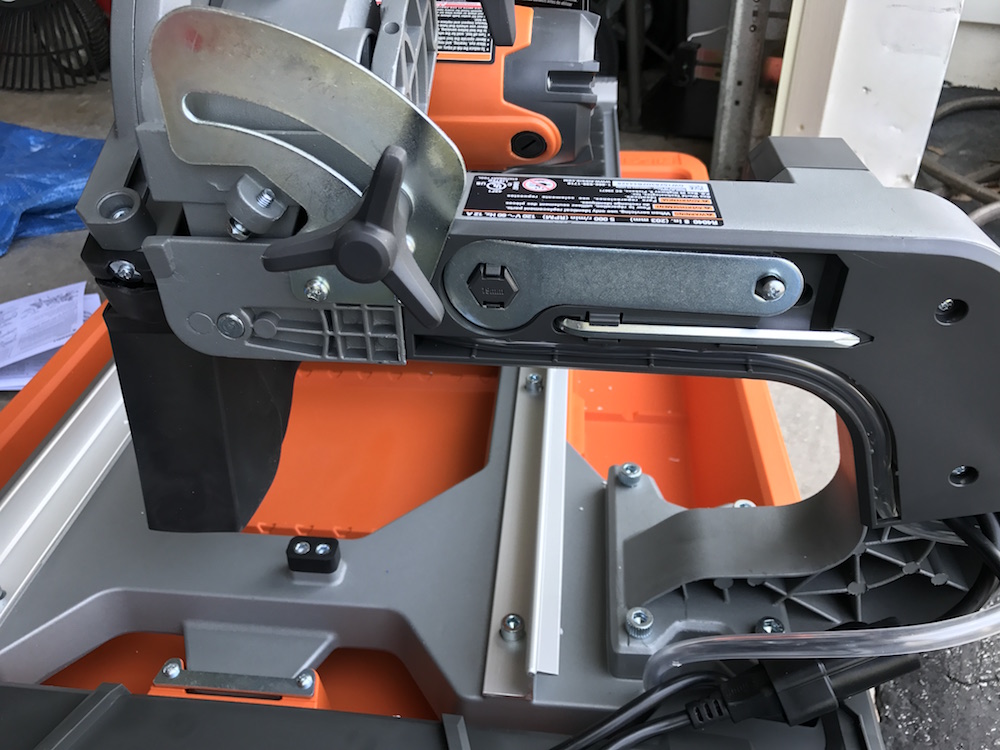
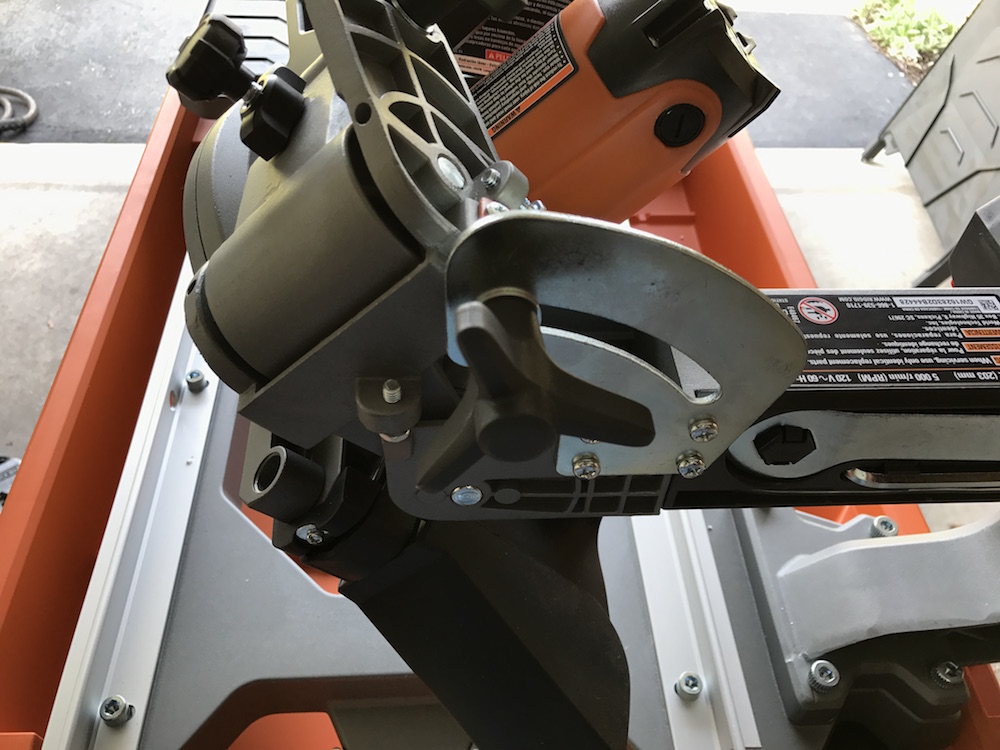
The setup feels very solid when assembled. The table glides smoothly, thanks to dual-bearing rollers. A knob by the motor makes it easy to lock it in the down position, or to unlock for use in plunge cuts. The motor can also be quickly tilted and locked into position to make beveled cuts at 22.5 or 45 degrees.

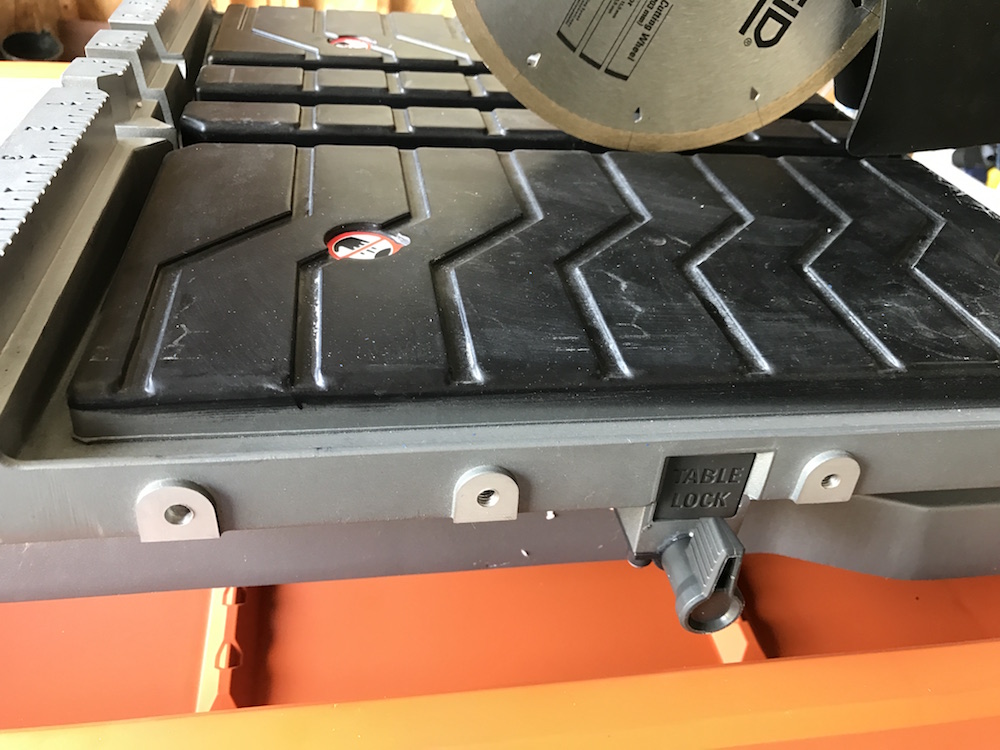
Using a small lever on the side of the table, it can be locked into position beneath the motor. This would be useful for making repeated cutoffs, or for plunge cuts. The same lever also allows the Ridgid R4040S tile saw to be a free-range beast, or as free-range as you can be going backward and forward.
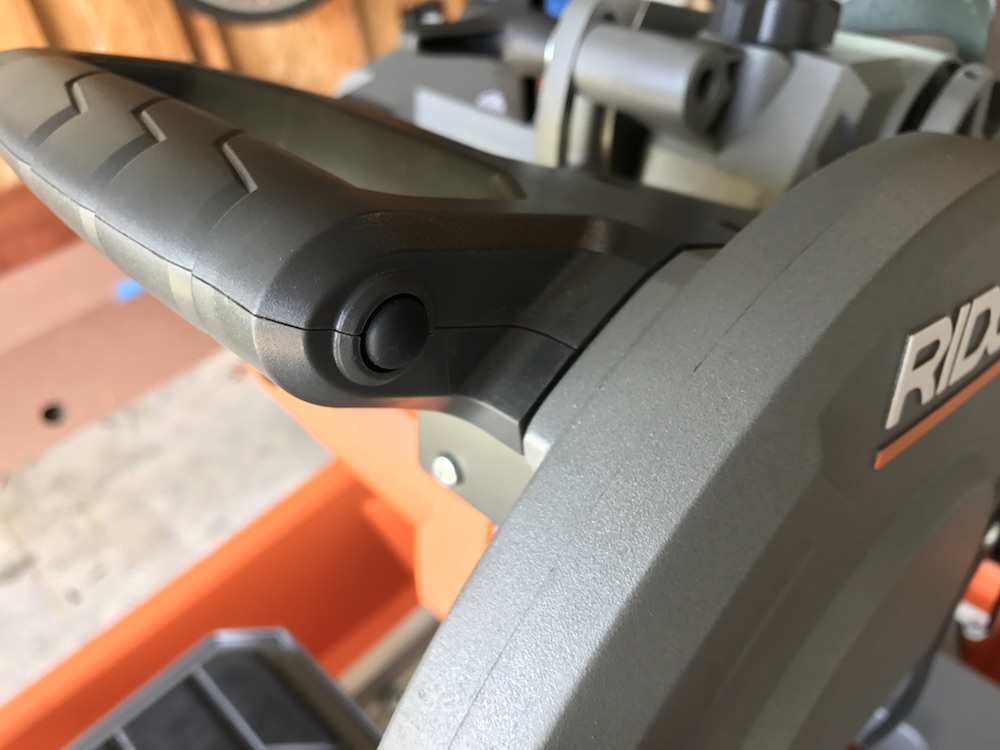
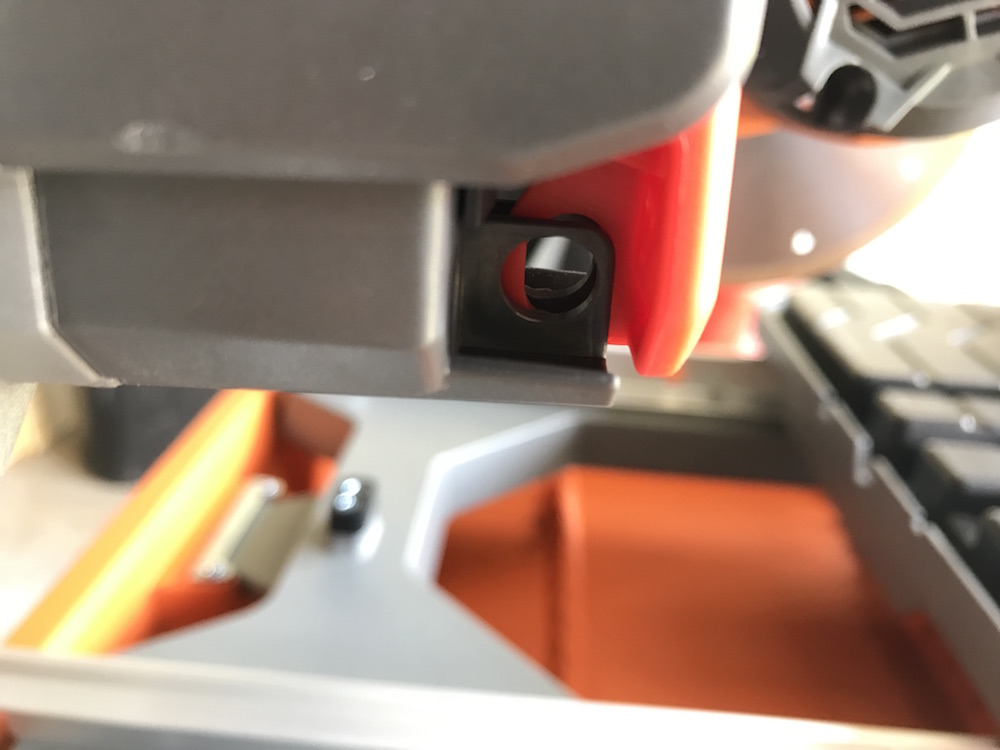
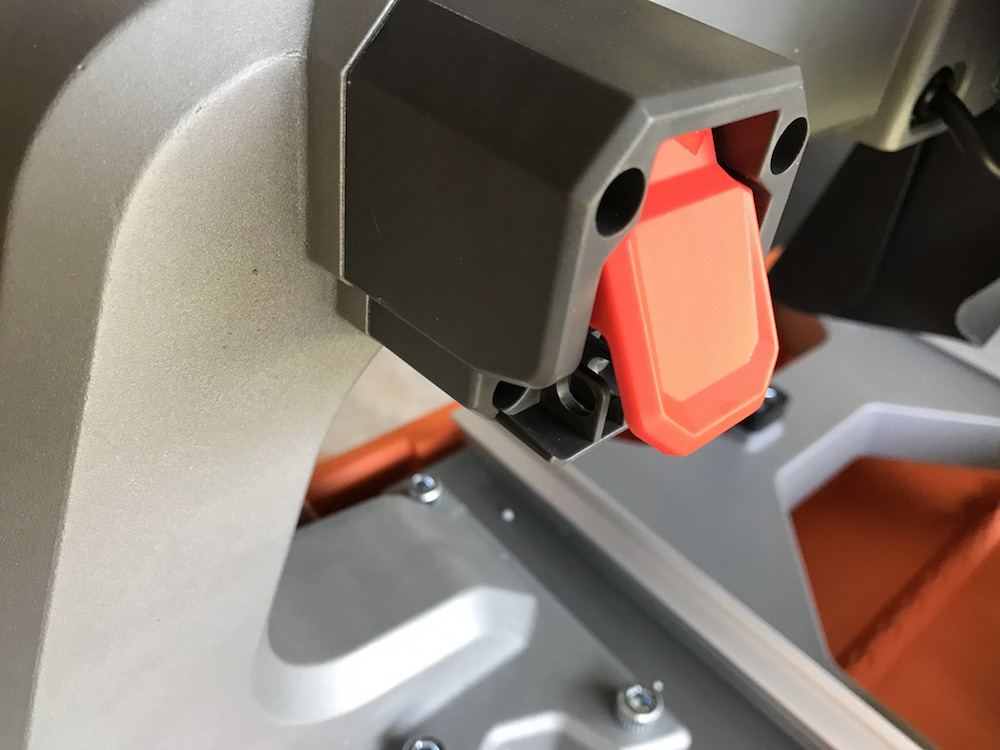
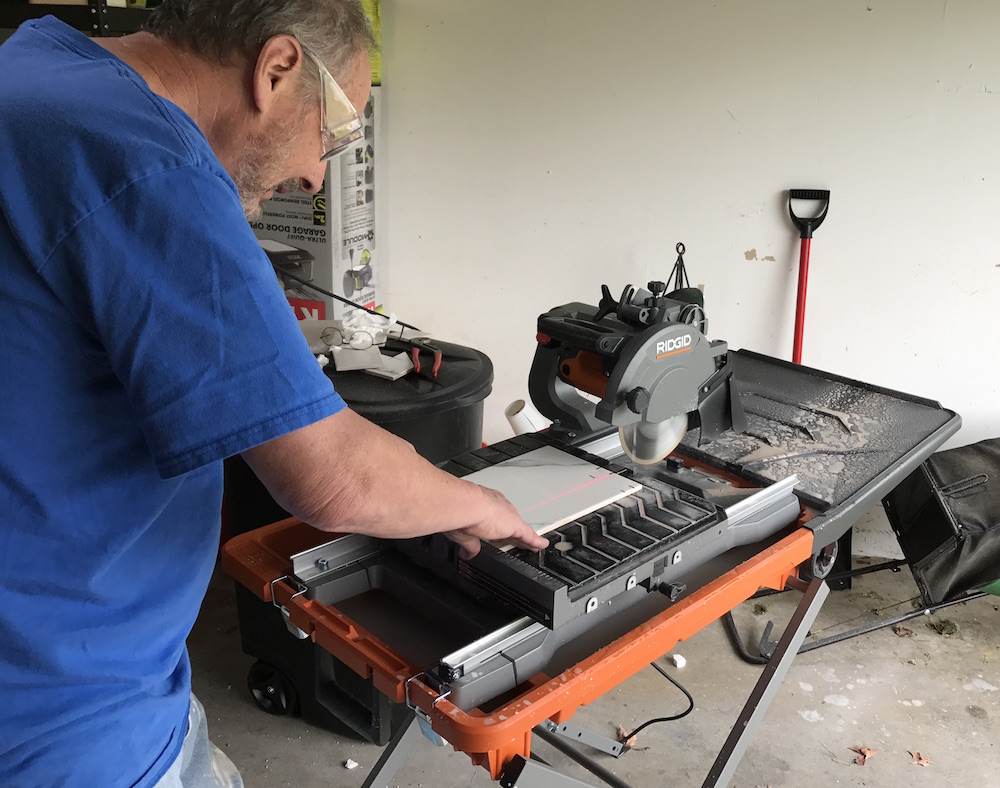
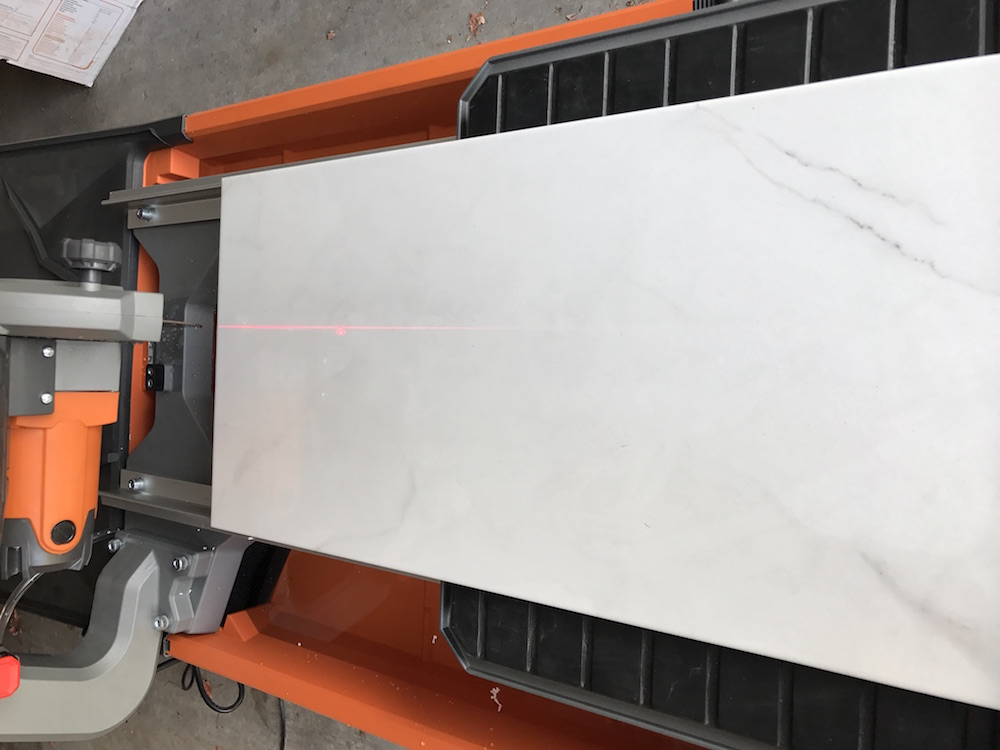
One of my favorite features on the Ridgid R4040S tile saw is the laser guide. It makes a visible line the entire length of the tub, so even if you start with the table pulled all the way back, you can get the blade lined up with your mark. The laser is activated by a button on the end of the motor’s handle, and remains on until you command it otherwise. It was dead on, and really sped up the cutting process. If it does eventually get knocked out of whack, from being dragged from job to job, the manual provides adjustment instructions.

Take A Stand And Pull The Trigger
Another feature my creaky knees and I really appreciated is the included saw stand. The stand is sturdy, and simple to set up: Slide the feet out to the desired height, insert the pins, and flip the locking clips around. Two crossbars fit into grooves in the tub and saw assembly, and the setup is very stable.

The power switch on the Ridgid R4040S tile saw can be locked in the off position. I think this is a great safety feature for a tool that might be left at a customer’s home for several days during a remodel.
The tray has wheels at one end, so when your slicing and dicing is complete, you can tug it along behind you, rather than trying to carry it to your vehicle. It stands solidly upright, making it easy to store.
The Ridgid R4040S Tile Saw Makes The Cuts
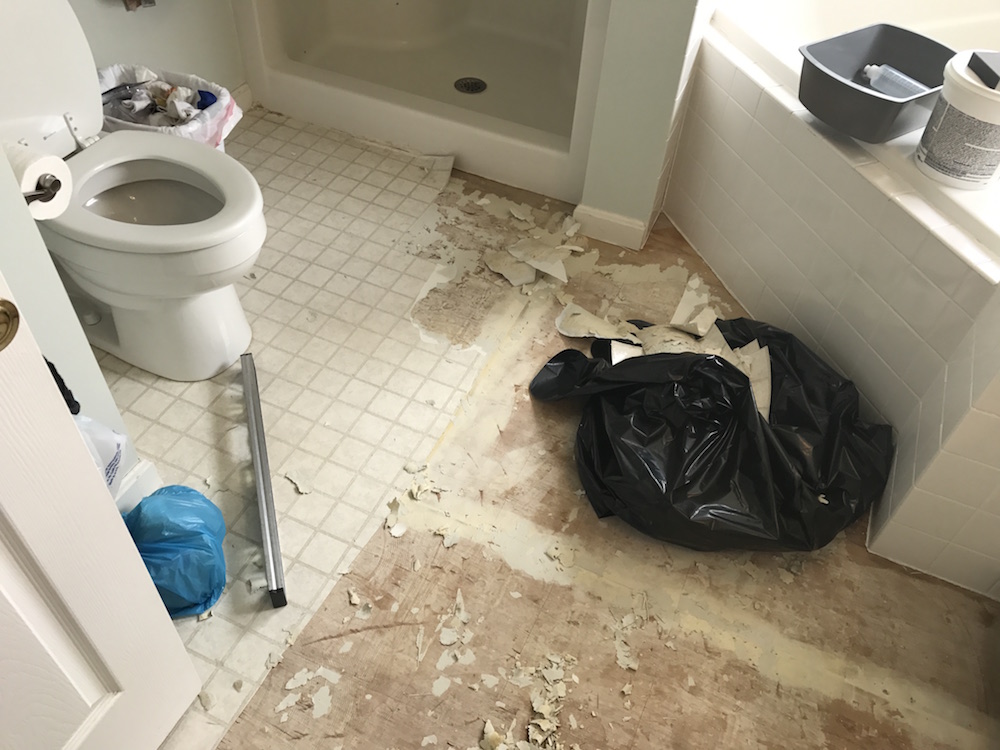
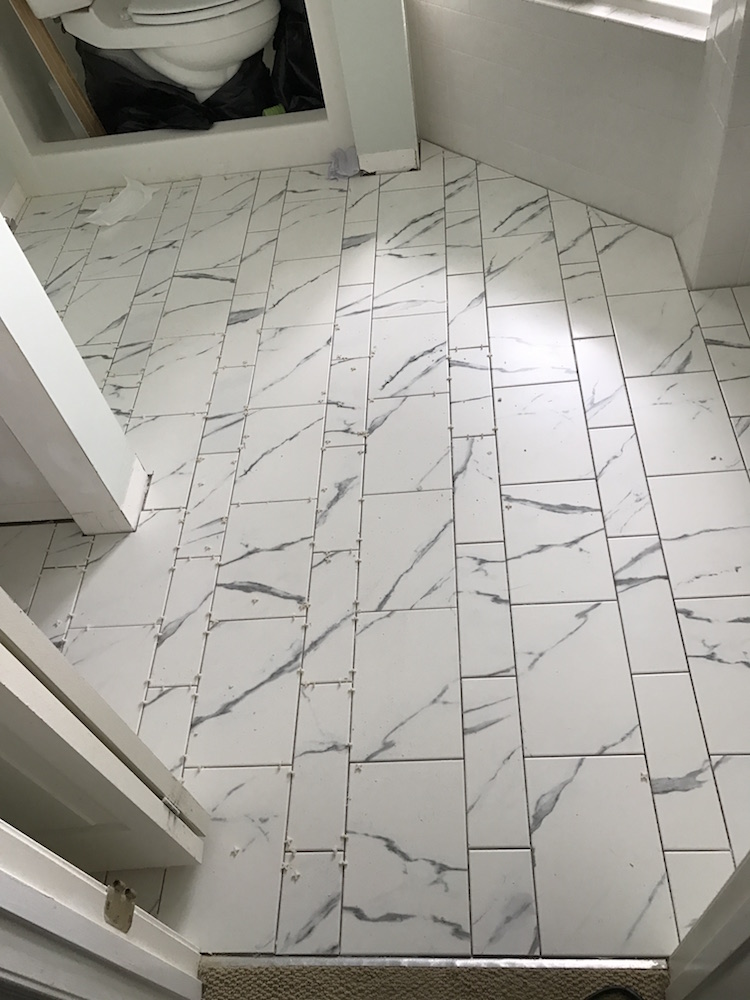
For its break-in project, I put the Ridgid R4040S tile saw to work on a bathroom floor tile job. We were using a mix of 4 X 12” and 8 X 12” ceramic tiles, and the bathroom had a Jacuzzi-style tub with a 45° angle, to keep boredom at bay.
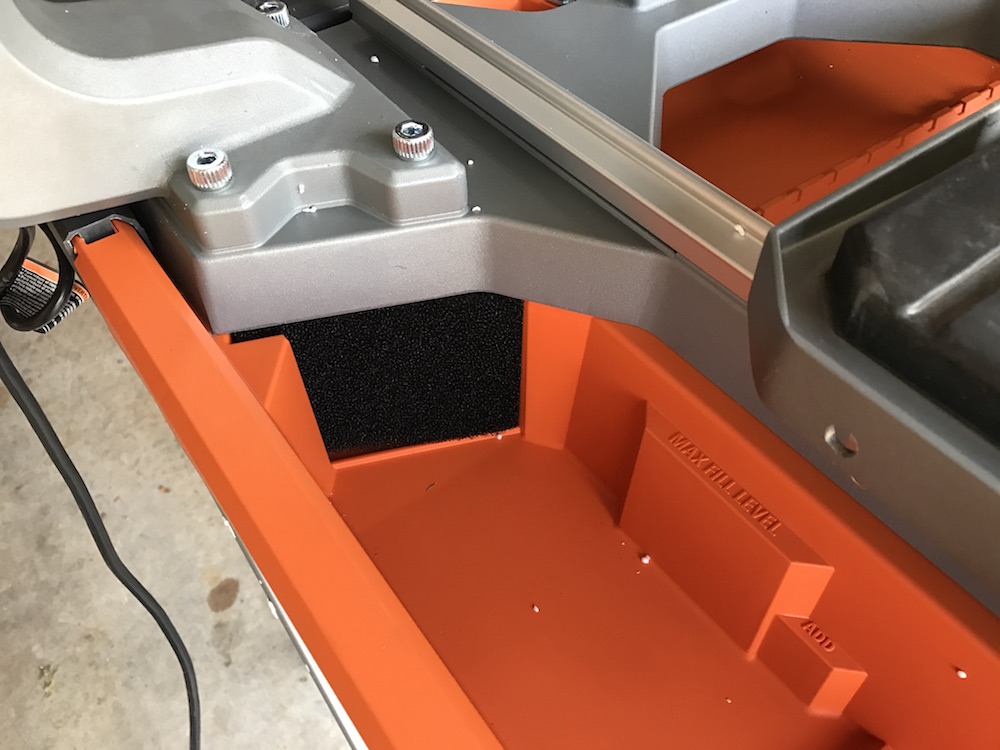
I set the saw up in the garage, and filled it with a garden hose. Protruding MIN/MAX fill indicators make it easy to get the water to the right level, and a foam filter keeps much of the sludge out of the pump reservoir.
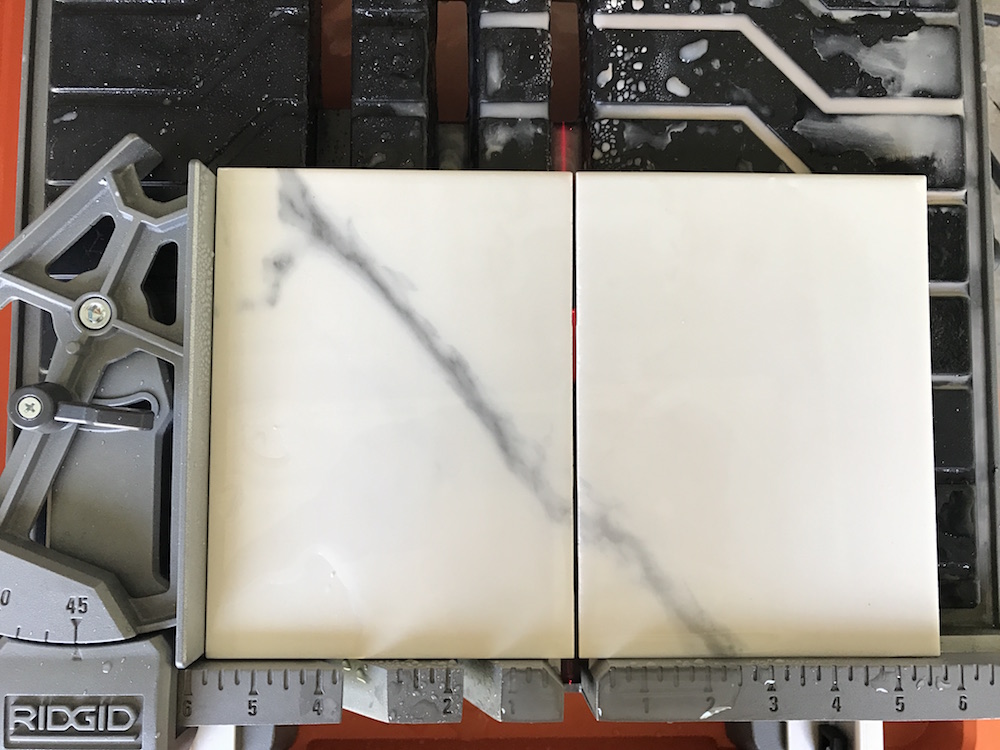
The first few cuts I made were simple cross cuts. We were staggering the joints, so I needed to cut several of the 4” wide tiles in half. After determining the mid point of the tiles, I clamped the miter guide in place. It locks down firmly, and made it fast and easy to get precise, repetitive cuts.

For other cuts of various lengths, the laser line was a huge help. I had the saw set up in the garage, and the light was easy to see. When the saw was in direct sunlight, it was tough to see the line, a problem common to pretty much every laser light.
To power up the Ridgid R4040S tile saw, just pull the large red switch toward you; push it back in to shut it down. It takes a few seconds to get the water flowing off the blade; I used this time to ponder the mysteries of the universe. And occasionally to think about how good the first beer would taste at the end of the day.
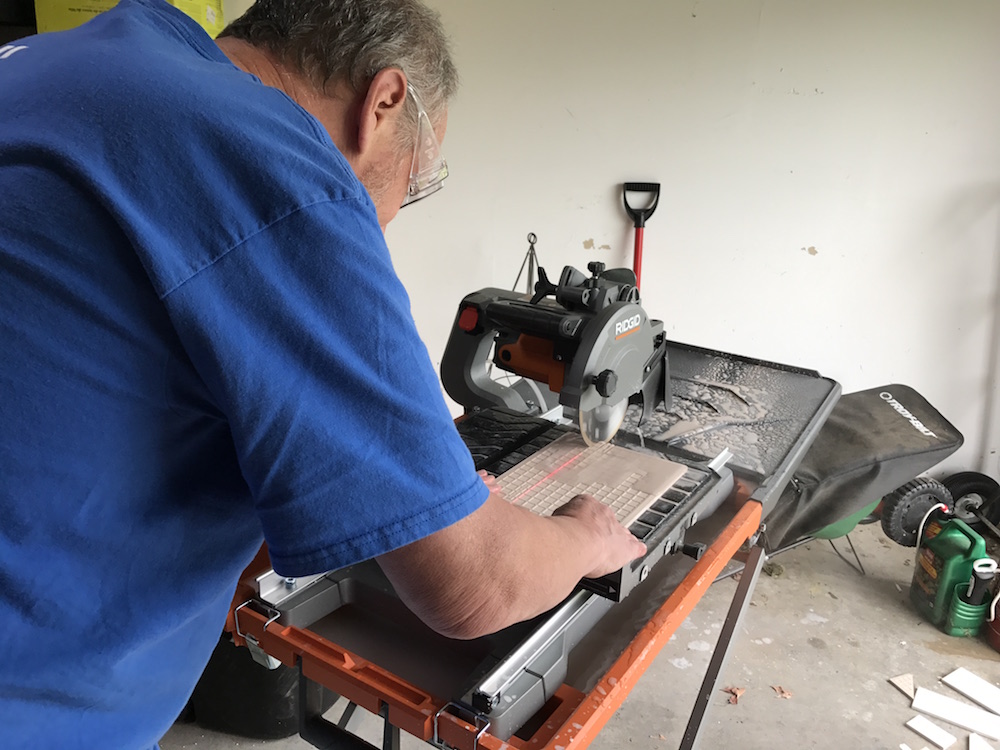
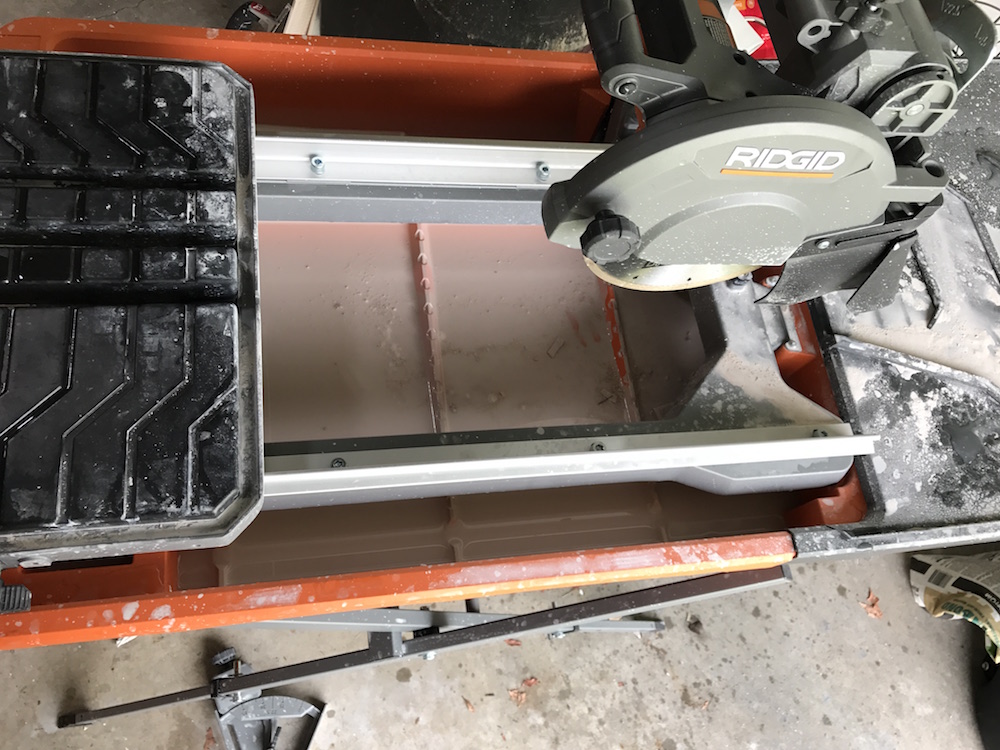
The tray glided very smoothly along the rails and under the blade. The rubber on the table did a great job of keeping the tile from slipping around. The 8” blade sliced through the tile quickly and smoothly, with no bogging down at all, unlike the little saw I was used to using. Every cut I made came out perfectly smooth, with no chipping at all.
Next up were the angle cuts. The miter guide can be placed on either side of the cut line. This made it easy to find a comfortable position to hold the tiles in place while making the 45° cuts. The angle was dialed in at a perfect 45°, and again there was no chipping, even at the pointed ends of the angle cuts.
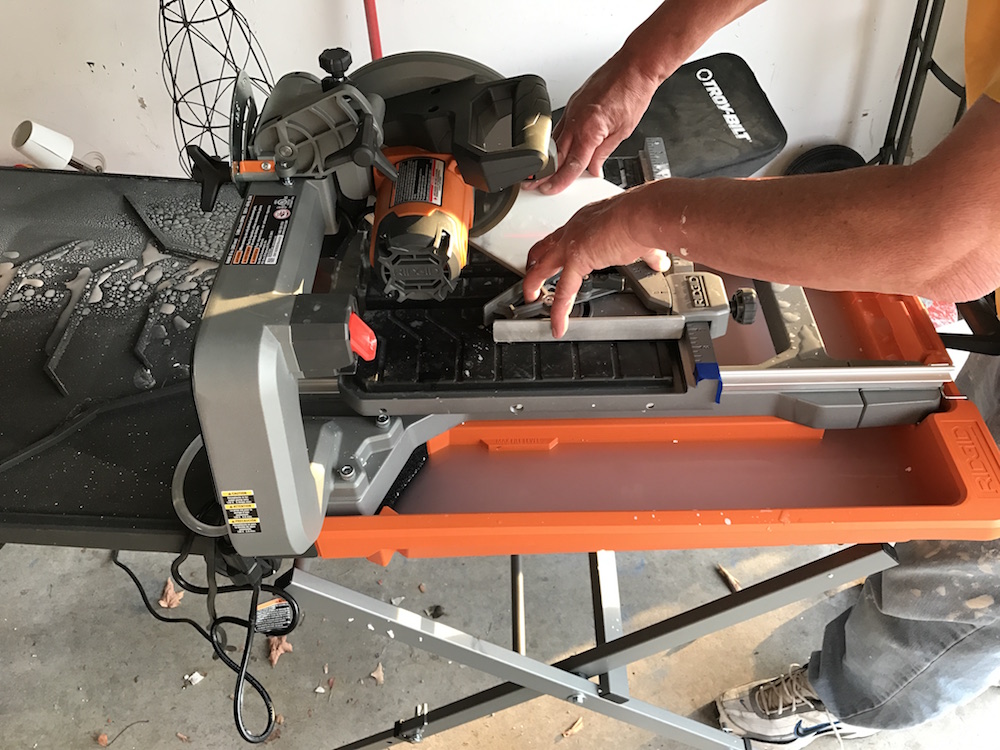
The Ridgid R4040S tile saw also did a nice job on our notch and L cuts. Marking the top and bottom of the tile helped me avoid overuse of my special tiling vocabulary. I cut the top first, then flipped the tile over; the bottom cut requires overcutting the mark, which takes a little practice to avoid crossing the line.
Here’s a step-by-step video from Ridgid, showing exactly how to set up and use their four top-end saws, including the R4040S; it includes a couple of tips that might be helpful for ANYONE trying not to exceed their daily quota of foul language.
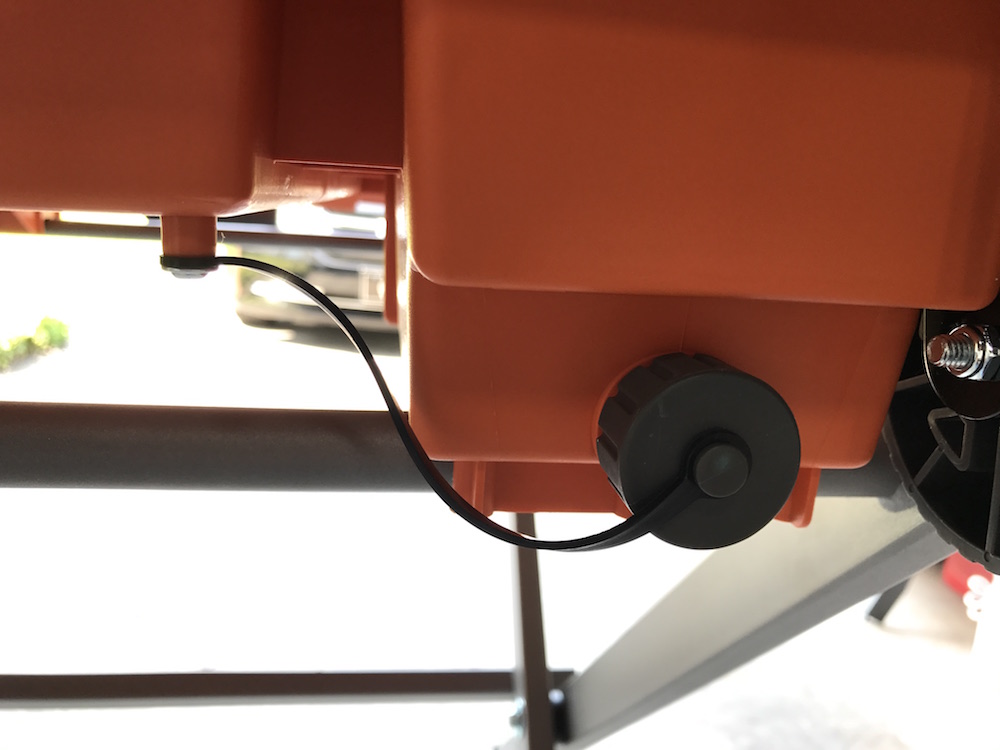
After all the cuts were made, draining the reservoir was easy – just unscrew the cap at the rear of the tank. Just make sure you have a bucket ready to catch the sludge water. A series of baffles in the bottom of the tray, combined with the foam filter, helps keep sediment out of the pump area.
Ready For A Saw That’s A Cut Above?
I was impressed with the Ridgid R4040S tile saw. It feels well made, solid and durable. It’s easy to set up and use, accurate, and gave perfectly smooth cuts with absolutely no chipping. The ability to cut 24” tile, make accurate bevel and miter cuts, and make plunge cuts makes this a saw that should appeal to a lot of users. Throw in the ability to cut 4” thick pavers, and it gets even easier to rationalize making the investment.
The only negative I can come up with is that when you’re cutting 24” long tile, there’s a fair bit of it hanging off the table unsupported. Some sort of extension table would be helpful for tile setters who regularly install this type of large tile. Even so, when I tried it out, I had no issue with cutting tile this large.
If you’re a remodeler who does a lot of tile jobs, a serial renovator, or just a DIYer who likes having quality tools to get the job done, I think you’d be very happy with the Ridgid R4040S tile saw. I’m almost looking forward to my upcoming kitchen backsplash tile job – and now I control the NEW Community Tile Saw! Ridgid backs the saw with a 90-day money-back guarantee, a three-year warranty, and its Lifetime Service Agreement.
Buy the Ridgid R4040S Tile Saw from the Home Depot for about $500:
Phil, the old R4030 I use has a broken lock knob on the table. I bought a replacement online, but I don’t understand how it works. Can you explain?
Hi, Joe – I’m not sure which knob you’re talking about. Is it the one that locks the sliding table to the rails, to keep it from sliding? At the moment, my saw and I are in two different places, and I won’t be able to take a look at it for a few more days. Let me know if you still need help, and I’ll be happy to have a look at mine to see how it goes together. You might also try calling Ridgid support, they should certainly be able to guide you through the installation process. Contact them at 800-474-3443.
Here’s a link to the owner’s manual:
https://cdn2.ridgid.com/resources/media?key=956bd7f8-fc7a-4ddd-bf1b-69c343dfaac1&languageCode=en&countryCode=US&type=document
And a link to the parts list, that may be helpful in assembling it:
https://cdn2.ridgid.com/resources/media?key=39a6407c-f252-4861-ac0e-4f8cdbf3b34e&languageCode=en&countryCode=US&type=document
Phil, never done tile, just pavers and stone, any recommendations on tile spacer brands,and/or what you use, I’m seriously considering to go tile when I remodel the kitchen and our baths. Thanks
I’ve been using this saw’s little brother the 4020 Jobsite 7″ wet tile saw, for hardscaping projects, used it last week on some 4.5″ concrete pavers to contain a pea-gravel path for a client, it was about 90′ long and meandered and had a few hard sweeping curves required cutting as well as fitting end pieces. I ended up removing splash guard and riving knife (Disclaimer not recommended probably not OSHA approved) , had to then score as deep as possible on both sides while standing behind the table because of the plume of wet spray, I slide the pavers on a paper towel and used 14″ X .5″ x 1″ strip of foodgrade plexi-cutting board to slide against the fence, then finish the cut with dust mask and a diamond turbo rim on my circular saw, now that created quite the dust clouds.
This would have made the job go much faster and cleaner sans dust mask as well. I also like the built-in pump, on board tool storage and the laser is a nice add as well. Included stand is nice and much more compact than the 4’x2′ folding lifetime brand table I normally use. Yet the 4092 10″ Beast is very enticing but $200 more than the R4040, it uses the same stand setup as the Rigid AC9945 MSUV miter saw utility vehicle – that I use and store my 10″mitre saw, but still takes up a 2.5′ x 3′ of floor space with its foot print but I now use my miter saw all the time, its a breeze to setup and store when finished. The R4040 looks like it has a much smaller storage footprint similar to the R4020. Yet HD has the R4091 10″ beast on Special buy for $459 till 6/21 normally $699 but still the storage footprint for me is an issue, but mighty tempting nonetheless (No, I don’t work HD or TTI (Rigid’s parent company).
Hi, Jonathan –
For tile spacers, I normally use the “tombstone” type spacers (they look like a cross), and stand them up between each row of tile. You can get a bag with hundreds of them at any home improvement store. To reiterate, I’ve done a fair bit of tile work, but I am definitely NOT a tile pro; any tile setters out there, please feel free to weigh in with suggestions!
As for the bigger Ridgid “beast” saws, I have no experience with them. I can see how they’d be attractive to someone who cuts a lot of big, thick hardscaping material, though. The R4040 can cut up to 2-3/4″ in a pass. I measured the clearance, and with the head fully upright, you could get material up to 4-1/4″, or maybe a shade thicker, through it. If your pavers are a true 4-1/2″, they wouldn’t make it, just an FYI.
Good luck with your tile projects; it’s really not that hard to do, good prep and getting the layout right is 90% of it. Looks great when it’s finished, too! I’ll be doing another kitchen backsplash in the near future, and I’m always amazed at how it transforms the space. It was interesting hearing about your paver workaround, too – being able to improvise is key. Let us know what you decide to do, and how it works out!
Oops – forgot to mention, the footprint of the R4040 is about 16″ x 26″, if you set the folding stand on top of it, or about 18″ x 26″ with the stand behind it.
You should just leave the toilet in the shower. Put a mirror in there for shaving and you can knock out the 3 “S” all at the same time. That’s like win-win… win.
Makes the bathroom feel much roomier, too. Three S’s, let’s see if I remember correctly: Shower, shave and sing, right?
Where’s the like button?!
Unfortunately, it’s right behind the toilet…