

Ask a random woodworker what power tool they consider the backbone of their shop. There’s a good chance “table saw” will be at or near the tip of their tongue. Figuratively, we hope. Most projects begin at the table saw. But to get the most out of yours, you need to accessorize: a fashionable handbag, some shiny bling and a jig or two. One jig every woodworker should own is a crosscut sled. It opens a world of possibilities and causes stock miter gauges to blush of inadequacy. Home Fixated sponsor Rockler recently sent us their table saw crosscut sled to check out. With its adjustable miter fence, flip stop and workpiece hold-down clamp, it has a lot to offer. Basically, it’s a tool for your tool.
Rockler Table Saw Crosscut Sled – Just What The Doctor Ordered
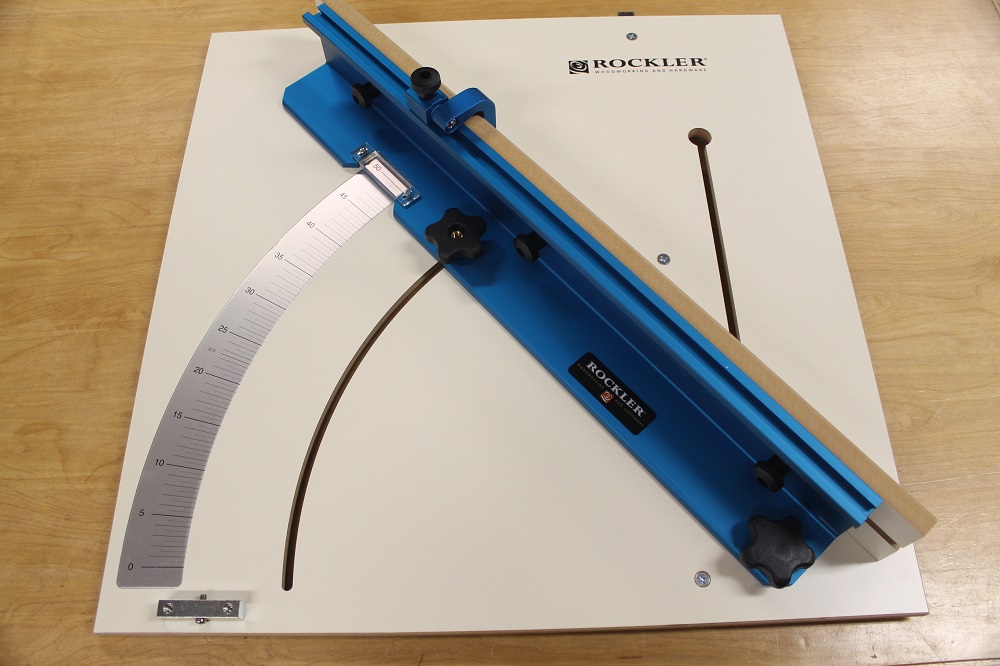
Table saws are woodworking workhorses. They command prime real estate in the middle of most home workshops, and rightfully so. But on its own, a table saw is a bare operating system with a clunky interface. It’s the apps – the fences, sleds and other jigs – that make it so versatile.
A good jig makes it easy to achieve accurate, repeatable cuts and – along with personal protective equipment – helps keep the doctor away. Never feed material through a table saw without the aide of a rip fence, miter gauge, crosscut sled or some other method of securely holding or guiding the piece and preventing it from twisting and shifting.
When your workpiece binds or twists – and/or catches the back side of the blade – that’s when dangerous kickback occurs. And one mindless action can greatly increase the risk of flesh-to-blade contact, which, as you might imagine, is profoundly undesirable. A sled is so nice because it shuttles the workpiece along, keeping everything square to the blade and your fingers out of the way. Rockler’s crosscut sled is not a safety device, per se. But when used properly, it does make working with a table saw a lot safer (and more accurate).
Fences – Not Only For Keeping Out The Riff-Raff
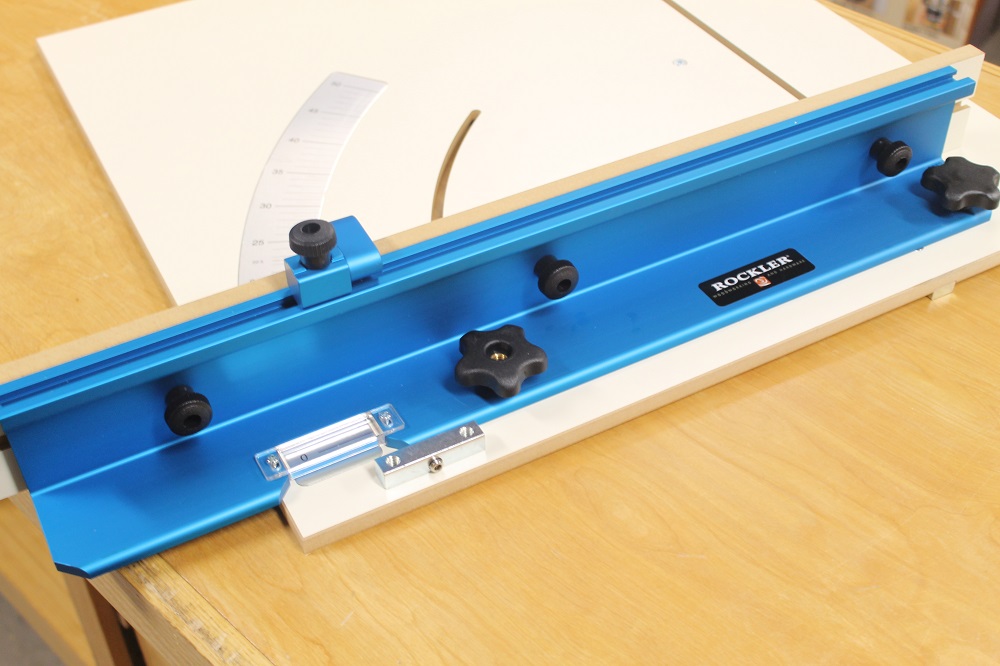
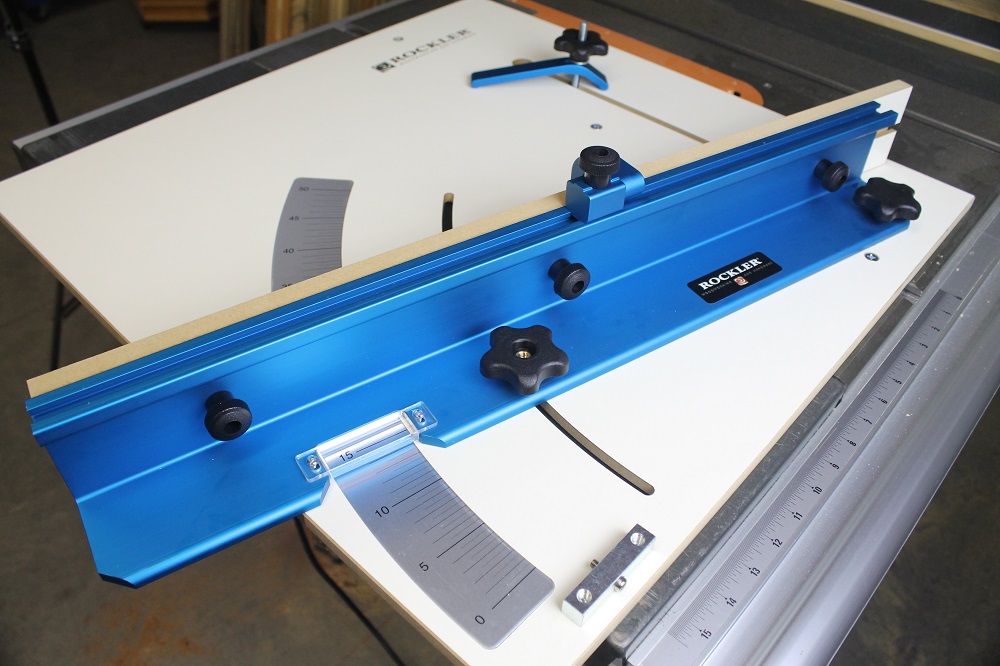
The Rockler Table Saw Crosscut Sled includes a steel runner and a melamine-covered MDF platform. The runner is unlikely to ever wear out and the MDF platform should stay flat for years to come (just keep it away from water). But, in my opinion, the best component is the quality aluminum fence.
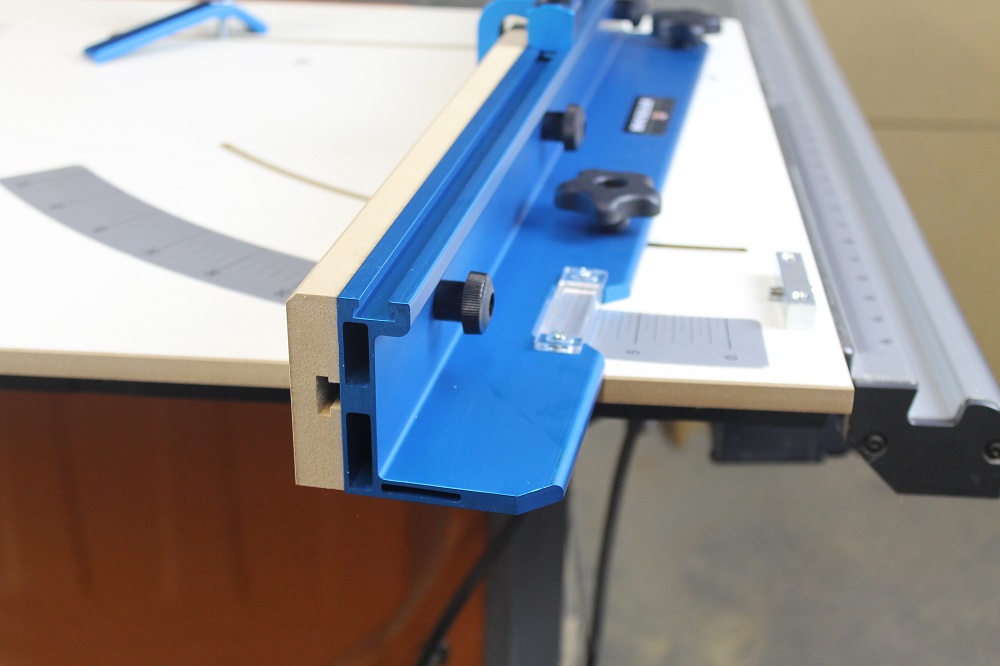
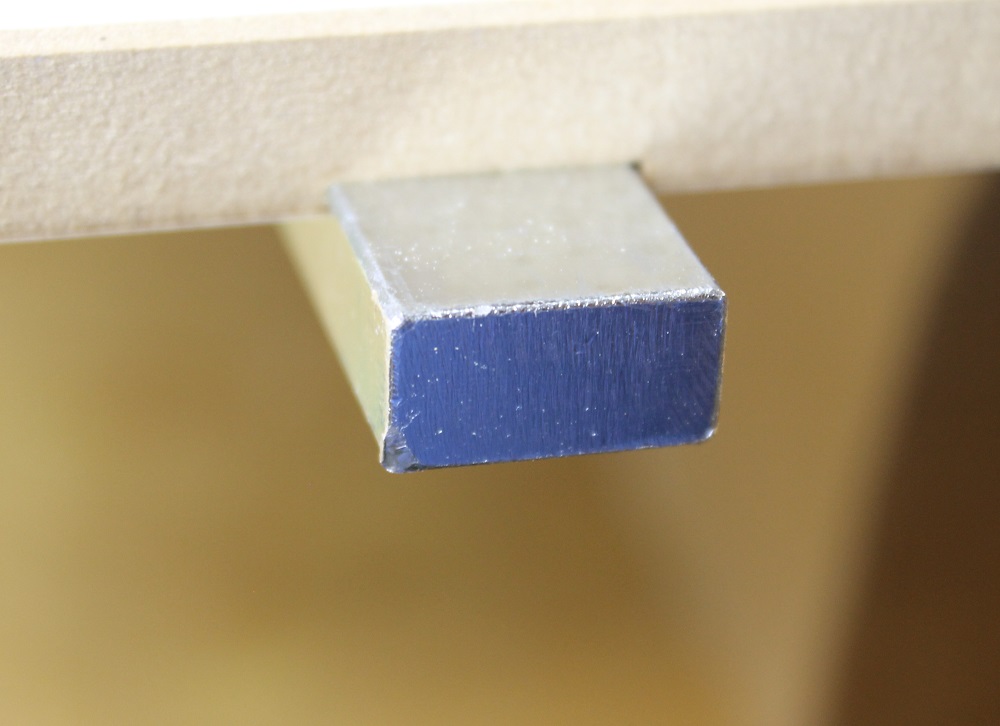
Adjustable, Sacrificial Backer Board – Rockler Table Saw Crosscut Sled
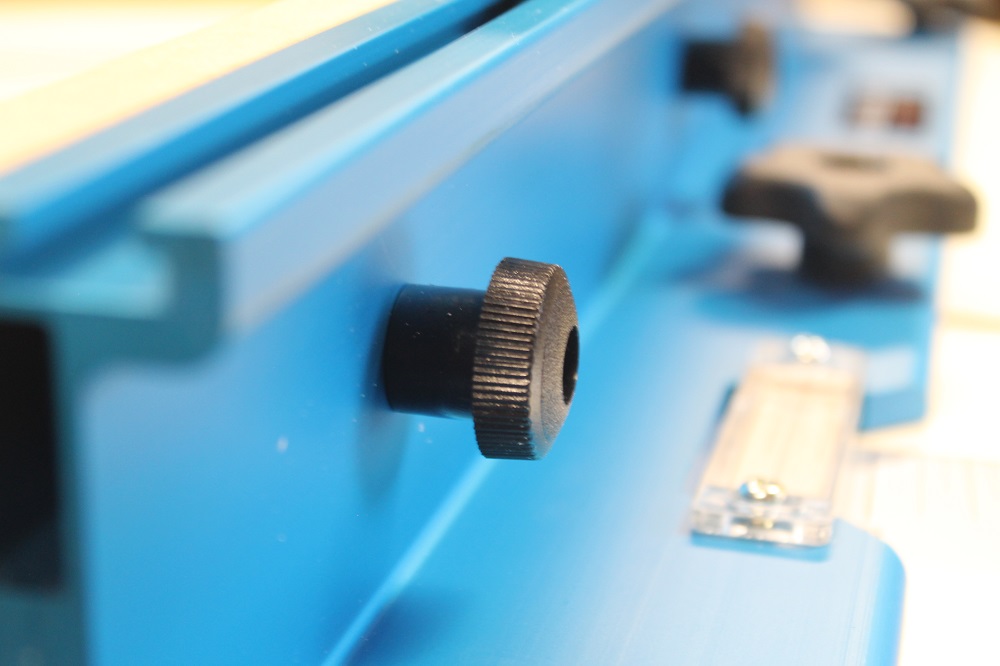
The backer board (Rockler calls it the “fence face”) is used when you want to support your workpiece as the blade exits the cut, mostly to reduce splintering and tear-out. The platform already does this for the bottom of the workpiece; a backer board does it for the edge facing the operator. So sometimes you may want it extended to where it contacts the blade. To adjust, loosen two knobs and slide it into position.
The fence face/backer board is “sacrificial” because if you use it as a backer – (as opposed to just a fence face) – the end will get chewed up and you’ll eventually want to replace it. If or when you do need a replacement, just cut a piece of MDF or smooth-faced plywood to size. Then route a T-slot and you’re good to go.
Using The Rockler Table Saw Crosscut Sled

The two most common operations done on a table saw are rip cuts and cross cuts. Ripping “rips” the fibers apart. These cuts follow the grain of the wood and are used to make boards narrower, usually with the aide of the saw’s rip fence. Crosscuts, however, make pieces shorter; you’re cutting across the grain. This is where Rockler’s crosscut sled comes into play.
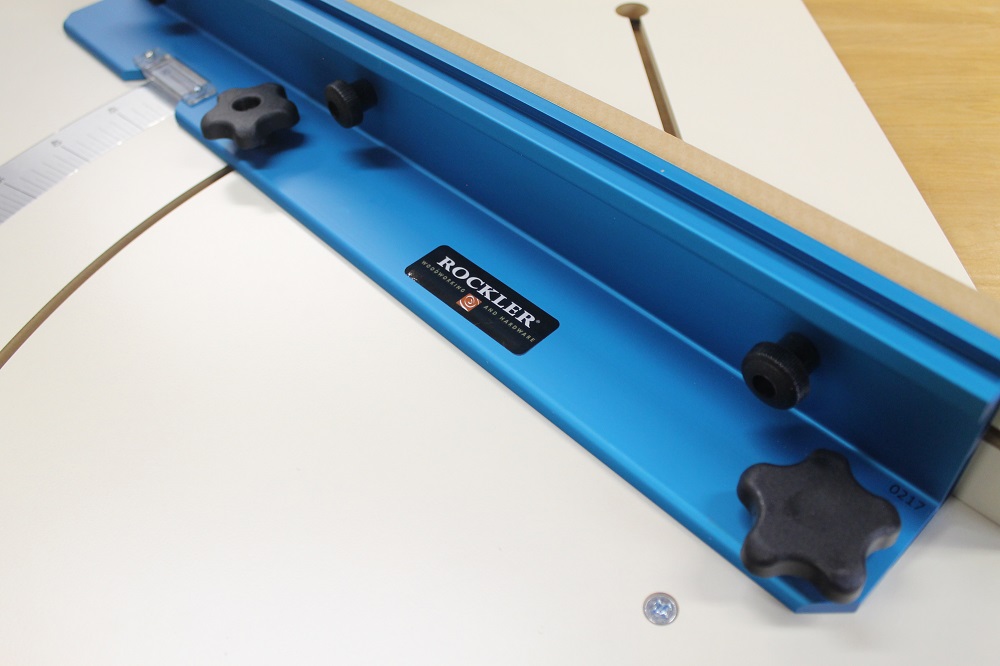
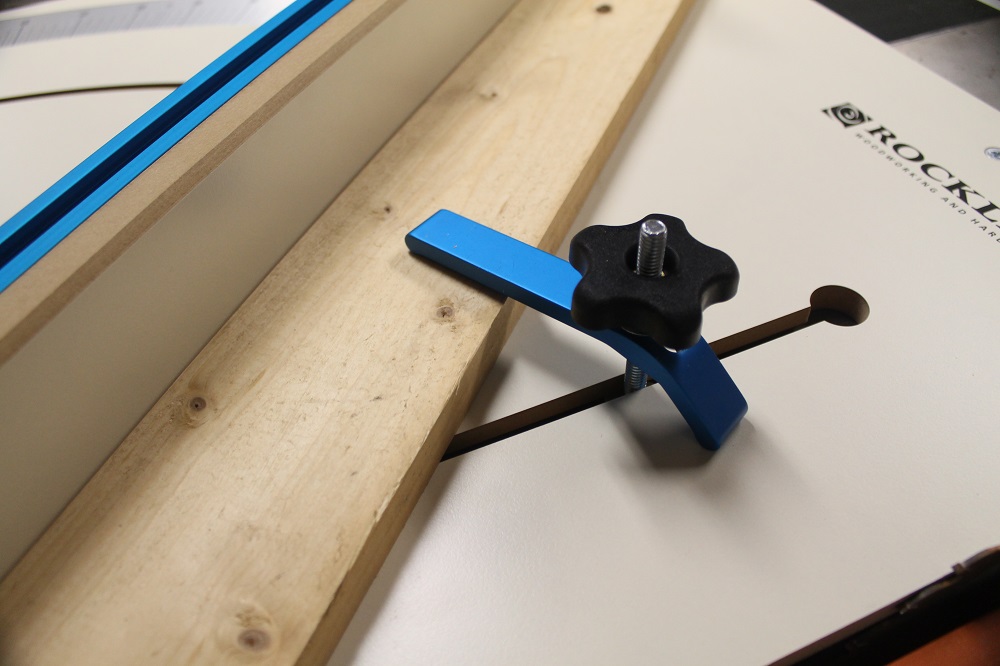
Flip Stop – Repeatability You’ll Flip Over
To cut multiple pieces to the same length – providing you want them shorter than the length of the fence – use the flip stop. The flip stop can be moved anywhere along the length of the fence and tightened with a knob screw. Then you butt the end of your workpiece against the flip stop and it comes out the exact same length every time. You only have to measure once. Depending on the project, that can be a huge time saver.
When not in use, just flip it up and out of the way. Or, if you’d rather, it can be taken off (or put back on) in seconds, with no tools required. And if you want more than one position indexed, you can always add another flip stop.
Rockler’s Crosscut Sled Drop-off Platform – Sold Separately

For even better results with workpieces of all lengths, consider adding Rockler’s crosscut sled drop-off platform. This will provide true zero clearance on both sides of the blade, preventing the offcut from sagging, reducing tear-out and splintering, giving you cleaner cuts. It will also prevent smaller pieces from falling between the blade and throat plate. After all, the offcut isn’t always waste. Sometimes it’s an important part of your project.
What’s Your Angle?
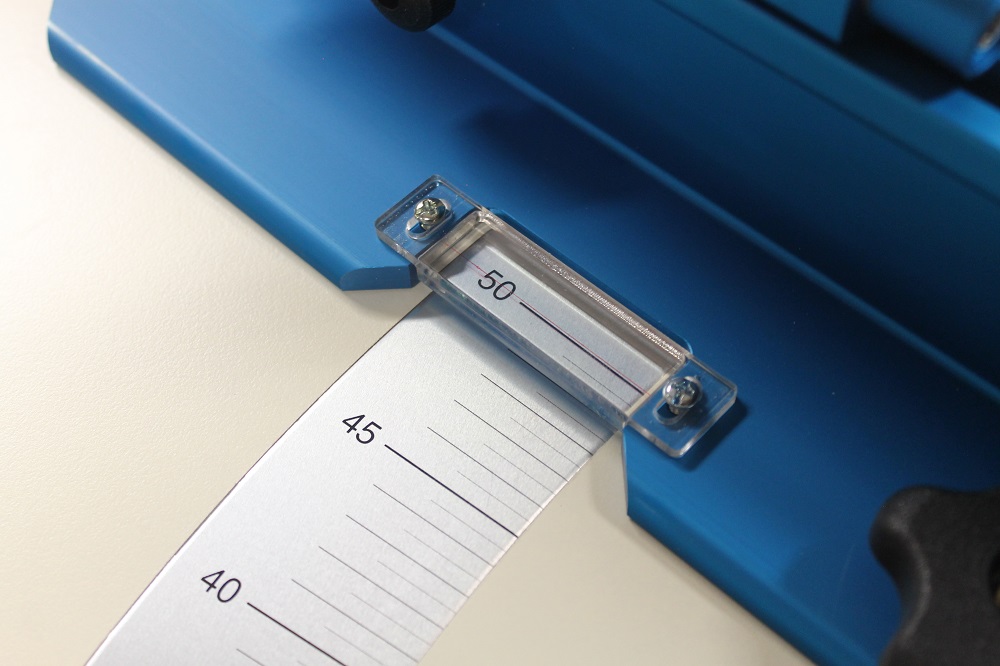
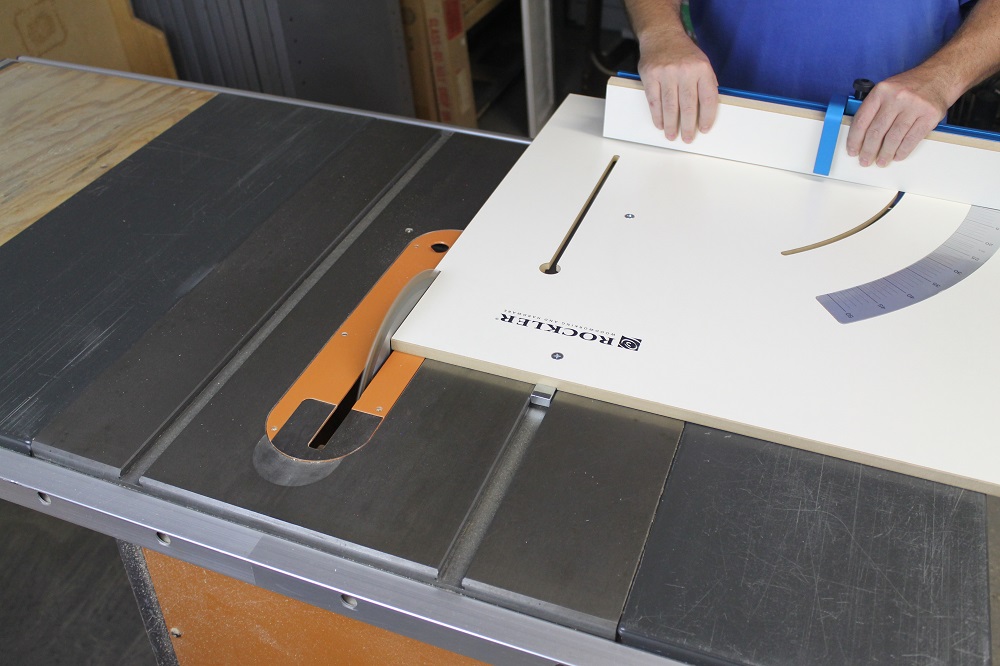
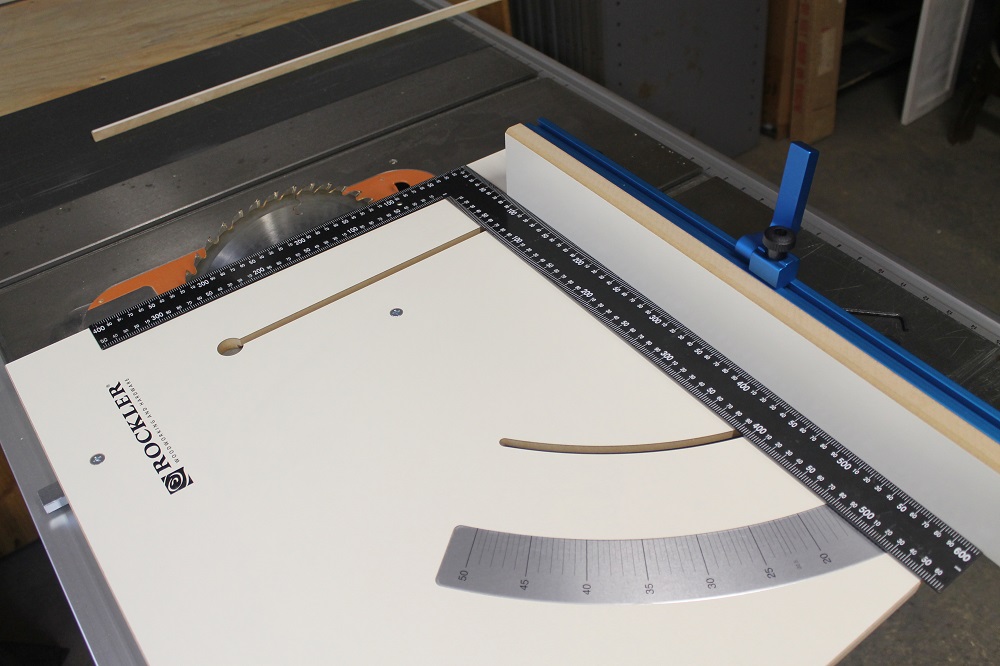
One huge advantage this sled has over many others is the adjustable miter fence. It can be angled anywhere from 0° (square to the blade) up to 50°, covering most of your mitering needs. The protractor is clearly marked in 1/2° increments.
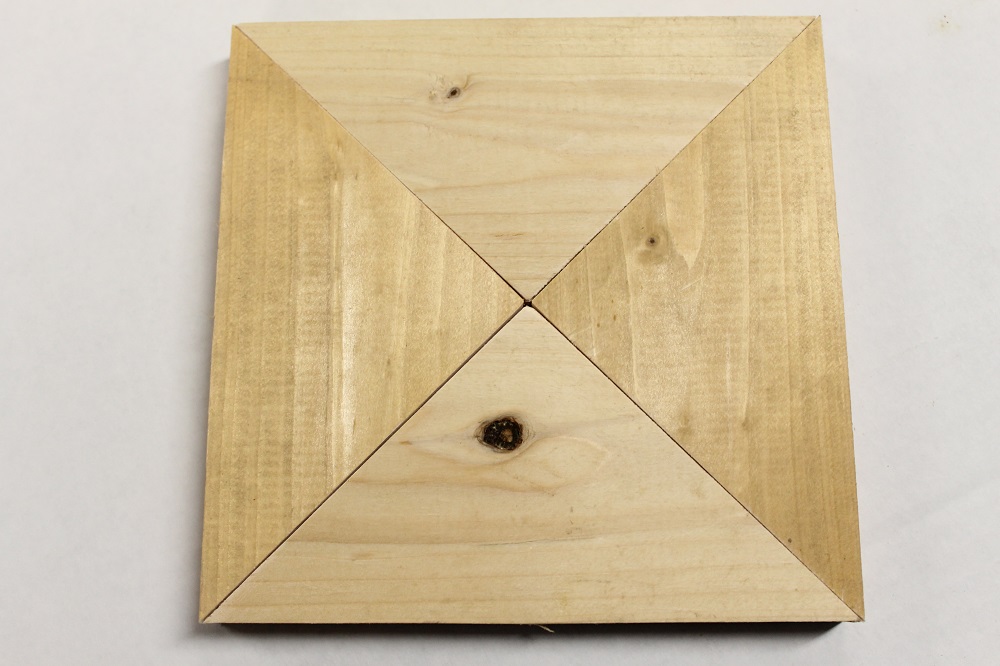
Cutting Accurate Miters With The Rockler Table Saw Crosscut Sled
As with most tools, when ultra precision is required required, you may have to do some fine adjustments. That’s woodworking for you; you make test cuts on scrap material and tweak your setup as needed. I cut some 45° angles using the built-in protractor as my guide. My test cuts were accurate to within a small fraction of a degree, so I only had to adjust my setting a tiny hair to be dead on.
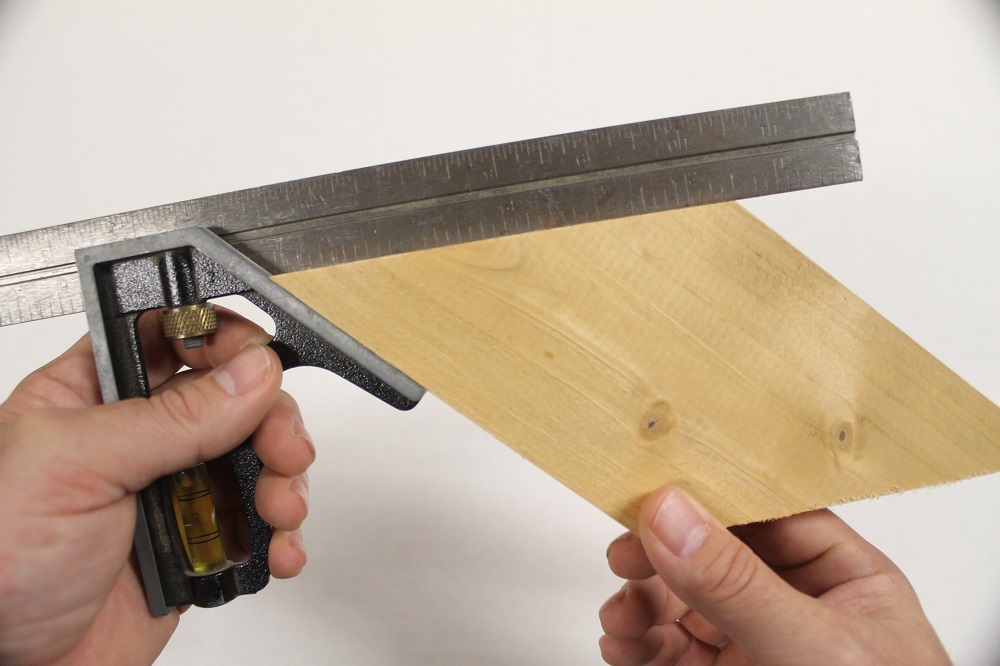
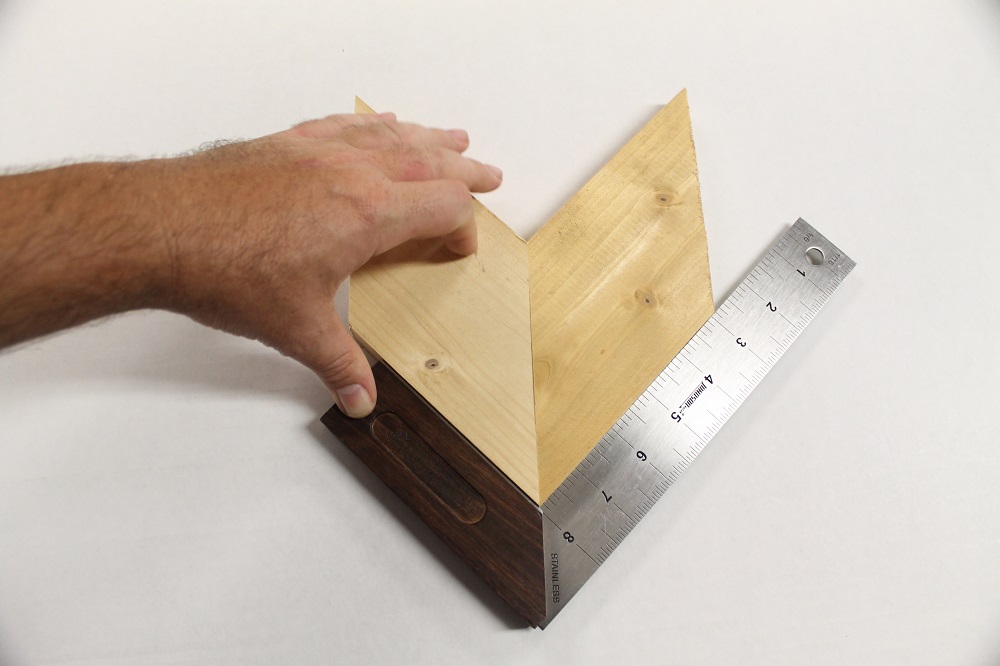
Once I made eight test cuts I could see I had the angle off ever so slightly. Considering this is the accumulated error of eight copies of the same test cut – before tweaking the angle – that’s pretty darned good! Nudging the fence ever so slightly dialed the angle in to perfection.
The scale is more than sufficiently accurate for most woodworking. With any infinitely adjustable fence, you should make test cuts and home in on the angle if you really require extreme precision. This table saw crosscut sled is certainly way more accurate than the scale on most miter gauges.
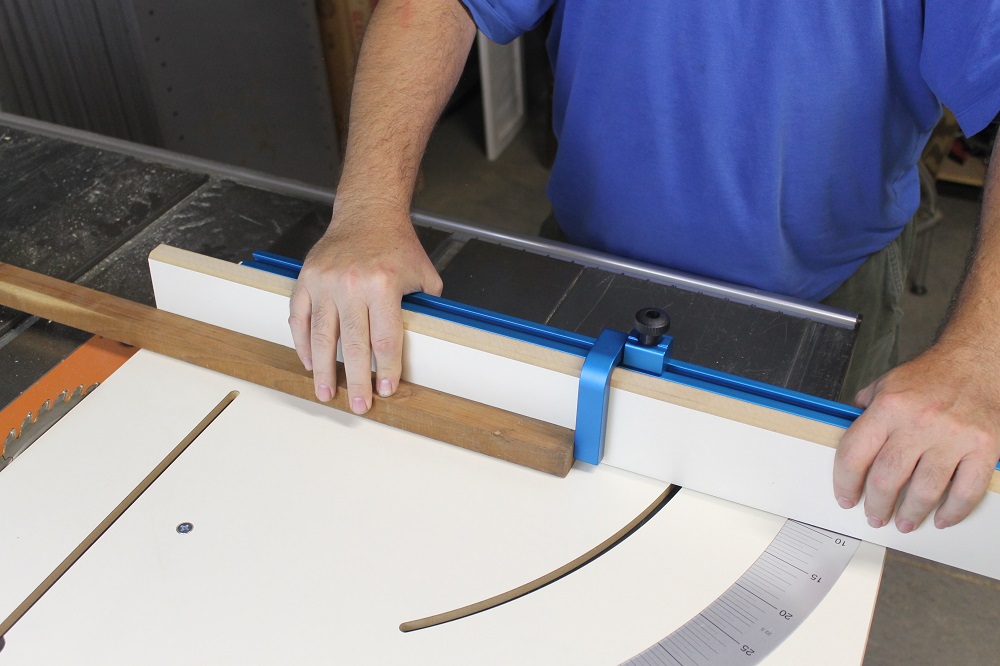
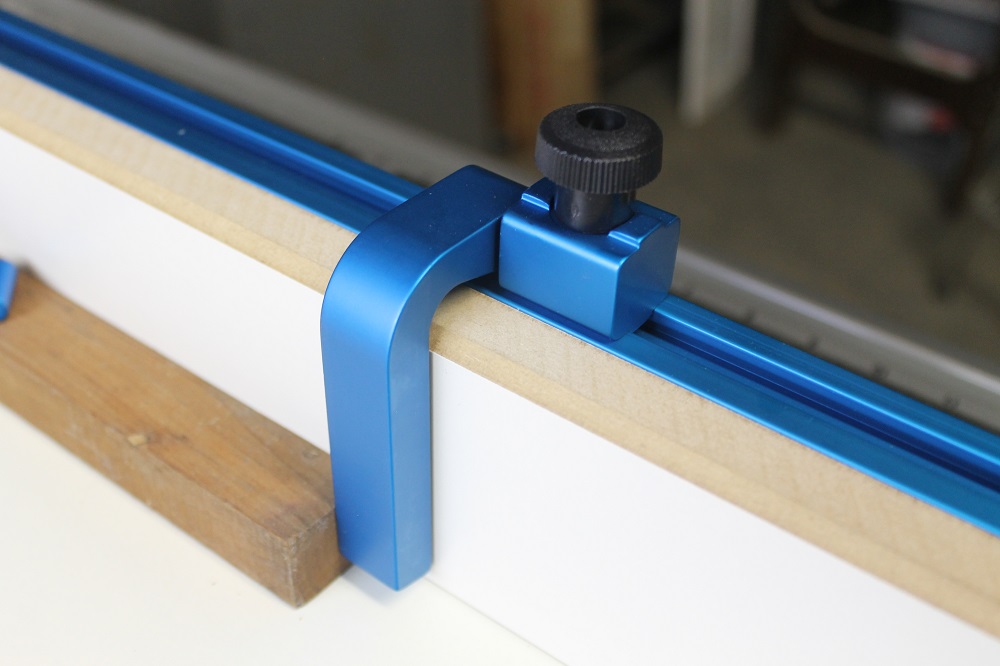
Hold up! Let’s Talk about the Hold-Down Clamp

The hold-down clamp can accommodate a variety of material thicknesses. If needed, put a piece of scrap wood under the short side of the clamp to raise it for thicker stock.
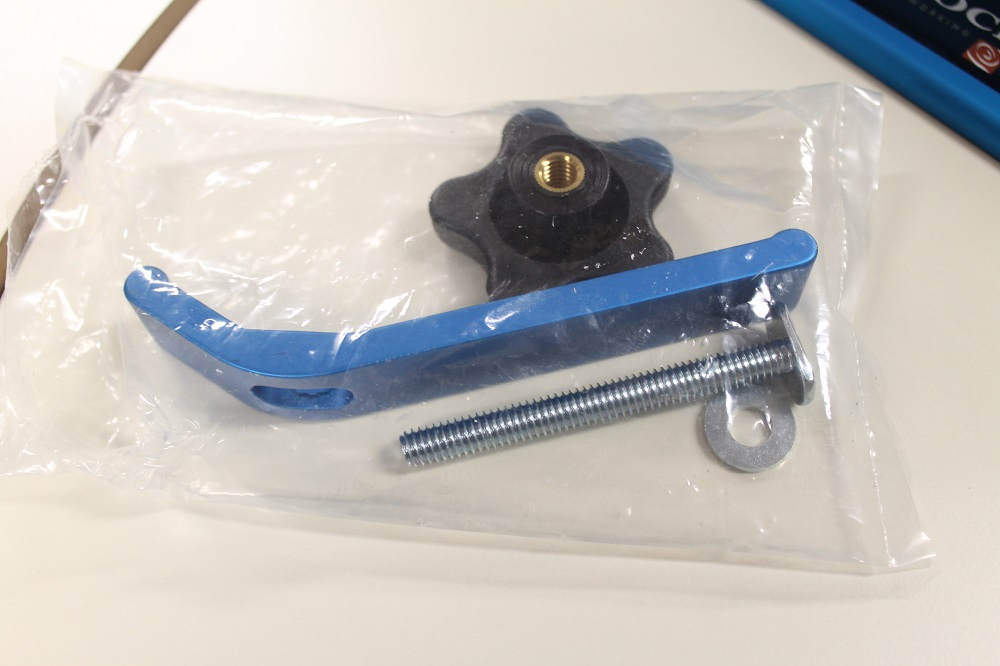
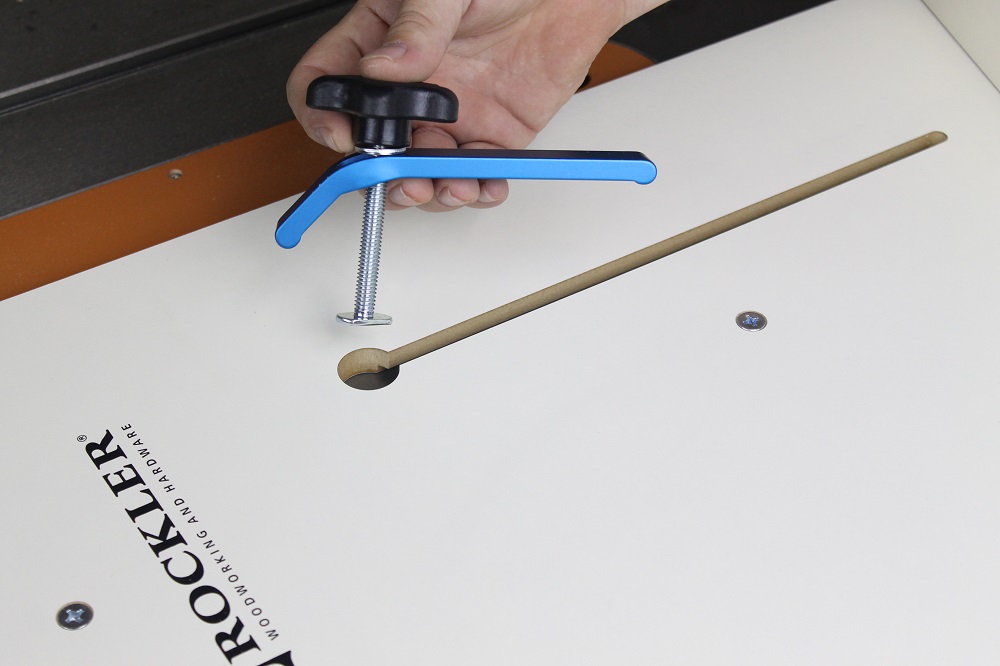
The hold-down clamp is quick and easy to install. Just drop the T-bolt head into the keyhole and slide it to the desired location. Tighten as needed.
Assembling The Rockler Table Saw Crosscut Sled – Sort Of
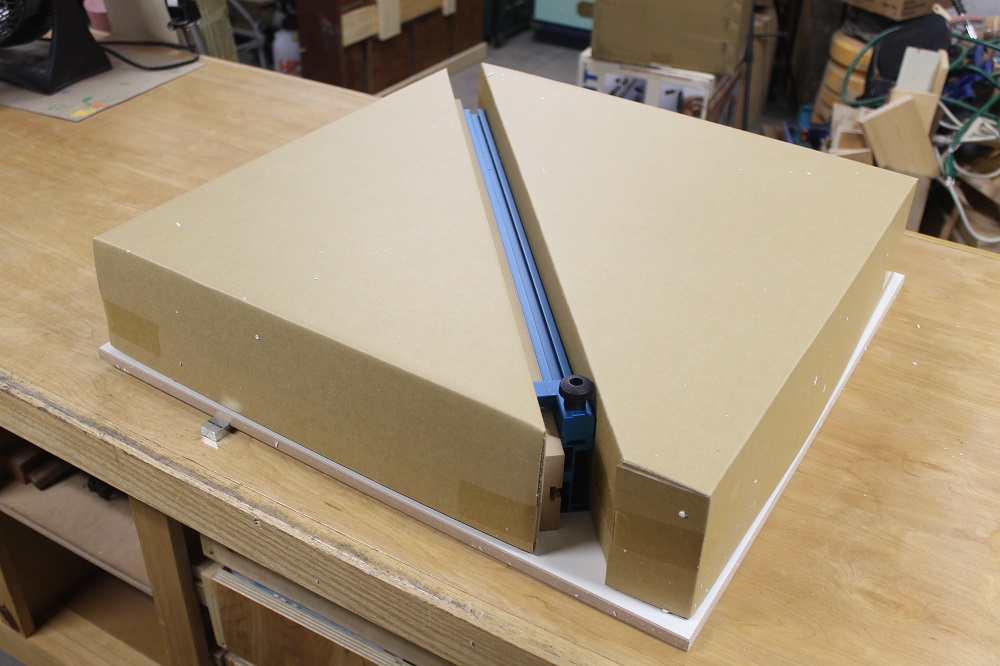
For the most part, the Rockler table saw crosscut sled comes preassembled.

You will have to remove the fence (very easy; no tools required) to attach the included self-adhesive low-friction tape strips, which help the fence pivot smoothly and keeps wear to a minimum. You also stick 3 strips to the bottom of the sled platform.
Right off the bat, I placed one of the strips in the wrong location. Well, I actually placed it right where the instructions showed. But the left wing of my saw must be shorter than the people who wrote the instructions had in mind. So the strip to the far left ended up overhanging, never to contact the saw’s table, as it’s meant to do. There are no extras, so pay attention to where you stick them (if you peel them off, you lose the adhesive).
Initial Setup Of The Rockler Table Saw Crosscut Sled – Easy As Pie

Because saw dimensions vary, there’s a simple setup procedure required to marry the sled to your particular table saw. But don’t sweat it, it’s painless and really easy to do.
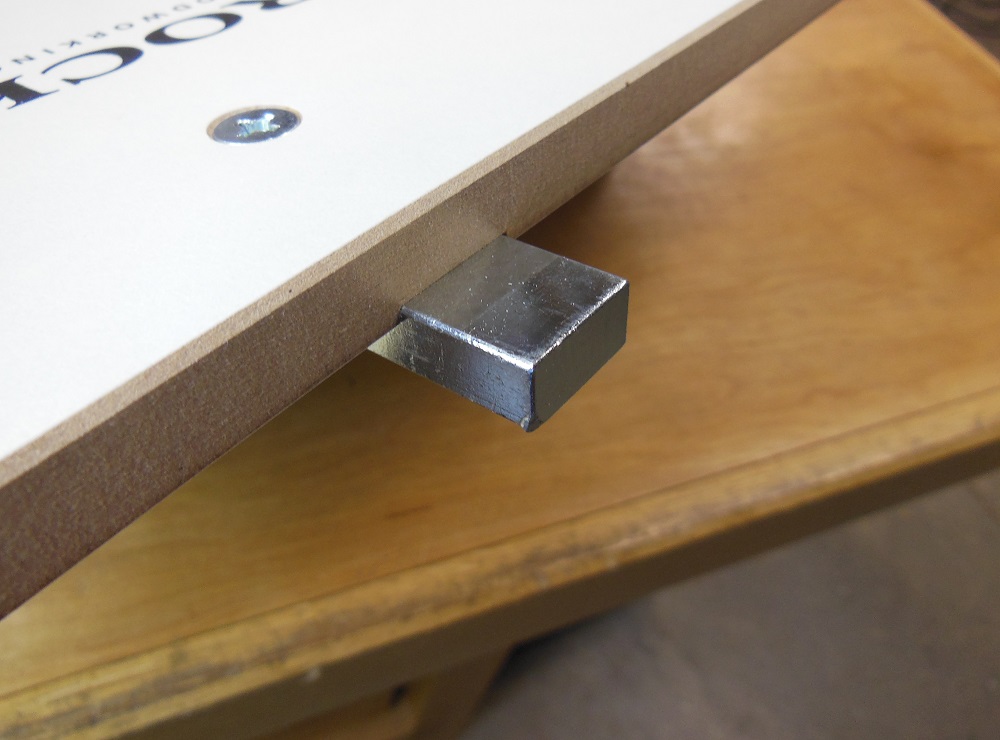
After lowering the blade into the table, use the included hex key to adjust tension on the ball bearings in the miter bar so that it slides easily without being loose.
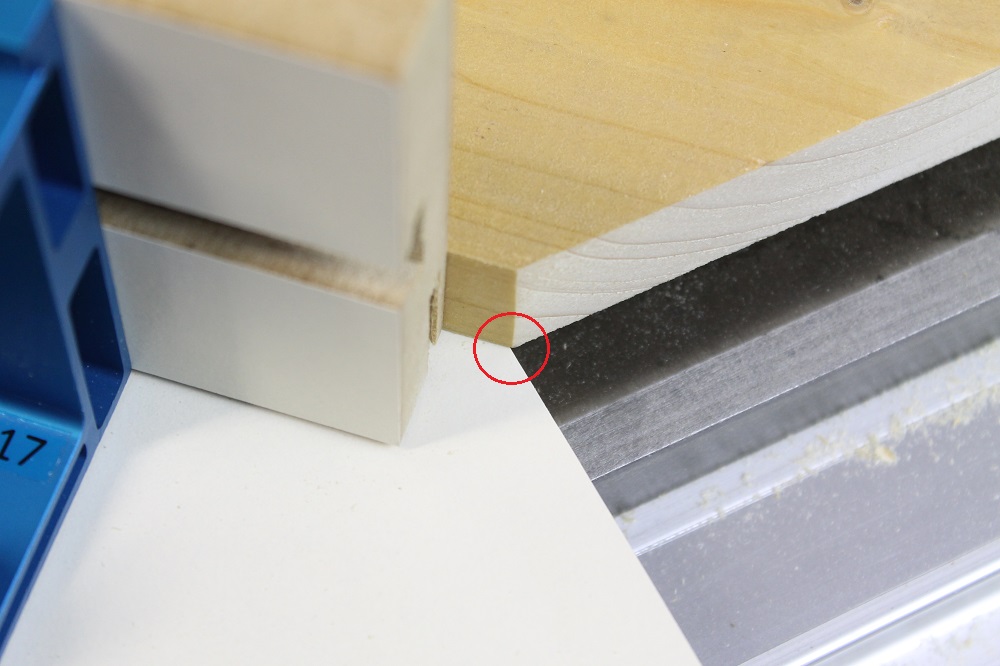
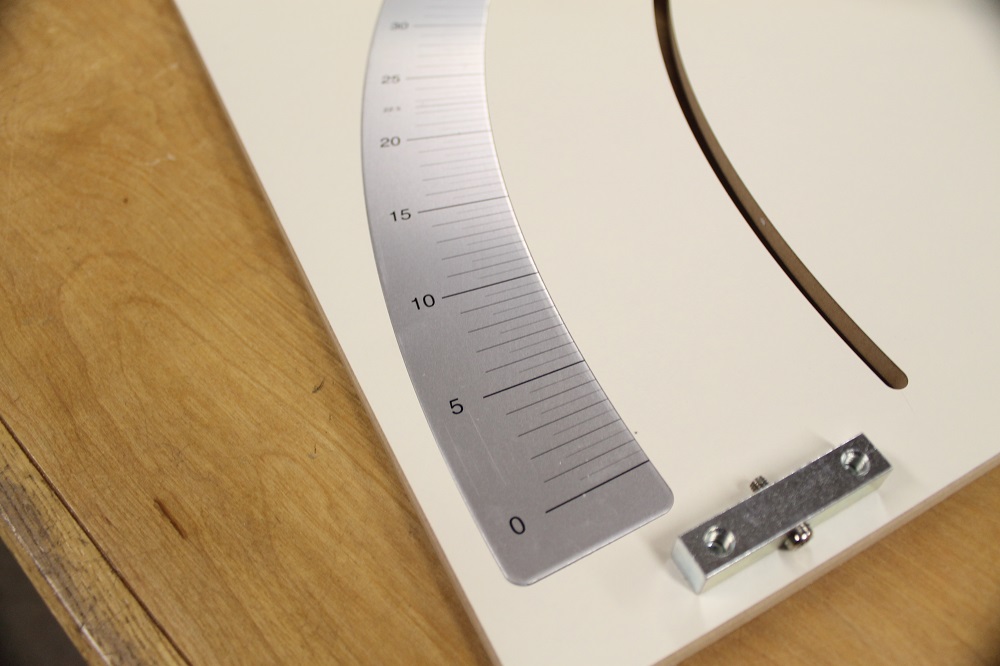
Next, you’ll need to trim the edge of the platform. This newly cut edge creates a “zero clearance” (no space) between it and your blade, so your cuts will be clean with very little chip-out on the bottom face. It also serves as an indicator of where the blade will cut. Simply align your cut line with the edge of the sled platform and you’ll cut right where you want every time.
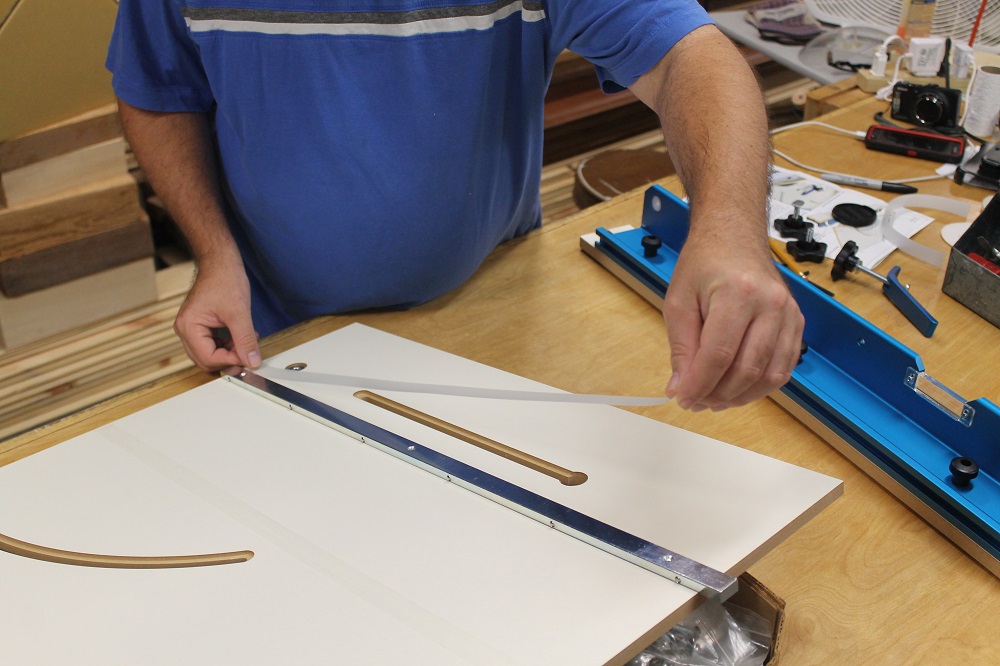
Zeroing The Sled Fence
To zero the fence to the scale, raise the blade all the way and square the fence to the blade. Be sure to rotate the blade so that the square rests against the plate and between the teeth. Then set the zero stop.

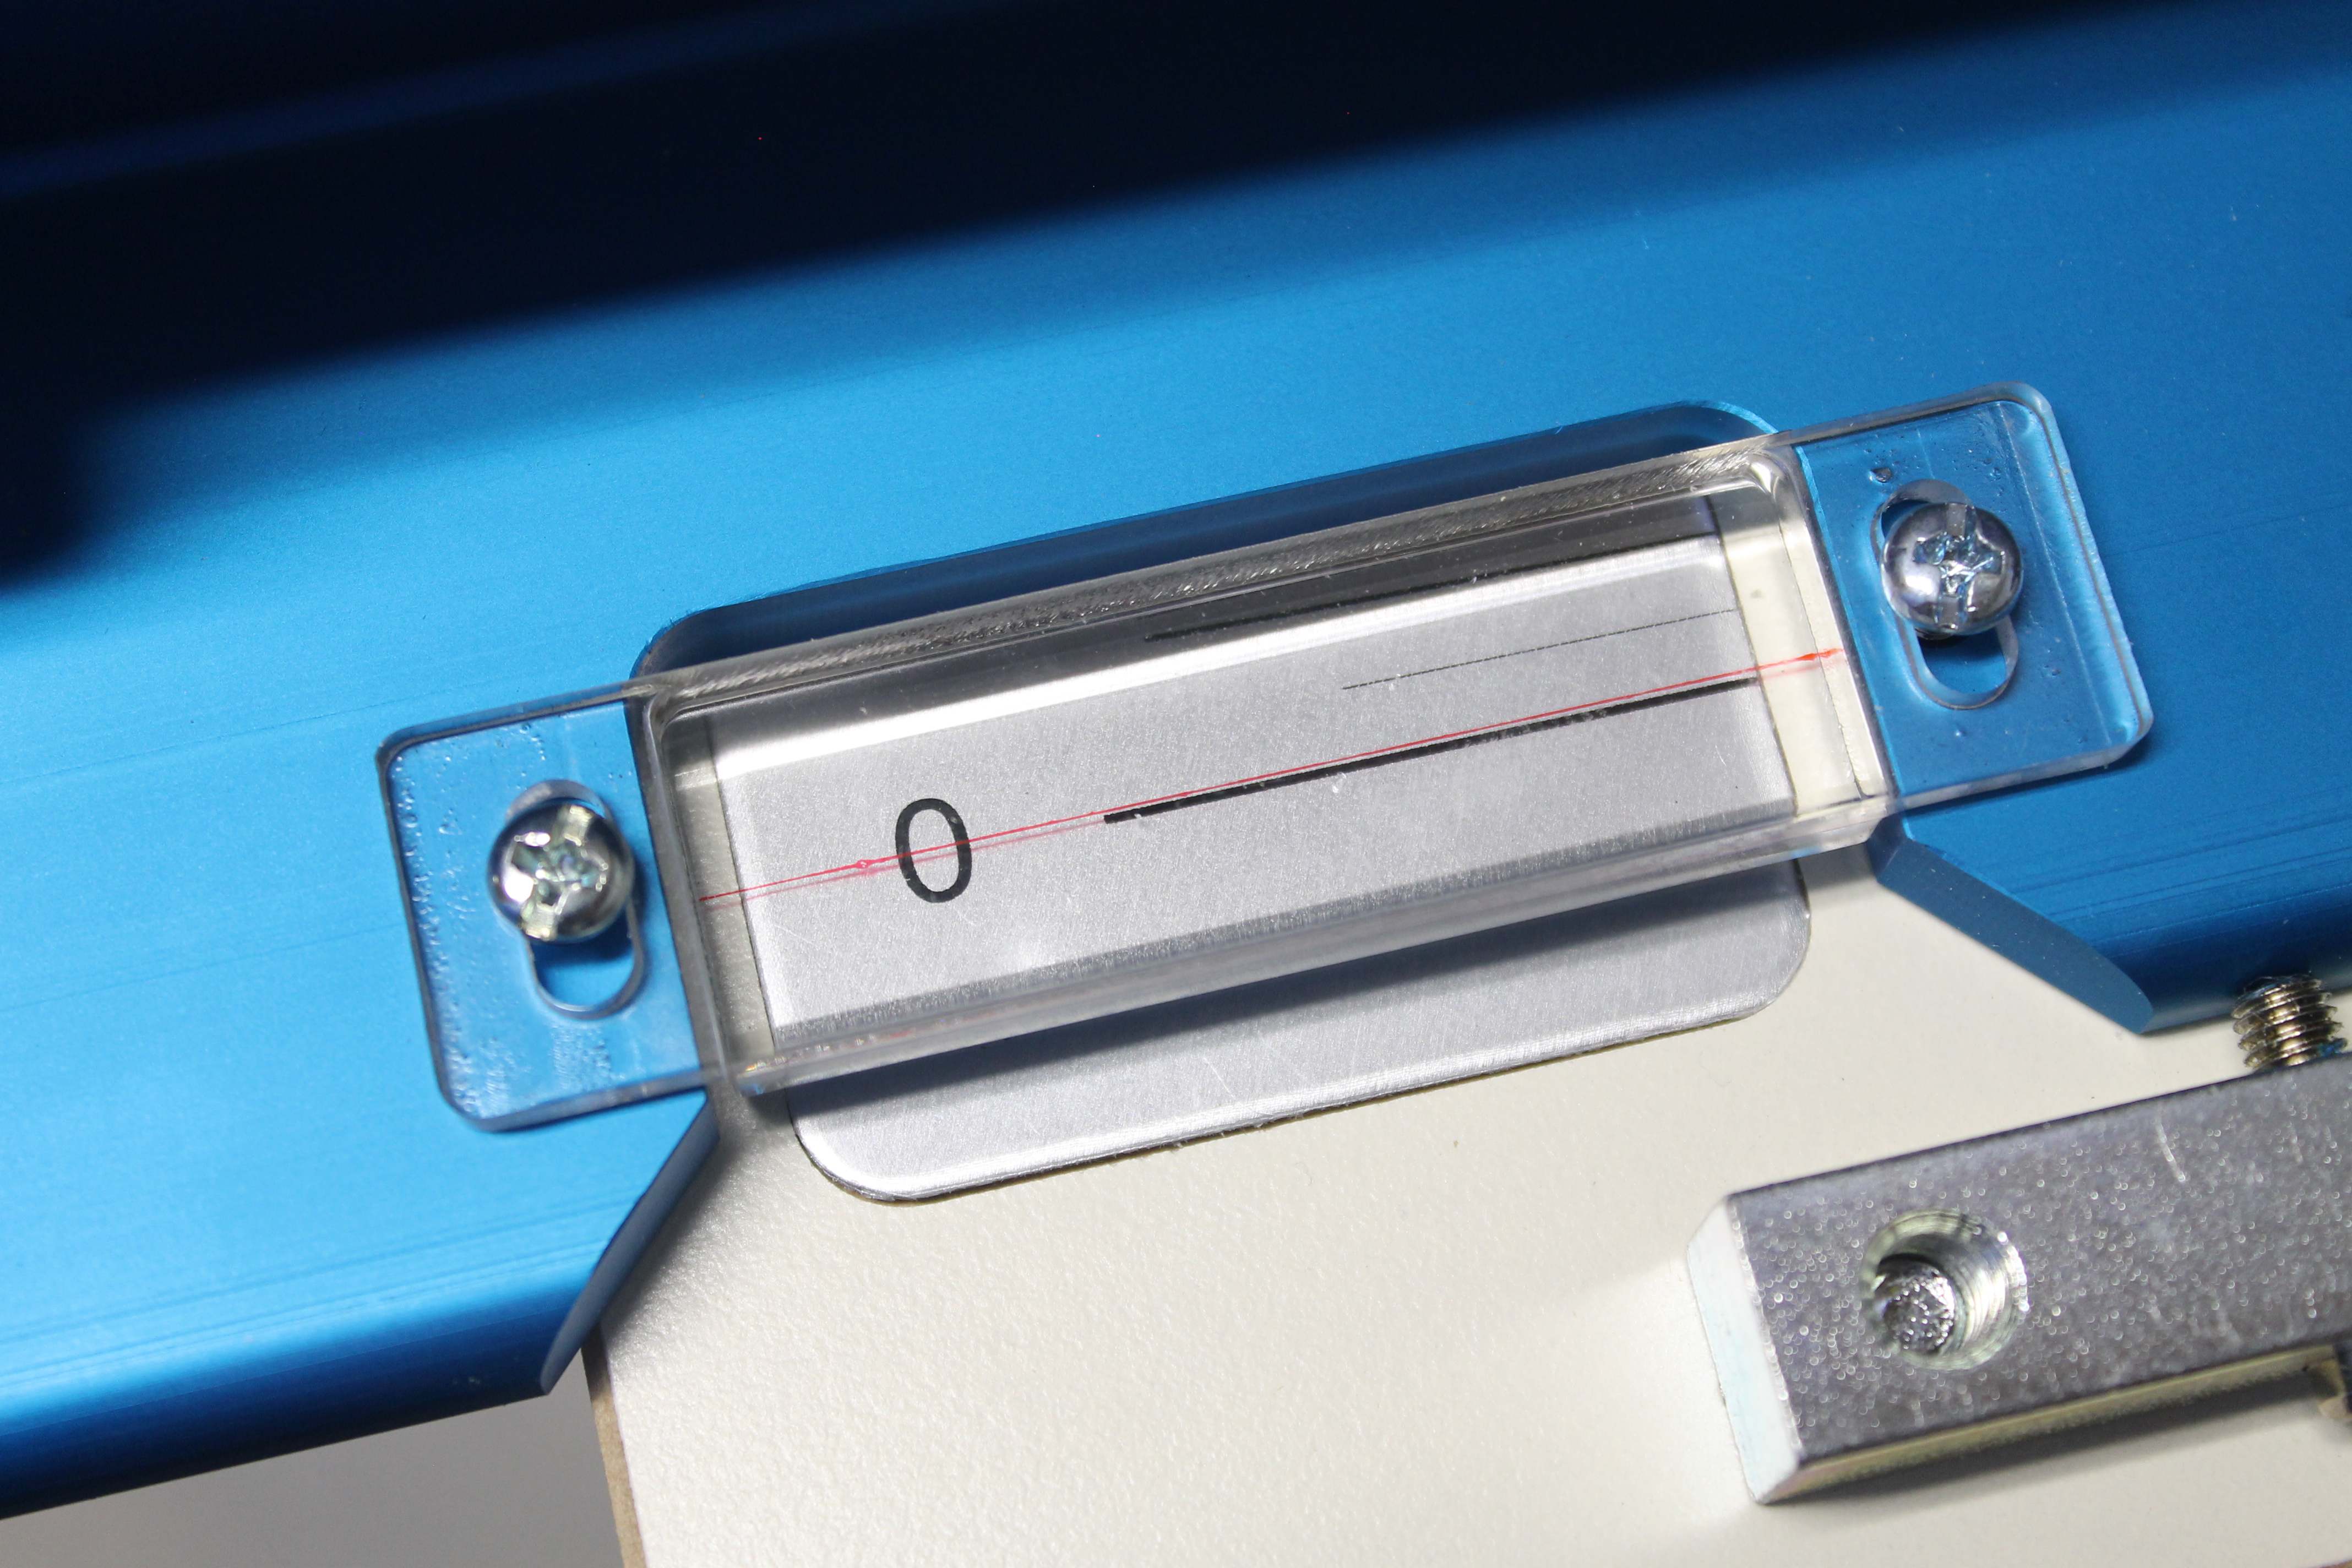
Finally, zero the pointer to the protractor. That’s all there is to it; easy peasy lemon squeezy. With setup out of the way, the sled is now ready for use!
What’s Not To Like About Rockler’s Table Saw Crosscut Sled?
I have only a few minor criticisms, none of which undermine the utility of the crosscut sled.

For one, the packaging could use a little more attention. The hold-down clamp was sealed in the same bag as its mounting bolt, allowing the anodized finish to get all dinged up. And speaking of dinged up, I wish there was some sort of barrier between the end of the zeroing screw and the aluminum fence to protect the fence from being poked and having the finish marred.
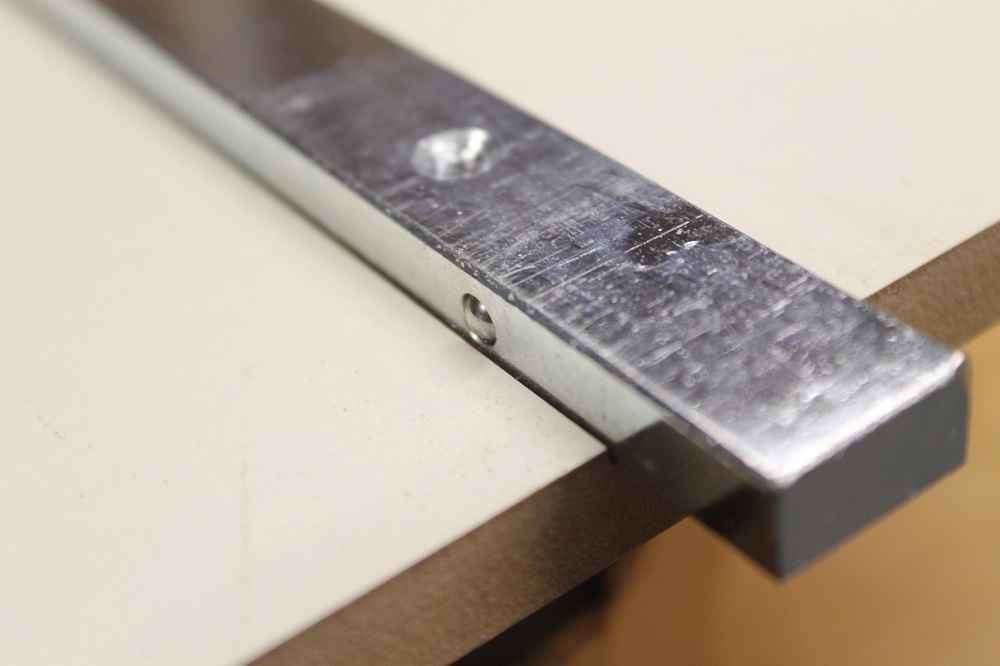
During my first use, the miter bar sounded like it was scraping. I discovered a burr. The far end of the bar protrudes from the sled platform (which is perfectly fine). But in shipping, that protrusion is not shielded from poking into or out of the box. So, if the shipper isn’t careful – and they never are – the end of the miter bar can get peened on the warehouse floor, delivery truck or whatever other hard surface it’s dropped onto.
If it was shielded for transit – perhaps with a rubber or plastic cap – that would never happen. Yours probably won’t have this issue. But the one we received did.
Also, the pointer on the fence is high enough that it can induce parallax error. So be sure to look as straight down as you can for the most accurate setup. Again, nothing that should discourage you from buying the sled. Just something to be aware of.
Finally, I would have liked to have seen the drop-off platform as an included item, rather than a separately purchased accessory. You really want the pair. You don’t need the drop-off platform, mind you. But for maximum benefit you should probably have it.
Rockler Table Saw Crosscut Sled – Does It Cut It?
A crosscut sled is vastly superior, for most applications, to the stock miter gauge that comes with most table saws. A basic sled is set up for right angle (0°) cuts only. But this one makes it easy to accurately cut angles up to 50°. So projects like picture frames or segmented turnings, for example, are easier to pull off.
If you want to get down to the business of making cool projects – rather than trying to first build an accurate sled so that you can make cool projects – I, and most of the customers who have left feedback on Rockler.com, say it’s hard to go wrong with this one.
The Rockler table saw crosscut sled is available for $149.99:
The optional but recommended drop-off platform accessory can be had for an additional $37.99:
Can Rockler crosscut table saw sledge fit Skil table saw 3400-02?
Wow, I was really excited about this as I read thru the detailed and thorough review. I was disappointed when I got to the price though, $150 seems like a lot. I own a rockler table saw that costs under $300 so is this add on worth more than 50% of the entire machine cost?
Thanks for the feedback, Rich. Personally, I find huge benefits in having a crosscut sled. The price, however, is why I feel that the drop-off platform should be included. Ultimately, the sled is a very useful tool that will serve you well. Whether it’s worth the investment to you and in your situation (as opposed to building your own) is something you’ll have to decide.
Roller always makes quality stuff. This would have saved lots of time and effort on a previously completed project!