

I love it when I can turn something I’m going to throw away into something useful. And that’s just what I did with my leftover wood scraps and other old materials that were headed into the dumpster – I turned them all into a work of art. And I didn’t even have to pull a Van Gogh and cut off my ear in the process! Read on for a little inspiration that might have you dumpster diving to create an artistic masterpiece!
Over the holidays, I took the family out to a nice restaurant for dinner. While I was waiting for the rest of the guests to arrive, I took a seat over at the bar and had a drink. That’s when I noticed the strange yet enchanting wood art piece that was on the wall next to the bar. It was really just a bunch of oddly shaped wood pieces glued together, but it really looked good. So, after a little libation and dinner, I walked out with a new project on my mind.
From Trash to Treasure
I’ve been collecting junk for as long as I can remember. I even save the little wood cut offs from the miter saw. It’s good for firewood, but usually gets thrown away if we don’t get a chance to have a fire in the fire pit. Every year about this time, I end up having buckets full of wood and metal odds and ends that end up being tossed away during my New Year’s tool shed clean out. In case you’re planning on making some of your own wood art, it took me about a year to save up enough junk for my project. If you don’t like hoarding junk, then you’ll need to find somebody who does.
Backer Boards
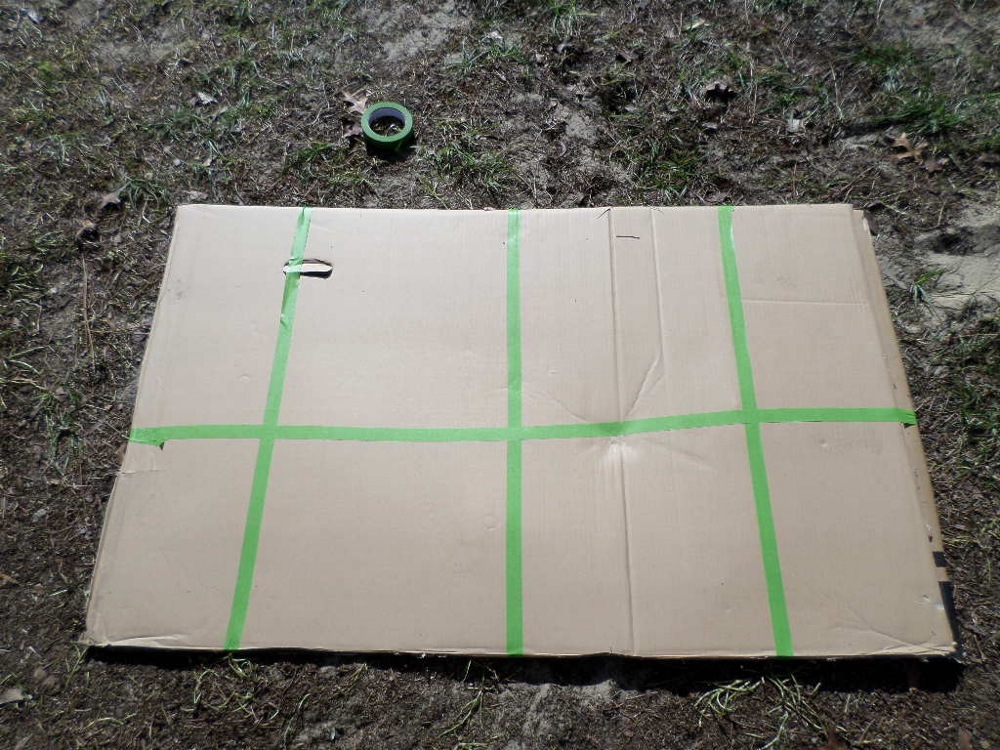
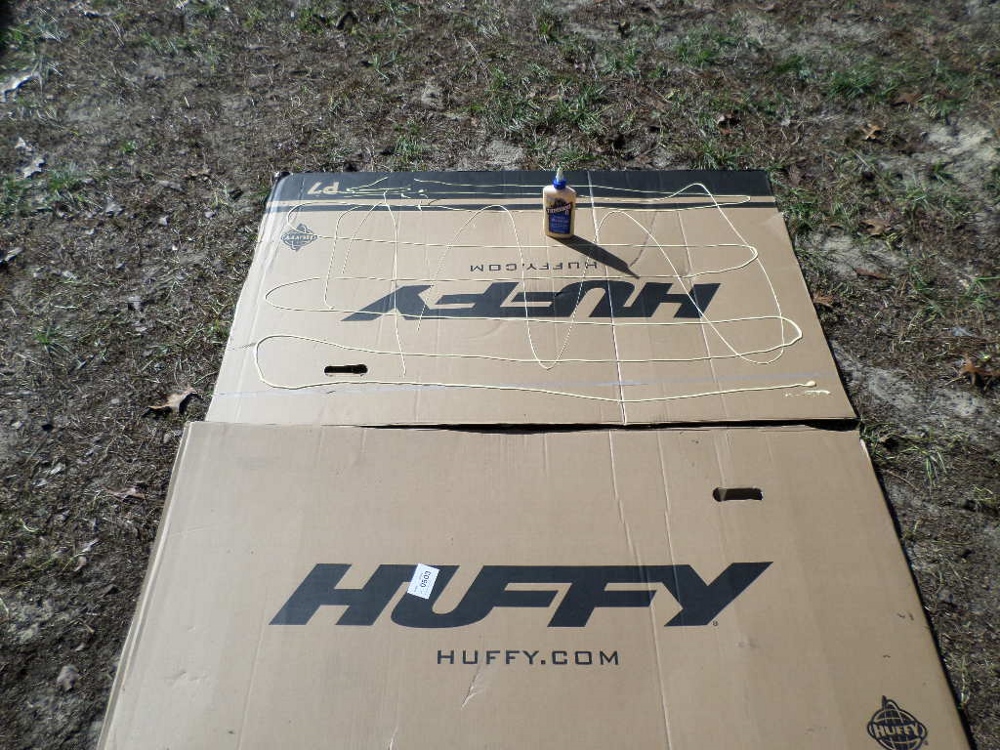
After I had a few buckets of my junk supplies handy, I needed a backer board of some sort to hold all of the materials in place. I had a huge piece of cardboard leftover from Christmas presents, so I decided to cut out the two large pieces from each side of the box and glued them together. This made for a stiff and sturdy backer board once I added a little tape. I suppose you could use just about anything, including plain old plywood. My use of multiple layers of cardboard kept the approach consistent with using materials that would otherwise be discarded. Keep in mind the backing needs to be fairly stiff and sturdy to hold all of the stuff in place once it’s hanging from the wall. The backer board should also be lightweight because your artwork can get pretty heavy on its own.
Sorting it All Out
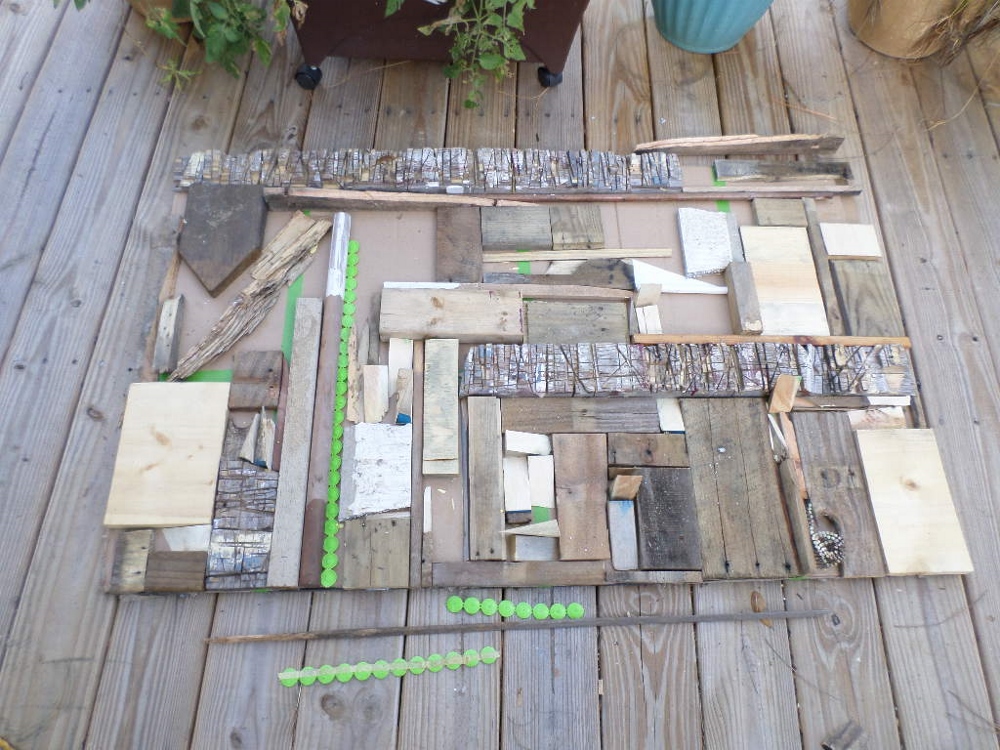
This is where it gets fun. I laid out my cardboard backer board onto the wooden deck to make it a little easier to spread everything out and sort through the pieces. I placed the largest pieces onto the backer board first, arraigning them where I thought they might look good. No need for adhesive just yet. I just left the pieces as they were until I had found a place for the smaller stuff to fit into the big picture. At this point, it’s just pick and choose until you’ve got most of the backer board filled with pieces. Once you’ve got the basic look you’re going for, you can break out the glue and move on to the next step.
Another technique for this step is to use masking tape to outline the dimensions of your backer board. Then use that as a template to play around with position. Once you’re happy with the look, you can start moving the pieces from the masked outline to be glued on the actual backer board.
Junk Gluer
I have to admit, this part was a little tedious, but in the end it paid off. Using some leftover wood glue that was about to go bad, I spread a little glue on the back of the larger pieces first. Once they had a chance to dry a bit, I started with the medium sized pieces followed by all of the other little trinkets and pieces of junk that went onto my work of art. I let it dry for a few hours, then I lifted the panel up carefully to see if there were any small pieces that I forgot to glue—and there were a few that fell off as I lifted the backer board up. A little more glue and everything was in place and good to go. After everything was dry, I brought it inside overnight to cure and get conditioned to the indoor temperatures.
Hanging Out – Getting that Wood Wall Art Hung
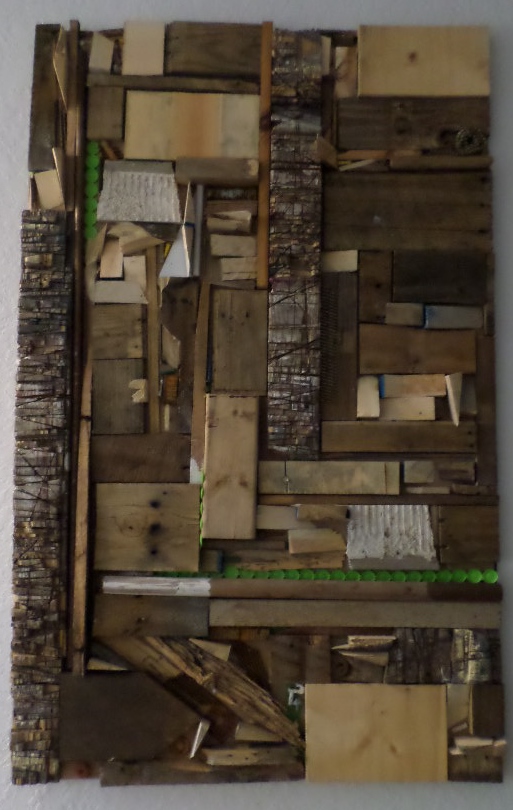
I had planned on installing a nice wood frame around the outside of the backer board, but once I lifted up the whole piece of art, I thought it was pretty heavy already so I opted to leave it as it was when I secured it to the wall. I also thought about using a nice piano wire to help hang the project, but I was worried about it taking the weight. So, in junk style fashion, I used a few well-placed hex head screws to hold the project to the wall studs. They blend in so well with all of the other wood and metal pieces that you wouldn’t even notice that they are there to hold up the art.
So now my new motto is “why throw it out when you can hang it on the wall?”
This is really a great idea for the pack rats out here.