

Whether you’re a woodworker or cabinetmaker, a finish carpenter who installs a lot of wood trim, or just an avid DIYer, you’ve undoubtedly had the experience of opening up a partially used can of stain or varnish, only to discover it’s useless because it’s skinned over. Or maybe it’s dried up, or full of mystery gunk, and too contaminated to use. Now, you’ve not only got the added expense of having to buy more product, you have the aggravation – and wasted time – of having to stop what you’re doing to go fetch. The folks at Finishing Solutions LLC feel your pain, and they’ve come up with a solution: StopLossBags. We received a couple to evaluate – join us as we bag ‘em and tag ‘em.
According to the developer of the StopLossBags, when a fresh can is first opened, it has the ideal solvents to solids ratio for brush application. Evaporation and oxidation from repeated opening and closing of the same can leads to a thickened and degraded finish, and eventually the varnish skins over inside the can making it unusable. And as a special treat, now you’ve got hazardous waste.

The normal practice of opening a can of wood finish and dipping a brush directly into it, while easy, can have unfortunate consequences. Evaporation occurs all the time the can is open, changing the solids to solvent ratio. Invariably, some finish gets into the seal ring around the edge of the can, and when resealed begins to set up, compromising the seal of subsequent closings of the can. The can now has oxygen in it from the air which replaces the finish used, and that reacts with the remaining varnish.
By transferring the finish from the original can into a StopLossBag, you will be able to reduce both evaporation and oxidation, allowing the finish to remain closer to its original quality for an extended time and allowing you to use more of the finish you’ve paid for. The inventor of the StopLossBags has been doing testing for preservation effectiveness. Since being bagged around the end of July 2014, Minwax Polyurethane is still at 99.93% of its original composition.
StopLossBags Step Right Up
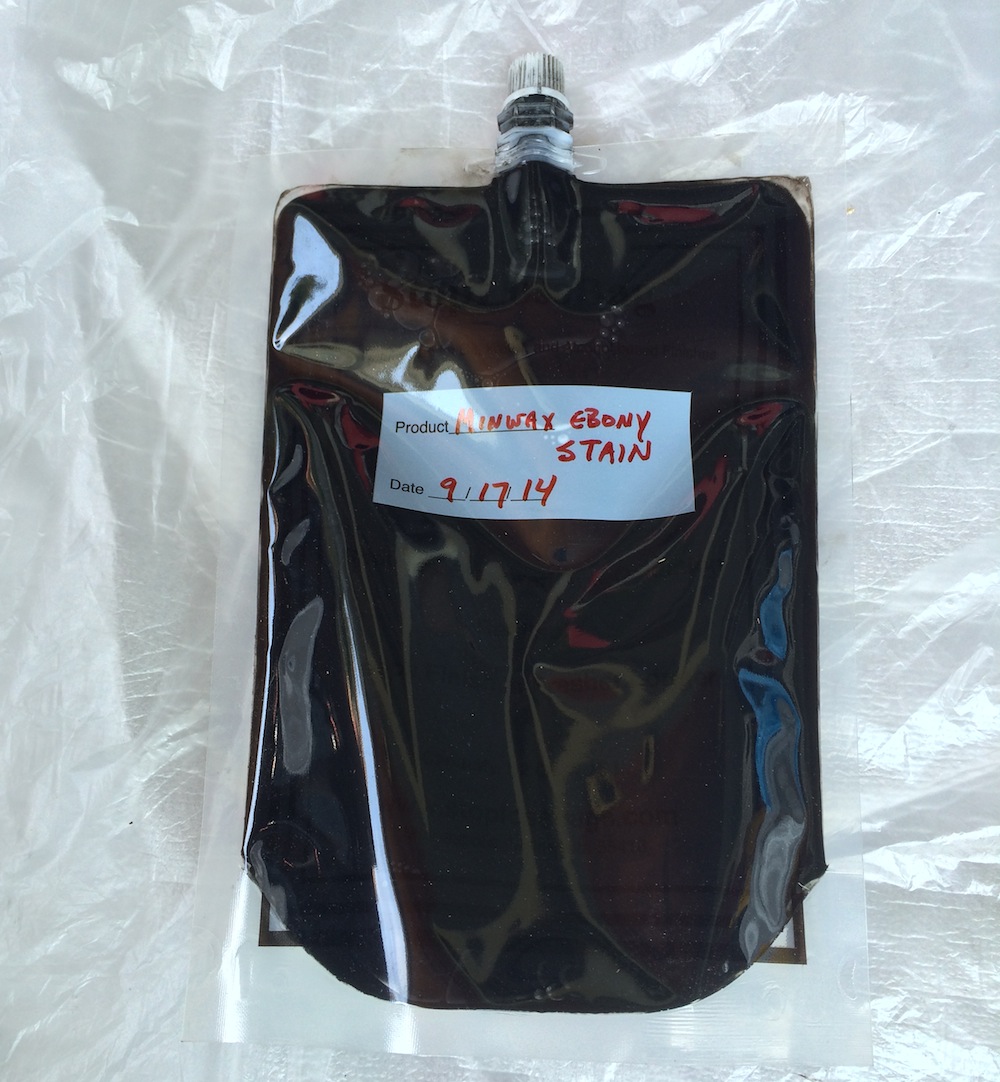
We have an old house, with a wood staircase to the second floor. The treads are stained black, and the risers are painted white. Thanks to someone stomping up and down those stairs in work boots, they need a fresh coat of ebony stain every couple of years. The last refresher was just over a year ago, and we still had a bit over a half a quart of stain left. I stomped outside in my work boots, and transferred the remaining stain into one of the StopLossBags.

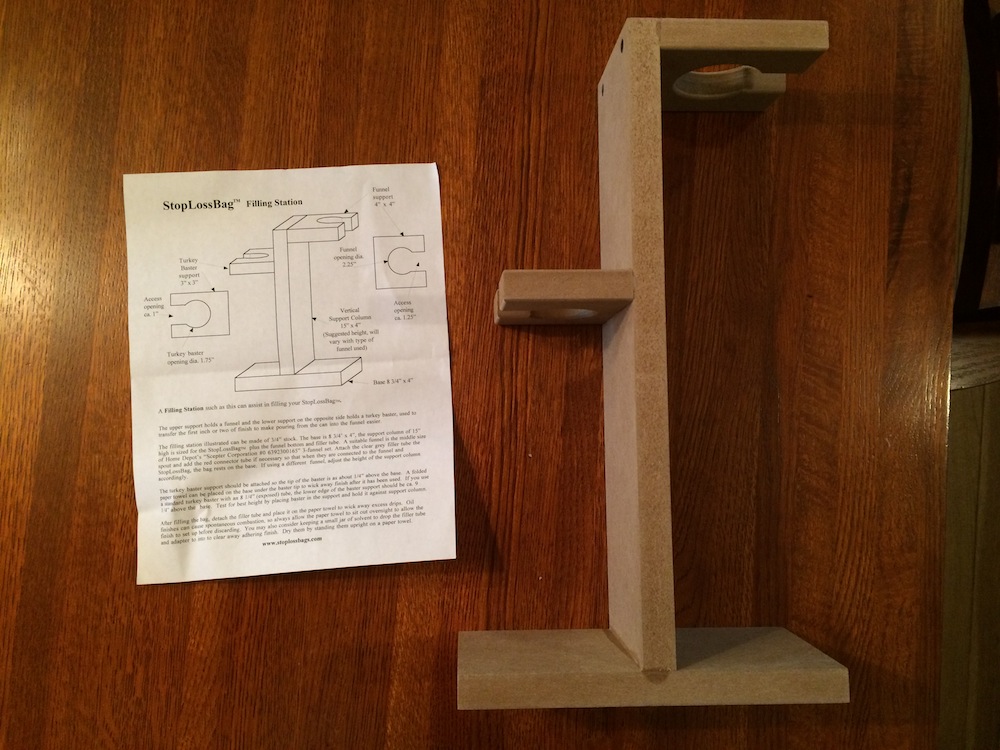
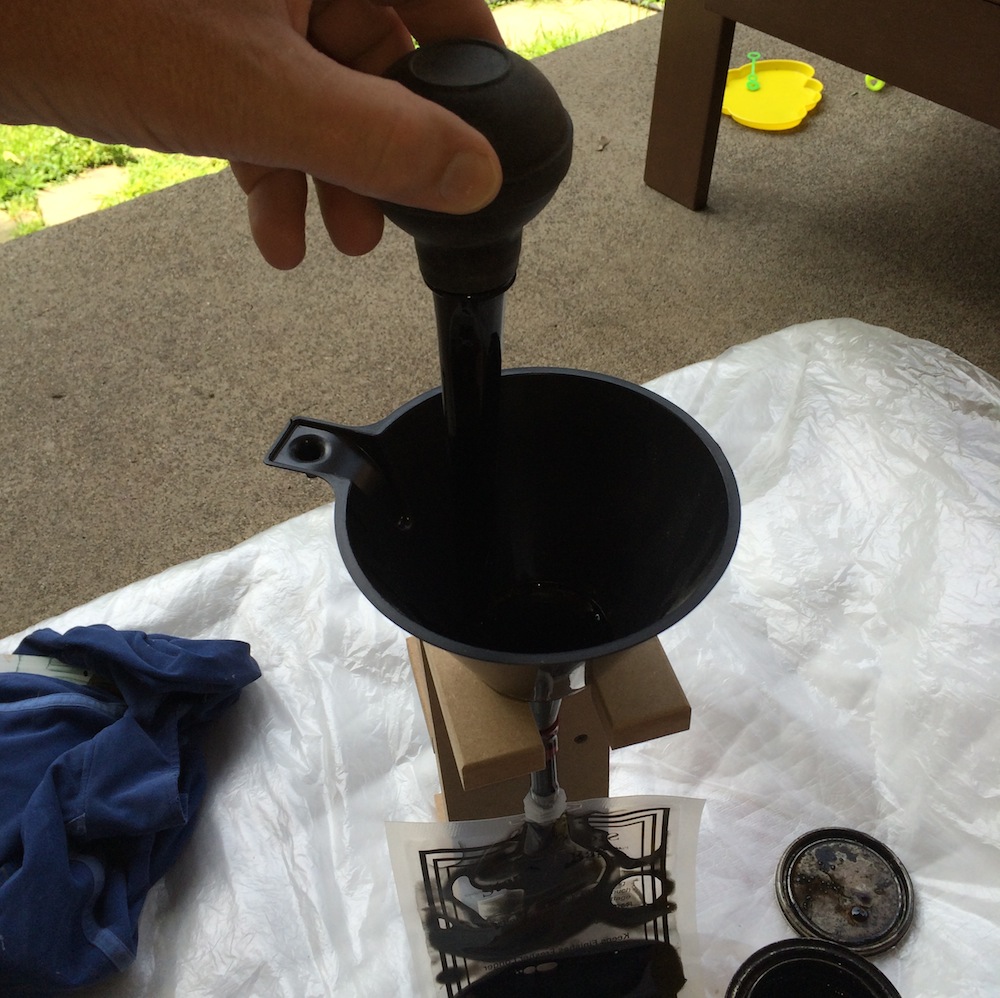
The StopLossBags come with a couple of rubber tubes to use as adapters. One end fits around the spout of the pliable plastic bag, the other around the neck of a funnel. (The second adapter is for larger funnels). The process is pretty simple: Just transfer the contents of Can A into Bag B. The StopLossBags website, in addition to having some useful tips on storage, has instructions for building a simple filling station to make the transfer process easier.
It’s a good idea to mix the contents well first, and if the can has been opened and re-sealed, to strain it through a filter. If the can is full, a turkey baster helps get the level down to where you can pour the rest out without spilling (much) of it. The tip of the baster fits right into the neck of the bag. When the bag is full, squeeze out any remaining air, screw on the airtight cap, and you’re done!


To make the transfer even easier, the StopLossBags folks now offer a collapsible funnel. Designed to fit snugly over the rim of a quart or liter can of varnish, the spout fits directly into the bag. According to the manufacturer, cleaning is easy, and can be solvent-free, for most woodworking varnish. Place the funnel on a folded paper towel to let it dry overnight. The dried varnish will not adhere to the funnel and can be peeled from the inside.
https://youtu.be/KkinALHZxdQ
Now for the HomeFixated insider’s tip of the day: Have rags, plastic, rubber gloves, and mineral spirits ready. You probably won’t need all that, but it can save you some aggravation if you have a little mishap. Trust me.
One Year Later
It was just over a year ago that I bagged the stain. I recently opened the StopLossBag with the ebony stain, and poured some out into a small container. Before doing so, I shook and squeezed the bag, to make sure it was well mixed. It was a nice change from the usual can opening routine, of trying to clean all the dust and accumulated debris from around the edge of the lid, getting it open without dropping any of that crud inside, then having to stir the contents up – assuming they were still usable.
The stain was in great shape. No contaminants, no skimming, just everything that SHOULD be in a can of stain, and nothing that shouldn’t. And kneading the bag is a great stress reducer!
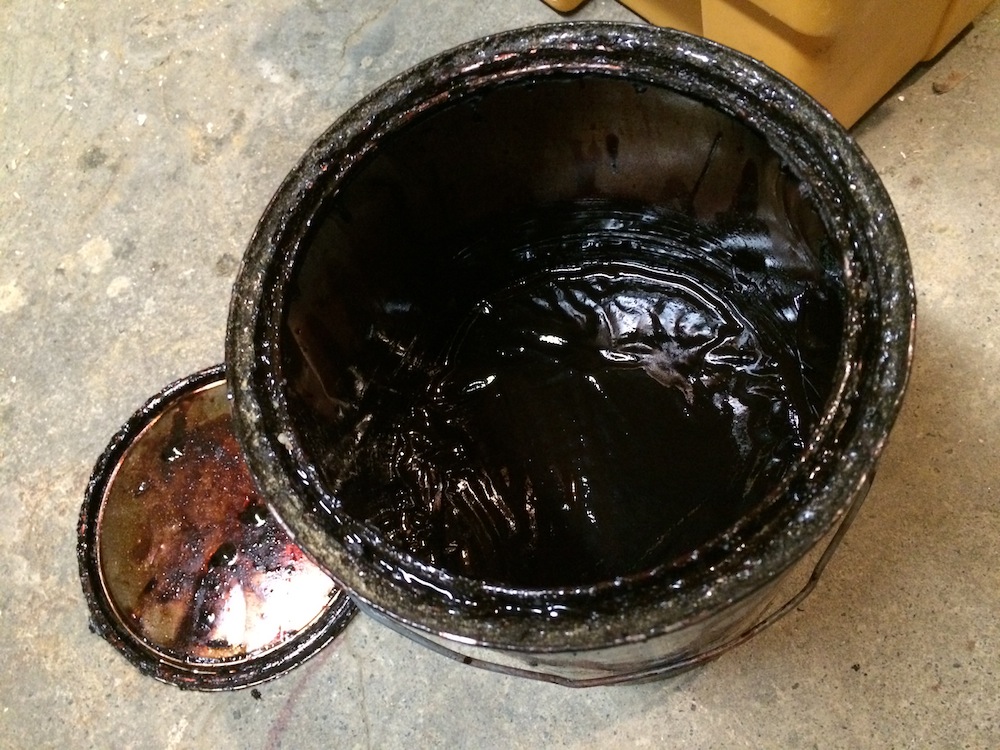
We’re in the middle of a farmhouse renovation, part of which involves replacing all the trim in the house. We’re using oak, all of which is being stained and sealed with polyurethane before being installed. We’re doing a room at a time; this means that sometimes a few weeks will pass between staining/sealing marathons. We’ve been using good quality stain and polyurethane, which ain’t cheap, and trying to seal the cans well between sessions. Invariably, though, when we manage to pry open the cans for another session, they’re – you guessed it – skinned over and full of crud.
Since I’m tired of having to toss expensive products – and running to fetch MORE expensive products – I’ll be ordering more StopLossBags. In addition to being a handy way to store the stain and the polyurethane, it will help us get working more quickly. The key benefit is that we won’t have to toss any more partially-used gallon cans of expensive materials. The bags are re-usable, and can be purchased directly from the manufacturer. You can get four bags for around $16, including shipping.

I am using “Good Stuff” which have the consistency of yogurt. How do I get it into the bag, since it not flow into the bag?
Can I store Zinsser Bulls Eye shellac in the bag?
How do you store these bags? Do you lay them down or stand them up? Are they designed to handle oil-based paint? Sorry for all the questions.
They are self standing, so that’s not a problem. However, if you have trouble squeezing all the air out you may prefer to lay the bag on its side to let the bubble come to rest in the middle of the bag. The oxygen in the bubble (which could cause a jell ring in the neck) gets dissipated into the rest of the varnish and doesn’t cause a problem.
They work quite well with oil-based as well as latex paints.
Thanks
Any concern with the bag breaking down or degrading because of what’s in it?
Paul,
The bags have a three-ply wall. One ply is to prevent solvents from escaping, one to inhibit oxygen from getting in, and one for strength. Acetone and lacquer thinner degrade the walls.
The company has a trial bag that was filled with polyurethane in August, 2012, and the bag is still fully intact, contents still liquid.
Well this is just genius. I could’ve used these years ago… better late than never I suppose 🙂
I’m with you, Rob – I’m always happy when I discover a simple product that’s great at what it does. And saving money doesn’t suck, either!