

It never fails. I buy a five gallon bucket of joint compound for a project and I only use half of it. The rest sits in the bucket until by the end of the year; it’s a nasty soupy mess that ends up in the trash. So this year, when I was cleaning out my old supplies, I decided I needed to use that little bit of leftover joint compound for something fun – making a paper mache alligator for my kid. This technique probably isn’t endorsed by craft professionals, but if you’re intrigued, keep reading for this fiber-filled how-to!
Some people spell it like it’s pronounced (paper mache), while others keep to the original French spelling (papier mache). Either way you spell it, it’s one of those silly French words that translates into something weird – in this case, chewed paper. It might sound gross, but it’s used for all sorts of cool stuff and isn’t just for kids, although they sure love it. So, if you have a bit of leftover joint compound, some old newspaper and a bit of wire, you can easily create your own paper mache the joint compound way.
The Juice (and Not OJ)
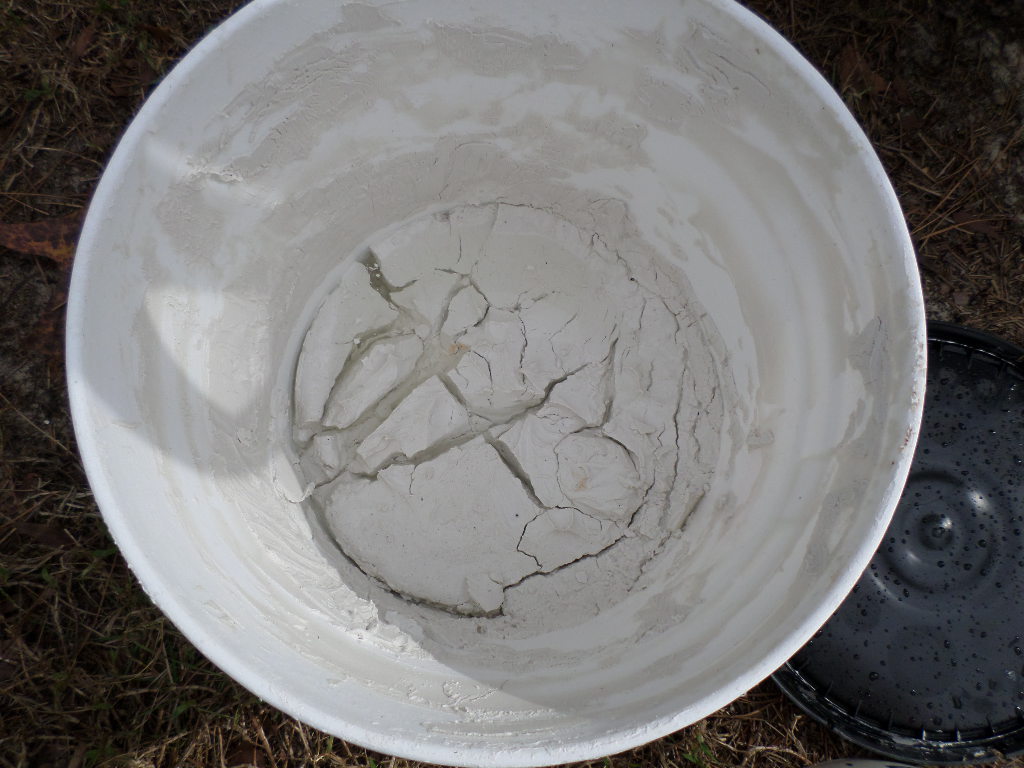
Like regular paper mache productions, you have to use a base compound that will dissolve into water and then harden after it dries. This lets that old newspaper strips soak up the adhesive so when the strips dry, they stiffen around the frame of the project. Many paper mache formulas consist of plaster of Paris, glue or even flour. My recipe is a little different, but I’ve seen variations of it online that are similar to mine.
HomeFixated-Style Paper Mache Recipe
I use: one gallon of water mixed with two heaping scoops of joint compound and a few teaspoons of white glue. Stir it up really well until the joint compound and glue have completely dissolved in the water and then it’s ready to go. You may need to occasionally stir the mix as the joint compound will slowly settle to the bottom of the bucket.
The Paper (or Papier)
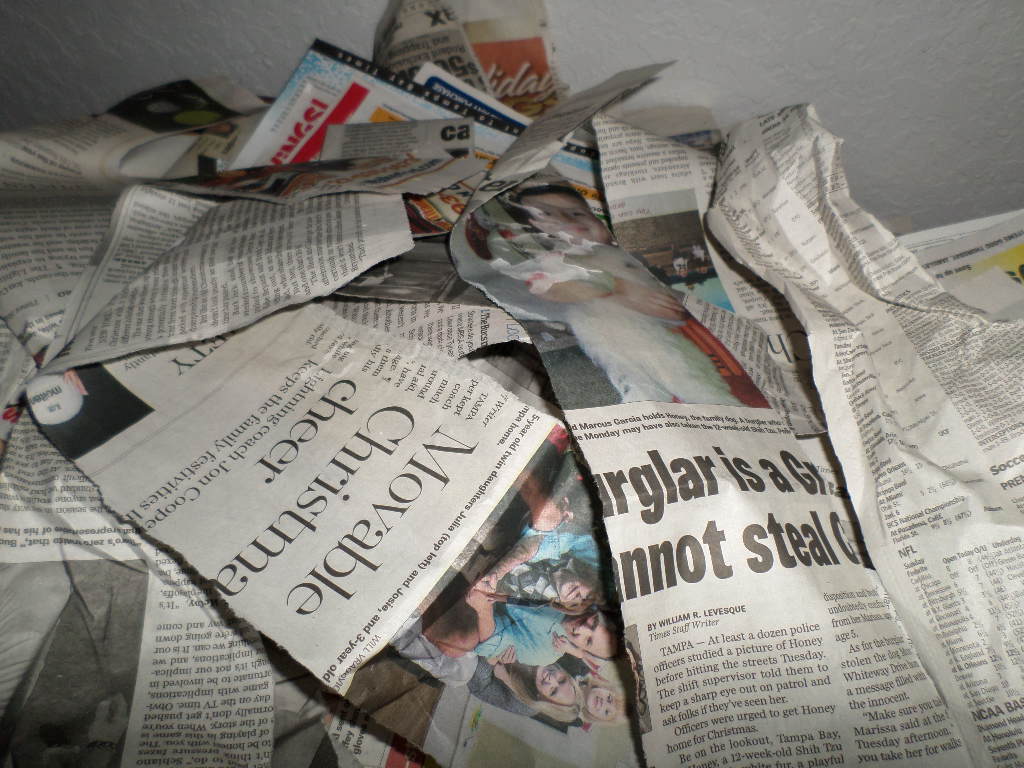
For the paper layers, we just used some old newspaper we had left over from earlier in the day. We ripped them into strips about three or four inches wide and set them aside until we were ready to use them. If you’re going to just use the paper mache as-is and paint over it, it’s a good idea to use a white computer paper for the final layer of paper mache. This will provide you with a smooth surface that can be painted easily.
The Wire (not the TV show)
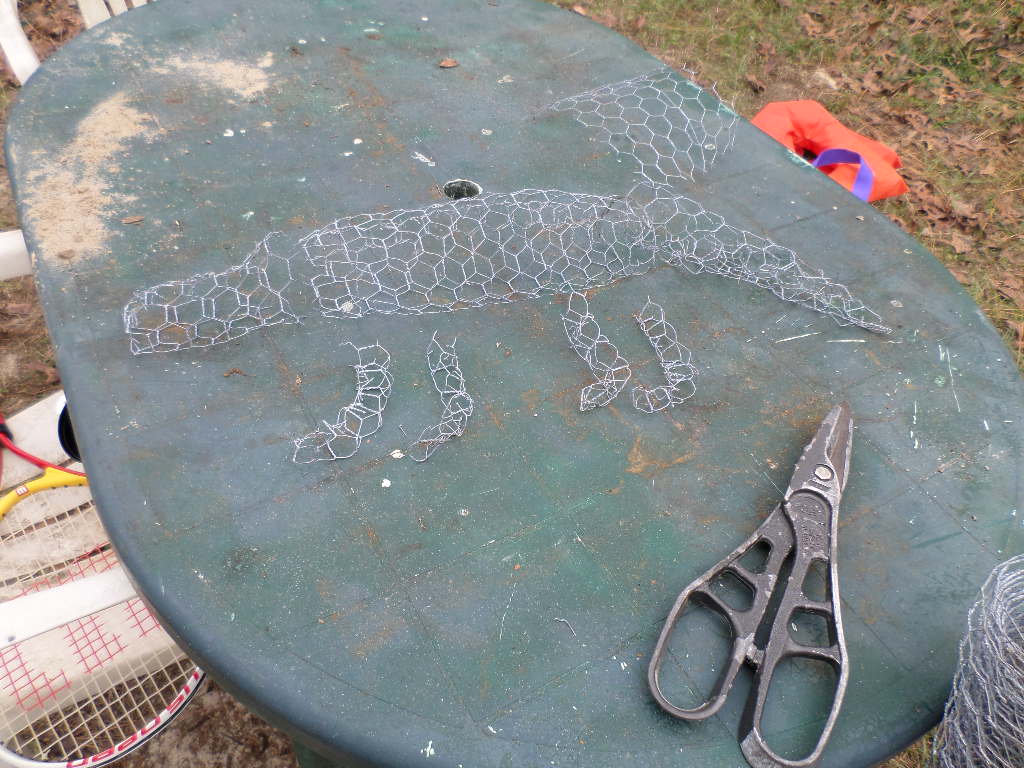
Now that you’ve got all the sticky stuff ready to go, you need something to stick it to. I was fortunate enough to have a bunch of chicken wire left over from the chicken coop project I did a while back, but if you don’t have any like that laying around you’re going to need to pick some up. They sell some really small rolls (25 feet or less) at many feed and farm stores, so don’t head over to the big box stores unless you’re looking to buy a 50 foot or larger roll. Either size roll makes a lot of alligators!

Once you’ve got the wire, you can bend, fold and twist it into whatever shape you desire. We attached seven pieces of wire together until it sort of resembled a small alligator (you be the judge). You don’t have to be a master sculpture to get it right, the paper mache will end up doing the real work so don’t go overboard on your wire frame, it’s only going to get covered up anyway.
Making a Mess
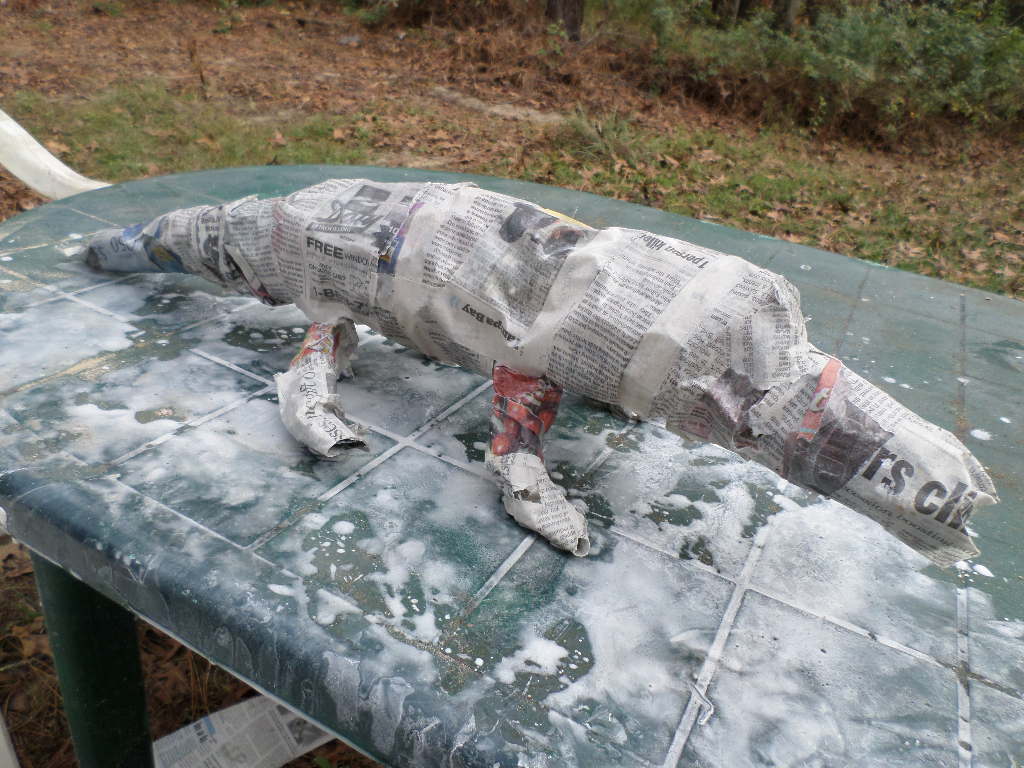
This is the part I hate, but most kids love – getting all grubby and wet with the newspapers. It’s a simple process: just dip the newspaper into the paper mache mixture until it’s completely wet all of the way through the paper. Apply the wet strips one layer at a time until you’ve got most of the wire frame covered. Allow it to dry for a few hours in direct sunlight, and then add additional layers of paper mache until you’ve completely covered the frame with paper. Let it dry overnight before continuing on to the next step.
Joint Compound is the New Marble
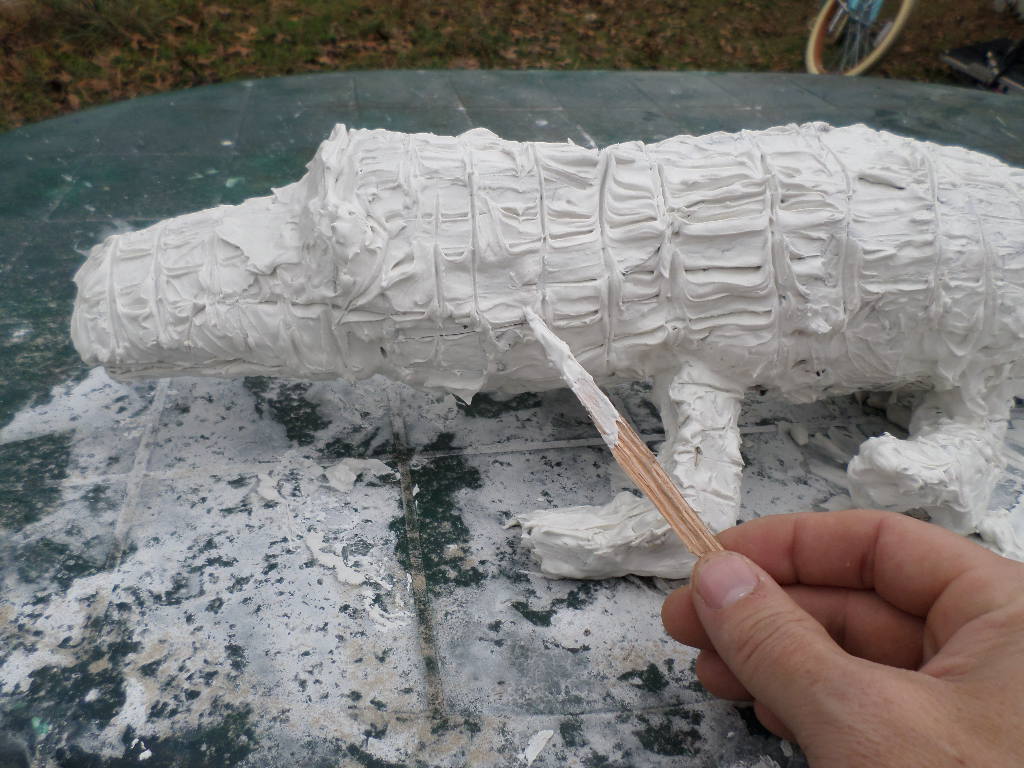
After our little alligator friend was all dry, we decided that we would cover him with a thin layer of joint compound. This allowed us to cut in scales, eyes and a happy little smile onto our new buddy. At first, I tried to apply with an old joint compound knife, but it wasn’t going on smoothly and before we knew it, we were smearing this stuff on with our bare hands. It’s not toxic and easy to clean up, but it’s still a good idea to do this part outside because it does get messy. If you’re a clean freak, gloves might be in order.
Once it set up a bit, we could carve lines and textures into the now-stiffening material. We had to be really careful with the whole thing while it was still moist because it was very fragile and wanted to fall apart. I put it inside for the night and let it sit under a desk lamp to dry until the morning.
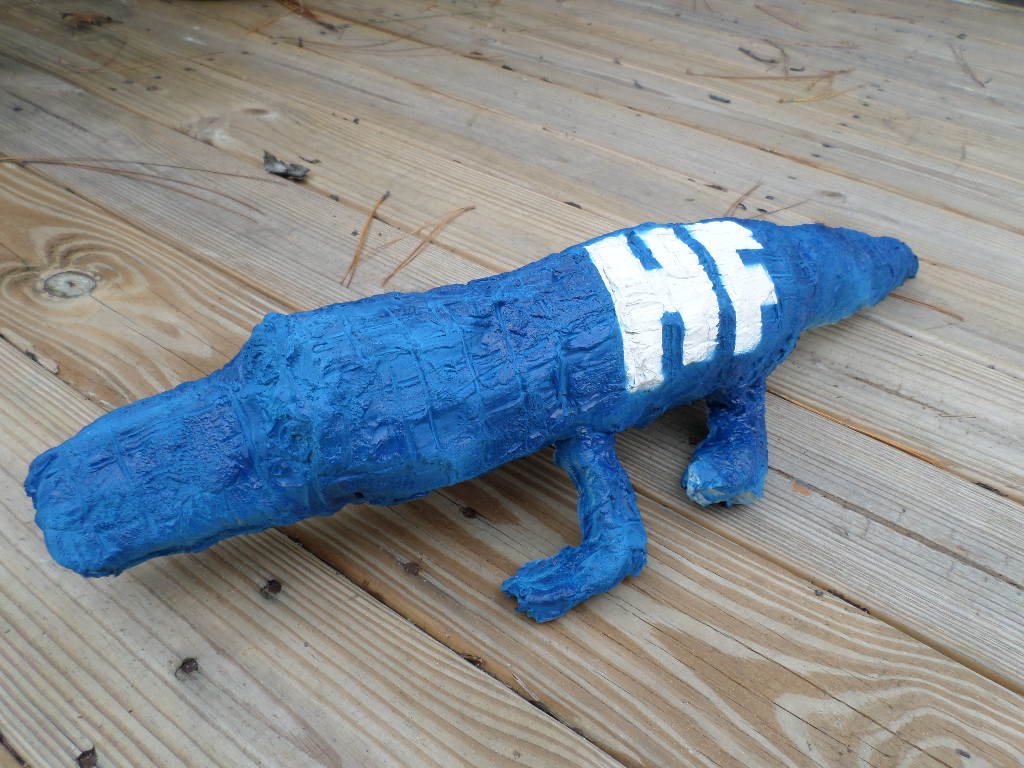
It cracked in a few spots, as we expected, but with a little more joint compound to fix the troubles, it soon was all ready for painting. It dried one more day because of the repairs before we covered it with a coat of blue paint (can you tell we like the Florida Gators?) and now we have a new friend for life – Wally the Home Fixated gator!
What paint did you use? Was this alligator for outdoor use—was it weatherproof? I want to use your recipe for DIY front yard gravestones for Halloween, so need a weatherproof papier-mâché recipe.
Can you use wall plaster over traditional paper mache?
I genuinely enjoyed your humor in this. As a diyer and artist I was looking for something entirely different but I enjoyed your take on paper mache with drywall compound.
Cool idea. Just might get an “adult” to act like a kid again!!!!