

Contrary to popular belief, it technically is possible to have too many clamps. It’s just not something you’re likely to ever experience; like unicorns or an entertaining Rob Schneider movie. However, an impressive clamp stash is only the beginning. Now that you have them, where will they be stored? Clamps are heavy; but there’s no need to lug them back and forth when they can be rolled right over to you – wherever you need them – with very little effort. Given that almost every woodworking project requires clamping at some point, the Rockler Pack Rack Clamp & Tool Storage System is a beautiful solution that piqued my interest at first sight. But is it worth your hard earned money? Well, we’ve received a Rockler Pack Rack to try out so I guess we’ll find out together!
Rockler Pack Rack – Some Assembly Required

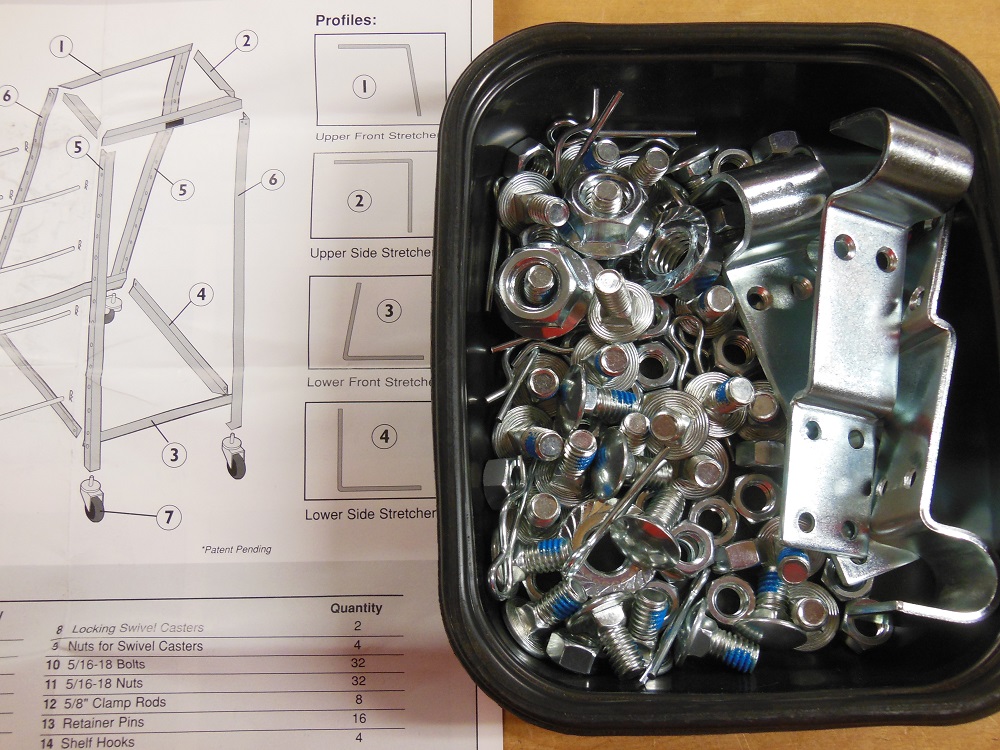
Assembly of the Pack Rack is fairly simple. The instruction booklet is short and sweet with lots of pictures for clarity. It took me about an hour and a half – working at a casual pace – to put together (not counting the shelf and wooden parts).
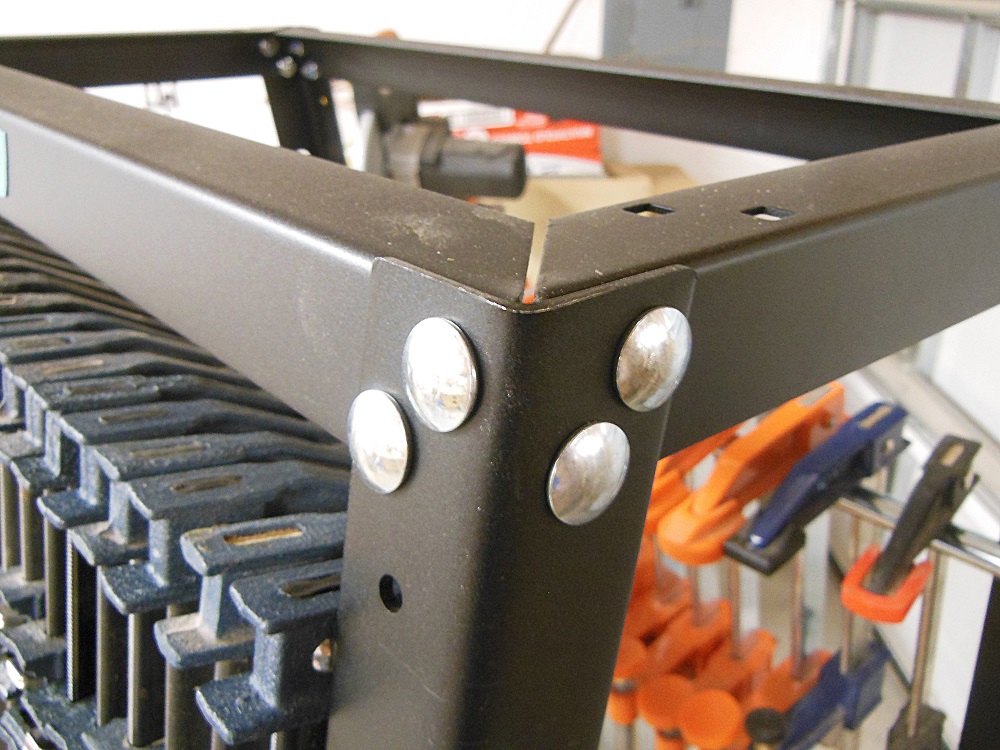
Once it’s assembled, the Pack Rack is impressively sturdy. It’s not going to twist or “rack” on you.
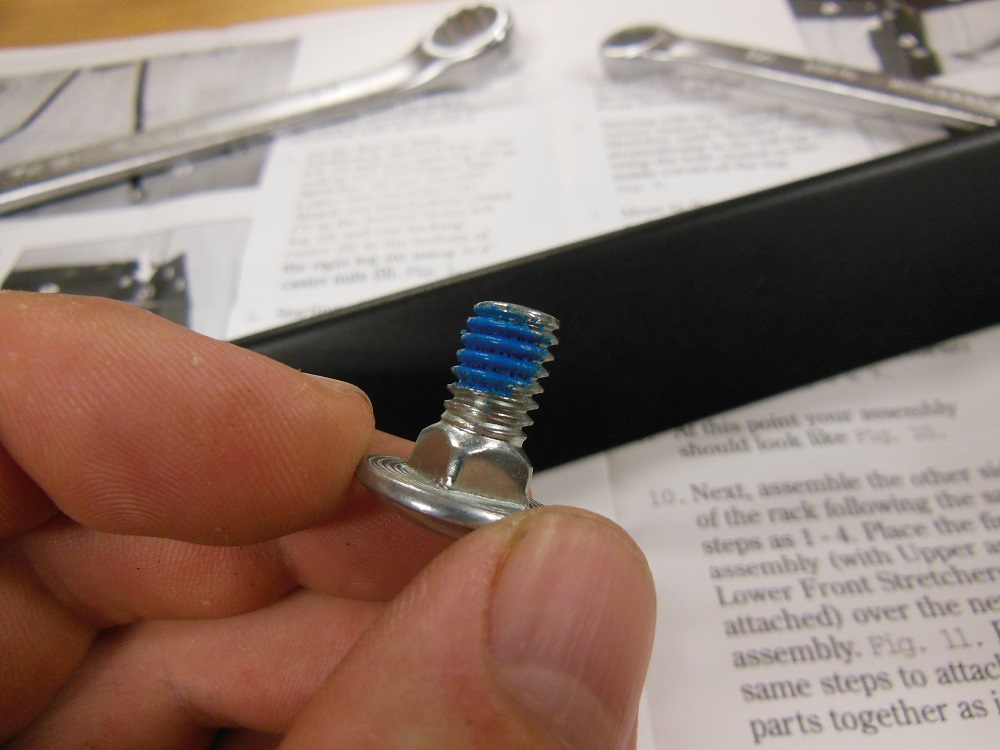
Due to tight clearances, a couple bolts were tricky to tighten. But I was able to cinch them up nicely with a thin wrench and a deep well socket.
Rockler Pack Rack – Plenty Sturdy
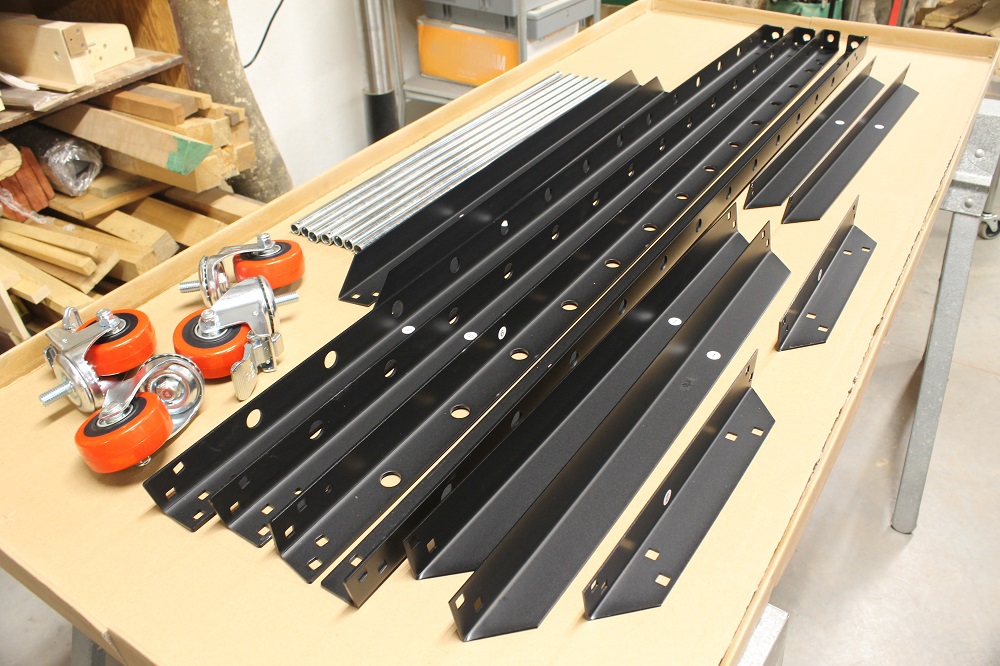
The size of the box will fool you at first. But when you lift it you’ll realize there’s a lot of metal in there. At 47 pounds, the steel frame is heavy enough for a solid unit, but light enough not to break your back.
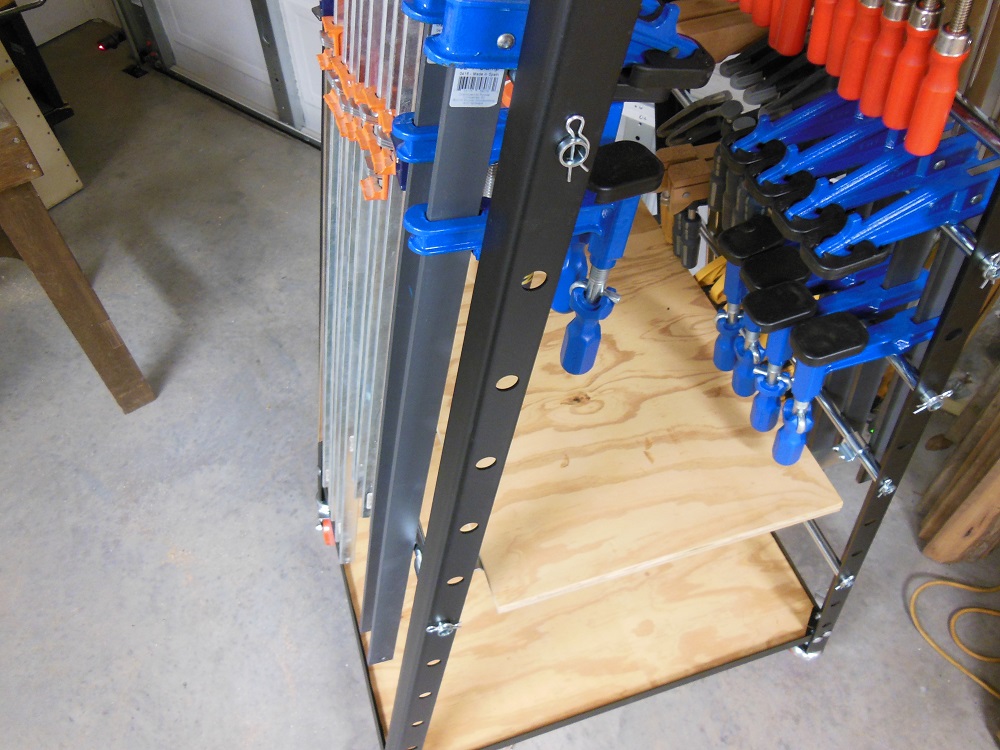
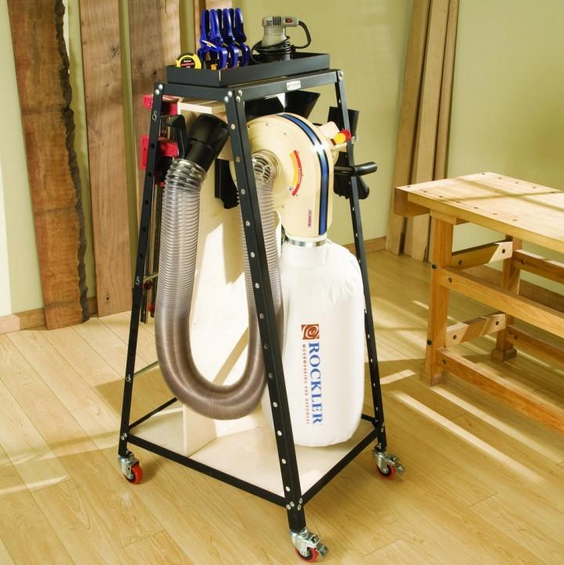
Speaking of not breaking backs: the Pack Rack is a 31”L x 24”W x 58”H multipurpose shop cart that’s plenty sturdy for just about anything you’d want to use it for. The tapered design makes it very stable and keeps clamps in their place.
Rockler Pack Rack – Hot Rods

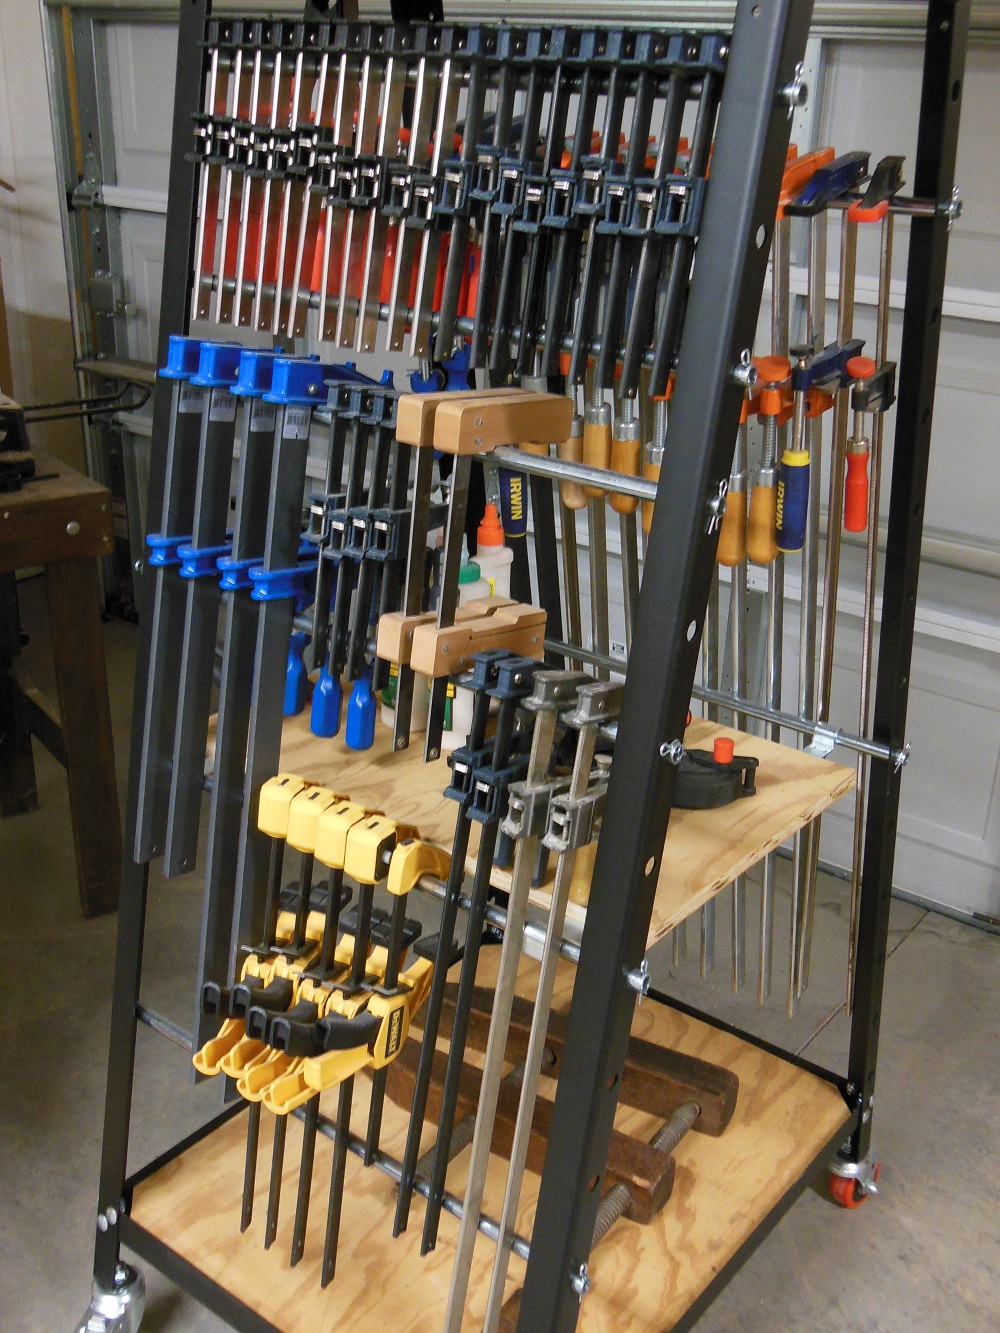
The eight included steel “rods” are actually hollow tubes. I loaded a couple of them down with heavy clamps (and placed a bunch of weight on the shelf) with no noticeable flexing. So they are plenty strong.
The rods are held in place with hairpin cotters (“R clips”), so it takes only moments to install or rearrange them to your liking.
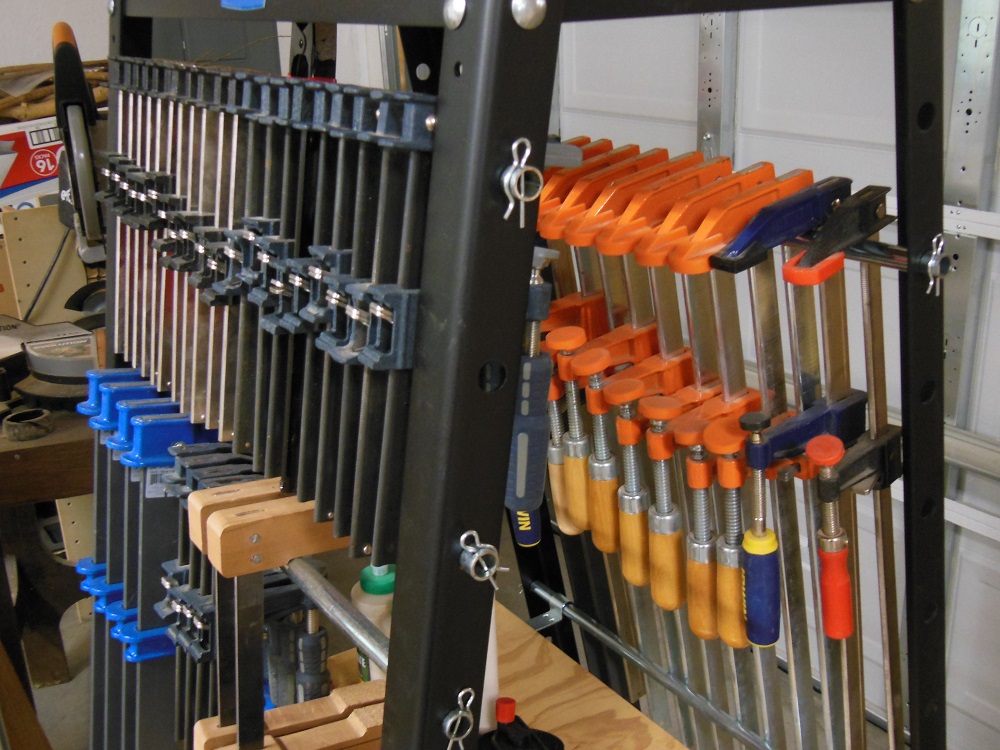
The eight included rods are enough for most applications, but extras are available in packs of two. Rockler also offers extra long rods, for even greater storage capacity.
Rollin’, Rollin’, Rollin’ – Keep That Rockler Pack Rack Rollin’
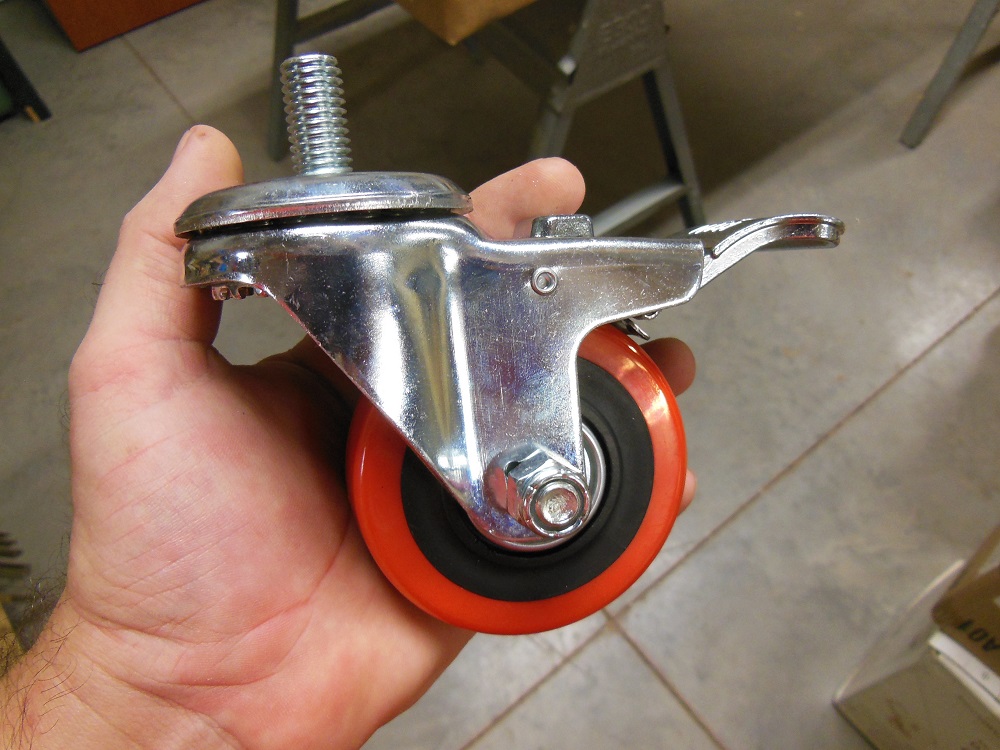
The Rockler Pack Rack comes with heavy urethane swivel casters that glide like a banana peel in an oil slick on ice. All four casters swivel for complete freedom of movement; none of that shuffling back and forth nonsense.
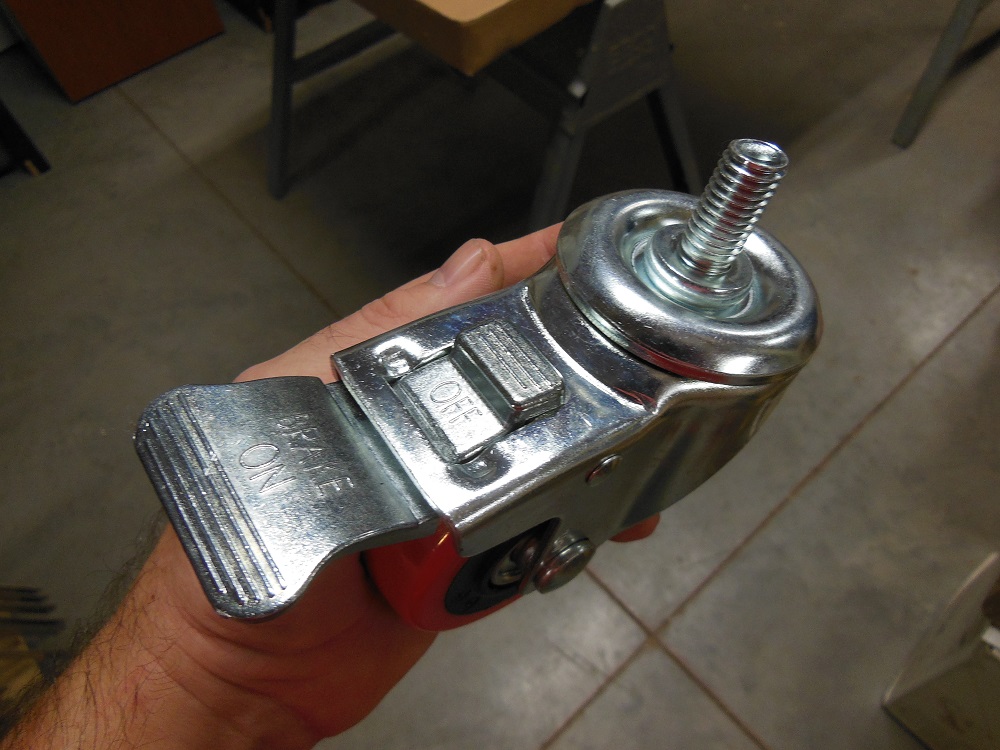
The Pack Rack is a pleasure to roll around the shop. The movement is silky smooth, even with a full load. And a full load of clamps is a lot of weight.
Installing Shelves On The Pack Rack
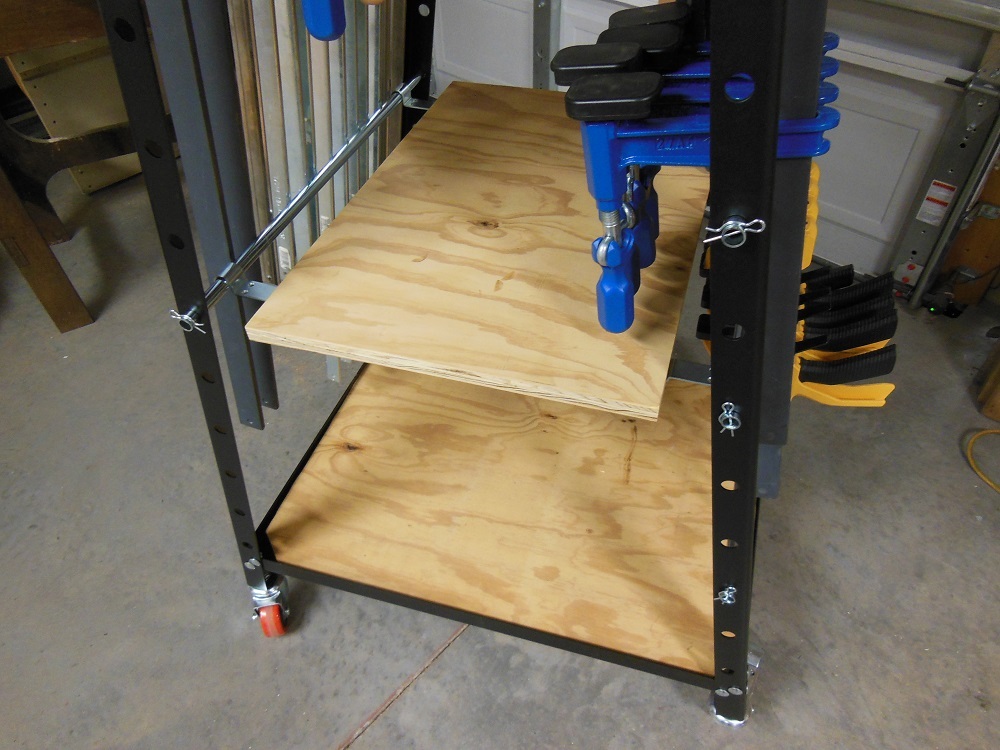
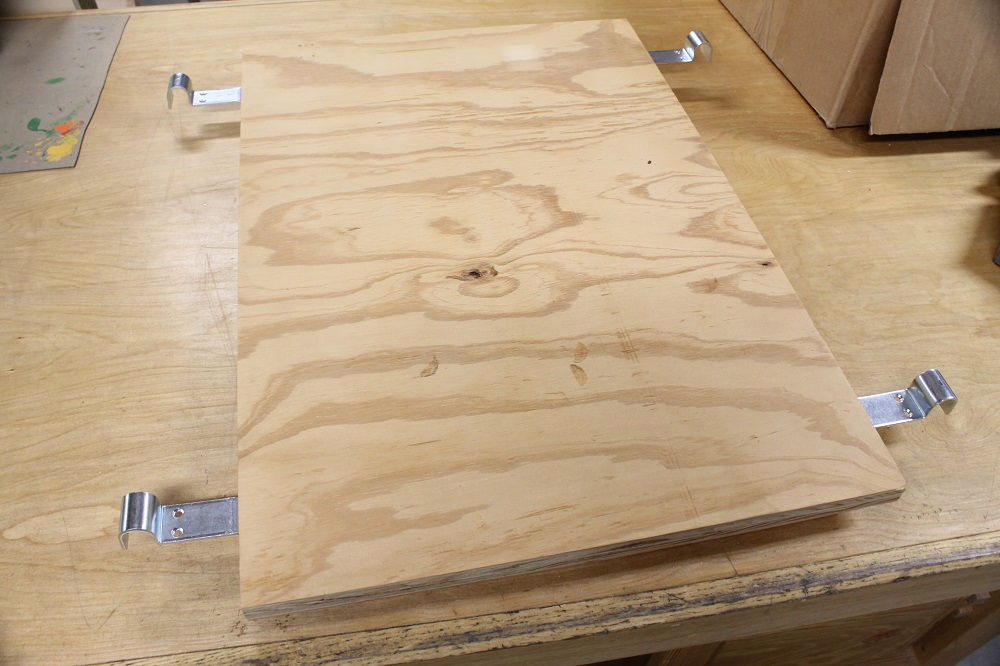
You must supply your own sheet goods if you want shelves; I used 3/4” plywood. The bottom shelf sits on a lip formed by the angled steel of the frame. Just cut a piece to the proper dimensions, clip the corners (clearance for the bolts in the frame) and set it in place. There’s no need to fasten the bottom shelf in place; it’s not going anywhere.
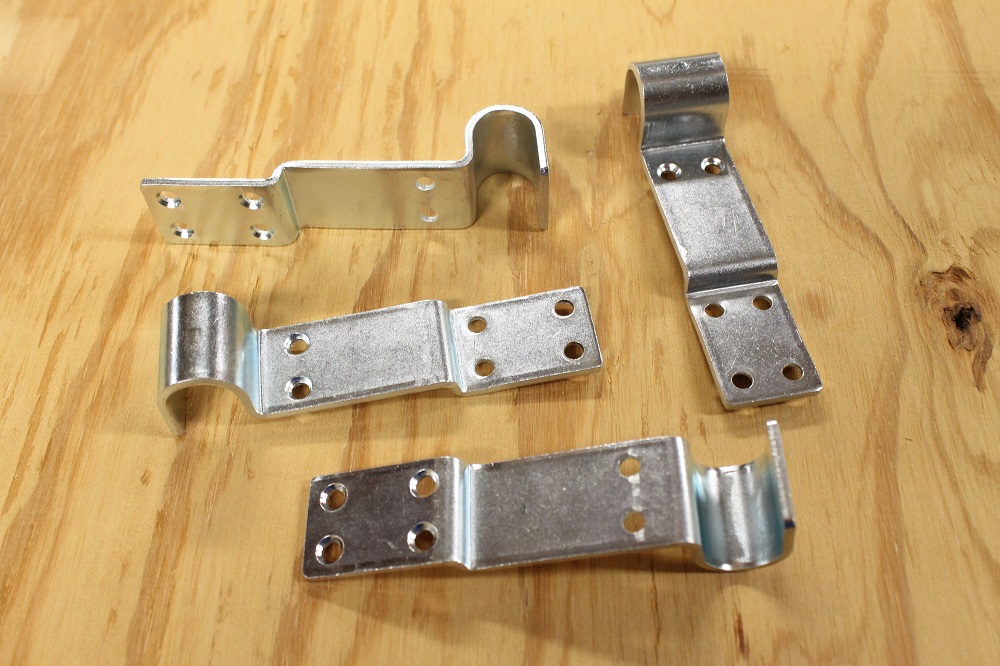
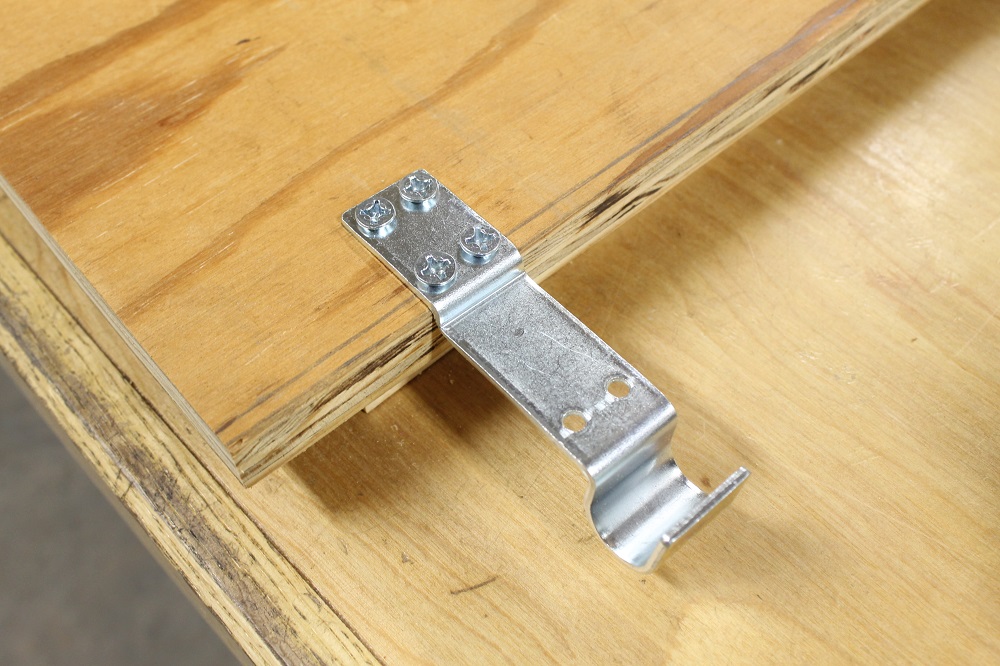
For any shelves above the bottom, there are special brackets that hook over the clamp hanger rods. For most applications, you probably won’t need any more. But – if needed – extra brackets may be purchased separately in sets of 4.
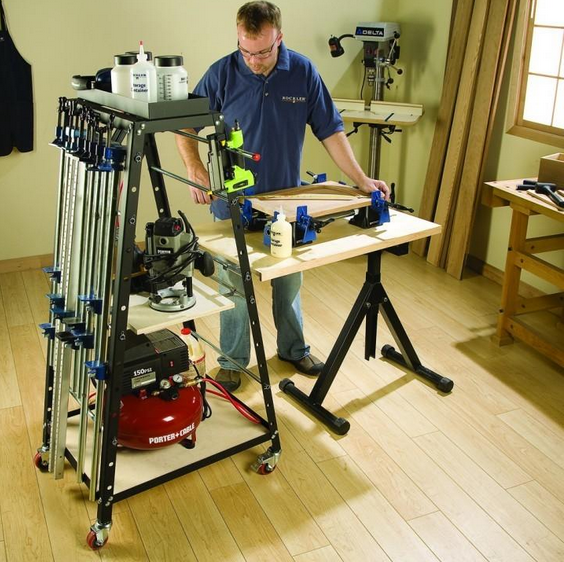
The shelf brackets can come in handy for other purposes as well. Above, a pair of shelf brackets holds one end of a work table. This might be a great solution for small workshops, where horizontal surfaces are at a premium.
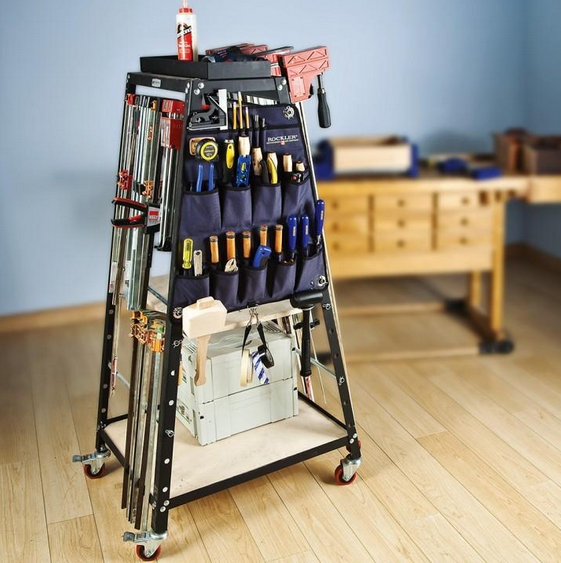
Accessorizing And Customizing The Rockler Pack Rack
The most obvious use for the Rockler Pack Rack is clamp storage. But a look around the Internet revealed lots of alternative ideas.
One popular use for the bottom shelf is to hold a shop vac or pancake air compressor. I also saw several examples where people have used the Rockler Pack Rack to mobilize their dust collector.
Other available accessories include:
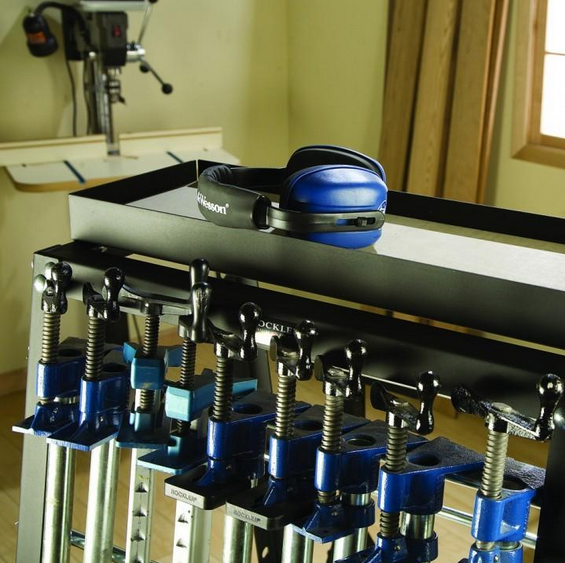
* A top cap tray for holding loose items.
* Longer clamp rods extra storage of clamps, extension cords and more.
* Parallel clamp rack which can be hung on a wall or used with the Pack Rack. Though my Bessey K-Body parallel clamps stay on the stock Pack Rack rods just fine.
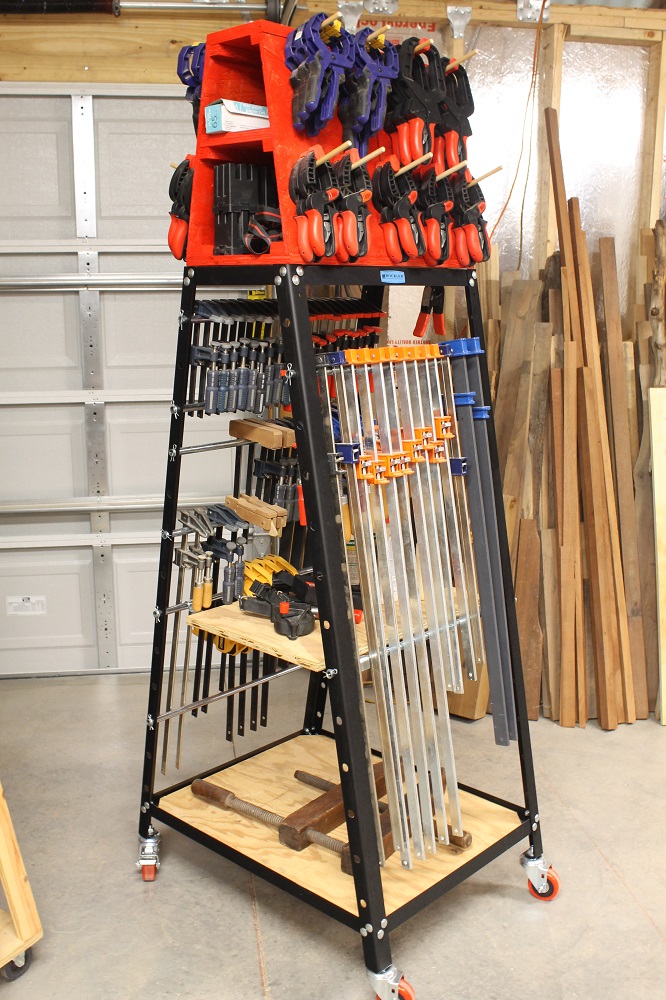
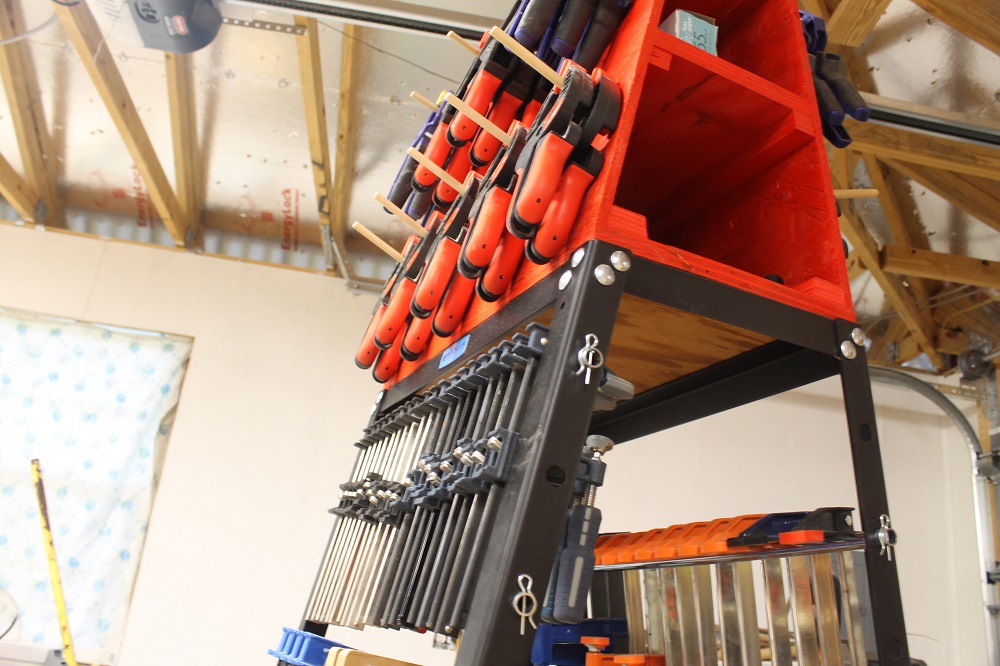
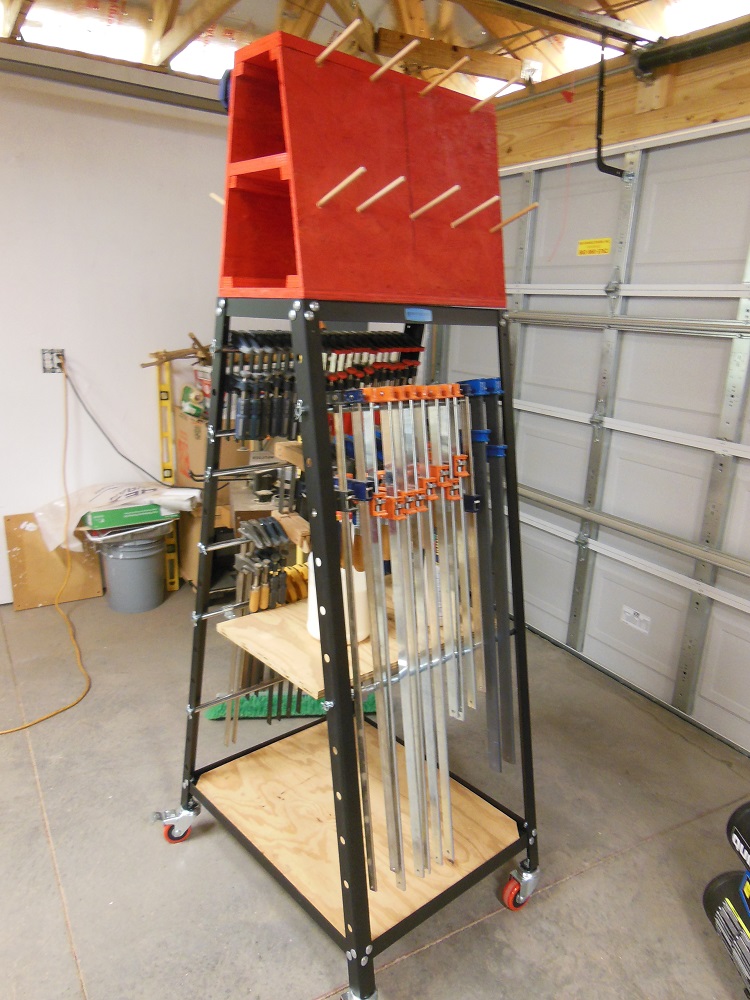
I built an additional storage module for the top of my Pack Rack. For tips on how it was made, there’s a brief overview at the end of this article.
Rockler Pack Rack – Final Evaluation
With such a useful and sturdy shop cart, it’s hard to find much fault. My only criticisms are minor. First, some of the bolts can be tricky to tighten during assembly, but I eventually got them all. I also couldn’t get mine perfectly squared up. But it’s close enough for government work and doesn’t affect its performance one bit. This is a utility item, not a precision machine.
Finally, to figure out what size to cut my upper shelf, I had to tape the brackets in place then measure the span between them. It would have been nice if Rockler included a chart to tell you the different shelf dimensions (every shelf position accepts a different sized shelf).
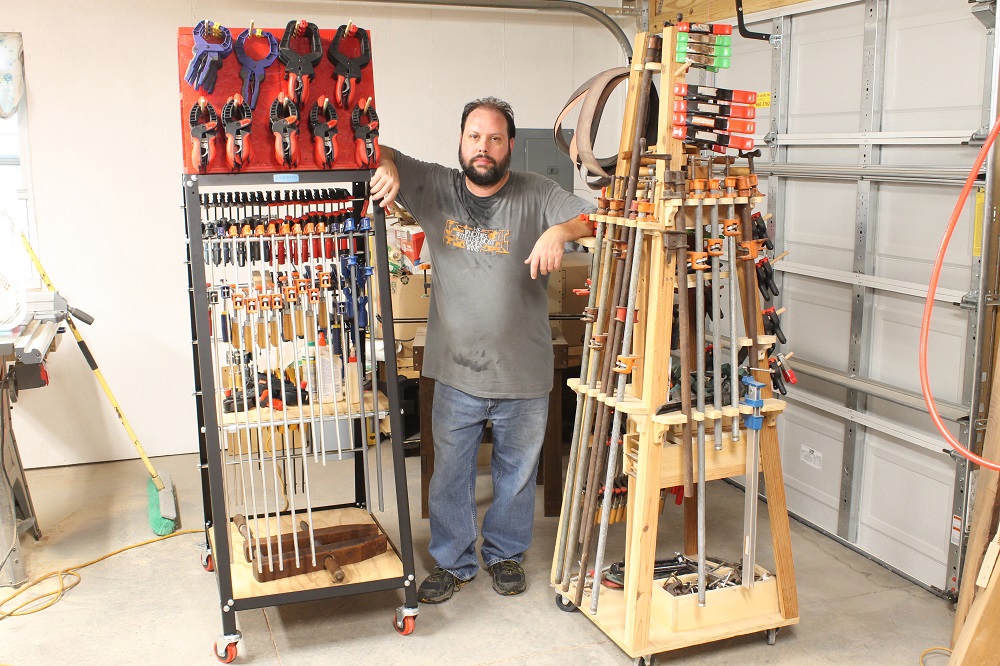
Several years ago, I made a rolling clamp rack out of wood. For all the trouble it was to design and build my own, the Rockler Pack Rack is a great deal. It’s also stronger, more stable and rolls a lot better than the one I made myself.
Shop Made Pack Rack Topper – Quick Construction Tips
If you like the topper I built for the Pack Rack and want to try making your own, here are a few tips to get you started:
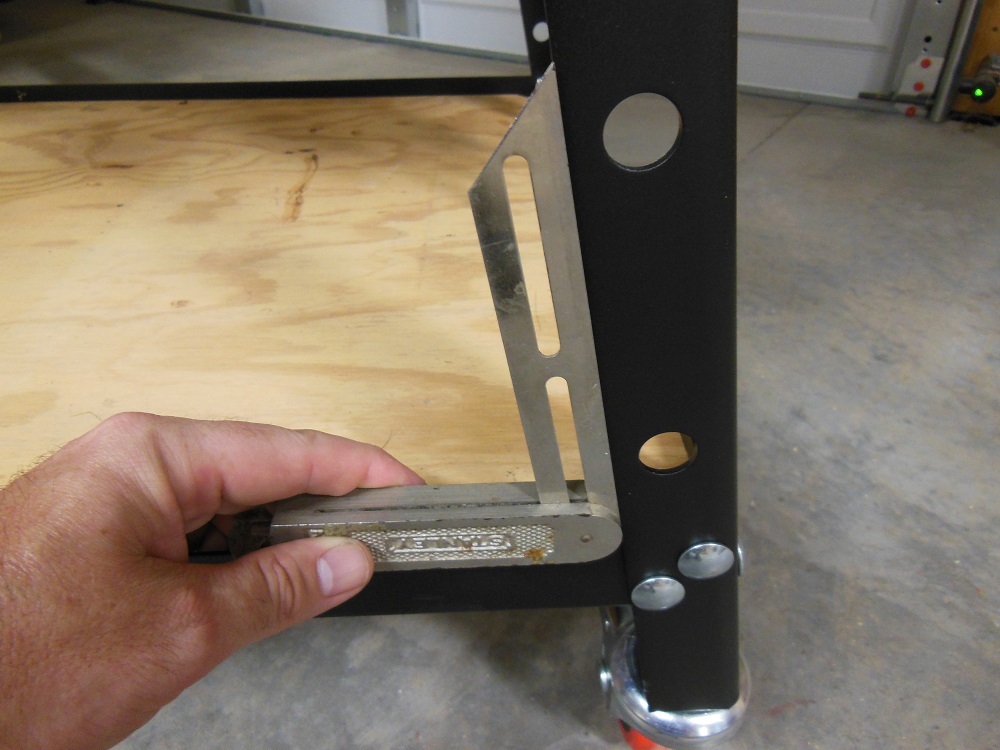
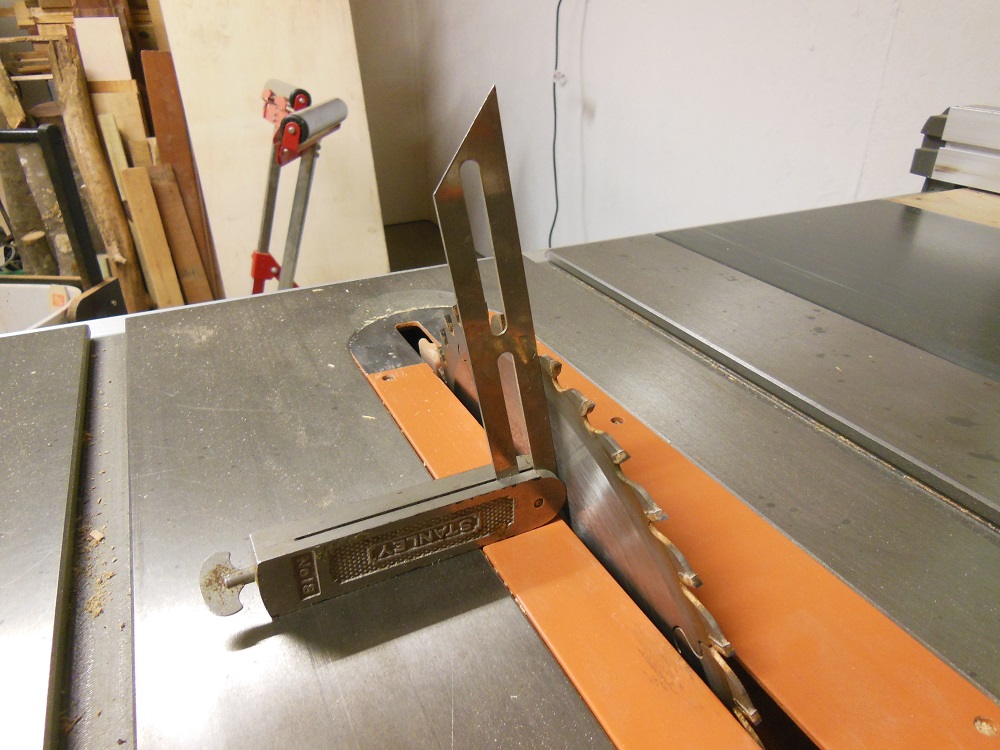
I wanted the slant of the Pack Rack to follow through to the topper. So I used a sliding T-bevel to measure the angle near the base. That angle was then transferred to my table saw blade.
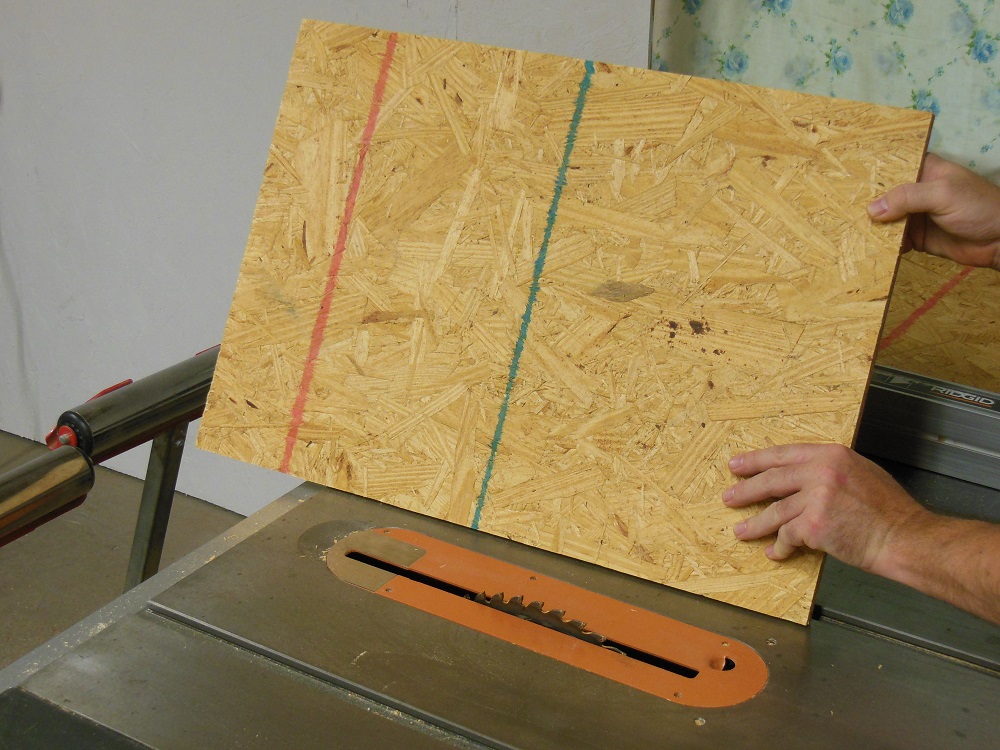
Like the shelves, my topper is made entirely of scrap wood I had laying around the shop. The sides (or faces, I suppose) are 7/16” OSB scraps from when I did the walls. The rest is 3/4″ plywood.

The most important thing is to be conscious of the direction of your angles; it’s easy to get confused. The angles of the base, top and shelves point in towards each other (like a trapezoid). Same with the lower braces.
The top braces and shelf braces are angled in the same direction (like a parallelogram). Same goes for the side panels.
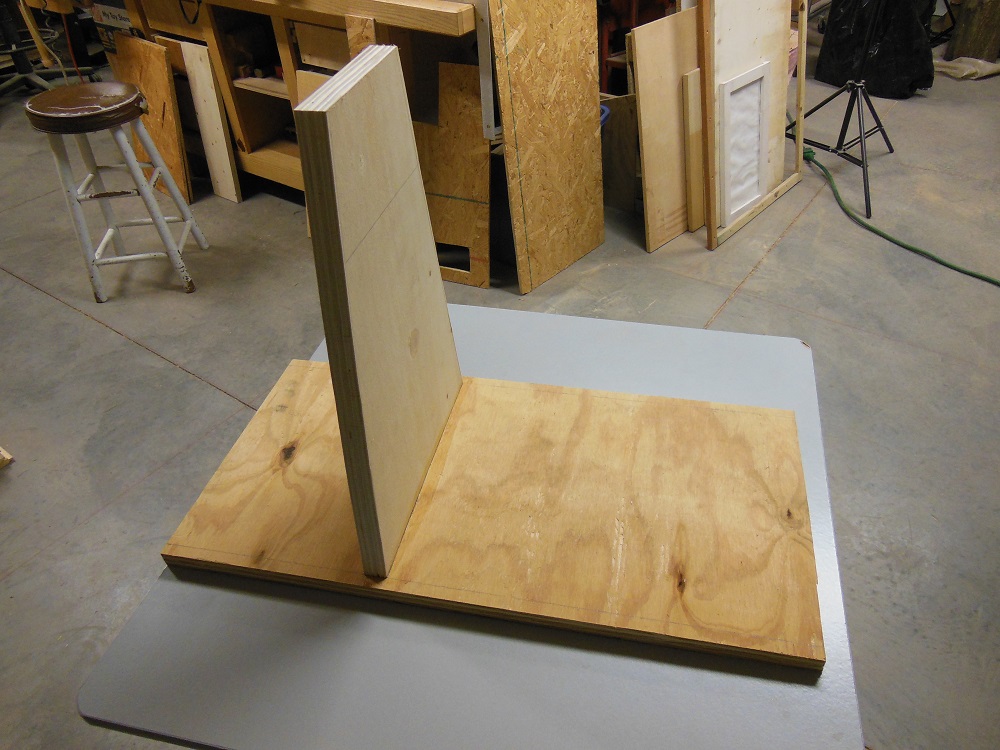
Rather than have open tunnels all the way through, I used a vertical divider to separate the space. The bottom of the divider is narrow enough to allow the side panels to rest atop the bottom panel.
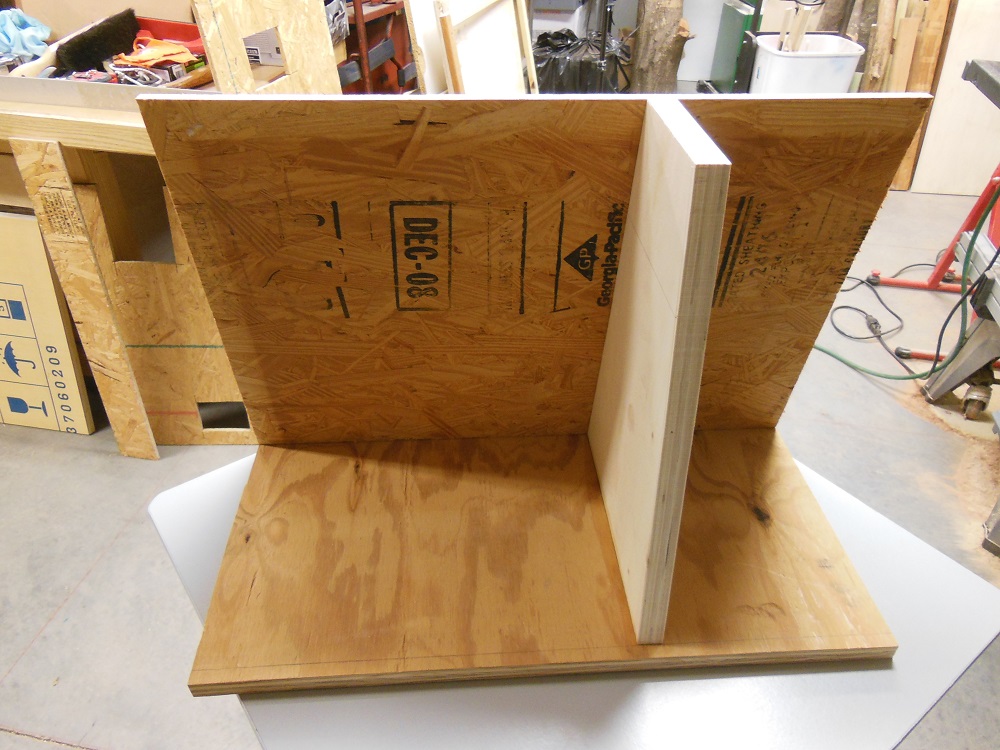

The shelf on the shallower side is high enough to accommodate a gallon of glue underneath. The other shelf is closer to the middle.
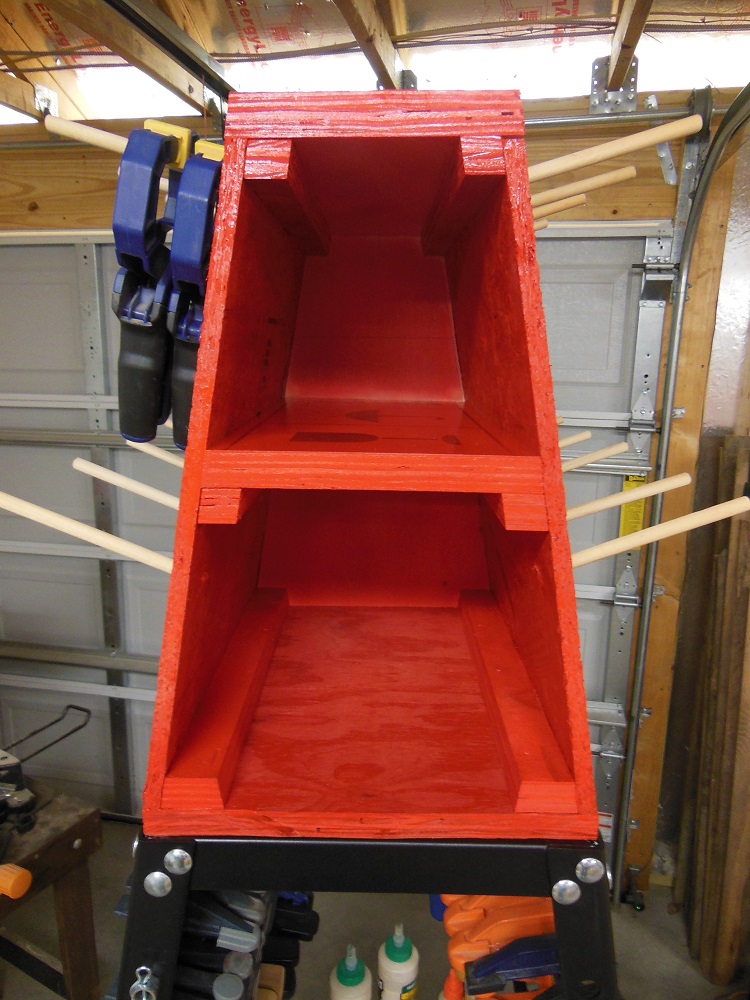
I painted the assembled unit then drilled holes for 3/8” hardwood dowels, which were glued in place. Finally, it was screwed to the top of the Pack Rack, using the existing accessory mounting holes and some coarse threaded wood screws from underneath.
The Pack Rack sells for $169.99 at our sponsor Rockler Woodworking and Hardware. For the money, the Rockler Pack Rack is where it’s at!