

If you do any kind of trim work at all, you are undoubtedly aware of the kick-ass tool known as the finish nailer. If you’re a finish carpenter, you probably own at least a couple of them. I am definitely NOT a finish carpenter – I don’t even play one on TV – but I’ve installed my share of baseboard, window and door trim, and even the occasional fancy-schmancy stuff like wainscot and crown mould. Even though trim work isn’t my forté, this type of nailer is such a time saver that I’ve managed to accumulate three over the past couple of decades, ranging from a little 23-gauge Bosch pinner to my 15-gauge Bostitch finish nailer. And handy as all those nailers are, they all just got nudged over a bit on the shelf to make room for the Ryobi Cordless AirStrike Nailer, Model P320, which recently arrived courtesy of Ryobi for our evaluation.
The Ryobi Cordless AirStrike Nailer is a recent addition to Ryobi’s line of 18-Volt ONE+ tools. It will run on the older NiCad batteries, but will shoot a lot more nails if you power it with a Lithium-Ion battery. This 18-gauge brad nailer features AirStrike Technology, which eliminates the need for noisy compressors, tangled hoses or expensive, smelly gas cartridges. This means faster setup and easier maneuvering on the job site. The Ryobi AirStrike drives 18-gauge nails from 5/8” to 2” in length, and includes 2 non-marring pads to keep your work surface free of tool marks. Other features include (take a deep breath): selectable driving modes (single sequential or contact actuation), tool-free depth-of-drive adjustment, a simple air pressure adjustment dial, tool-less jam release for easy access to clear nails, a dry-fire lockout feature, a belt hook that attaches to either side, and a low nail indicator to quickly and easily see when it is time to re-load. Here’s a quick one-minute overview from Ryobi:
http://youtu.be/X2btV0AMWa8
Who Needs A Finish Nailer?
My introduction to finish nailers came many years ago. I was installing a beadboard ceiling on the 8’ X 20’ porch of an old house, using pieces of tongue and groove beadboard around ½” X 3” X 14’ long. My helper and I were holding the pieces up and hand-nailing 4p finish nails through the tongue into each ceiling joist, craning our necks as we stood on a makeshift scaffold (the ceiling was 10’ off the floor). There was quite a bit of tongue-splitting taking place, accompanied by an equal amount of grumbling and special construction words.
Toward the end of the day, after we’d been at it for a couple of hours, we had less than ¼ of the ceiling finished. A subcontractor at the site took pity on us and offered the use of his compressor and finish nailer. The only catch was that he needed it back first thing the next day. Long story short (I know, too late), we had the rest of the beadboard up in a little over two hours, and the next day I bought the contractor a case of beer. Not long after, I bought my first finish nailer.

Aside from being way the heck faster than using a hammer to get your trim nailed, finish nailers have several other advantages. Since you only need one hand to use them, the other hand is freed up to hold your beer position the trim and hold it in place. They shoot a very thin nail, which leaves behind a very small hole to be filled. And finally, the small size, and the speed with which the nail goes in, makes it much less likely to split your trim than hand-nailing.
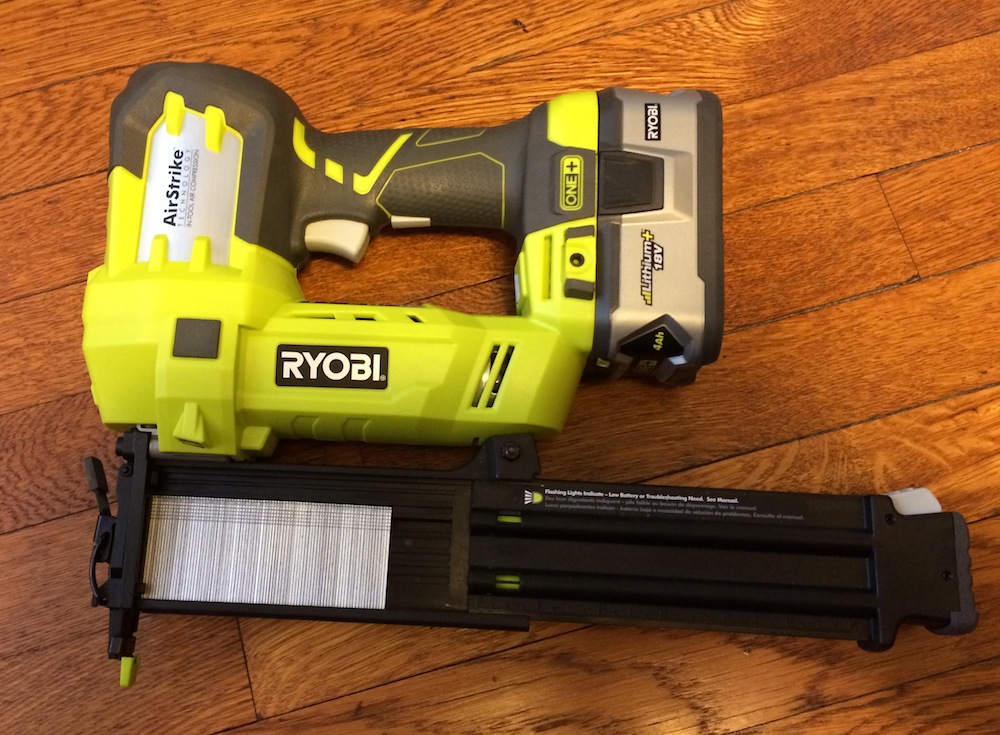
Let’s Take A Look
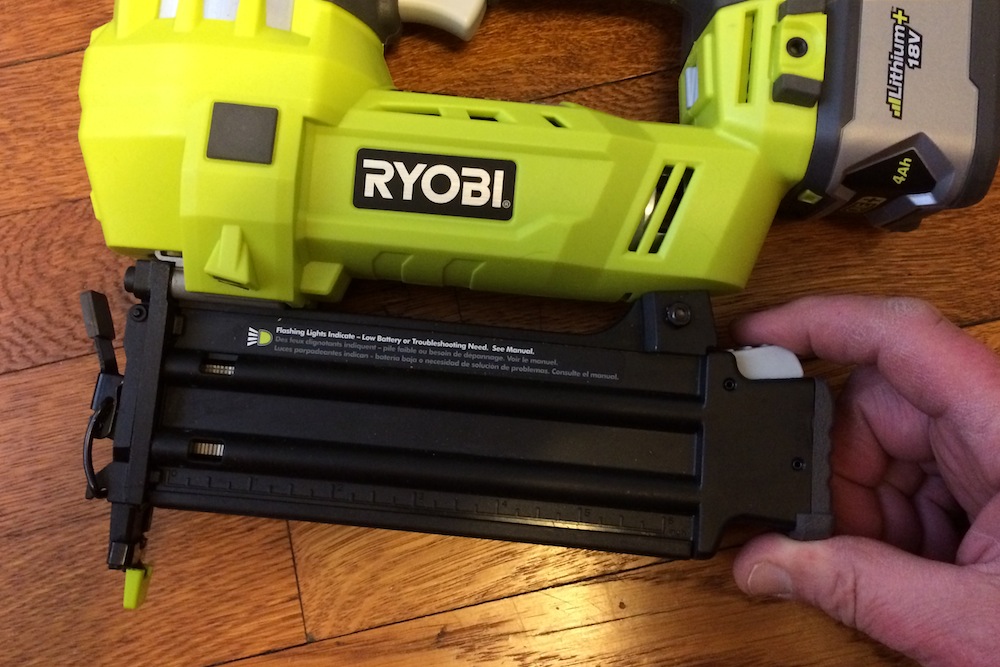
The Ryobi Cordless AirStrike Nailer feels very solidly made. It loads very quickly – just depress the lever at the back of the magazine, slide the magazine cover open, drop in the nails, and slide it closed.
I didn’t experience any jams with the tool, but if it does jam, it’s quick and easy to clear. First, remove the battery (a good first step in doing anything with a tool that can shoot a long, sharp piece of steel at a high rate of speed). Open the magazine and remove the nails. Next, pull up on the latch and open the jam release. Insert a flat blade screwdriver into the tip of the driving mechanism and push it back, freeing the nail jam. Pull out the bent nail, close the latch, reload the nails, slap the battery back on, and resume nailing.

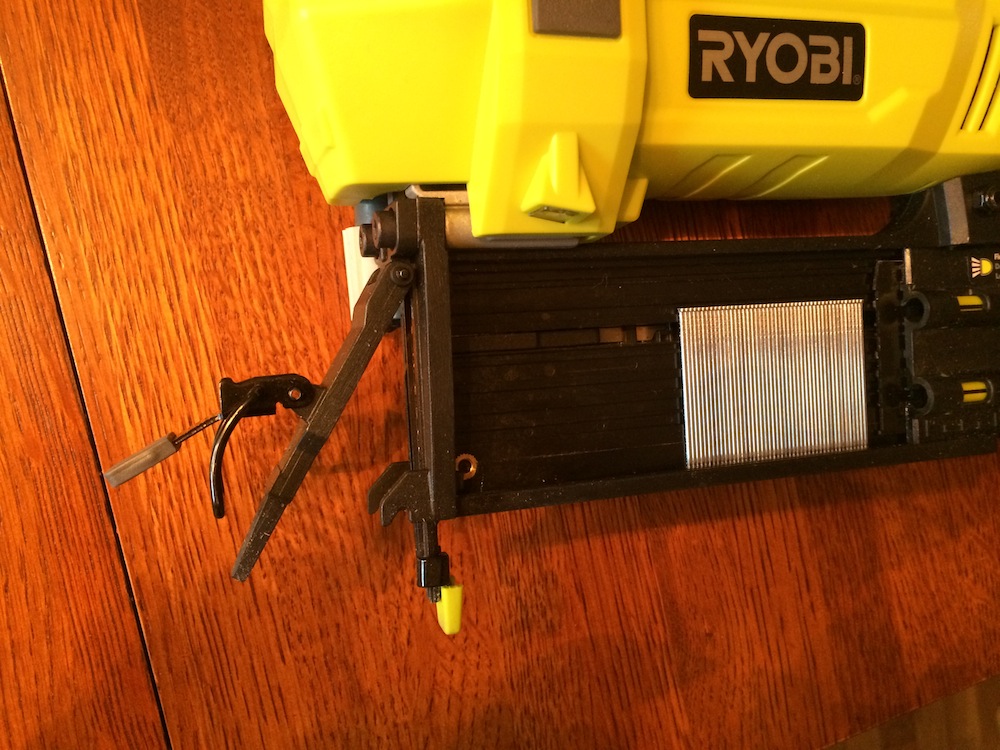

- Clear the jam, and close it up.
Speaking of shooting sharp pieces of steel, I fully endorse Ryobi’s recommendation to use eye protection with side shields marked to comply with ANSI Z87.1. I had no issues with the Ryobi, but I have had the experience of having a deflected nail go flying past. Not only do you have to perform an unscheduled underwear change, but in a contest with a flying nail, you will lose. If you don’t believe me, check out this nailer incident on HomeFail.com.
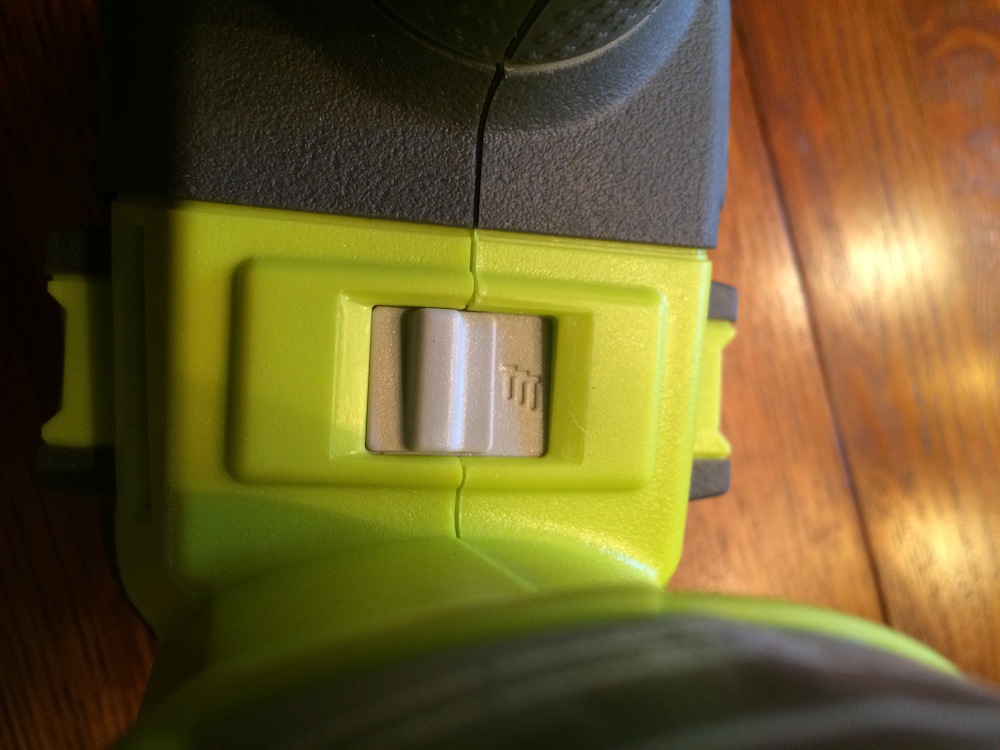
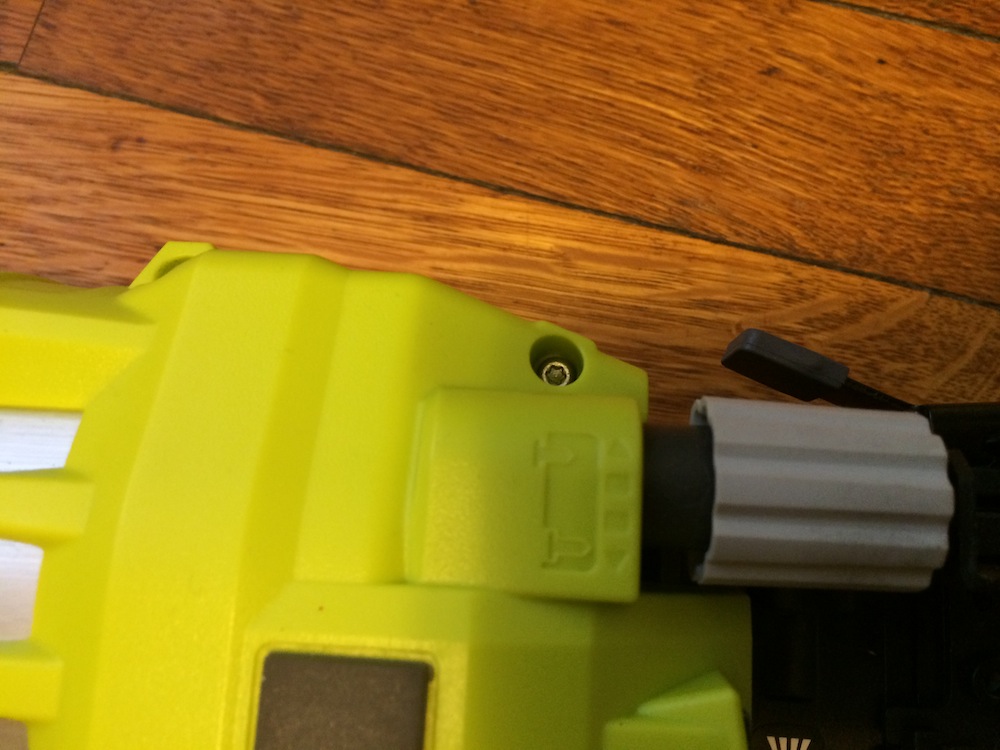
It’s easy to switch between the two modes of firing. “Single sequential actuation” mode basically means you push the nosepiece against the work surface until it’s depressed (you can cheer it up later), pull the trigger ‘til the nail shoots, release the trigger, move on, and repeat. With “Contact actuation” mode, also know as bump nailing, just hold the trigger down, and every time you contact the work surface and depress the nosepiece, you fire a nail. This method tends to not allow the same degree of accuracy, but it’s a lot faster (but also more dicey from a safety standpoint). I fired about fifty 2” nails using the contact actuation method, and the gun cycled and was ready for the next shot very quickly. At any rate, to change modes, just remove the battery (not necessary, but recommended by Ryobi), slide the mode switch, and replace the battery. Easy peasy!
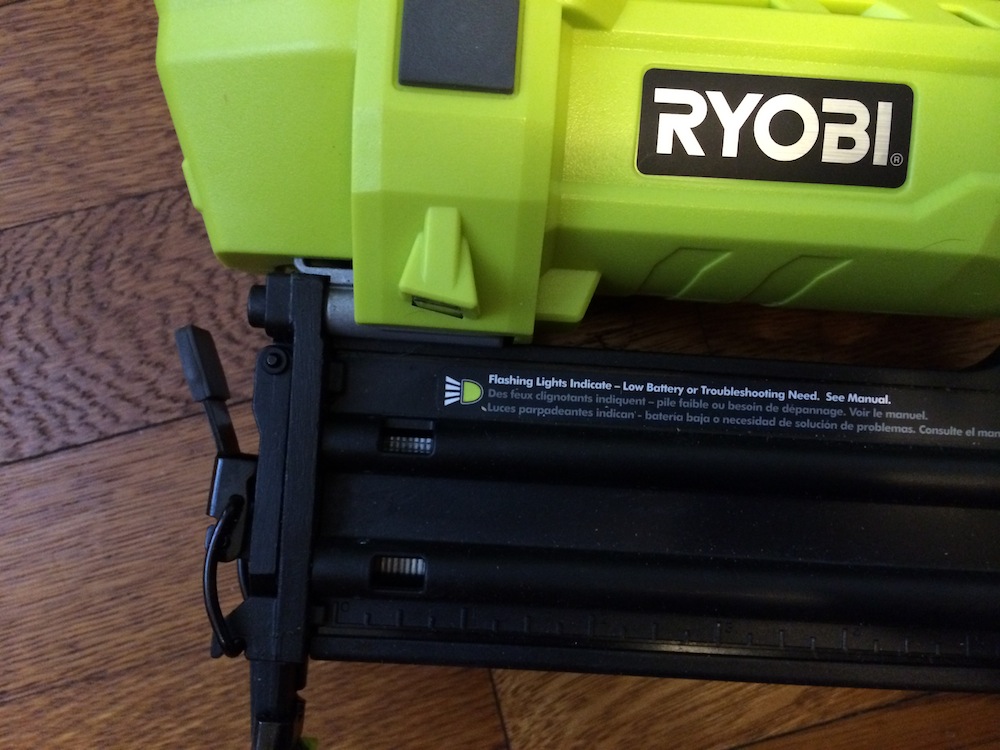
The Ryobi Cordless AirStrike has a nail indicator window so you can see when you’re running low on nails, and the dry-fire lockout feature keeps you from bumping merrily along shooting blanks. When the tool is almost empty, it prevents firing until nails are added. This helps prevent damage to the tool and your workpiece, along with saving you a little time not by having to go back and re-nail your missed spots. When I tested this out, it locked out with 4 nails remaining.
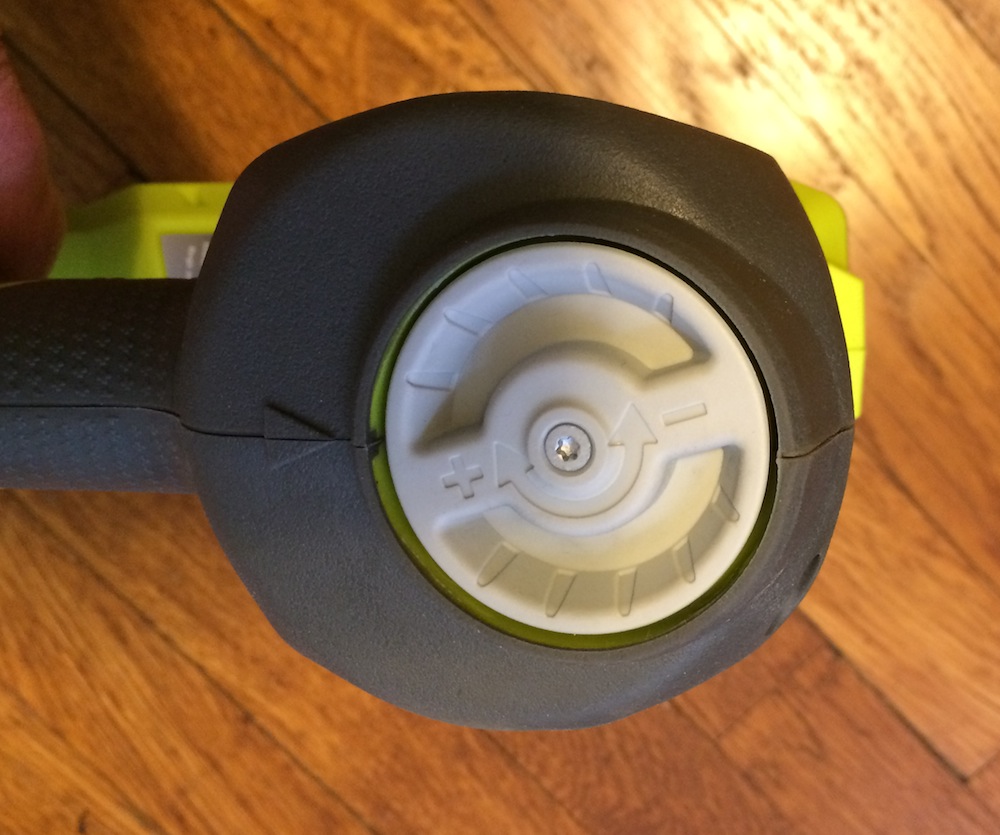
The Ryobi Cordless AirStrike Nailer provides two ways to control how much the nails sink into the workpiece: an air pressure control, and a depth of drive adjuster. Obviously, a 2” nail going into oak will require more pressure than shooting a 5/8” brad into pine. Test your depth of drive by driving a test nail into a sample of the materials you’ll be using for the actual job. Ryobi recommends tweaking it by first using the air pressure adjustment; this is simply a dial on top of the tool. Turn it clockwise to increase pressure, counterclockwise to reduce it. If you need MORE POWER, spin the depth-of-drive wheel, re-testing after making your adjustments.
Here’s a pretty informative “How to do everything with your nailer” five minute video from Ryobi:
http://youtu.be/7Q4a5T4P4HM
The Ryobi Cordless AirStrike Nailer—Preserving Marital Harmony
As I mentioned, I already had three finish nailers, including an 18-gauge brad nailer, although it could only take nails up to 1-¼” long. When I’m working on a decent-size project, they get a good workout. In between projects, though, they sit patiently on the shelf, waiting for a task that justifies dragging out the compressor and hose, firing it up, oiling the gun, shooting some nails, and then reversing the whole process. Unless I’m under a lot of pressure (usually spousal in nature), small projects like installing a piece of trim here and there get postponed.
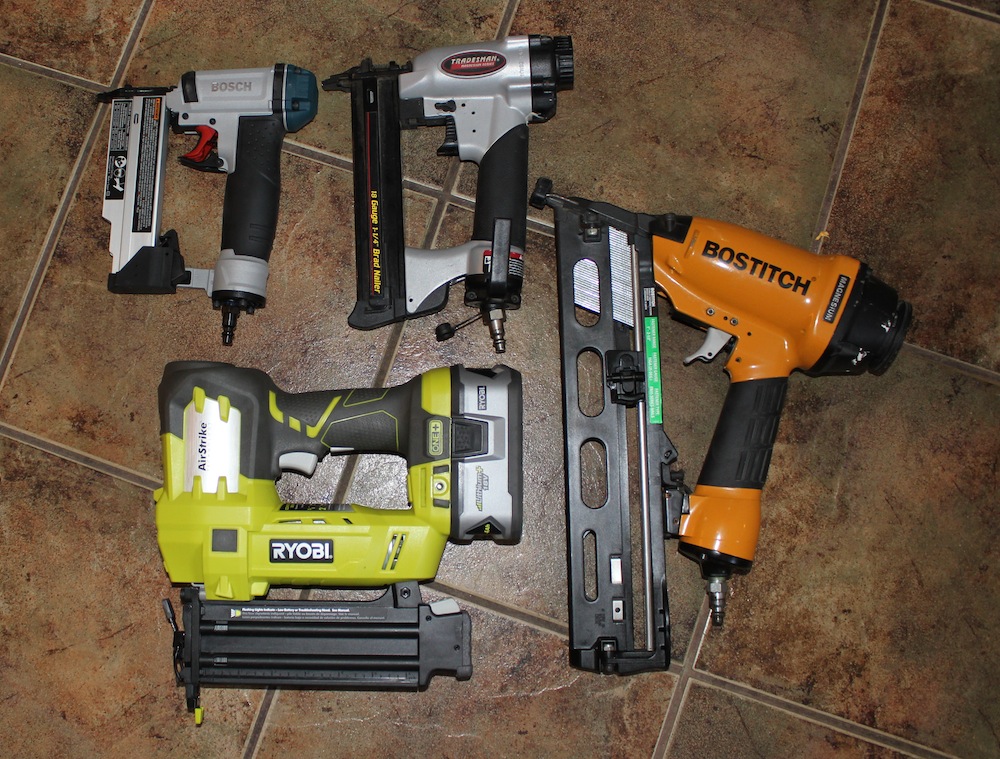
- Four nailers, no waiting…from now on, anyway
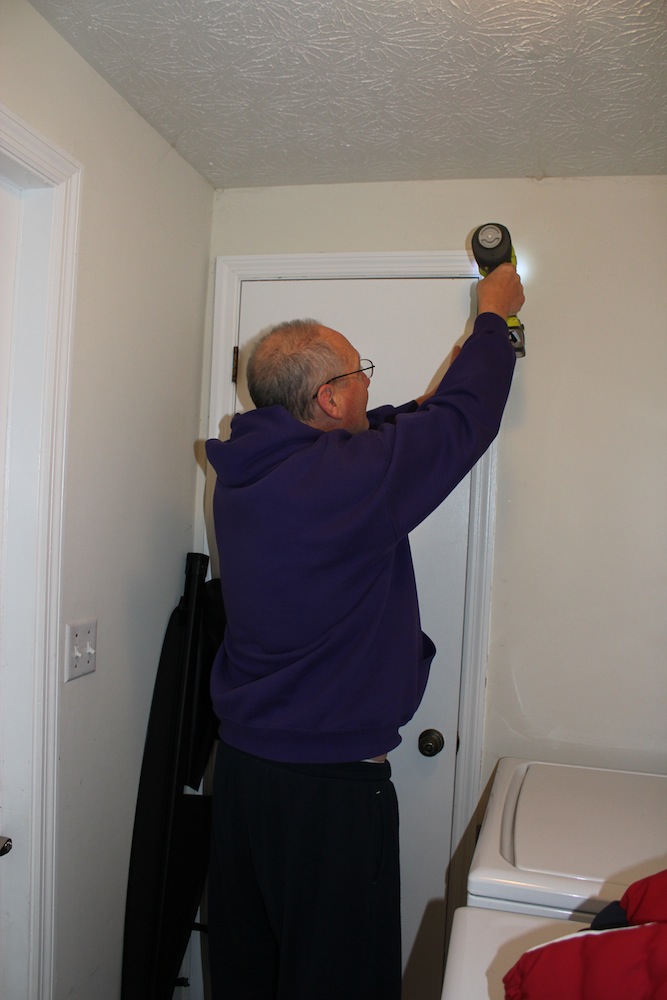
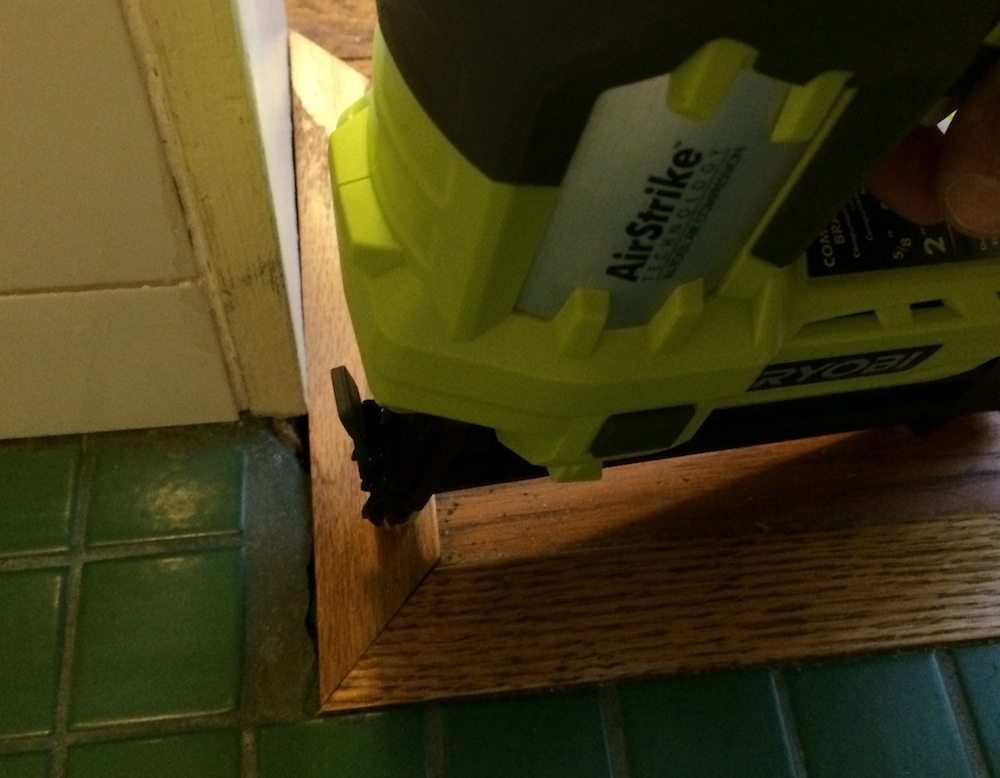
Then along came the Ryobi Cordless AirStrike Nailer. This is the kind of stuff this nailer is perfect for, and over the past few days I used it to finish a slew of small projects I’d been putting off because I was too lazy to drag out the compressor, hose and nailer. Replace the trim around my daughter’s pantry door after last year’s drywall repair? Done! Adding new door-stop moulding for our bedroom door? Got it! Installing the final piece of oak floor trim around our bathroom threshold? Nailed it! It’s so easy to just grab the nailer, slap a battery on it, and get the job done, I find myself looking for loose trim to fix.


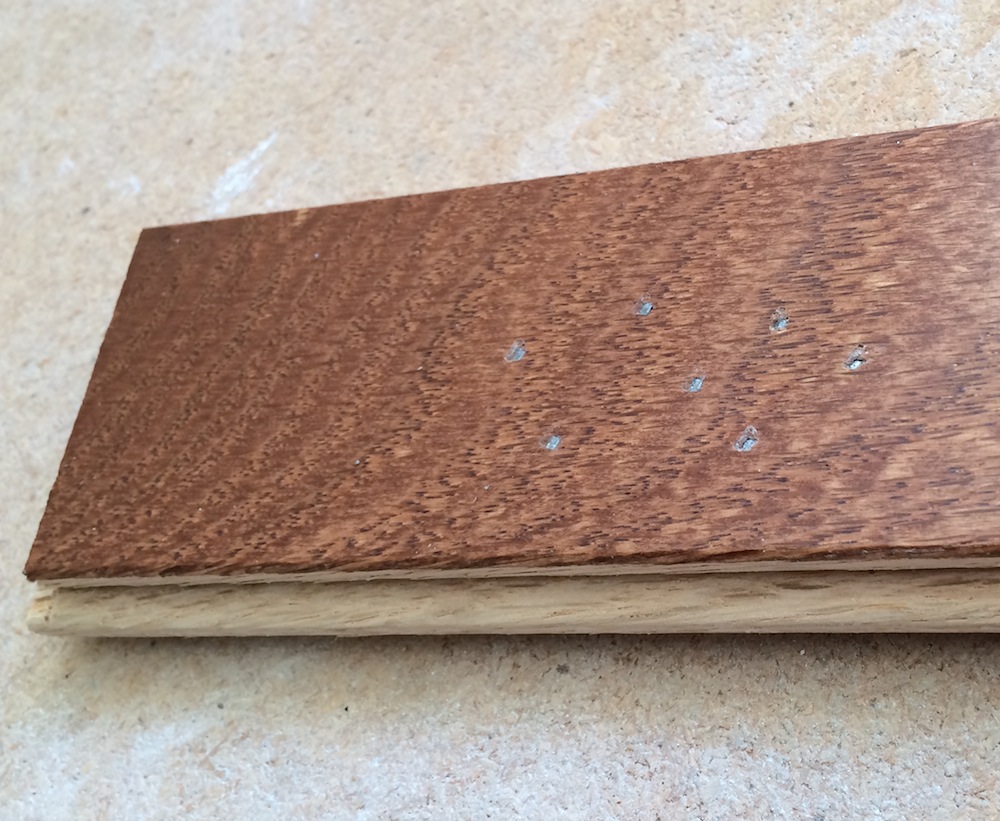
I have a whole-house renovation project underway in which I’ll be installing oak trim everywhere – windows, doors, baseboards, the works. I wanted to see if the Ryobi Cordless was beefy enough to push a 2” nail through ¾” oak trim and beyond. I took a couple of scraps of oak flooring, set them down on the osb-over-plywood floor, and let ‘er rip in bump-nail mode. I had to adjust the air pressure dial and the depth-of-drive wheel to the max settings, but the Ryobi buried all the nails, countersinking them about 1/16”. If it can do that, it should be able to handle the oak trim with no problem, and should easily handle pine trim all day long.

Ready To Call In An AirStrike?
If I didn’t already have the Ryobi Cordless AirStrike Nailer, there is no doubt in my mind I would buy one. The Ryobi has just become my go-to nailer for small to medium projects, just because it’s so easy to get into action. And on bigger jobs, like the whole-house trim job, it will work nicely alongside the air-powered Bostitch. It’s backed by a three-year warranty, and I think it’s a great tool for the price – $129 at Home Depot. It’s an especially great deal if you already own one or more of their One-Plus line of 18V tools, and have a battery and charger; if not, you’ll need to buy them separately.

There are a couple of options available; there’s a kit available from Home Depot that comes with a charger and compact Li-Ion battery for $60. If you already have a charger, and do a lot of nailing (or drilling, sawing or whatever with other Ryobi tools), the extended capacity 4.0Ah battery lasts a LONG time – four times longer than the NiCad battery. After doing all my small projects, and running well over 100 2” nails into the oak and into a test 2X4, it still lit up all four bars on the built-in fuel gauge. It’s also 20% lighter, which doesn’t hurt when you’re lugging a tool around all day. It ain’t cheap, though, at $99.


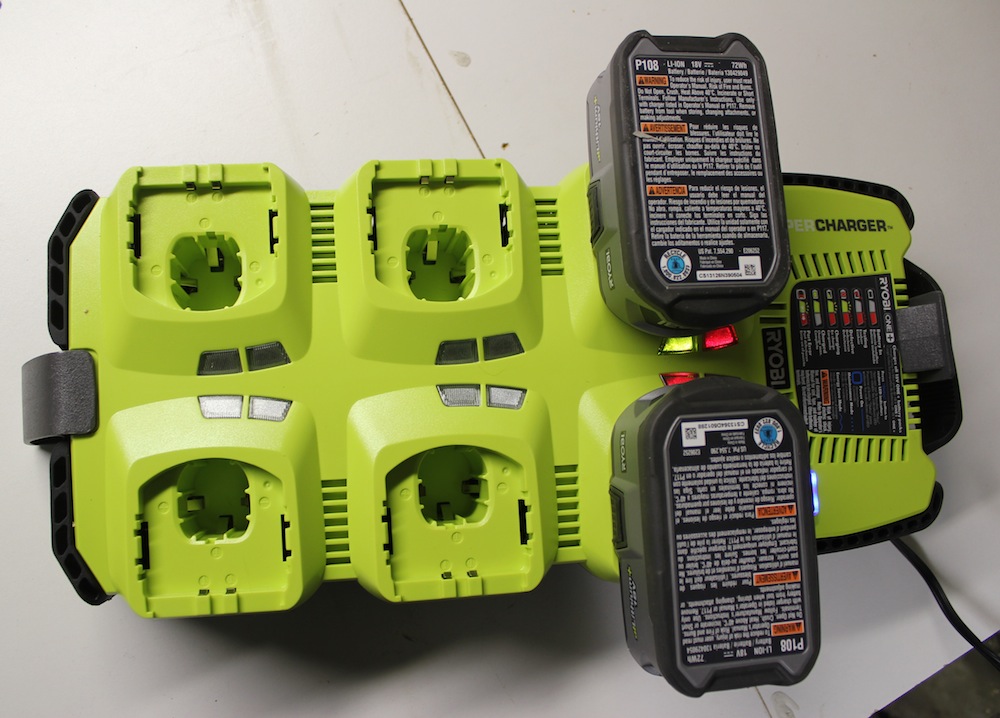
If you have a passel of Ryobi 18V batteries, and want to keep tabs on ‘em, you might want to invest $79 in a SuperCharger six-port battery charger. The SuperCharger charges up to six 18-volt ONE+ batteries, and can take a mix of NiCad and Lithium-Ion batteries. It recharges batteries in as little as 30 minutes, and Ryobi’s IntelliPort technology obtains maximum battery performance by applying a charge only when needed, until all batteries are fully charged. Note: this charger charges the batteries one at a time. It states this in the specs, but some buyers missed it and were miffed, thinking it would charge up to six batteries simultaneously. Indicator lights show battery and port status as batteries are charged and maintained, or when the status button is pressed during energy save mode. The included quick-release wall mount bracket securely mounts to your wall to help organize and maximize work space, and the charger can be removed from the bracket to schlep your batteries along to the work site.
Bottom line: the Ryobi Cordless AirStrike Nailer exceeded my expectations, and I think it’s a great tool. If you’re someone in the trades who already has one or more nailers, but wants the ability to skip the compressor setup for small or medium jobs, or for punch list work, this will be a huge time and aggravation saver for you. If you’re a DIYer, the Ryobi Cordless AirStrike Nailer could easily serve as the only finish nailer you’ll need. The tool only, Model P320 is $129 at The Home Depot:
hello! i have an ryobi p320 & both leds were flashing per ryobi could be a low battery! this not the a thermal fusible link that burnt (non replaceable) needs a pc board $70 @ eReplacementParts.com ! fyi oil the drive rod all the time!
How long ago did you buy the nailer? It’s warranted for three years, so if it’s less than three years old, I’d contact them and see about getting it in for them to repair.
i bought used ! i love no hoses! there a thermal opened & there a dead short on PC board
I have the Ryobi p320 airstrike 18 gauge nailer everything was fine never jammed up never had battery problem until one day I charged my batterys went to work and it doesn’t do anything but but blinking slow and longer then 10 seconds in the manual it says if longer then 10second contact a Ryobi customer service I was just hoping you might have an idea so I won’t have to send it off and probably get et charged more it’s worth
If you haven’t already tried removing and re-installing the battery, or trying a different battery, that might clear it up. If not, try the customer service number; they deal with them all the time, and may have a procedure to “reboot” the nailer and get it running again. If it’s still not working, and you bought the tool within the last three years, it’s still under warranty, and hopefully the repair would be free. Good luck, Joe, and if they have a fix for it, let us know.
My nailer jambs after every three or four shots. It also puts in two nails at a time. Then it will jamb. Open it up, remove the jamb, close it back up and after two or three shots it jambs again? Any idea?
Hi, Darrell – It’s hard to tell what the problem might be without more info. Did the nailer work fine for awhile, and then suddenly start having the problem, using the same nails you’ve been using? Does it only have the problem with certain length nails? You could try taking all the nails out, and trying a different strip of nails. Also, make sure everything is clean and dry. Dirt, sawdust, oil etc. could be gumming things up.
Assuming you’re using the right nails (18 ga. straight nails), it sounds like there might be a problem with the striker mechanism. You might want to check the Ryobi Customer Help site https://www.ryobitools.com/support/faqs/general/customer-help for FAQs and contact information. They may be able to offer some suggestions to clear up your problem. If not, and the tool is still under warranty, they should be able to get you up and running again.
Hi there – thanks for writing this review. I just tried my air nailer for the first time and don’t believe the nails are shooting out at all. I just ended up with a bunch of holes in the test wood piece. I decided to take the names out and mark the first 3 with a sharpie to see if they did in fact deploy but they were still there after about 4 strikes of the gun. I opened the jamming area and found one single nail in there. It wasn’t bent or anything but I went ahead and removed it and tried again, no no avail. I’m a brad nailing virgin so I have no clue what I could be doing wrong. The instructions suck so they aren’t any help. Would you happen to have any ideas why the nails aren’t actually shooting? BTW, I tried changing the pressure dial back and forth and nothing works. It looks so easy that I thought it would operate perfectly outside of the box. Any help you can offer is appreciated. Thanks in advance!
The fact that it’s making holes in your test material indicates the nailer is at least TRYING to work! It sounds like the tip that drives the nails in is bypassing the nail. You’ve already tried the jam-clearing technique; after you cleared it and tried 3 or 4 more nails, was there a single nail in the nose again? If so, it sounds like the nail might be too big. The first thing to check is to make sure you have the right type of nails. The P320 needs 18-gauge straight (0 degree) nails, between 5/8″ and 2″ long. Try removing the strip of nails and using a different strip, and make sure the follower is tight against the back of the strip of nails to push it forward. If none of this works, and you bought it within the last 90 days, take it back to Home Depot, and they’ll exchange it. If not, call Ryobi at 800-525-2579. They may have other suggestions to get your nailer working, and if not they can tell you how to get it fixed under warranty. Good luck – let us know what happens
Hello, i have just bought a ryobi nail p320 . Well, it doesn’t work. I bought it in a pawn shop, it came with a battery lithium 18v . But it doesn’t work. The battery it’s fully charge. Do you guys have any info on that
Which battery did it come with? Is it one of the new Ryobi Lithiums with the power meter or an older black battery without?
Hi, Carlos – There are a couple of things you could try. First, open the nosepiece, and make sure the nailer isn’t jammed. Make sure you have the correct size, 18-gauge fasteners in it; if it came with nails, they might not be the right ones. Open the magazine, and make sure everything moves smoothly inside, and that the follower (that pushes the nails forward) isn’t riding over the strip of nails. Like Mark mentioned, make sure you have one of the new High Capacity batteries, and that it actually works. Does your battery work in other Ryobi tools? If you know anyone that has a Ryobi tool that takes the same type of battery, try their battery out and see if that brings yours to life.
In case you don’t have a manual, I will put in a link to the online manual for the tool at the end of this, that will give you some things to try. It also gives you the operating instructions. The tool comes with a three-year warranty, but they may require you to show proof of being the original purchaser. Worst case, if you can’t get it running, does the pawn shop offer any guarantee on stuff they sell? If so, maybe you can get your money back, and try, try again. Good luck, and let us know how it works out.
http://www.homedepot.com/catalog/pdfImages/88/88131dc6-9b7e-437b-ab14-9eb1d40c4d04.pdf
Bought one worked great for aweek then it stopped .continous blinking light when u want to nail off.any thoughts any busy
According to the manual, if the light is blinking rapidly that means the battery needs to be recharged. If it keeps blinking slowly, something else is wrong, and you’ll probably have to get it repaired. How long ago did you buy it, Liam? If it was within the last 90 days, just bring it back to the store and they’ll replace it with a new one. If you’ve had it longer than 90 days, there’s a three-year warranty, so you should be able to get it fixed for free.
As Phil said, the battery could be the problem. I’ve seen this before. Also, I’ll mentioned that I tried to use the brad nailer with the earlier version of the Ryobi Li-on battery (the all black one without power monitor) and it would not operate even with a full charge. I have since only used the newest 4.0 battery on all three nailers and it works fine.
This is far and away the most informative, comprehensive, and witty review out there on this tool. Ryobi should hire you to work with their marketing team to consult them on redoing the product pages on their website.
Thanks, Marco – at the very least, I’ll use your comments to go after a massive pay increase from our esteemed leader at HomeFixated! I’ll be posting a review in the near future of Ryobi’s new 16-gauge AirStrike nailer, along with the Dewalt cordless framing nailer, so if you’re a nailgun guy, stay tuned…Thanks for reading!
Excellent news. I could have used it this weekend.
I little follow up on future Air Strike models. I was in Home Depot yesterday and there was a little market brochure. I picked it up and flipped through it and noticed that they showed three nailers. Looking closer I saw that they have a new one on the horizon or so it seems. Along with the current stapler and 18 gauge brad nailer, they show a 16 gauge finish nailer. I did grab one of the flyers assuming I could find something online. I have not been able to find anything yet but it for certain that there is a new Air Strike that should show up in stores soon.
Thanks for the heads-up, Mark! I wrote to our contact at Ryobi, and as soon as I hear anything back, I’ll post it right here. A 16-gauge nailer would be sweet!
According to our contact at Ryobi, the 16-gauge nailer is still a couple of months away from hitting the shelves. He said there should be more info within a week–as soon as we hear anything, we’ll get it posted right here.
I stopped by HD yesterday for some stuff and picked up the literature. The 16 gauge straight finish nailer is product number P325. From the picture the chasis looks a little larger including the “tank” portion. It looks to use a single LED rather than two on the prior models and has a few extra vent slits towards the rear. Otherwise it looks very similar to the other two.
Right you are. Not a lot of official info available yet, but they do have the manual posted online already at http://manuals.ryobitools.com/system/files/8301/original/P325__781_trilingual.pdf?2014, and it looks like it’s pretty much identical to the 18-ga in design and operation. It will take 3/4″ to 2-1/2″ nails.
Great find. Rubbing my hands together now! Honestly, I just bought a new compressor that should run just about everything I need. However, I’m still really excited about these new Air Strikes.
Just heard back from our contact at Ryobi. The 16-ga. nailers should be hitting the shelves at Home Depot early in June.
I’ve been debating over air vs electric and this ryobi has me falling on its side of the fence.
I would definitely check it out, Robert. If there’s a Home Depot near you, you can take a look at it before deciding; the one nearest me even has one set up as a demo model right now. If you do, let us know what you think!
I have both the Ryobi brad nailer and the narrow crown stapler. I use the nailer for the exact same jobs you have mentioned, trim and moulding. I haven´t had the opportunity to utilize the stapler much. However, I have a hard wood floor project on the horizon so I´m thinking of using it for the underlayent.
Do you have any insight to Ryobi´s plans for additions to the line such as 16 gauge finish nailer? I would love to get my hands on something like that.
Great website, love it.
Hi, Mark –
I sent a message to Ryobi’s marketing manager to see if they have anything like that in the works. A beefier 15 or 16-gauge version would be a VERY useful tool. I’ll post any answer I get right here. Thanks for your comments!
I contacted Ryobi yesterday to check on a possible larger-gauge AirStrike nailer, and got a response back this morning. Per Jason Swanson, VP of Communications/PR for Ryobi’s tool group, “In regards to a 15 or 16 gauge nailer, we continue to explore the capabilities of the New AirStrike Technology and hope to have more news to share soon.” As soon as they have news to share, you’ll be among the first to hear about it, right here.
Good to know. I´d surely grab one if it is anything like the first two. Keep us posted!
I keep my airstrike in the house now instead of the shop because it’s just so stinkin’ convenient. It is worth getting into the One+ line for.
Cool, thanks for the feedback Jeff!