

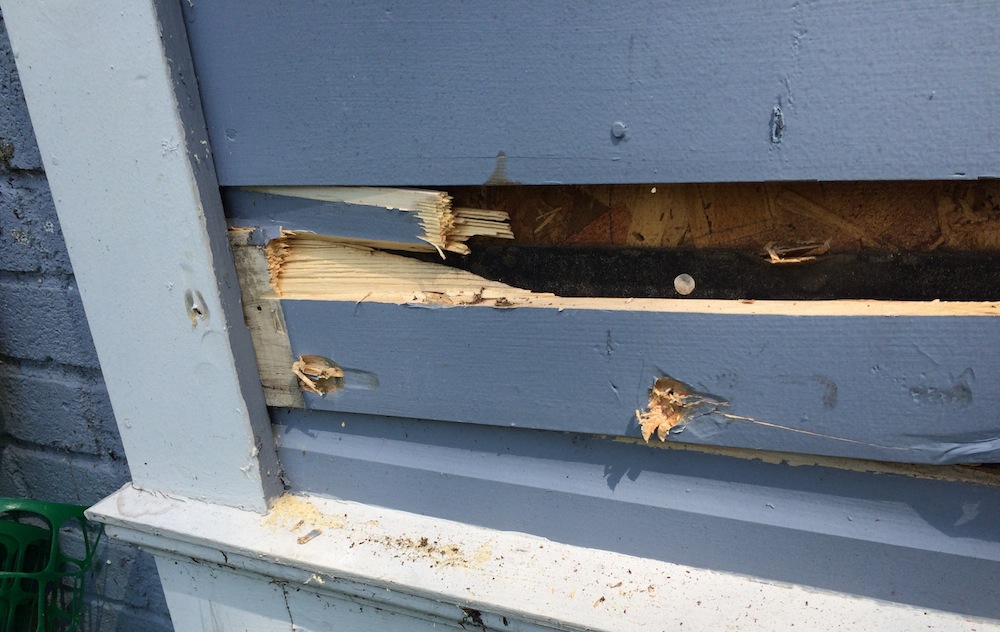
We’ve always loved older houses. They have personality and character that is often hard to find in new construction. A side benefit of that character is that you get many, many opportunities to hone your DIY skills. Our house has character up the wazoo, and I recently got a chance to rectify some more of it. We have wood drop siding, and thanks to Mother Nature working her magic, one piece had a good bit of rot. Woohoo – time to dig out a few tools and perform some emergency clapboard siding repair!
The best way to make this fix would have been to remove the entire piece of siding, as all the clapboards in that area spanned the entire 12’ wall. Unfortunately, the siding is tucked in behind corner trim at both ends, and there is other trim that sits atop the corner trim. That would have involved removing and replacing a lot of other wood, and it’s pretty likely something else would have gotten broken in the process. I decided I could live with a piece of butted siding.
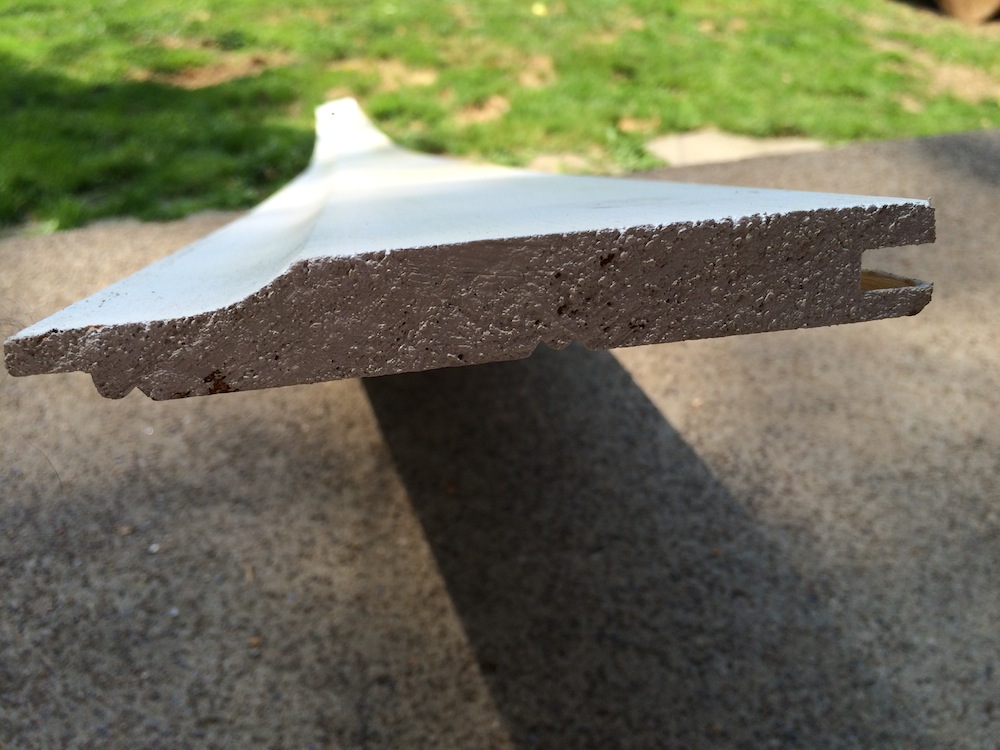
Clapboard Siding Repair: Get A Good Match
Our siding is tongue and groove, with a cove profile at the top. It’s commonly called Dutch lap or cove lap, and retailers refer to it as Pattern 105 or 106. Home improvement centers aren’t likely to carry siding like this. For your clapboard siding repair, your best bet for a good match on anything out of the ordinary is a good lumberyard.
I bought a couple of pieces of the siding, in case I screwed one up or discovered more rot (both very likely scenarios). I measured to get the exact length of the new piece, making sure to allow for enough to slide in behind the corner trim. After a light sanding, I primed the board on every surface. While it was drying, I tackled the demo portion of the clapboard siding repair mission.
Out With The Old
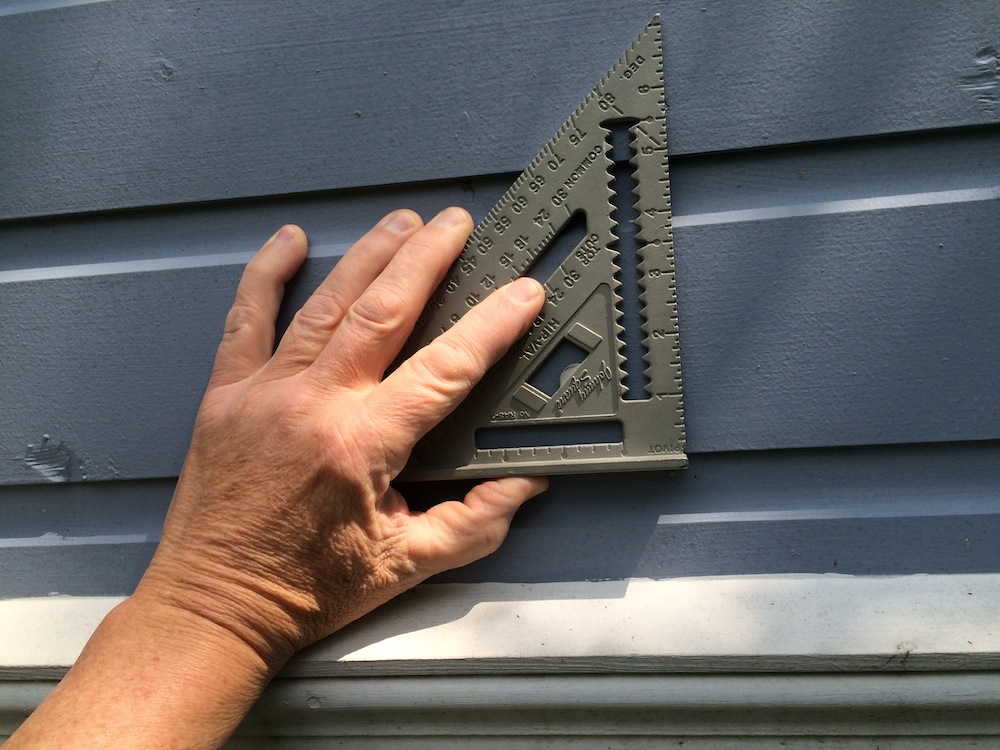
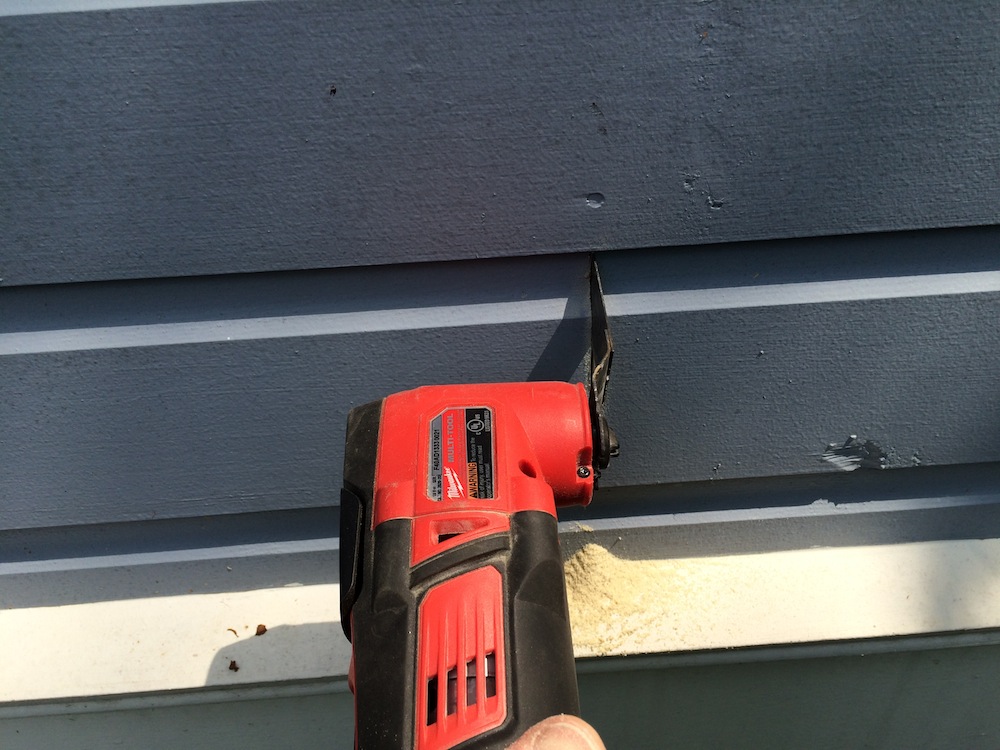
To get the best finished look when butting siding, it’s best to use two relatively long pieces, rather than one long and one short. If you’re replacing more than one piece, be sure to stagger the joints. I picked a spot beyond the rot (a little bonus DIY poetry there for ya), and marked a straight edge using a speed square. Pick a spot that’s on a stud, so you’ll have something solid to nail your new piece into. Using an oscillating multi-tool, I cut a vertical line through the siding. You could also do this with a trim saw or other small handsaw, but the OMT does a nice quick job of it.
This type of siding is usually face-nailed. You can usually spot at least some of the nails through the paint; if not, grab a good strong magnet, and move across the face until you find one. Normally, the rest will be about 16” apart. Use a cat’s paw, and dig the old nails out. If the end of your damaged piece of clapboard is beneath a piece of trim, like mine was, you may have to remove a nail that goes through the trim and the siding; I did. If the studs aren’t obvious, mark them on the piece of siding below with a piece of masking tape, so you’ll be able to secure the replacement siding.


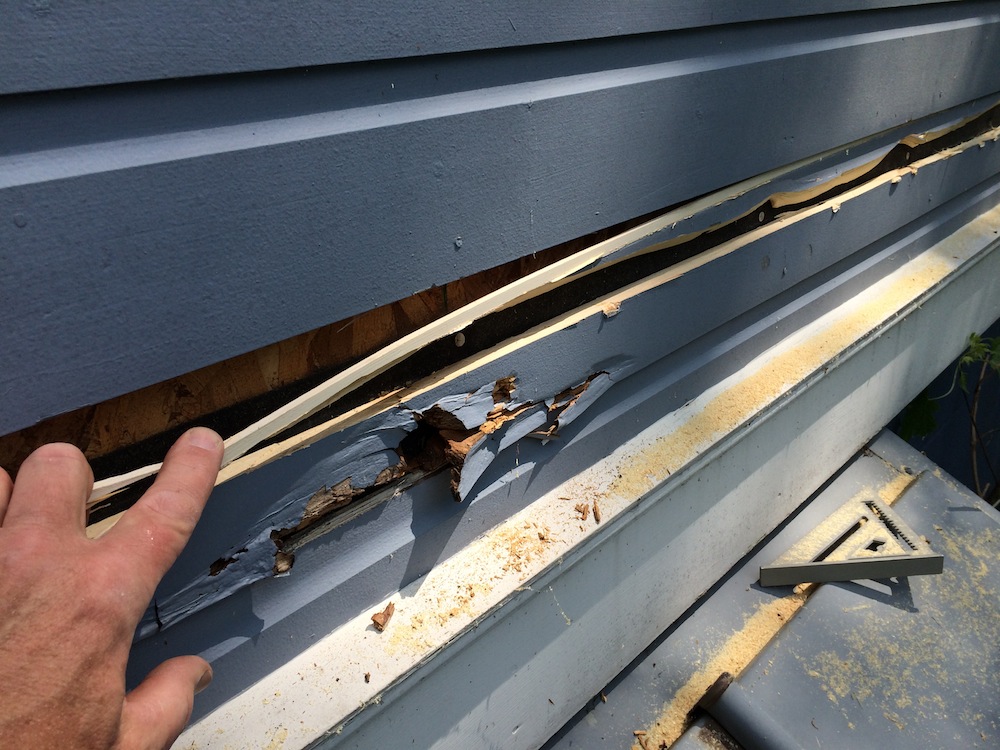
After the big chunks are out, you’ll have to wiggle out any pieces that are stuck behind the trim. Take your time, again being careful not to damage the clapboards above and below. There’s likely to be tarpaper or house wrap behind the siding; try not to damage it. If you do, repair it with a piece of good waterproof tape. If there are other pieces left where you made the vertical cut, use a utility knife or a sharp chisel to carefully remove them.
Clapboard Siding Repair, Part II – Fresh Wood
Once the old stuff is out, the Martha Stewart portion begins – make it beautiful again. Since the siding was tongue and groove, it would be impossible to insert a new piece between two existing pieces of clapboard. Stupid physics. The options are to either take off the siding all the way to the top or bottom, or to cut off the rear section of the groove. I chose option two; feel free to go the other route. If you do, buy lots more siding.
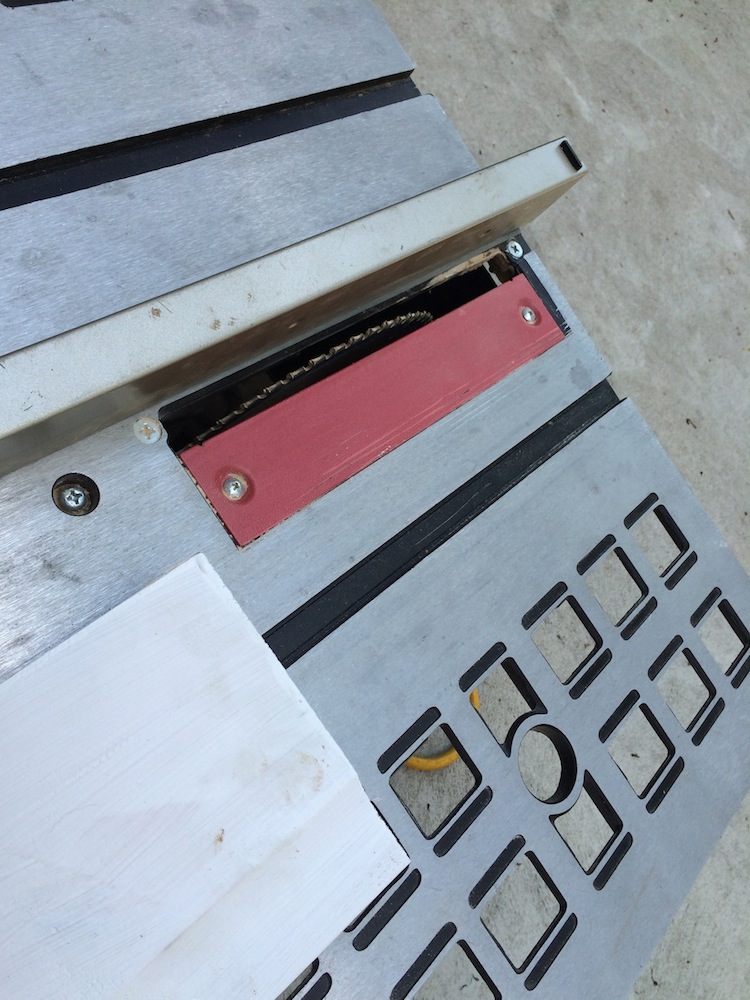
If you’re cheap and lazy practical like me, removing the rear section of the grooved portion of the board is pretty easy. Just set your table saw blade to cut the thickness of that portion of the board, usually ¼” deep, and set the width of the cut for the depth of the groove. Run the piece of clapboard through the saw, and you’re almost ready to do the installation. If you’re doing a butt joint at one end, and trying to fit the other end beneath a piece of trim, like I did, there’s one more thing you’ll need to do.
In this scenario, once again pesky physics is rearing its ugly head. You’ll be trying to insert one end of the clapboard behind the trim piece, while simultaneously inserting the top of the repair piece (the tongue) into the groove of the piece above. Since the other end of the repair piece has to overlap the existing piece of clapboard, which it will be butting up against, it can’t go up into its groove. Nothing worse than not being able to get into your groove.
The solution? You need to cut off a bit of the tongue portion from the top of the new piece at the end that will be butted. Since the clapboard will flex a bit, this will allow you to manhandle it into place, sliding it sideways behind the trim and up into the groove. I took off a chunk about 14” long by about ¼” high. Just be careful not to cut down too far into the meat of the clapboard, or you’ll have an unsightly gap – and the probable beginning of a new section of rot!
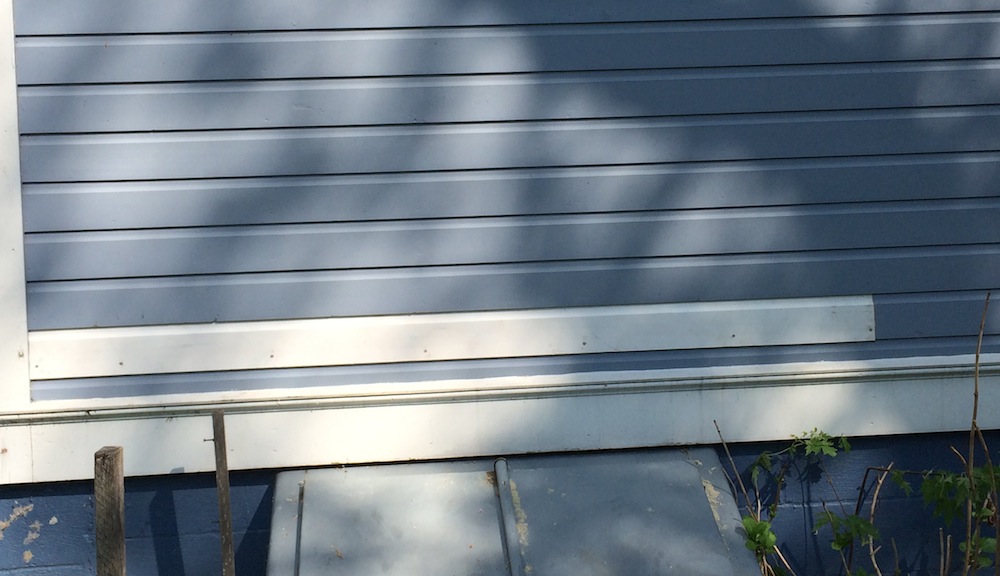
Once that’s done, start inserting your repair piece near the trim end. Fit as much of the top of the new piece of clapboard as you can into the piece above, while maneuvering the trim end under the edge of the trim piece. Using a piece of scrap wood against the opposite end of the new clapboard, so you don’t damage it, tap the repair piece gently in under the trim. Go slow and easy, until the butted end drops in. If you go too far, you’ll have a helluva time backing it up. Again using a piece of scrap wood, make sure the repair piece is tucked fully up into the groove of the piece above. Your clapboard siding repair is almost complete!
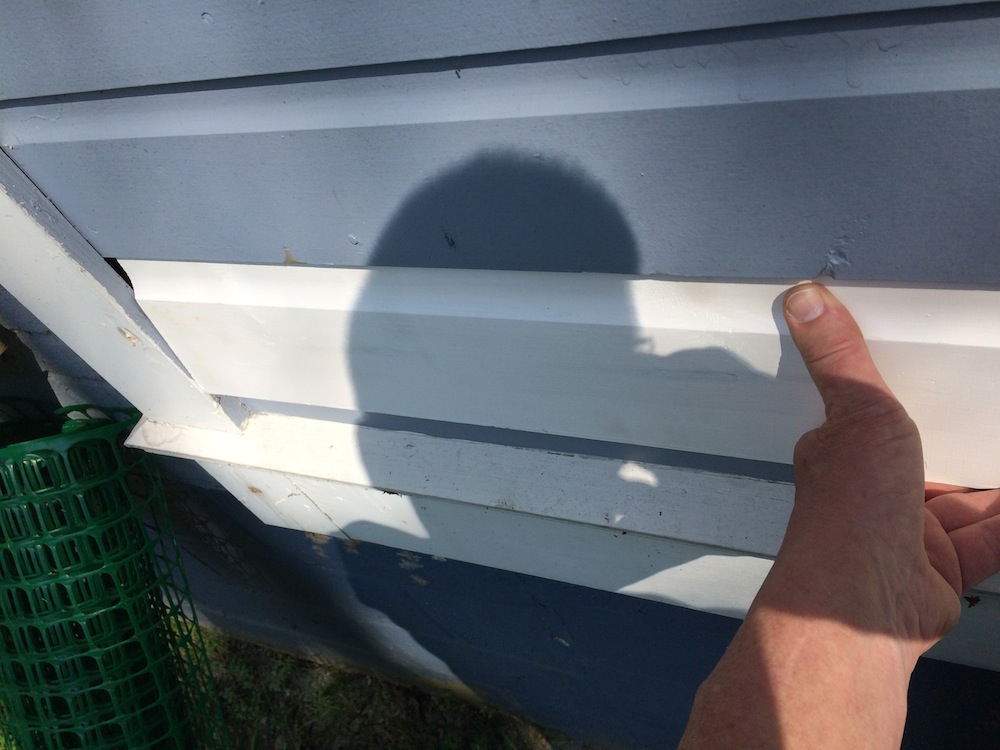
To finish the job, nail your new piece of siding to the studs, using hot dipped galvanized nails. Using some good-quality paintable caulk, caulk the top and bottom edges of the new piece of siding.
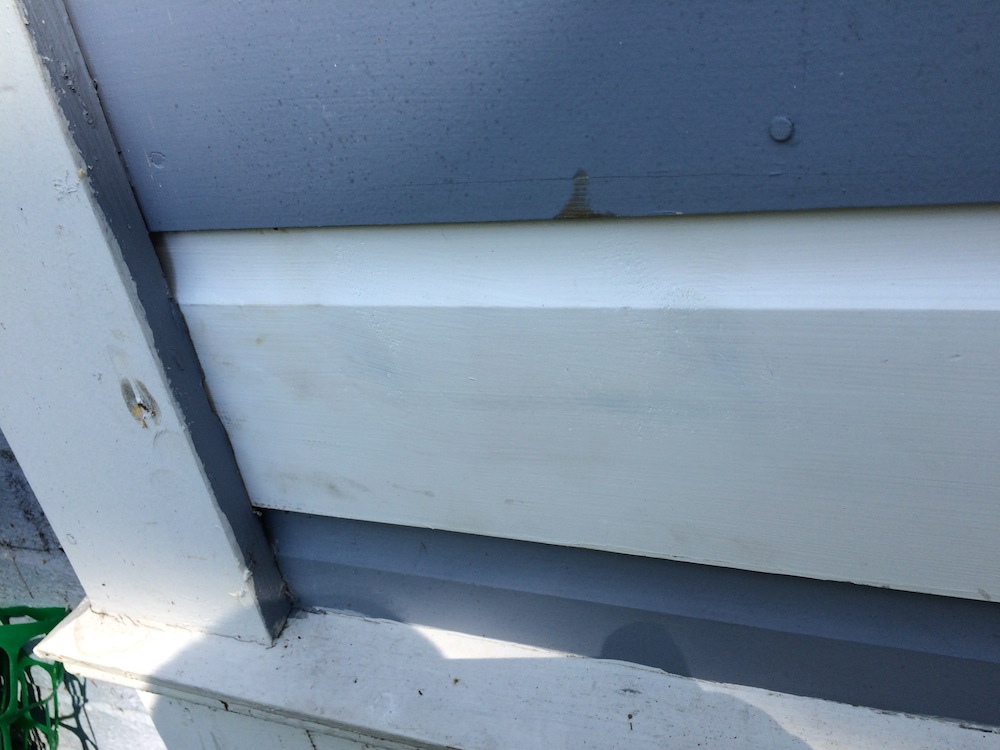
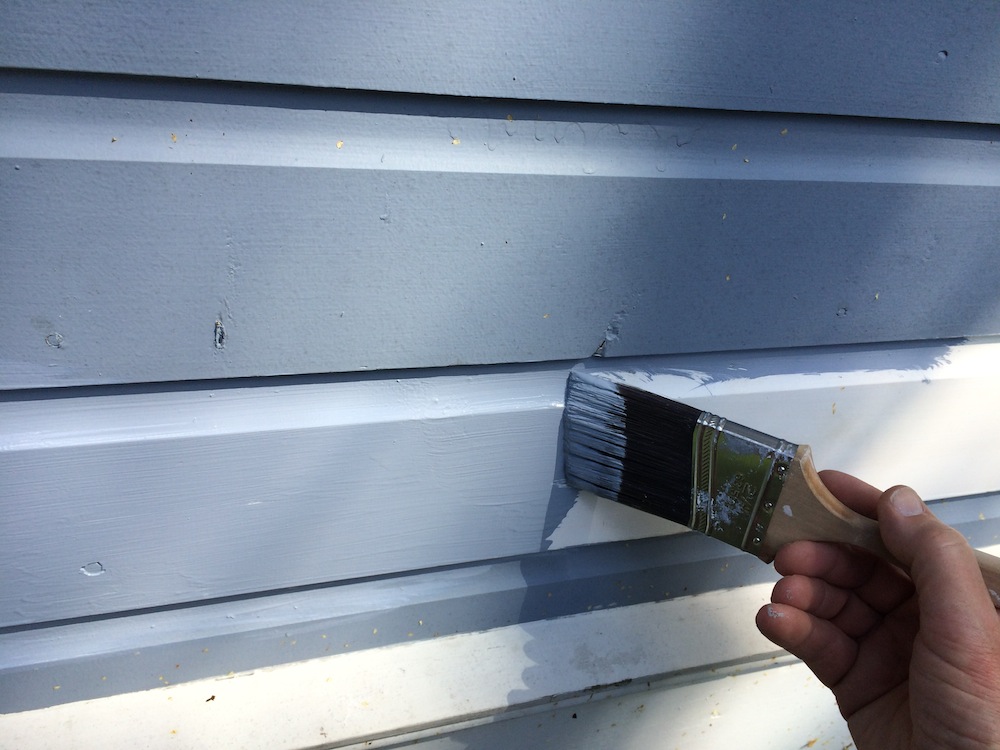
If you have some leftover paint from your last paint job, put a good coat of it on your beautiful patch job. If not, take a scrap of the stuff you pried off to your nearest home center or paint store. They should be able to match it, and fix you up with a pint; that should be plenty to complete this mission, and leave you with a bit for the NEXT clapboard siding repair!

Good Article, gives me hope. I contracted a paint company to paint my house.In the quote they said they were going to replace 3 boards. My expectation was they would replace with like boards. Well, they blotched the work terribly. Then they claimed somewhere in the contact replaced wood would be best they can match. Whoops! The quote also said I was to be 100% satisfied. lol. They went to Lowe’s and bought cedar siding. Now that this is my problem, I researched and found out my siding is Spruce with a Dutch lap. Find out the only Mfg of Spruce siding, quit the business after his mill burned down in Canada. The job they did is actually comical and I would laugh, if it wasn’t my home. Trust me, cedar and spruce are two very different woods. I am now on a quest to find some similar wood, probably pine in the dutch lap design. Now I at least know what I need.
Unfortunately, there are a lot of tradespeople who don’t take much pride in their work; too bad for you that you ended up with one of them. Good luck in your quest to match the siding; we’re fortunate to have a good architectural millwork/lumberyard not far away. If there’s no one close to you, maybe you can buy some plain spruce or pine, and have it milled to match your existing siding. Probably wouldn’t be a cheap date, unfortunately. Good luck!
Good to read!
Nice job. Wouldnt even know it was worked on. Thanks for the article
I was lucky – the house was painted about eight years ago, but the leftover paint still matched pretty well. Glad you enjoyed it!
Great job! You make it look easy.