

Many of the tools we review here at HomeFixated are Bigger/Smaller/Lighter/Stronger/Faster/More Efficient versions of tools we regularly use. Cordless drills, reciprocating saws, compressors, chainsaws, miter saws – the list is longer than the NHL playoffs. Every so often, though, I get the opportunity to try out a tool I’ve never used before, like an oscillating multitool or an impact driver, and great rejoicing ensues. Such was the case when I recently received the latest version of a tool that’s a staple item in many a woodworker’s shop – the Kreg K5 Pocket Hole Jig. Cowabunga – joinery will never be the same!
I’ve always known what pocket holes were, of course; those little angled slots lurking on the back of table legs, and inside cabinets. I knew that it’s a great way to make a strong connection between two pieces of wood. I never explored the possibility of trying it, though, because it seemed like it probably called for an expensive tool setup and a steep learning curve. Turns out I was wrong (hey, it had to happen sometime).
The Kreg K5 jig is the latest iteration of a jig that’s been around for over 40 years. This new version has some features that make the setup and use of the jig even easier than the previous version, aka the Kreg K4 (see the pattern here?). Some of the improvements include moving the clamping handle around to the front of the unit, and making the clamp adjustment tool-free and much faster. Here’s the official Kreg K5 list of features:
• Front-mounted clamp handle makes clamping easy – no need to reach around the workpiece to close the clamp
• Spring loaded, ratcheting clamp mechanism adjusts without tools
• Quick-release pin holds drill block in place, and can’t get lost
• Removable storage wings provide extra support and built-in storage for bits, screws and accessories
• Stop-collar setting block makes drill bit setup easy
• Swiveling dust collection port accepts standard 1-1/4” vacuum hose
• Adjustable workpiece stop mounts on either side for easy, repeatable drilling
• Comes fully assembled
What’s In The Blue Box, Vanna?
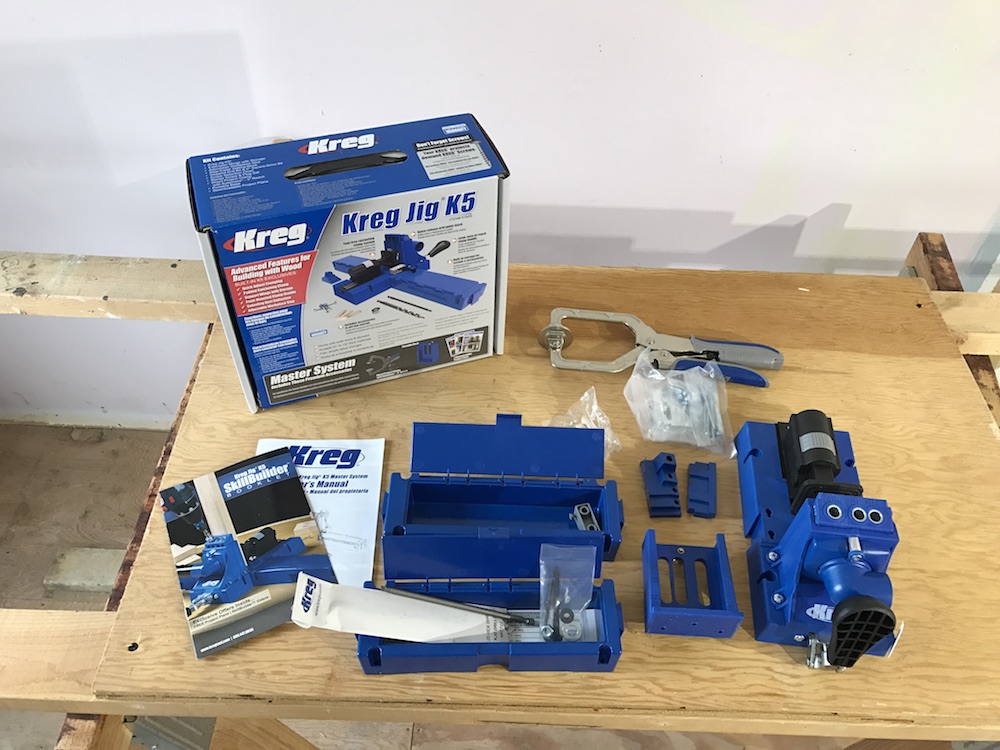
The Kreg K5 pocket hole jig is available in a couple of configurations. The basic set includes the Kreg K5 base with ratcheting front-side clamp, extension wings, swiveling dust-collection port, drill guide block, spacer block, workpiece stop, drill bit setup block, stepped drill bit, 6″ driver bit, stop collar, Allen wrench, hex wrench, starter Kreg Screw set, starter pocket-hole plug pack, and 3 downloadable project plans.
The jig is also available as the Kreg K5 Master System, which is what we received to evaluate. The Master System gives you all of the above plus a 3″ Automaxx Face Clamp (which comes in VERY handy) and a portable base. The clamp can accommodate material up to 3” thick, and it adjusts automatically, allowing you to clamp workpieces of varying thicknesses without ever having to adjust the clamp.

The standard drill guide block that comes with the Kreg K5 jig will let you drill pocket holes in materials from 1/2” to 1-1/2” thick. Kreg also offers two optional guide blocks. The Kreg Micro-Pocket drill guide makes a narrower hole, and is intended to join material as small as ½” thick and 1” wide. The Kreg Jig HD (Heavy Duty) is designed for use on materials at least 1-½” thick. It’s great for 2x4s, 2x6s, etc., and uses large, beefy #14 x 2-½” screws to give you a solid connection for workbenches, outdoor furniture, decking, and other big projects.
The Jig Is Up – And It Only Took A Couple of Minutes
Getting the Kreg K5 set up was fast and easy. The instruction manual that accompanies the jig is well-written and illustrated, and provides a clear, easy-to-follow guide through the setup process. The Kreg website also has a passel of well-done videos, covering a wide assortment of topics ranging from setup to screw selection to joinery techniques in various materials, as well as project ideas.
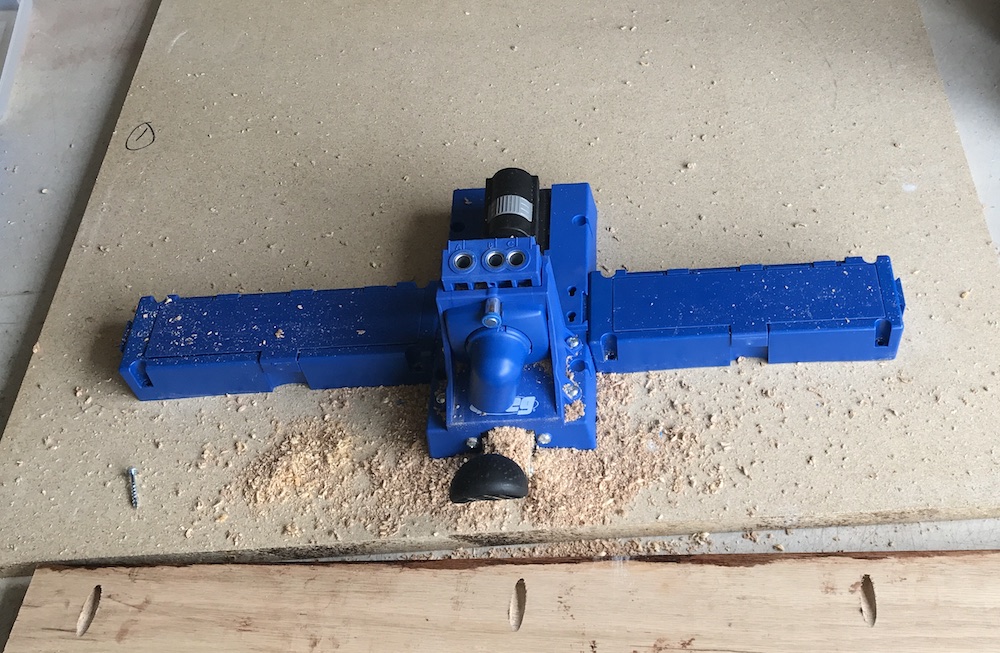
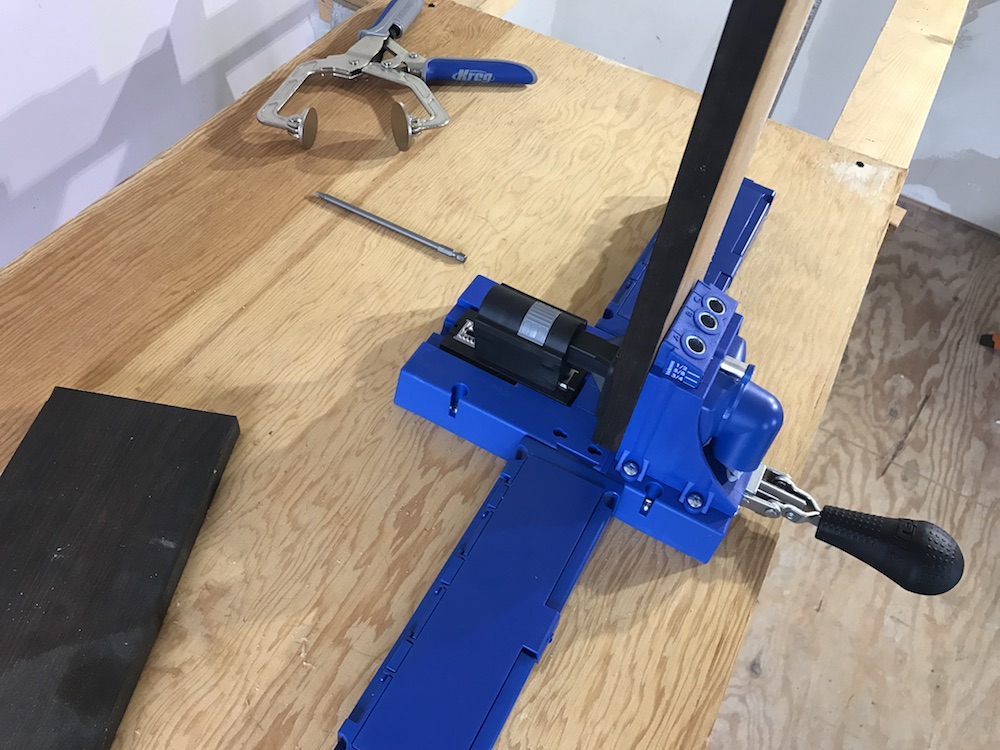
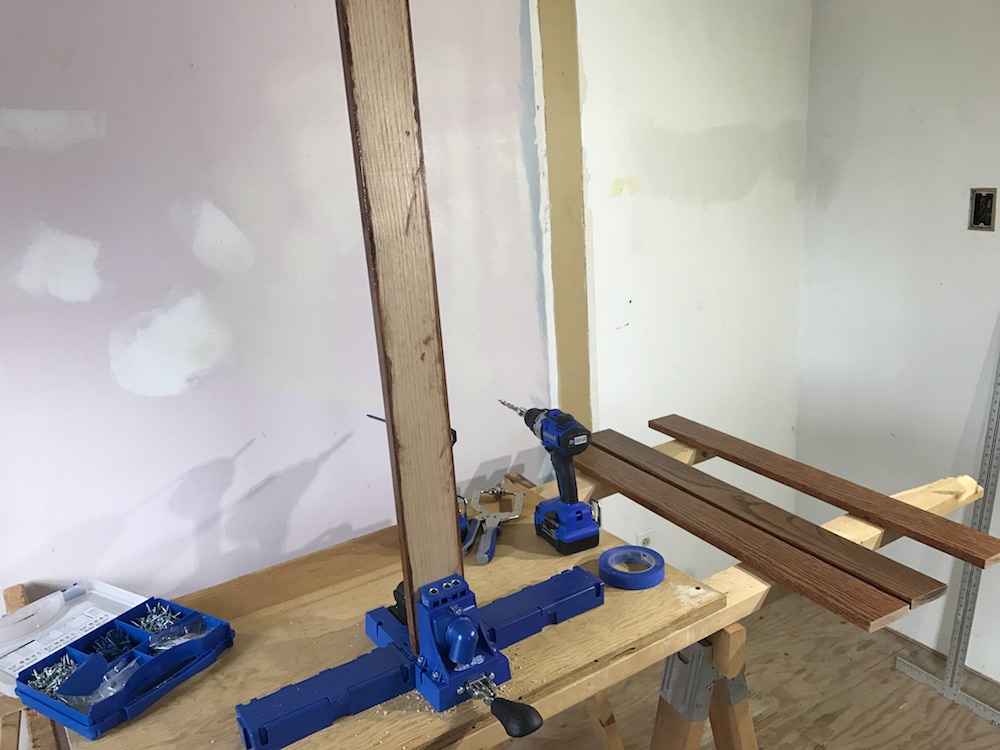
Since drilling is best done using a stable platform (just ask Exxon), I decided to screw the Kreg K5 assembly to a piece of scrap plywood. I slid the side wings into their retaining slots on the side of the guide, and ran some screws through the holes in the jig to hold it down.

The wings, by the way, are pretty handy; they offer a great place to store the drill and driver bits, adjustment wrenches, and an assortment of screws and/or plugs. There’s also a reference label that provides easy access to recommended screw sizes for various material thicknesses.

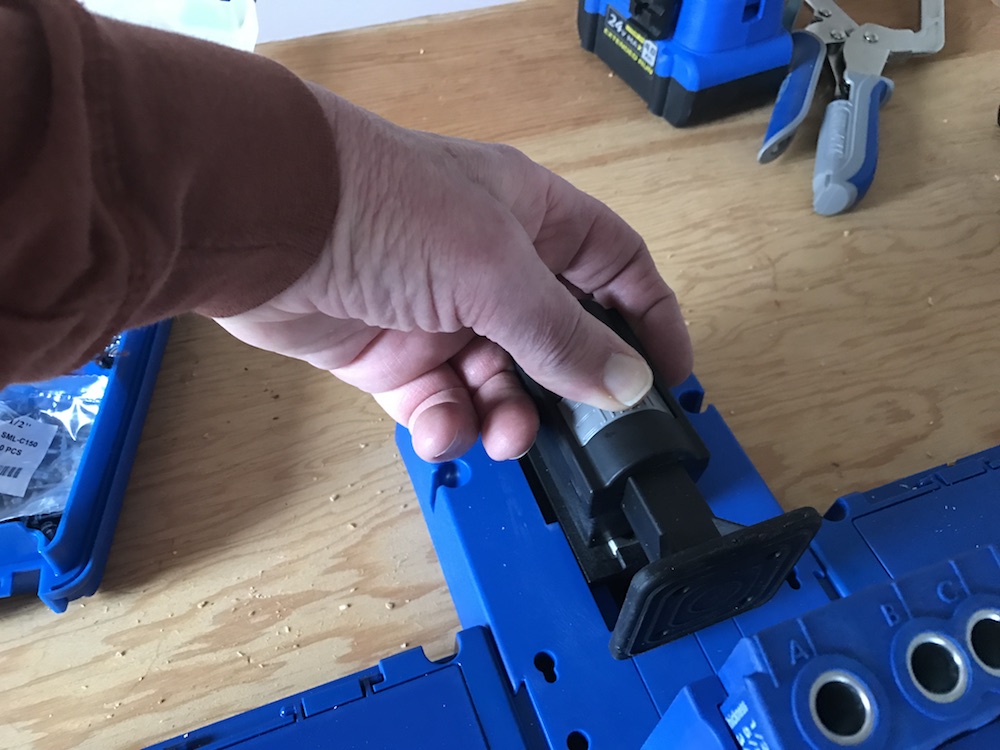
Adjusting the drill guide is simple on the Kreg K5 jig. Simply pull out the retaining pin, slide the guide up until the thickness of your material lines up with the top of the guide socket, and slide the pin back in.

Once the drill guide is set, you need to install the stop collar on the drill bit; this controls how deeply the bit penetrates your material. Check the reference chart to see what length screw you’ll be using. Slide the setting block in front of the drill guide, and slide the drill bit into one of the three bushings on the guide.

Now just drop the pilot tip into the hole in the block that corresponds to the length of the screw you’ll be using. Slide the stop collar onto the top end of the drill bit until it rests on top of the drill guide, and tighten its set screw with the hex wrench.

The final step, adjusting the clamp for the thickness of the material you’ll be using, is fast and simple. Press in the ratchet release and slide the clamp assembly all the way to the rear. Place your workpiece against the face of the drill guide, and move the clamp handle to the full-down position. Slide the clamp assembly forward until it contacts your workpiece. Now simply raise the handle until you hear two clicks. The clamp is set, and you’re ready to make some pocket holes.
The Kreg K5 Pocket Hole Jig Improves The View
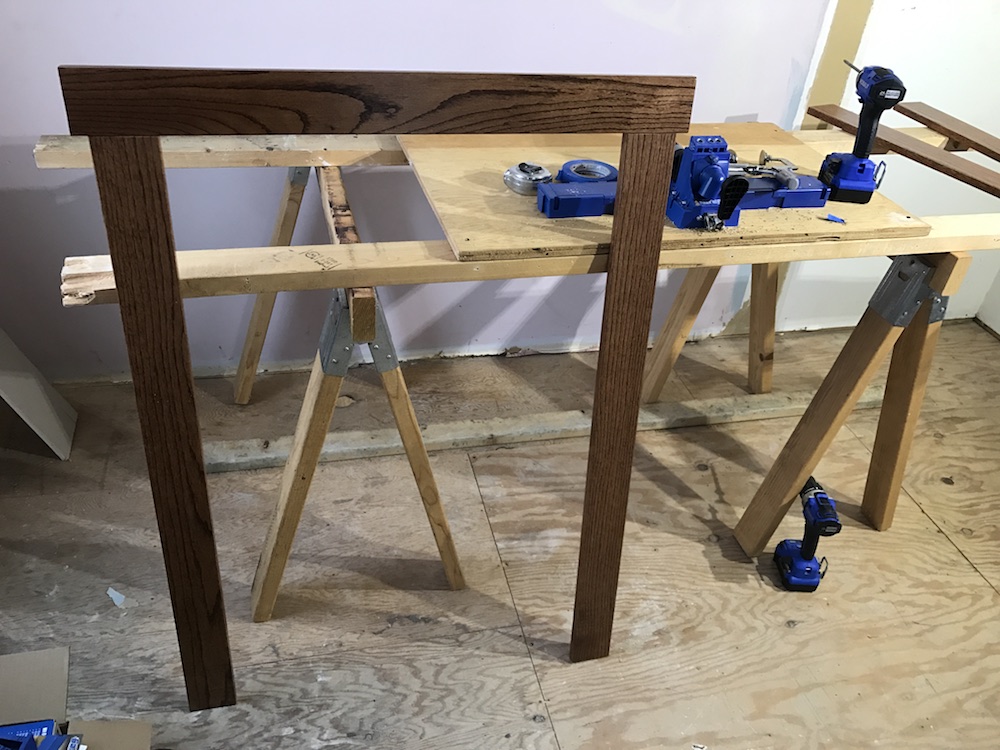
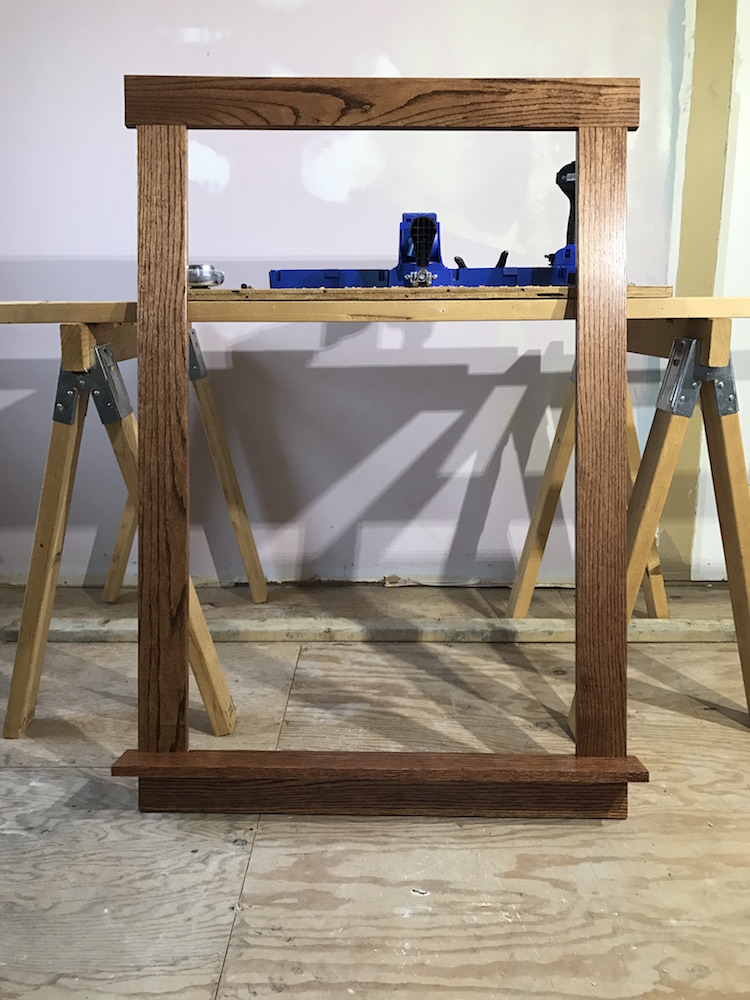
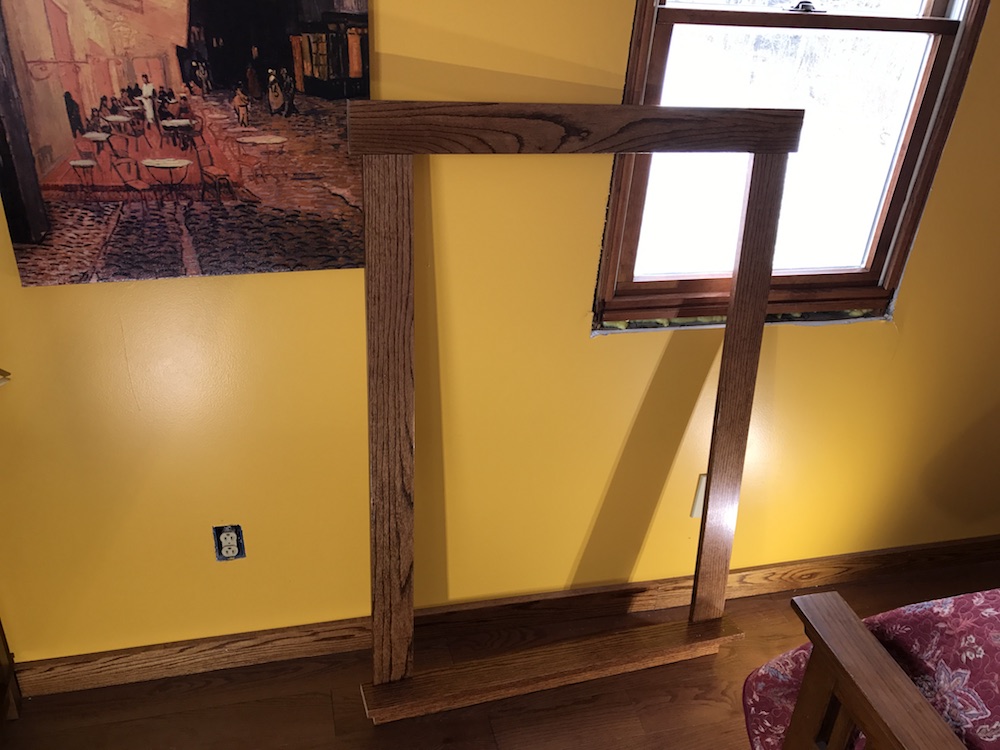
We’re replacing all the windows in our old farmhouse, and I’m fabricating new window trim out of oak to replace all the cheapo existing trim. The design we chose is Craftsman-ish, with butted joints and a slight overhang for the top and stool pieces. The first window I trimmed out was nailed piece by piece to the window frame and into the studs through the drywall. I also toenailed the pieces together.

Unfortunately, the house is old and has way more than its share of character. Translation: Not a square/straight/level/plumb/flat surface in the joint. When the trim was nailed to the uneven wall surface, it pulled apart a bit in a few areas, opening up some ugly gaps, and causing me to once again delve deep into my special DIY vocabulary. When our friends at Kreg offered the chance to evaluate the Kreg K5, I danced a jig of my own.
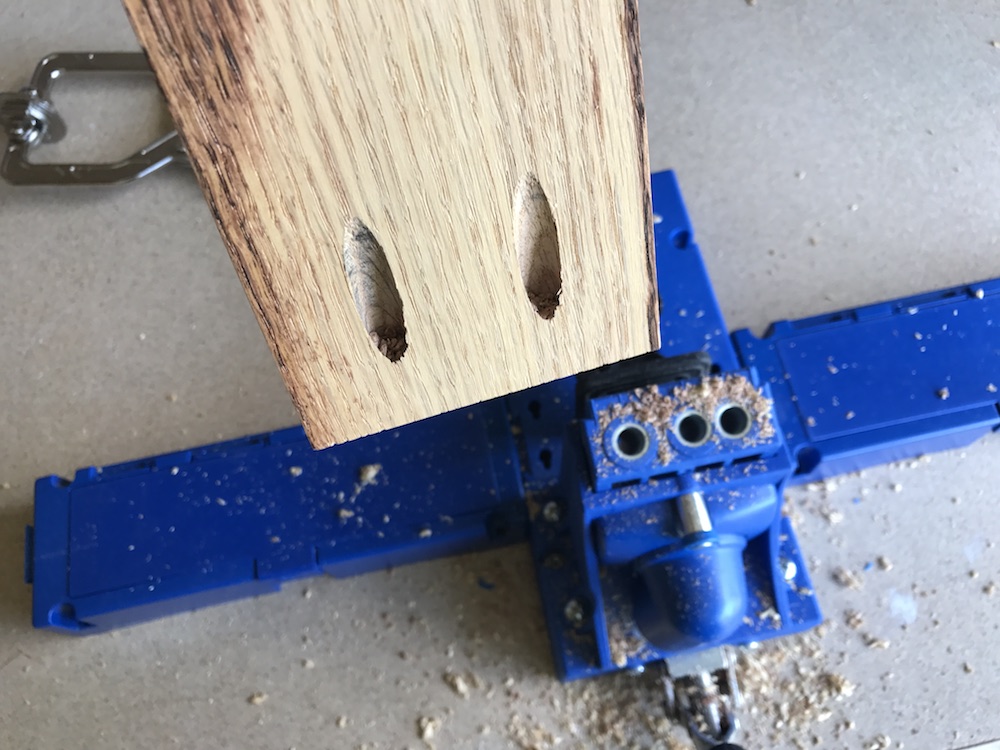
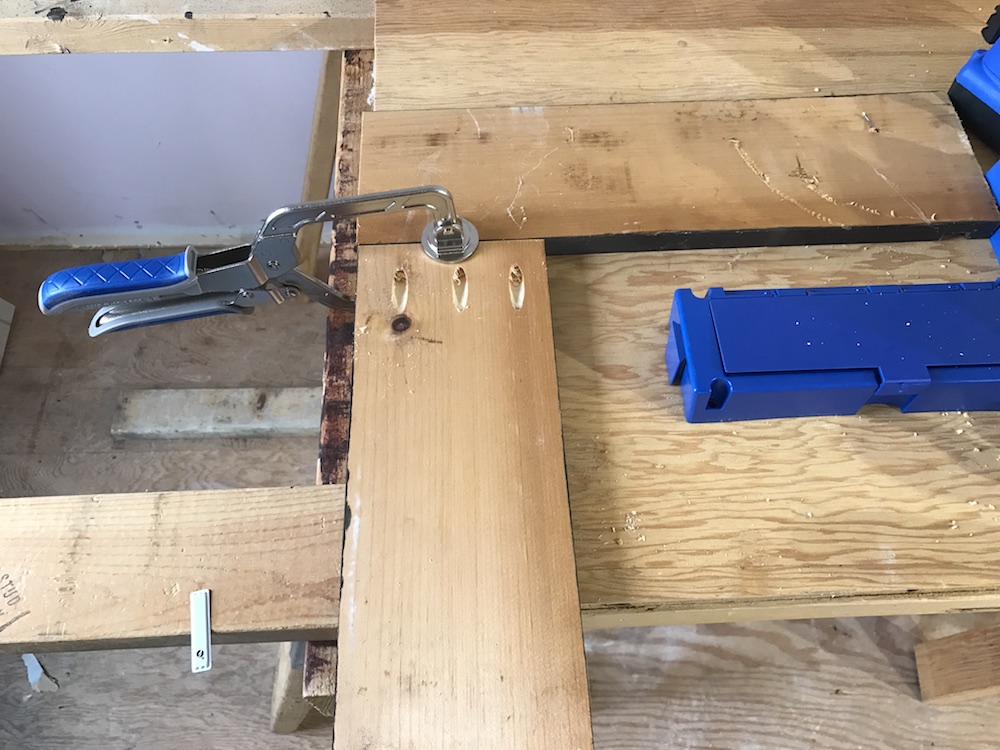
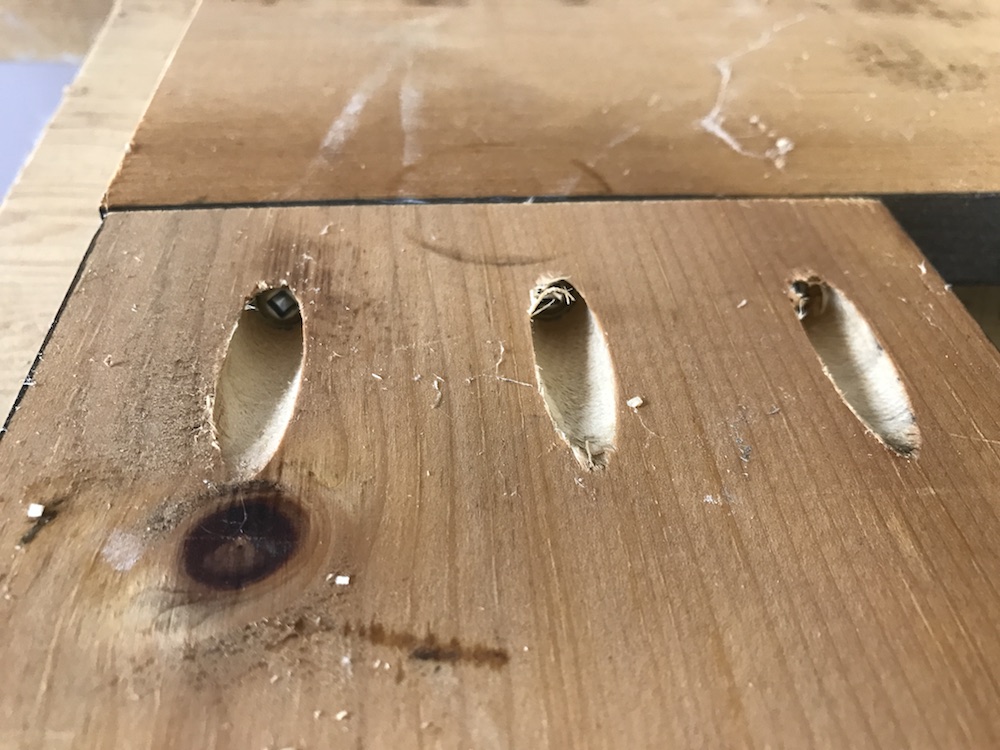
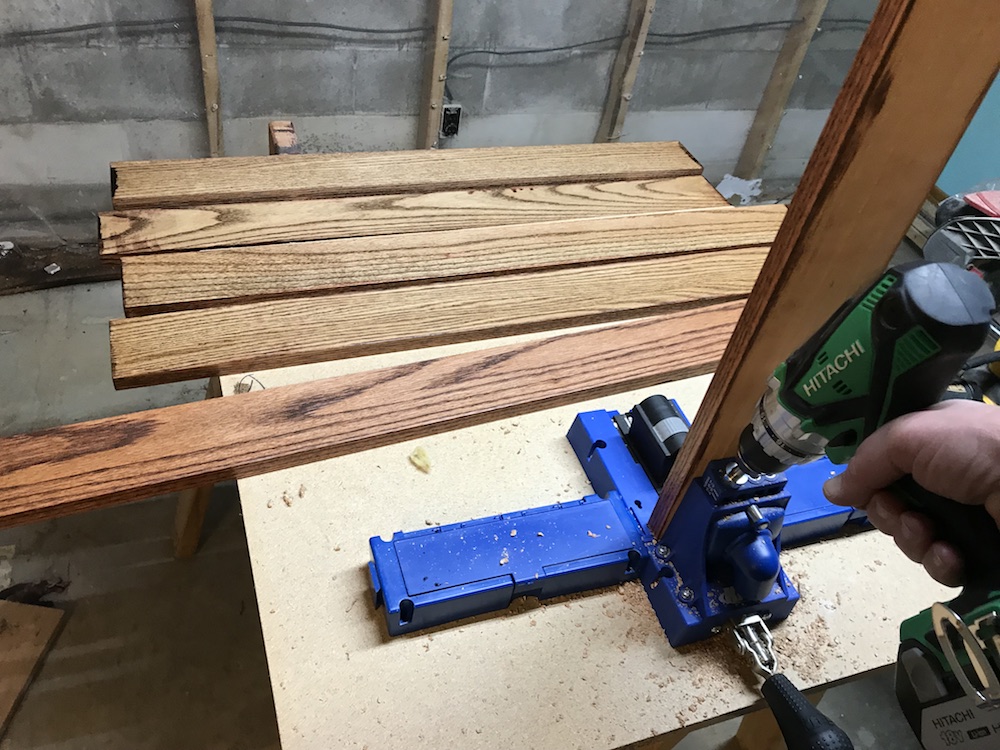
Oak is expensive, so in the spirit of “trust but verify,” I decided to do a trial run of my first-ever setup of the Kreg K5 jig on some scrap 1×6, before starting in on the oak. I eyeballed the spacing for the first two holes, and clamped the board into place. Next, I chucked up the bit in my drill. In keeping with the spirit of Kreg Blue, I decided to use my Kobalt set for the inaugural batch.
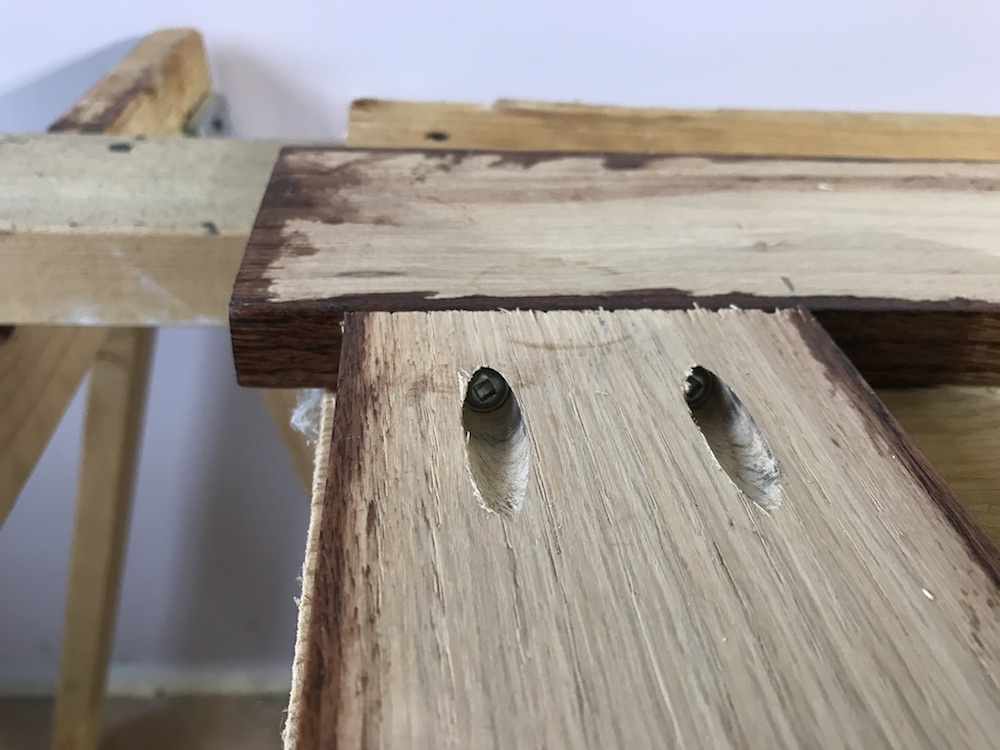
The clamp held the 1×6 firmly in place while I drilled, and the drill bit fit perfectly in the holes in the drill guide. To start drilling, Kreg recommends you insert the bit fully into the guide before starting the drill, then backing it slightly off the material. That’s what I did, and it worked great. The bit went quickly through the material, and the stop collar stopped the drilling at the perfect depth. The collar stays rock solid on the bit, by the way; I haven’t had to tighten or adjust it since I first installed it, and I’ve drilled a LOT of holes into oak trim since then.
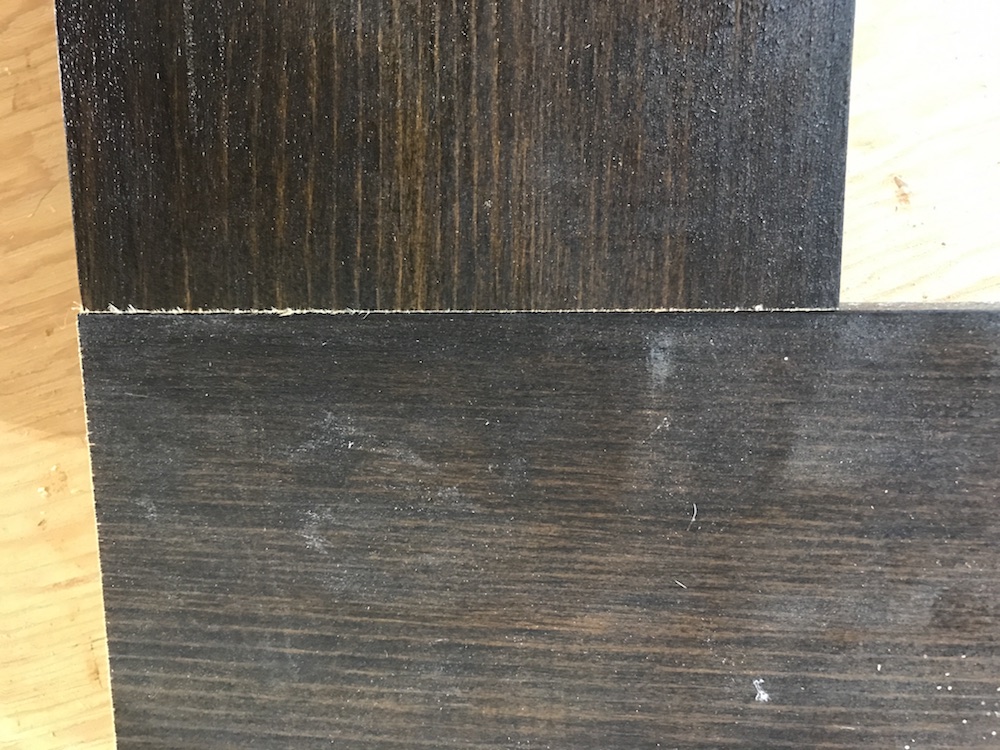
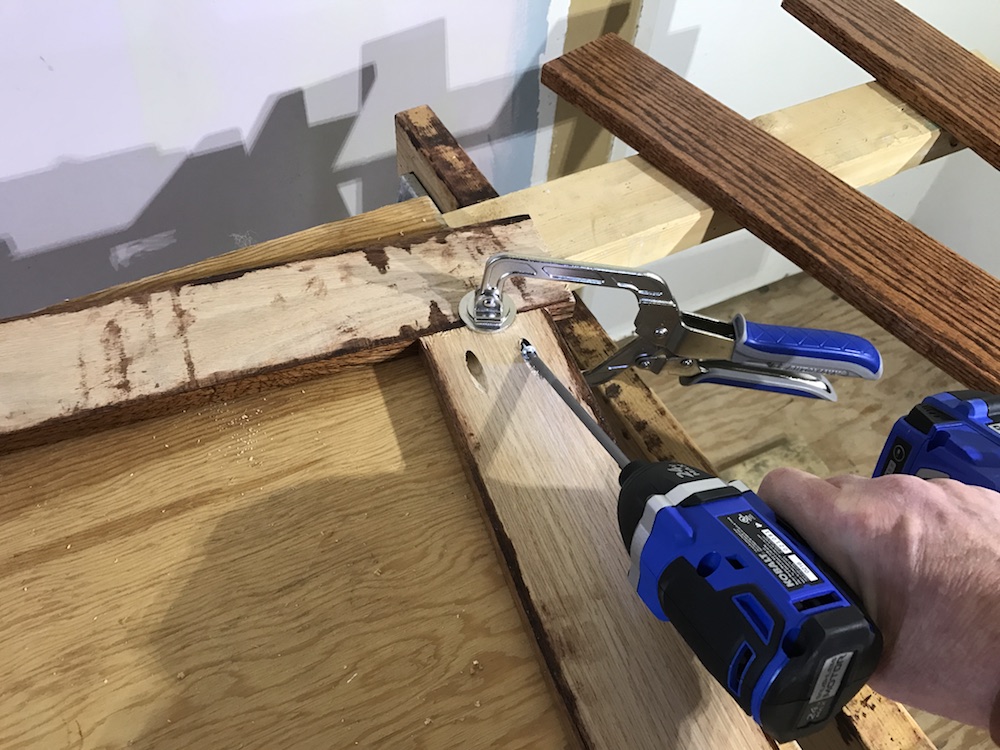
After my holes were drilled, I clamped the piece I had just drilled to another scrap of 1×6 with the Automaxx clamp that came with the kit. Centering the clamp over the joint between the two pieces locked them very firmly together. I then inserted the 6” square head driver bit that came with the Kreg K5 kit into my Kobalt impact driver. I grabbed a couple of 1-1/4” coarse-thread screws from the assortment that came with the kit, and the impact driver quickly snugged them up.
The Kreg square-head screws work great; the bit fits snugly, and I have not had any stripping or cam-out. (Be careful not to over tighten, especially if you’re using an impact driver). When I removed the clamp, the two boards were firmly and perfectly joined. Great happiness ensued, and I got ready for the real stuff.
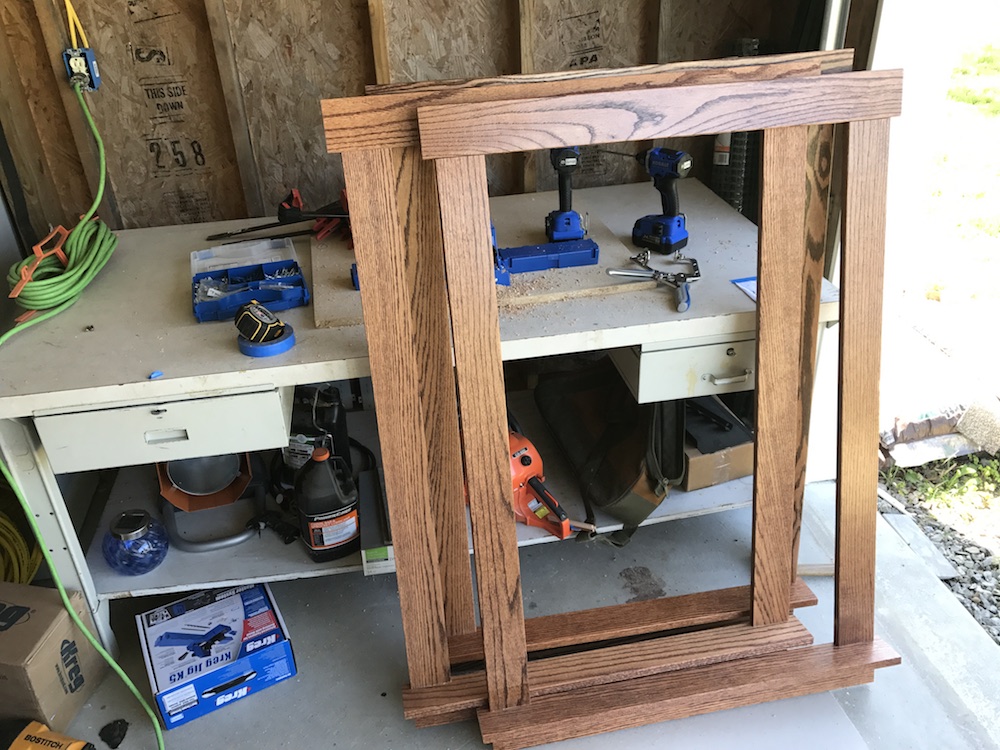
The Kreg K5 jig worked just as well on the 3/4” oak trim as it did on the scrap pine. I’ve used it in several sessions, usually making frames for three windows at a time. Once I got the hang of it, which didn’t take long at all, I turned into a lean, mean, frame-making machine. Minus the “lean” part.
The bit is very heavy duty, and had no trouble at all boring into my oak 1x4s. The original bit has made a lot of holes with no apparent dulling. The Automaxx clamp works very well to hold the pieces together for attachment. The self-tapping, square head screws dig right in, and make a very strong attachment. I used the fine-thread 1-1/4″ screws with the oak, and I have had zero splitting or joint failures.


One thing to note: Drilling these holes generates a fair bit of sawdust. The Kreg K5 has a nice swiveling dust port built in, and if you have a shop vac or dust collection system, it would be an excellent idea to get it connected. If you don’t, make sure to brush off and blow out the shavings frequently.

Ready To Do The Kreg K5 Jig?
So far, I’ve used the Kreg K5 to make about 140 pocket holes, as I trim out our oak windows. It has been a huge time saver. More importantly, the trim stays solidly together after it’s nailed into place around the windows; no more profanity-inducing gaps. I have a new shop going up at the moment; it’s almost finished, and once it’s ready, the Kreg K5 will be getting a workout putting together workbenches, storage cabinets, and shelving. Not to mention the woodworking projects I’ll finally have the space to build!
In my opinion, the Kreg K5 pocket screw jig is an excellent addition to my tool corral. It’s well-designed, and even though it’s primarily made of plastic, it seems sturdy and durable. The set provides you with everything you need to get started doing most common projects, and the resulting joinery is rock solid.
If you do a lot of larger or smaller projects or repairs, the optional drill HD and Micro-Pocket guides expand your options. You may also want to invest in a bulk pack of screws. There are various options available, including a handy 675-piece assortment that makes it likely you’ll have the size you need. Kreg backs the drill guide on the Kreg K5 jig with a lifetime warranty. If you’d like to get it together – and have it STAY together – give the Kreg K5 jig a try.
Buy the Kreg K5 Jig from Home Depot for around $129:
Buy the Kreg K5 Master System from Rockler for around $159:
Buy 675 Screw Assortment from Rockler for around $24: